By Ilhan Adiyaman, Alibaba Cloud Tech Share Author. Tech Share is Alibaba Cloud's incentive program to encourage the sharing of technical knowledge and best practices within the cloud community.
This post features a walkthrough on how to set up and get started with Habitat in minutes with Alibaba Cloud's Container Service. You'll build, deploy, and manage a basic web application that includes a load balancer, all from your workstation.
Habitat is an open source project by Chef which helps you to move an application configuration, management and behavior to the application itself, by creating a platform independent build artifacts. It enables you to package your application and not worry about where it's going to be deployed until you are ready to deploy it. If you deployed it on virtual machine and now decide to switch runtime environment to Docker containers, you don't need to repackage or rewrite your application. The same Habitat package can run in both environments without refactoring it. Habitat works with both new and existing applications. You can use it to:
So we can easily say, Habitat enables you to package your application and not worry about where it's going to be deployed until you're ready to deploy it. If you decide to switch runtime environments, for example, from a VM to Docker containers, you don't need to repackage or rewrite your app – the same Habitat package can run in both environments.
If your team is exploring or actively developing micro services, this post will give you a sense of how Habitat provides simple and consistent ways to deploy and manage cloud-native applications with Alibaba Cloud Container Service and Container Registry.
You should have an Alibaba Cloud account. If you don't have one already, visit the Free Trial page for a free account.
In your workstation, you should also install Docker. If you are new to Docker, you can read the Getting Started guide to get a better understanding of how it works. You'll also need a GitHub account so that you can authenticate with Habitat's Builder service. Habitat Builder is place for you to store your packages and obtain packages built by others.
Habitat Builder is a main hub of Habitat which allows you to store, automatically build and deploy your Habitat packages. Before start configuring your workstation, we should set up an account on Habitat Builder. In this walkthrough, we'll need a Personal Access Token of our Habitat Builder Account in order to configure our workstation to talk to our Habitat Builder account.
To create an account on Habitat Builder, open the Habitat Docs where it explains how to start creating it. For this walkthrough, just complete the first three steps:
After you complete the steps above, you can set HAB_ORIGIN and HAB_AUTH_TOKEN environment variables. We can add these environment variables to make it easy to work with your package names and authentication with builder.
Replace try-habitat with your origin name as shown below.
$ export HAB_ORIGIN=try-habitatReplace the token with your actual auth_token value.
$ export HAB_AUTH_TOKEN=<replace-this-with-your-auth-token>Habitat command-line interface(CLI) called hab is everything you need to do in Habitat. Again, the documentation explains everything you need to set up and configure your workstation.
For now, just complete the first two steps:
During the Configure Your Workstation step, it will ask you for the __personal access token__. At this part, paste the token you set previous step above.
In order to verify the installation, you can run hab --version command.
$ hab --version
hab 0.57.0/20180530114142For this walkthrough, we will use Habitat sample Node.js application.
Clone this repository to your working directory.
$ git clone https://github.com/habitat-sh/sample-node-app.gitThe project includes the sample application's source codes and a Habitat plan which describes how to build the package.
For the sake of demo, the Habitat Plan files have been generated for you under the /habitat directory. Open the plan.sh file in your favorite editor and change the value of pkg_origin to the origin name you created earlier above.

In this step, we will start building Habitat packages for the web application. Habitat builds applications as its own format called Habitat artifact(.hart). Building the application as .hart package enables you to do things such as:
First, let's enter to Habitat Studio by running hab studio enter from the root of our application repo, so that we can start building our artifacts.
$ hab studio enterThe Habitat Studio is an interactive Linux environment that acts as a "clean room" for creating Habitat packages. There is no other software in the Studio other than what you define. You can run simple Linux commands such as ls or pwd inside of the Studio.
[1][default:/src:0]# pwd
/src
Here, when you run pwd, you might expect to see the sample-node-app directory and its parent directories, however it will show you /src. The reason for this is the studio runs in a chroot environment. This environment is often called a "Unix jail" or "chroot jail" as it cannot access files outside the designated directory tree. The use of chroot is common in virtualized environments such as containers. In fact, the Studio runs in a Docker container that contains no other software. This helps ensure that the package you create includes only what you need.
Next, run build command to produce a Habitat artifact(.hart) for our application. Habitat will produce a package (a .hart file) and place it in the results directory.
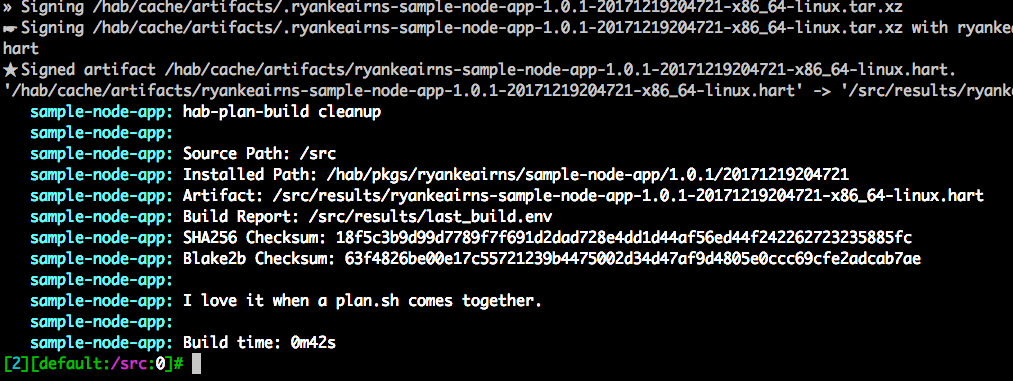
[2][default:/src:0]# buildOnce the build finishes, you will see the following message near the end of the output (see screenshot below): "I love it when a plan.sh comes together." Your packages are now built.

You can also check whether the artifact is produced or not by listing directories using the Linux command ls on the Studio as shown below.
[3][default:/src:0]# ls ./results
last_build.env  try-habitat-sample-node-app-1.0.1-2017121904721-x86_64-linux.hart
Your packages are now built. Leave the Studio open for the next part.
Now that the build is complete, let's test it out by running the package. There are two common ways of running a Habitat package.
You can export the .hart to a Docker image and use docker run or you can start services directly from the Habitat Studio by using the Habitat Supervisor which is a process manager, much like PID 1 in linux where it responsible starting and monitoring the service that's defined in the Habitat package and receiving and acting upon configuration changes from other Supervisors. If you want to learn more about how you can run your application by using Habitat Supervisor, check out Habitat's documentation where they are also explaining the details of the supervisor.
Here, we will use docker image export in order to use this image later to upload Alibaba Cloud Docker Registry and launch our Container in the cloud.
With a single command in the Habitat Studio, you will have exported the .hart file as a Docker image as shown below.
[4][default:/src:0]# hab pkg export docker ./results/<path to .hart>After the export finishes, you can run exit to leave the Studio.
[5][default:/src:0]# exit
logout
Now, run the Docker container see the result.
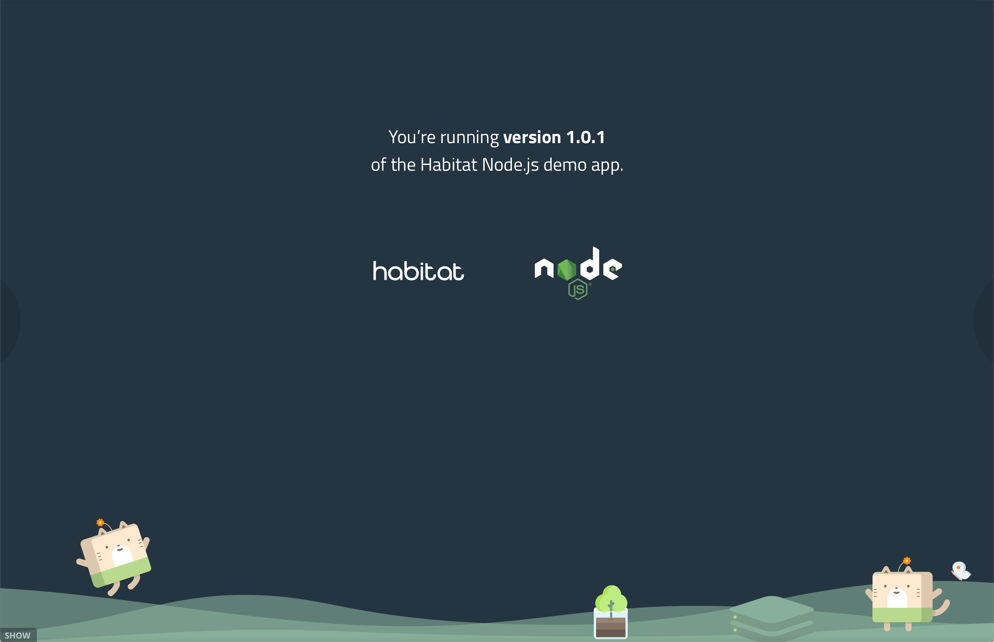
$ docker run -it -p 8000:8000 try-habitat/sample-node-appFinally, go to http://localhost:8000 in your browser to see the sample application UI as seen in the screenshot below.

Although Habitat works great with Docker, you can deploy Habitat packages to almost any environment, including bare metal, a VM, the cloud, Mesos, Kubernetes, and more. Here, we will publish our image in to Alibaba Container Registry which is a fully-managed Docker registry provided by Alibaba Cloud. In order to run our sample application container on Alibaba Cloud, we can publish the image into Container Registry and then create a container instance.
There are a few simple steps to publish our image:
Local Repository for the Code Source section as we will only publish our docker image.Manage to see the guide which explains how you can publish the docker image into the registry.Now, you are ready to publish your image to container registry. You can follow the guide provided by Alibaba or just follow the steps below.
First, login in to Alibaba Cloud Docker Registry.
$ sudo docker login --username=<your-email-address-here> registry-intl.us-west-1.aliyuncs.comThen, push our exported Docker image in to the Alibaba Cloud Docker Registry. Here, don't forget to replace the parameters based on account details.
$ sudo docker login --username=<your-email-address-here> registry-intl.us-west-1.aliyuncs.com
$ sudo docker tag try-habitat/sample-node-app registry-intl.us-west-1.aliyuncs.com/try-habitat/sample-node-app:latest
$ sudo docker push registry-intl.us-west-1.aliyuncs.com/try-habitat/sample-node-app:latest
Now you can use this image to create a container and run your application on Kubernetes.

2,593 posts | 791 followers
FollowAlibaba Clouder - June 14, 2019
Lady Amelia - September 19, 2024
Alibaba Clouder - September 20, 2018
Alibaba Clouder - August 10, 2018
ApsaraDB - April 1, 2019
Alibaba Cloud Community - May 6, 2022

2,593 posts | 791 followers
FollowLearn More
 Container Registry
A secure image hosting platform providing containerized image lifecycle management
Learn More Container Service for Kubernetes
Alibaba Cloud Container Service for Kubernetes is a fully managed cloud container management service that supports native Kubernetes and integrates with other Alibaba Cloud products.
Learn MoreMore Posts by Alibaba Clouder