Threat detection is an essential part of security operations. Threat detection allows us to quickly detect anomalies that occur in our environment. This article will describe how to detect a threat using Alibaba Cloud SLS. The technique that will be used in this article is included in the defense evasion tactic by MITRE, namely indicator removal by deleting events or logs on server (T1070.001).
The image below shows the flow of the case study that will be carried out. The threat actor will delete logs on the windows server, later the event will be recorded by Sysmon and will be sent to the SLS logstore via logtail. After that, SLS will detect the incident with the alert rule that has been created and will send an alert to the SOC team for follow-up.
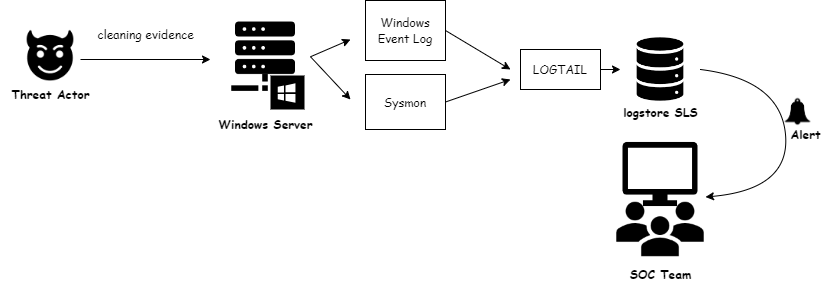
Picture 1. Threat Detection Flow
Here is an outline of what we will do:
• Create Project & Logstore SLS
• Installing sysmon on Windows Server
• Data collection via Logtail
• Install Invoke-AtomicRedTeam
• Create Alert Rule & Notification Template
• Detection Validation
First, we need to create a project in SLS dashboard. To create a project, click create project and choose the region that you want then fill in the project name and click OK. There are other configurations that you can set, like the resource group and log collection options.
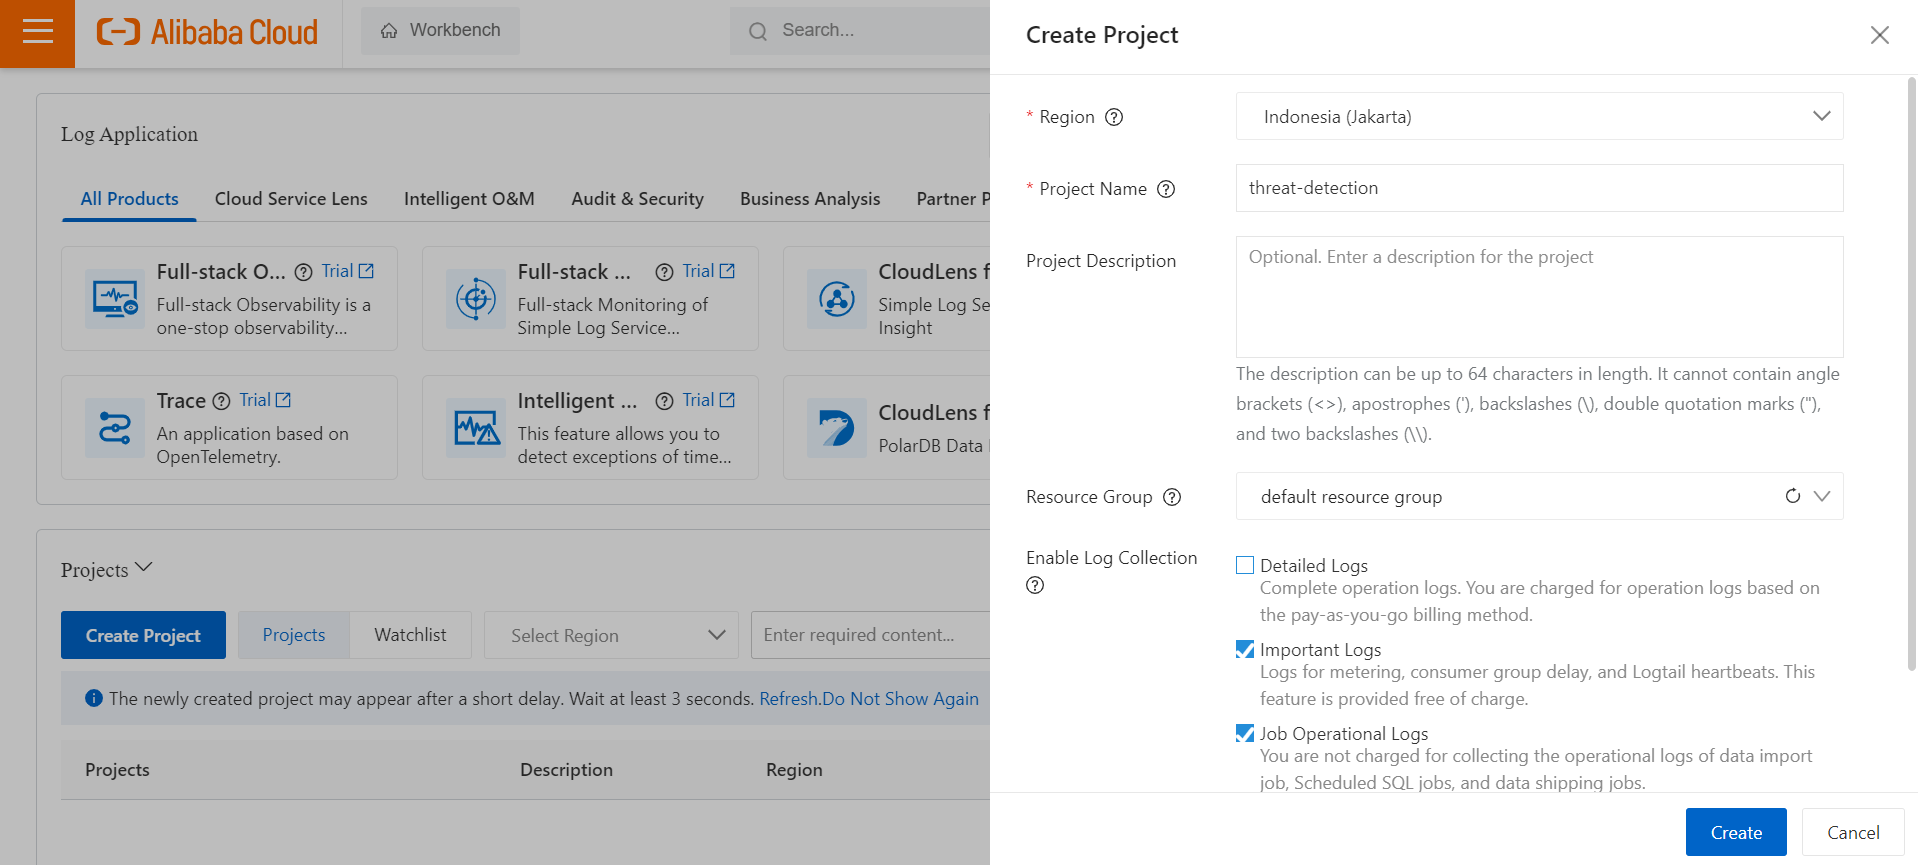
Picture 2. Create Project
After the project is created, the next step is to create a logstore. To create a logstore, you can click create logstore (will be shown after create the project) and then choose the logstore type, billing mode, and fill the logstore name. We can set the data retention on logstore from minimum 1 day to maximum 3650 days. Logstore also offer automatic sharding with maximum shards is 256. Each shard supports a write speed of 5 MB/s and a read speed of 10 MB/s.
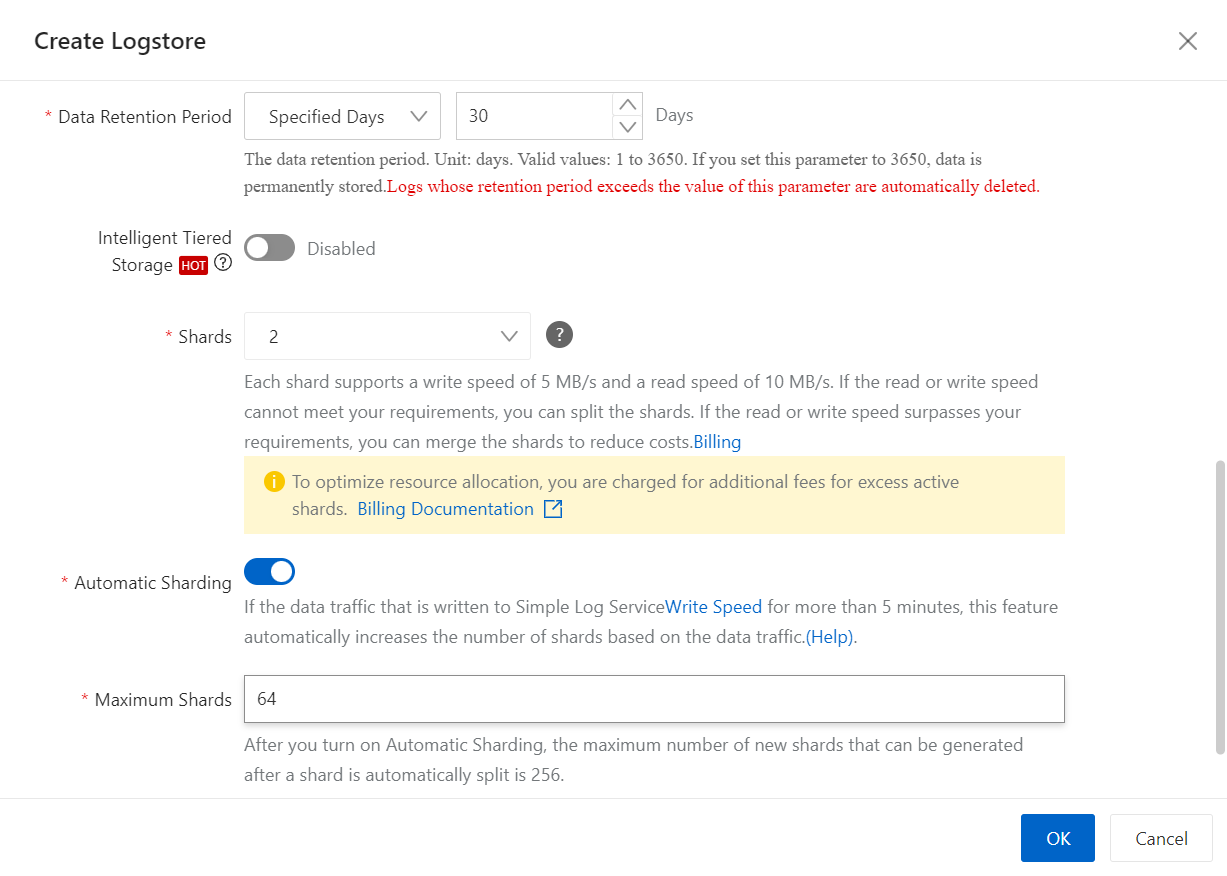
Picture 3. Create Logstore
After we create the project and logstore, we will install Sysmon to capture the process event on windows server. Sysmon is a powerful monitoring tool for Windows systems. It's designed to provide detailed information about system activities, making it invaluable for security investigations, incident response, and general system monitoring. To install Sysmon, first we need to download the installer on Microsoft’s official website. Extract the downloaded installer and run this command to install the Sysmon:
Sysmon64.exe -accepteula -i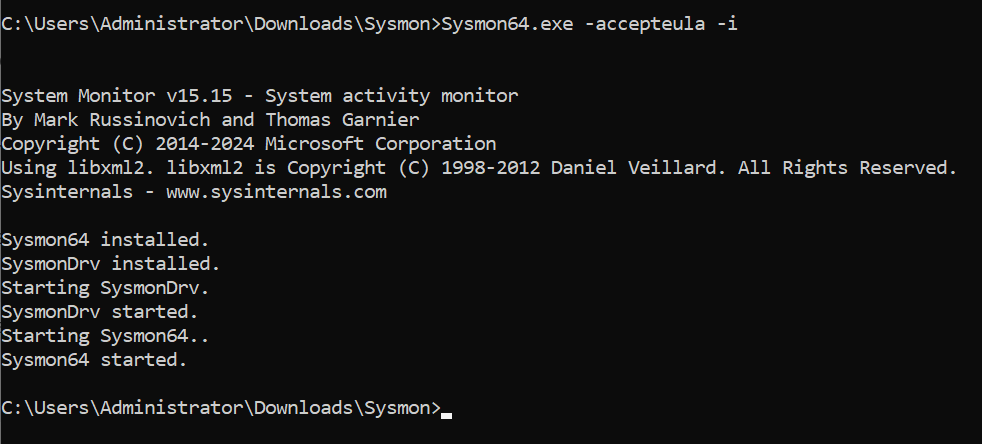
Picture 4. Install Sysmon
We can verify if the event has been successfully captured by Sysmon via event viewer.
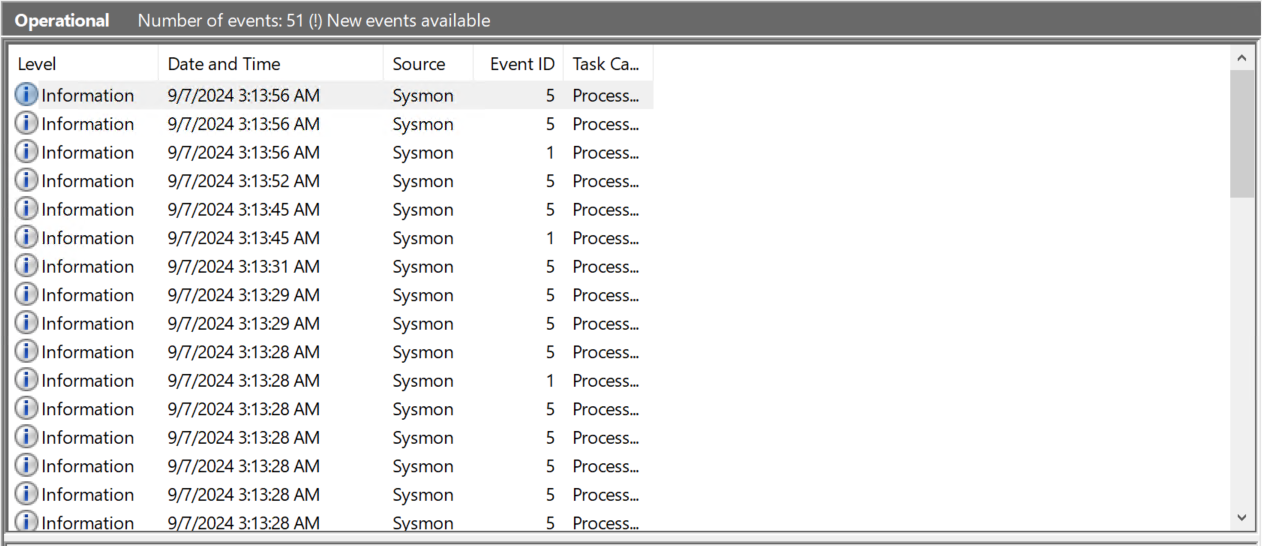
Picture 5. Sysmon Data
Back to SLS dashboard, now we need to collect Sysmon data to be stored in logstore via logtail. To collect the data, click + icon on data collection tab, choose windows event logs and click integrate now.
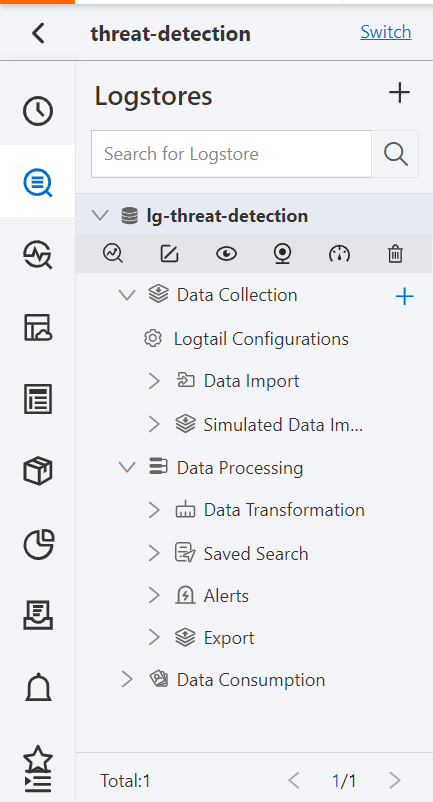
Picture 6. Add Data Collection
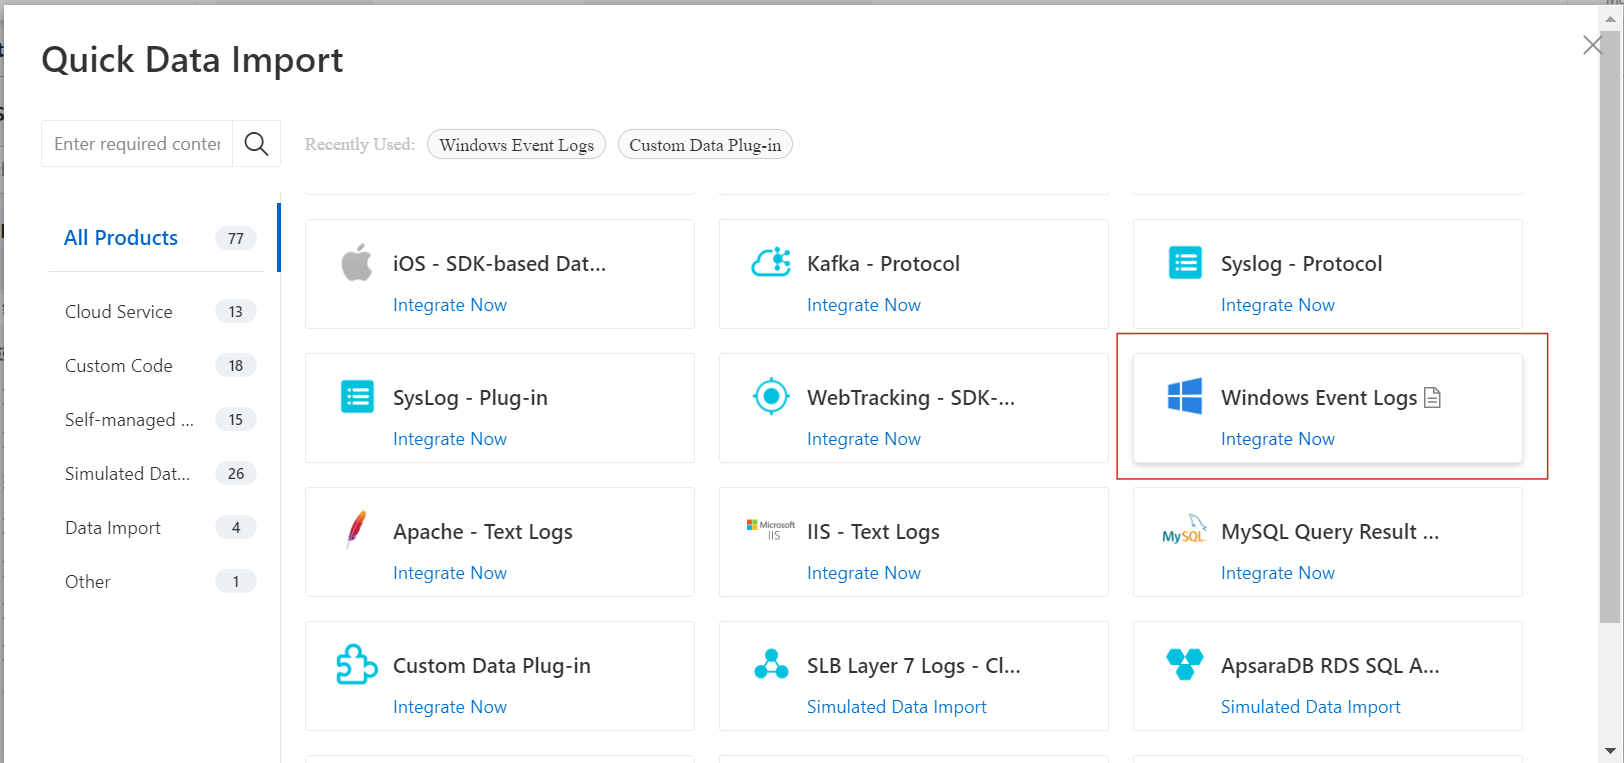
Picture 7. Windows Event Logs Plug-in
We need to install logtail in order to forward the Sysmon logs into logstore. Select the ECS that we want to install the logtail and then click create. It will automatically install the logtail agent.
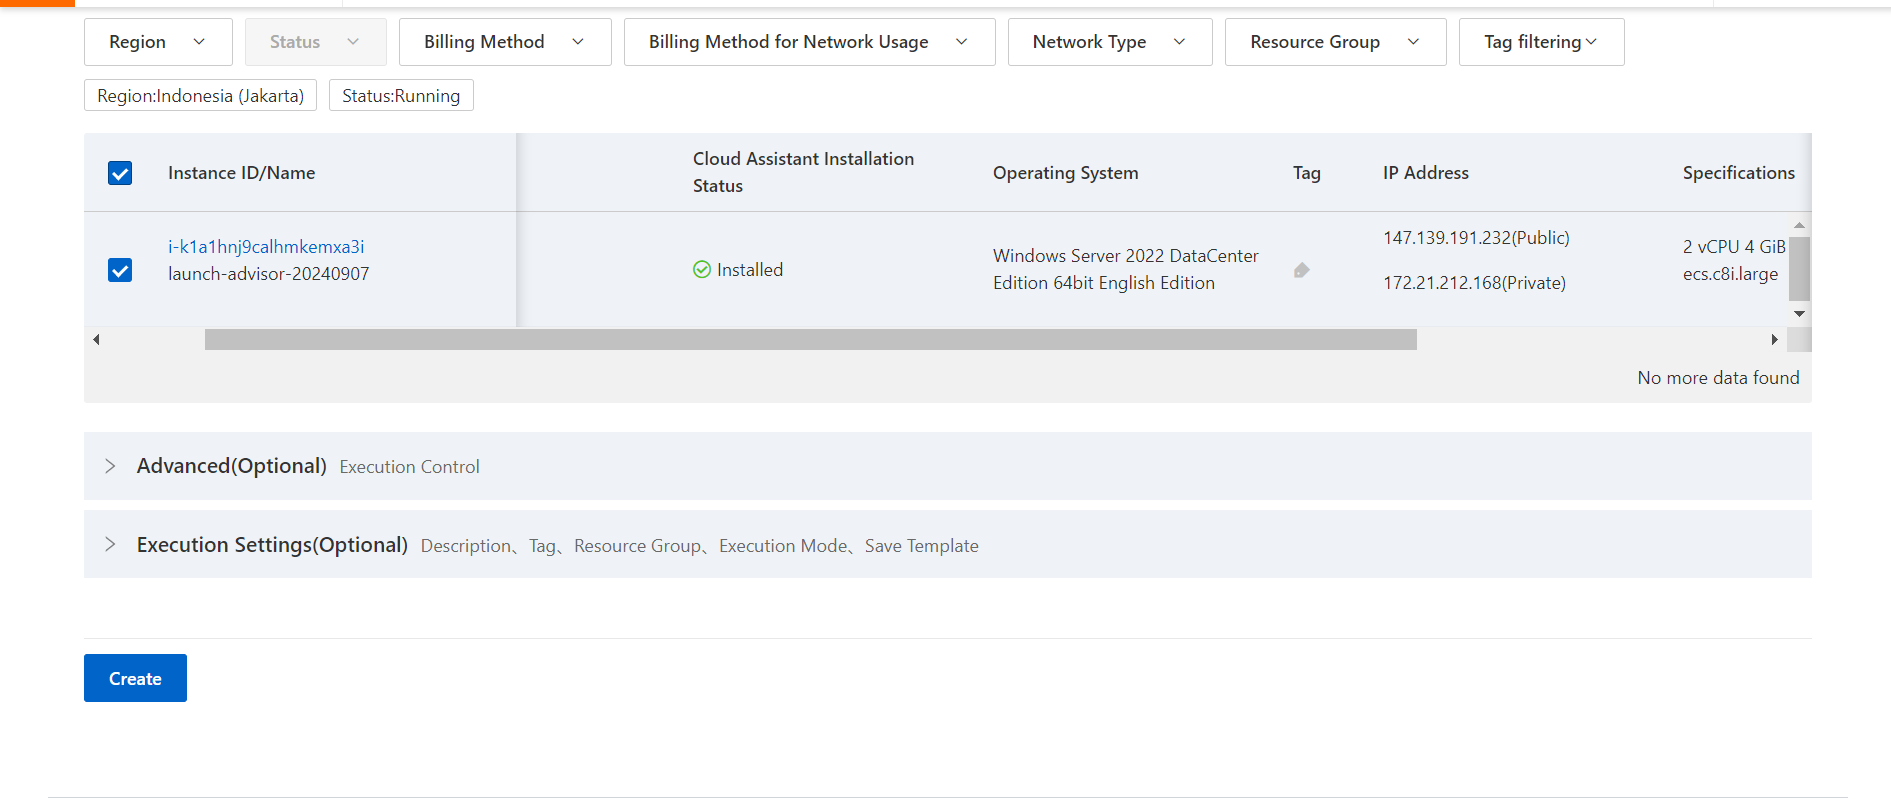
Picture 8. Install logtail
After the installation is completed, we have to create a machine group. A machine group is a virtual group of multiple servers. Simple Log Service uses machine groups to manage the servers whose logs need to be collected by using Logtail. Simple Log Service allows you to collect data from multiple servers by using the same Logtail configuration. The servers can belong to a single machine group or multiple machine groups.
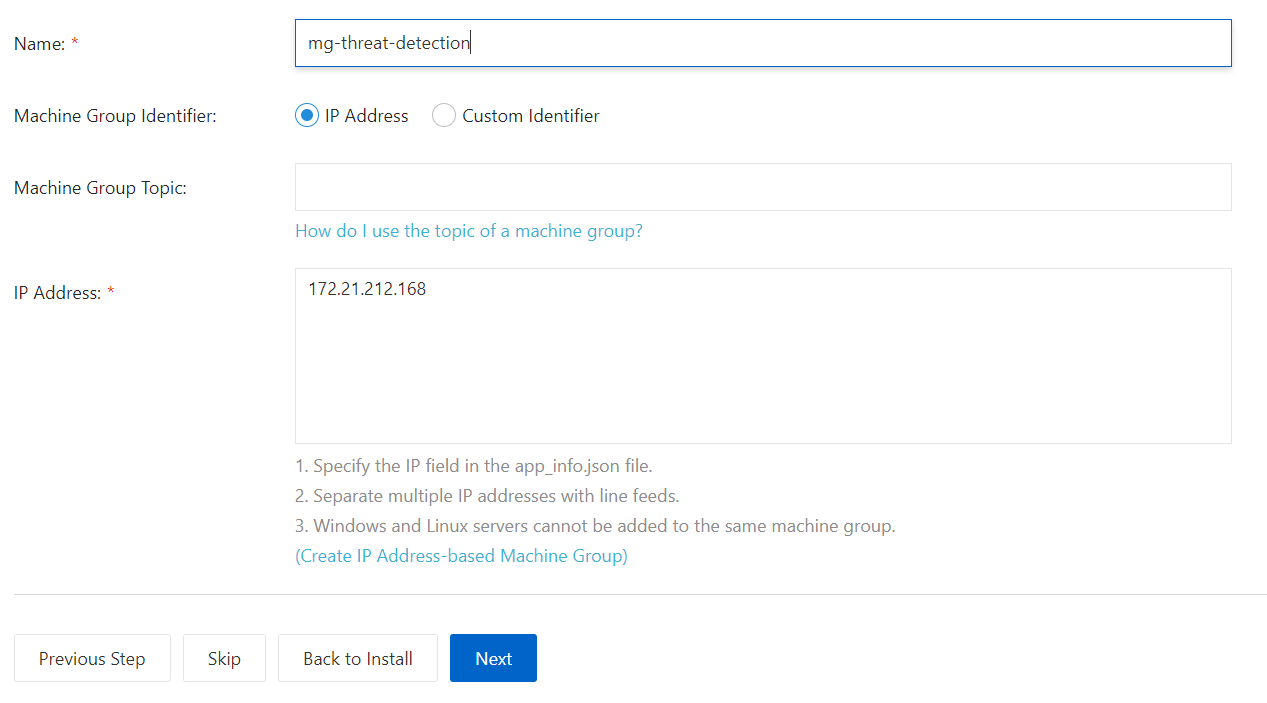
Picture 9. Machine Group
Click next until the plug-in configuration. In this step, use this configuration to add Sysmon channel:
{
  "inputs": [
    {
      "type": "service_wineventlog",
      "detail": {
        "Name": "Application",
        "IgnoreOlder": 259200
      }
      },
      {
          "type": "service_wineventlog",
          "detail": {
              "Name": "System",
              "IgnoreOlder": 259200
          }
      },
      {
          "type": "service_wineventlog",
          "detail": {
              "Name": "Microsoft-Windows-Sysmon/Operational",
              "IgnoreOlder": 259200
          }
      }
  ]
}
Click next, then preview your data. If the data exists, we have successfully add the data collection.
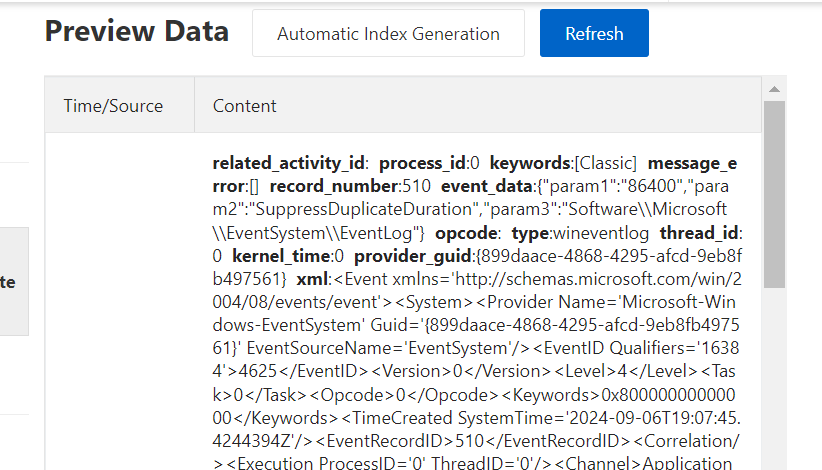
Picture 10. Preview Data Collection
We are using Invoke-AtomicRedTeam to perform the attack technique. Invoke-AtomicRedTeam is a PowerShell module to execute tests as defined in the atomics folder of Red Canary's Atomic Red Team project. The "atomics folder" contains a folder for each Technique defined by the MITRE ATT&CK™ Framework.
To install the execution framework and atomic folder, open powershell as administrator and run this prompt.
IEX (IWR 'https://raw.githubusercontent.com/redcanaryco/invoke-atomicredteam/master/install-atomicredteam.ps1' -UseBasicParsing);
Install-AtomicRedTeam -getAtomics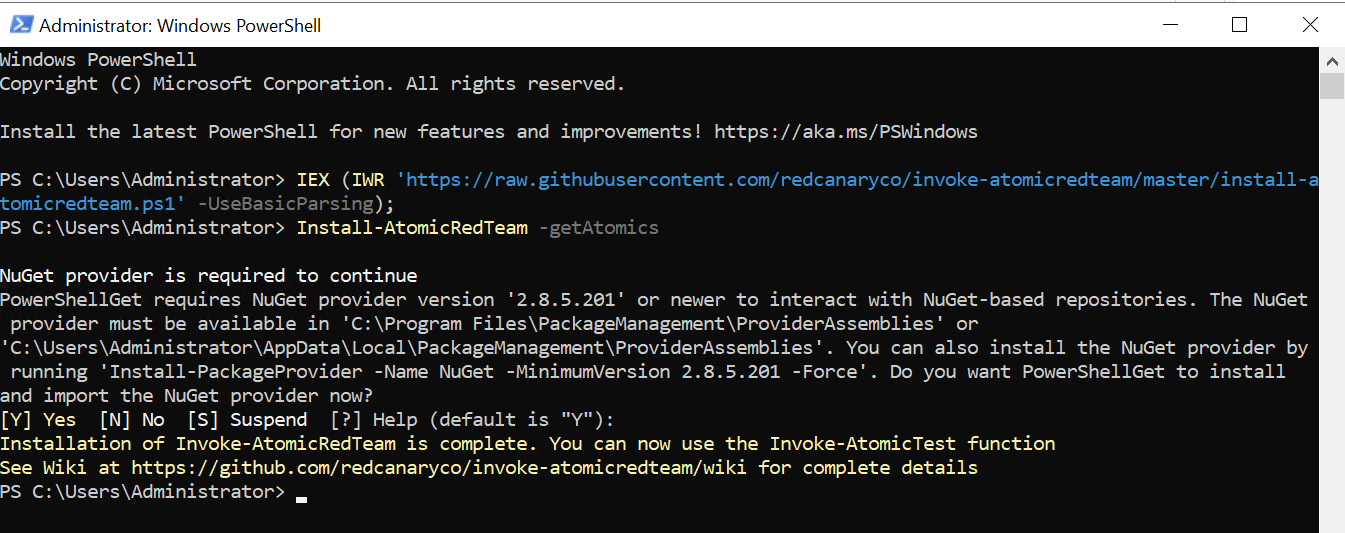
Picture 11. Install Invoke-AtomicRedTeam
Run the invoke command to execute the clear logs activity, and then verify if the events is detected by SLS.
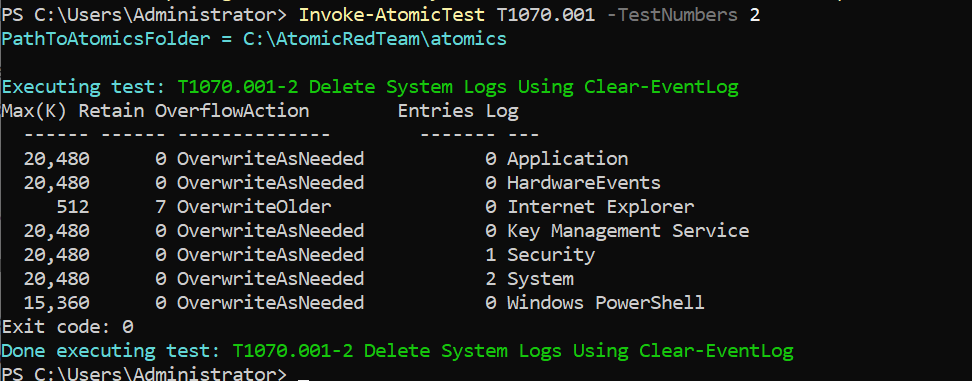
Picture 12. Clear Logs
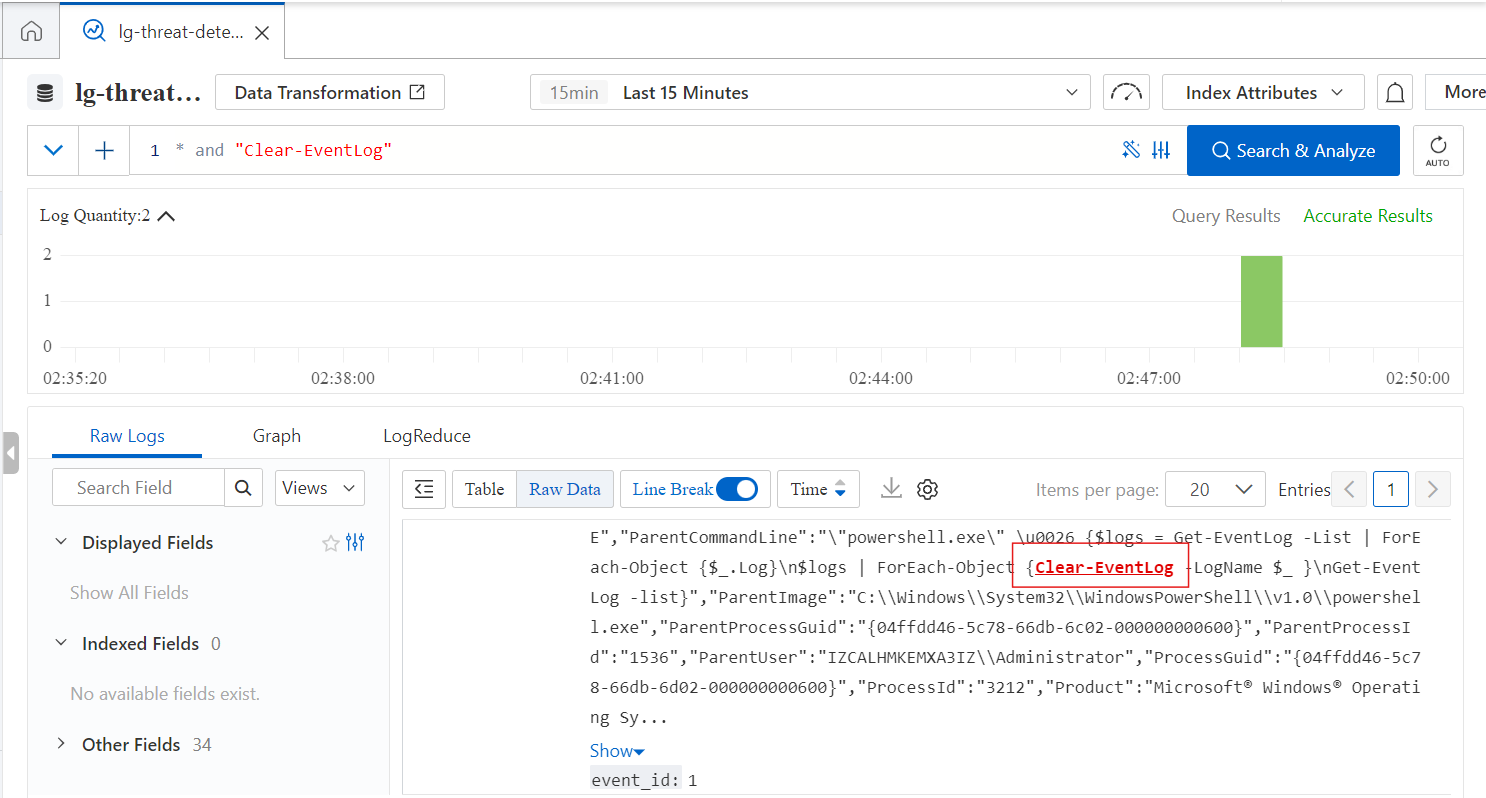
Picture 13. Clear-EventLog in SLS
The event has been detected, now we need to create the alert rule so we can get alerted if the same activity has been conducted by the threat actor. To create the alert rule, we need to fill the rule name, set the check frequency, create query statistics, set the trigger condition, and enable the Simple Log Service Notification.
We can use this query to detect the clear log events.
* and Clear-EventLog
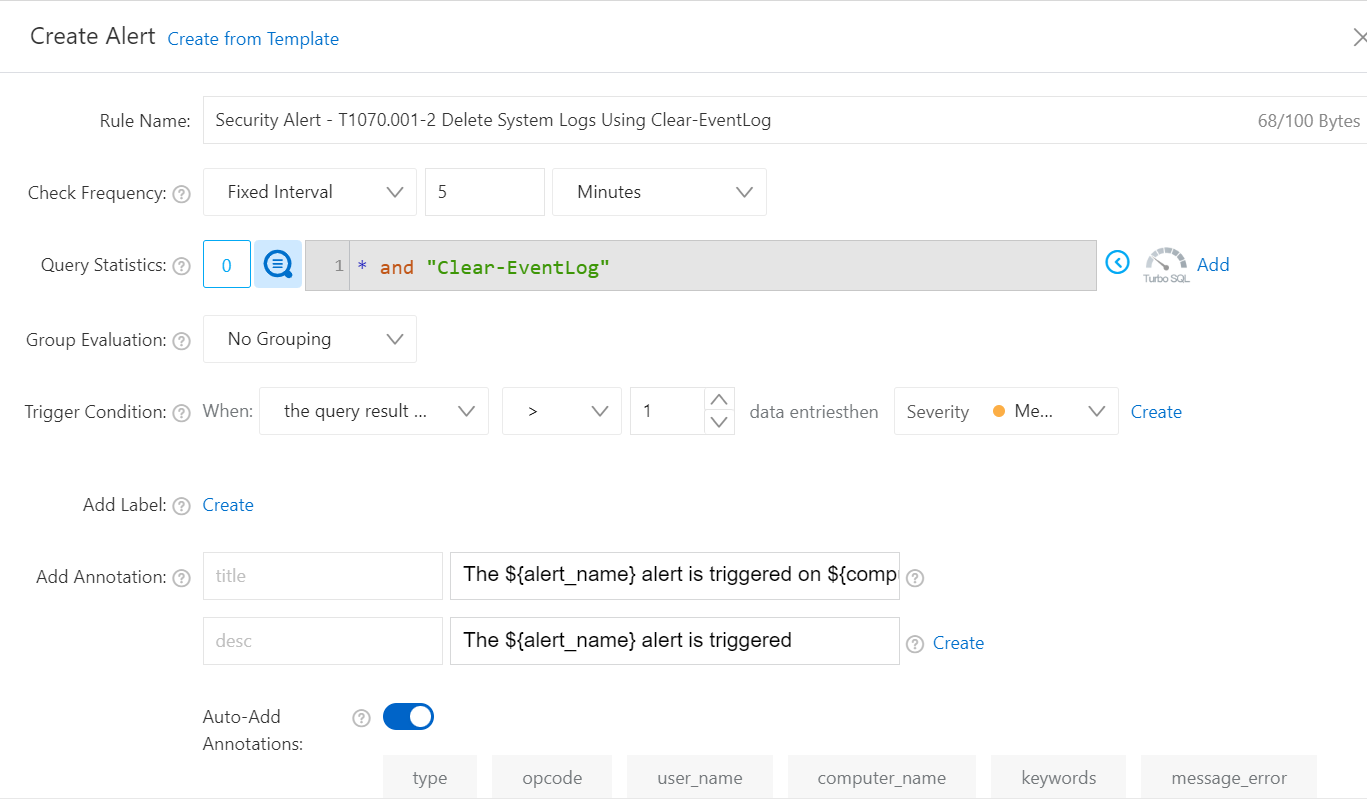
Picture 14. Create Alert
Next we need to enable the Simple Log Service notification by clicking the enable button. Change the alert policy to simple mode and set the notification method to email. We can set multiple recipients. And make sure you already created the recipient and alert template by clicking add button.
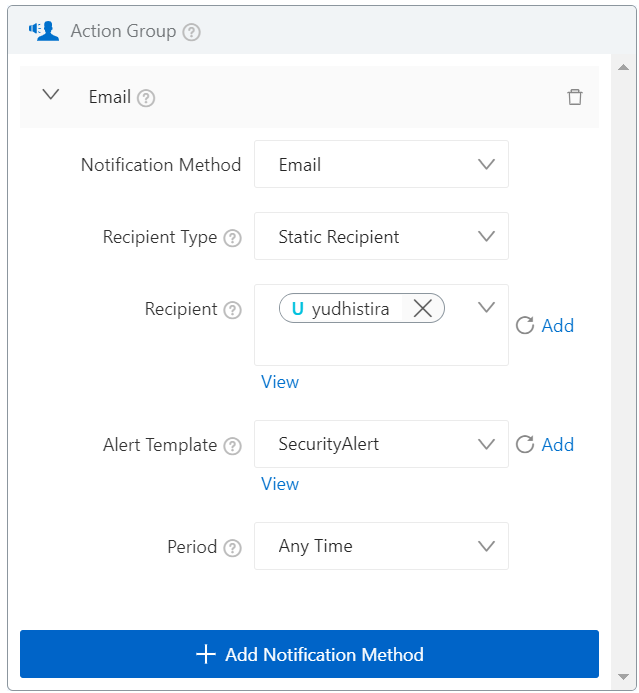
Picture 15. Action Group
You can use my alert template in case you need a reference.
Dear SOC Team,

We have identified a potential security incident that requires immediate investigation and response. Please find the details below:

Alert Name: {{ alert.alert_name }}
Date & Time Detected: {{ alert.alert_time }}
Incident Severity: {{ alert.severity }}

For further investigation, please access the alert dashboard.

Please ensure that appropriate action is taken as soon as possible.

Thank you,
Automated Security Monitoring SystemRun the Invoke-AtomicRedTeam again, and then wait for the alert rule detecting the events. You can also monitor the alert from dashboard.
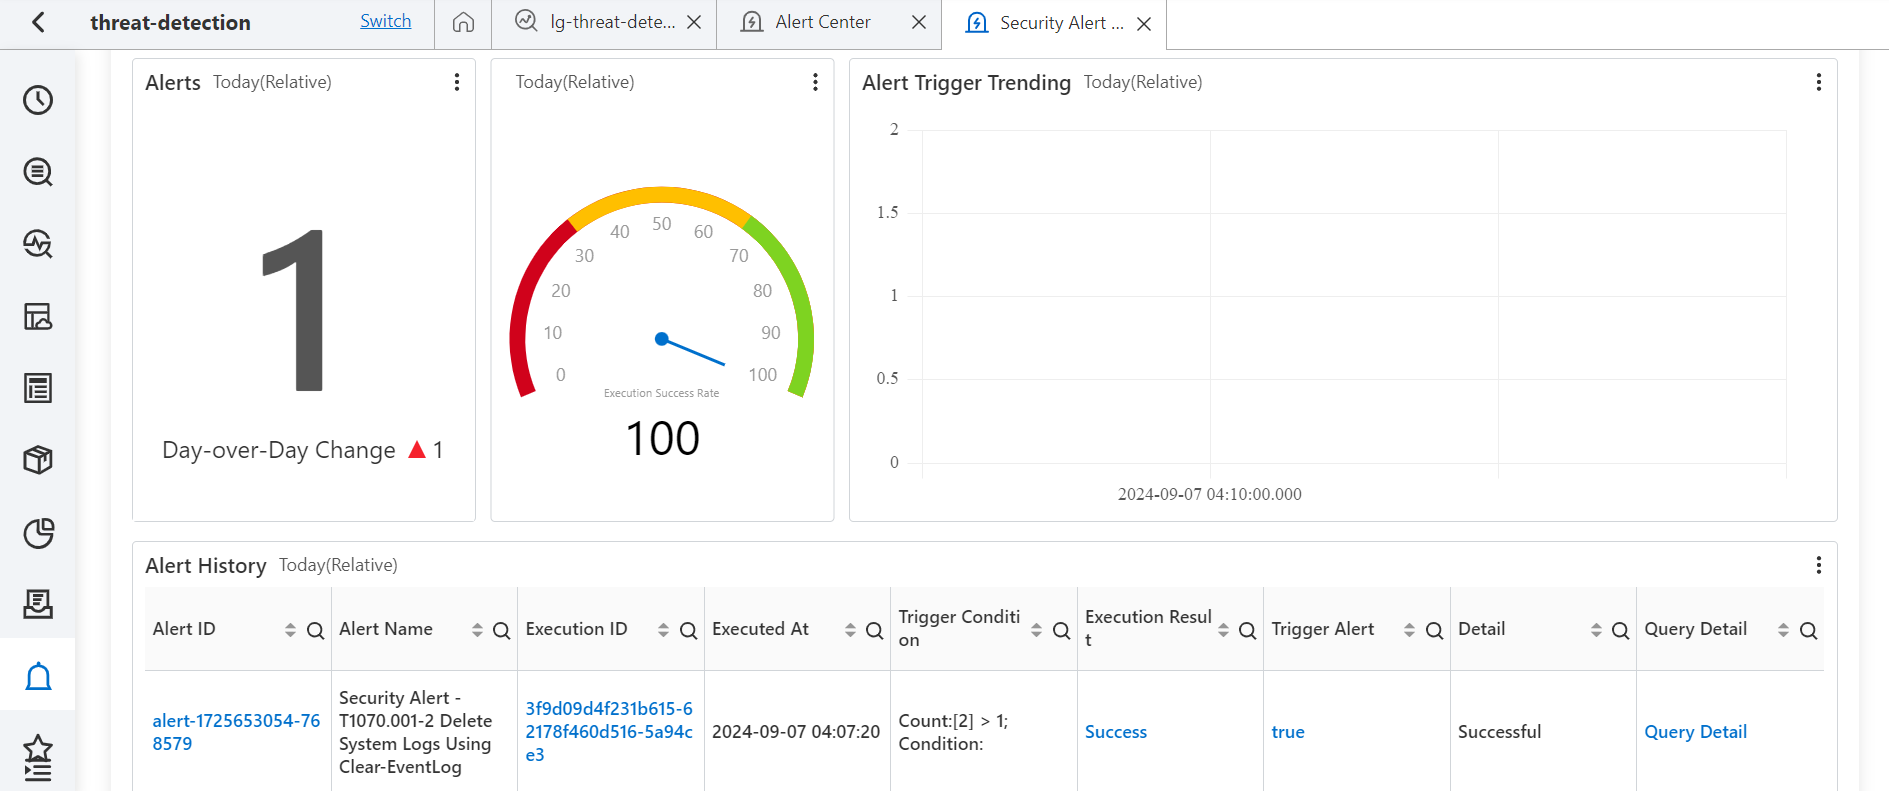
Picture 16. Alert Dashboard
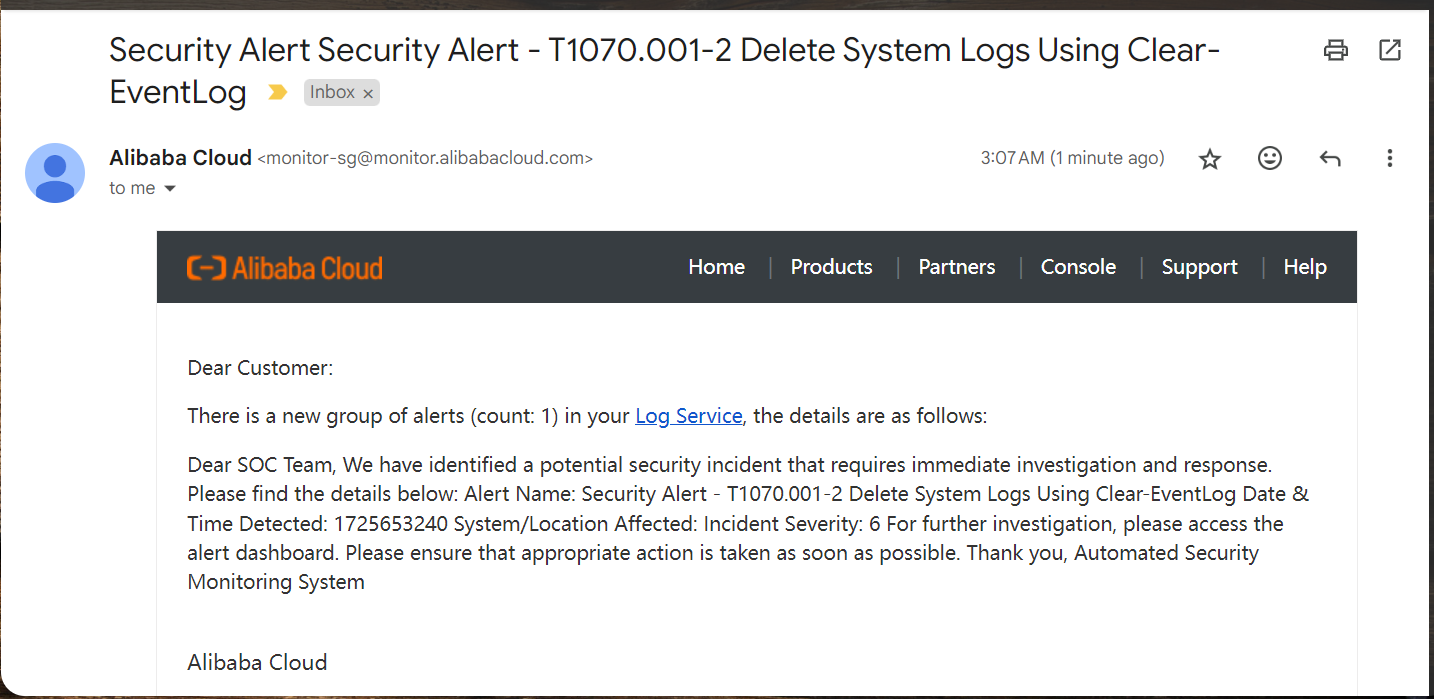
Picture 17. Notification Email
It’s done. You can leverage the query to add your threat detection capabilities using Simple Log Service in Alibaba Cloud. You can also add more data collection to give more visibility on your assets. Thank you!
Integrasi MikroTik sebagai NAT Gateway untuk ECS Alibaba Cloud
4 posts | 0 followers
FollowAlibaba Cloud Community - September 14, 2024
Yuriy Yuzifovich - November 8, 2022
Kidd Ip - May 29, 2025
CloudSecurity - September 11, 2025
Alibaba Cloud Community - August 12, 2024
Amuthan Nallathambi - August 24, 2023
4 posts | 0 followers
Follow Security Center
A unified security management system that identifies, analyzes, and notifies you of security threats in real time
Learn More Storage Capacity Unit
Plan and optimize your storage budget with flexible storage services
Learn More Hybrid Cloud Storage
A cost-effective, efficient and easy-to-manage hybrid cloud storage solution.
Learn More Managed Security Service
Identify vulnerabilities and improve security management of Alibaba Cloud WAF and Anti-DDoS and with a fully managed security service
Learn MoreMore Posts by Yudhistira Heriansyah