Compute Nest is an all in one service platform which helps the user to create applications by deployment from one console for all the products needed. Compute Nest has some services catering Generative AI solutions powered by Model Scope. This includes applications like RAG with LLM and text to video generation. In this blog we walk through the steps needed to deploy a web application for generating video from the text prompts. The text-video generation model is a model composed of three sub-networks, including: text feature extraction model, text feature-to-video latent space diffusion model, and video space mapping model. The overall model parameters are about 1.7 billion. Currently only English input is supported. The diffusion model uses the Unet3D structure and performs iterative denoising on pure Gaussian noise videos to achieve video generation. Enter the console of Compute Nest.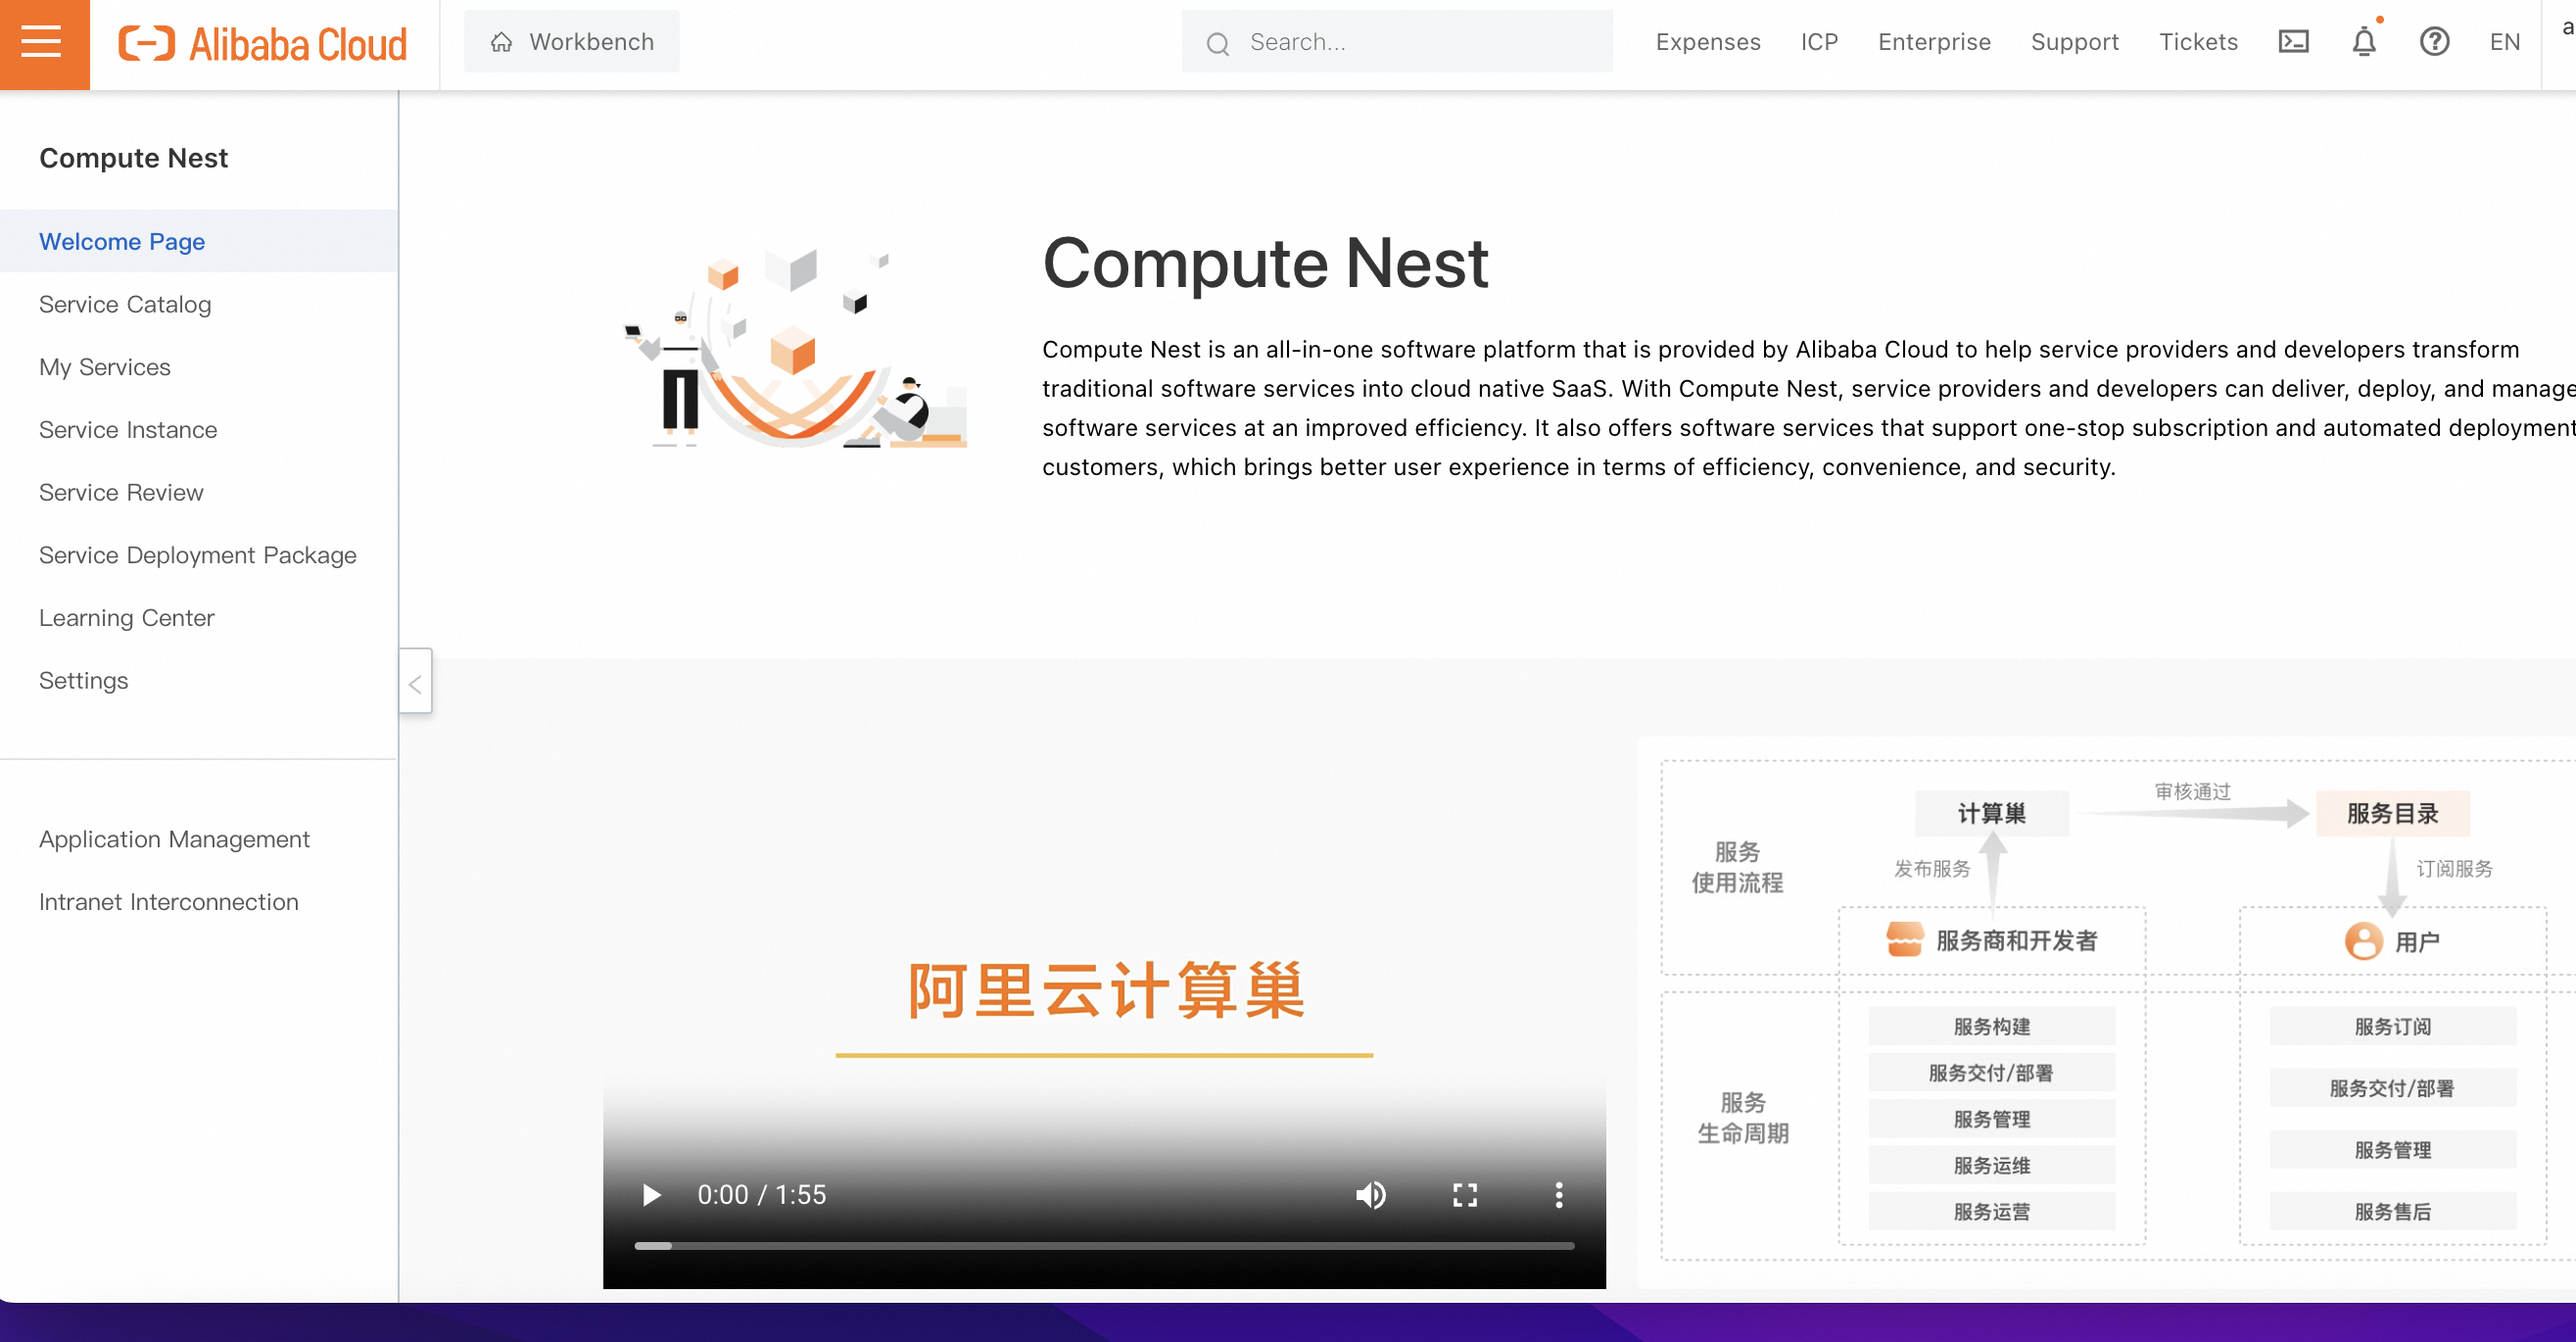
Click on "Service Catalog". Here you can browse through various services available and get to know more details.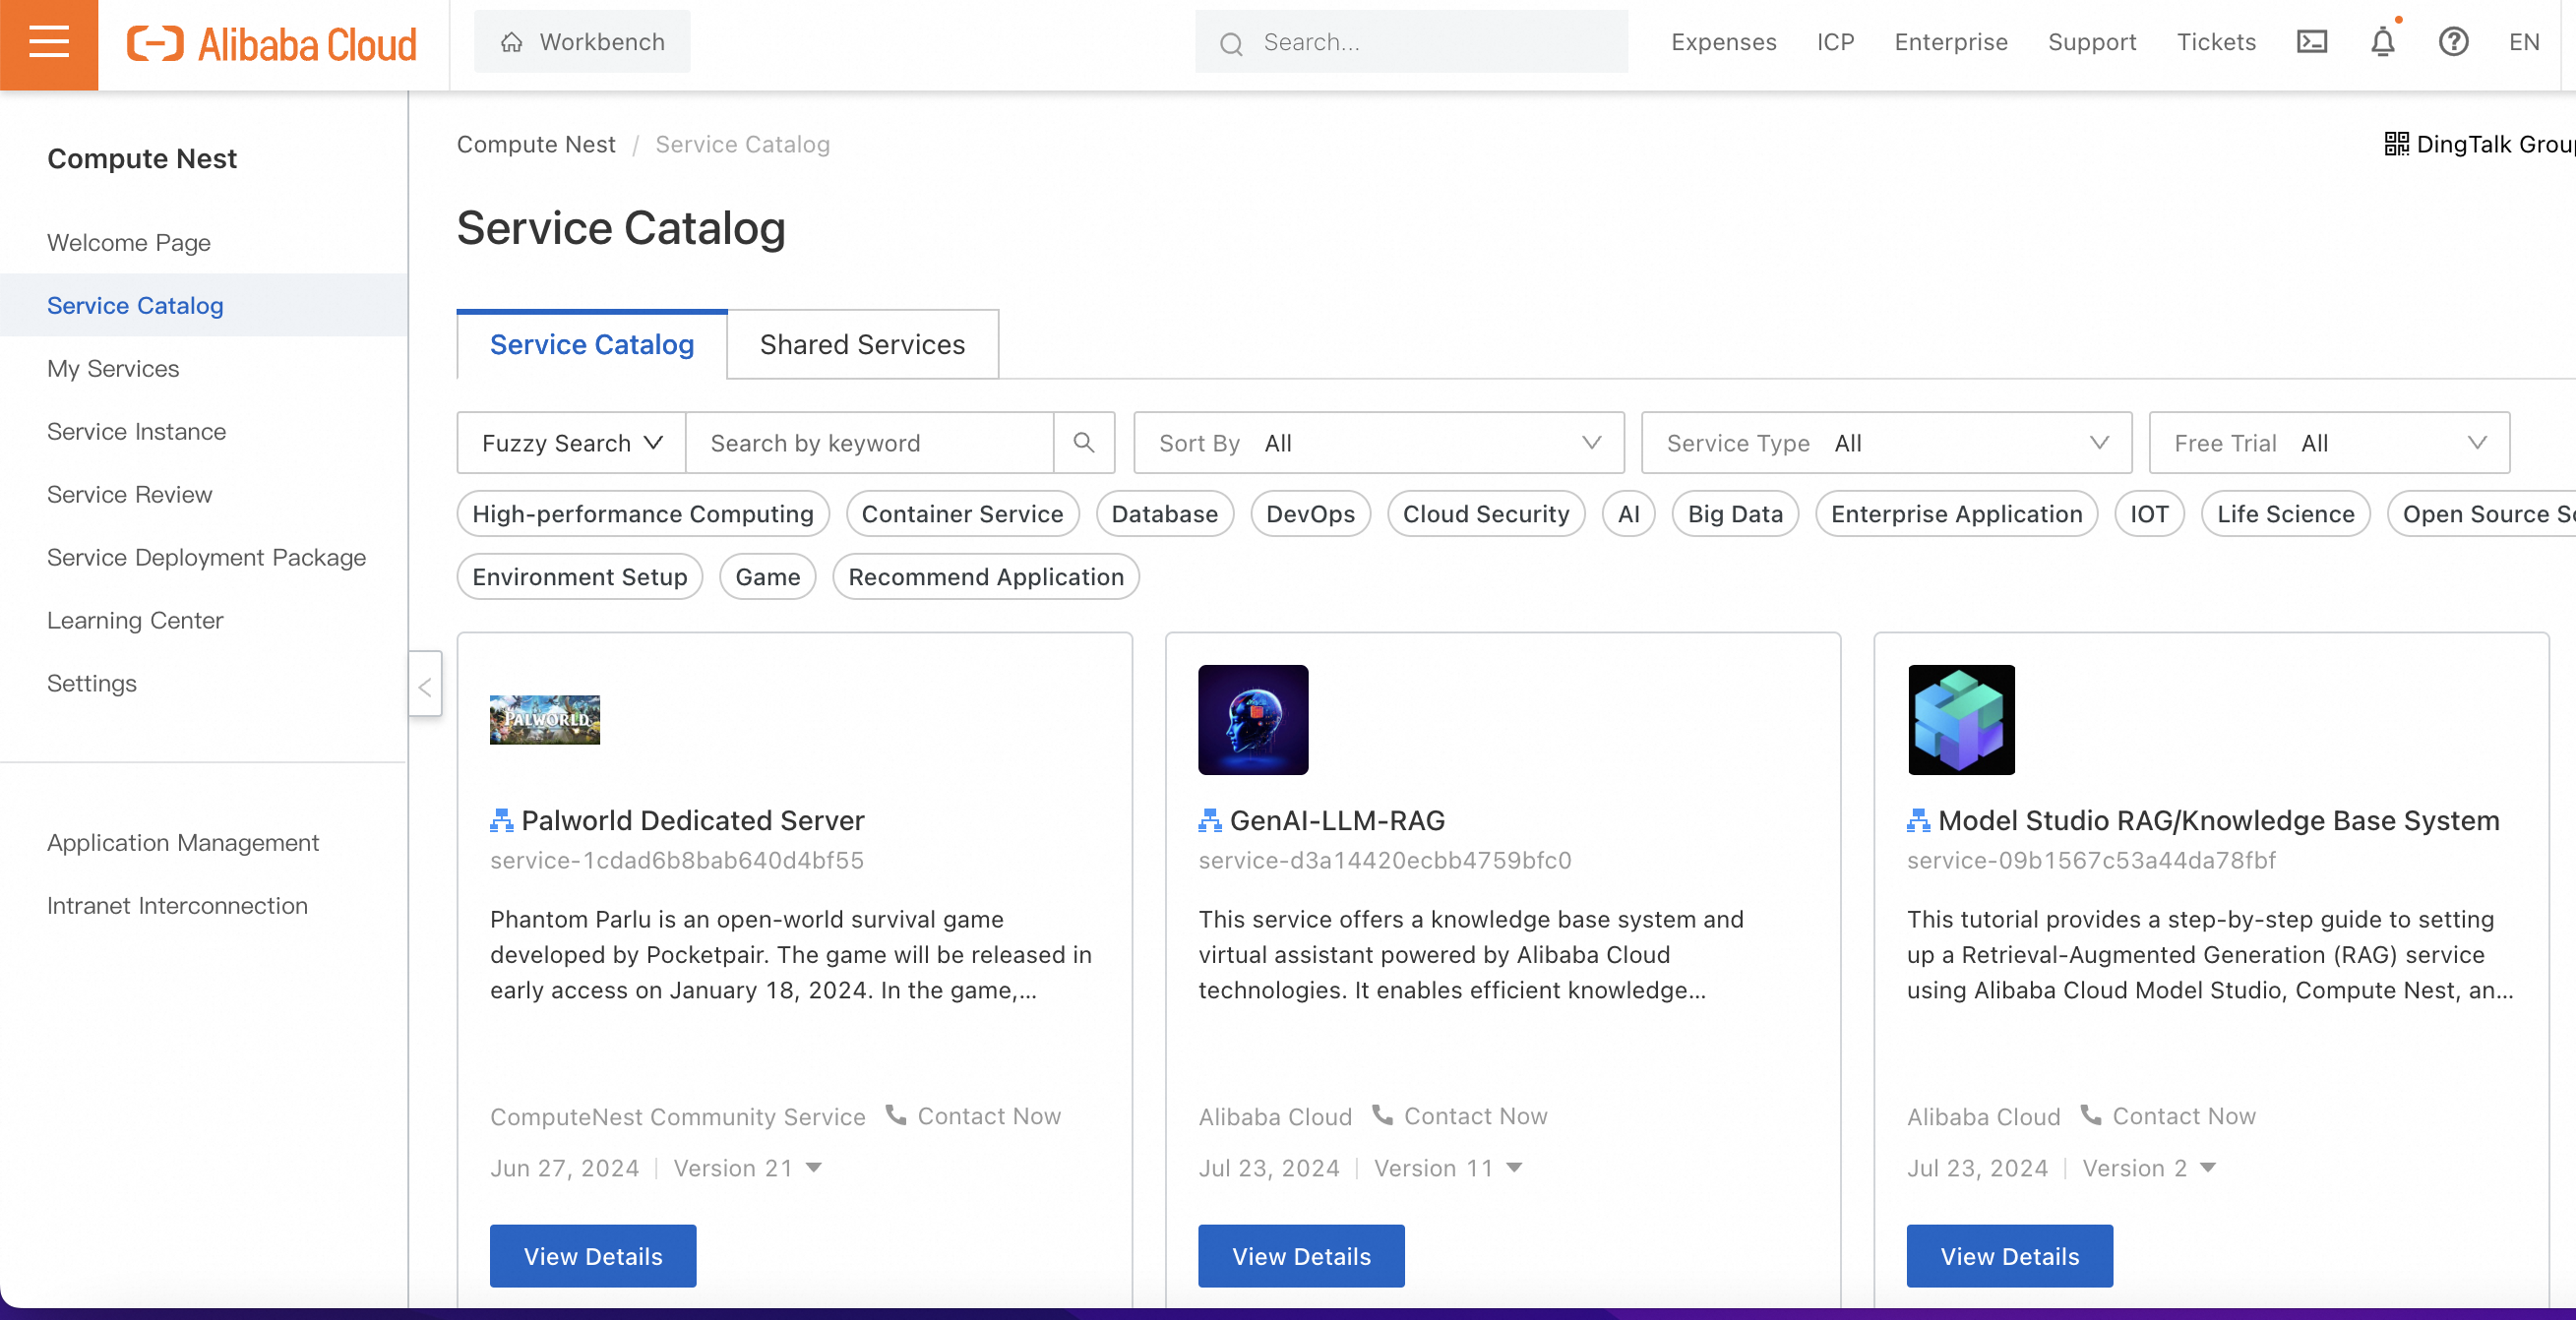
Search for text to video in the keywords and locate the service we need. Here is where we are going to select and create the application.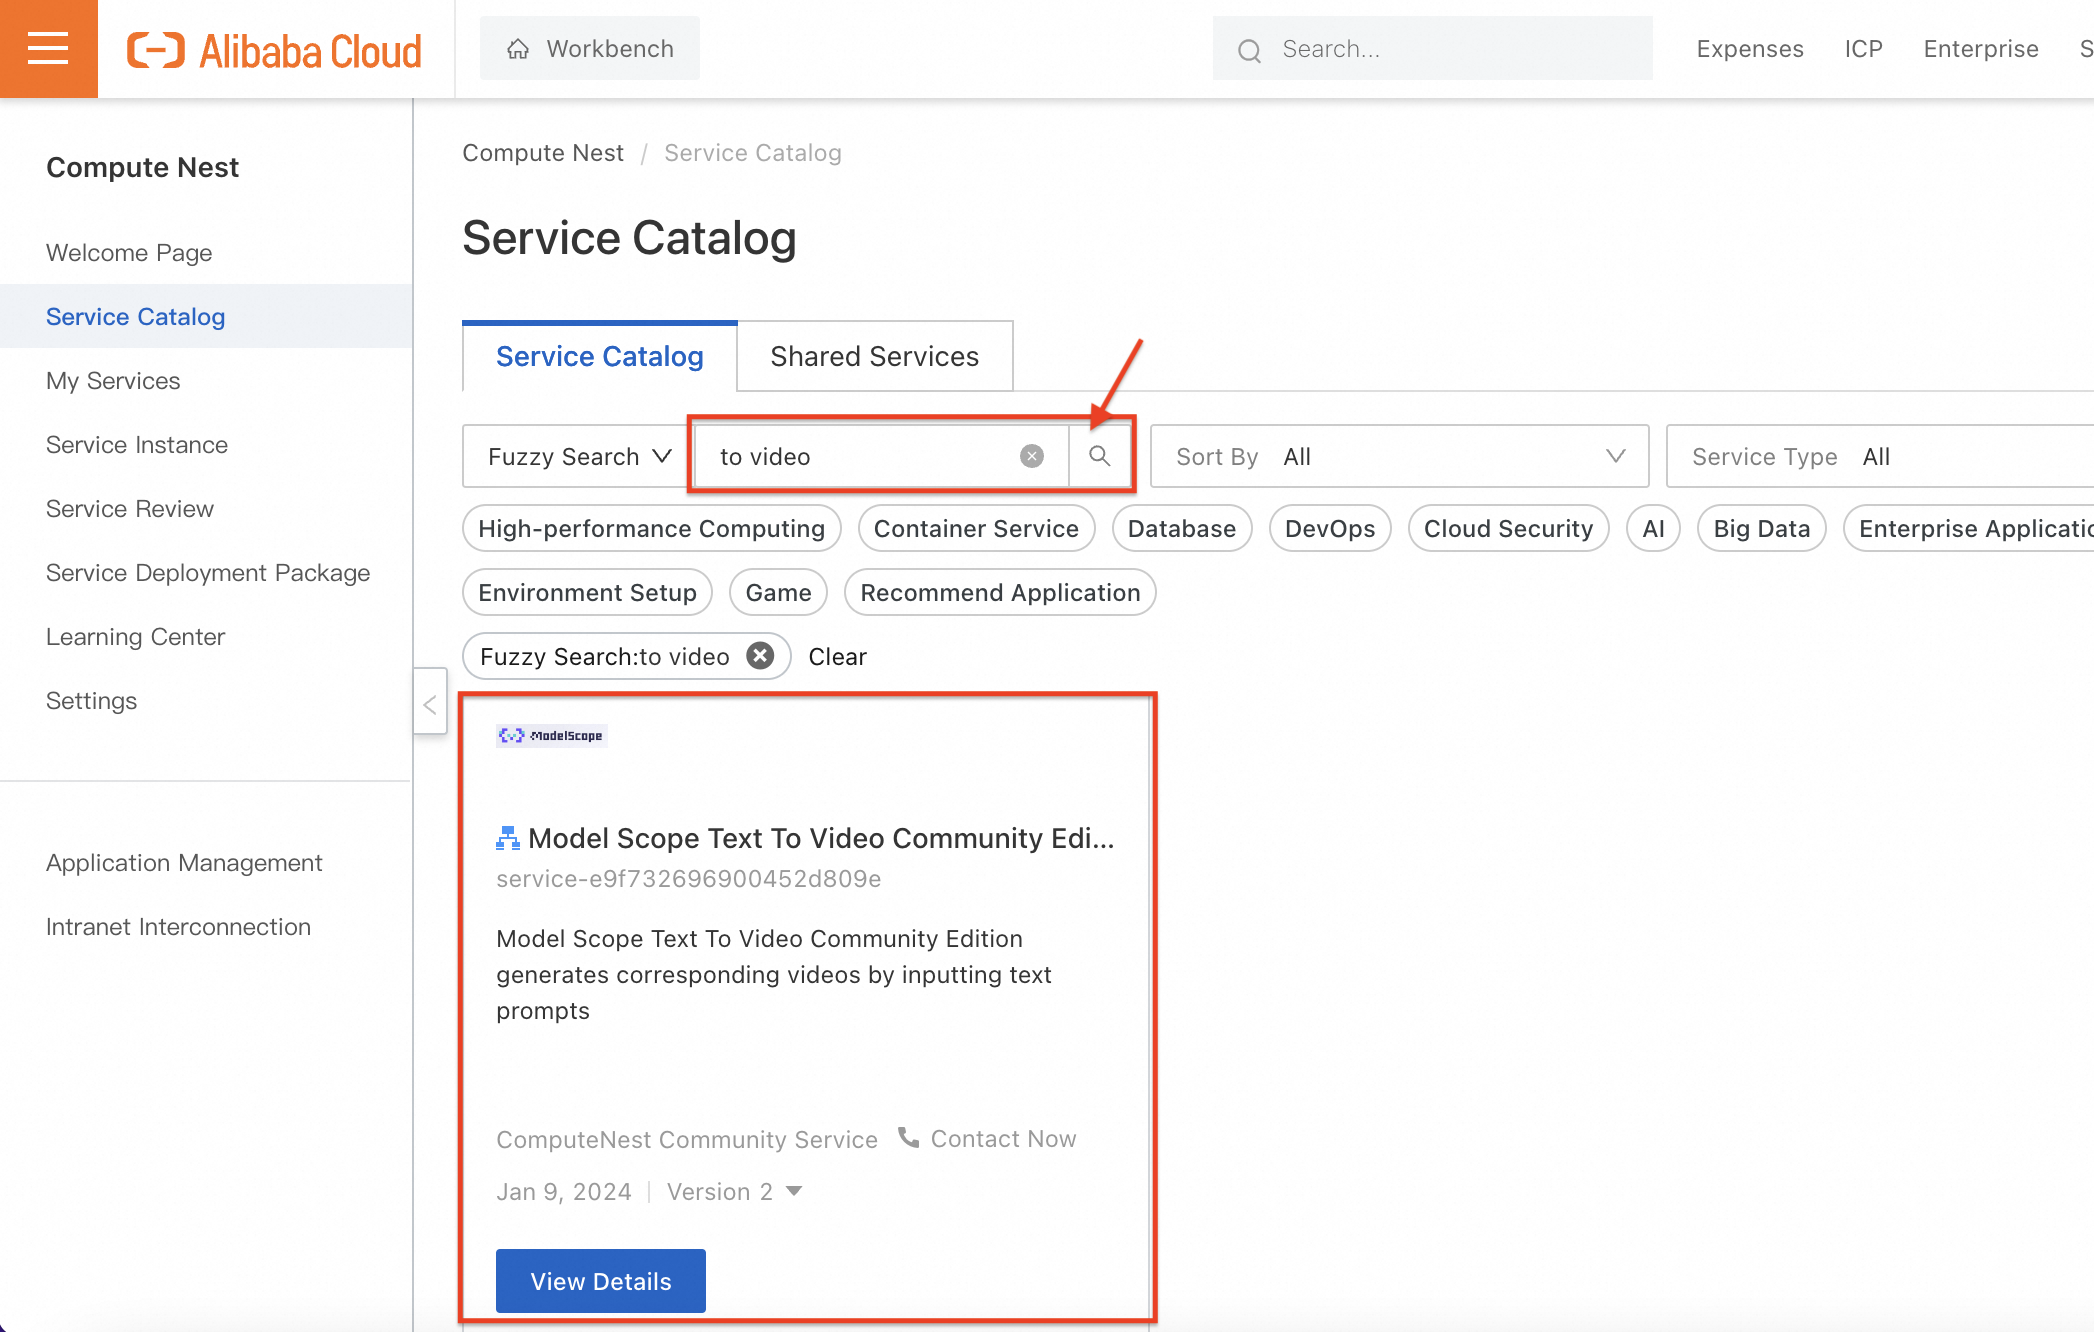
Click on "View Details".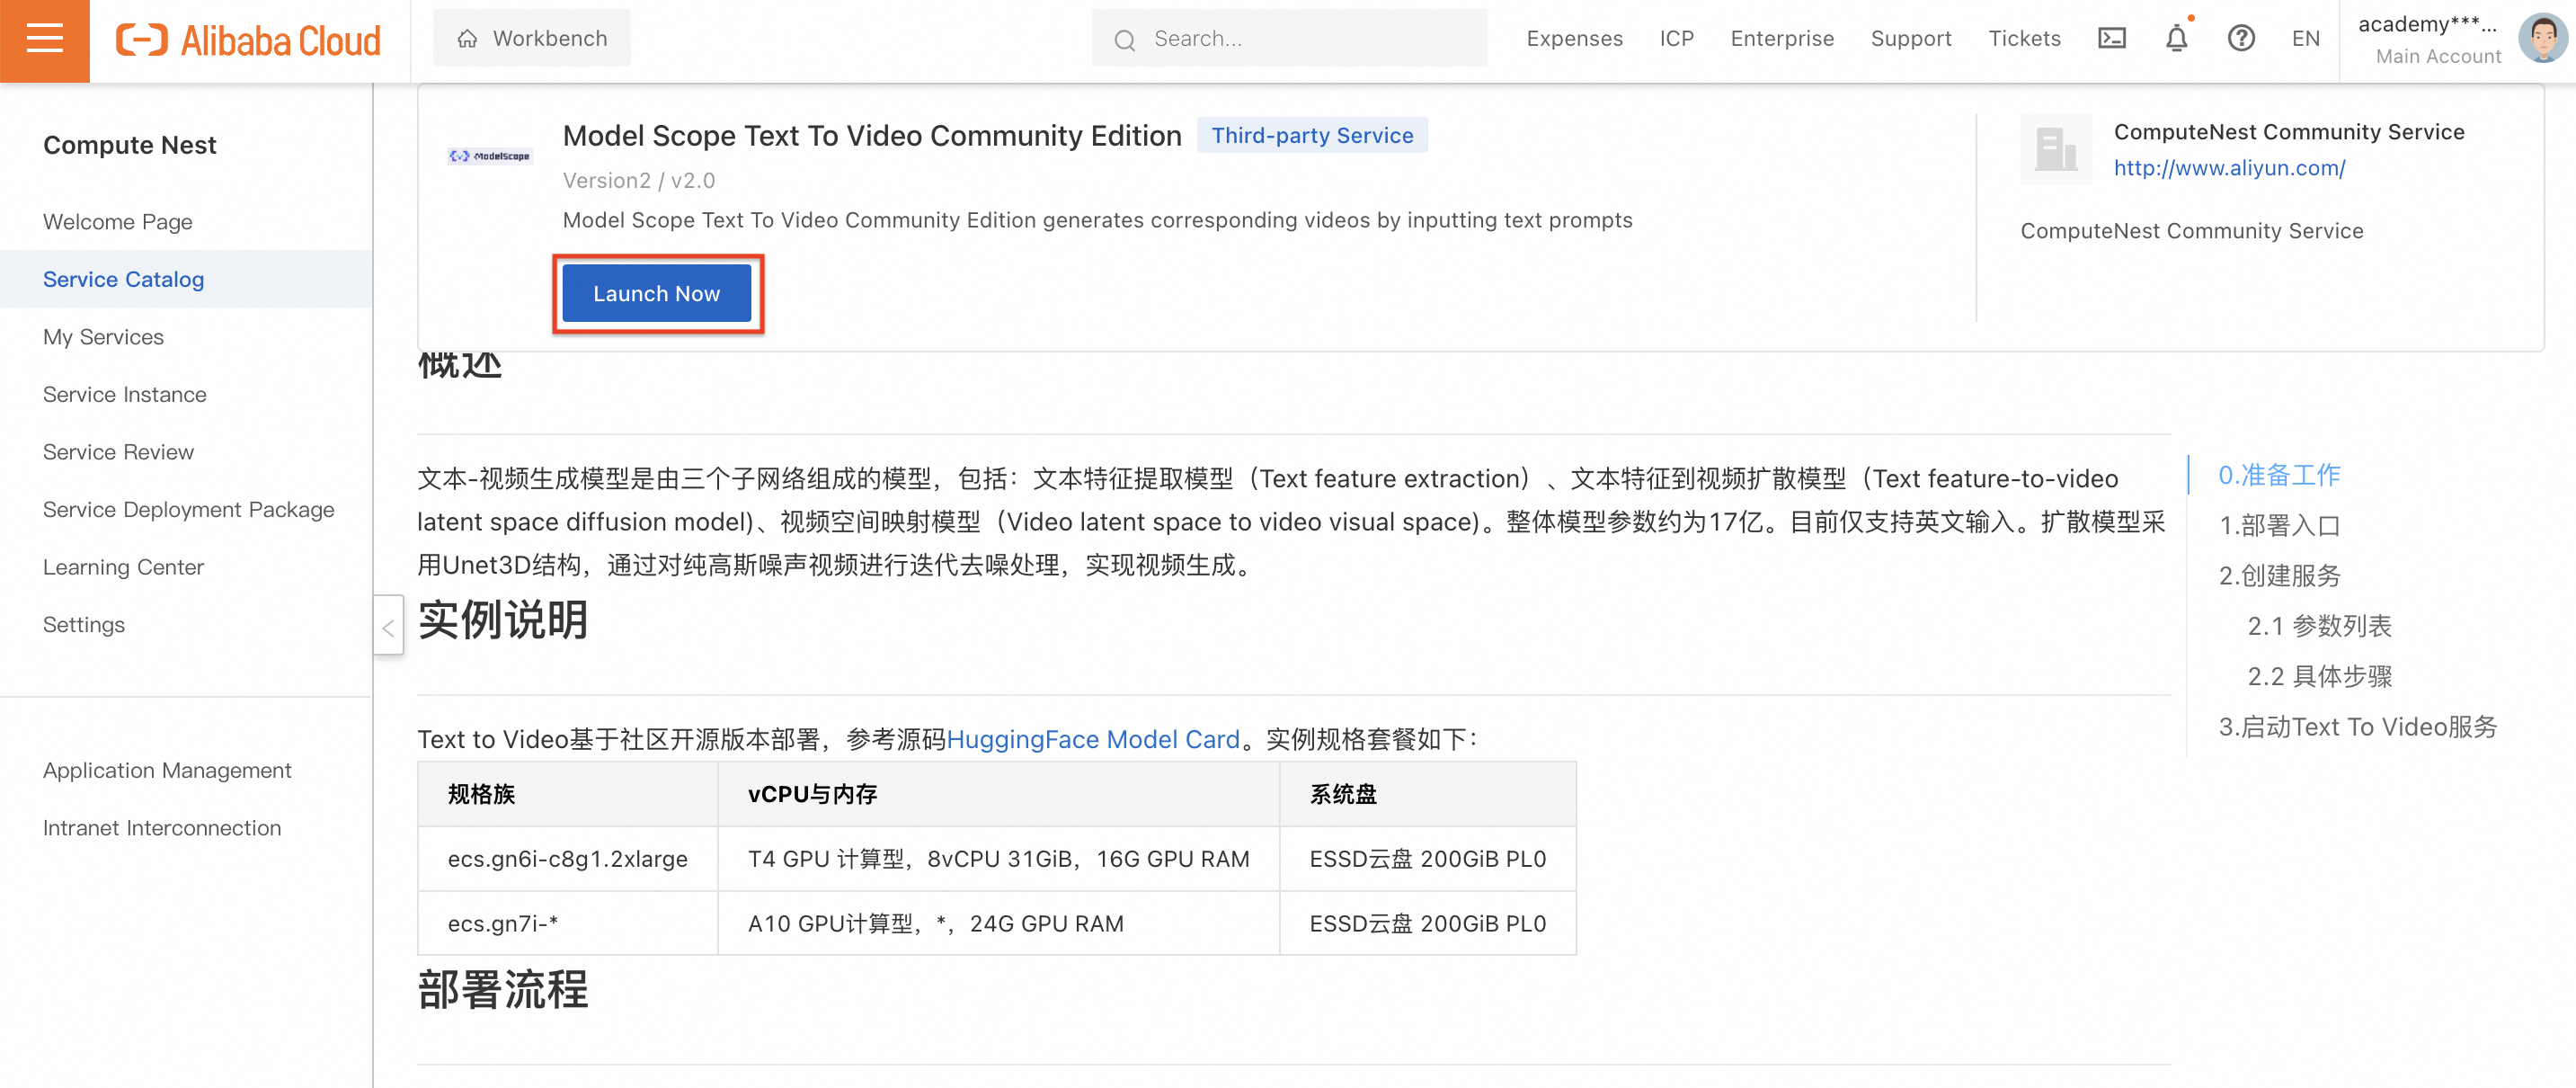
Note the minimum hardware requirements and click on "Launch Now".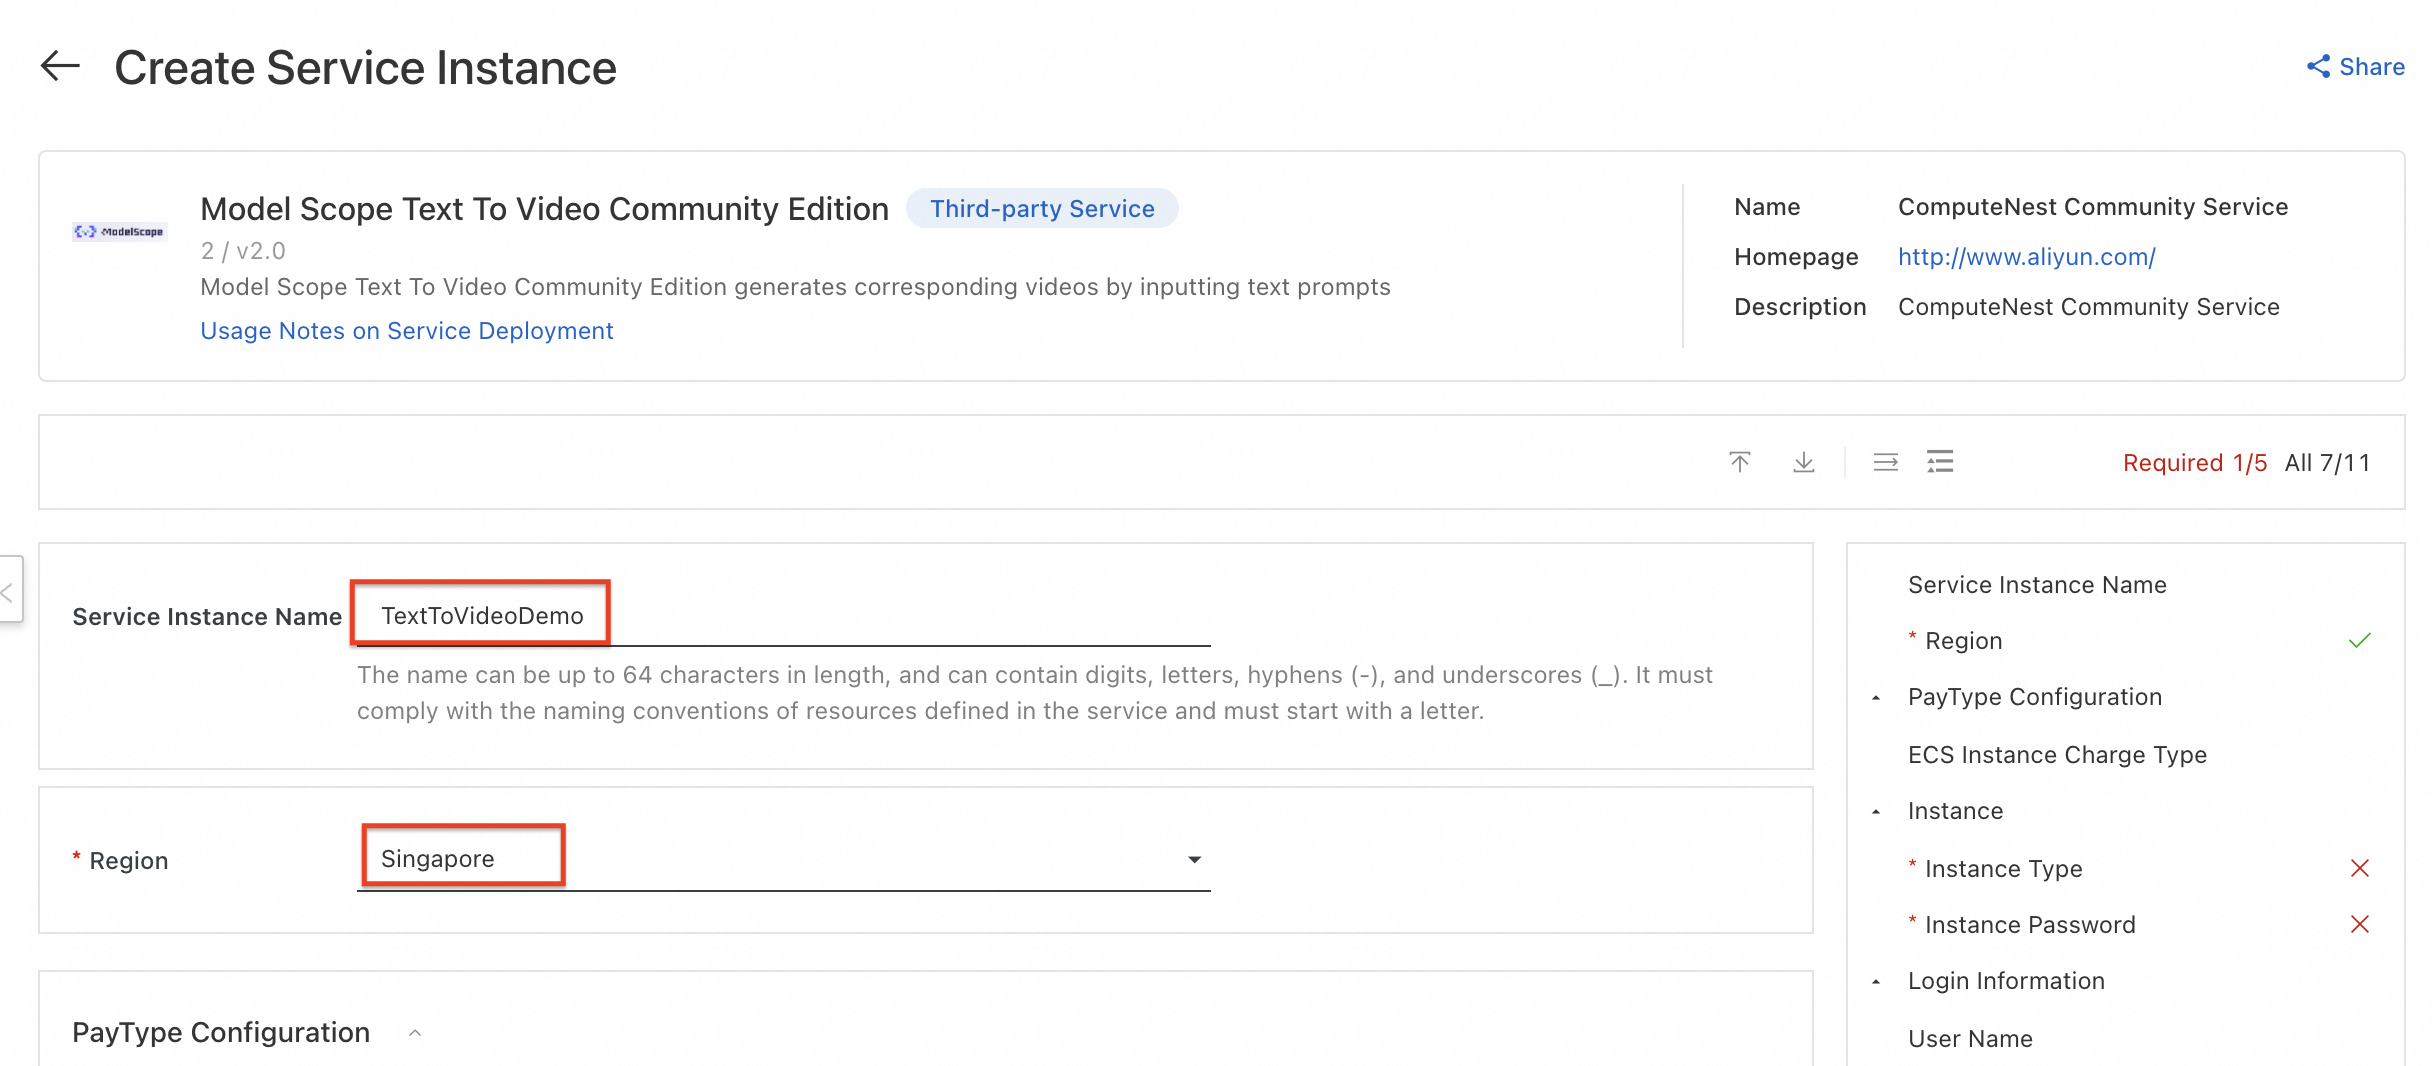
Enter a name for the service and select the region of your convenience. Here the application uses "Singapore".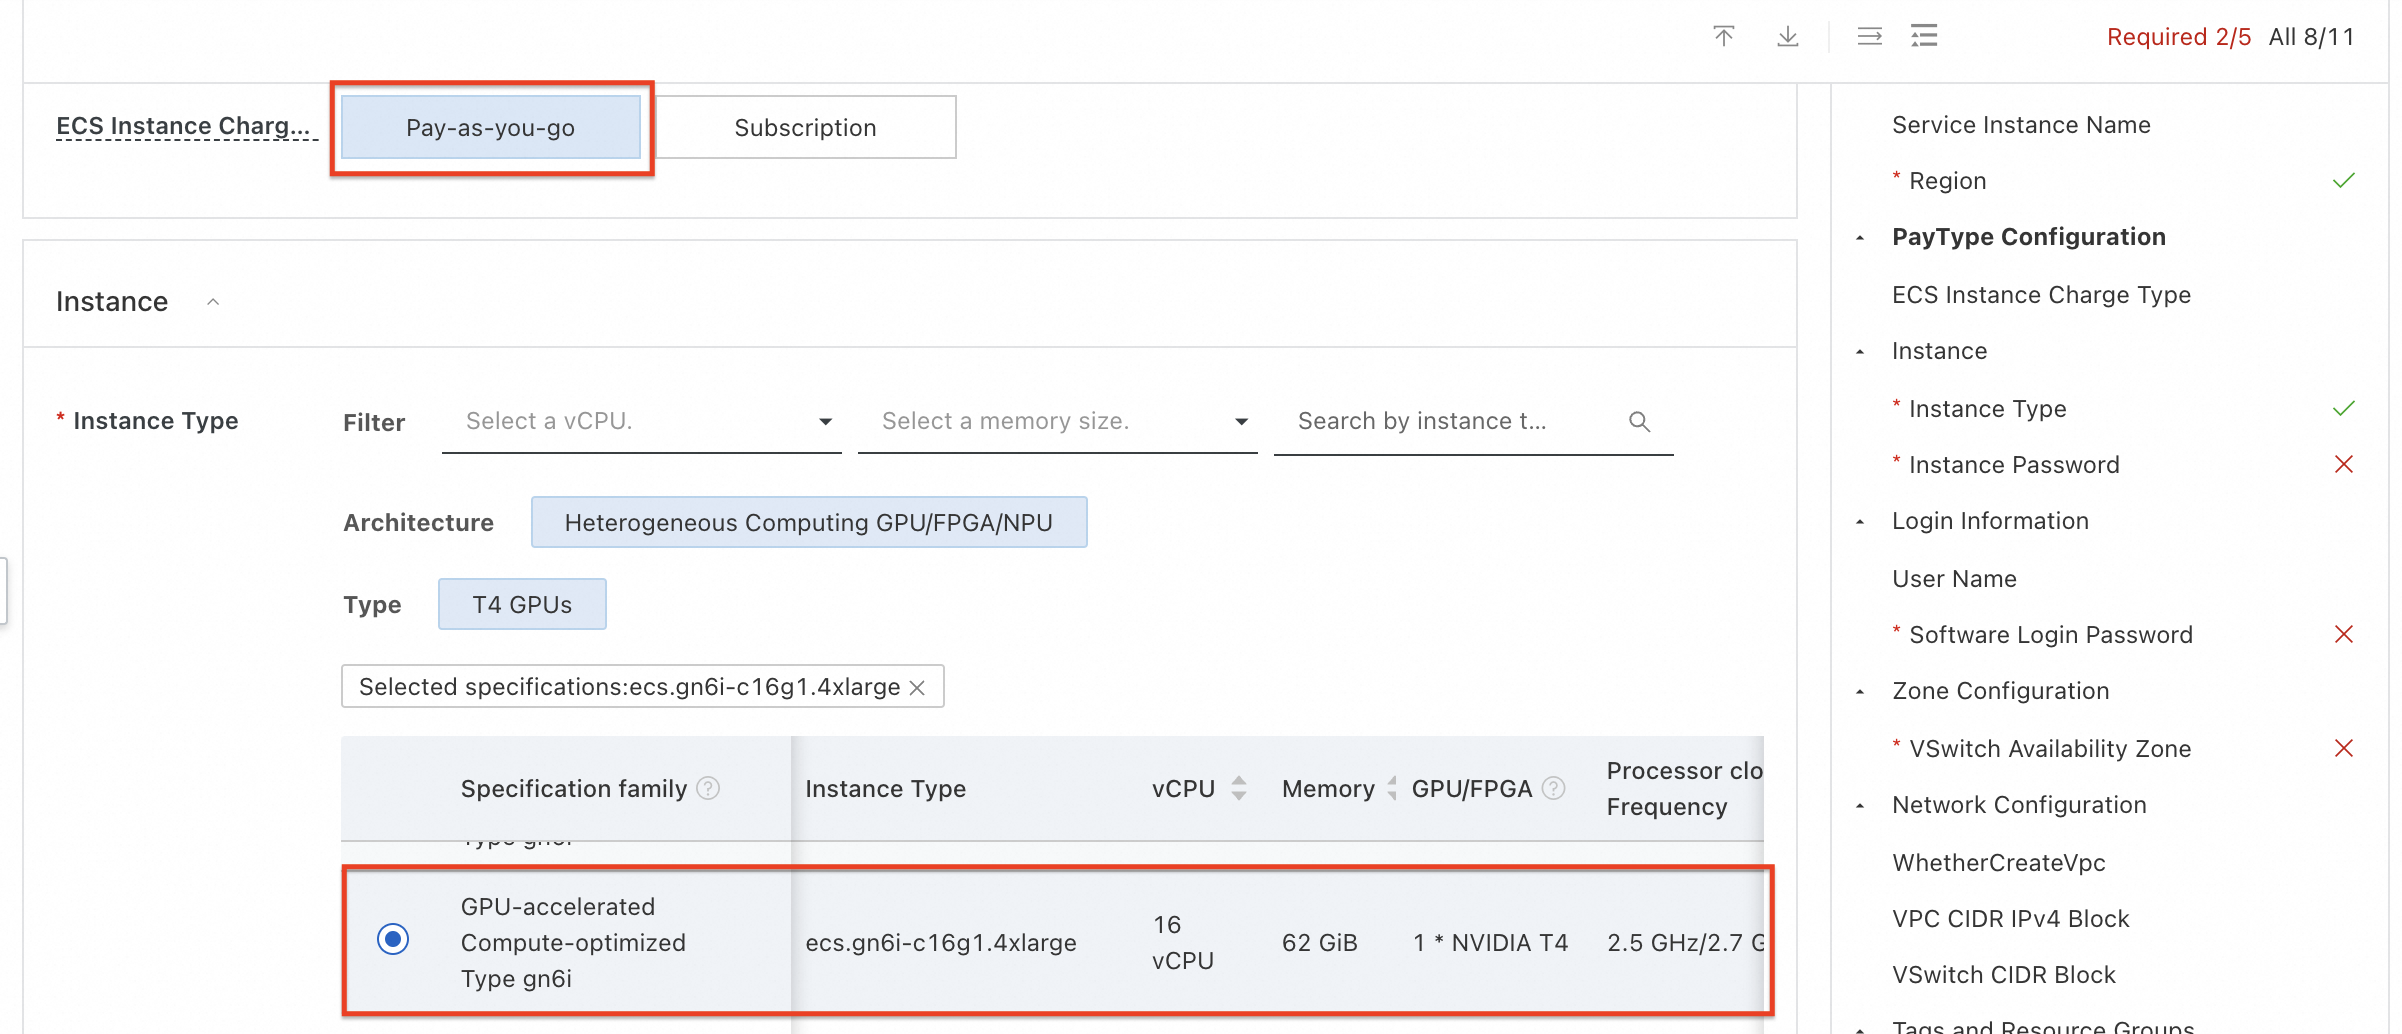
ECS instance with 16 vCPUs and NVIDIA T4 with PAYG mode is selected.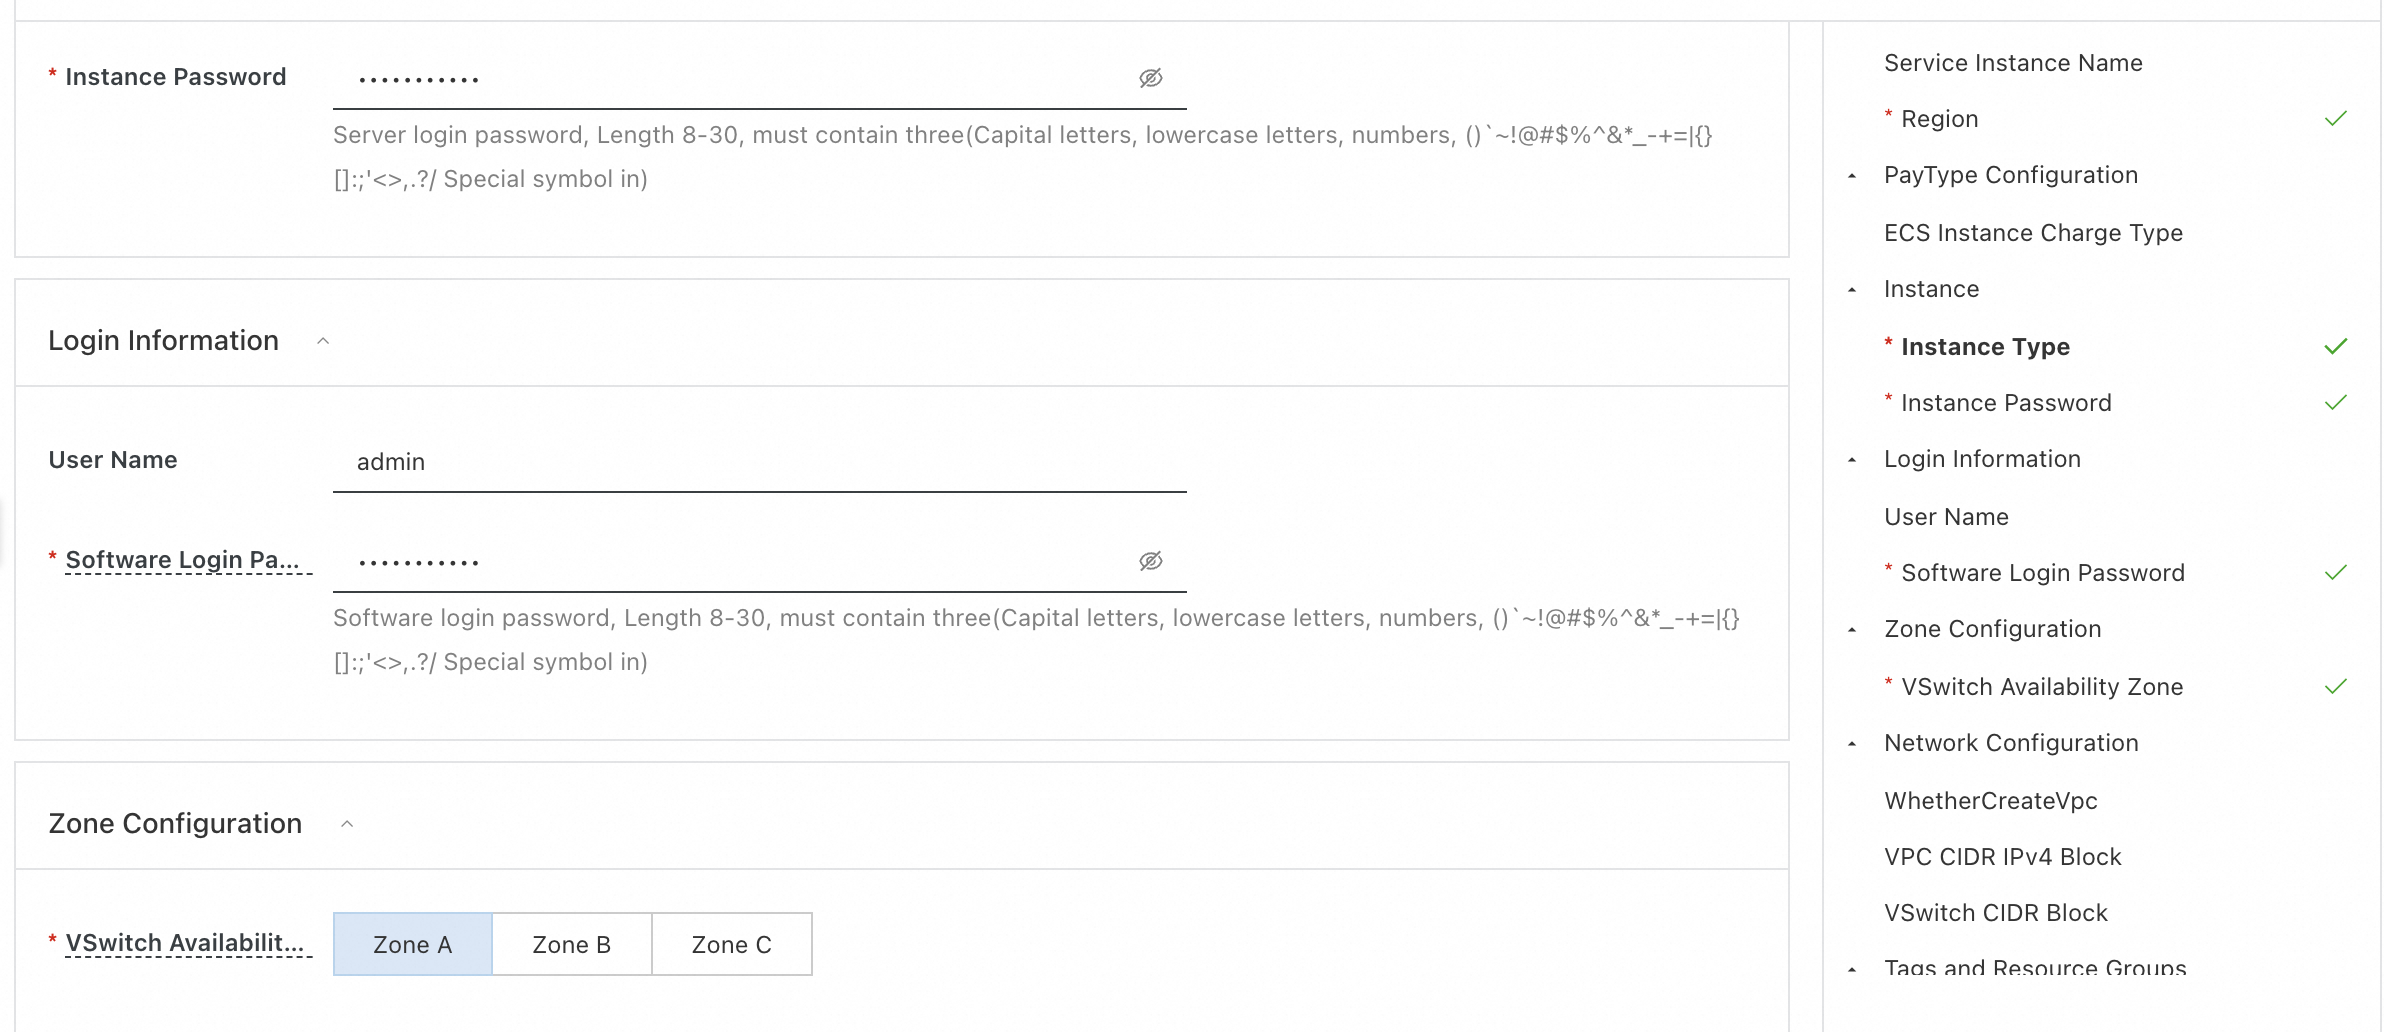
Enter the password to use for ECS and admin console of the application being incubated. We have chosen Zone A of the VPC in Singapore region.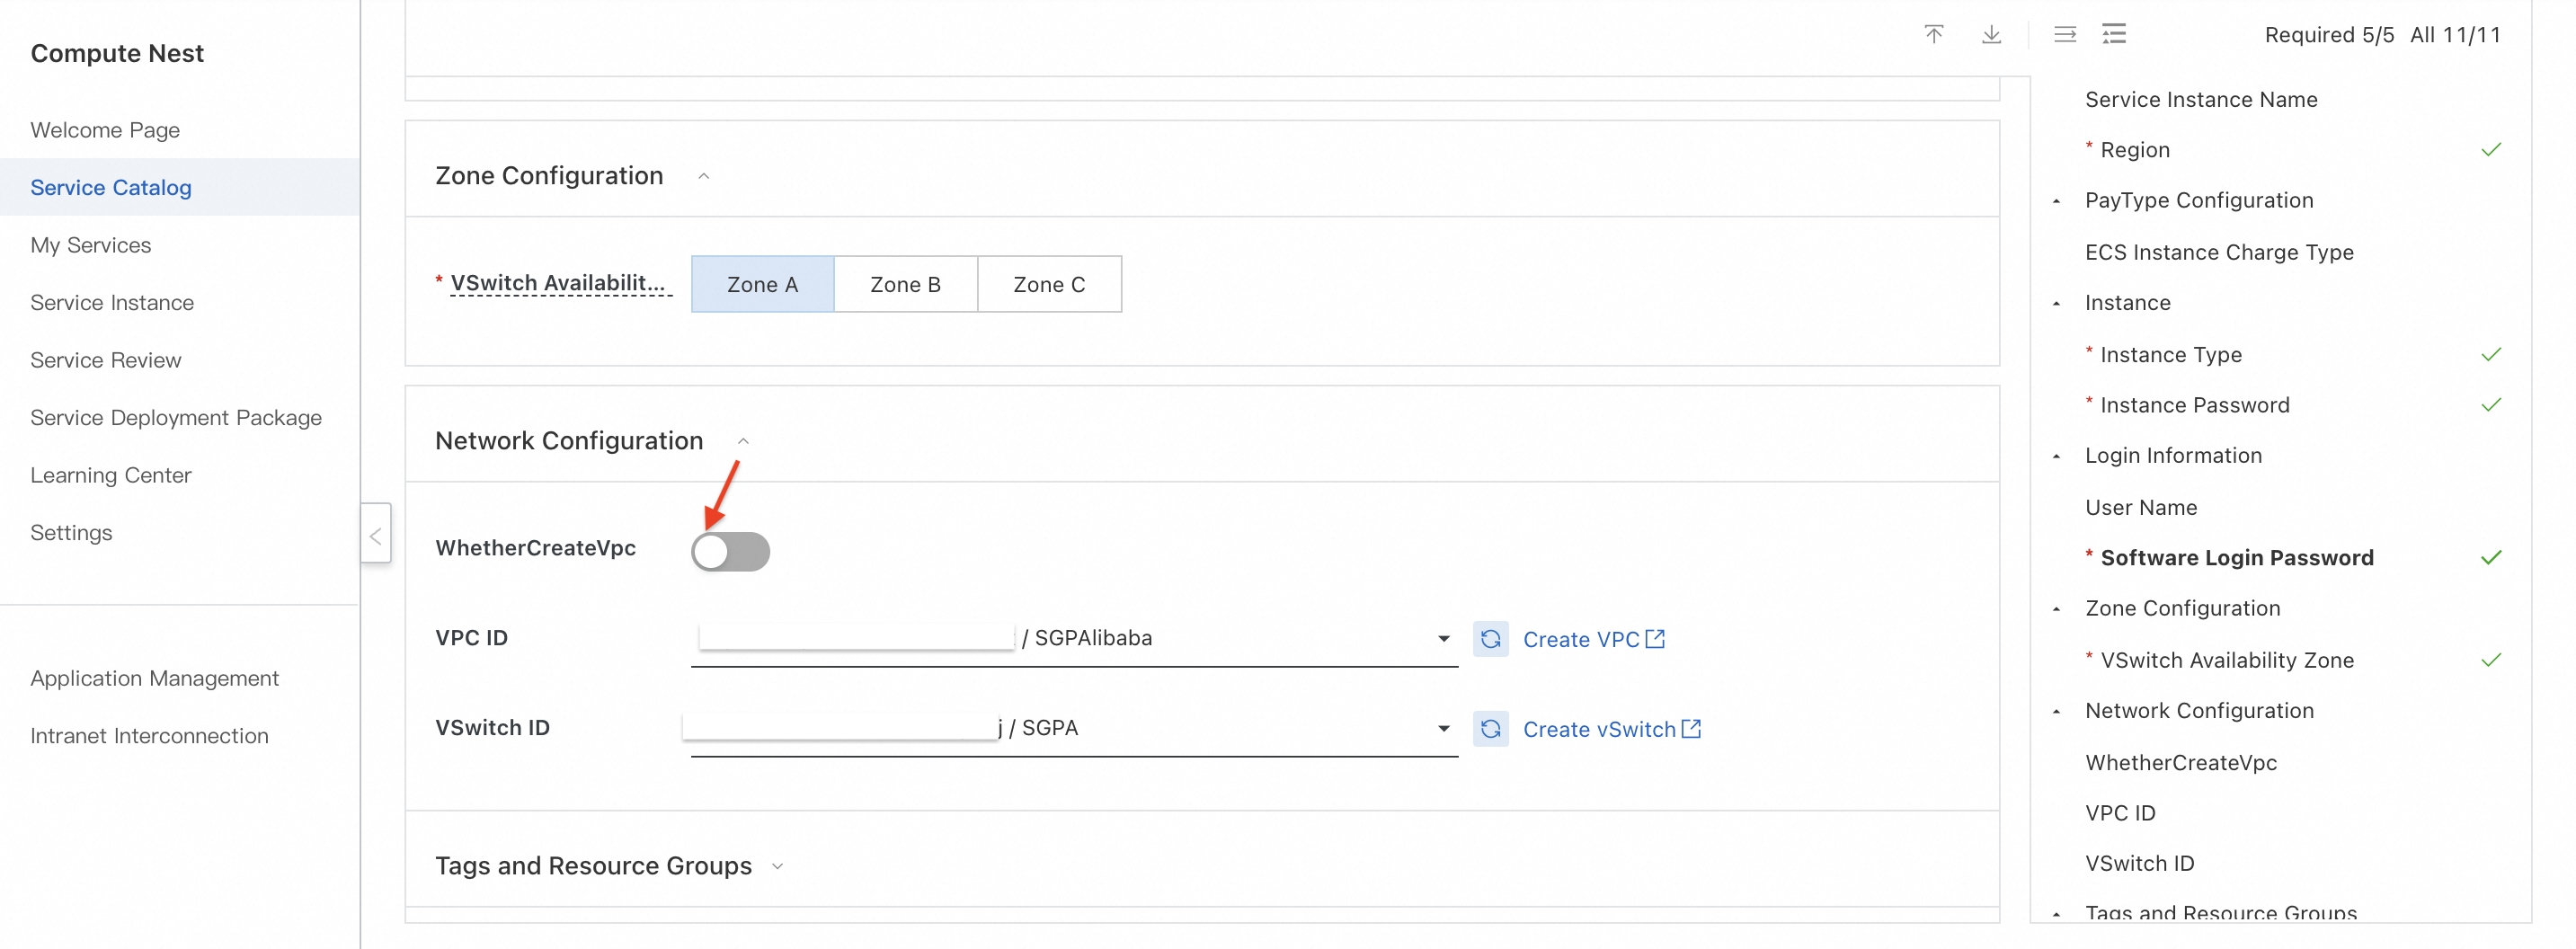
Since we use already existing VPC, deselect "WhetherCreateVpc". Select an already existing VPC and a vswitch among those in Zone A. Click on "Confirm Order".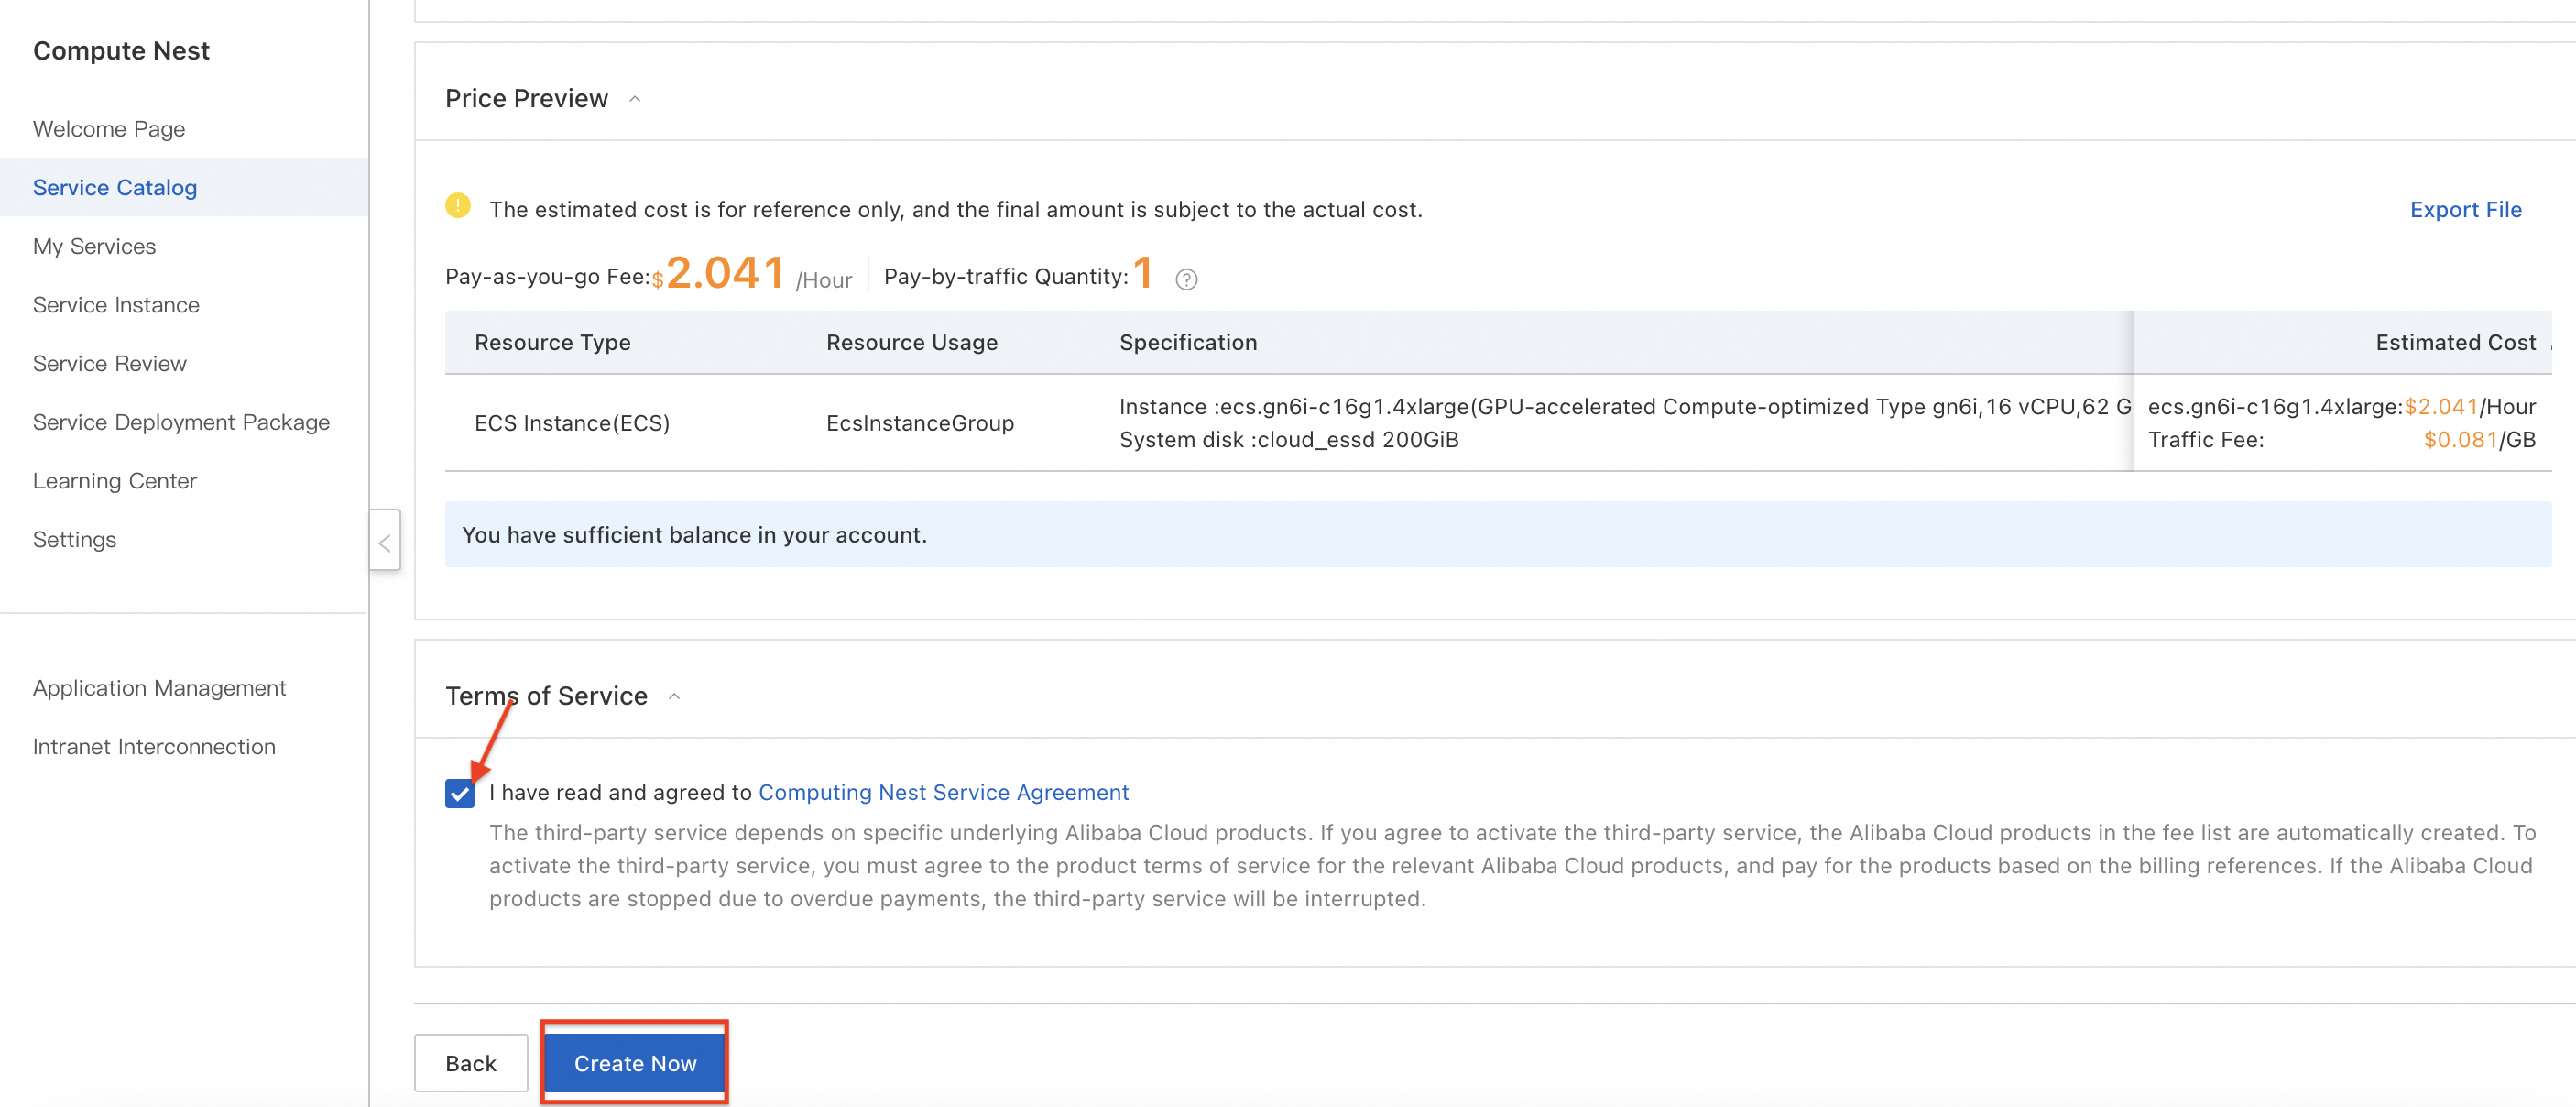
Check on the option to agree Computing Nest Service Agreement and click on "Create Now".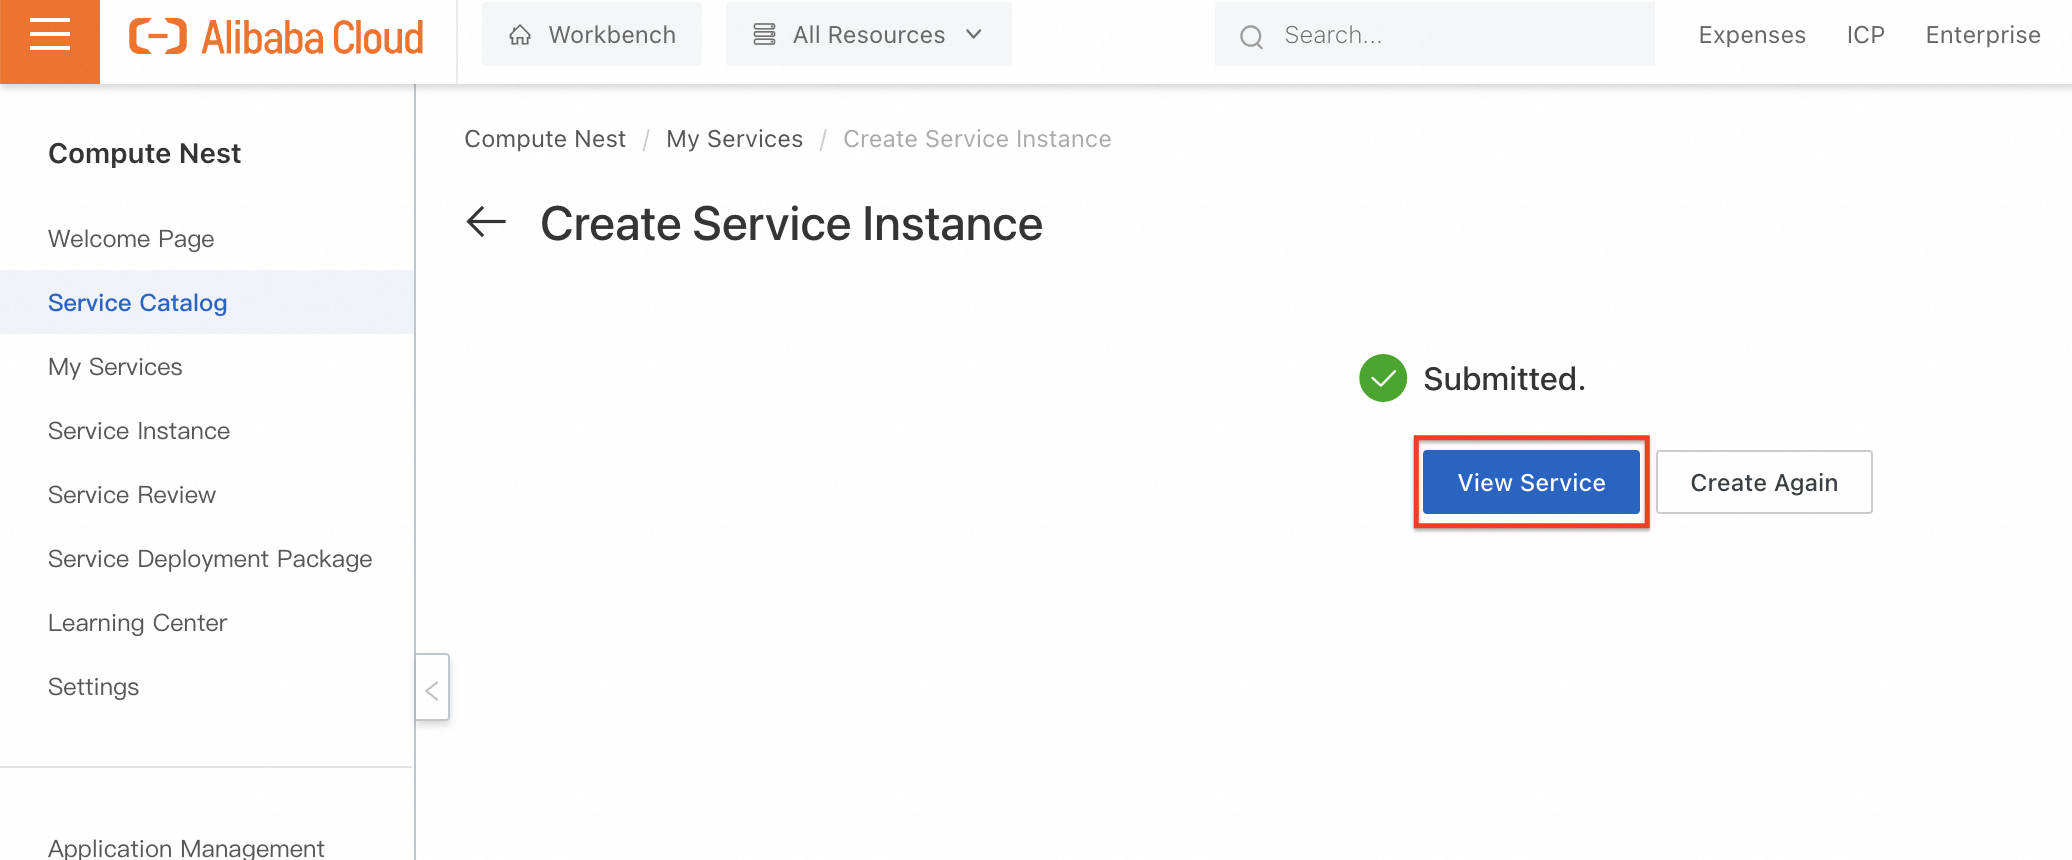
Now we reach the list of services being managed upon creation.
The service shows it is deploying and it will take some time to complete.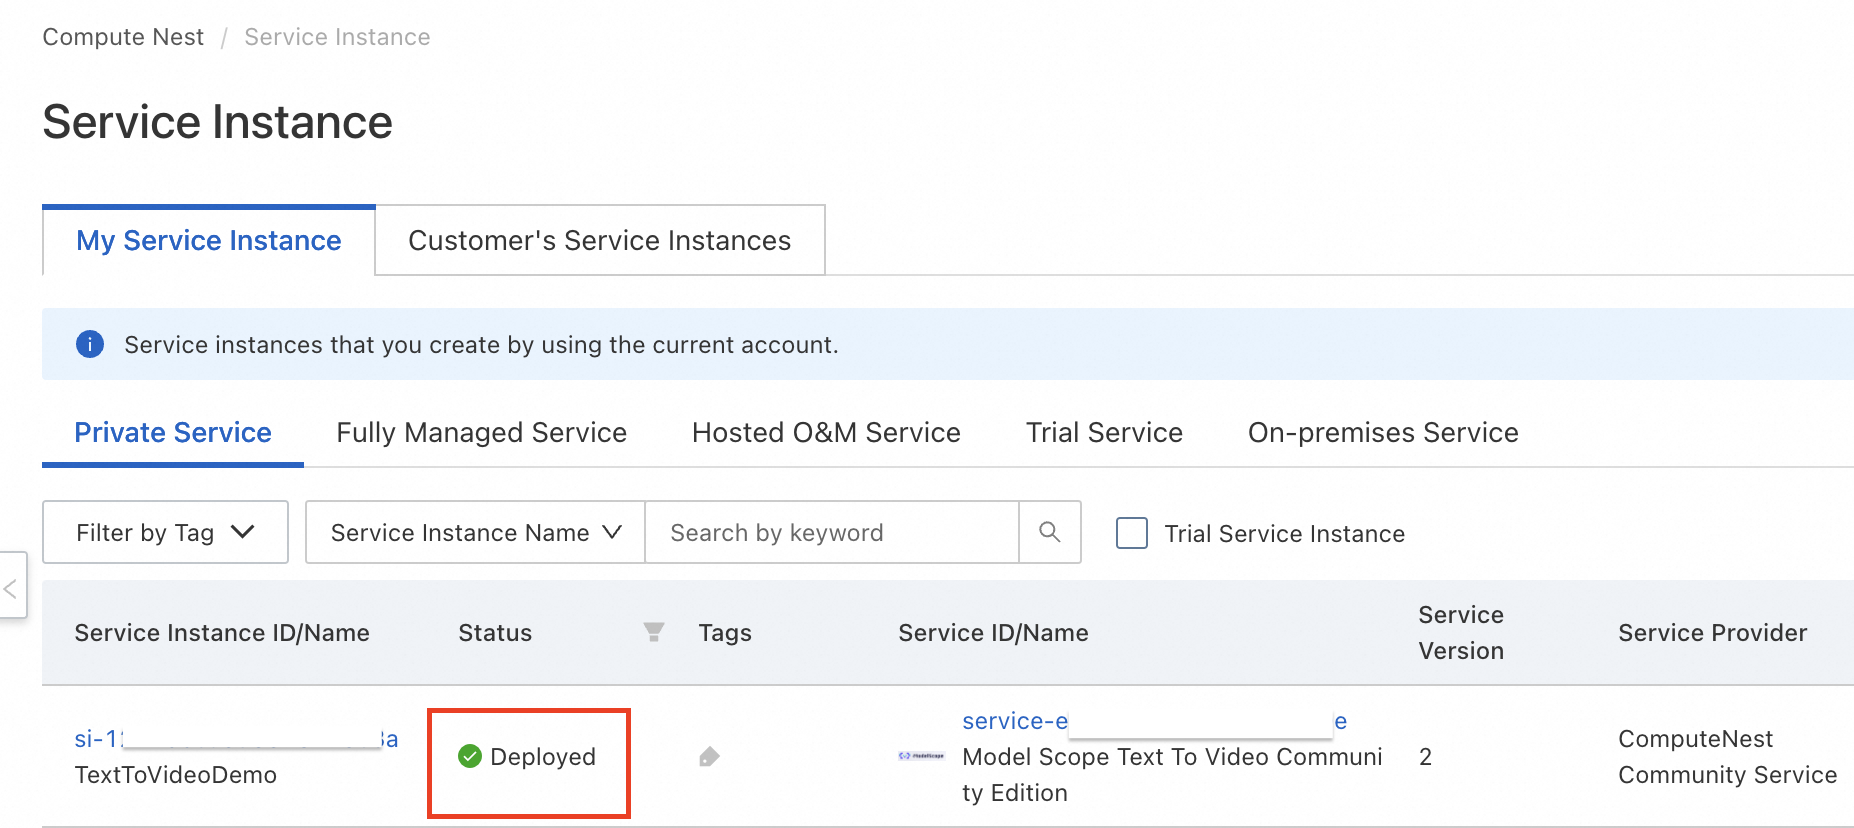
The deployed service will be identified with the green tick in the status. Now click on details in actions.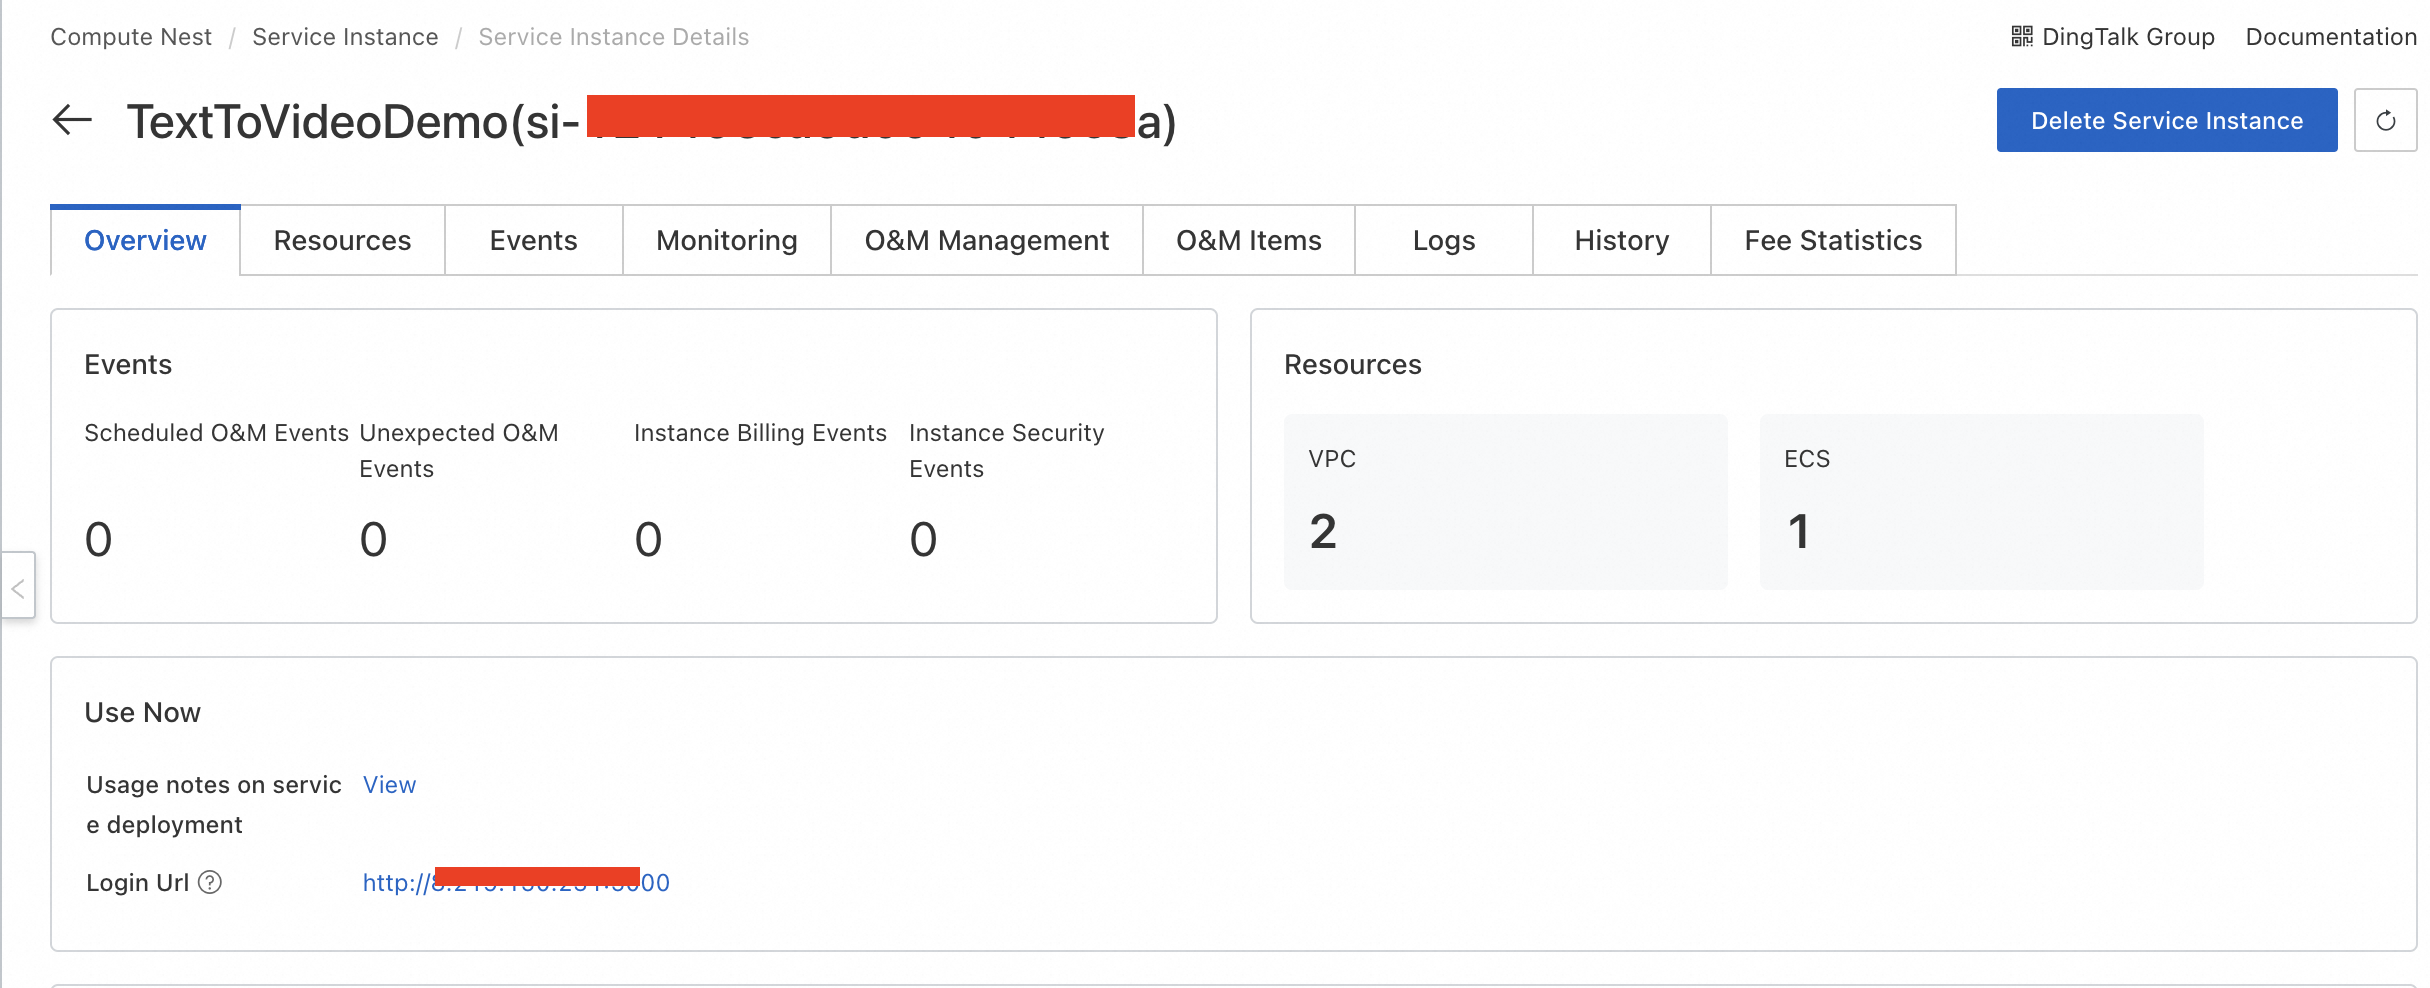
In the overview, we can get access to the login URL. This login URL is used to access the application. Enter the username as "admin" and provide the password you entered earlier for the application.
Tongyi Bailian - Model Studio with Chinese Version of Alibaba Cloud
Tongyi Wanxiang - An Alibaba Cloud SaaS for Multimodal Content Generation
Alibaba Cloud Community - September 6, 2024
Alibaba Cloud Community - September 14, 2024
Regional Content Hub - October 21, 2024
Regional Content Hub - October 8, 2024
Regional Content Hub - October 8, 2024
Regional Content Hub - October 14, 2024
 Compute Nest
Cloud Engine for Enterprise Applications
Learn More Offline Visual Intelligence Software Packages
Offline SDKs for visual production, such as image segmentation, video segmentation, and character recognition, based on deep learning technologies developed by Alibaba Cloud.
Learn More Function Compute
Alibaba Cloud Function Compute is a fully-managed event-driven compute service. It allows you to focus on writing and uploading code without the need to manage infrastructure such as servers.
Learn More Network Intelligence Service
Self-service network O&M service that features network status visualization and intelligent diagnostics capabilities
Learn MoreMore Posts by ferdinjoe