Effectively handling the traffic and data transmission loads of a multiple cloud server setup can be a complex process. However, it's completely necessary, as business-critical applications require a highly available solution to manage a heavy workload. Alibaba Cloud Server Load Balancer (SLB) simplifies the distribution of workload across servers, network links, and other resources to minimize latency and prevent possible overload. With SLB, you can balance multiple cloud servers or scale your application to optimize your resource utilization on the cloud.
In this tutorial, you will learn how you can set up and configure Alibaba Cloud Server Load Balancer to distribute loads across multiple cloud servers to effectively manage these loads.
As a prerequisite to this tutorial, you need to have multiple Alibaba Cloud servers, specifically Alibaba Cloud Elastic Compute Service (ECS) instances running already. Naturally, you will also need to have these ECS instances configured to host web pages.
1. Log in to the Alibaba Cloud Console.
2. Under the Products and Services section, select Server Load Balancer.
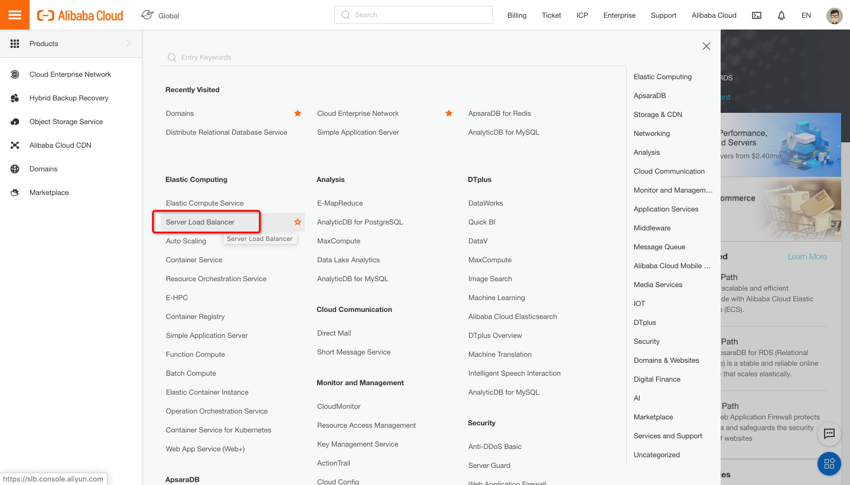
3. Select the same region where you previously launched your Alibaba Cloud ECS instances, and check for any existing Server Load Balancer in this region. If you need to create an SLB instance, select Create Instance on the top-left corner of the page.

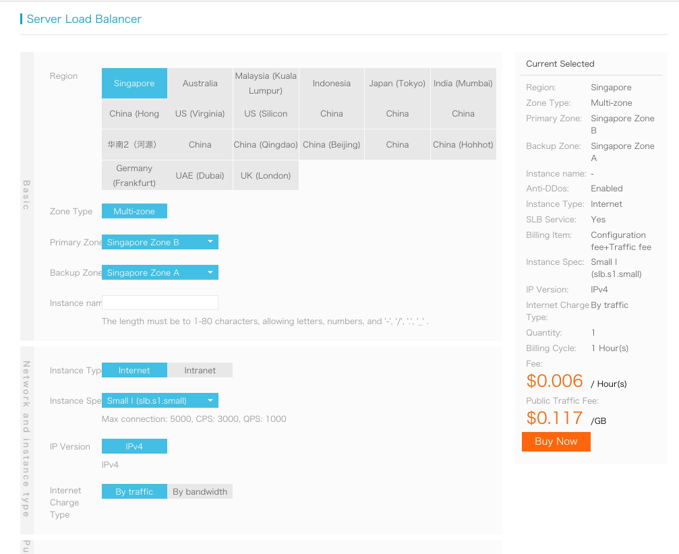
4. Choose your preferred selection for Region, Primary Zone, Backup Zone (if applicable), Instance Type, Public Bandwidth, and Quantity. Then, select Buy Now to confirm the order.
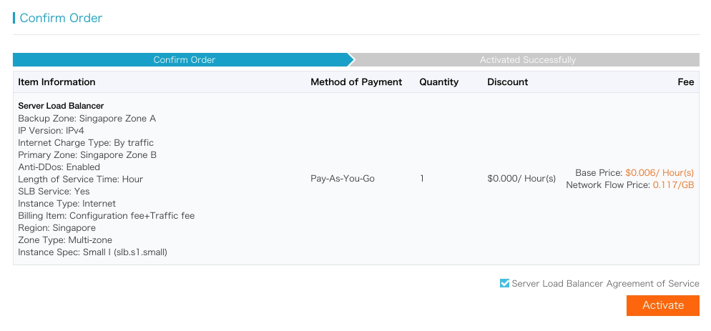
5. Verify your selection on the next page and click Activate to activate the service.
You will need to configure the purchased Server Load Balancer instance before using it.
1. On the management console, select Server Load Balancer.
2. To change the name of your instance, place your cursor in the Server Load Balancer ID/Name column and click the Edit icon.
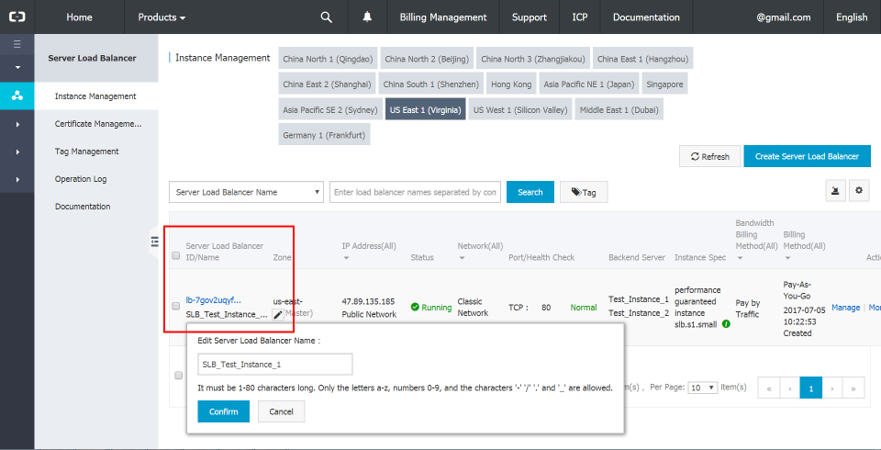
3. Click Manage to modify the configurations of your instance.
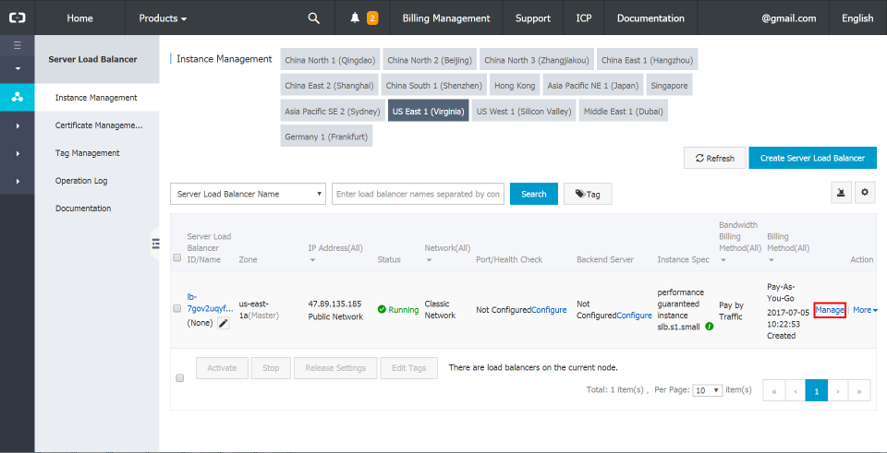
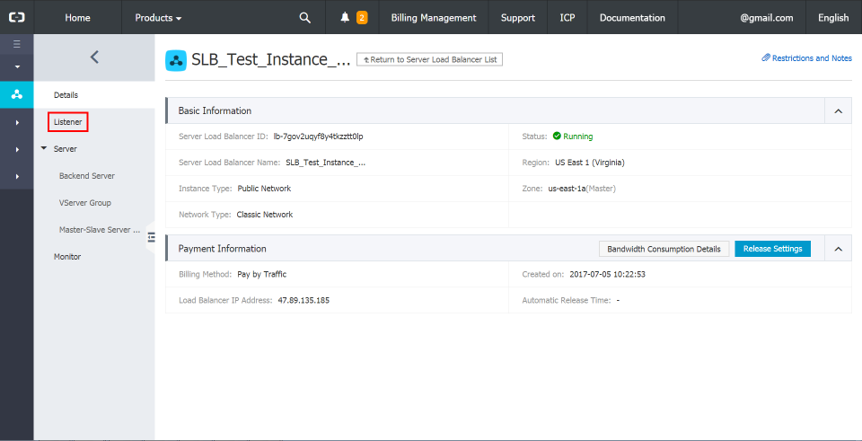
4. Select Listener in the left panel.
5. Select Add Listener in the top-right corner to open the Add Listener dialogue box.
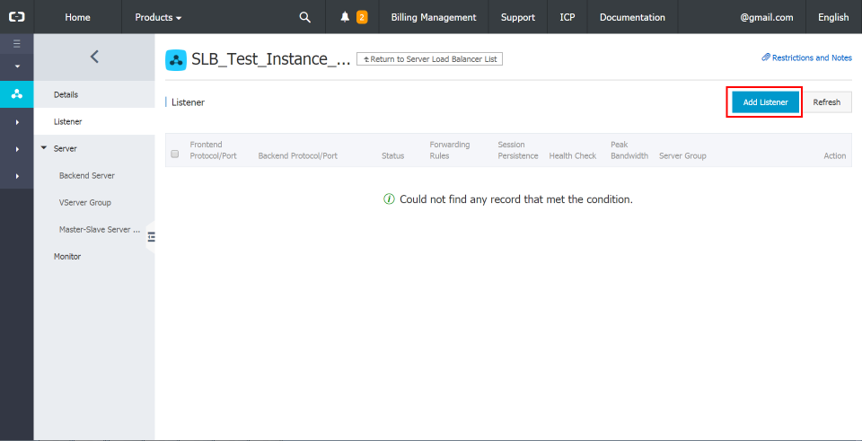
Note: One Server Load Balancer instance can have up to 50 listeners.
6. Select TCP and set the frontend and backend ports to 80. Click Next Step to go to the Health Check Configuration tab.
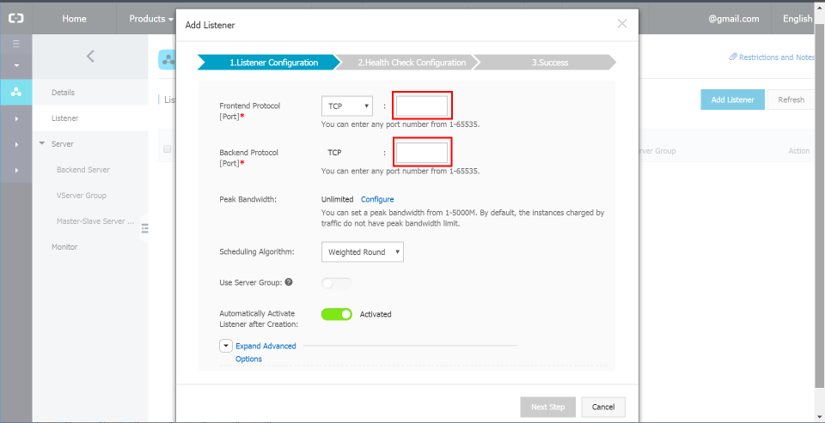
Note: Server Load Balancer supports both Layer 4 (specifically the TCP and UDP protocols) and Layer 7 (specifically the HTTP and HTTPS protocols) load balancing.
7. Click Expand Advance Options and set the parameters as shown in the figure below. Click Confirm to proceed.
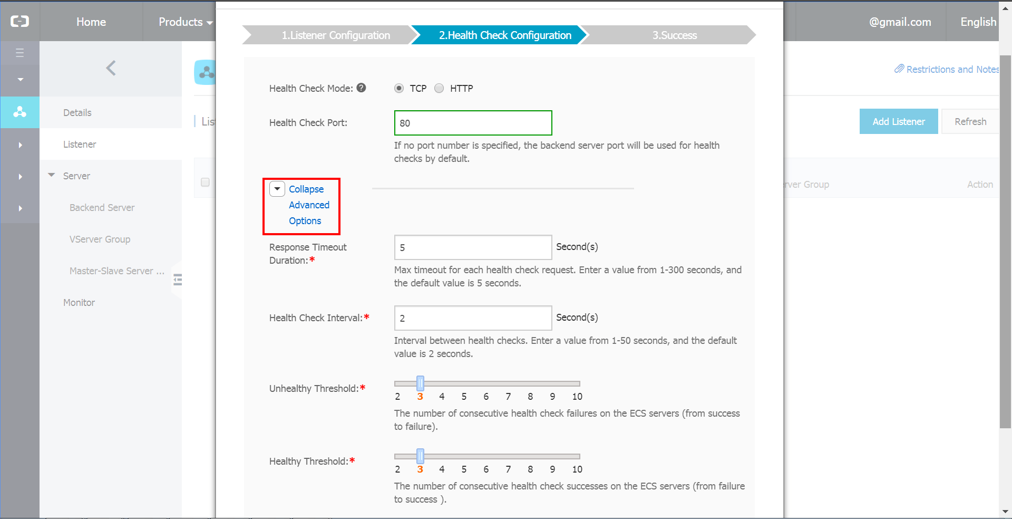
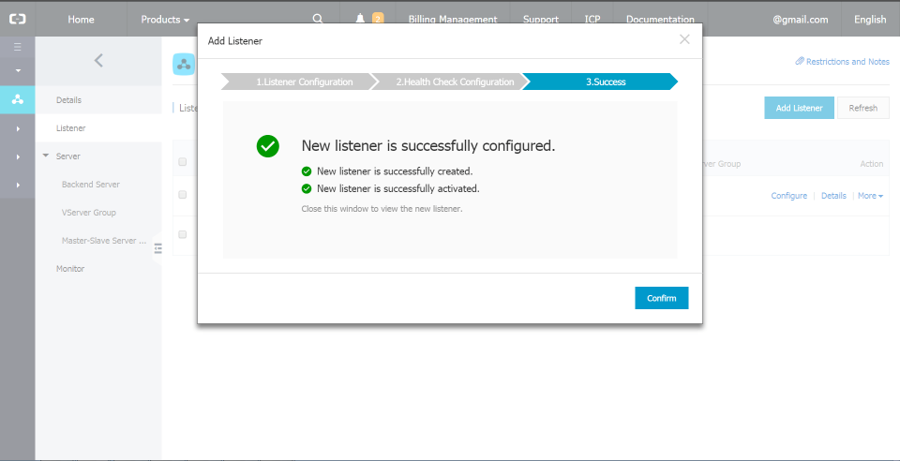
8. Click Confirm to close the dialogue box and return to the management console.
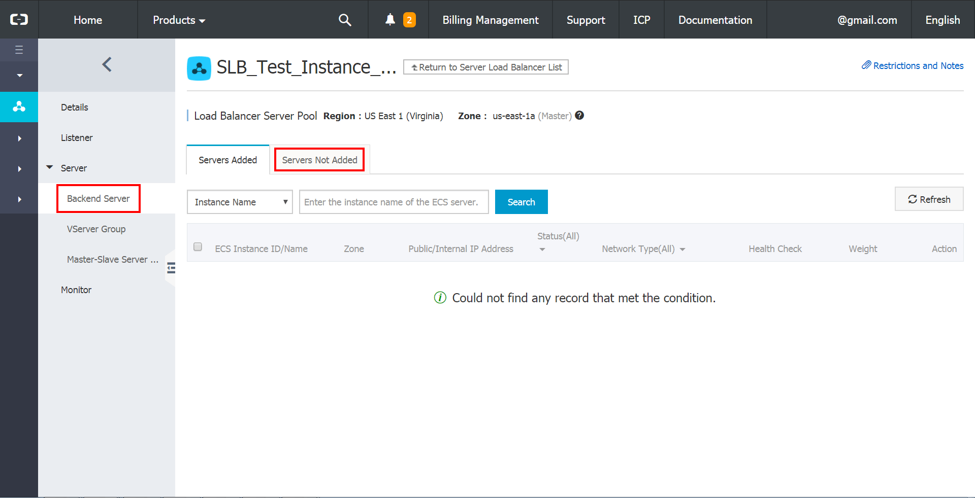
9. In the left-side panel, navigate to Backend Server located, which is under Server. Click the Servers Not Added tab to view all available servers.
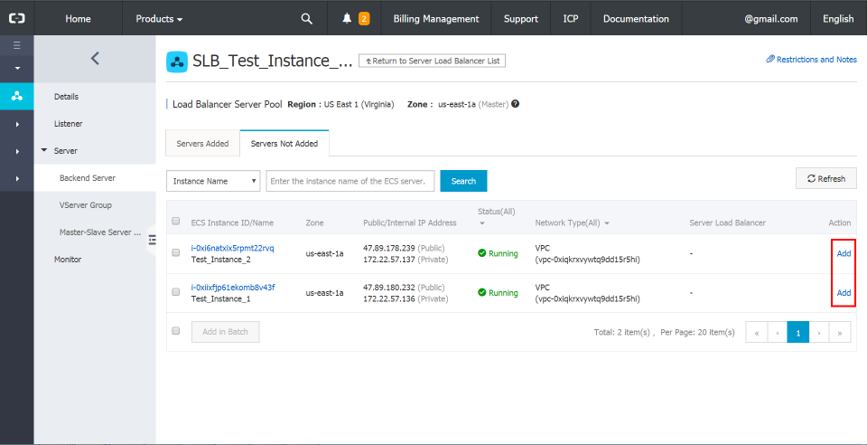
10. Click Add to add ECS instances onto Server Load Balancer.
11. Set the Weight of your ECS instances. Click Confirm.
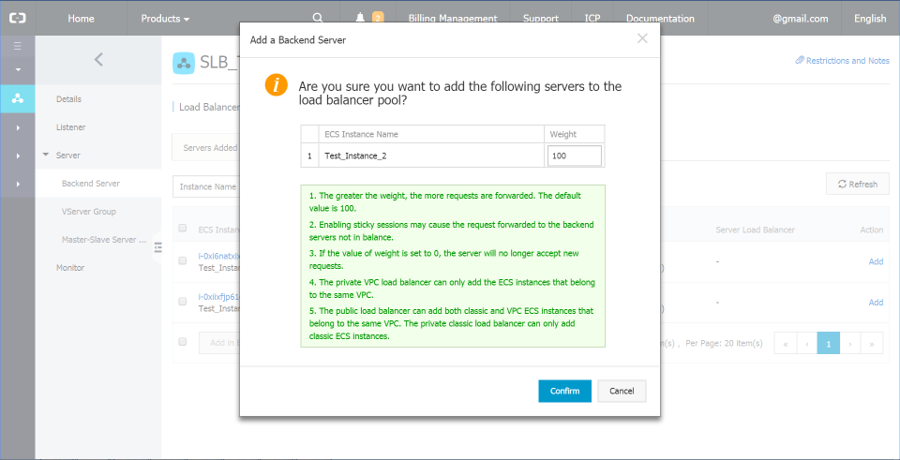
Note: If all instances are set to a weight of 100 (the default setting), the average forwarding rule is adopted. In this rule, the load is equally distributed among all the servers.
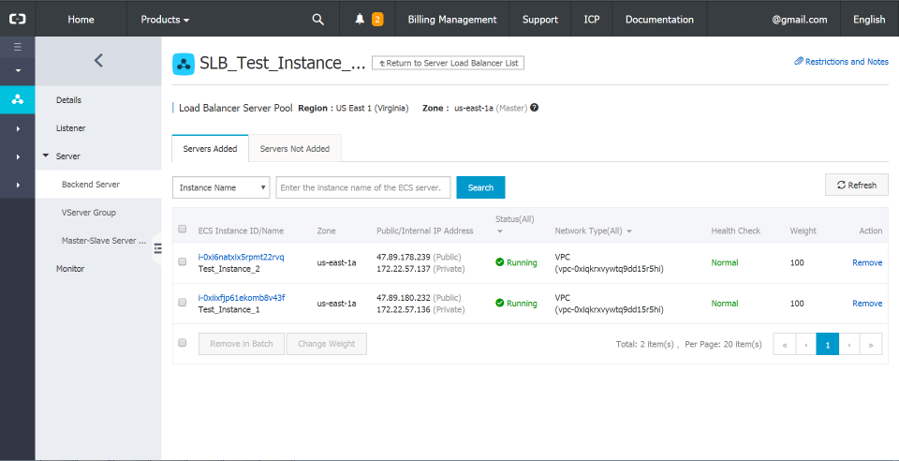
12. You will now see the two backend ECS instances added and displayed in the Servers Added tab.
13. Visit the address of the Server Load Balancer instance to verify successful installation. We have set up our ECS instances to host static websites.
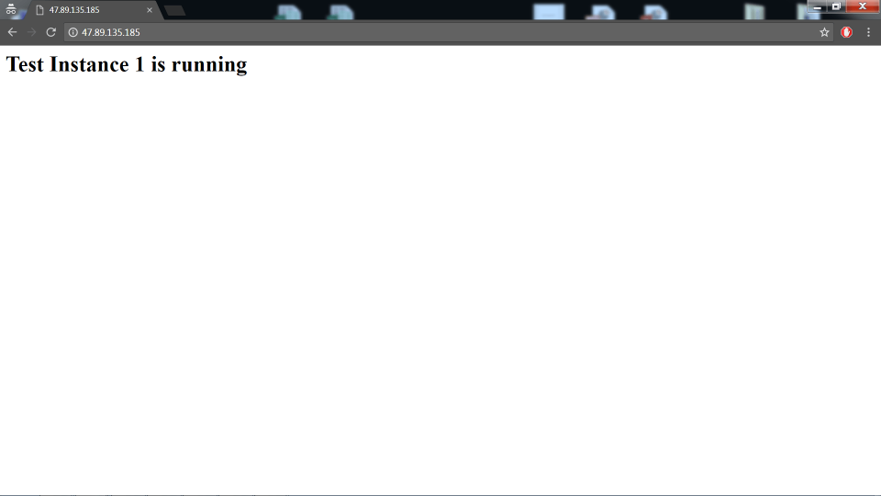
Note: You will be forwarded to any one of the web pages hosted by the ECS instances since the traffic load is equally distributed.
With that, you have configured Server Load Balancer to manage your ECS instances.
Migrating and Backing up Databases with Alibaba Cloud ApsaraDB for MongoDB
Deploy Plesk on Alibaba Cloud to Build and Run Your Websites and Apps

2,598 posts | 770 followers
FollowAlibaba Clouder - April 27, 2021
Alibaba Cloud Community - June 5, 2023
Alibaba Clouder - March 3, 2021
Alibaba Cloud Indonesia - September 13, 2023
Alibaba Cloud Indonesia - June 9, 2024
Alibaba Clouder - December 31, 2020

2,598 posts | 770 followers
Follow ECS(Elastic Compute Service)
Elastic and secure virtual cloud servers to cater all your cloud hosting needs.
Learn More Simple Log Service
An all-in-one service for log-type data
Learn More Server Load Balancer
Respond to sudden traffic spikes and minimize response time with Server Load Balancer
Learn MoreMore Posts by Alibaba Clouder
Start building with 50+ products and up to 12 months usage for Elastic Compute Service
Get Started for Free Get Started for Free