By Jeff Cleverley, Alibaba Cloud Tech Share Author
There are many PHP based Content Management Systems (CMS) that you can run on an Alibaba Cloud ECS Instance with a LEMP stack. Of these, Craft CMS is probably one of the slickest.
From the CraftCMS website:
"Craft is a content-first CMS that aims to make life enjoyable for developers and content managers alike."
Craft is laser focused on doing one thing really well - managing content. While being an incredibly flexible CMS, it is also extremely easy to use with a clean and fresh user interface (UI). Out of the box, it includes everything a performant CMS needs within core, including user management, media and asset management, flexible taxonomies, field management, content relationships, routing and highly performant search. Having said that, it is also extensible with a healthy plugin selection.
As Craft is built using the Yii high performance PHP framework, and adheres to modern PHP standards, it is also a very scalable and stable platform.
This tutorial assumes that you have already provisioned an Alibaba Cloud Instance. It is recommended to provision an instance with at least 1GB memory.
We will also proceed under the assumption that you have uploaded your public SSH key to your instance when you provisioned it, and that you have SSH software and Terminal/Command Line on your computer. All *nix based operating systems come with this as standard. If you are using Windows you will need to use PuTTY or install the Ubuntu Linux Subsystem for Windows.
During the tutorial, we will be issuing commands on the server as a 'root' user. If you are using a superuser, you will need to issue the sudo commands before any commands contained in the tutorial.
In the command code examples, I will be using 'example.com' and 'www.example.com' where appropriate. In the screenshots of live execution, I used a test domain 'duang.party' for demonstrative purposes. When you are running through this tutorial replace all domains with your own domain.
Login to your server:
$ ssh root@your_instance_ipFirst we will update our package manager, before installing the highly performant Nginx web server:
# apt-get update
# apt-get install nginx
You will be prompted to confirm the use of some additional disk space, return yes to continue and Nginx will install.
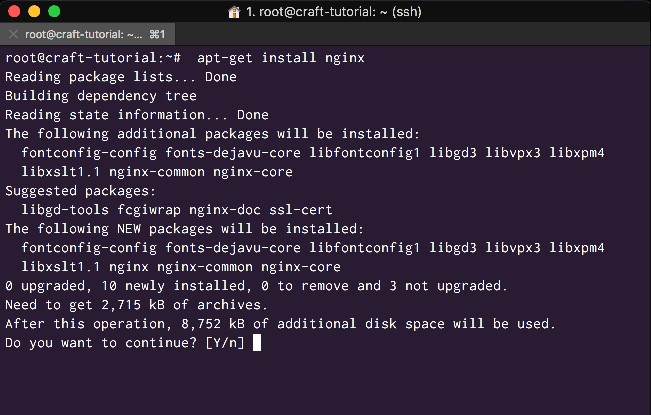
<Install Nginx>
Next up we need to install our MySQL database. We will be using MariaDB, a highly performant drop in replacement for MySQL created by MySQL's original developer. It is free and open source and comes with the guarantee that it will always remain so.
Do that with the following command:
# apt-get install mariadb-serverClick yes when prompted:
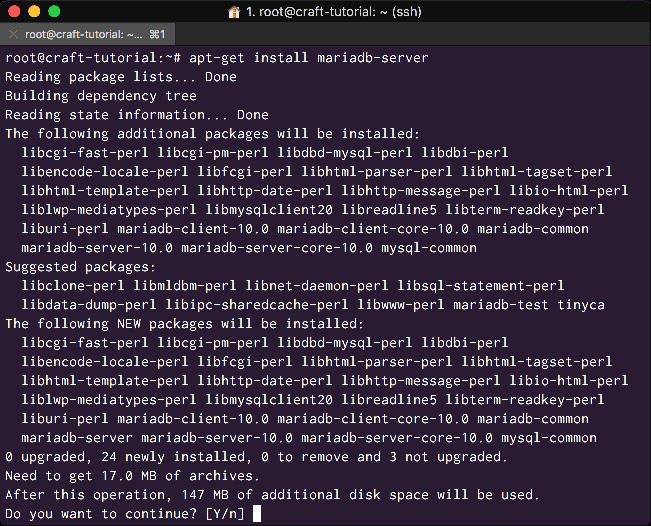
<Install MariaDB as a drop in replacement for MySQL>
Once you have installed MariaDB, enable auto starting, start the service, and check its status by executing:
# systemctl enable mysql
# systemctl status mysql
Your terminal should show you that MariaDB is both 'loaded' and 'active':
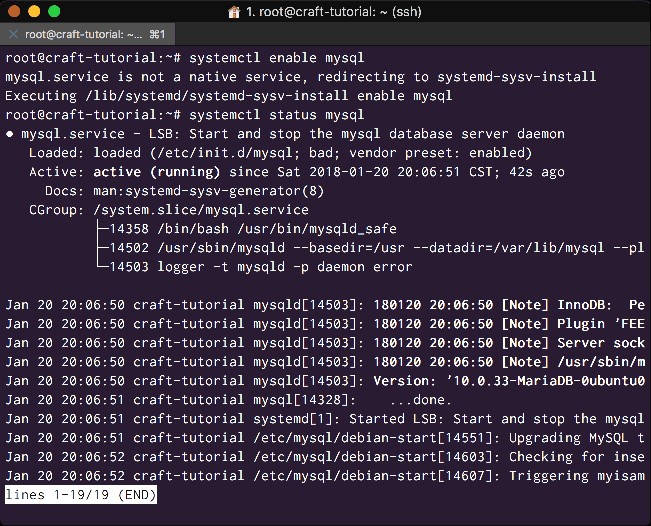
<Enable MariaDB to start and check its status>
We must also remember to secure our MariaDB installation, do that with the following:
# mysql_secure_installationYou will be prompted to create a root password:
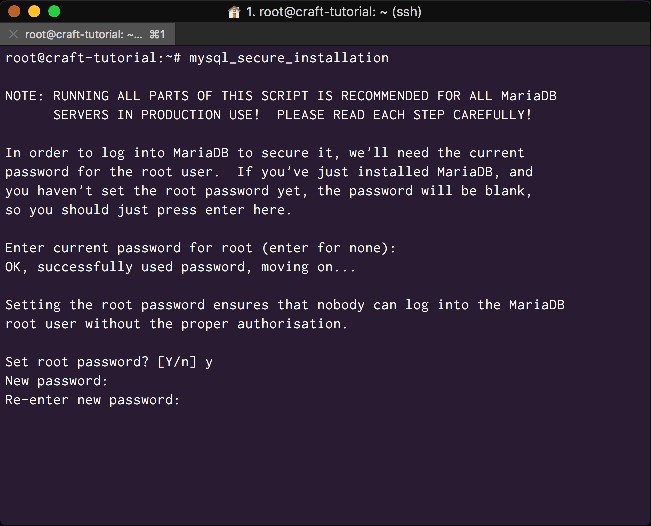
<Secure MariaDB - Create root password>
Then remove anonymous users, disable remote root login, and drop the test database, before reloading privileges:
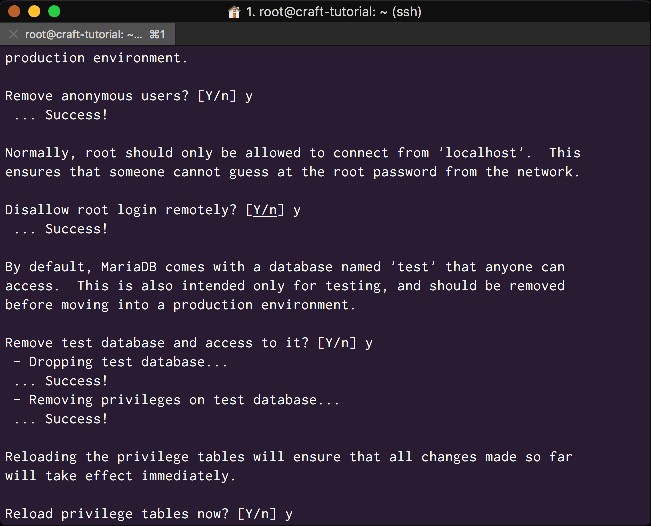
<Perform necessary security operations on MariaDB>
Once these are complete MariaDB is ready to use.
The final part of the LEMP stack we need to run Craft CMS is PHP. Although Craft will run on PHP5.3 and upwards, it is not advisable to use old and unsupported versions. PHP7 is much more secure and provides incredibly superior performance.
As Nginx doesn't natively process dynamic content, such as PHP scripts, we will need to install PHP-FPM. This will install all the core PHP packages we need to run with an NGINX server. Let's also install the PHP extension for MySQL at the same time:
# apt-get install php-fpm php-mysqlCraft CMS requires a few other PHP packages that aren't included in PHP-FPM, so we need to install them separately:
# apt-get install php7.0-curl php7.0-mbstring php7.0-mcrypt php-imagick php7.0-xmlYou will need to enter yes to continue when prompted:
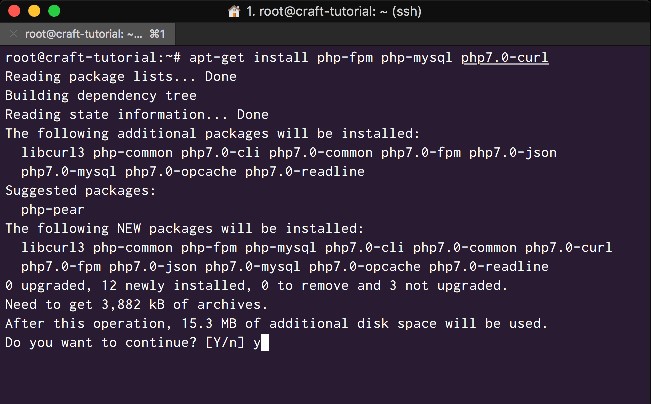
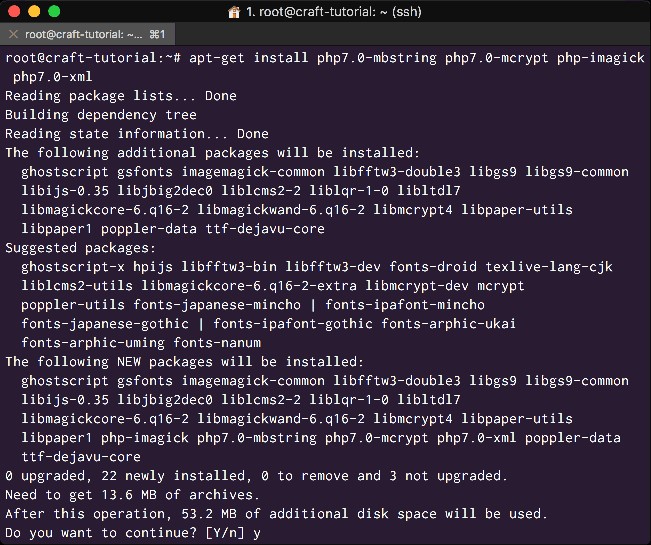
<Install PHP and the necessary PHP packages>
CraftCMS is a modern PHP application, as such its workflow uses both 'git' and the 'composer' php package manager during development.
Install these next:
# apt-get install composer git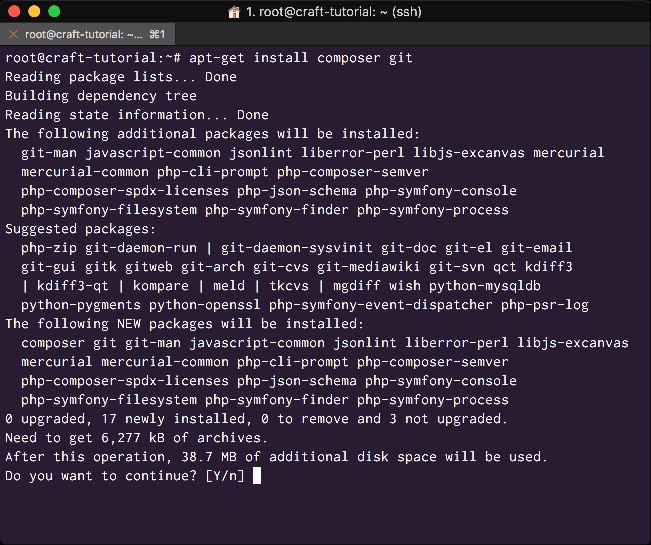
<Install development workflow dependencies>
We will need a root directory for the CraftCMS files and sub-directories. We will create this in the '/var/www/' directory:
# mkdir /var/www/example.comChange directory to your newly created route directory:
# cd /var/www/example.com
<Create a root directory for your site and enter it>
Now download the latest zip archive containing the CraftCMS files:
# wget -O craft.zip https://buildwithcraft.com/latest.zip?accept_license=yes --no-check-certificate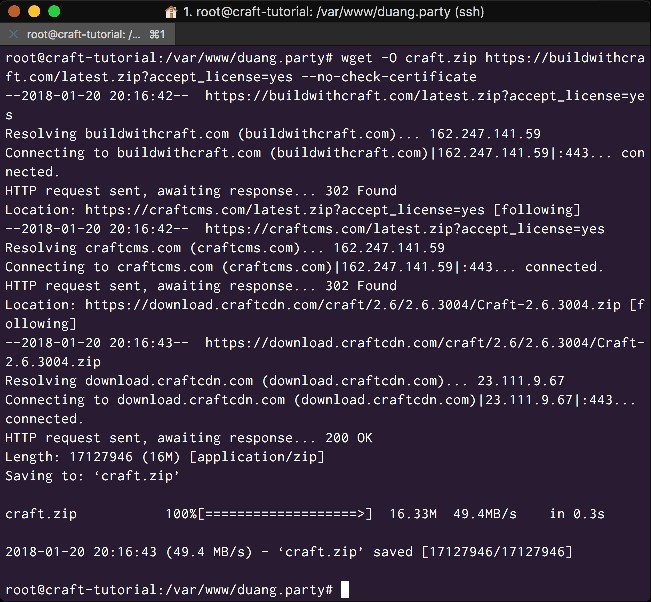
<Download the CractCMS archive>
We will need to unzip the archive, but first we need to install a package to do that:
# apt-get install unzipWe can now unzip the archive:
# unzip craft.zipWhen you unzip the archive it will create two directories within your root directory, 'craft' and 'public', you can see them if you list out the directory:
# lsCraft has a very modern directory structure, its public directory only includes the 'index.php' file required to run the application, this is the file our Nginx virtual host points to in order to serve the site. All of the nuts and bolts of the CraftCMS are run securely from a directory one level above the index.php file.
When you listed out the root directory contents, you will see that the 'craft.zip' archive is still there, we need to delete it:
# rm craft.zipWe also need to check ownerships of our directories:
# ls -lAs you can see 'root' owns both the 'craft' and 'public' directories:
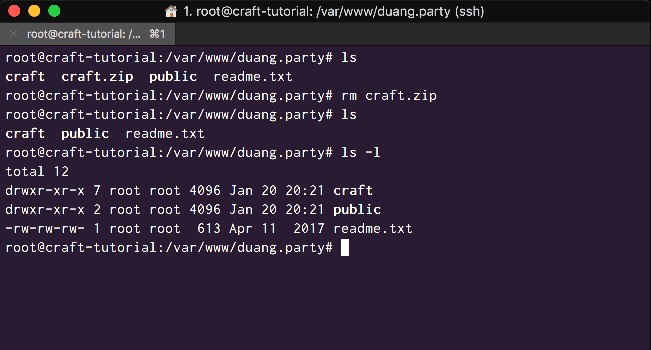
<Remove the Archive and Check directory ownerships>
Make the server user 'www-data' the owner of both directories, then recheck:
# chown -R www-data:www-data /var/www/example.com
# ls -l
You should now be able to confirm that 'www-data' user and group owns both directories:
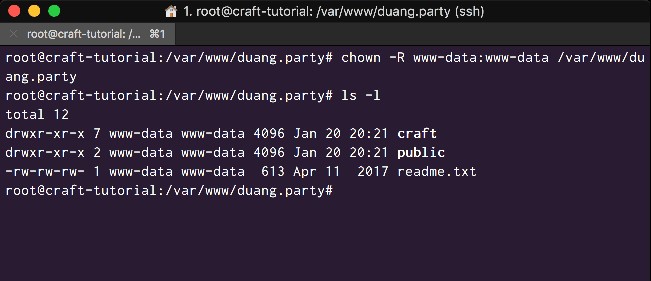
<Change the ownership of the Craft directories to www-data>
Now we have our directory and file structure prepared, we need to prepare our domain and Nginx virtual host configuration.
In your Alibaba Cloud Management Console, go to Alibaba Cloud DNS and add your domain.
You will then need to configure at least two DNS records. You will need to add an 'A' record with the '@' host and your Instance IP address as the value. You will also need to add a 'CNAME' record with the 'www' and your domain name as the value.
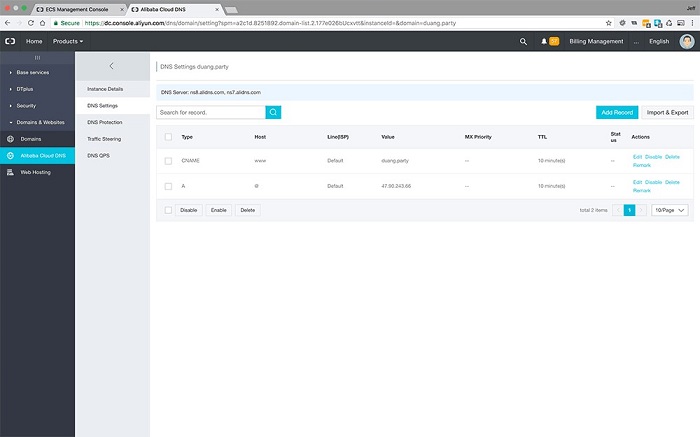
<Add a domain with an A and CNAME record>
The Alibaba Cloud DNS will also provide you with 2 DNS server records (nameservers). If you are using a third party domain registrar, you will need to login to your registrar and replace your domains current Nameserver records with those provided by Alibaba Cloud DNS.
Create a virtual host Nginx configuration file for your site in the '/etc/nginx/sites-available/' directory, and open it for editing:
# nano /etc/nginx/sites-available/example.comInside the configuration file add the following:
server {
  listen   80;
  listen   [::]:80;

  root /var/www/example.com/current/public;
  index index.php index.html index.htm;

  server_name example.com www.example.com;

  location / {
    try_files $uri $uri/ @rewrites;
  }

  location @rewrites {
    rewrite ^(.*) /index.php?p=$1 last;
  }

  location ~ \.php$ {
    try_files $uri =404;
    fastcgi_split_path_info ^(.+\.php)(/.+)$;
    fastcgi_pass unix:/run/php/php7.0-fpm.sock;
    fastcgi_index index.php;
    include fastcgi_params;
    fastcgi_param SCRIPT_FILENAME $document_root$fastcgi_script_name;
  }

  expires off;
  error_page 404 /index.php;
  client_max_body_size 300M;
}
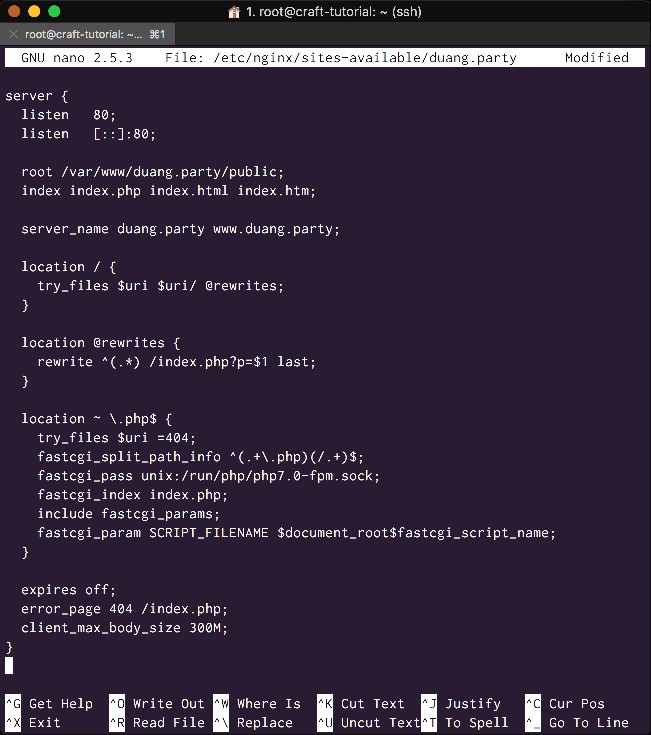
In the next step we will be using Let's Encrypt to issue an SSL certificate for our site, so make sure to remember to add your domain both with and without the 'www' host at the 'server_name' directive.
Your Virtual Host file for your domain should look like this:
<Edit your Nginx Virtual Host file>
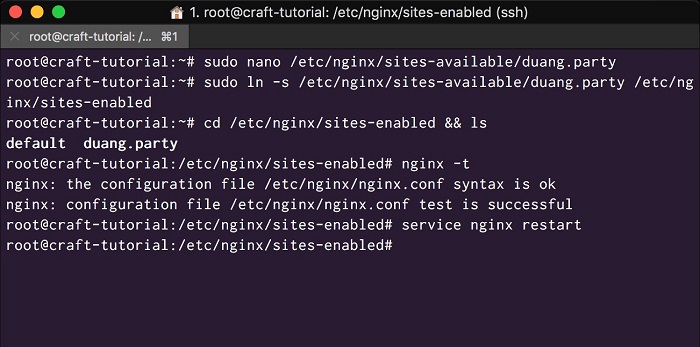
Save and close the file, then symlink the file into the '/etc/nginx/site-enabled/' directory.
# ln -s /etc/nginx/sites-available/example.com /etc/nginx/sites-enabled/I like to ensure that link has been created successfully by changing directory into the target directory and listing the contents:
# cd /etc/nginx/sites-enabled && lsAssuming that the link has been created, we should now check our Nginx configuration files for any syntax errors:
# nginx -tAssuming none have been found, reload Nginx:
# service nginx restartYour terminal should now look like this:
<Symlink your Virtual Host file and check your configuration file syntax>
Install Let's Encrypt Certbot
Before we install Certbot we need to add an external repository:
# apt-get install -y software-properties-common
# add-apt-repository ppa:certbot/certbot
Now update your package repository and install Certbot:
# apt-get update
# apt-get install python-certbot-nginxBefore we can install a certificate, we need to make sure our Alibaba Cloud security group has Port 433 (SSL) open. Visit your management console and security group and quickly check.
To obtain a Let's Encrypt SSL certificate with Certbot is easy using their Nginx Plugin:
# certbot --nginx -d example.com -d www.domain.comAdd your each domain (with and without www) immediately preceded by the domain flag '-p'.
Certbot will add all the necessary configurations to your Virtual Host.
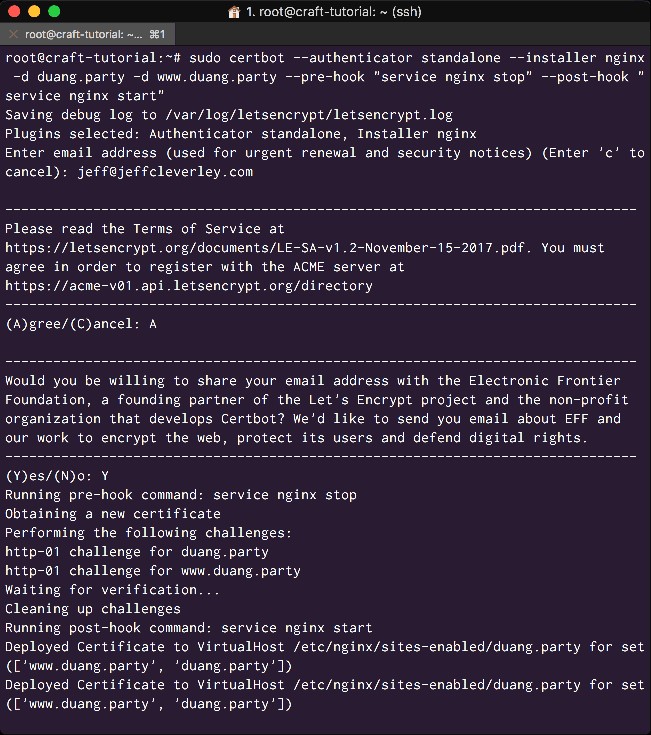
Note: At the time of writing this tutorial, a new security report has meant that Let's Encrypt has temporarily disabled part of their mechanism for issuing SSL certificates until they roll out a fix.
In the meantime we need to use an amended command that stops Nginx before issuing the certificate, then restarts Nginx afterwards.
The workaround command:
sudo certbot --authenticator standalone --installer nginx -d example.com -d www.example.com --pre-hook "service nginx stop" --post-hook "service nginx start"End Note
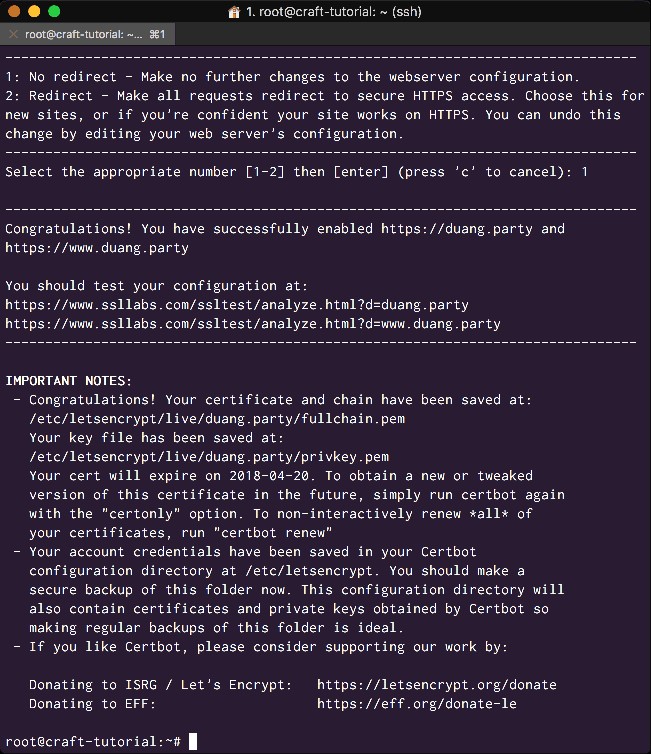
You will be asked for your email address, to agree to their terms, and whether you want to create an HTTPS redirect (Yes). Once you have answered these, Certbot will have successfully obtained your SSL certificate and automagically updated your Nginx Virtual Host file so your site will be served over HTTPS.
<Obtain your Let's Encrypt SSL>
Login to your MariaDB installation:
# mysql -u root -pCreate your database:
CREATE DATABASE craft DEFAULT CHARACTER SET utf8 COLLATE utf8_unicode_ci;Then add create your user and password, and grant your user the required privileges. Make sure you use a strong password:
GRANT ALL ON craft.* TO 'new_user'@'localhost' IDENTIFIED BY 'new_users-password';Finally, flush privileges and exit:
FLUSH PRIVILEGES;
EXIT;
After each command, you should have received a 'Query OK' response, and your terminal should look something like this:
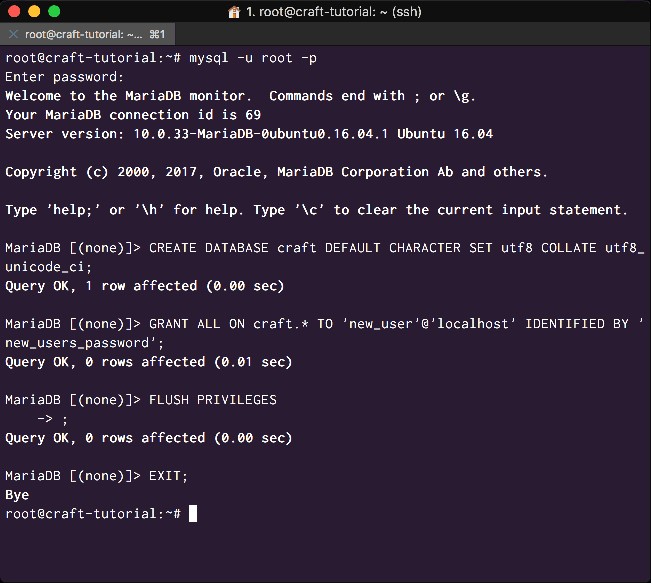
<Create your database and user>
Step 11. Configure CraftCMS to access the Database
You can find CraftCMS's database configuration file, 'db.php', within the '/craft/config/' directory. Open it for editing:
# nano /var/www/example.com/craft/config/db.phpInside the file, configure it like so, using the database details you created in the previous step:
return array(

    // The database server name or IP address. Usually this is 'localhost' or '127.0.0.1'.
    'server' => 'localhost',

    // The name of the database to select.
    'database' => 'craft',

    // The database username to connect with.
    'user' => 'new_user',

    // The database password to connect with.
    'password' => 'new_users_password',

    // The prefix to use when naming tables. This can be no more than 5 characters.
    'tablePrefix' => 'craft',

);
In your terminal it should look like the following:
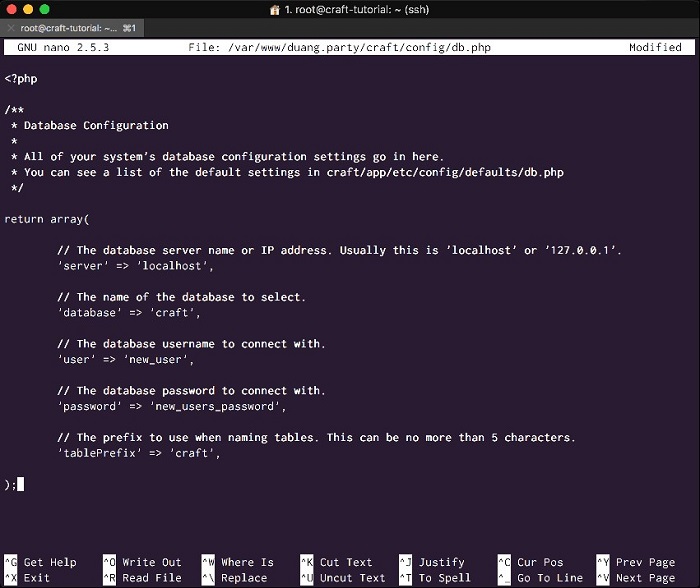
<Configure CraftCMS to access your Database>
Once you save and exit the file, you will be ready to install CraftCMS
Time to install CraftCMS. To do that visit your domain:
https://example.comIf everything has been configured properly you will be greeted by the CraftCMS installer:
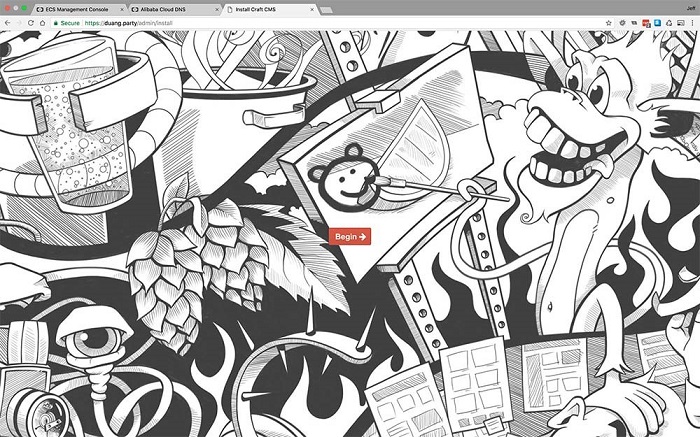
<Begin to install CraftCMS>
You will need to create your account, enter a username, email and password:
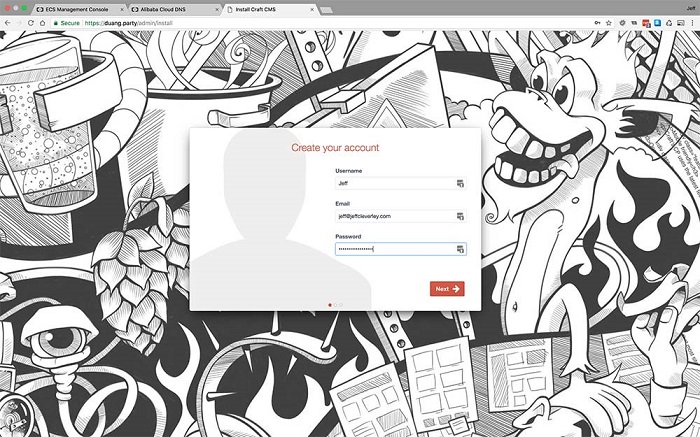
<Create your CraftCMS account>
Next up, you will set up your site. Enter your site name, the url and choose a language:
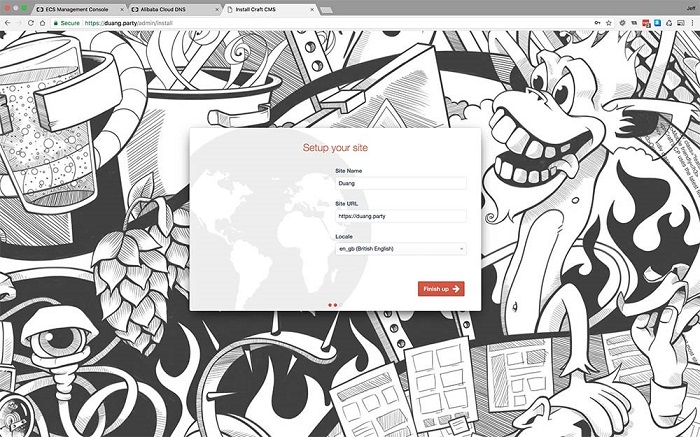
<Set up your site>
The installer will take a few seconds to configure everything before letting you know it has finished and giving you a link to your dashboard:
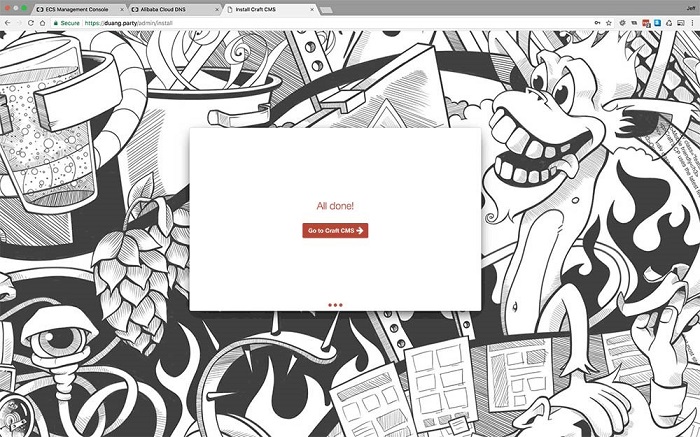
<Configuration is complete>
The CraftCMS dashboard has a clean, user-friendly interface. You should explore and start managing your content.
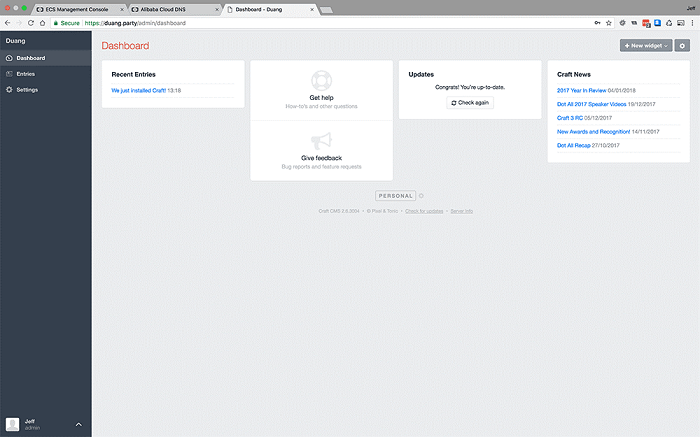
<CraftCMS dashboard>
If you visit your site URL, you will see a very basic template.
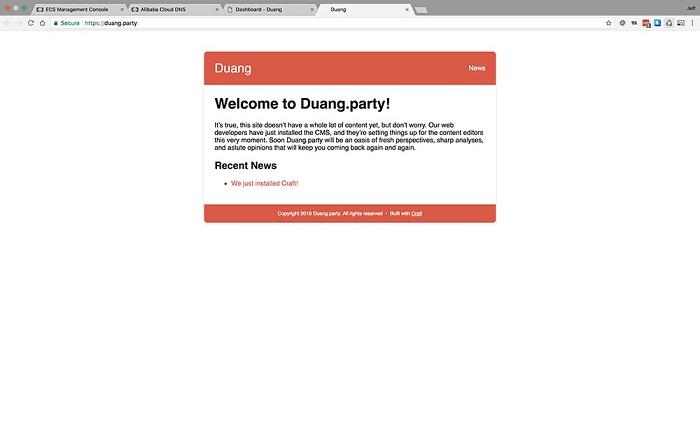
<Your un-themed site>
Don't worry about this basic theme, Craft has an excellent templating system that uses Twig for creating incredible beautiful, responsive, and fast themes.

2,593 posts | 792 followers
FollowAlibaba Clouder - May 17, 2019
Alibaba Clouder - May 20, 2019
Alibaba Clouder - May 16, 2019
Alibaba Clouder - May 17, 2019
Alibaba Clouder - April 1, 2019
Alibaba Clouder - May 21, 2018

2,593 posts | 792 followers
Follow CloudMonitor
Automate performance monitoring of all your web resources and applications in real-time
Learn MoreMore Posts by Alibaba Clouder
5316206321858932 December 7, 2018 at 12:56 pm
How does Alibaba compares against AWS. I have been using AWS for PHP MySQL hosting through Cloudways platform. I never had any issues with performance or downtime. The performance could also be because of the custom stack of the platform I am using.