Stable Diffusion Web UI based implementation is available in the github repository of user AUTOMATIC1111. This will help the users to implement stable diffusion with a Web UI supported by Gradio. Alibaba Cloud ECS has GPU based instances for heterogeneous computing which has the capability to effectively deploy generative AI based applications like Stable Diffusion. In this blog we will walk through the step by step procedures to implement Stable Diffusion in a GPU based ECS instance. In this tutorial, we proceed with the following steps:
1. Setting up the ECS instance
Alibaba Cloud offers ECS instances with heterogeneous computing facilities like GPU and FPGA which are mainly used for deep learning and multimedia rendering applications. As far as GPU based instances, NVIDIA boards like T4, P100 and V100 are available to be opted as per the functional requirements of the application. For this tutorial we will use a 5th generation ECS with NVIDIA P100 using the steps below: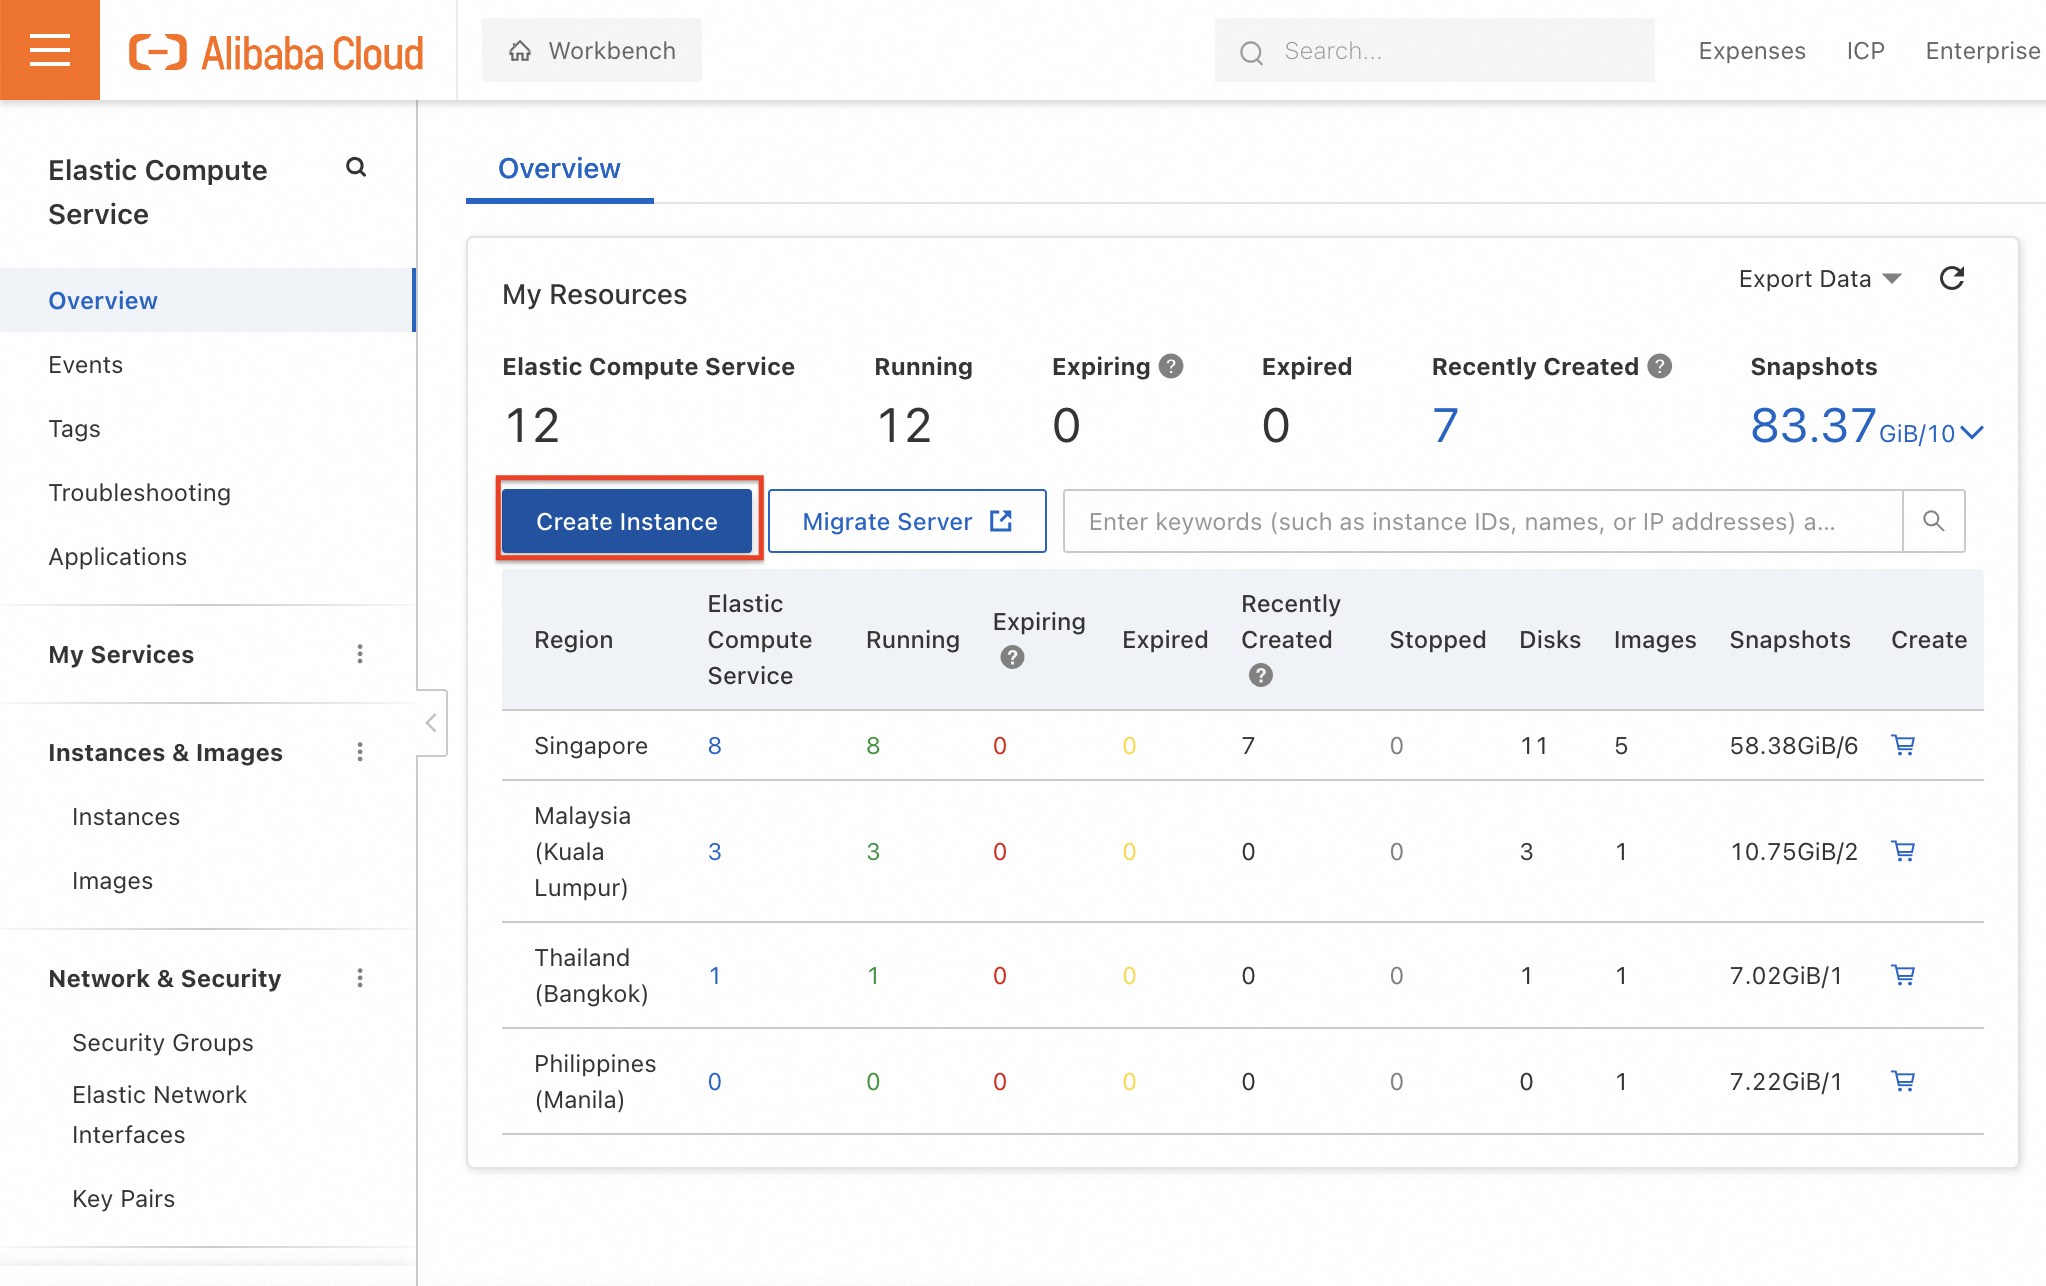
Get into the console of ECS and click on "Create Instance".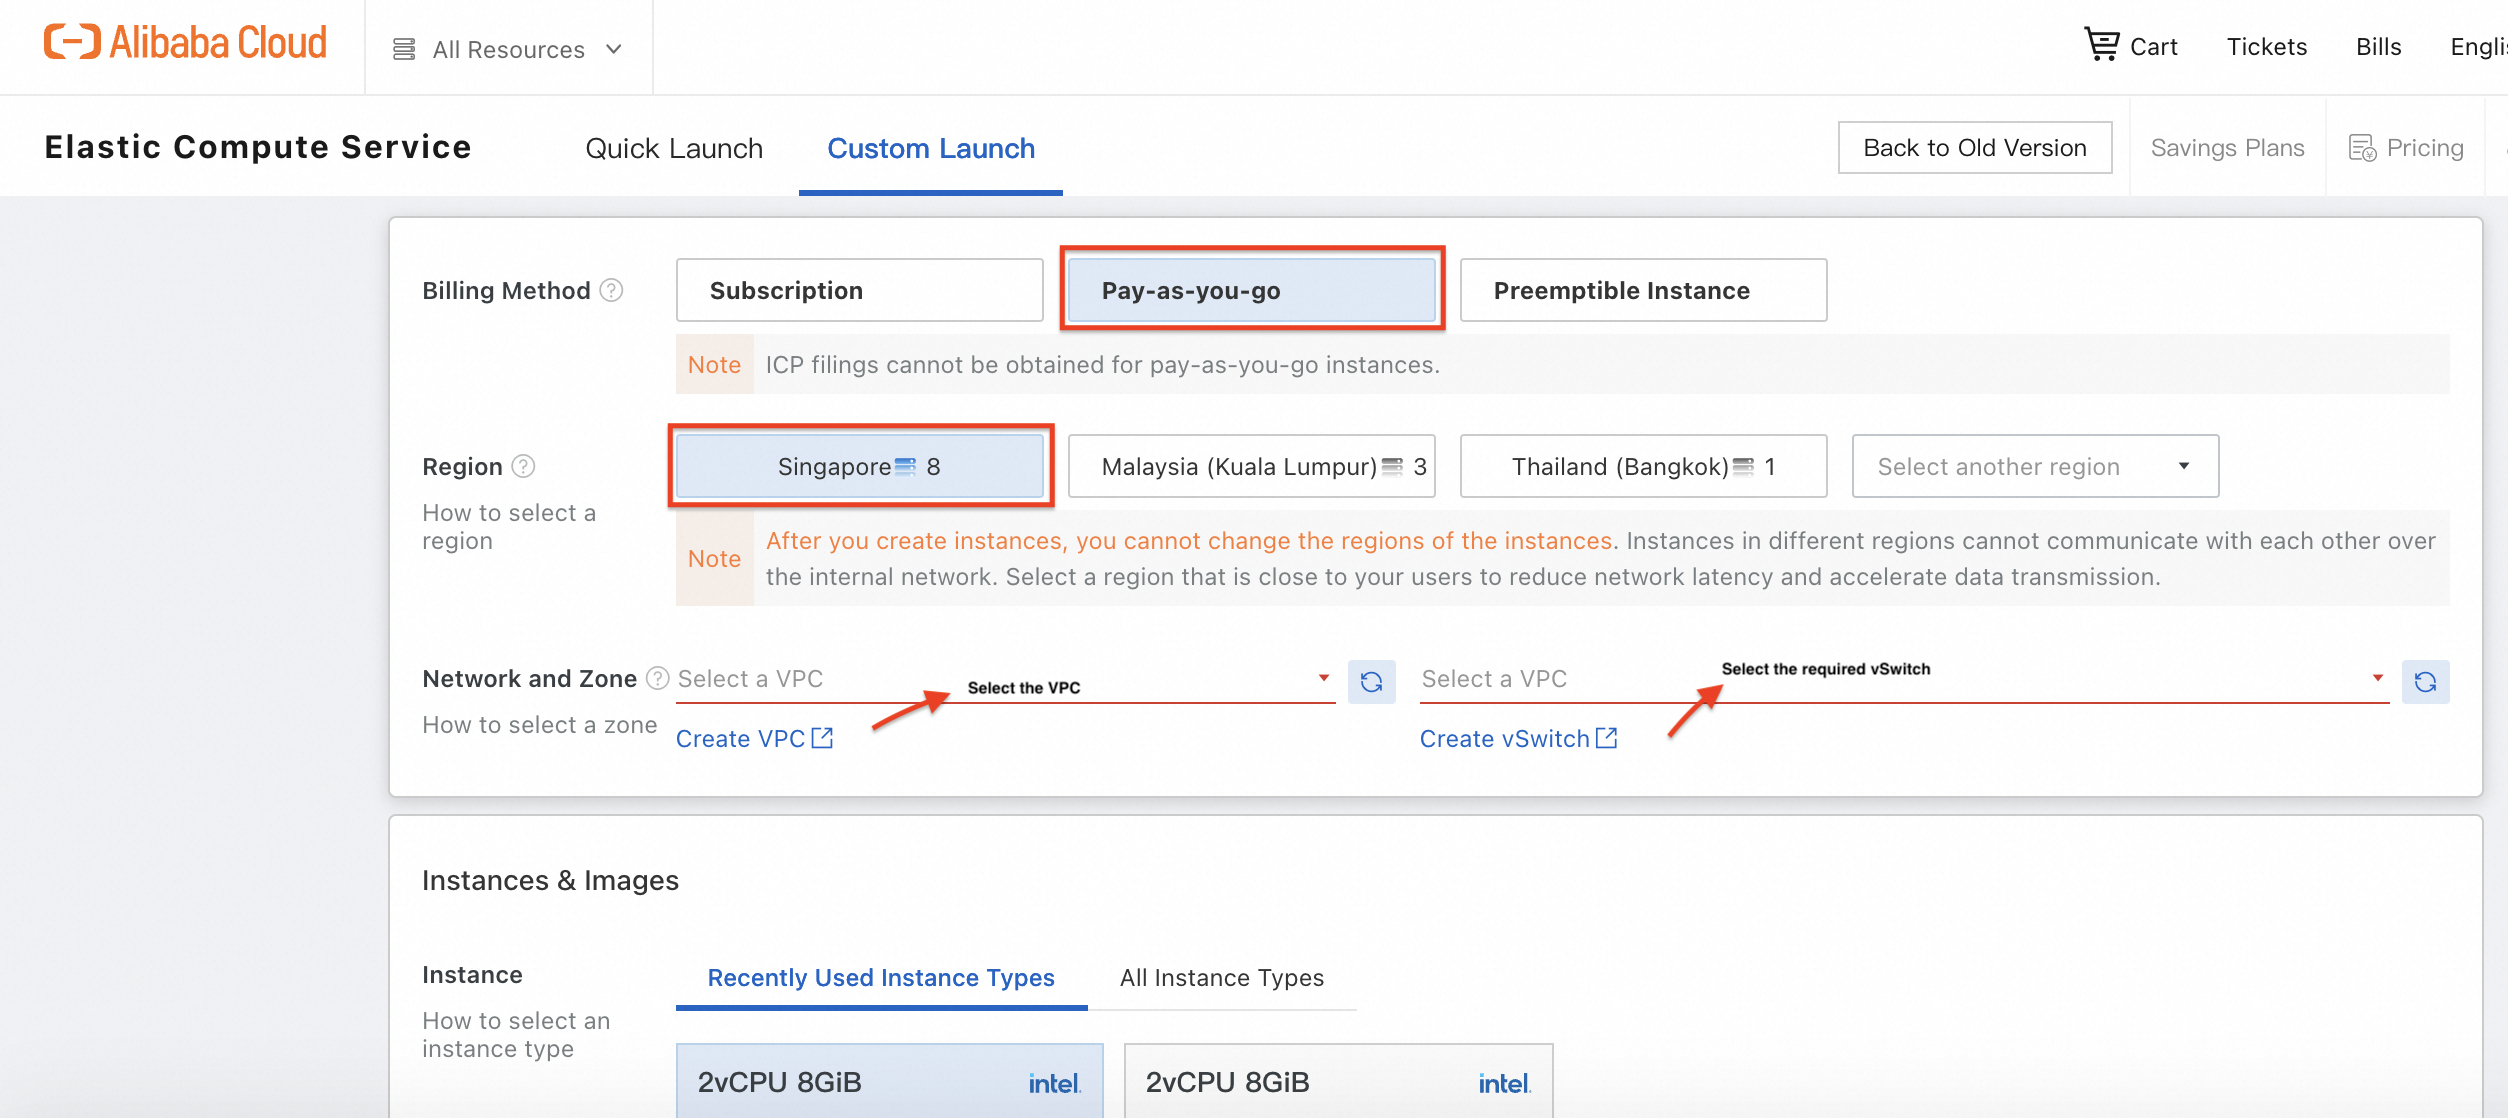
Select the billing method and region. Most of the GPU based instances are usually available in Singapore. Then select the required VPC and vSwitch.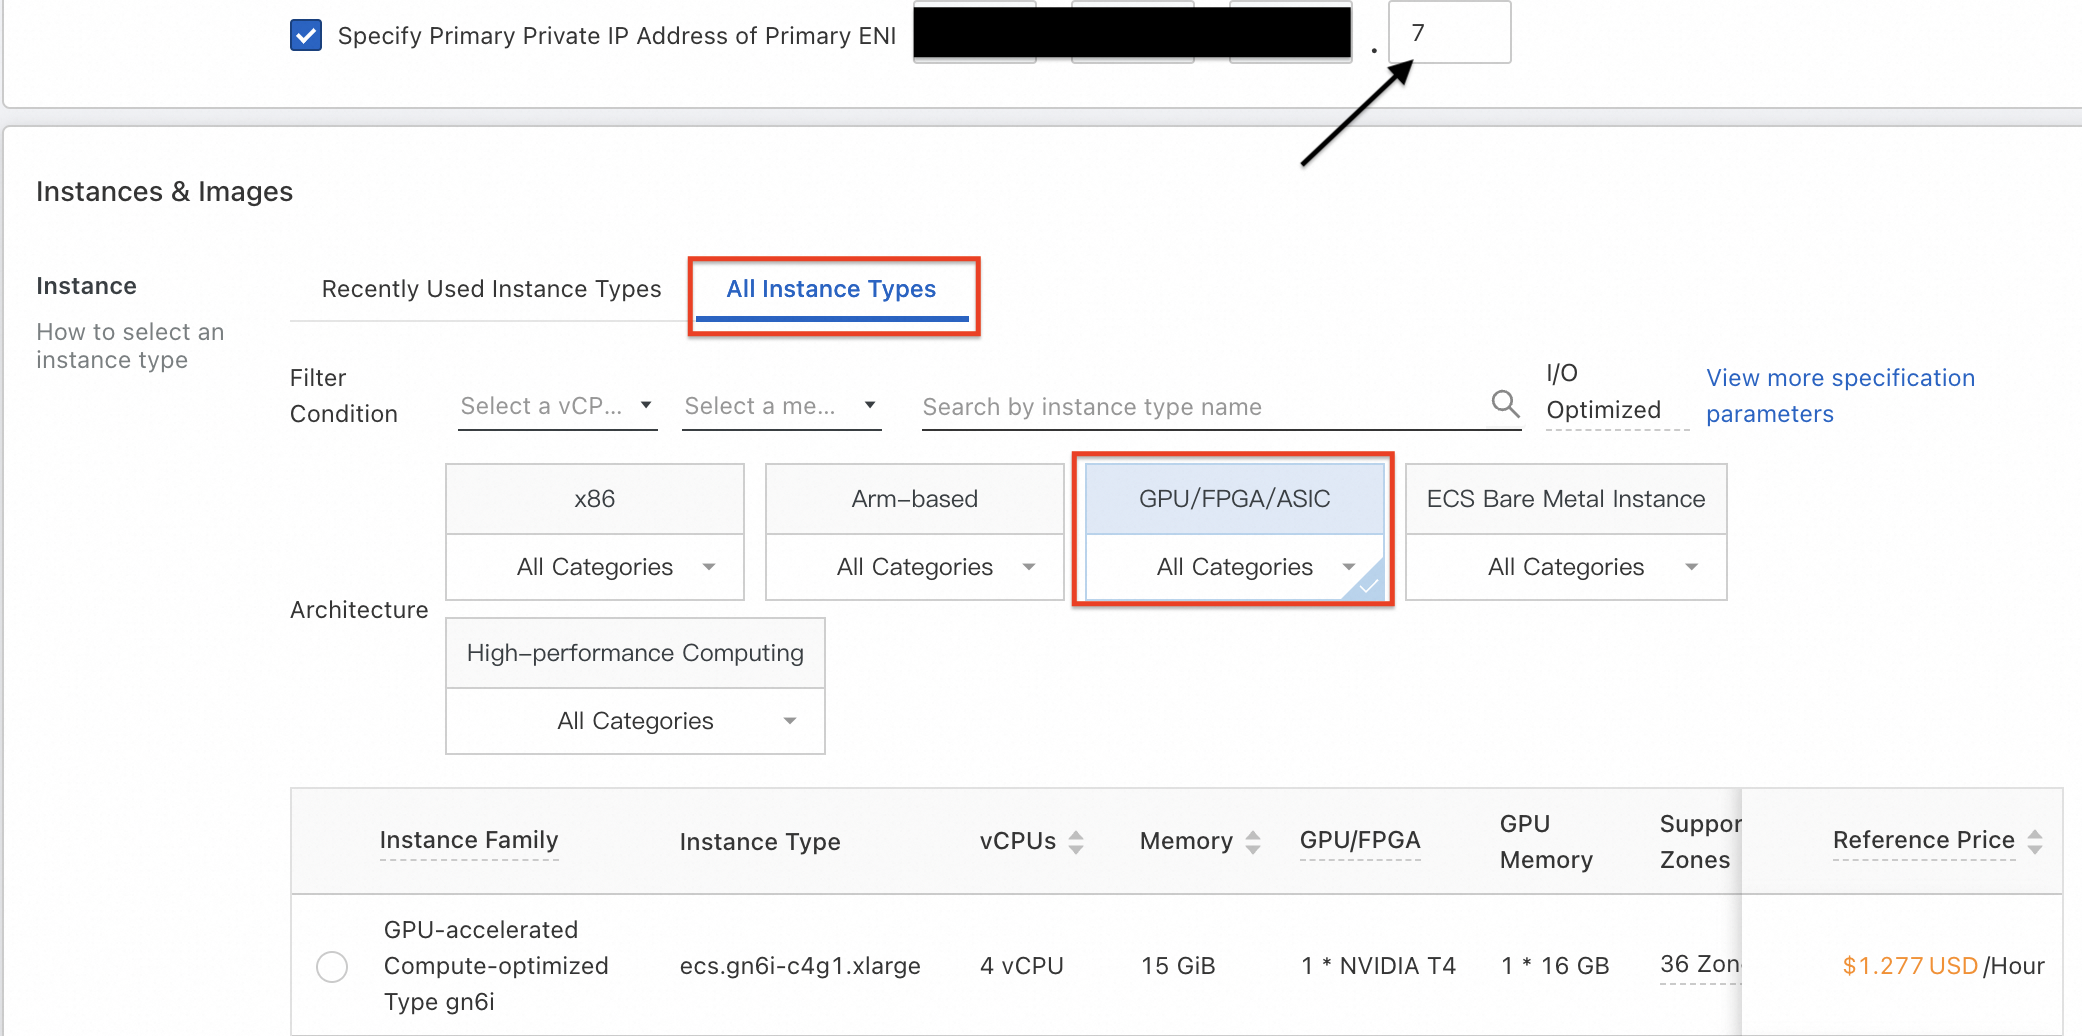
After selecting the VPC and vSwitch, a checkbox appears with a caption "Specify Primary IP Address of Primary ENI". Opt for that checkbox and specify the IP address without any conflict with the existing ECS instances in the same vSwitch. Select the option of "All Instance Types". Among the architectures given, select "GPU/FPGA/ASIC".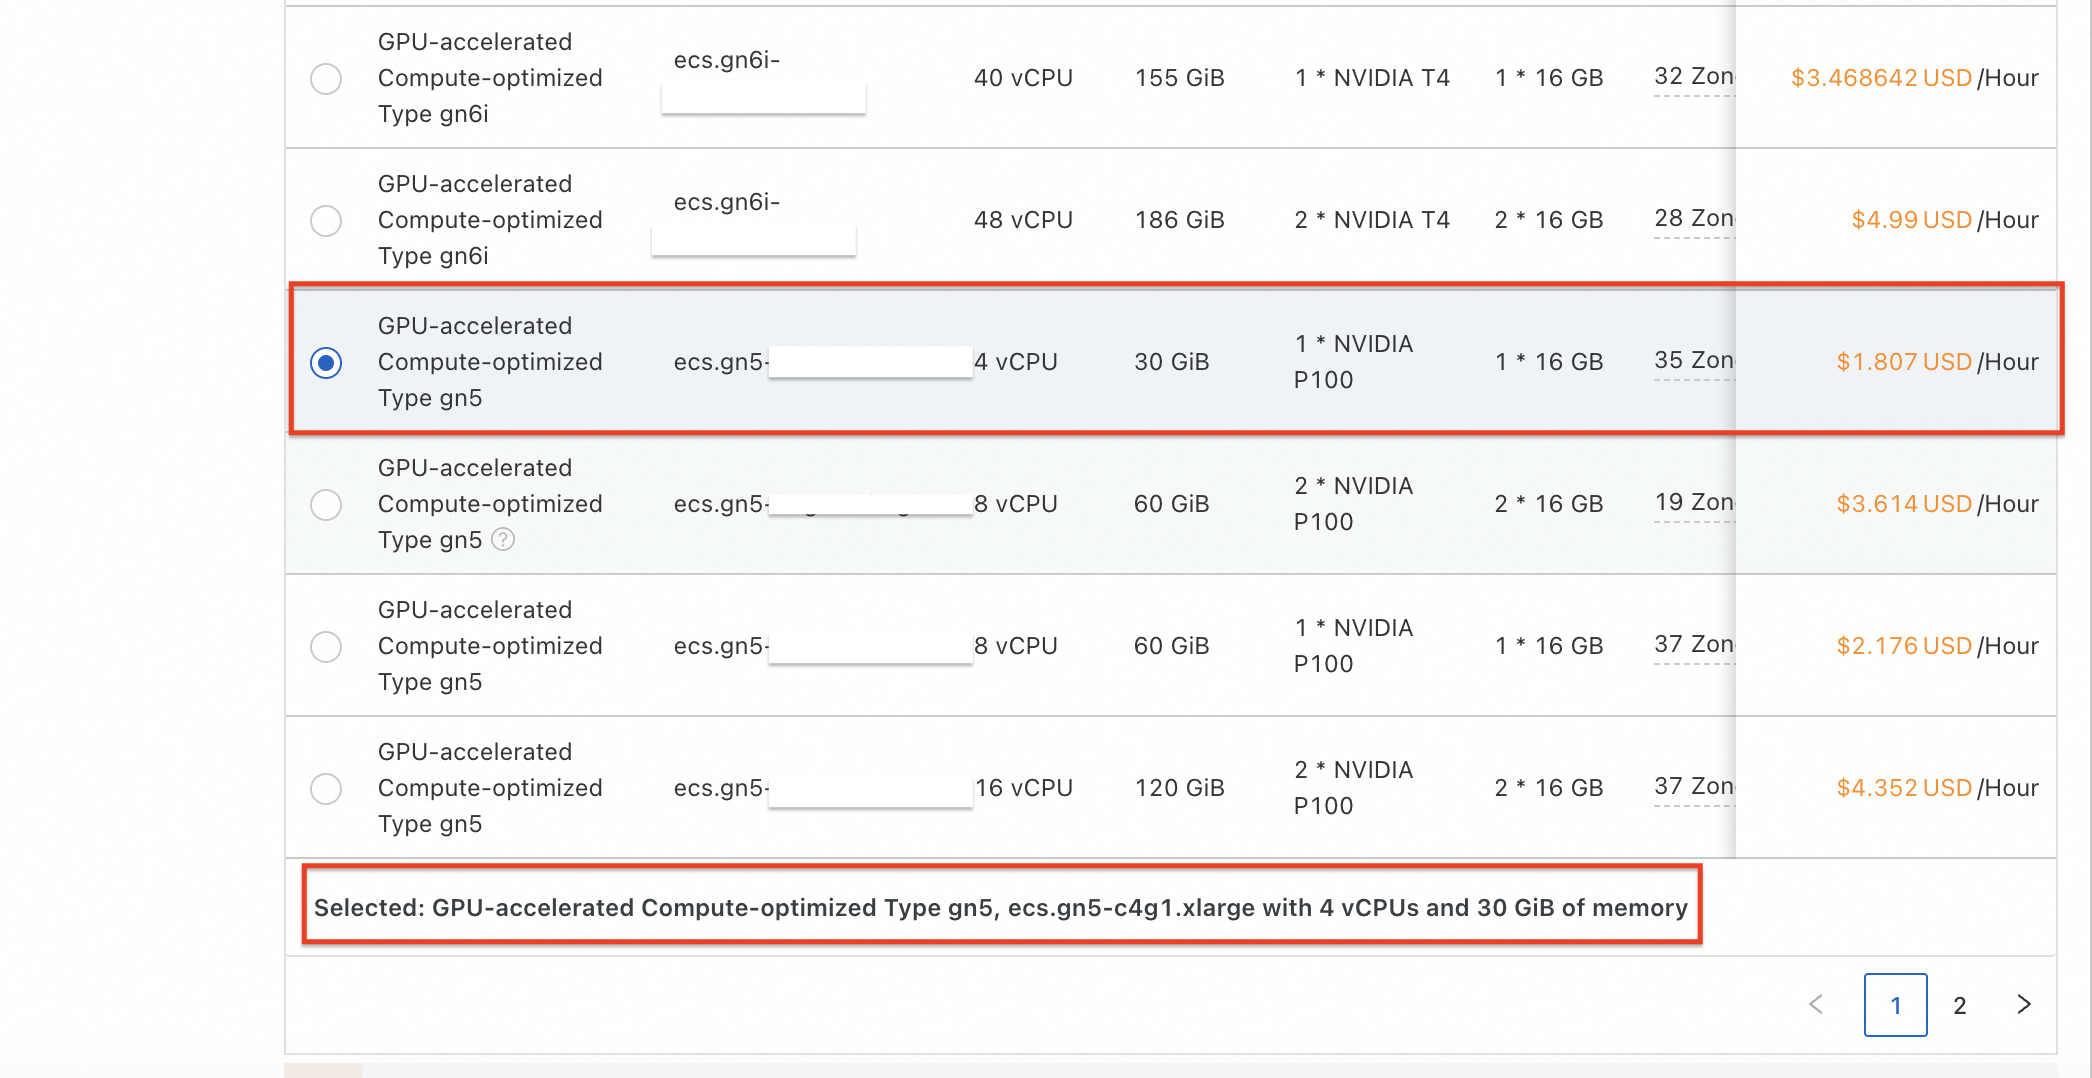
Select the required instnce. Here we have chosen a 5th generation compute optimized instance with 4 vCPUs, 30 GB RAM and 1 NVIDIA P100 GPU.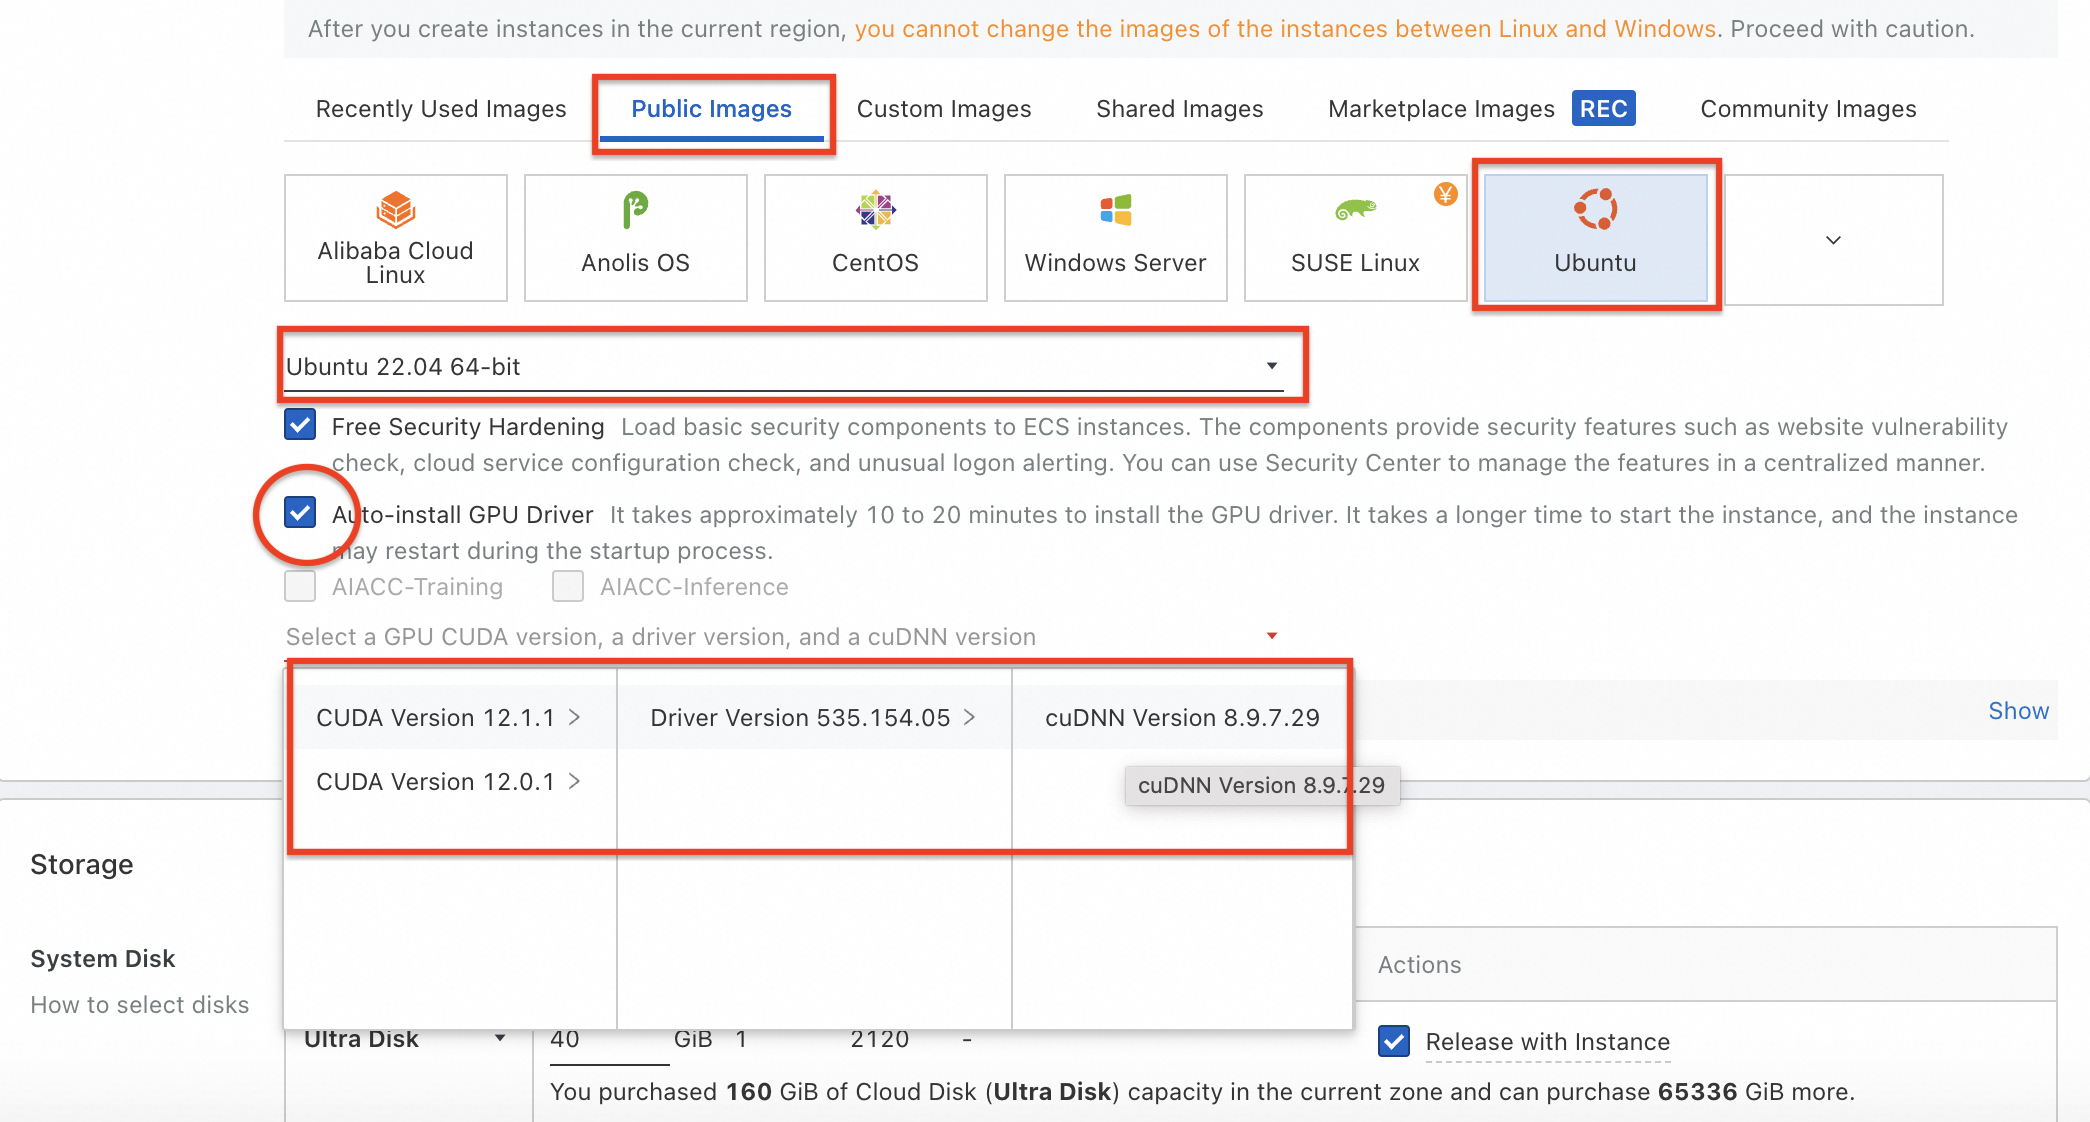
Select Public Images. In that opt for the version 20 of Ubuntu. Unlike spinning the usual ECS instance, we need to enable installation of GPU Driver. This is done by checking on "Auto-install GPU Driver" and selecting the latest or the required version of CUDNN.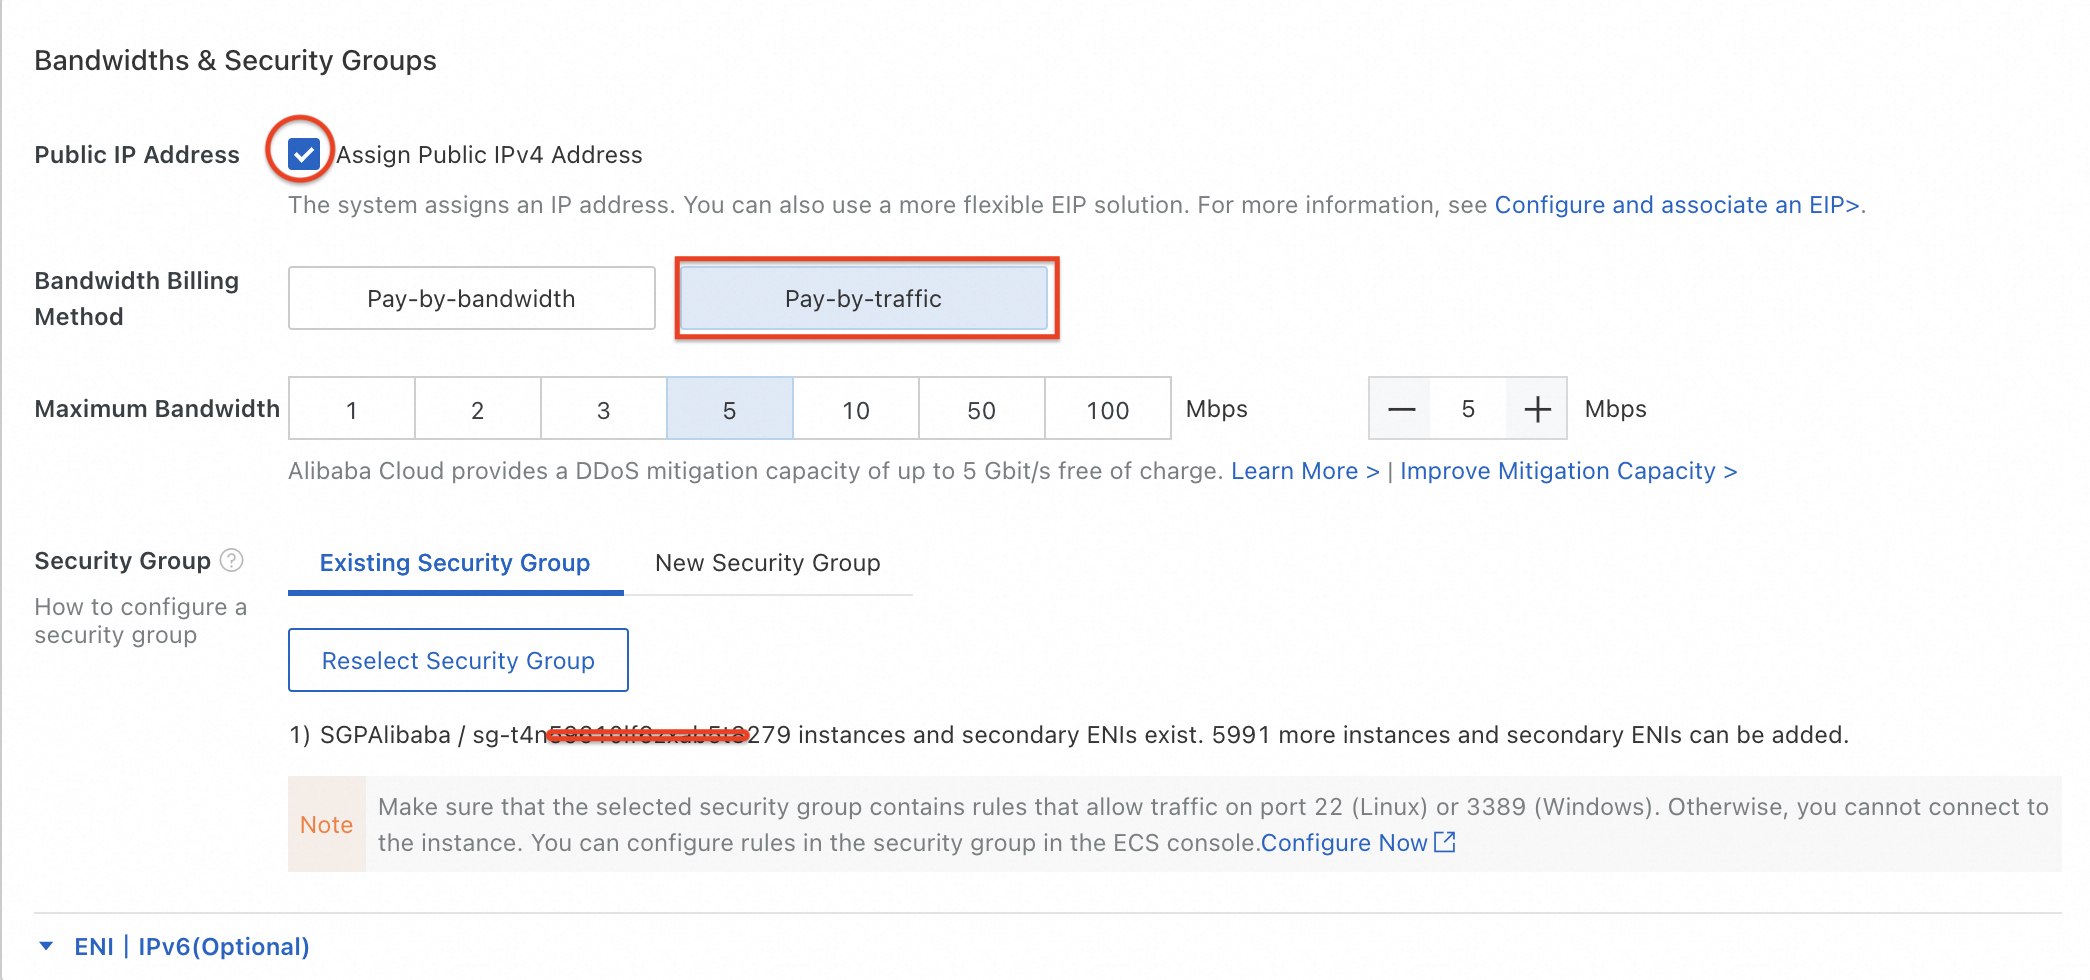
Opt for assigning a Public IPv4 Address using Pay by traffic mode or later bind an EIP. This is essential as the ECS instance needs to download Anaconda and Stable Diffusion Web UI from their repositories. After selecting the IP address, select the security group which is required to provide access to http and https protocols in outbound connections and port 22 to allow workbench to function.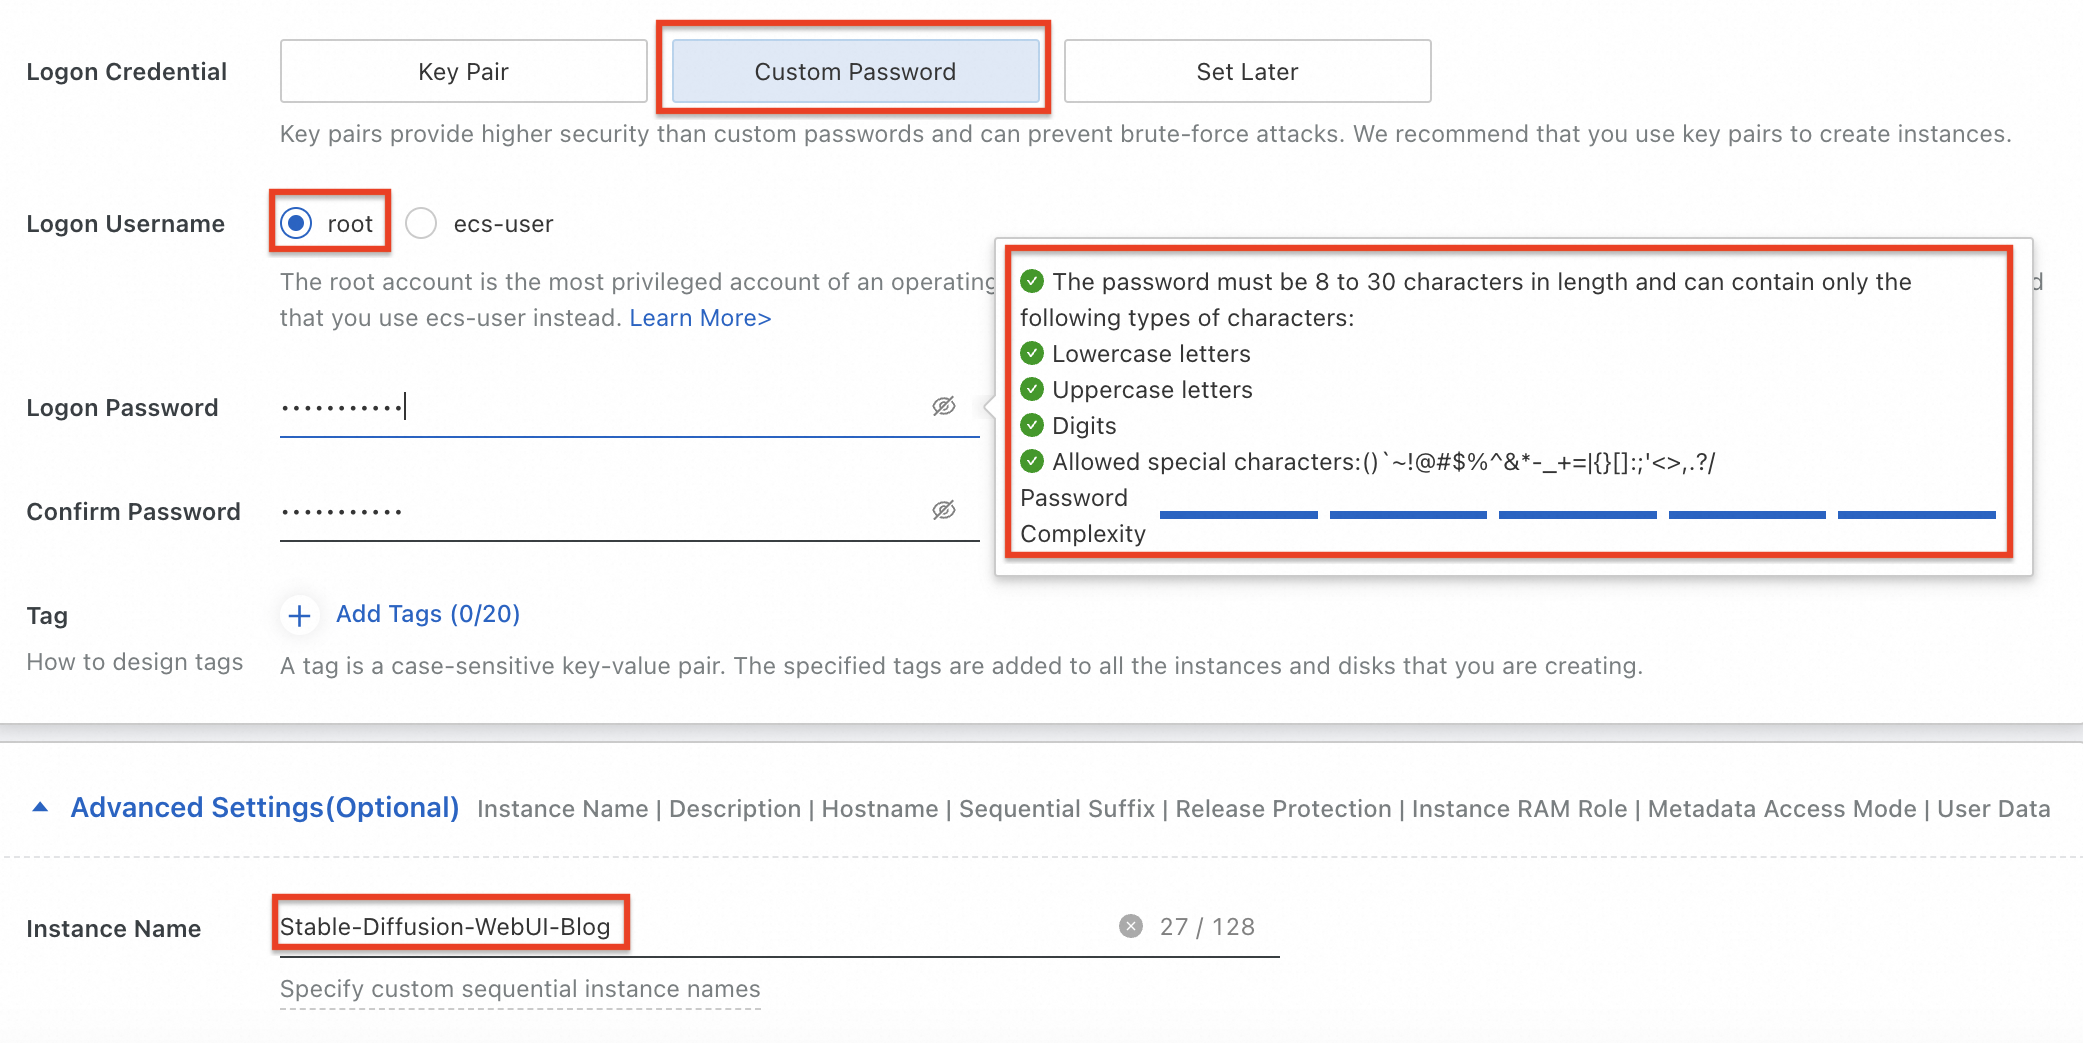
Set a custom password for the root user initially to enable auto installation of GPU drivers and few supporting libraries. Later in the command prompt we will create ecs-user as it is required for the installation of anaconda and stable diffusion web ui. Provide a name for the instance to get it identified among the other instnces created in the same console.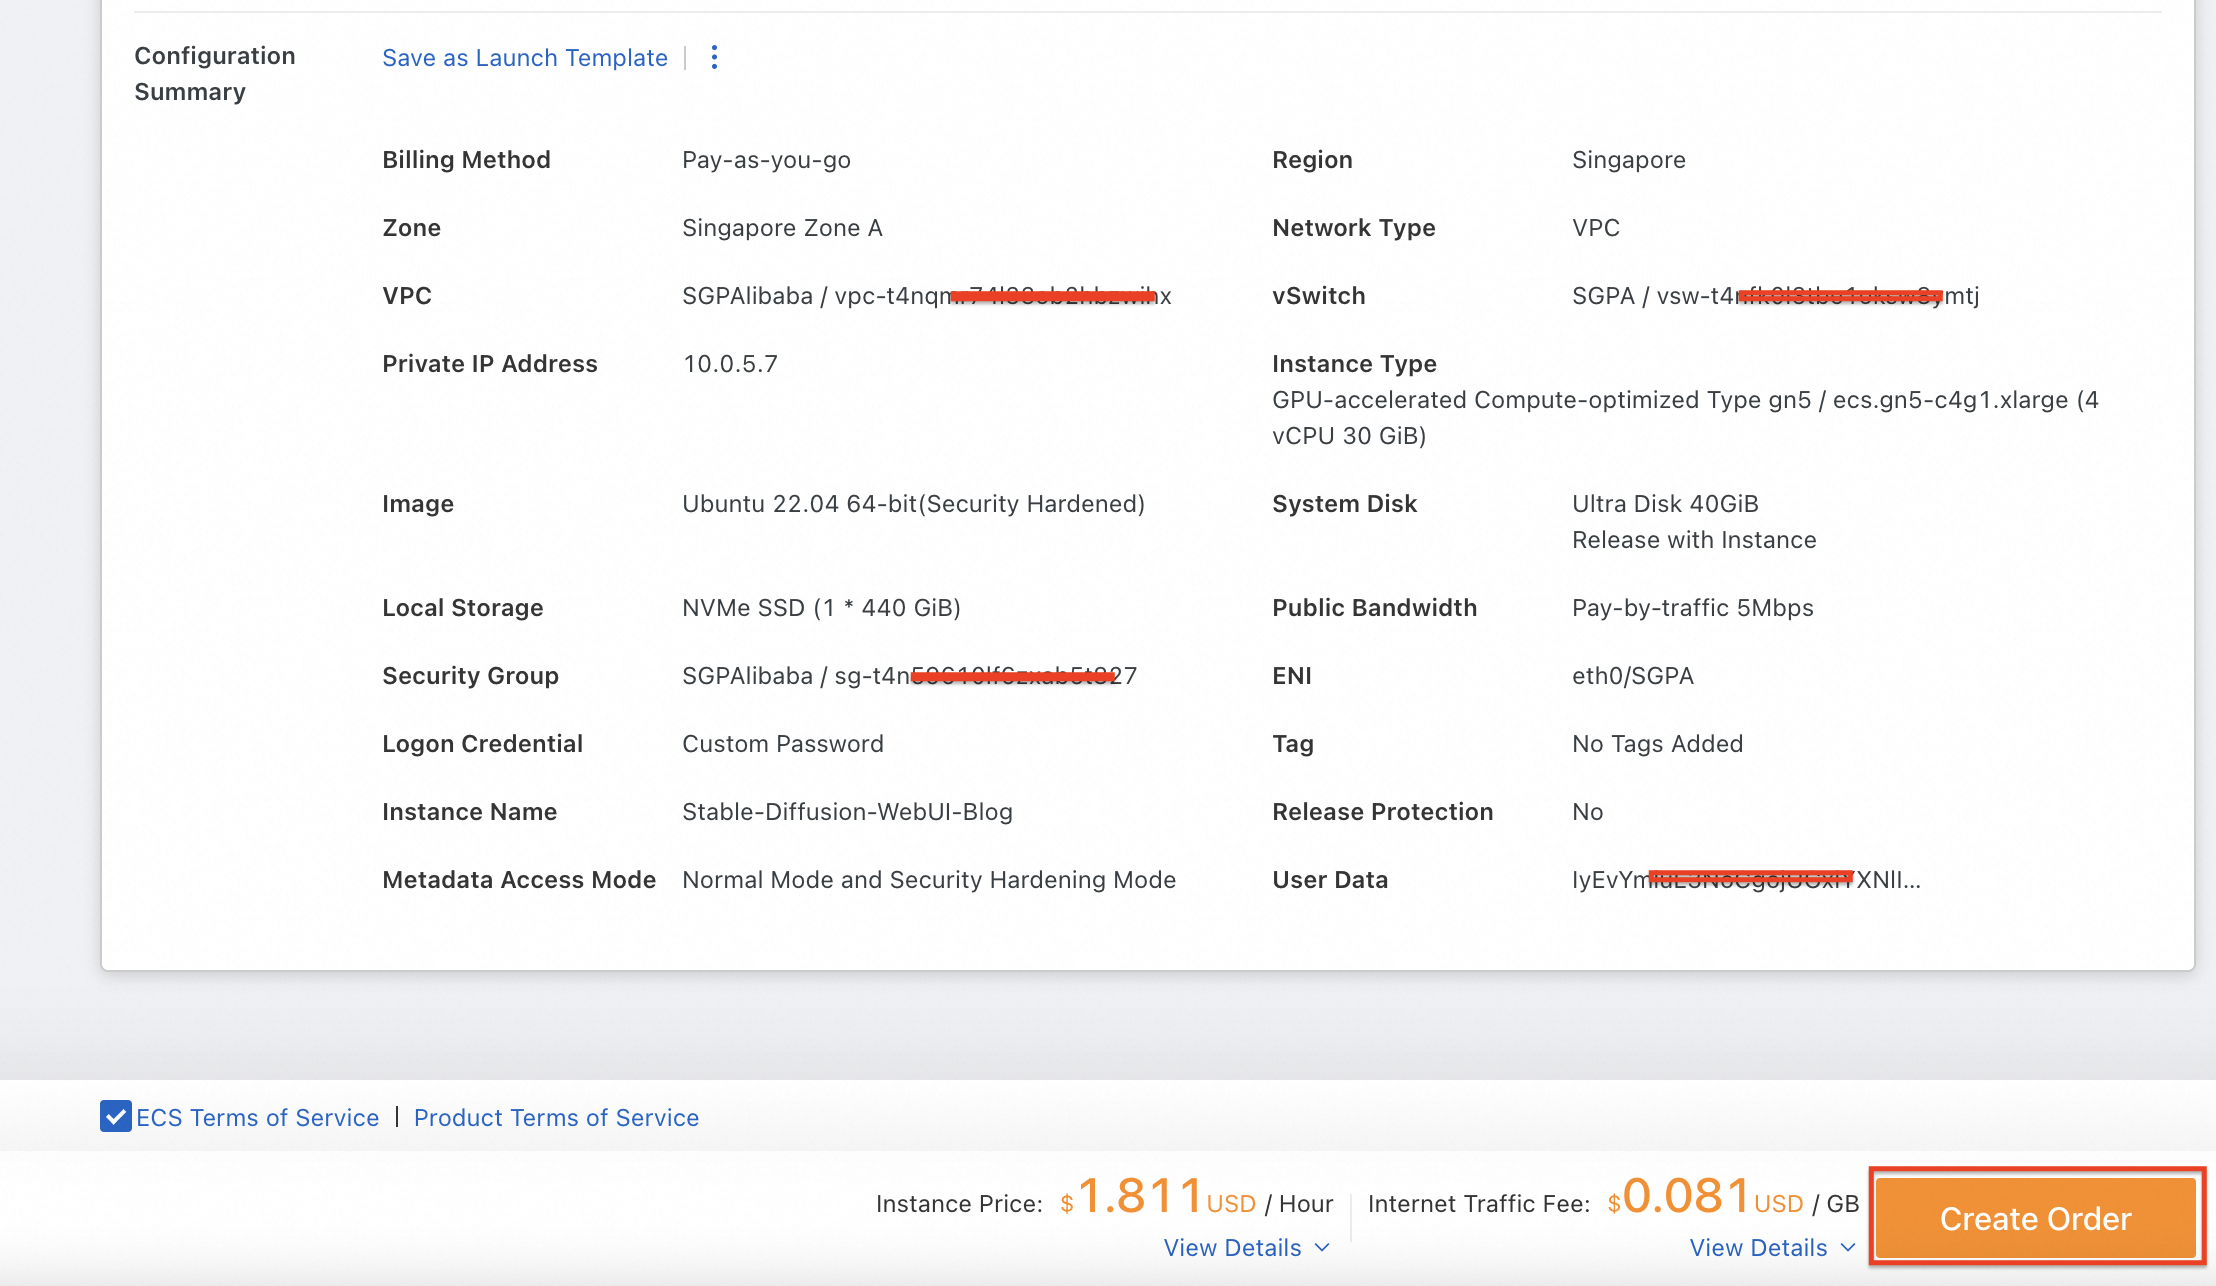
Check all the details in the configuration summary, accept the ECS Terms of Service and then click on "Create Order".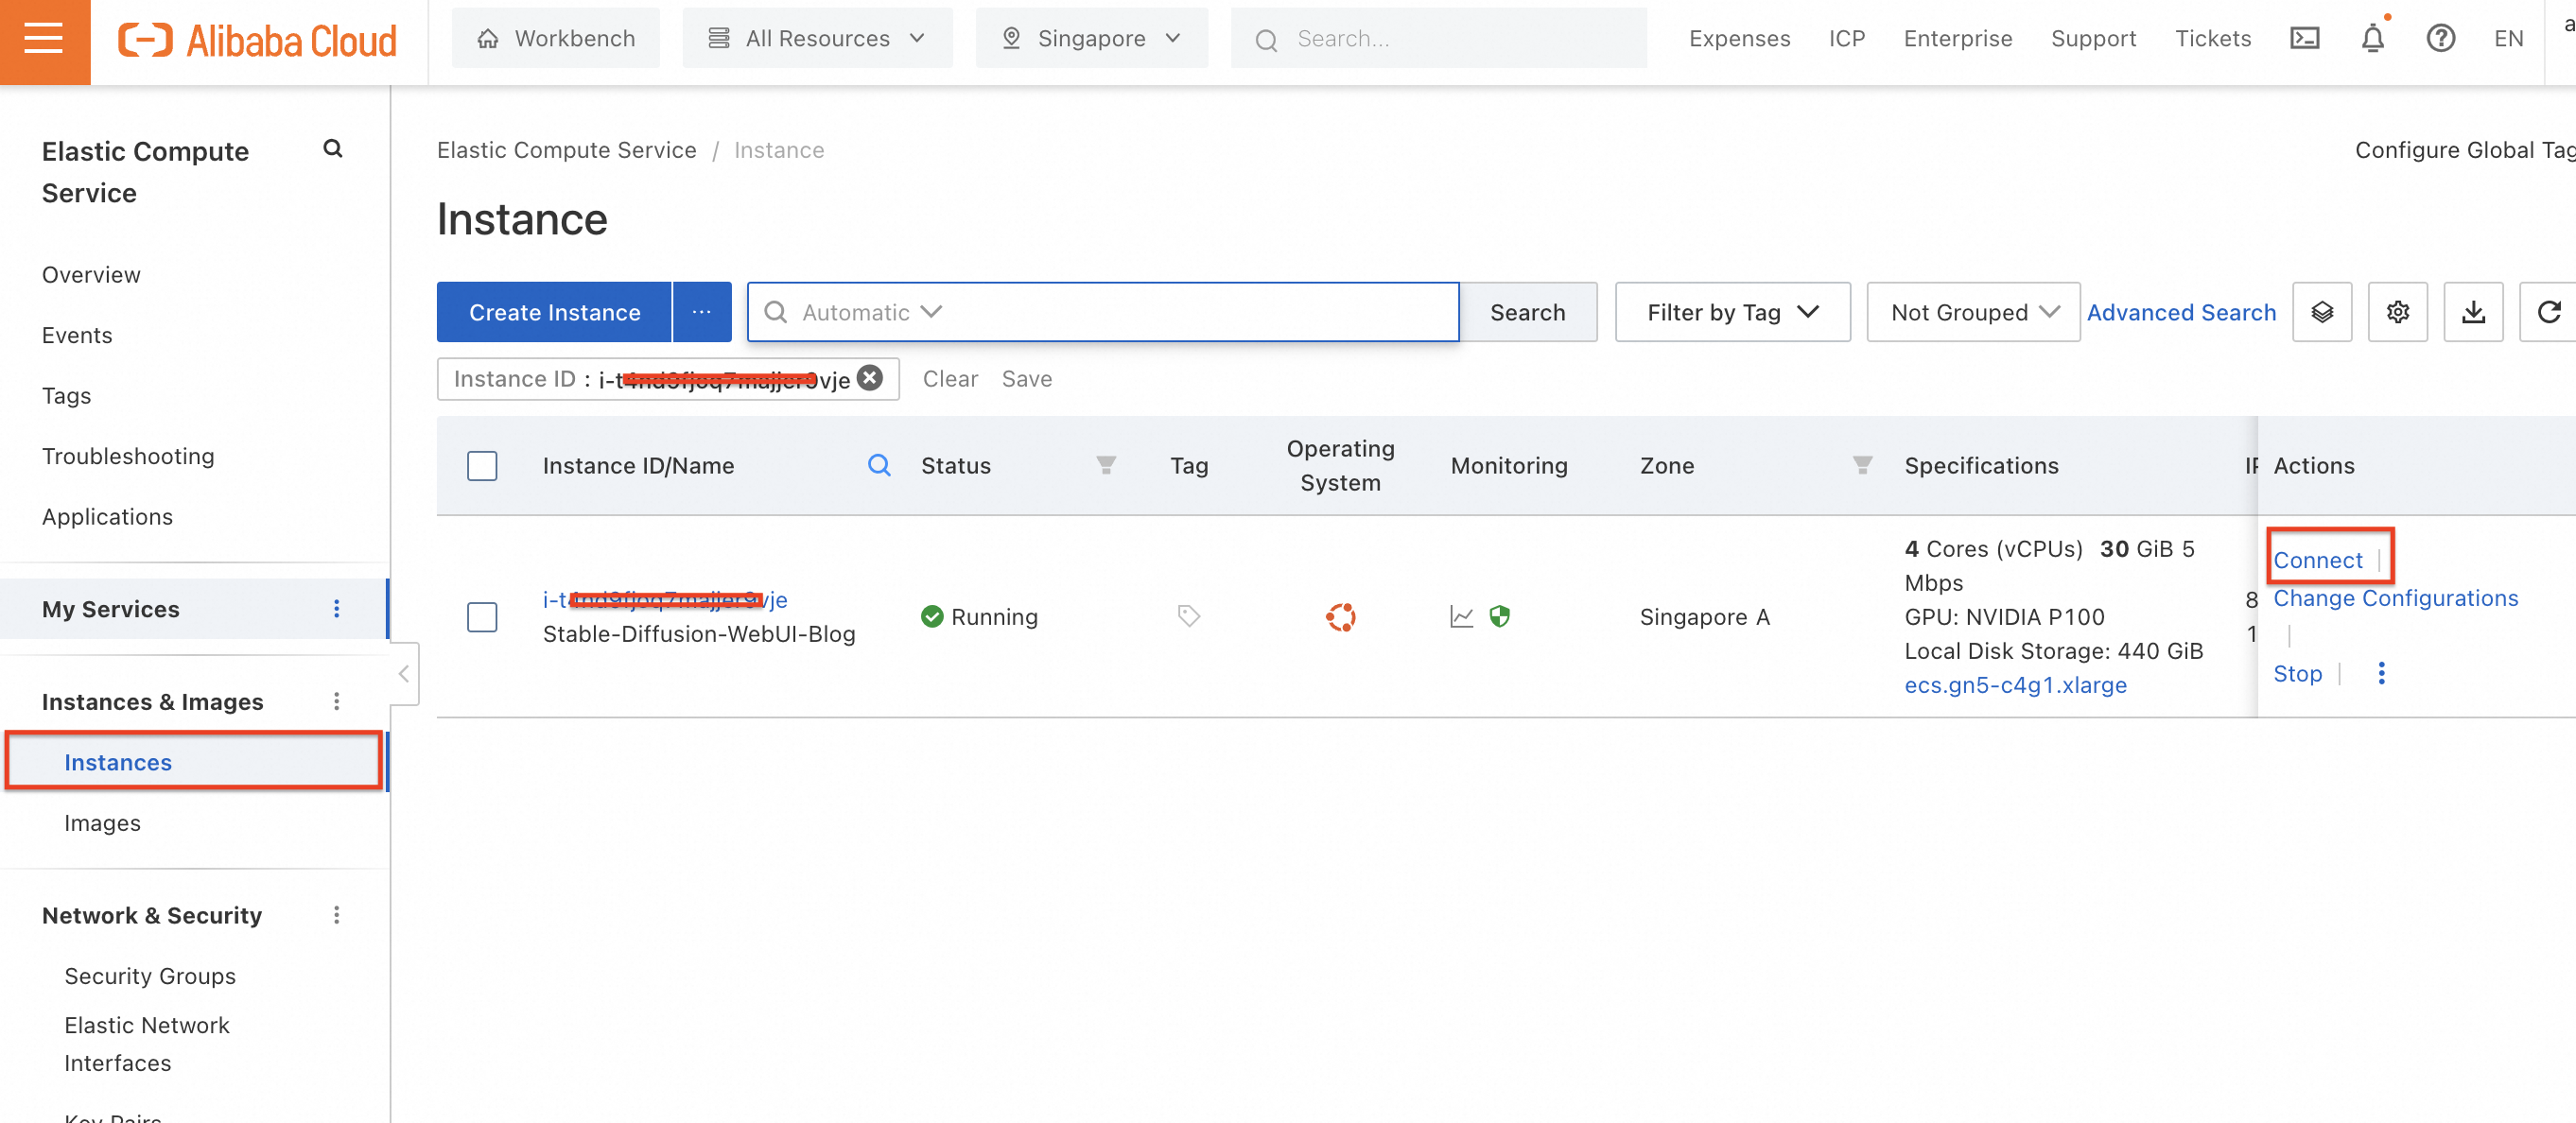
Now if you check in the instances, desired instance is up and running. Click on "Connect".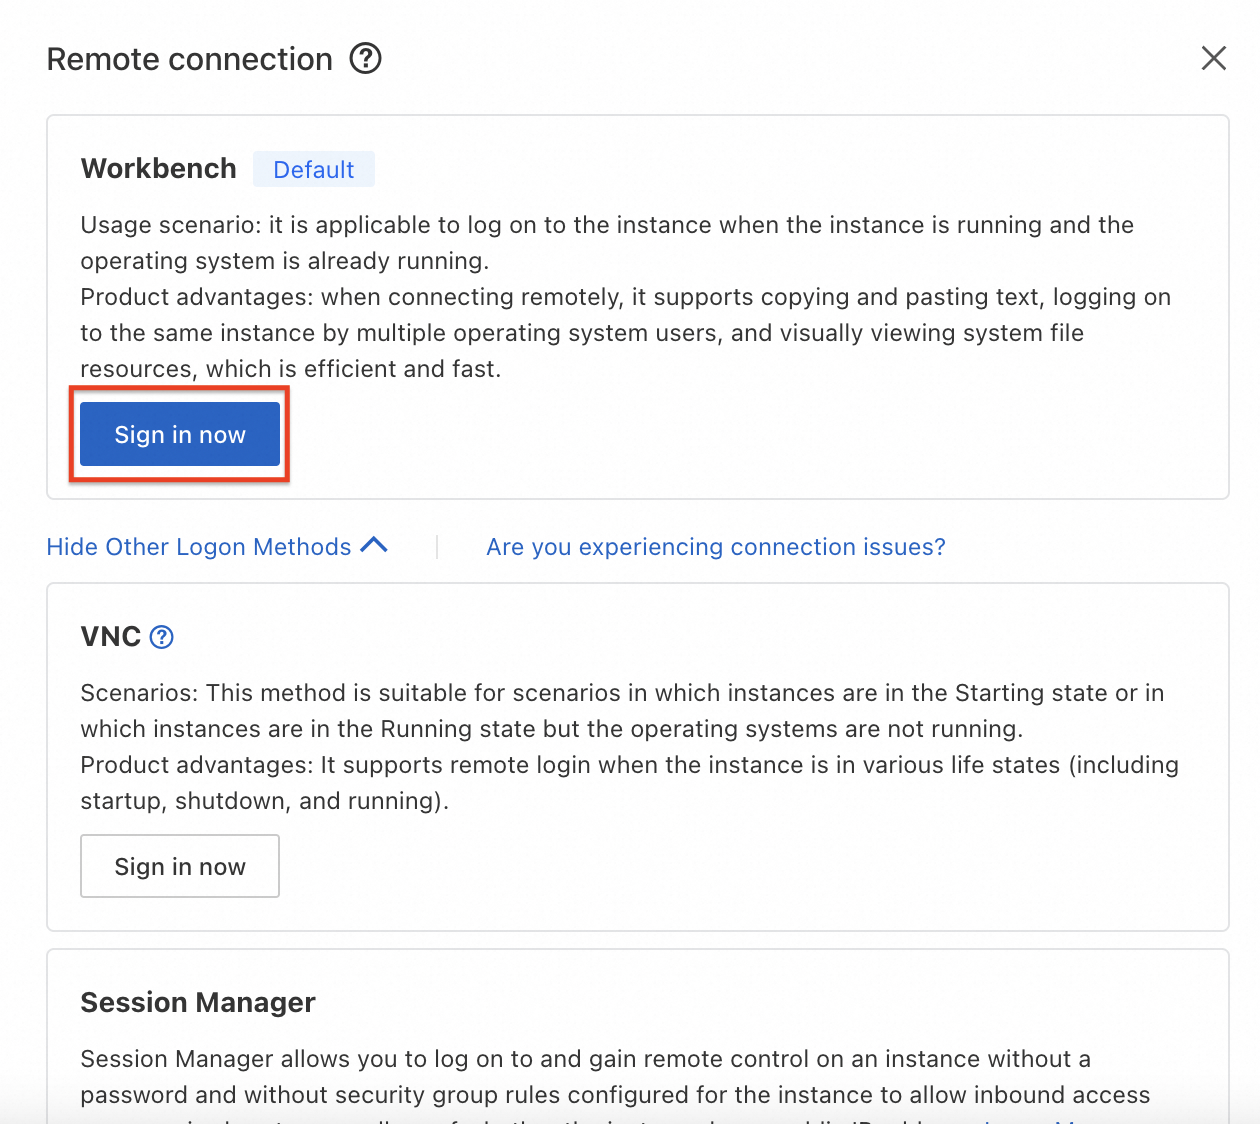
Sign into the workbench.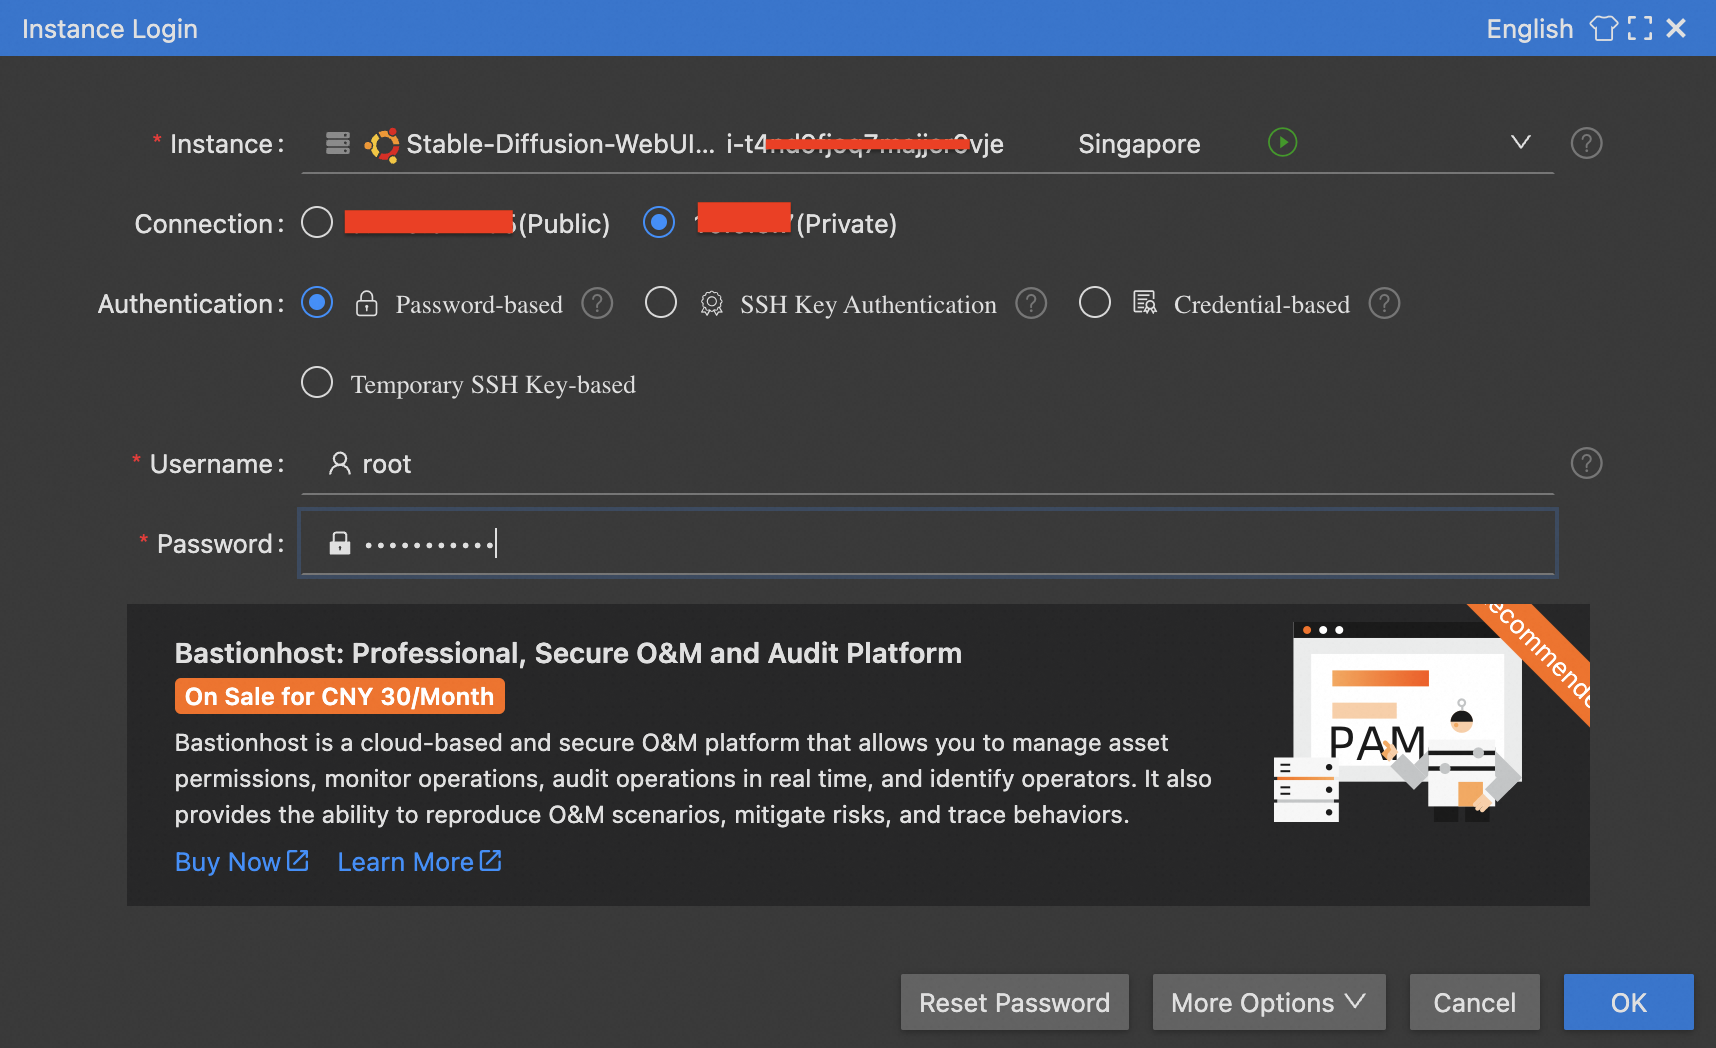
Enter the password and click OK.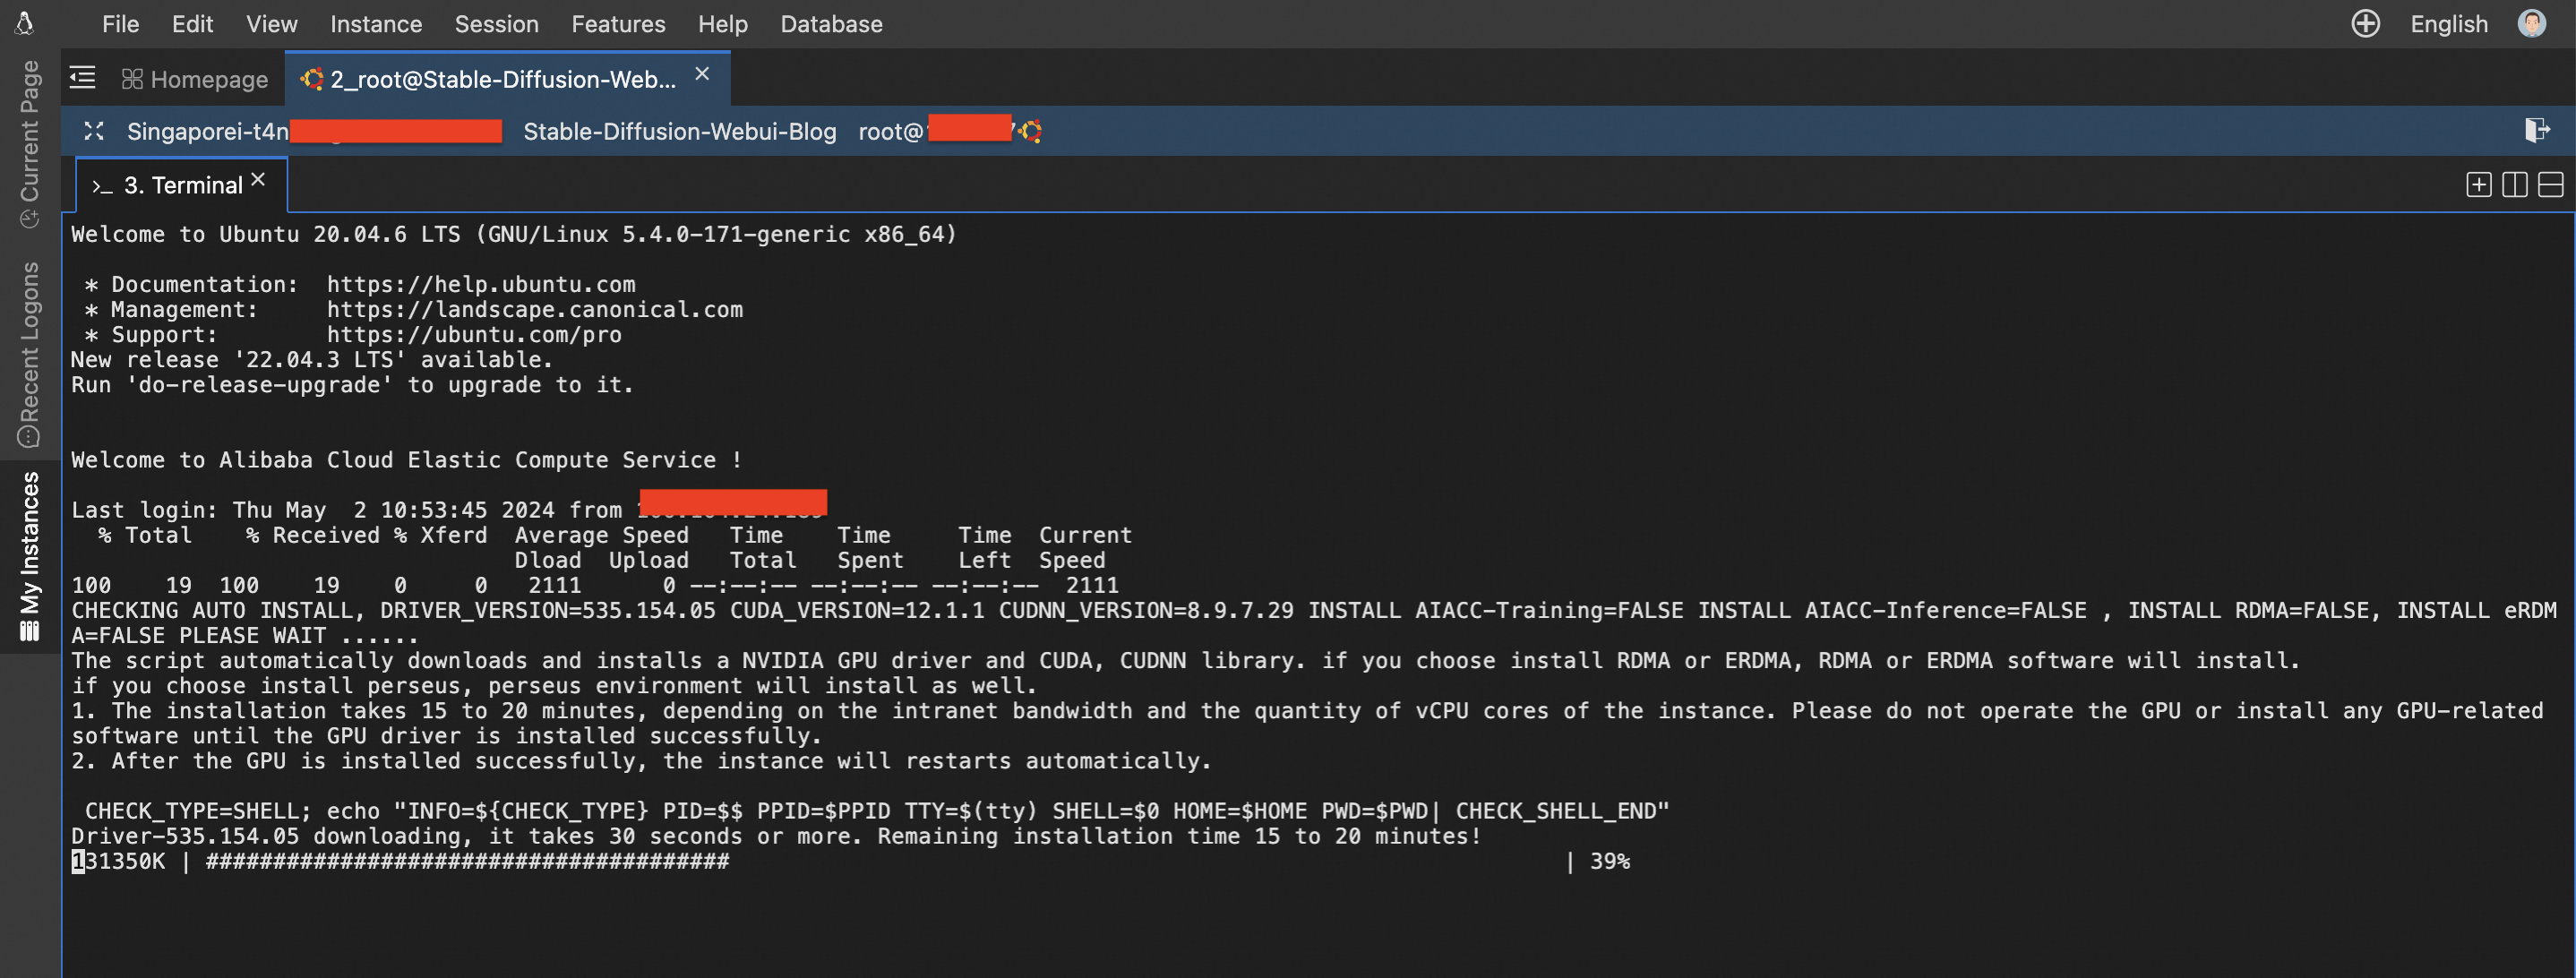
The ECS command prompt loads and and starts to install the GPU drivers as specified during the creation of ECS instance.
2.Installing necessary drivers
Once the auto installation of GPU drivers are installed, check the validity of CUDA with the specified GPU using the command below:
nvidia-smi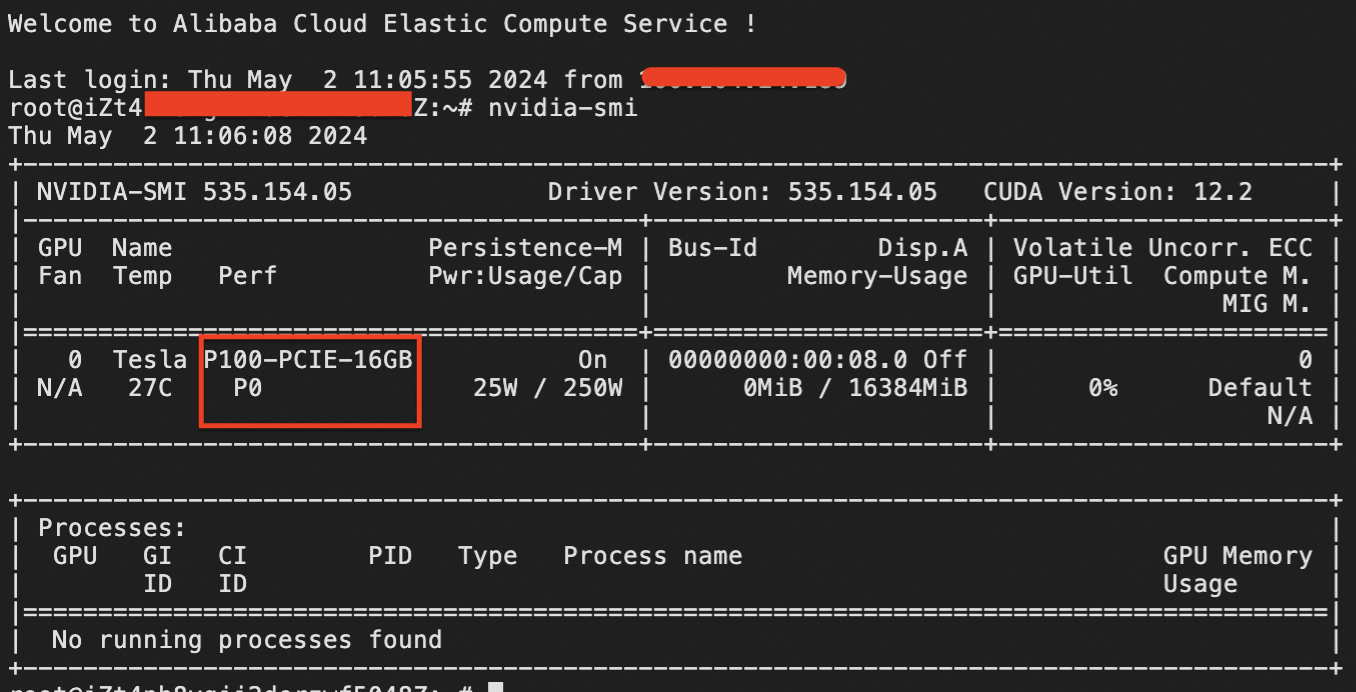
This displays the GPU which is supported by the recently installed CUDNN driver. Now update and ugrade the drivers and packages in the Ubuntu version installed.
sudo apt update -y && sudo apt upgrade -y
sudo apt-get update -y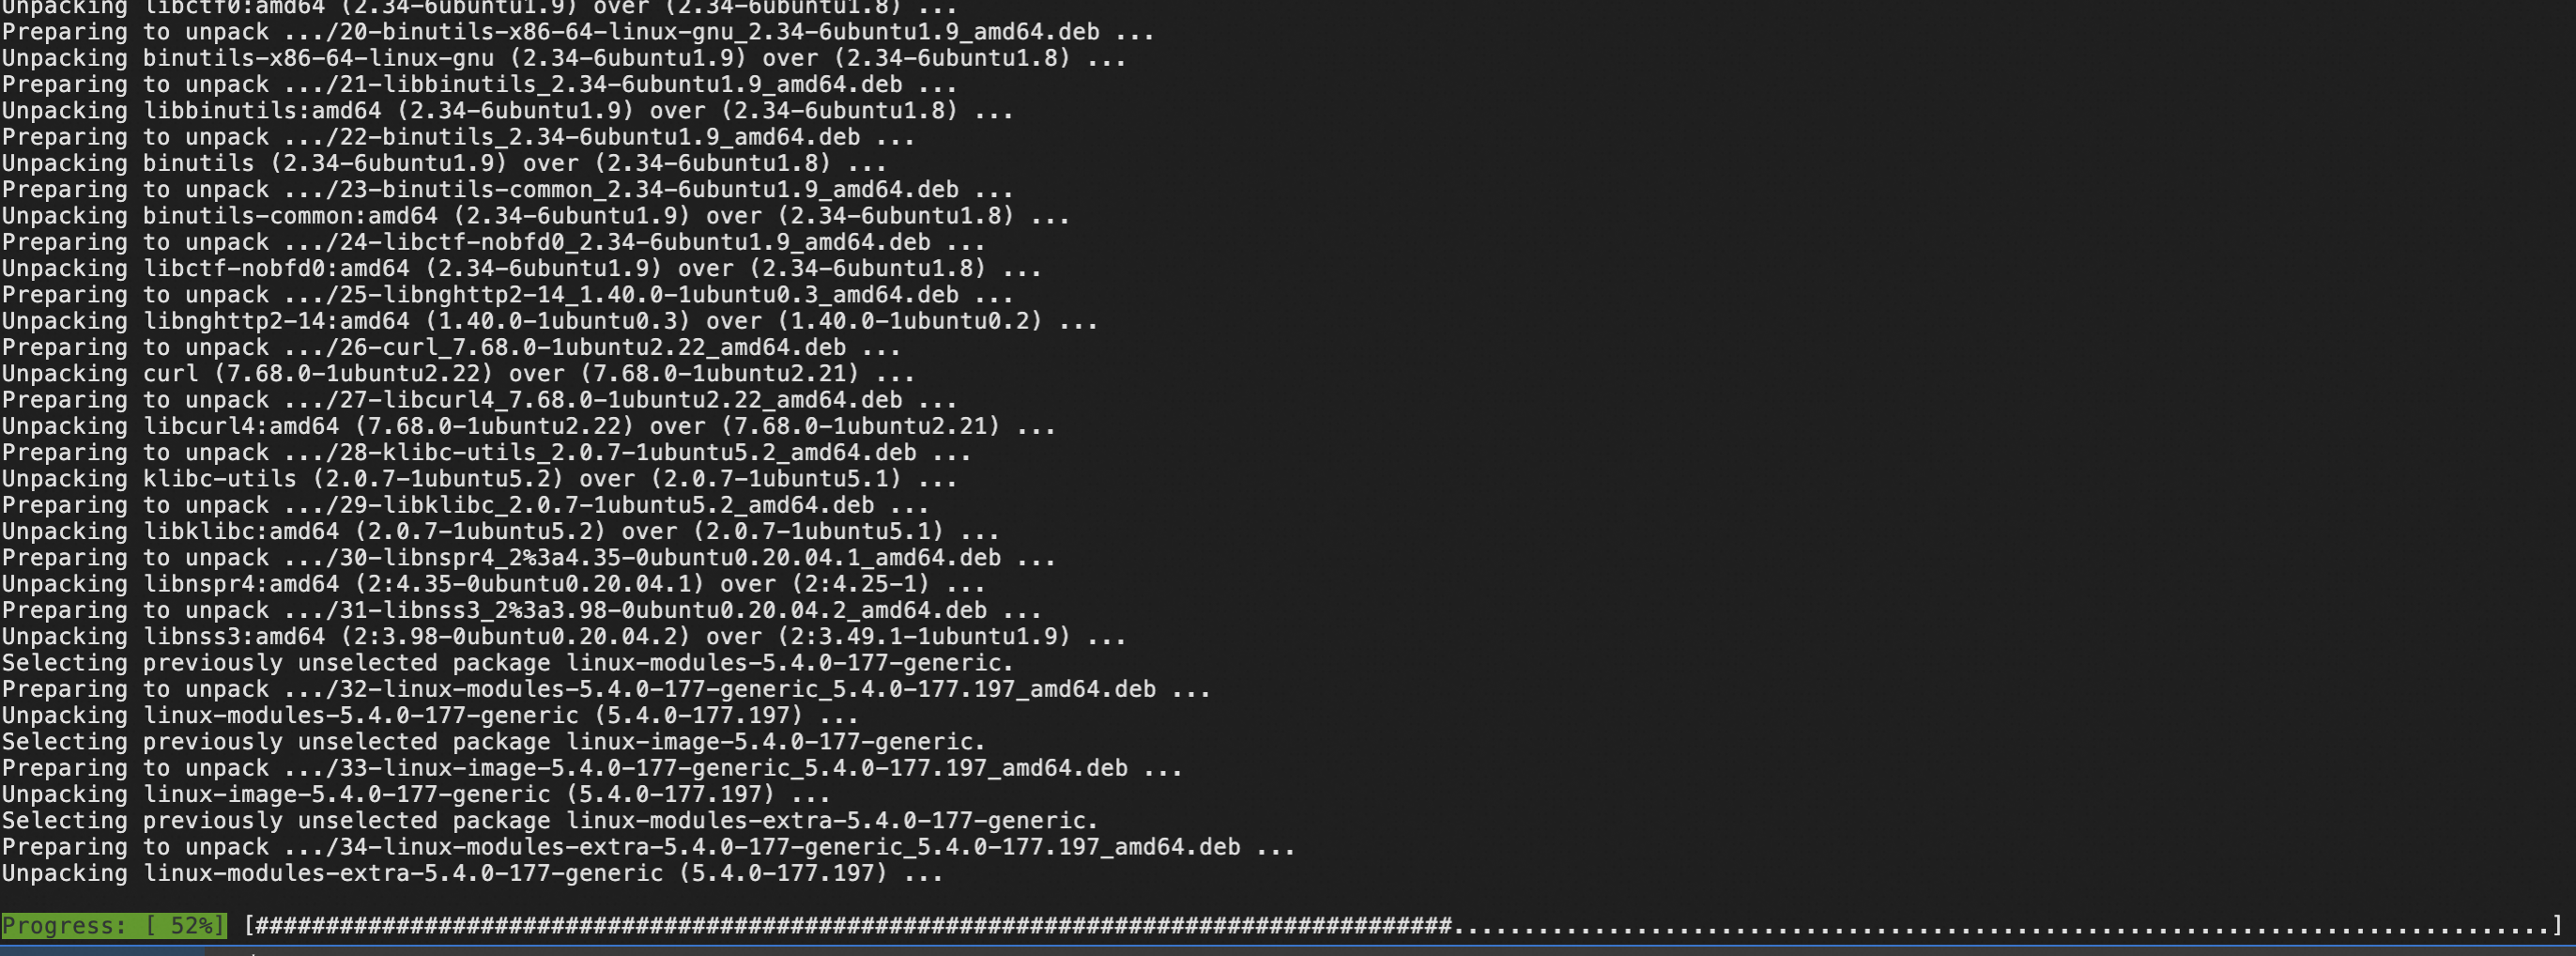
Install the package of git using the command below:
sudo apt install git -y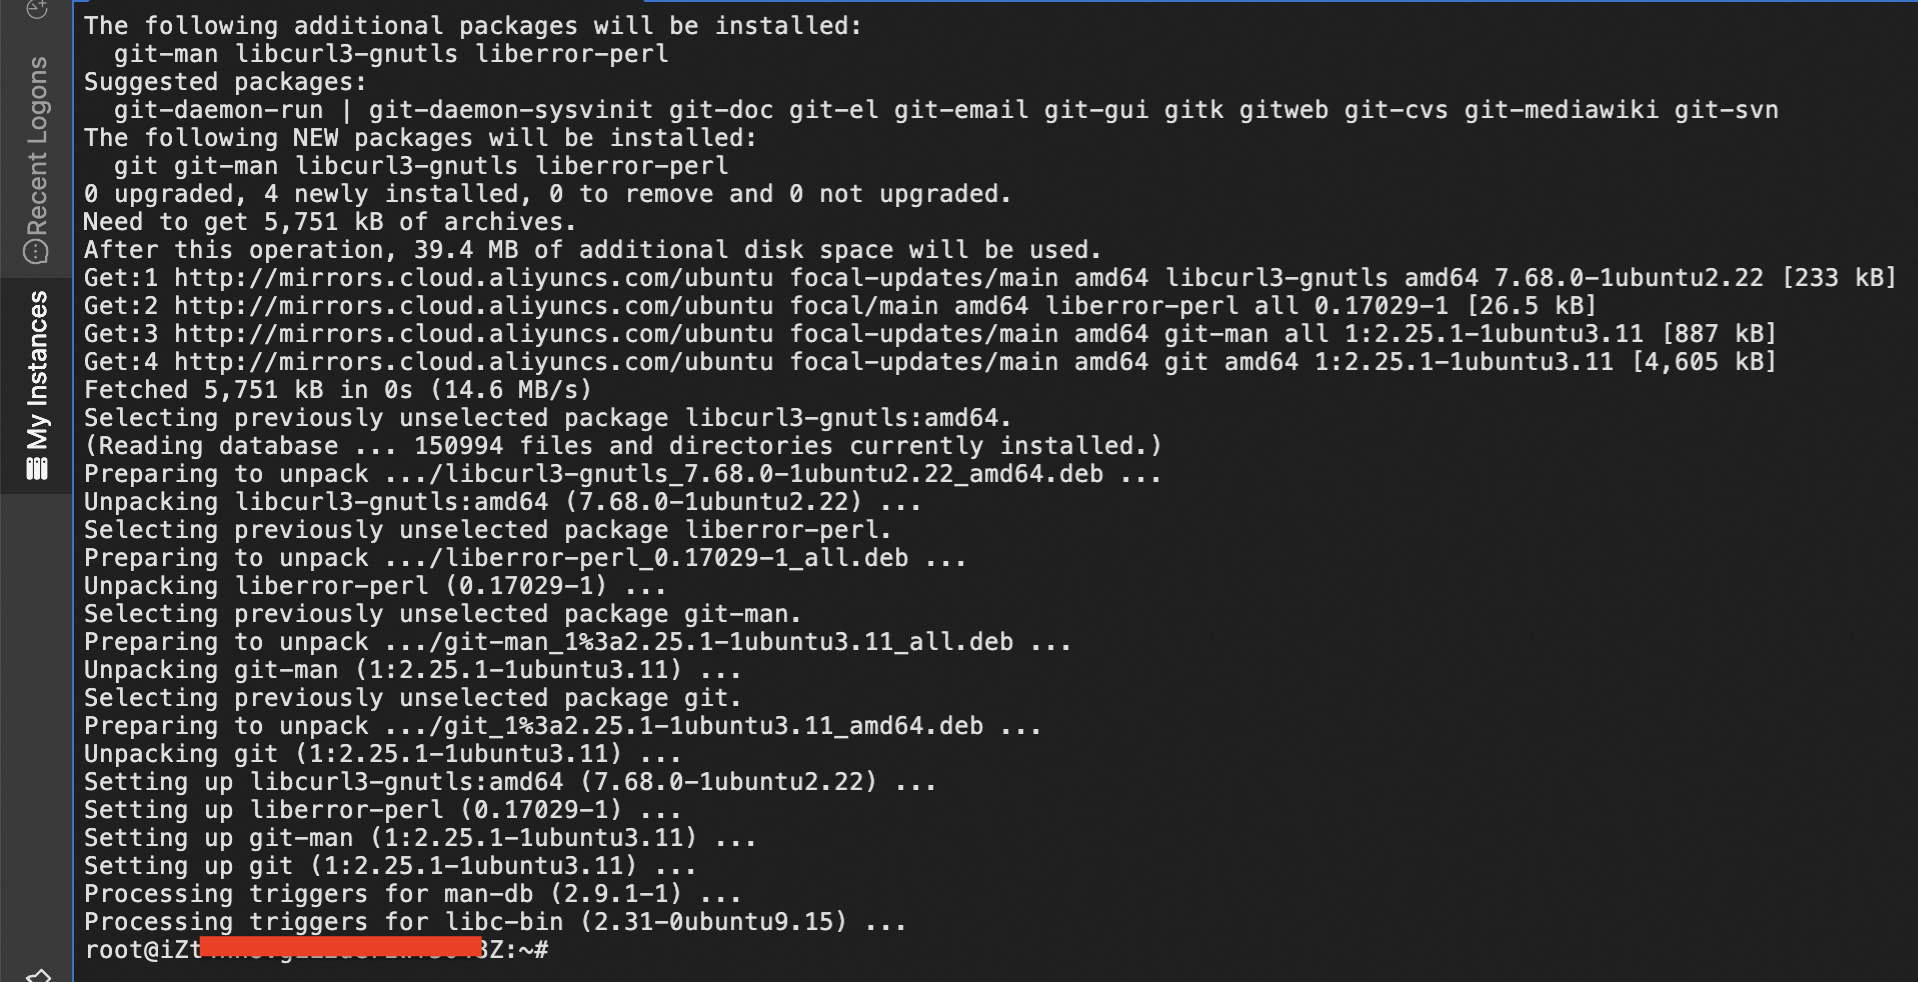
Next install the package of wget.
sudo apt-get install wget -yLastly with this root user install the package of ffmpeg.
sudo apt install ffmpeg -yThe remaining part of the installation process supports an user with non root user. So we create a new user as shown in the next step.
3.Creation of non root user
Create a new user with username "ecs-user" and set a password.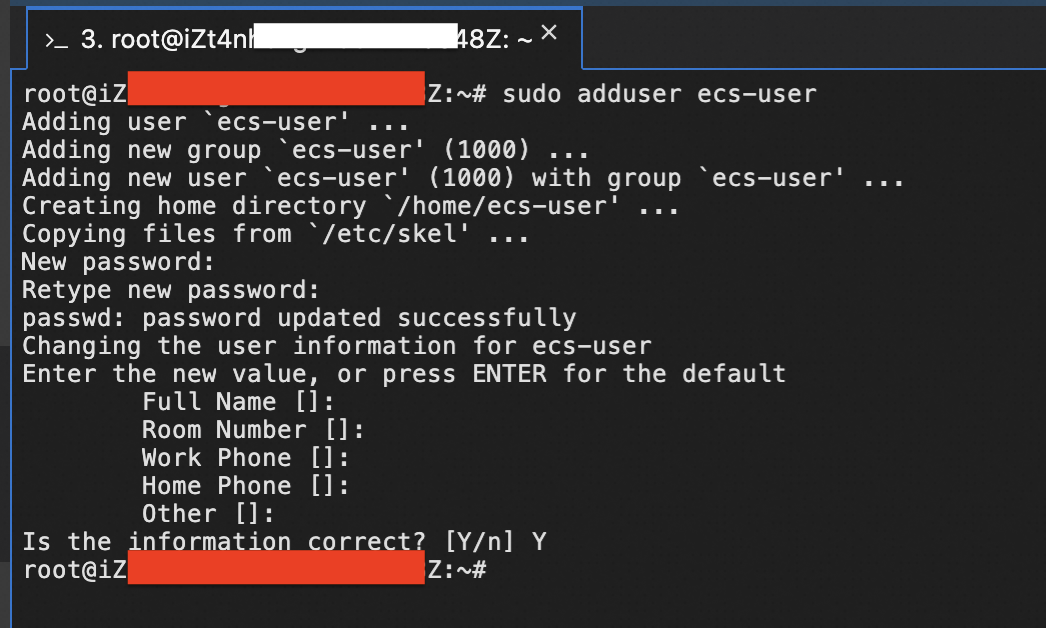
Logout off root and login again with "ecs-user".
4.Install Anaconda
Install Anaconda and check its validity with the command prompt statements.
wget https://repo.anaconda.com/archive/Anaconda3-2022.10-Linux-x86_64.sh
sh Anaconda3-2022.10-Linux-x86_64.sh

Press "Enter" to scroll down the agreement and then type "yes" to accept and press "Enter".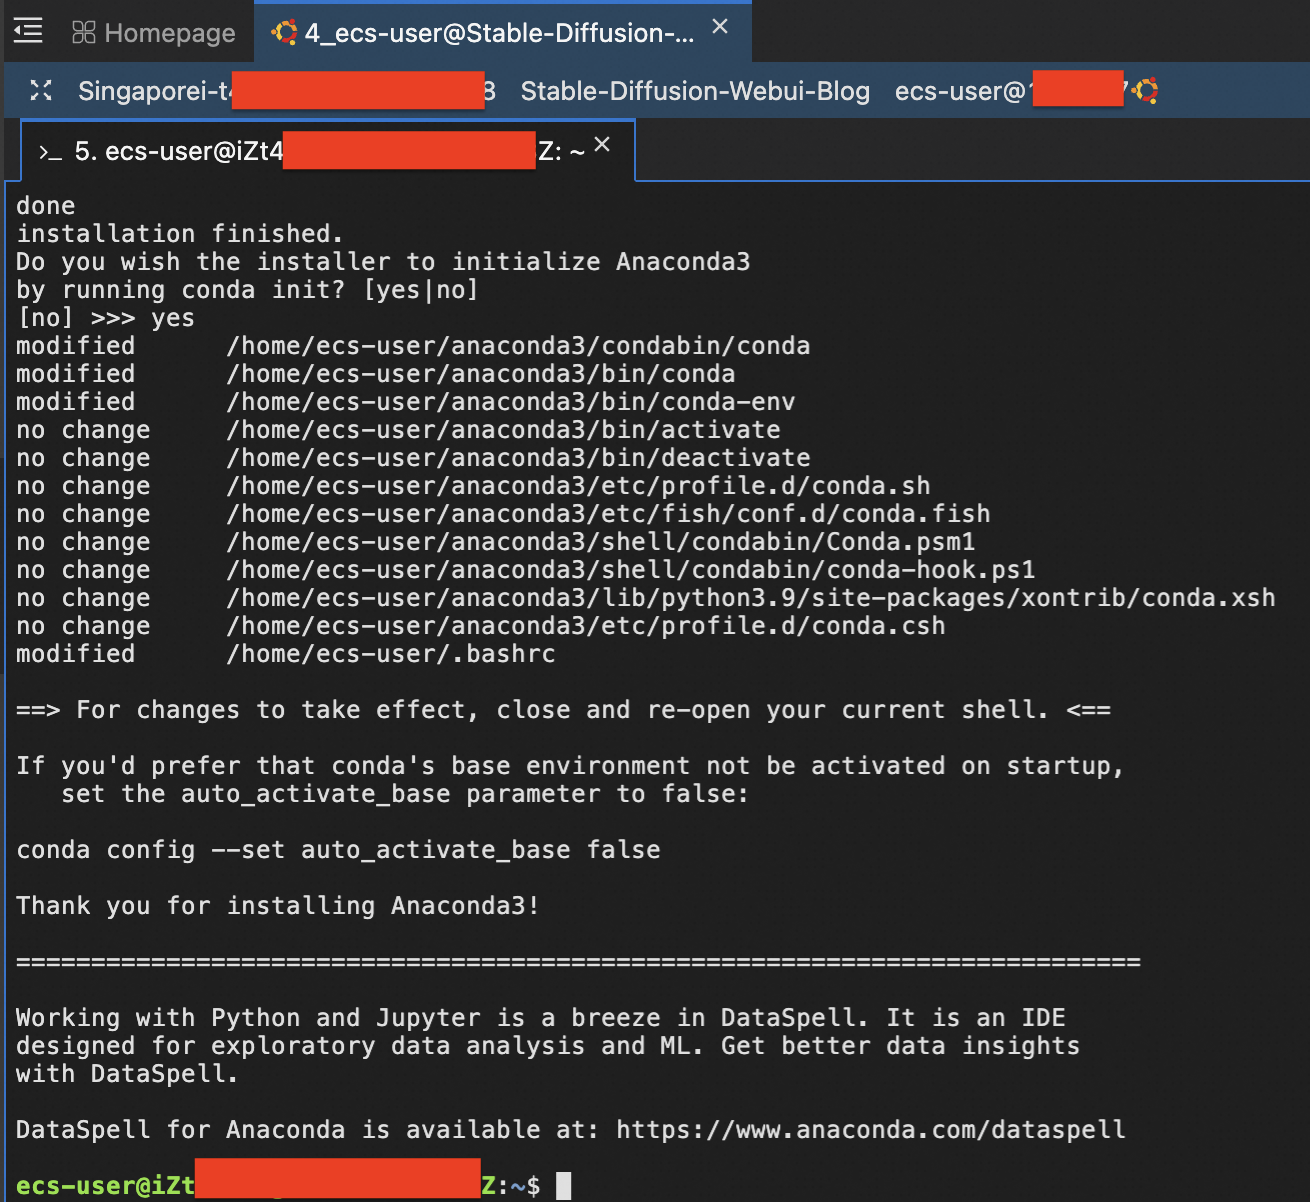
This concludes the installation of Anaconda. Now we need to set the environment path.
export PATH=~/anaconda3/bin:$PATH
conda init
source ~/.bashrc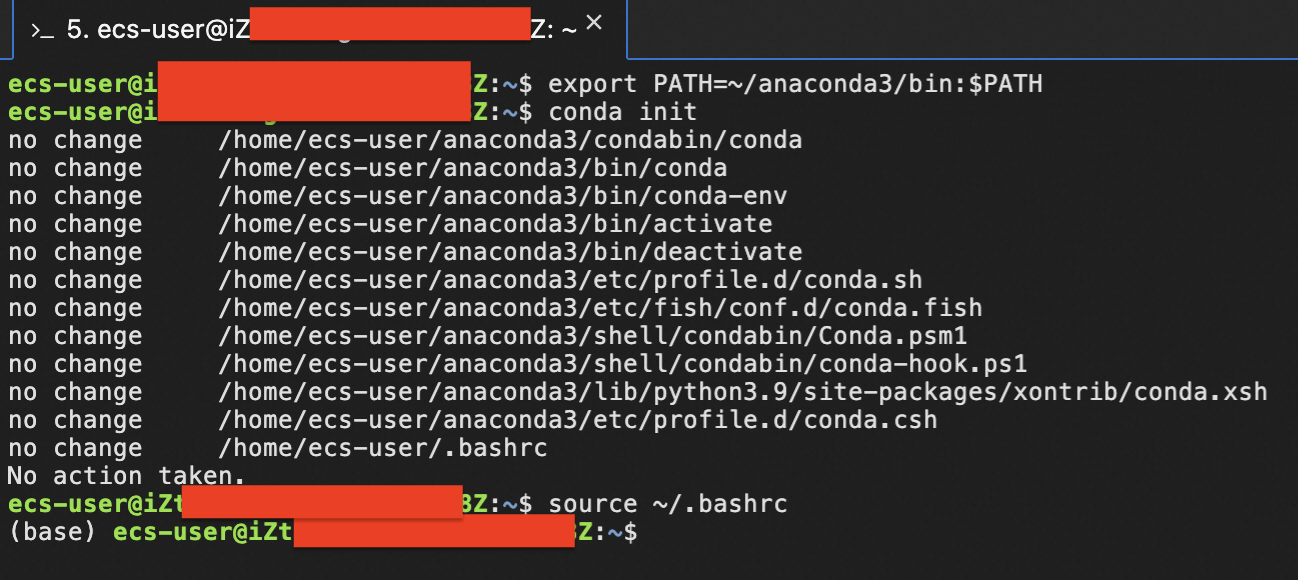
The visibility of (base) marks the initiation of virtual environment. Now we need to create a separate virtual environment for this purpose as stable diffusion uses Pytorch.
conda create --name sdiff python=3.10.6
conda activate sdiff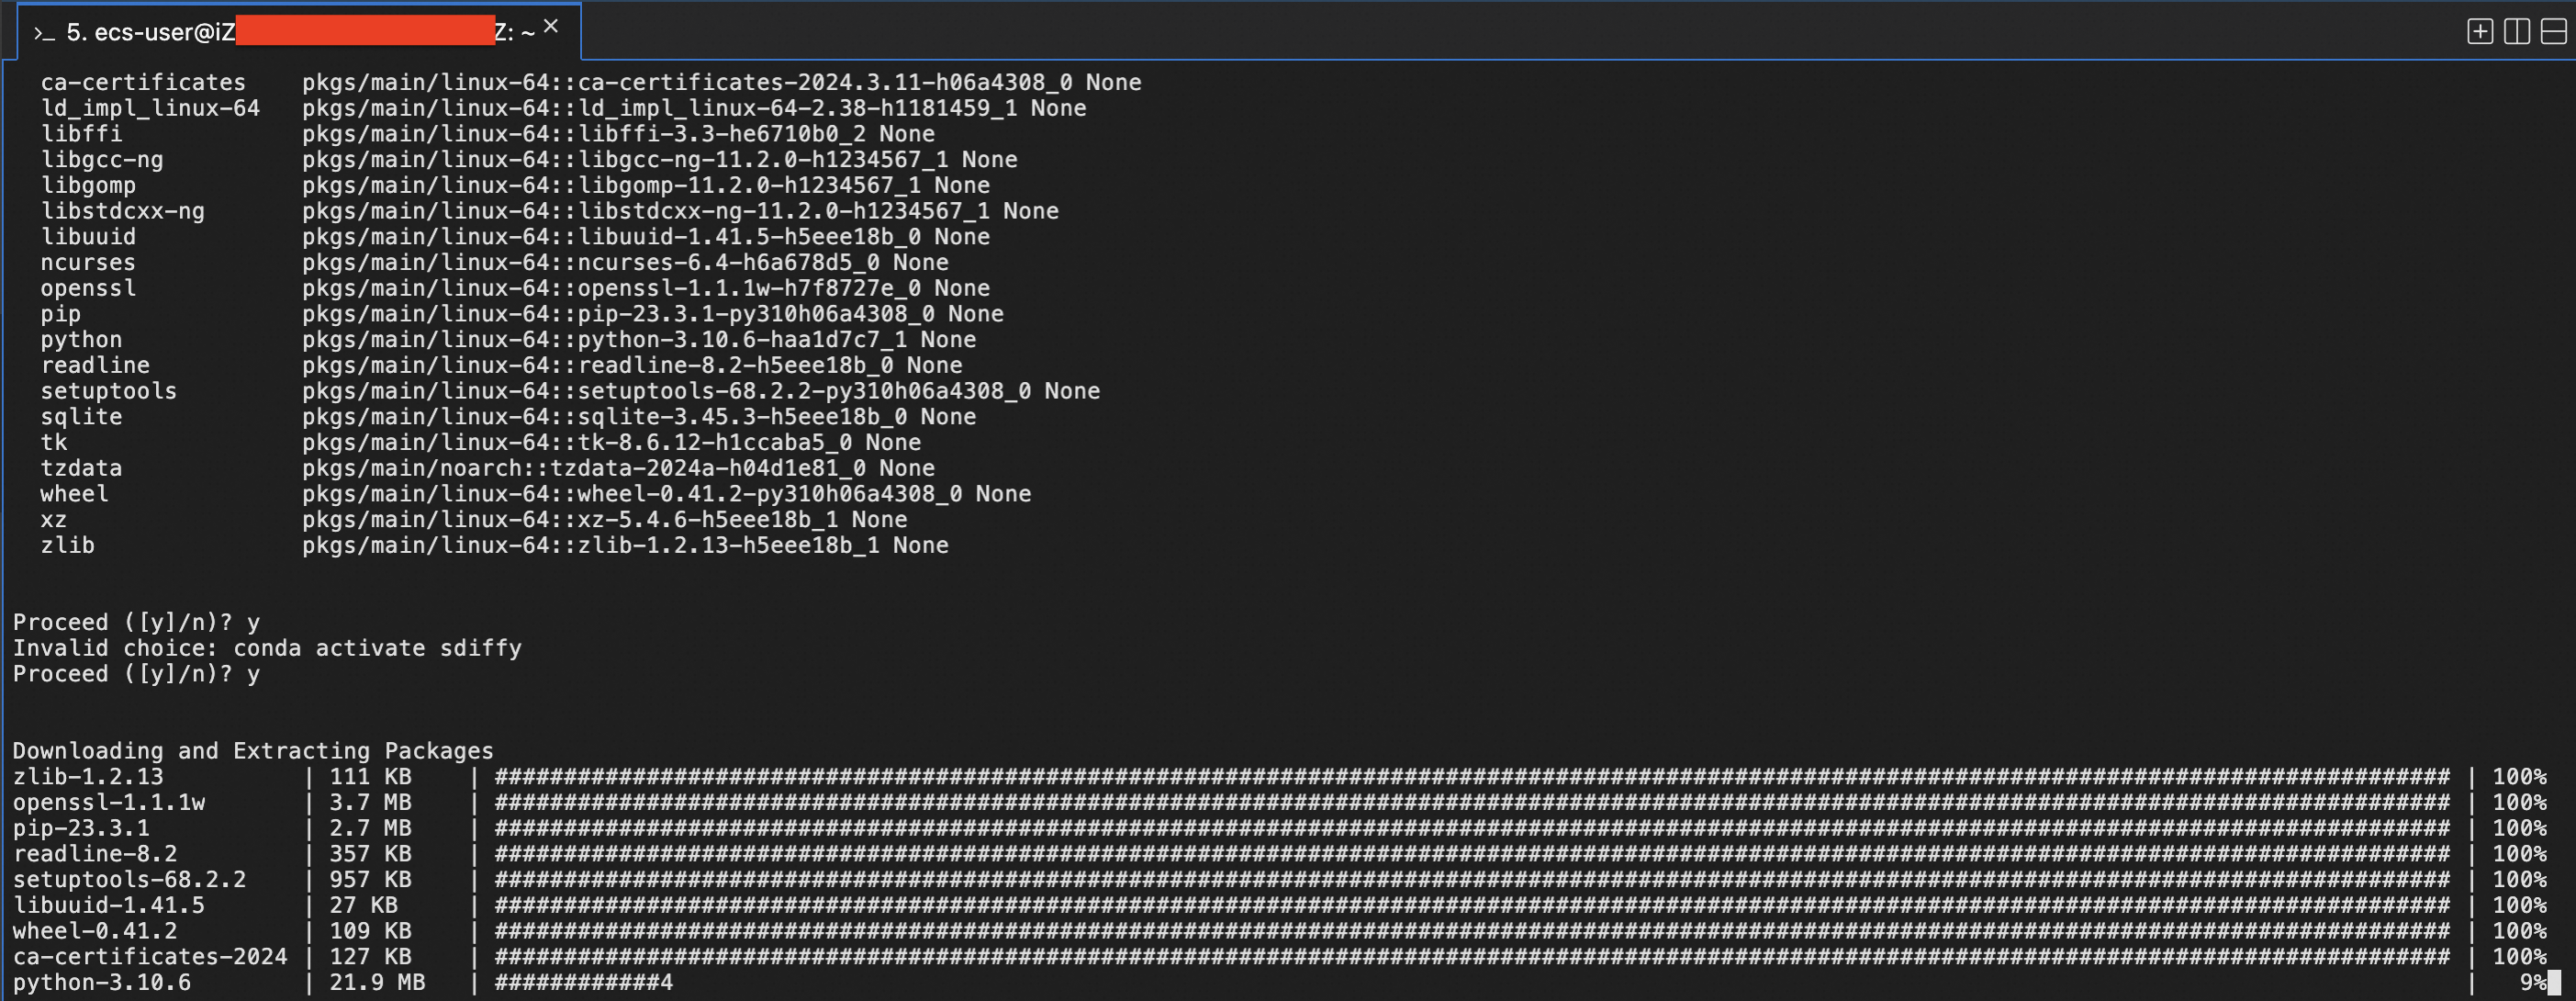
5.Install Stable Diffusion Web UI
Download the Stable Diffusion Web UI available with the repository of AUTOMATIC1111.
wget https://raw.githubusercontent.com/AUTOMATIC1111/stable-diffusion-webui/master/webui.sh
Upgrade the version of pip.
pip install --upgrade pipInstall the Web UI of Stable Diffusion.
bash ./webui.sh --xformers --share --enable-insecure-extension-access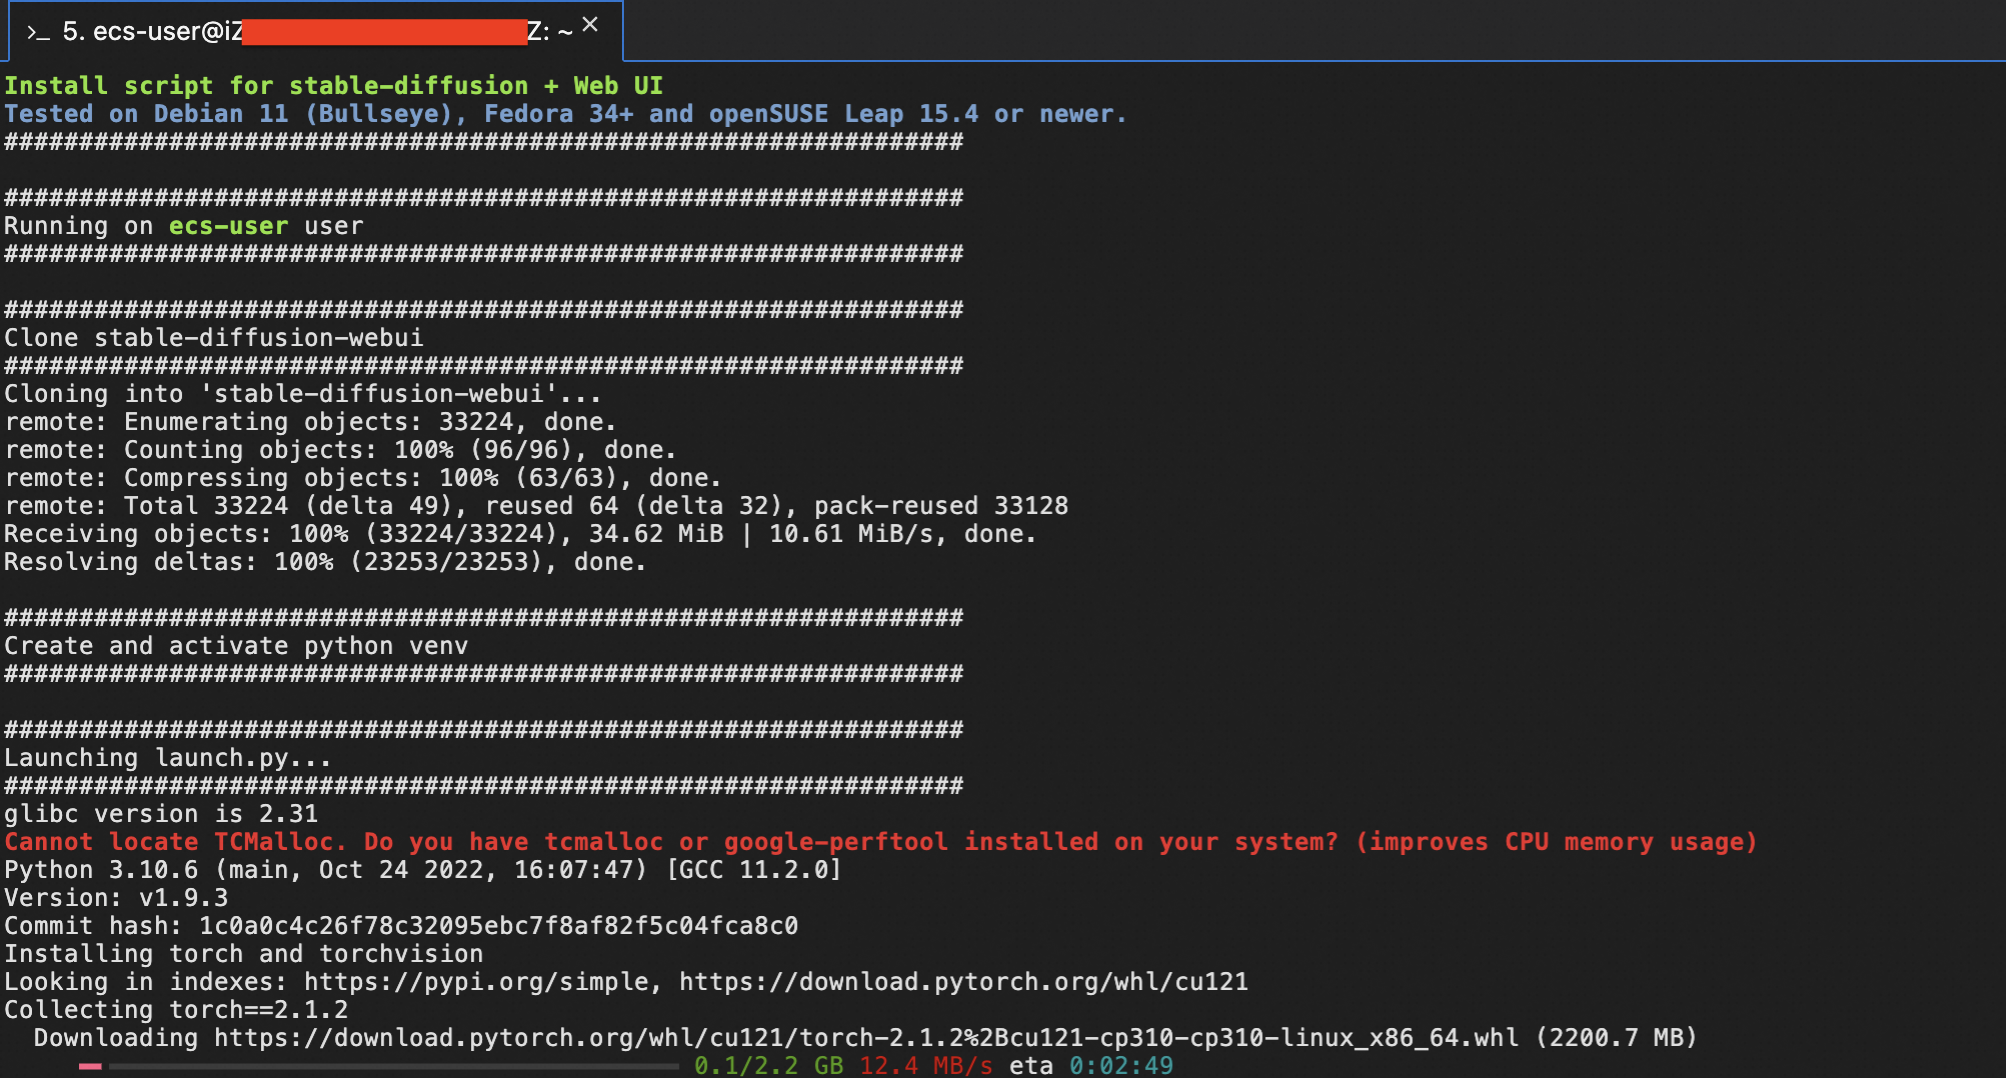
Downloading of Pytorch marks the successful setting for the web ui. Wait until the installation is complete. This will automatically download the stable diffusion model from a hugging face repository.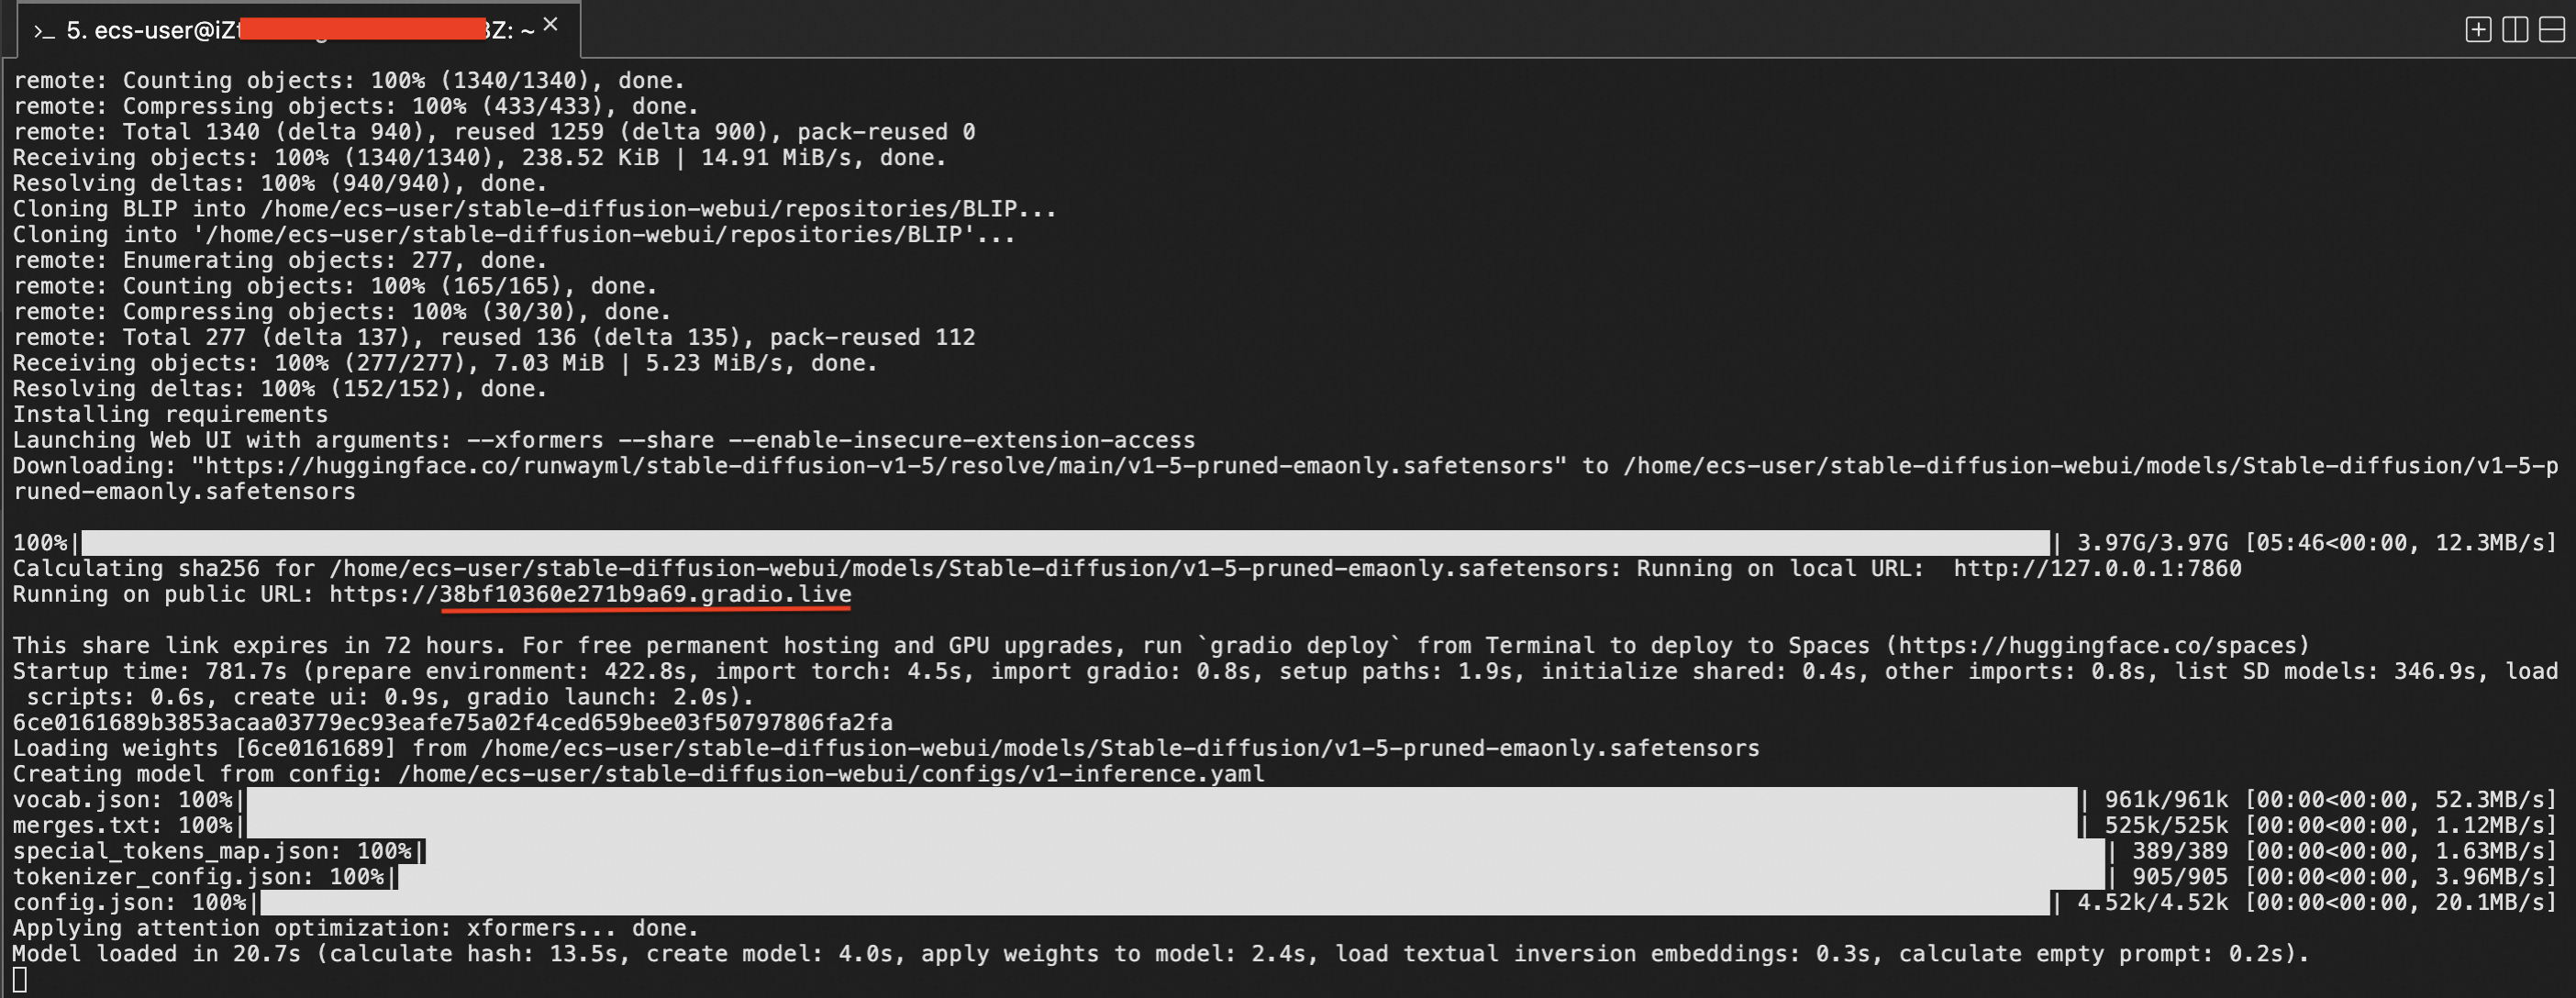
A gradio link gets generated to provide access to the web ui. Copy the gradio link and navigate using a browser.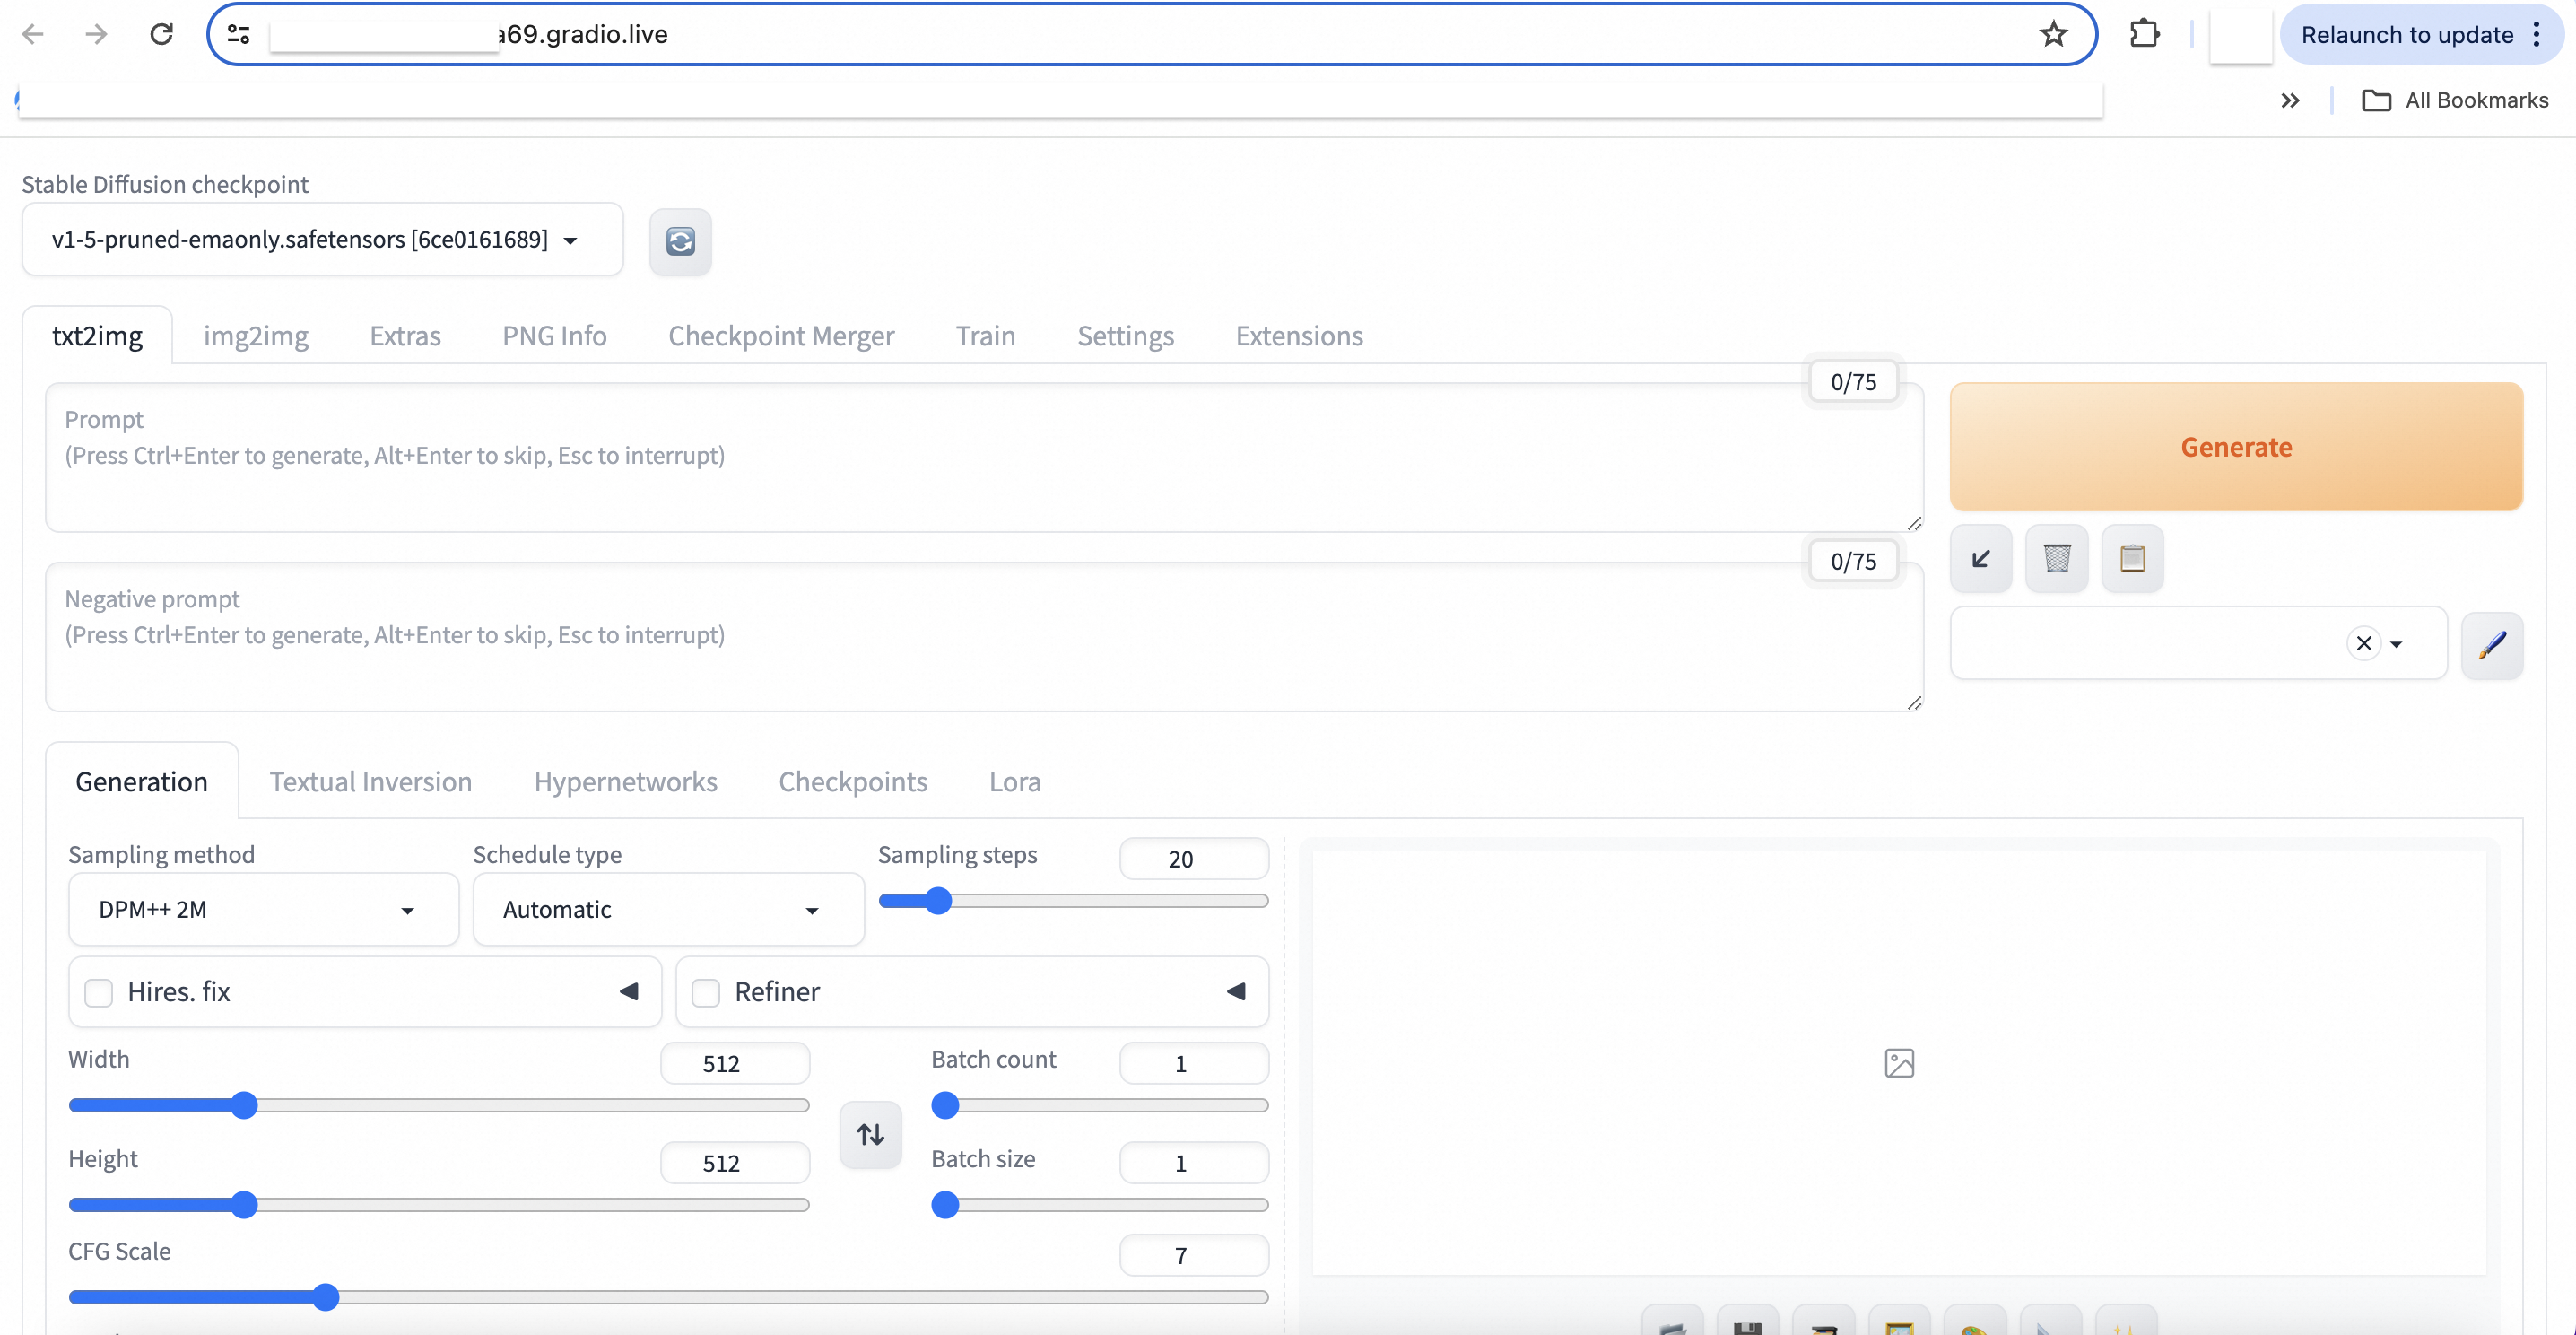
6.Post installation usage of Web UI
Enter the following command to run the Web UI.
bash ./webui.sh --xformers --shareThis will run the code in command prompt and generates a gradio url. Navigate through the gradio url to check the functionality of the web ui of stable diffusion.
Setting Alibaba Cloud ECS Instance With NGINX Supporting PHP and MySQL
Tongyi Bailian - Model Studio with Chinese Version of Alibaba Cloud
Alibaba Cloud Community - June 14, 2024
Alibaba Cloud Community - September 6, 2024
Regional Content Hub - June 24, 2024
Regional Content Hub - June 25, 2024
Regional Content Hub - June 14, 2024
Alibaba Cloud Data Intelligence - December 5, 2023
 Alibaba Cloud for Generative AI
Accelerate innovation with generative AI to create new business success
Learn More Tongyi Qianwen (Qwen)
Top-performance foundation models from Alibaba Cloud
Learn More ECS(Elastic Compute Service)
Elastic and secure virtual cloud servers to cater all your cloud hosting needs.
Learn More EasyDispatch for Field Service Management
Apply the latest Reinforcement Learning AI technology to your Field Service Management (FSM) to obtain real-time AI-informed decision support.
Learn MoreMore Posts by ferdinjoe