The ApsaraDB Stack is part of Alibaba Cloud's wider suite of database services products. Each of the database services products will free you from the administrative tasks often associated with managing your corporate data.
Creating regular backups is a vital part of managing a database server, whether it's cloud-based or running in your own on-premises data center. It may be that your application already handles this by automatically retrieving its key data from the database server and creating backup files at regular intervals. If this is not the case, you will need to create and manage your backups as part of the process of running an ApsaraDB for RDS instance.
ApsaraDB for RDS includes an automatic backup system as standard, and it's important that you configure this to ensure that your data is being backed up at suitable times.
Backing up databases is not always as straightforward as backing up document files, as one or more applications might be updating the database at the time it's being backed up. If an update involves amending more than one table in the database, and if the backup takes place before all updates are complete, the backup will not be reliable.
This tutorial will cover how to get started with the ApsaraDB Stack and how to ensure your data is backed up, including both automatic and manual backups and covering how to access your data from the backup, if case problems do occur.
For the purposes of this tutorial, we will look at the ApsaraDB for RDS product and demonstrate how you can back up a live database through the Alibaba Cloud Management Console.
The Alibaba Cloud Management Console provides a simple web-based user interface that allows you to access and configure your ApsaraDB for RDS resources.
Using this Console, you can create and modify ApsaraDB for RDS instances, change the capacity of the used resources and backup your databases.
First, you will need to create an instance to use the ApsaraDB for RDS service. If you already have an instance, you can skip this section.
If you need to create an instance, follow these steps:

You will be taken through the setup process to create an instance according to your business needs. For example, you can choose a suitable engine, memory CPU, storage space, and so on.
In the previous steps, we set up an instance on ApsaraDB for RDS.
Now, we will discuss and demonstrate how to back up a live MySQL database, which is running on Alibaba Cloud's ApsaraDB RDS for MySQL service.
There are two ways to back up your data on ApsaraDB for RDS. First, you can configure a backup policy that will automatically back up your database at predefined intervals and log each backup. Second, you can also manually back up your RDS data.
We will look at each backup option in more detail shortly.
Note: When you back up an instance, these files take up space and charges will be incurred if the used space exceeds the free quota on your account. We recommend that you create a backup cycle that appropriately balances your service requirements with the available backup space. For more information on these charges, please see these details on RDS pricing: https://www.alibabacloud.com/product/apsaradb-for-rds#pricing
1. Log in to the RDS console and click Manage on your target instance.

2. Click on Backup and Recovery in the left-hand navigation pane.
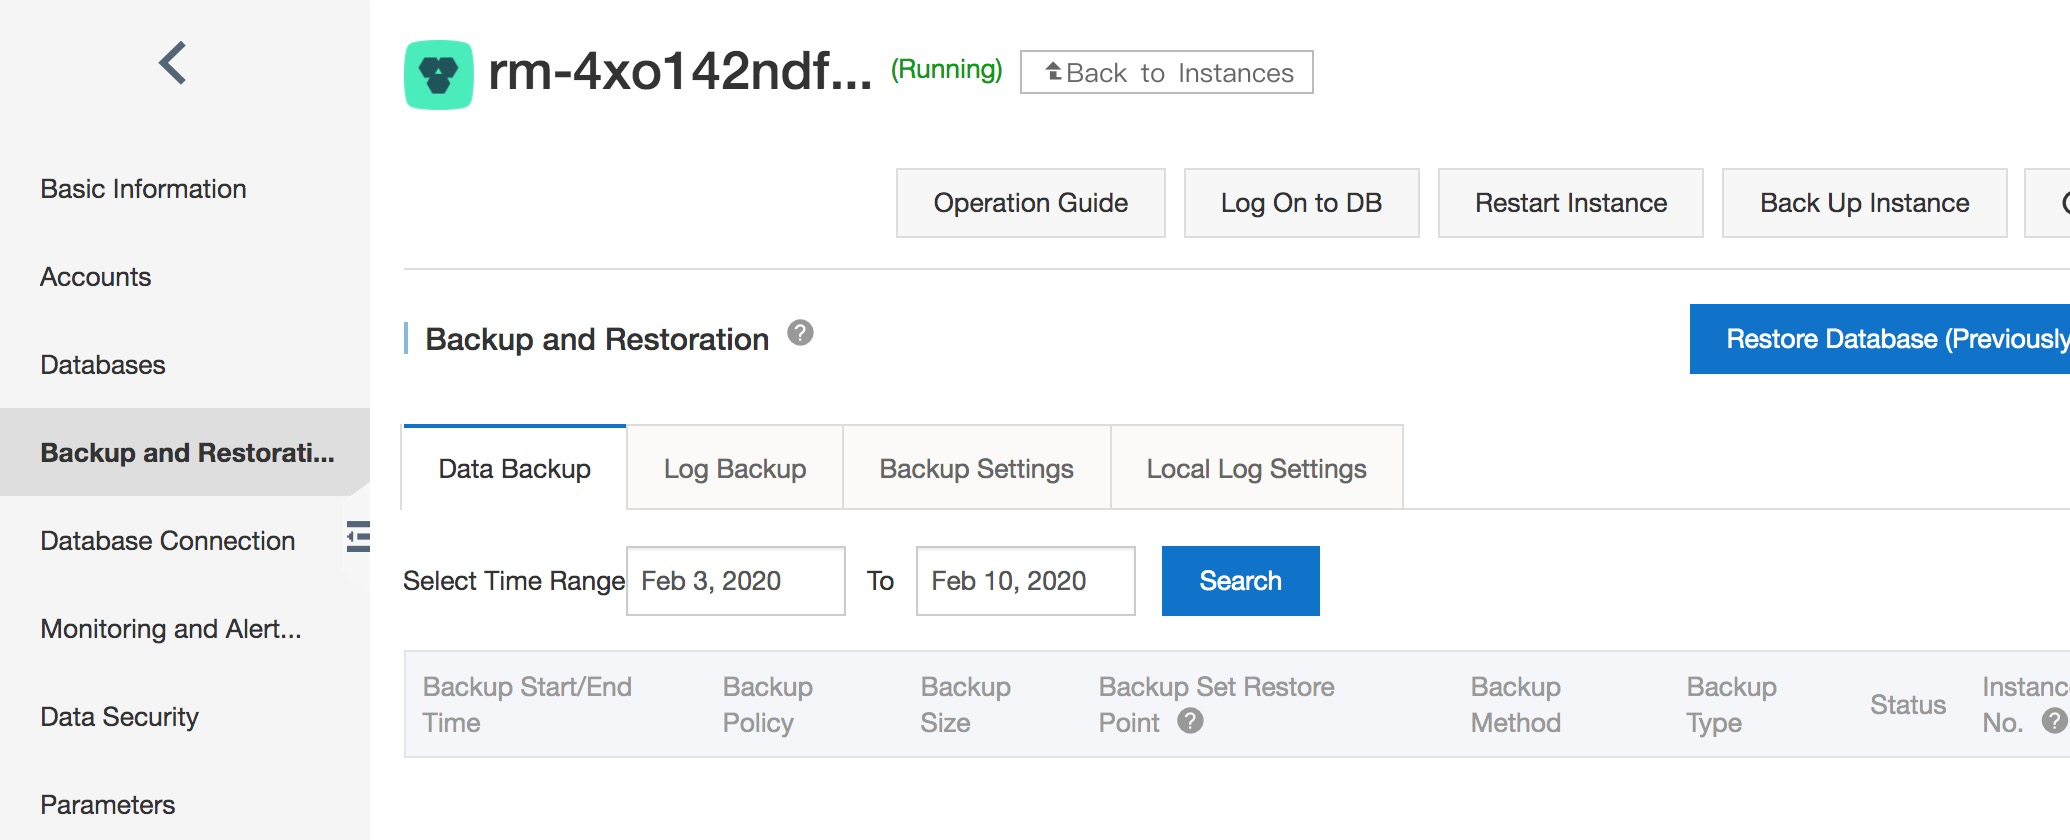
3. On the Backup and recovery page, select the Backup Settings tab and click Edit.
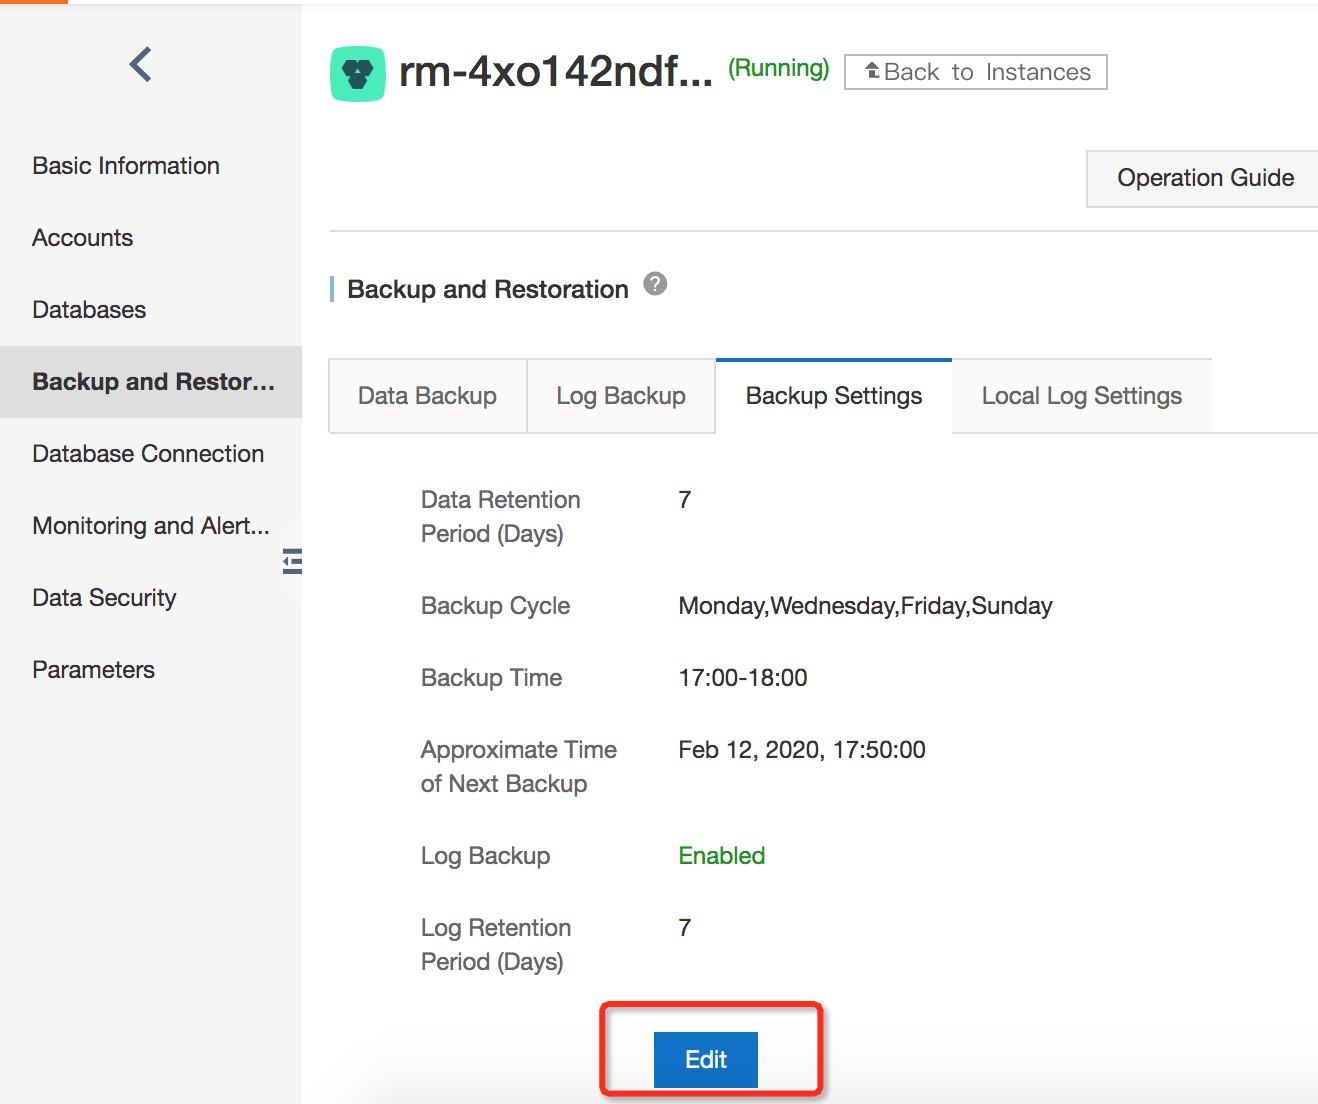
4. On the Backup Cycle page, set your backup specification and click OK. Each parameter is explained as follows:
• Retention Days: Specifies the number of days for which the backup files are retained. The default value is seven days. The value range is 7-730 days.
• Backup cycle: You can set this to one day or multiple days in a week. SQL Server, PostgreSQL, and PPAS instances are backed up daily by default and this cannot be modified.
• Backup time: This value can be set to any time and the units are in hours.
• Log Backup: Specifies whether to enable log backup. This is enabled by default for SQL Server instances and cannot be modified.
• Log Retention Days: Specifies the number of days when the log backup files are retained. The default value is seven days. The value range is 7-730 days and it must be less than or equal to the value of the retention days.
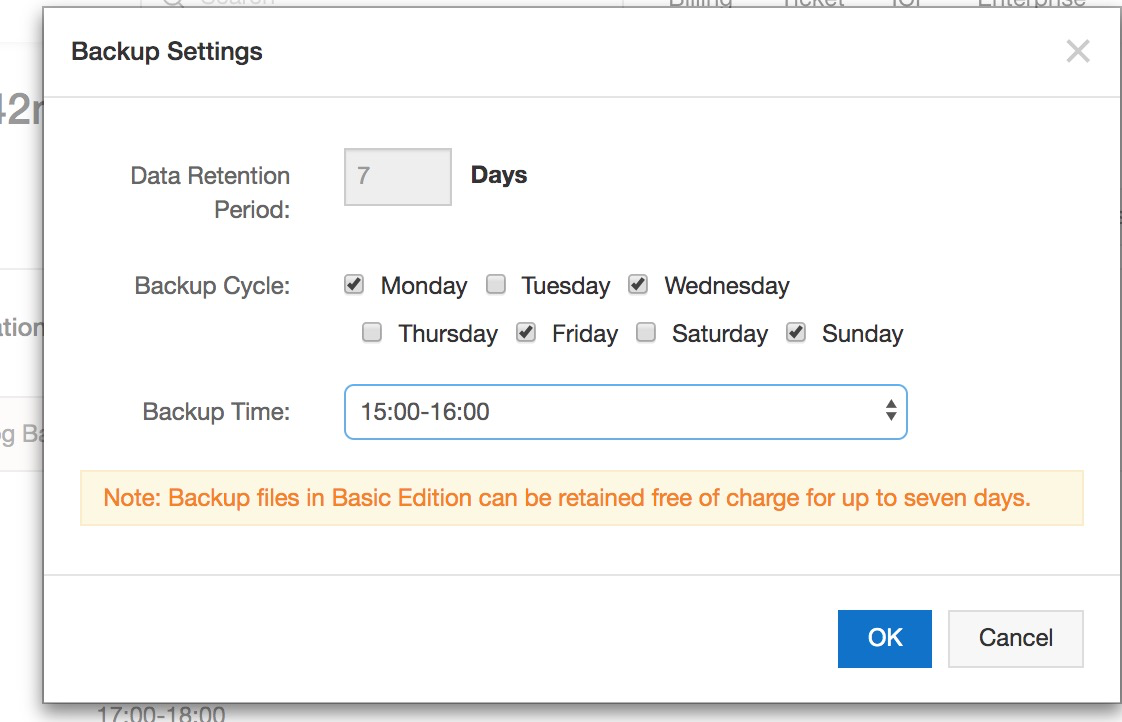
1. Log into the RDS console and click Manage on your target instance.

2. Click Backup Instance in the top right corner.
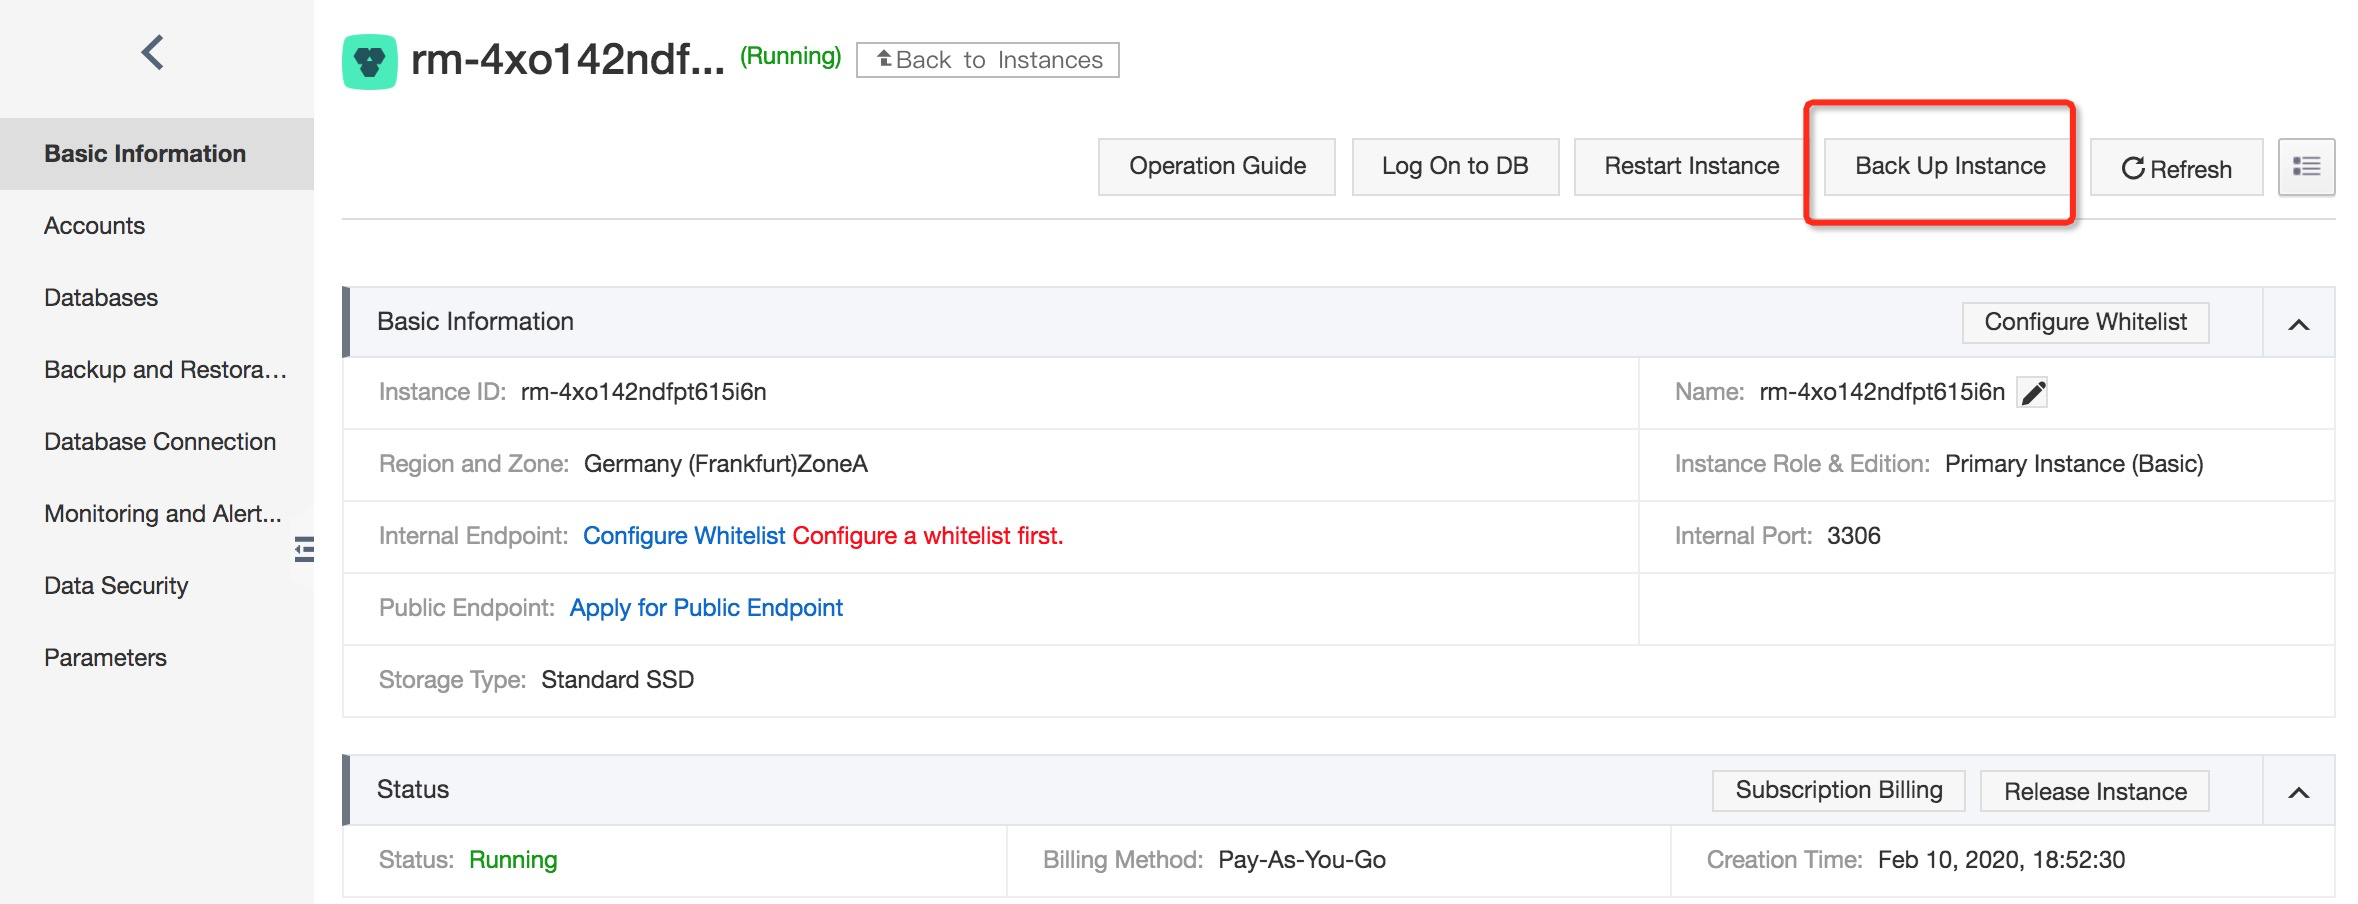
3. On the Backup Instance page, select your desired backup mode and policy, and click OK.

• Backup mode: For MySQL, you can choose between two Backup Modes, either a Physical backup or a Logical backup. For SQL Server, PostgreSQL and PPAS instances, the values are Automatic backup and Full backup. When Automatic backup is selected for an SQL Server instance, incremental backup is performed if either the current or the last two backups are full. If not, a full backup is performed.
• Backup policy: If you select Logical backup (or Full backup for SQL Server, PostgreSQL, and PPAS instances), you can select Instance backup or Single-Database backup. Single-Database backup is not supported for PostgreSQL and PPAS instances. If you select Single-Database backup, select the database you want to back up on the left and click > to add the selected database to the list on the right.
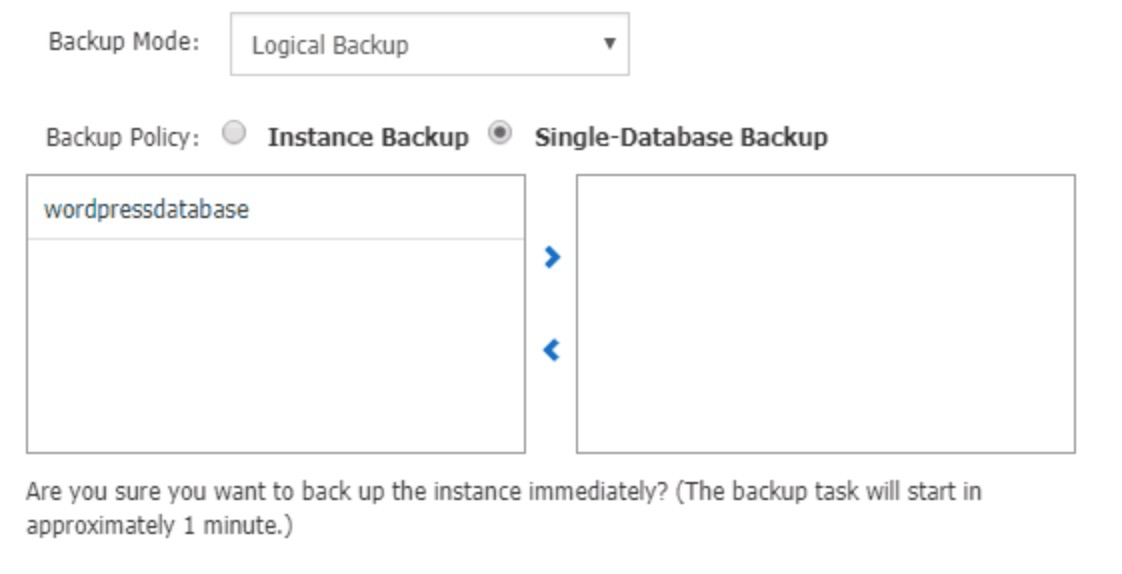
In the previous step, we demonstrated how to back up a live MySQL database.
Now, we will look at how to access your data from your backup.
1. Log into the RDS console and click Manage on your target instance.

2. Click on Backup and Recovery in the left-hand navigation pane.

3. Find the target backup and click Restore in the Action column.
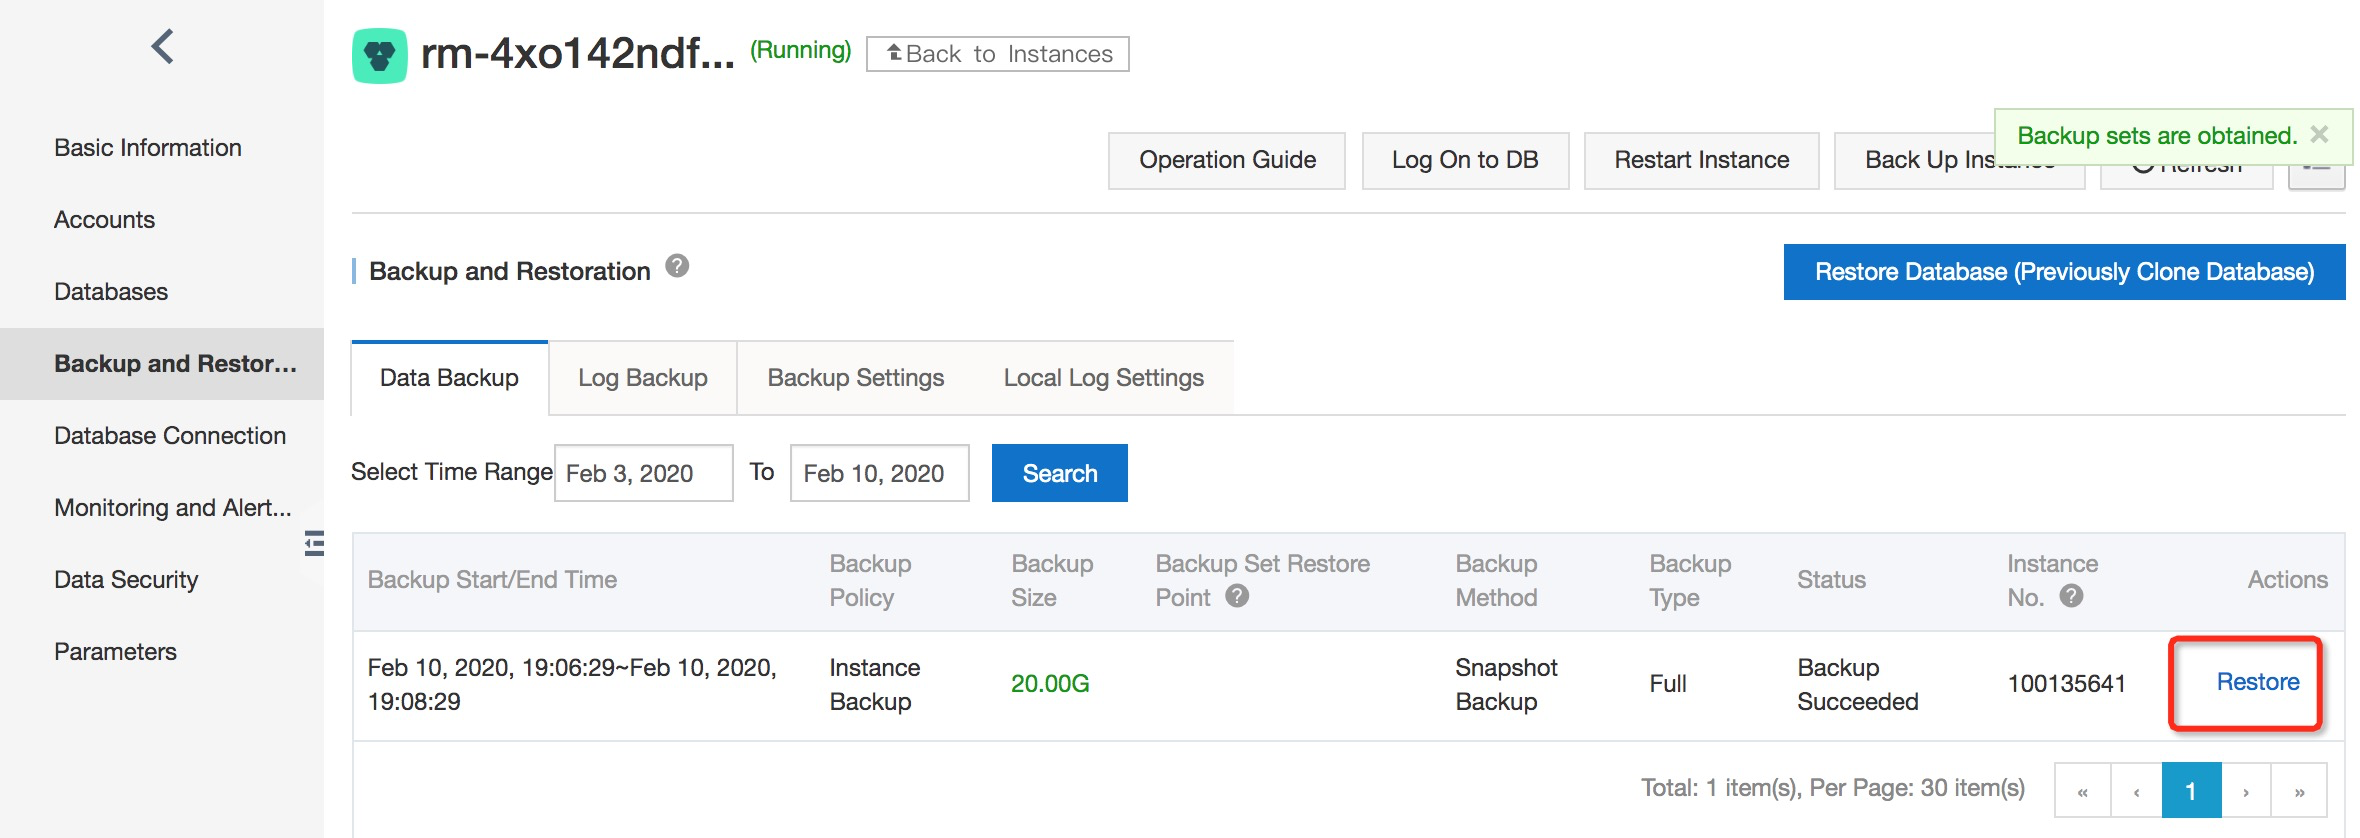
4. In the displayed dialog box, click OK.

5. Set the instance configuration.
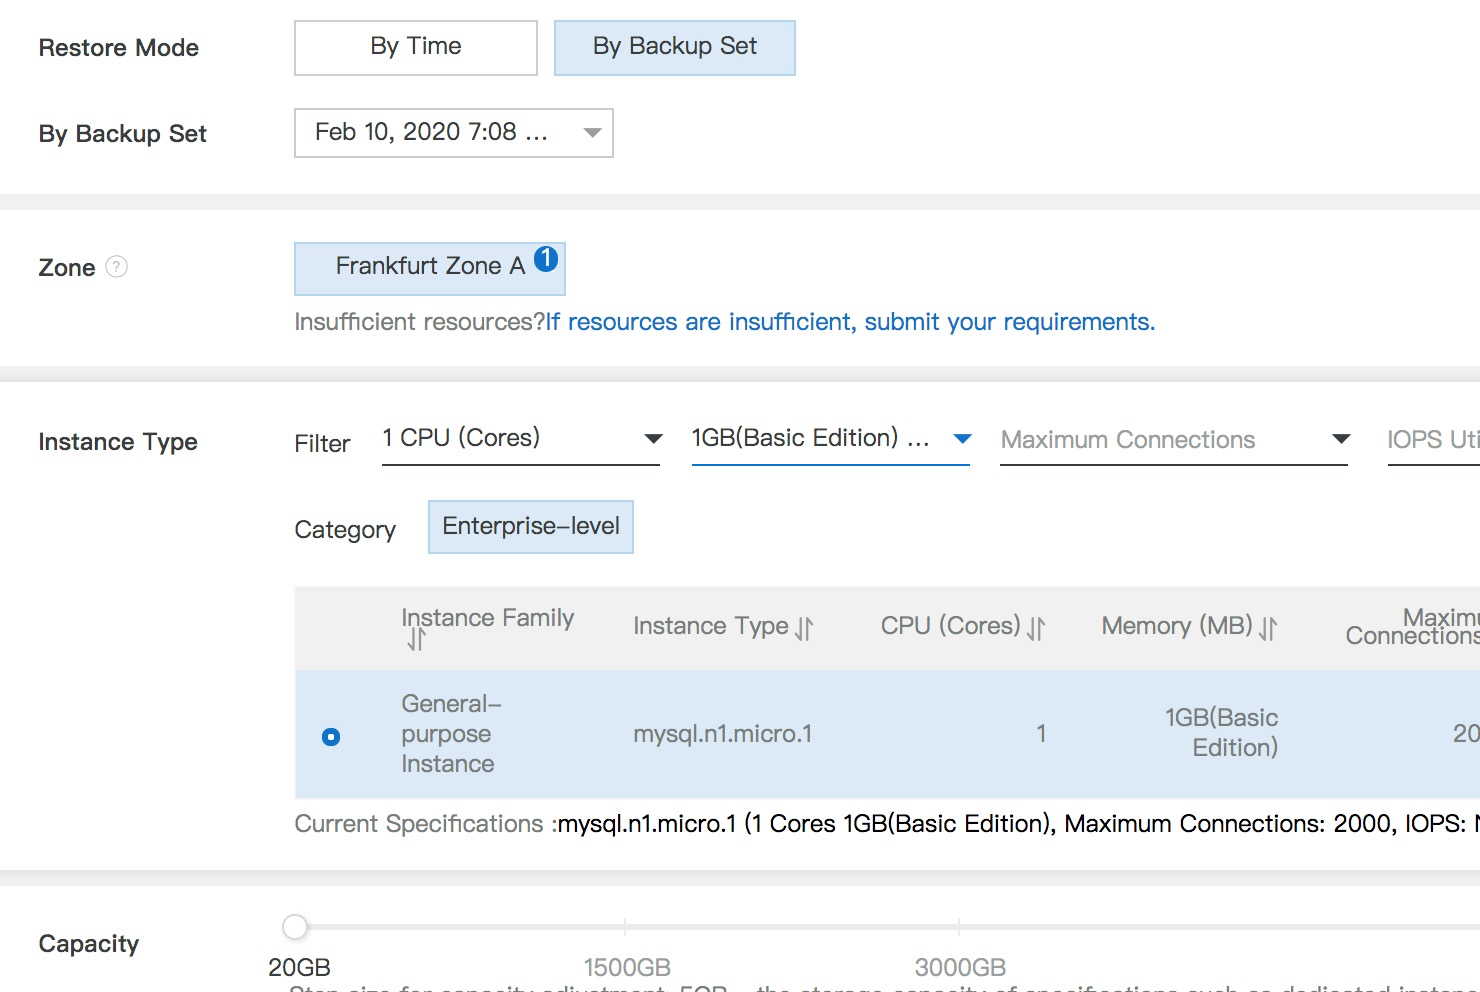
A range of parameters are available, these include:
• Restore Type: You can choose to restore data at a specific time or for a specific backup set.
• Recovery At: If you choose By Time, you can also select the time point of the data you want to restore.
• Backup ID: Select the backup set to restore. This parameter is required if Recovery Type is By Backup ID.
• Edition: Choose from either Basic or High-availability.
• Zone: Choose your location zone.
• Type: Choose your instance type.
• Network Type: This option determines the networking mode of your ECS instance.
• Duration: If you have selected to pay using our subscription service, select the subscription duration here.
• Quantity: you can create up to give clone instances at once, if required.
6. Click Buy Now.
7. Review the order information and agree to the product terms of service.
8. Click Pay Now.
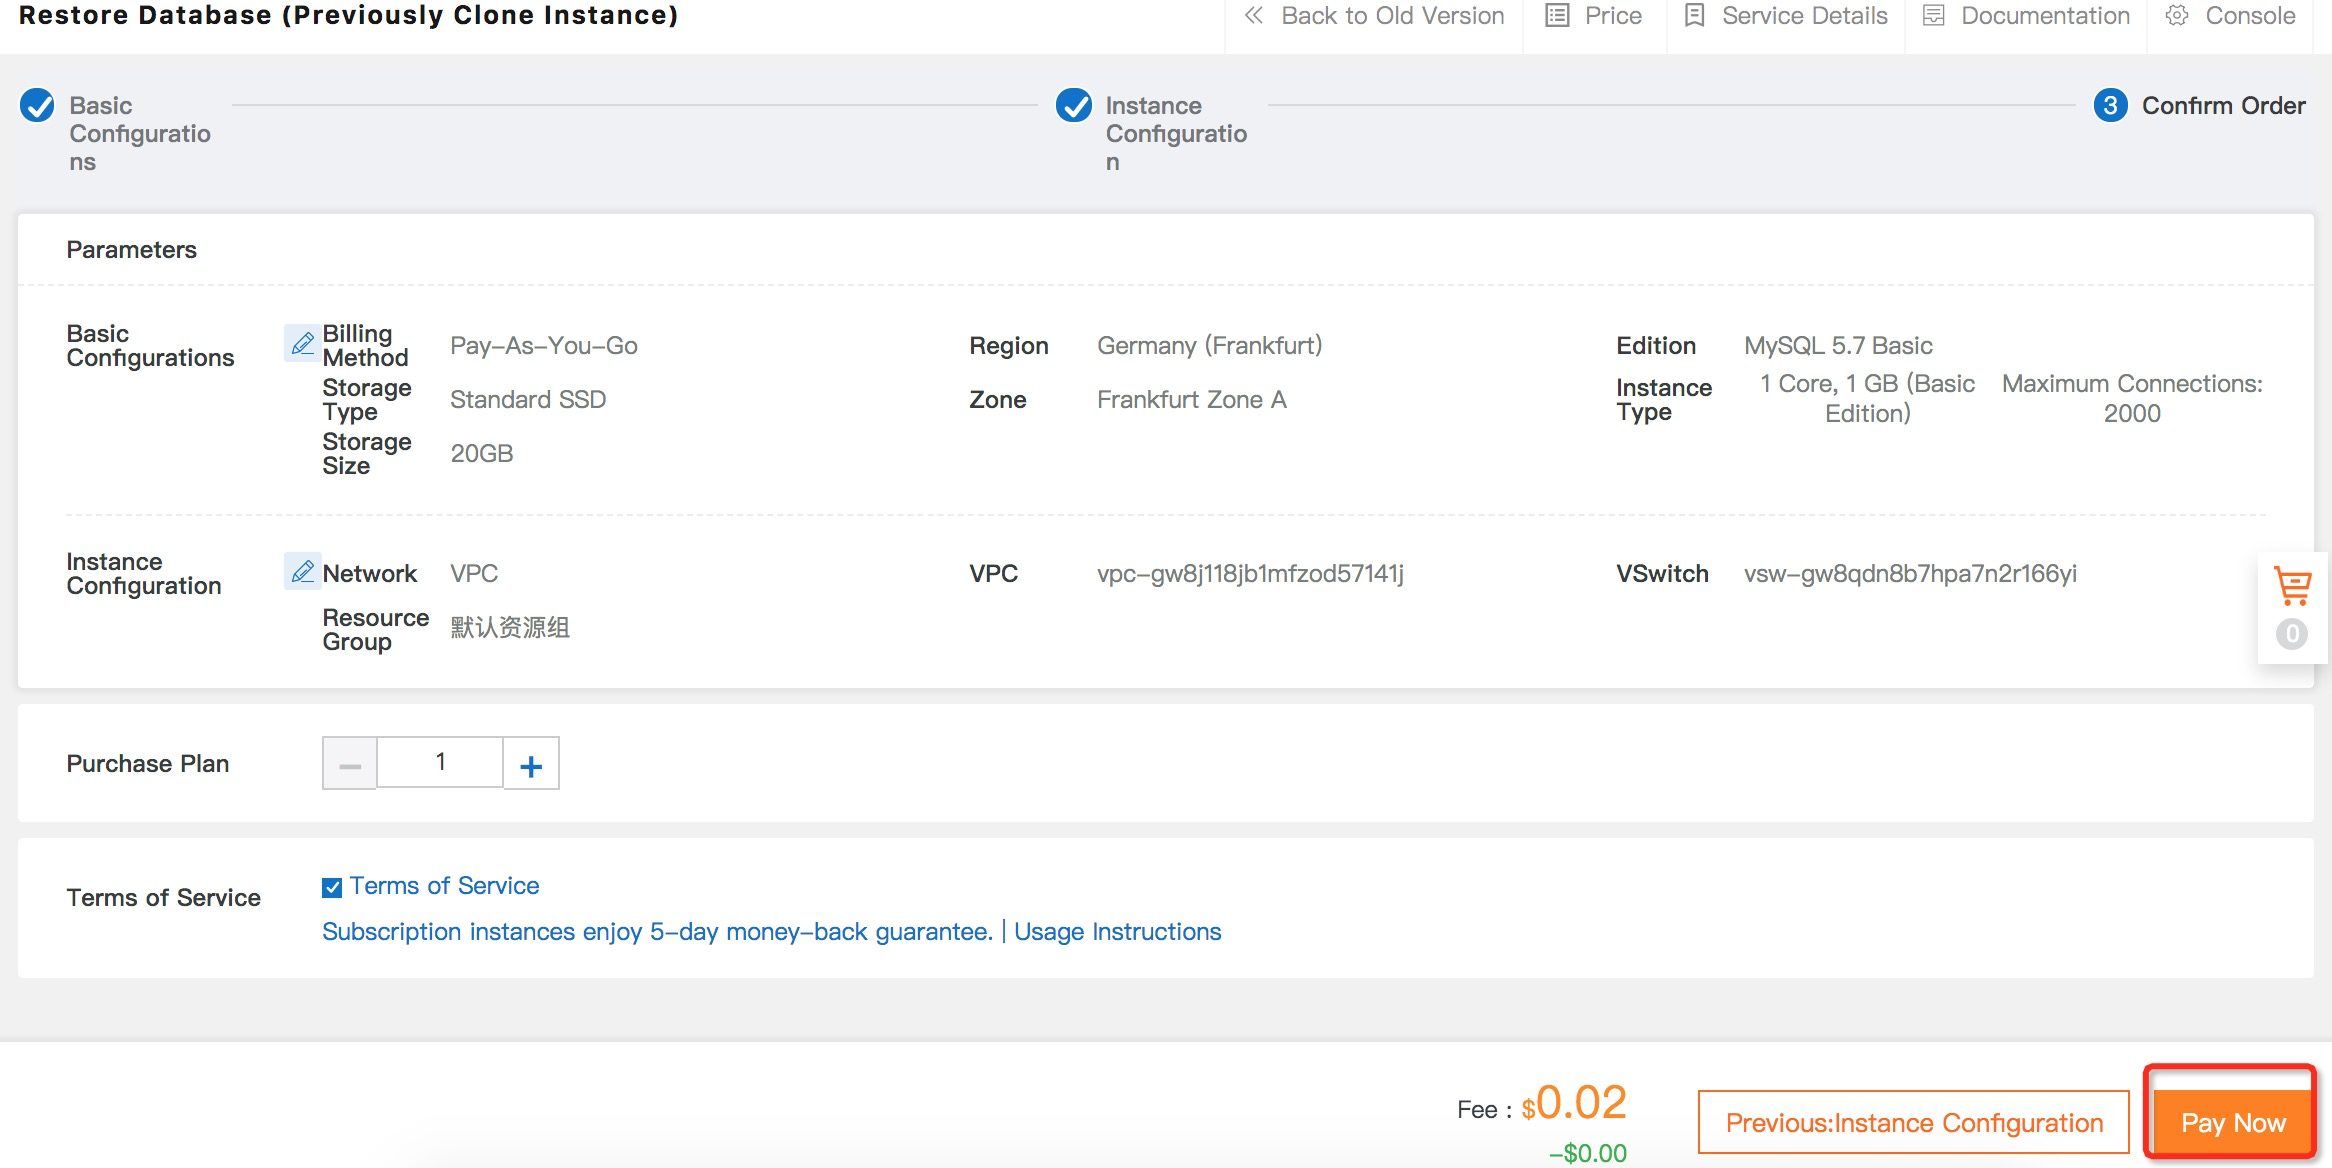
9. You will then be taken through to the payment screen. Click Pay.
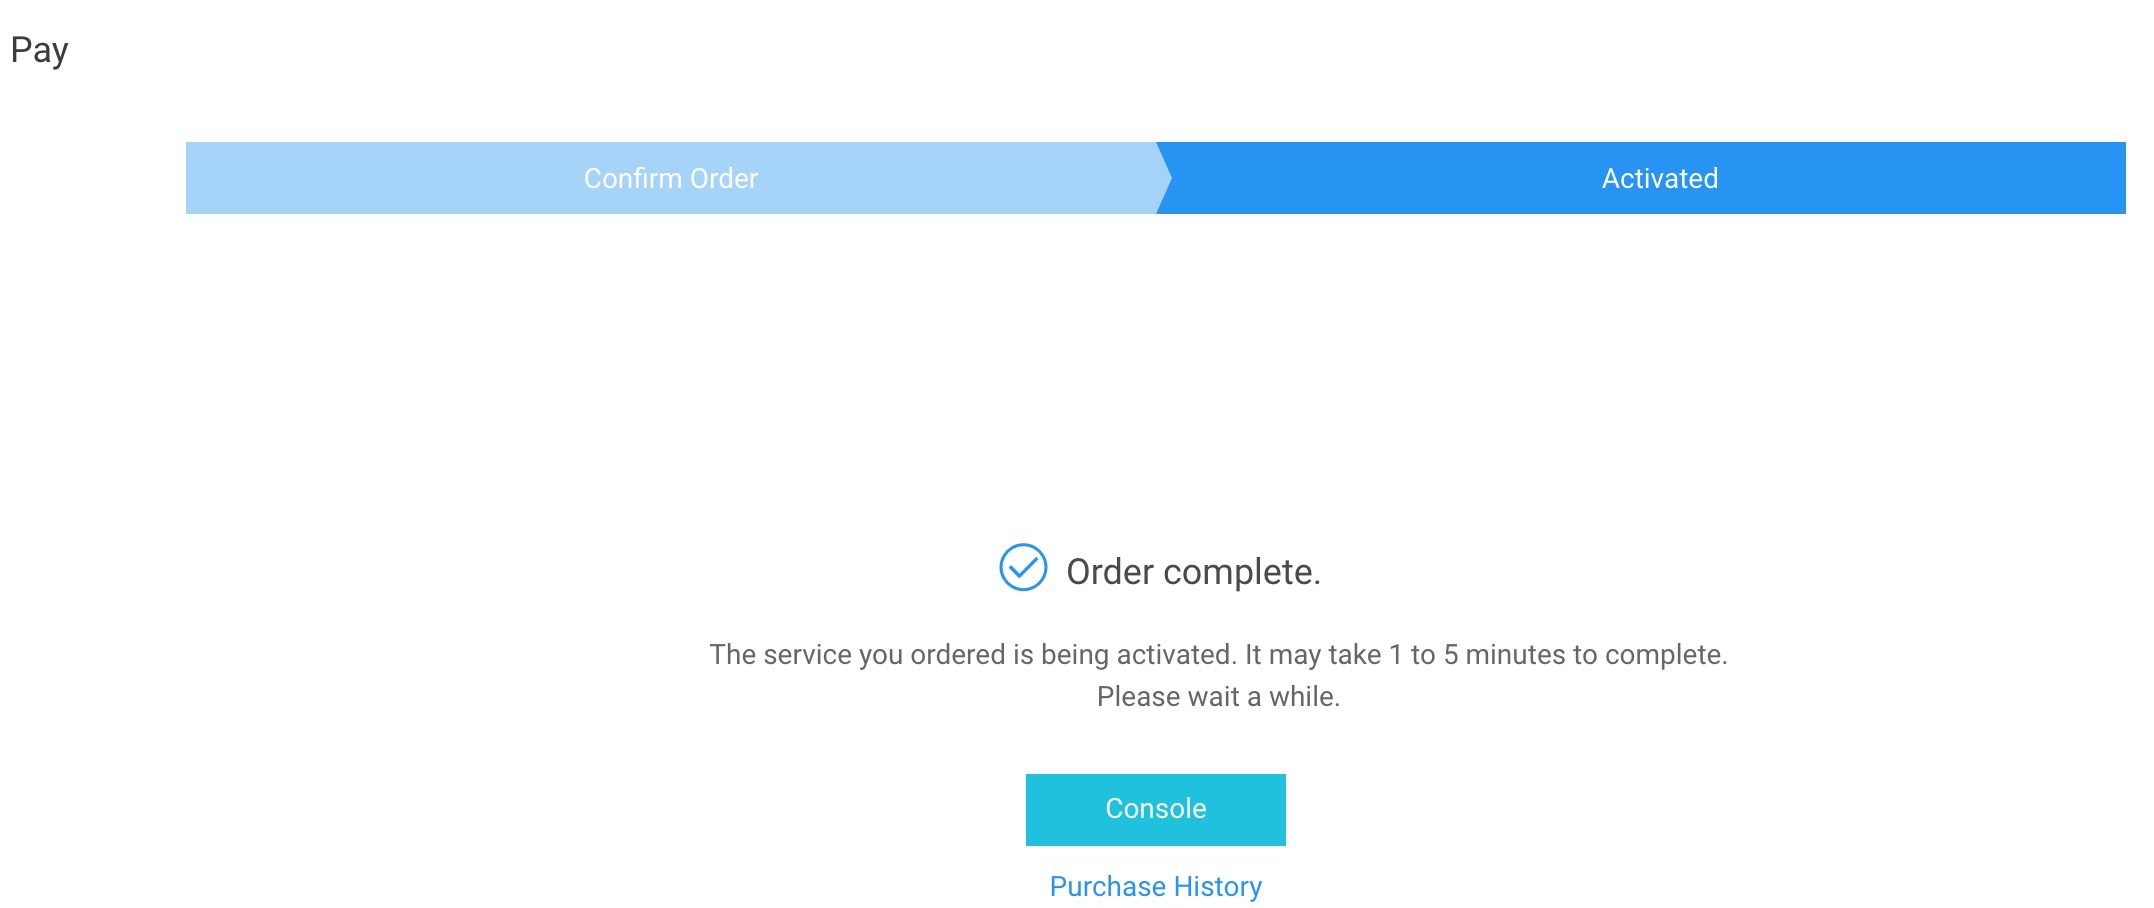
10. Your MySQL instance will be restored from the target backup.
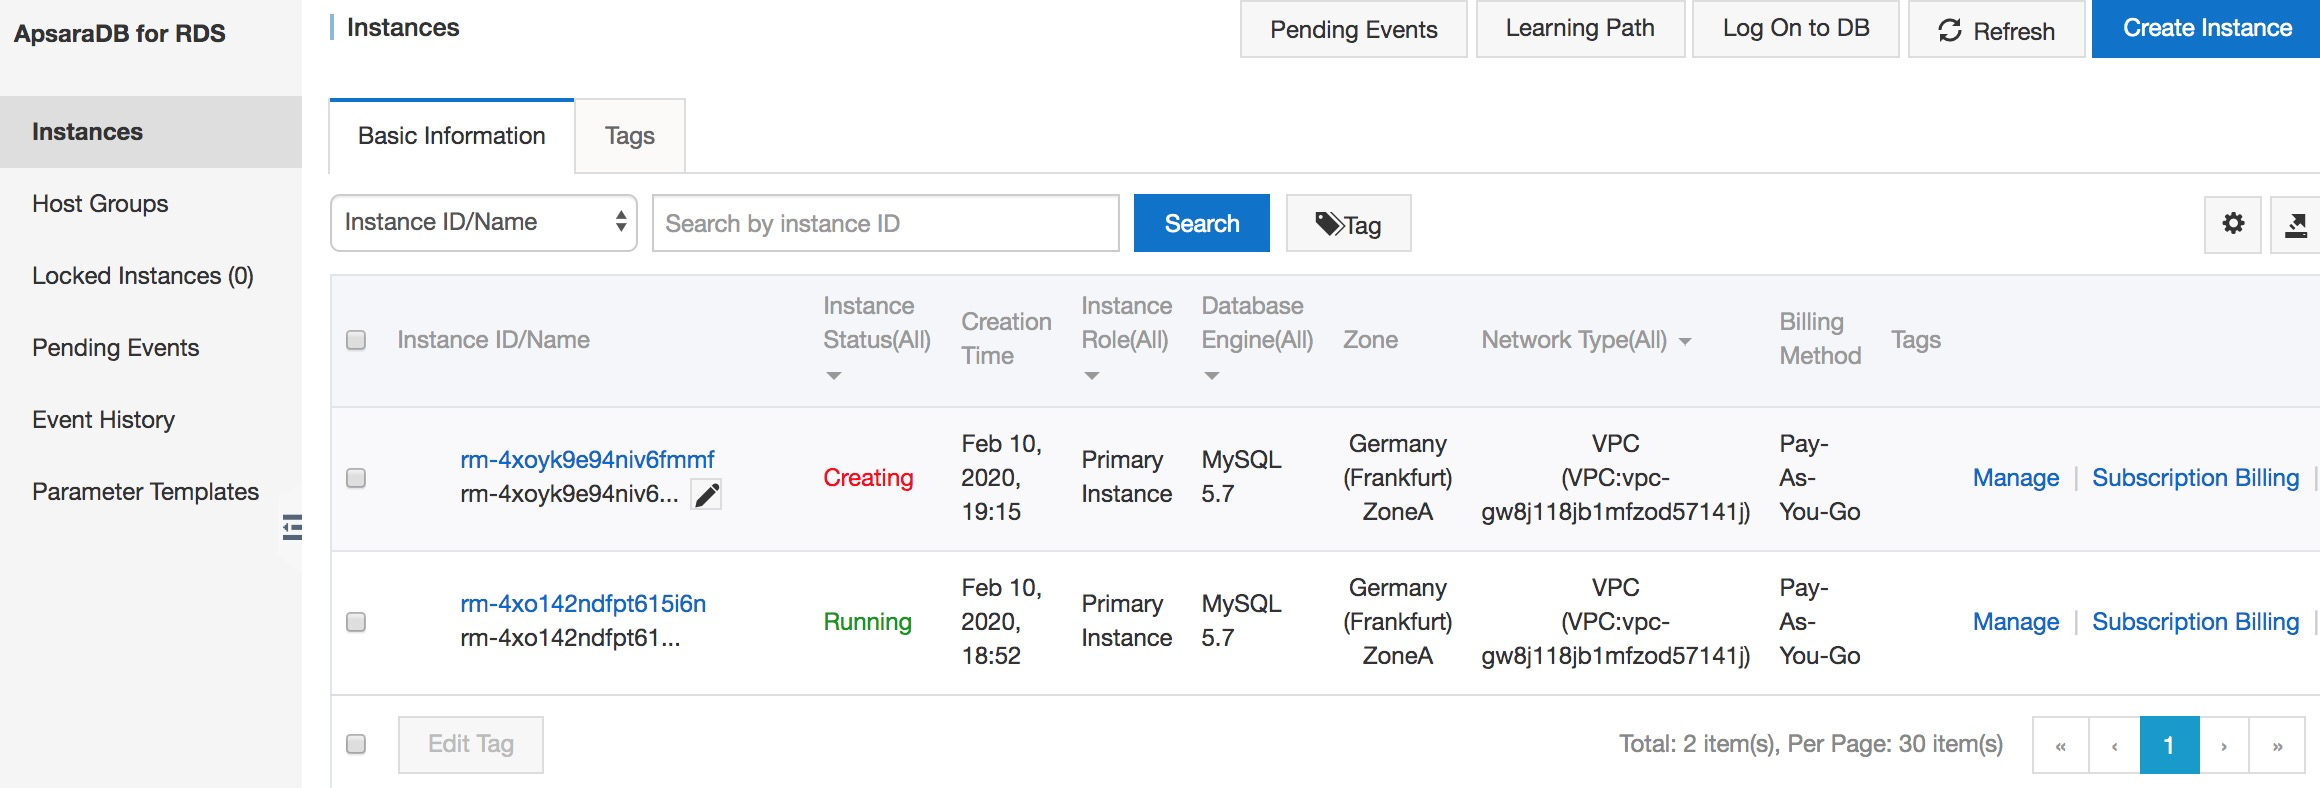
11. If you return to the Console, you will see that your new backup instance is being created. Once it has been created, you can access your RDS data as you would with any other instance.
In this tutorial, we have introduced Alibaba Cloud's range of database services products and demonstrated how you can back up a live database using the ApsaraDB for RDS product and the Alibaba Cloud Management Console. We also demonstrated how to create an instance of your database, how to create both automated and manual backups in the Console and how to access your backed-up data.
You can also find out more about ApsaraDB for RDS here: https://www.alibabacloud.com/product/apsaradb-for-rds
Performing Data Analysis on Klaviyo's Exported Data Points with Alibaba Cloud

2,593 posts | 793 followers
FollowAlibaba Clouder - July 30, 2019
Alibaba Clouder - February 25, 2021
Mehmad - December 30, 2024
Alibaba Clouder - April 9, 2018
ApsaraDB - December 30, 2025
JDP - March 26, 2021

2,593 posts | 793 followers
FollowLearn More
 ApsaraDB RDS for MySQL
An on-demand database hosting service for MySQL with automated monitoring, backup and disaster recovery capabilities
Learn More AnalyticDB for MySQL
AnalyticDB for MySQL is a real-time data warehousing service that can process petabytes of data with high concurrency and low latency.
Learn MoreMore Posts by Alibaba Clouder