This blog demonstrates a step by step procedure for setting up ThingsBoard Community Edition on an ECS (Elastic Compute Service) instance and sending telemetry data from MQTT client, namely MQTTX. Both ThingsBoard and MQTTX are open-source and can be used for IoT demonstrations to collect, process data as well perform device management. To check how our prototype will look like, Please watch this video:
• An ECS instance with the Ubuntu Operating System. If you don’t know how to create to create one, please watch this video
• Basic knowledge of Linux command line.
Start by logging into your ECS instance

We can either log into the ECS instance by clicking the “Connect” option or using SSH. To use SSH on a Windows-based PC, open-source software like putty can be used. For Mac, we can use Terminal to login by using the following command:
ssh root@your-ecs-instance-Public-ip
apt update
apt install openjdk-11-jdk –yjava –versionDownload the ThingsBoard Community Edition package using wget.
wget https://github.com/thingsboard/thingsboard/releases/download/v3.5.1/thingsboard-3.5.1.deb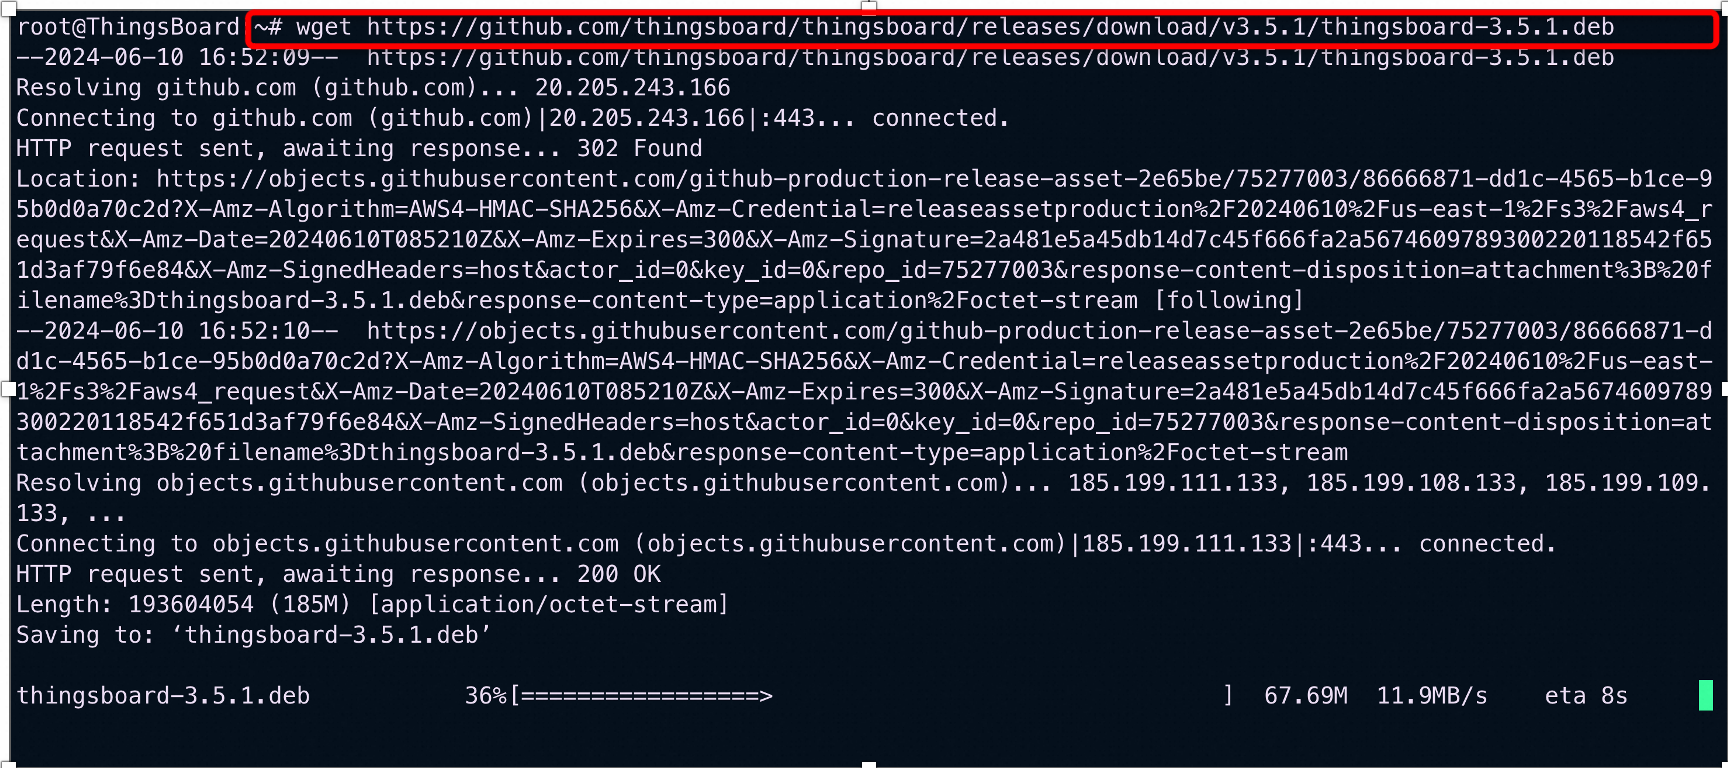
List the files to confirm the download:
ls
Install the downloaded ThingsBoard package:
dpkg -i thingsboard-3.5.1.deb
wget --quiet -O - https://www.postgresql.org/media/keys/ACCC4CF8.asc | sudo apt-key add -
echo "deb https://apt.postgresql.org/pub/repos/apt/ $(lsb_release -cs)-pgdg main" | sudo tee /etc/apt/sources.list.d/pgdg.listapt updateapt -y install postgresql-15service postgresql startThe instructions below will help to set the password for main postgresql user
su - postgresLog into PostgreSQL:
psqlSet a password for the postgres user:
\passwordIt will prompt you to re-enter the password. This password will be used later on in the configuration of ThingsBoard, so make sure to remember it.
Exit the PostgreSQL prompt:
\q
Then, press Ctrl+D to return to main user console
Now connect to the database again to create thingsboard DB:
psql -U postgres -d postgres -h 127.0.0.1 -W
CREATE DATABASE thingsboard;
\q
Then, press Ctrl+D to logout and return to main user console
Edit the ThingsBoard configuration file to add database settings:
nano /etc/thingsboard/conf/thingsboard.confAdd the following lines to configure PostgreSQL. Don’t forget to use your database password here:
# DB Configuration
export DATABASE_TS_TYPE=sql
export SPRING_DATASOURCE_URL=jdbc:postgresql://localhost:5432/thingsboard
export SPRING_DATASOURCE_USERNAME=postgres
export SPRING_DATASOURCE_PASSWORD=your_postgres_password_here
# Specify partitioning size for timestamp key-value storage.
export SQL_POSTGRES_TS_KV_PARTITIONING=MONTHS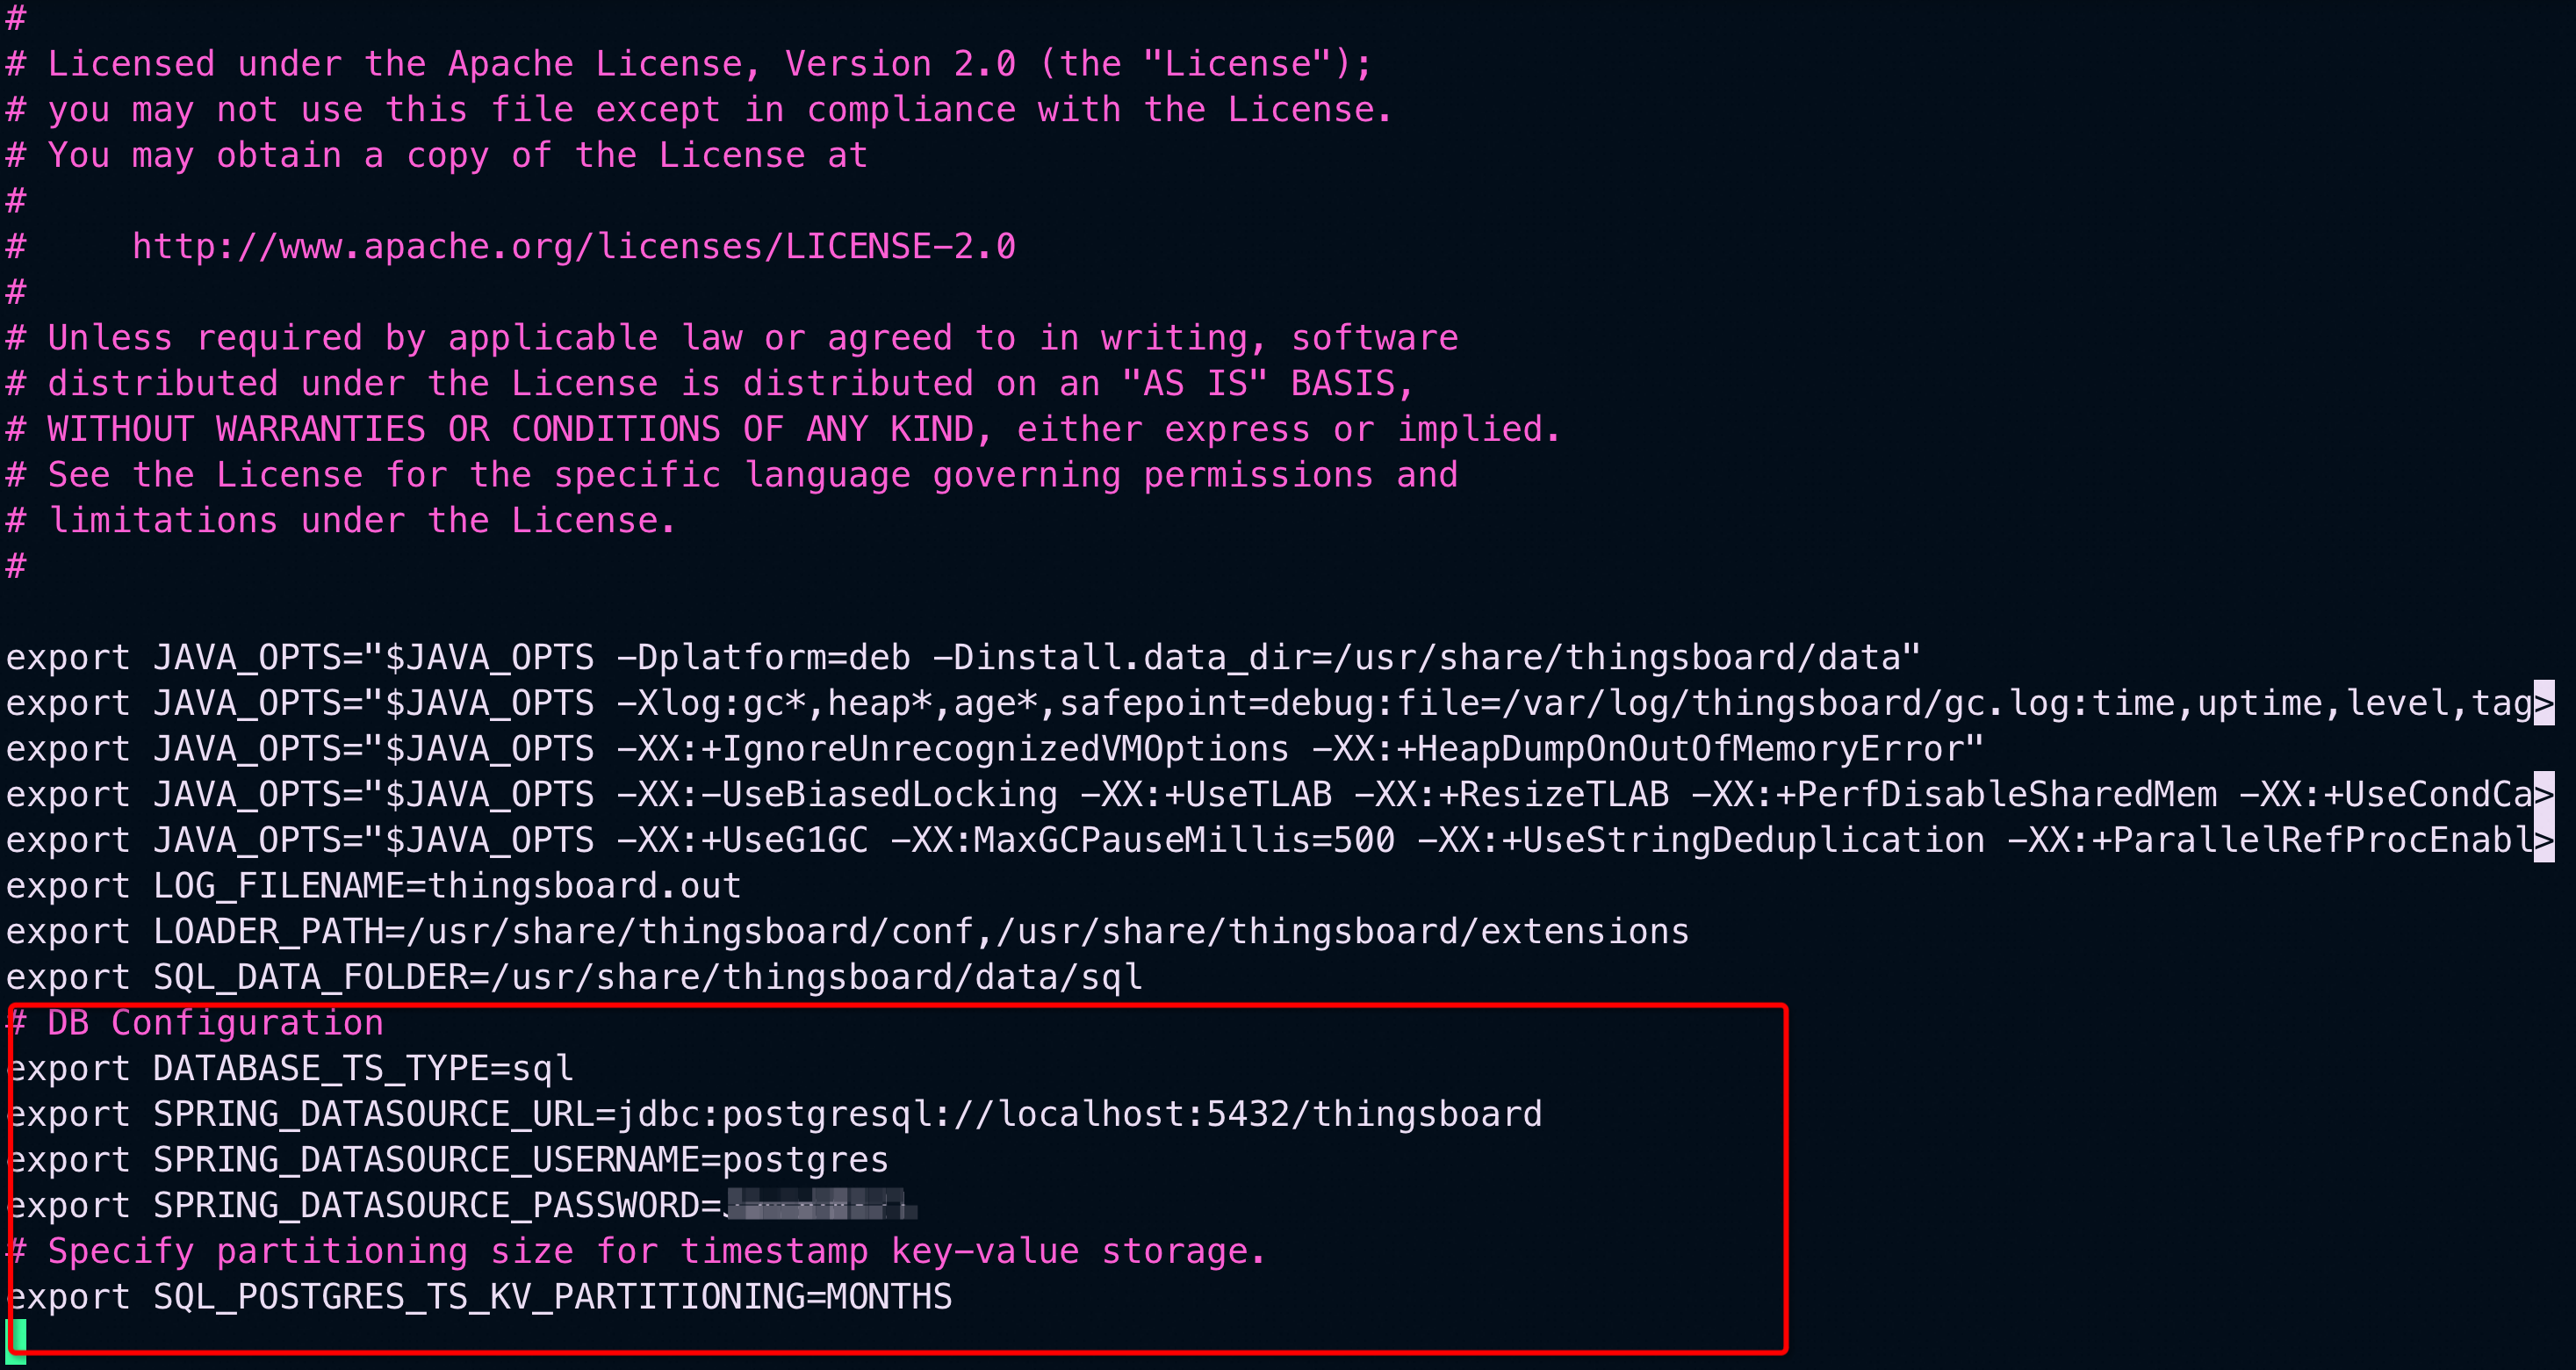
To load demo data, run the following script:
/usr/share/thingsboard/bin/install/install.sh --loadDemo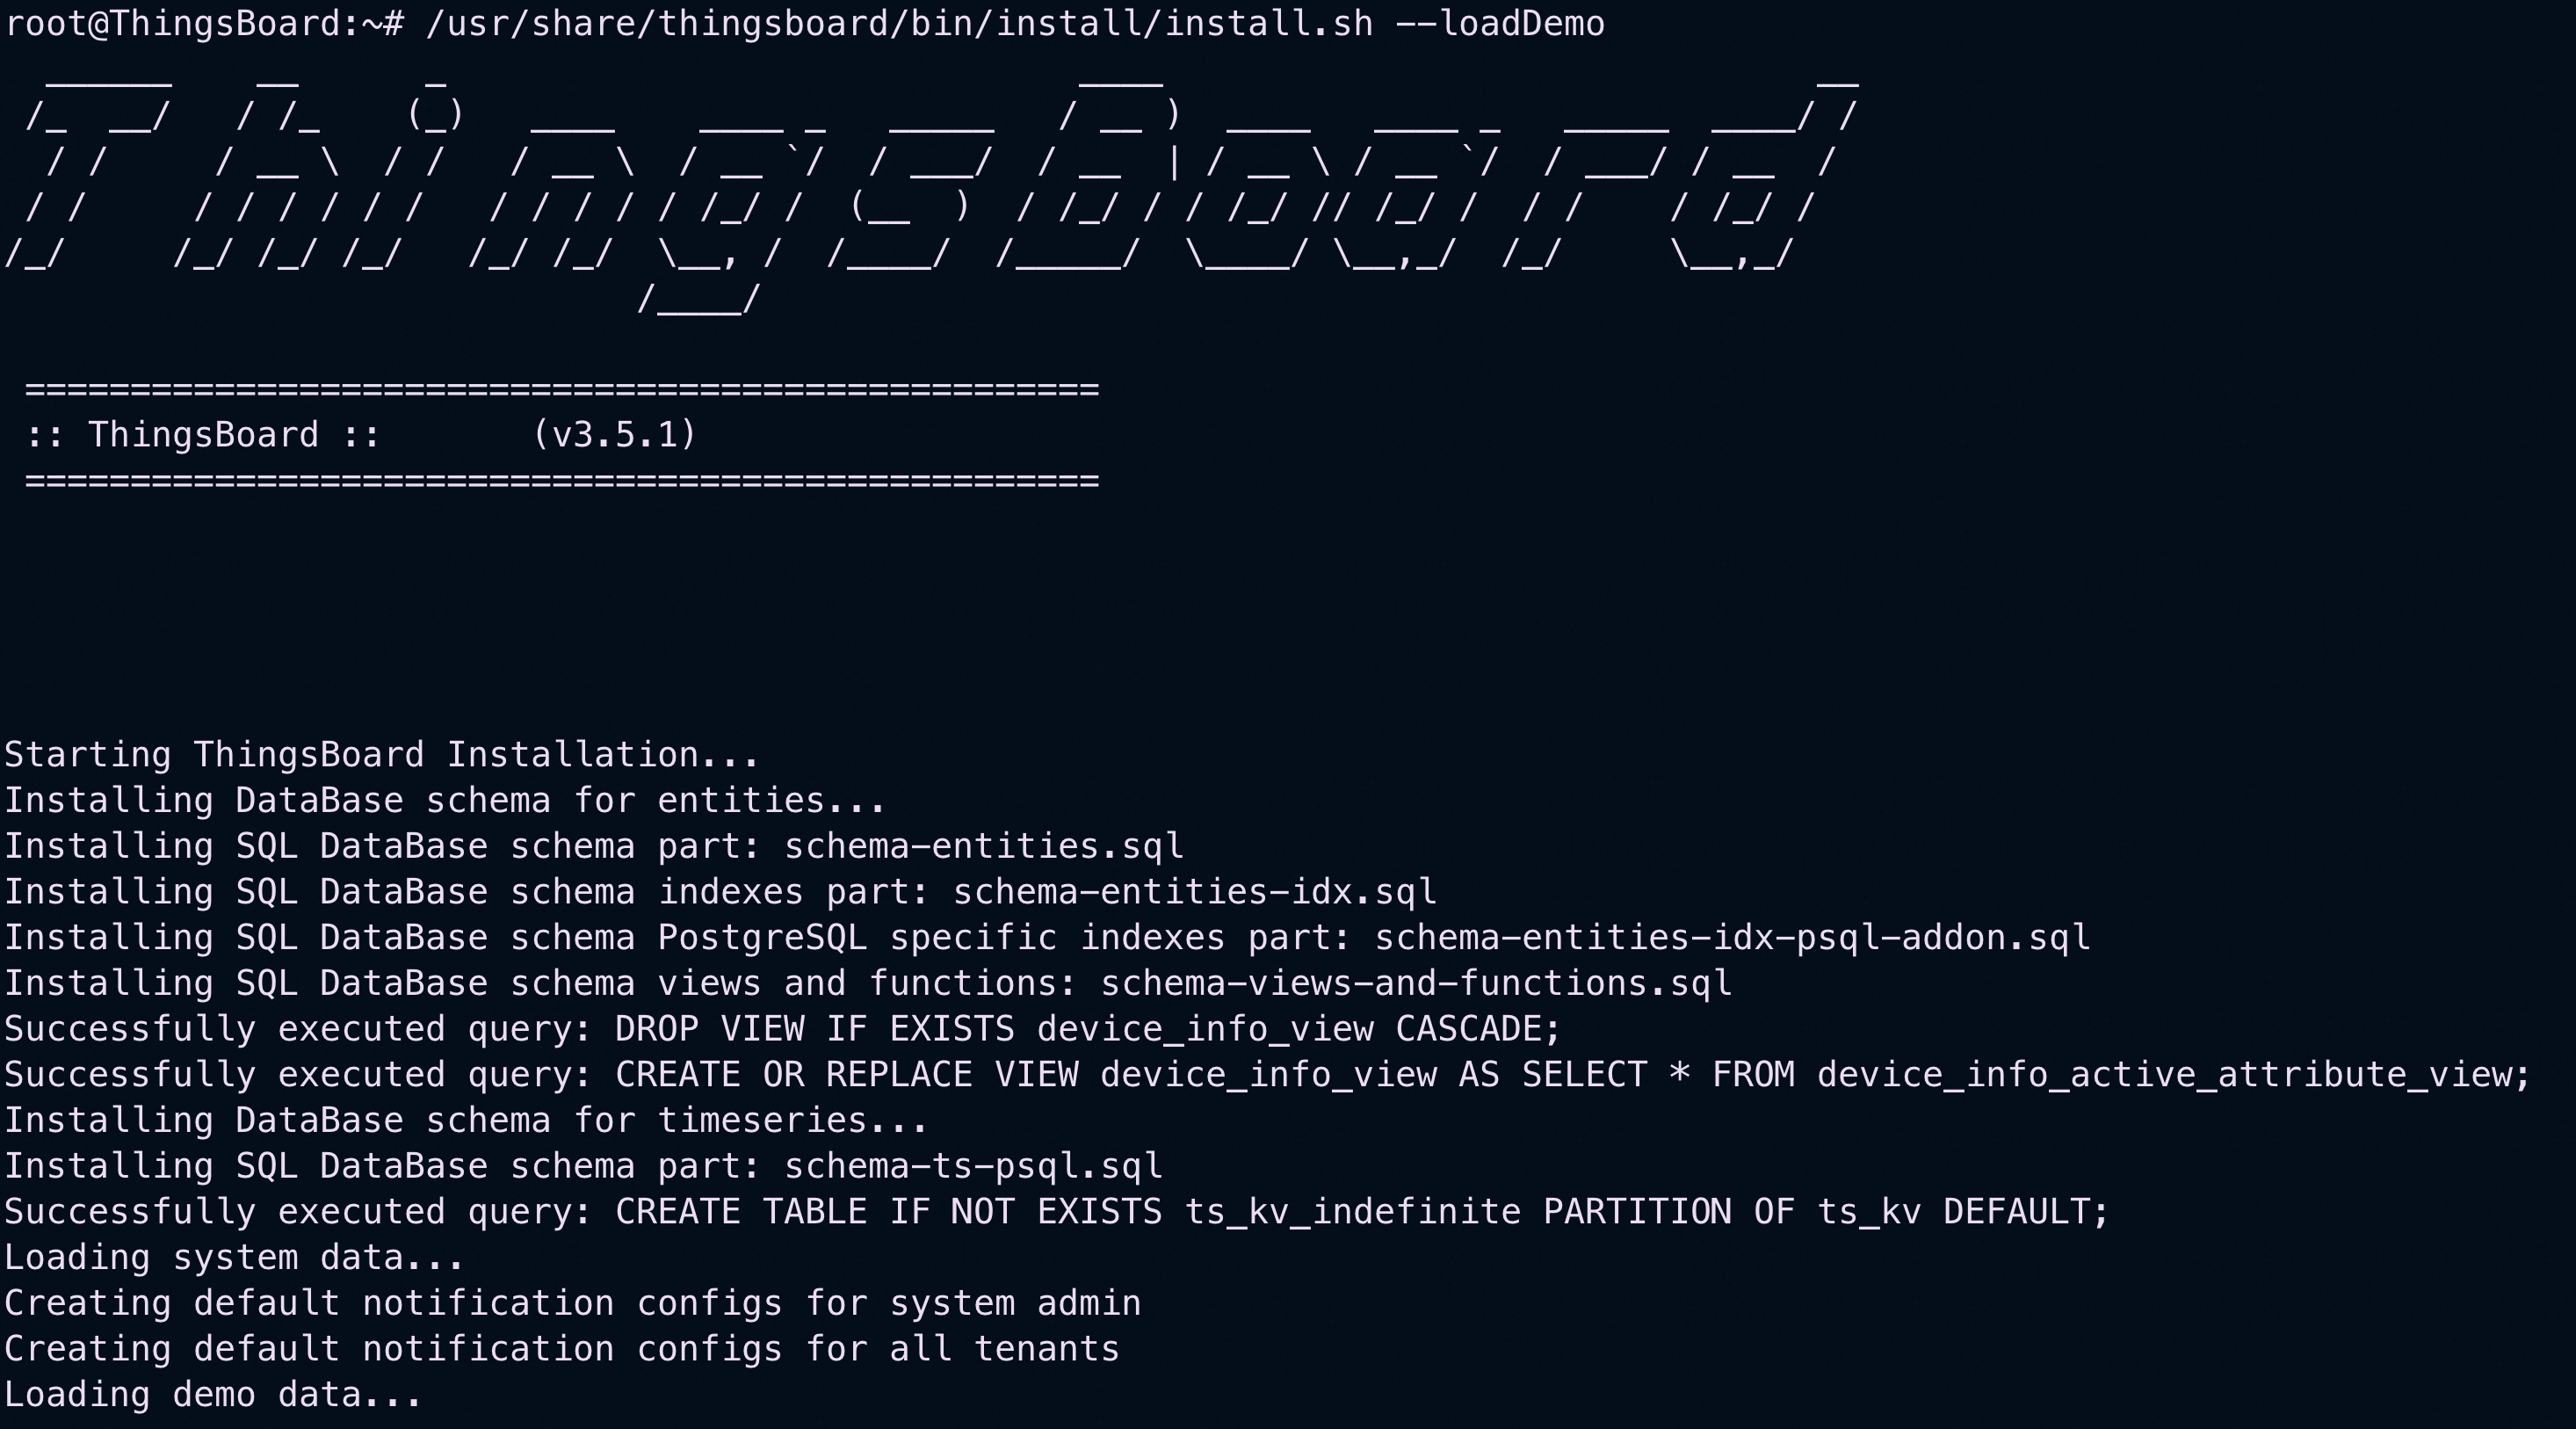
Start the ThingsBoard service:
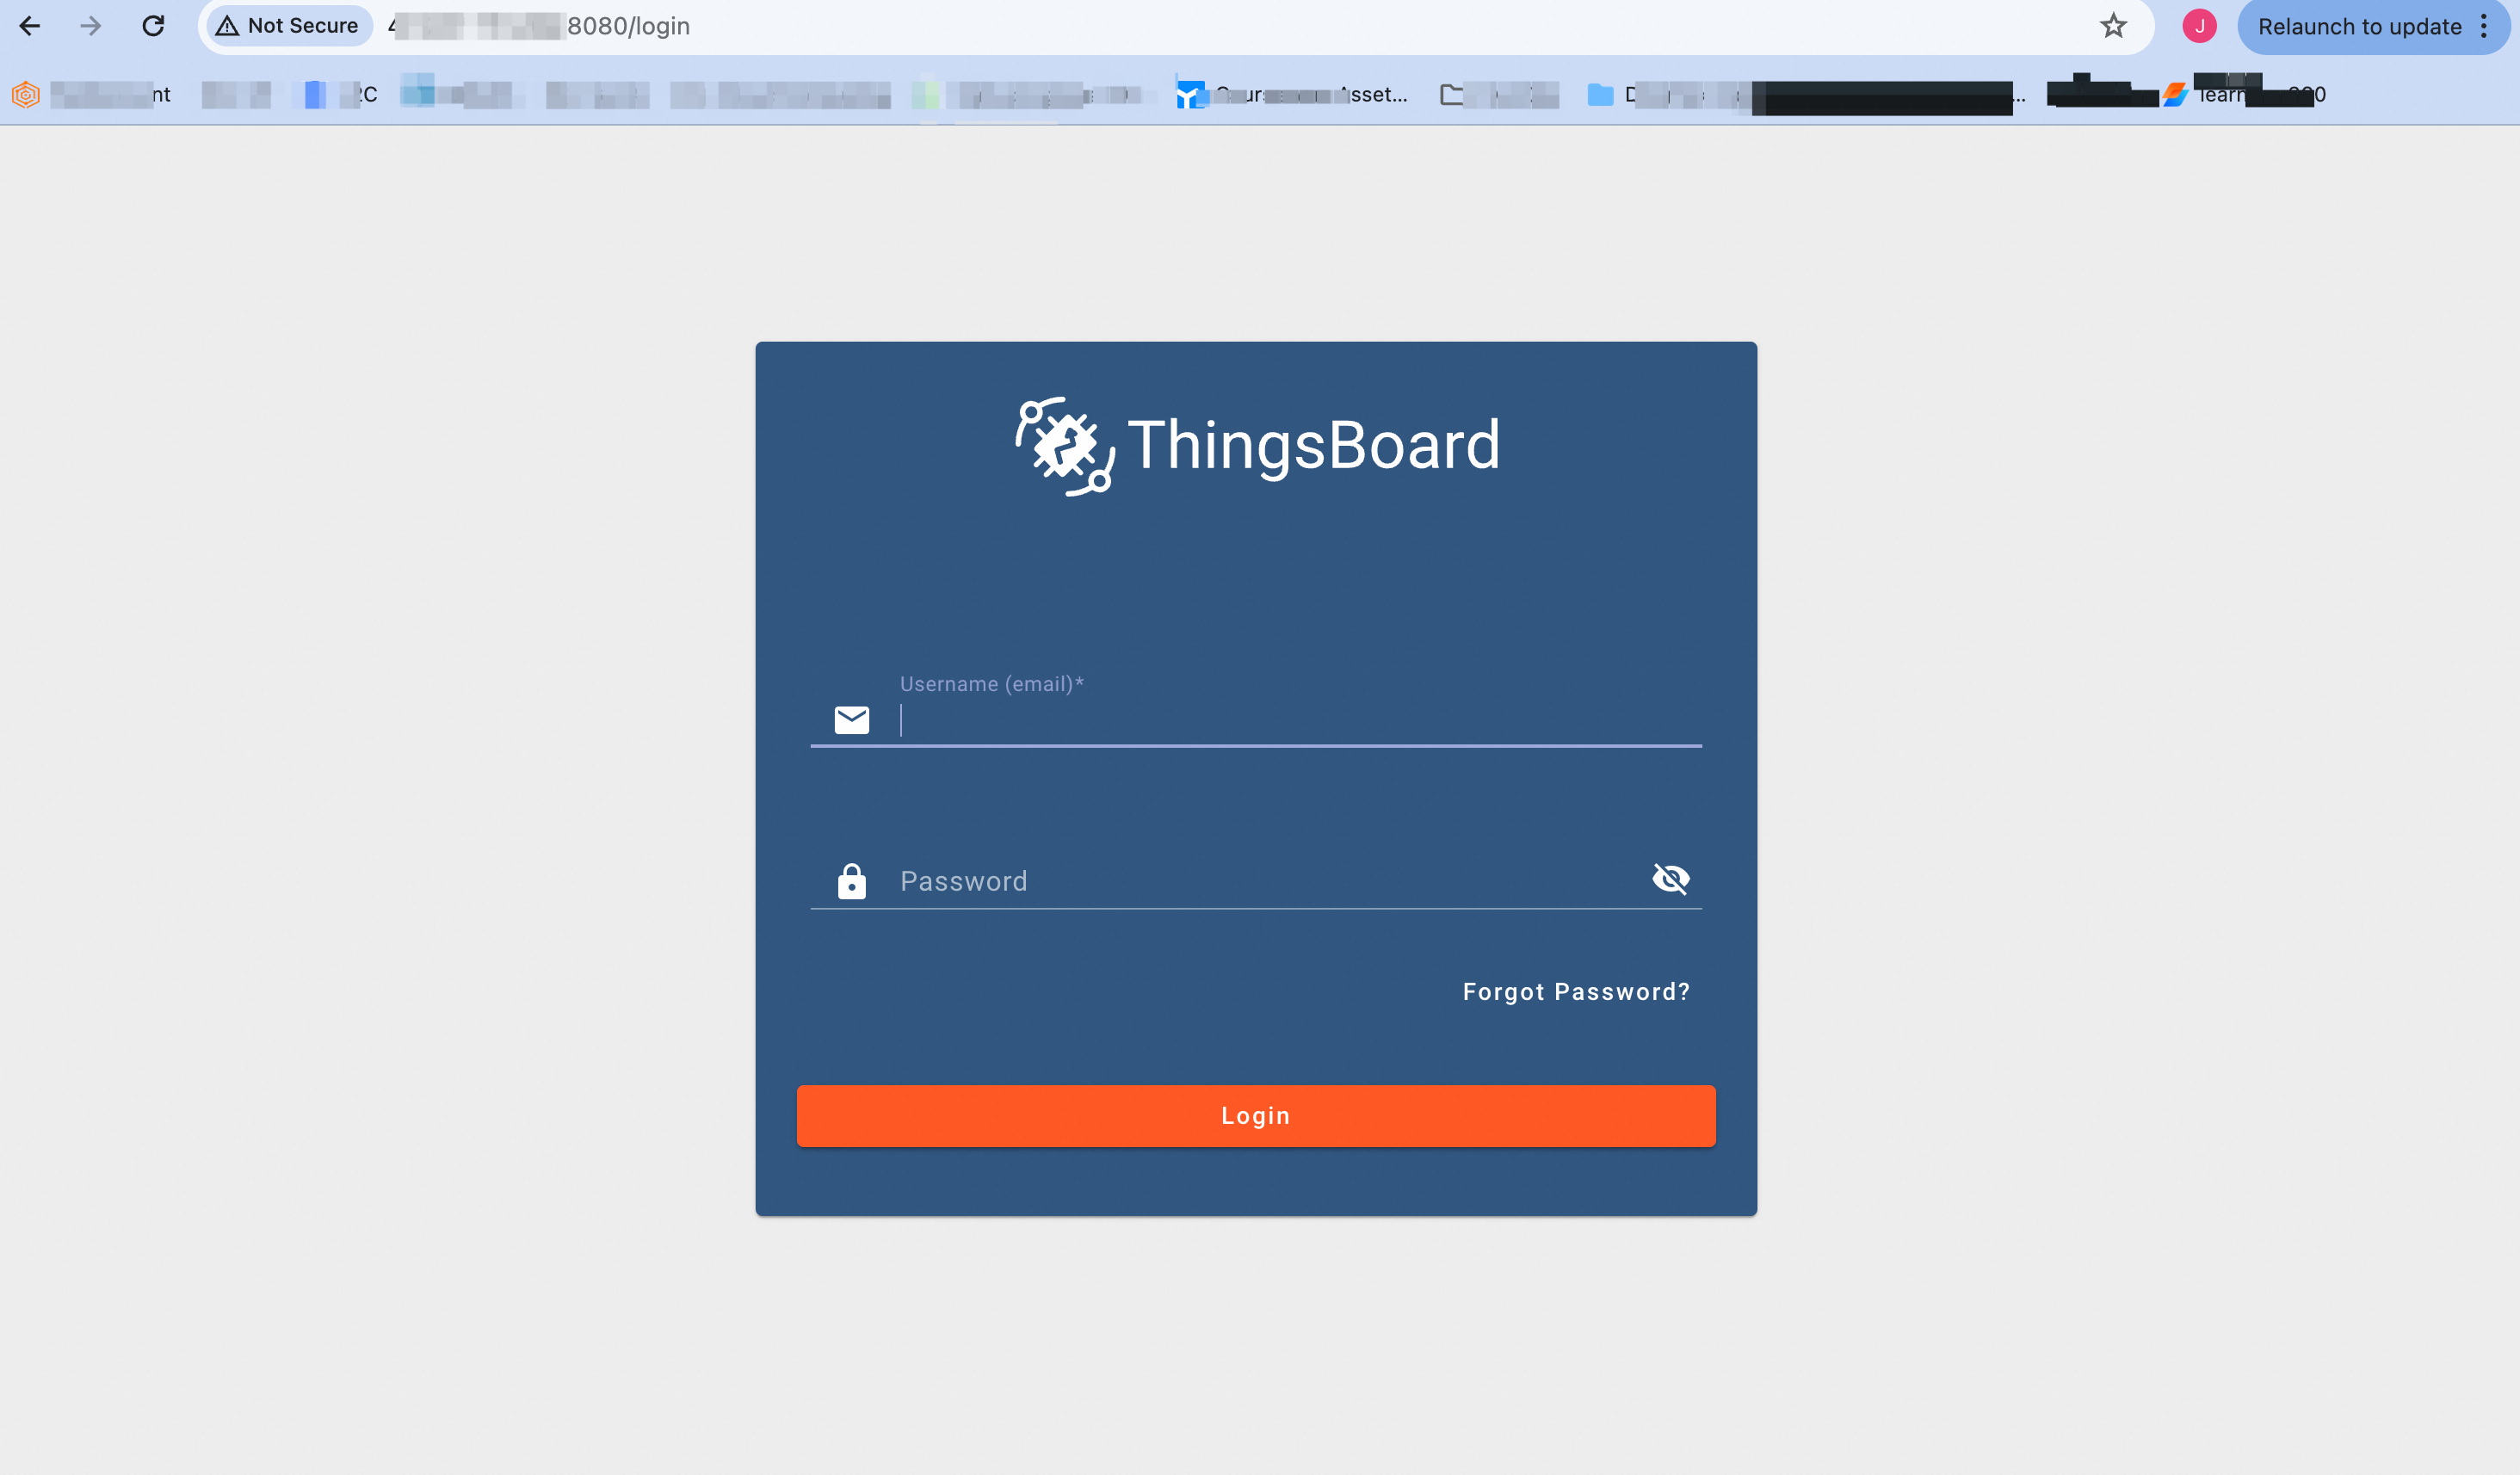
service thingsboard startYou can access the ThingsBoard web UI at:http://<ECS_instance_public_ip>:8080/
• System Administrator: sysadmin@thingsboard.org / sysadmin
• Tenant Administrator: tenant@thingsboard.org / tenant
• Customer User: customer@thingsboard.org / customer
We may use the System Administrator credentials for the login.
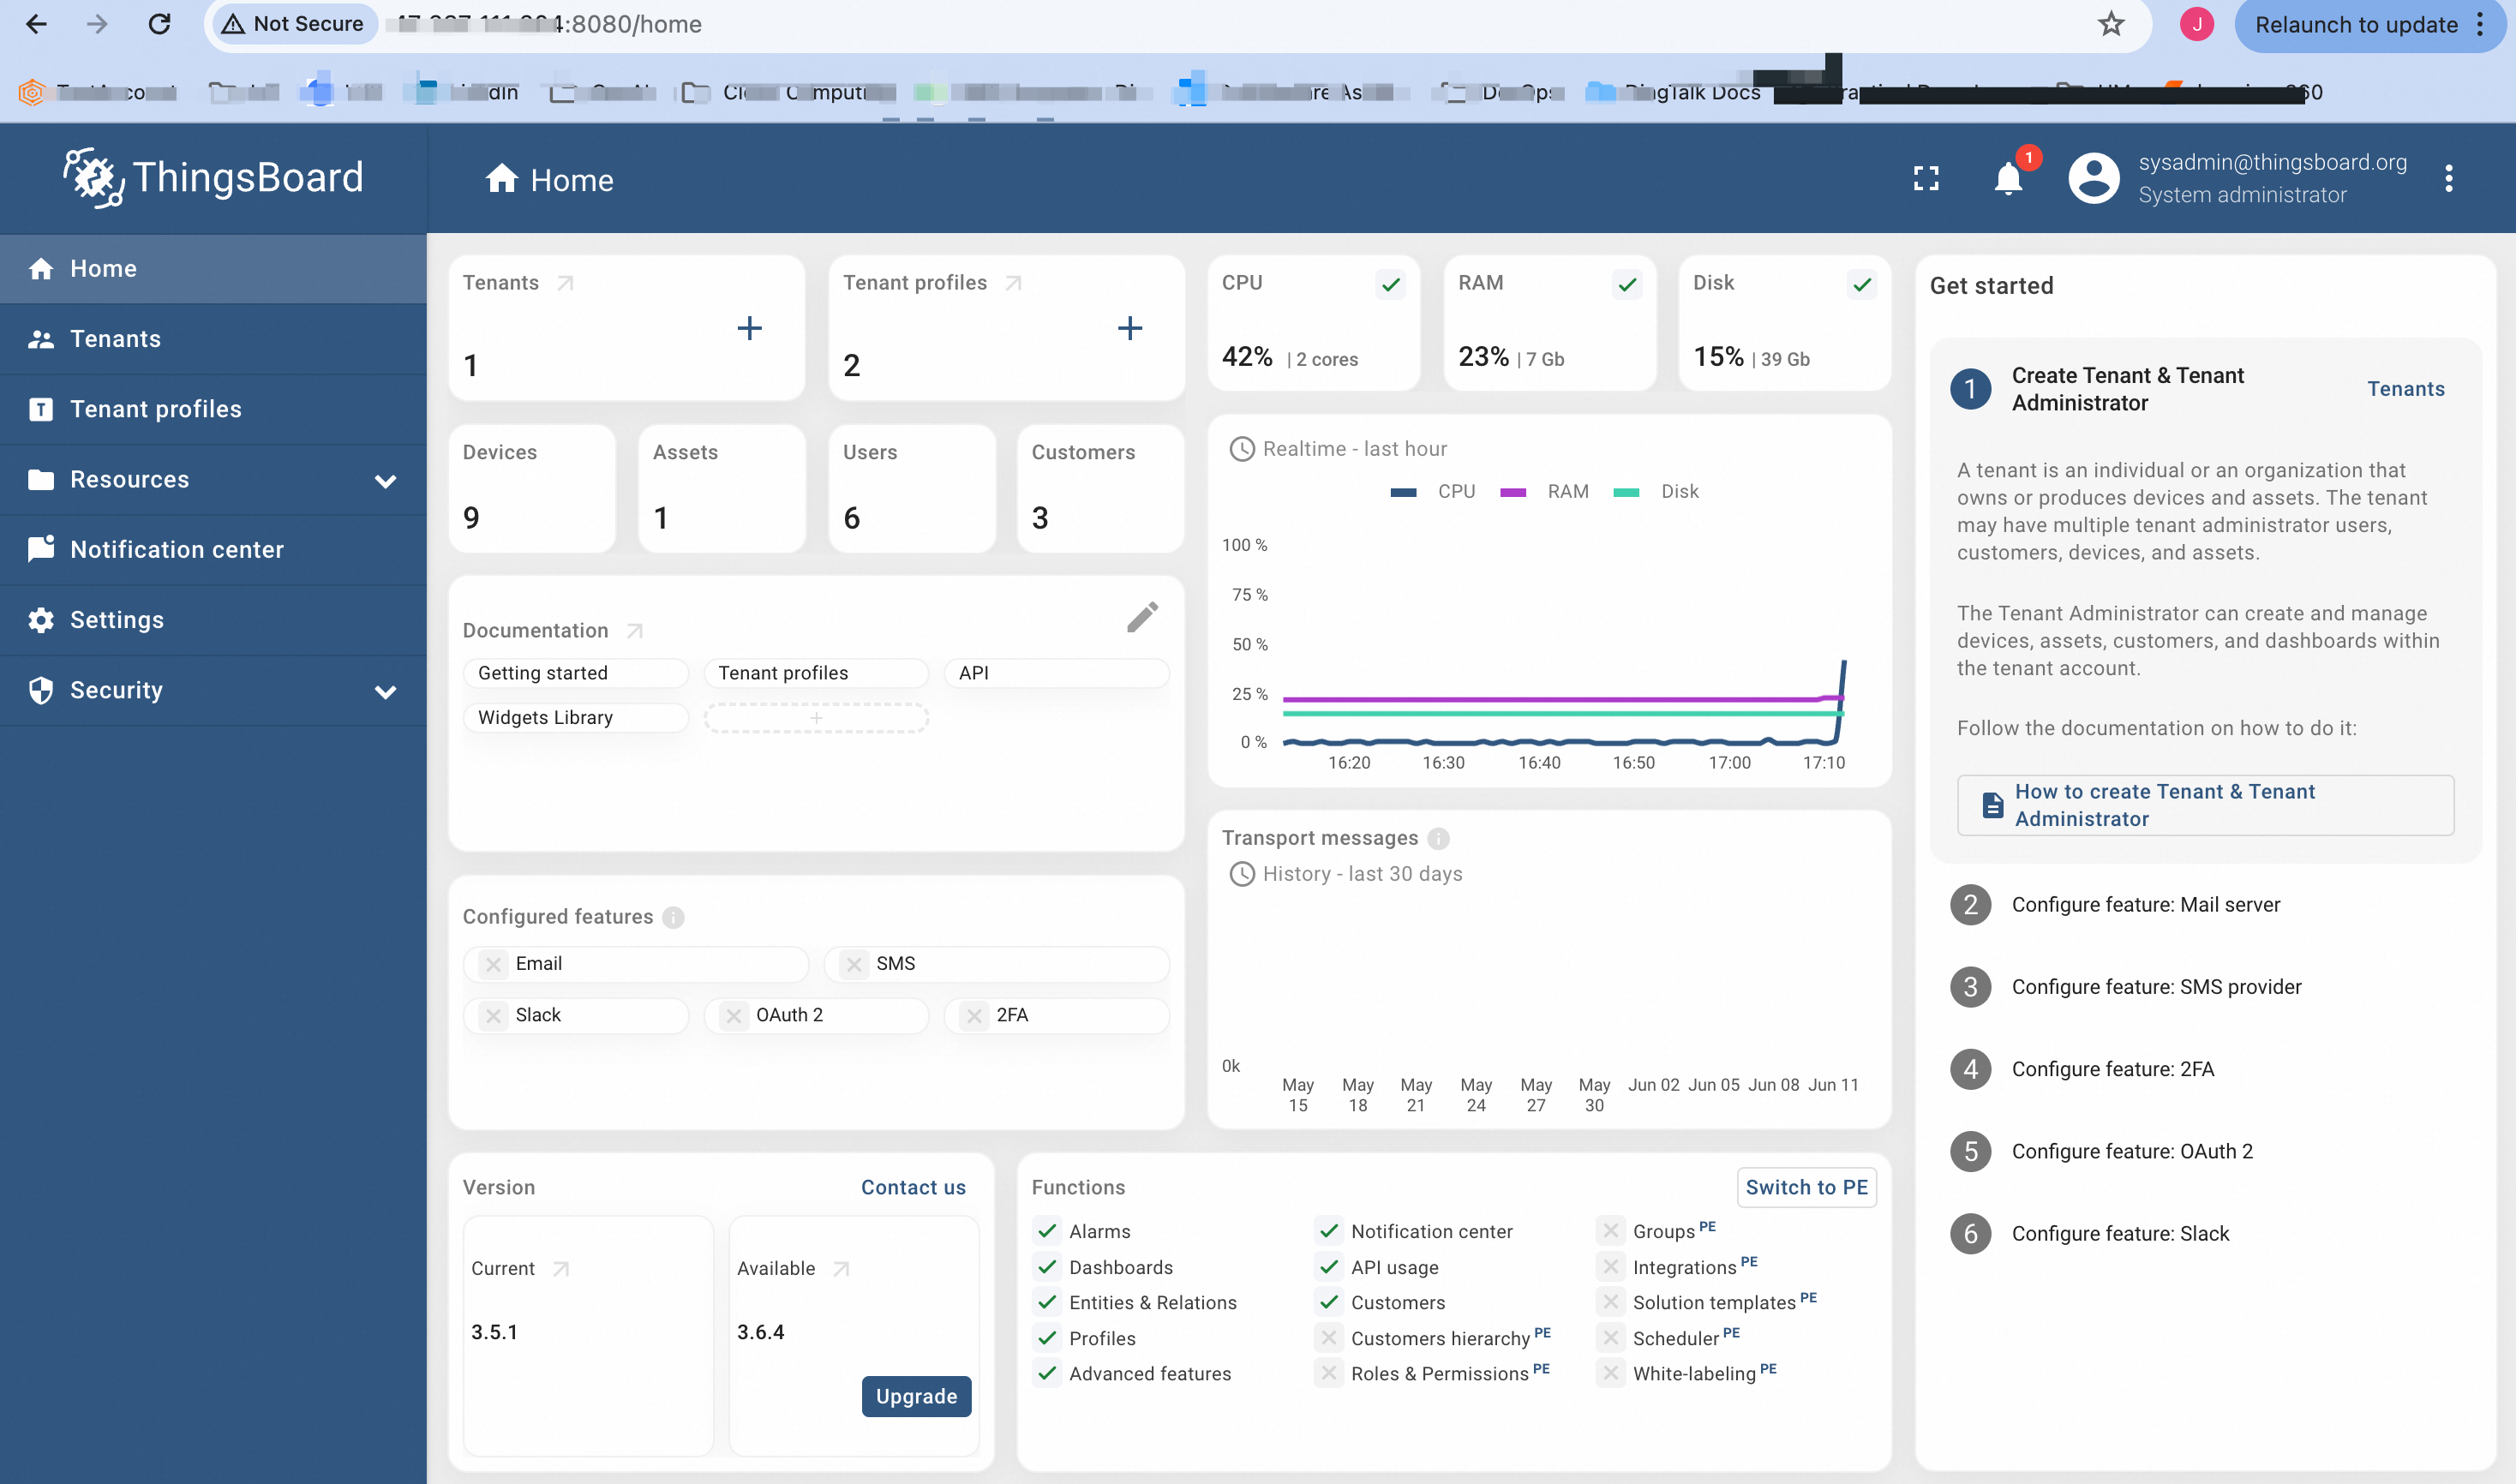
System Administrator (sysadmin) Account has the highest level of administrative control in ThingsBoard with full access to create, manage, and delete tenant accounts, perform system-wide configurations, and monitor system health and performance.
A Tenant Account represents an organization or business entity using ThingsBoard and manages its own isolated environment, including devices, assets, dashboards, and customer accounts.
A Customer Account represents an end-user or sub-organization within a tenant with limited access to the resources assigned by the tenant, such as specific devices and dashboards.
For the security reasons, it is recommended to change the passwords of the default accounts or disable them.
Here we will create a tenant account named Alibaba Cloud Academy. To do that, click on the Tenants option on the left, press + sign, then fill in the details and click on the add button.
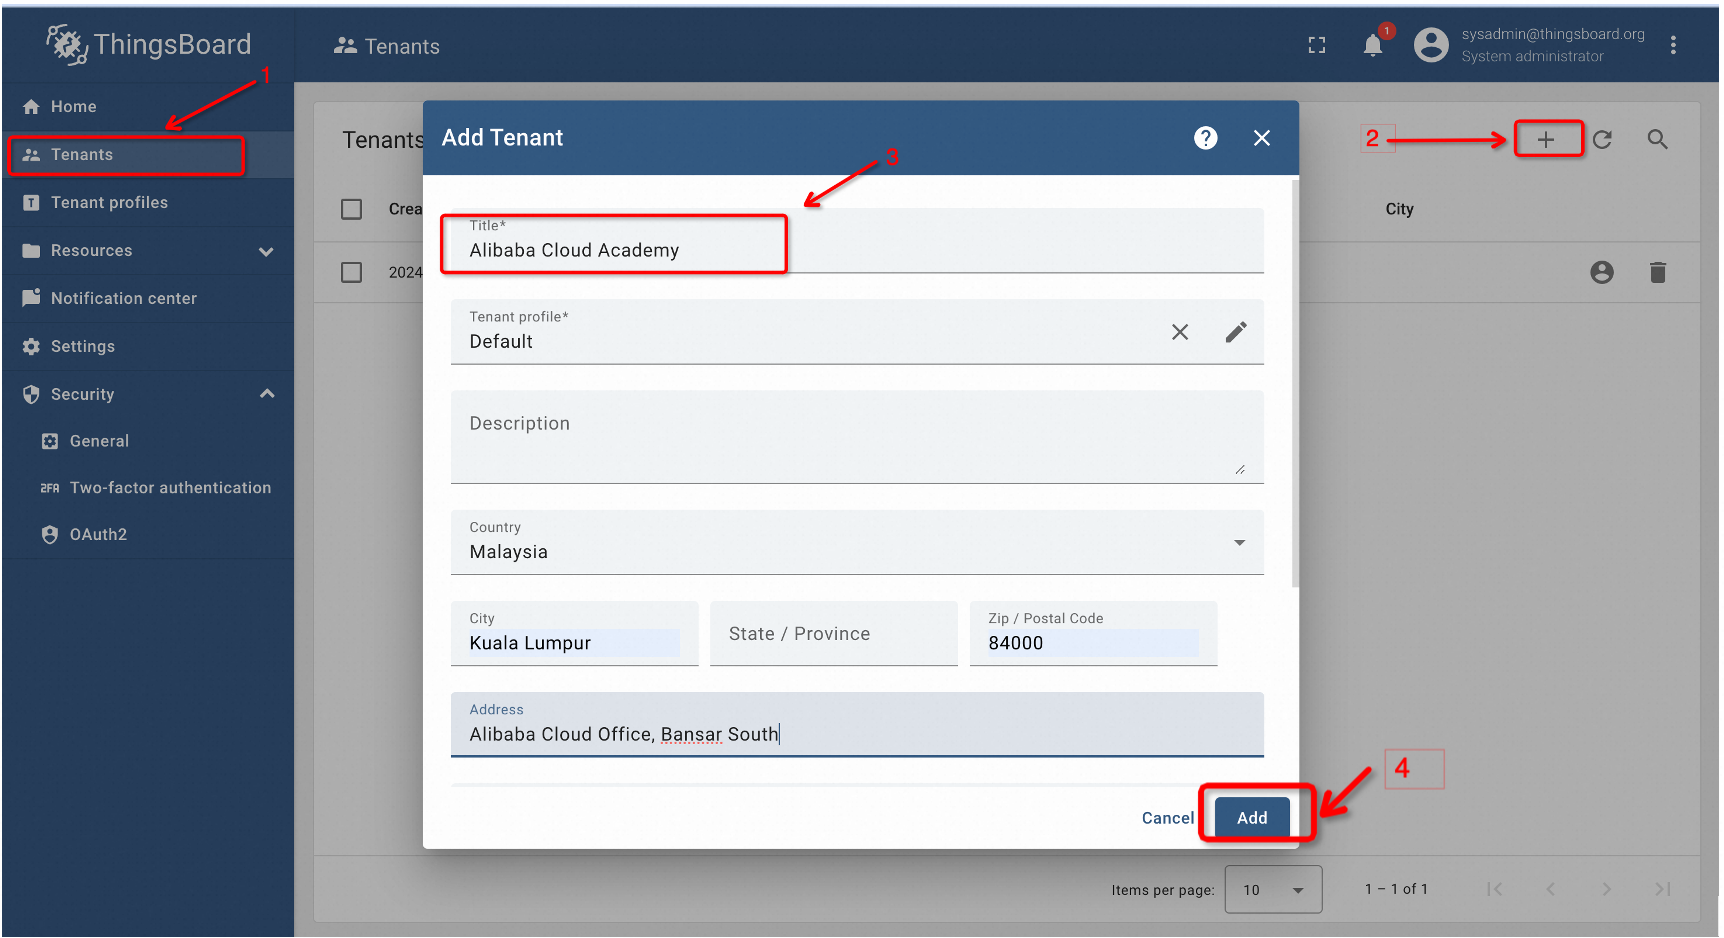
This will create a new tenant account, as shown below:

To create users, click on the Manage Tenants option on the right. It will take us to the Tenants Admin portal where we need to create a new user here. An email address is required for this process. The steps are shown below:
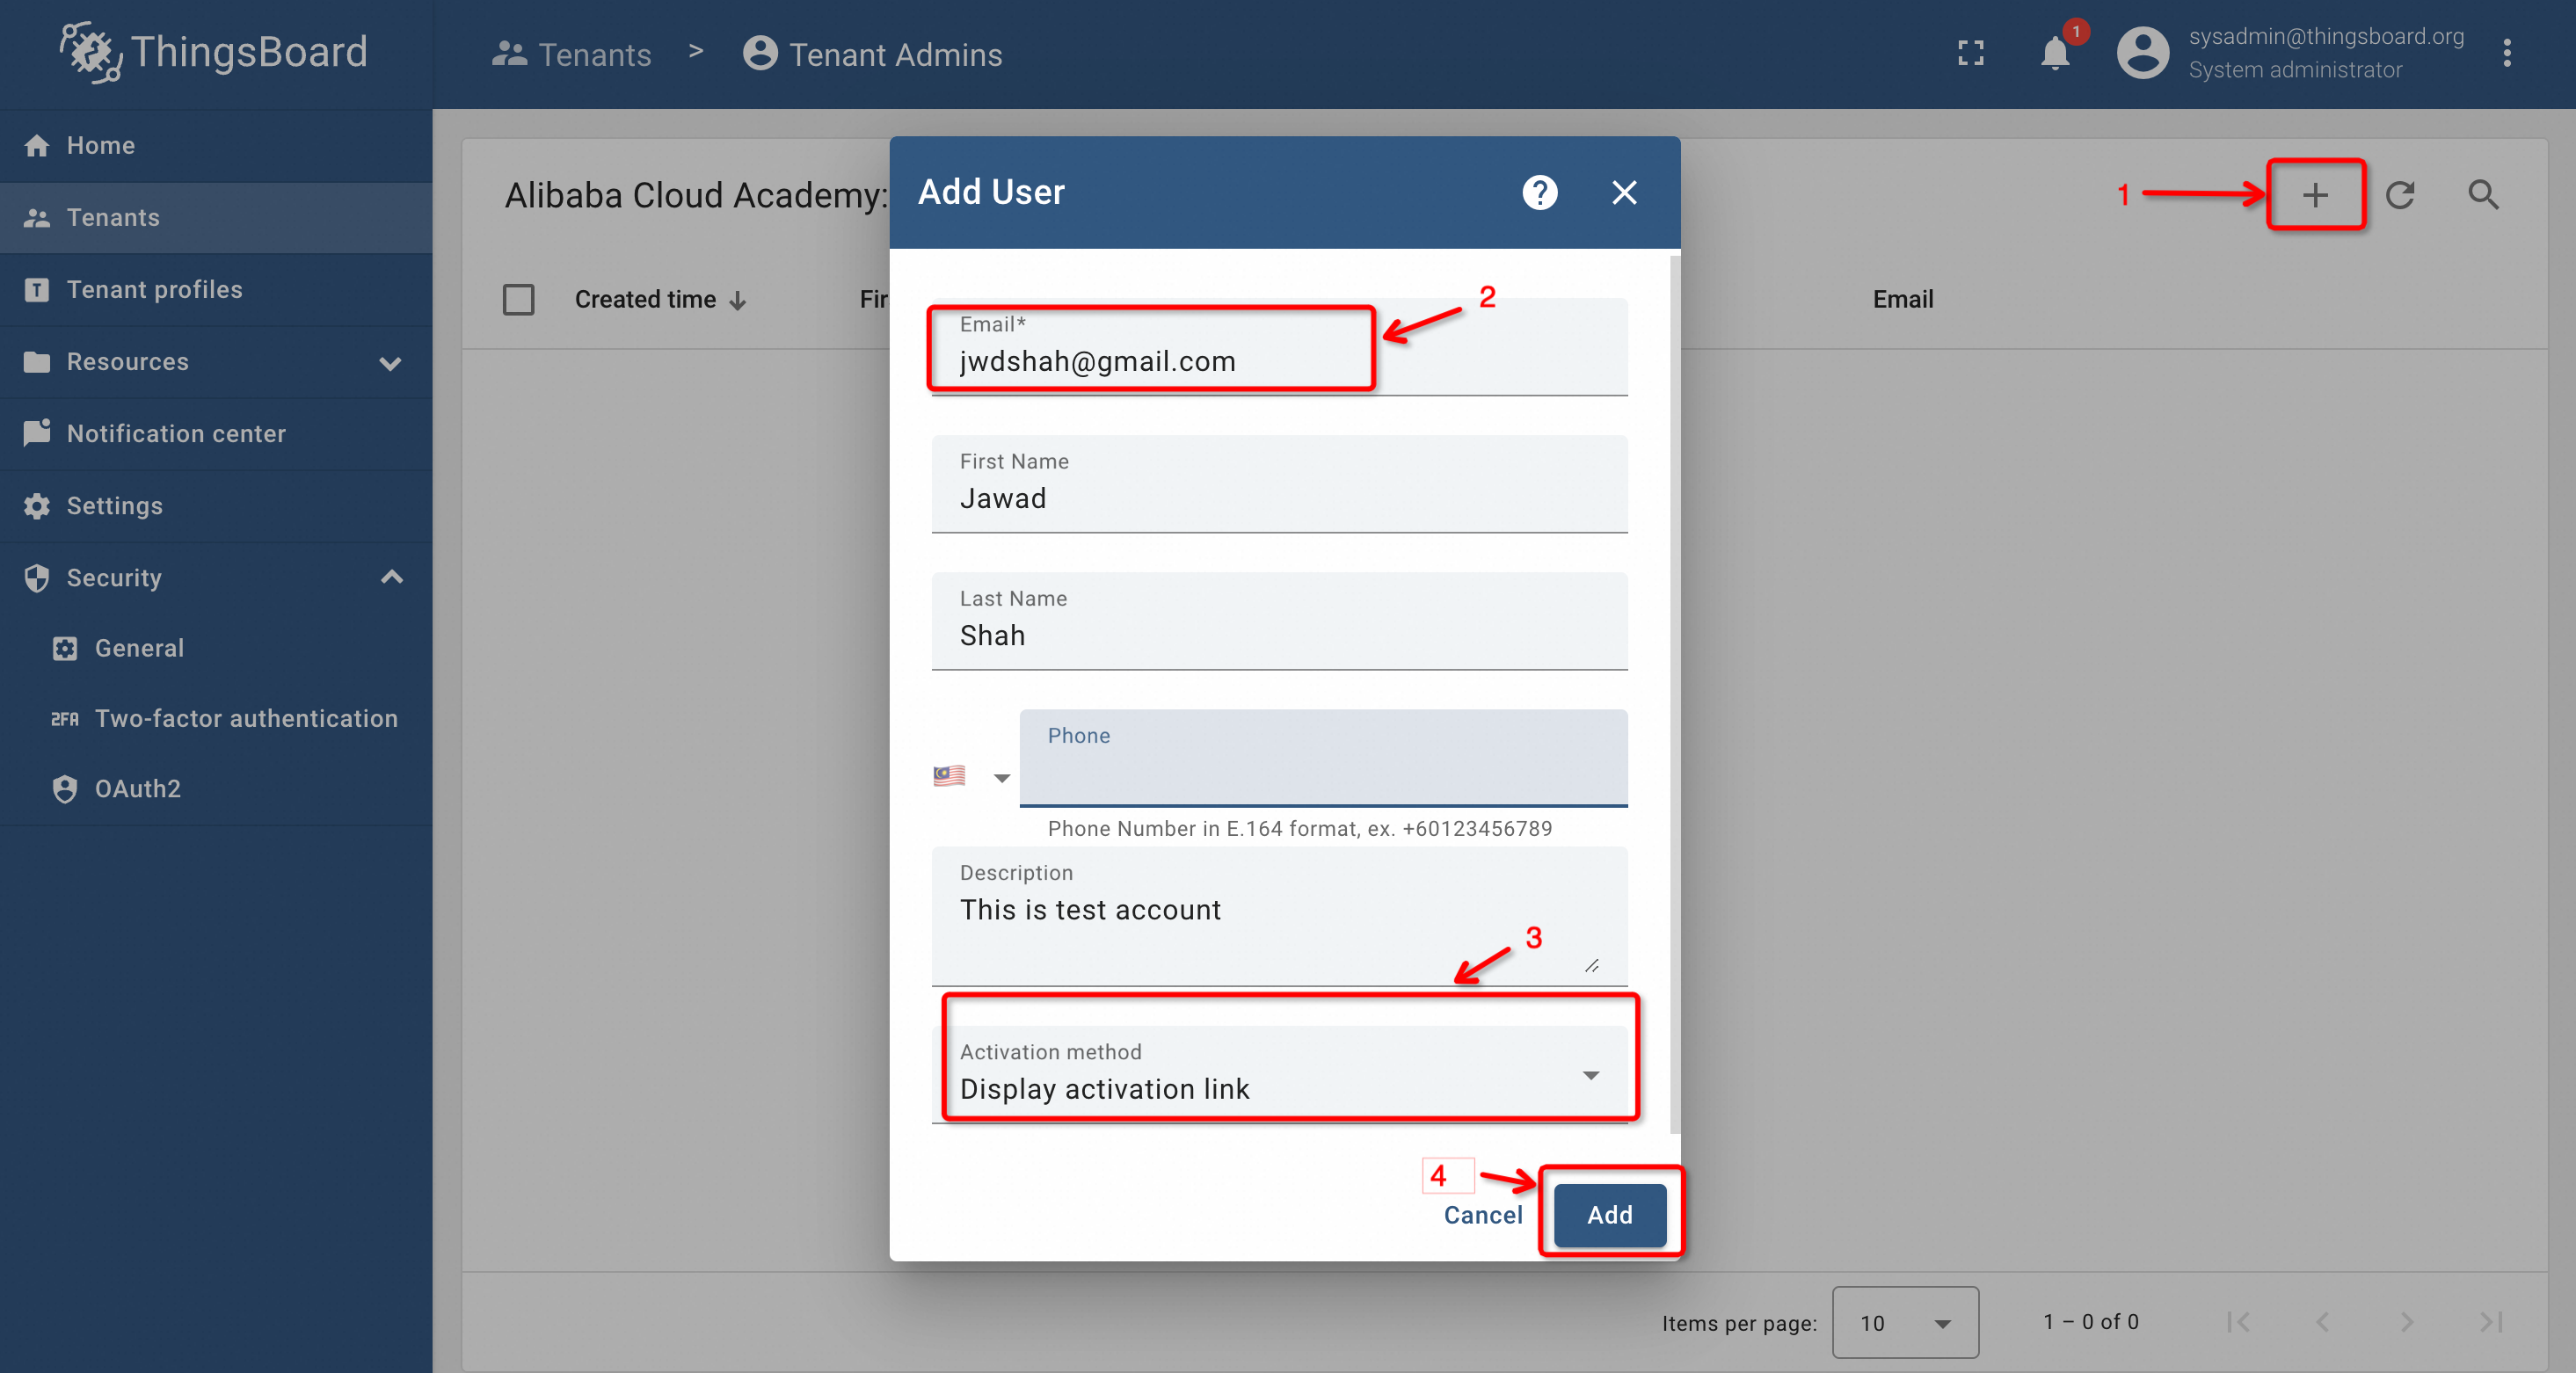
After clicking the add button, we will get the activation code, as shown below:
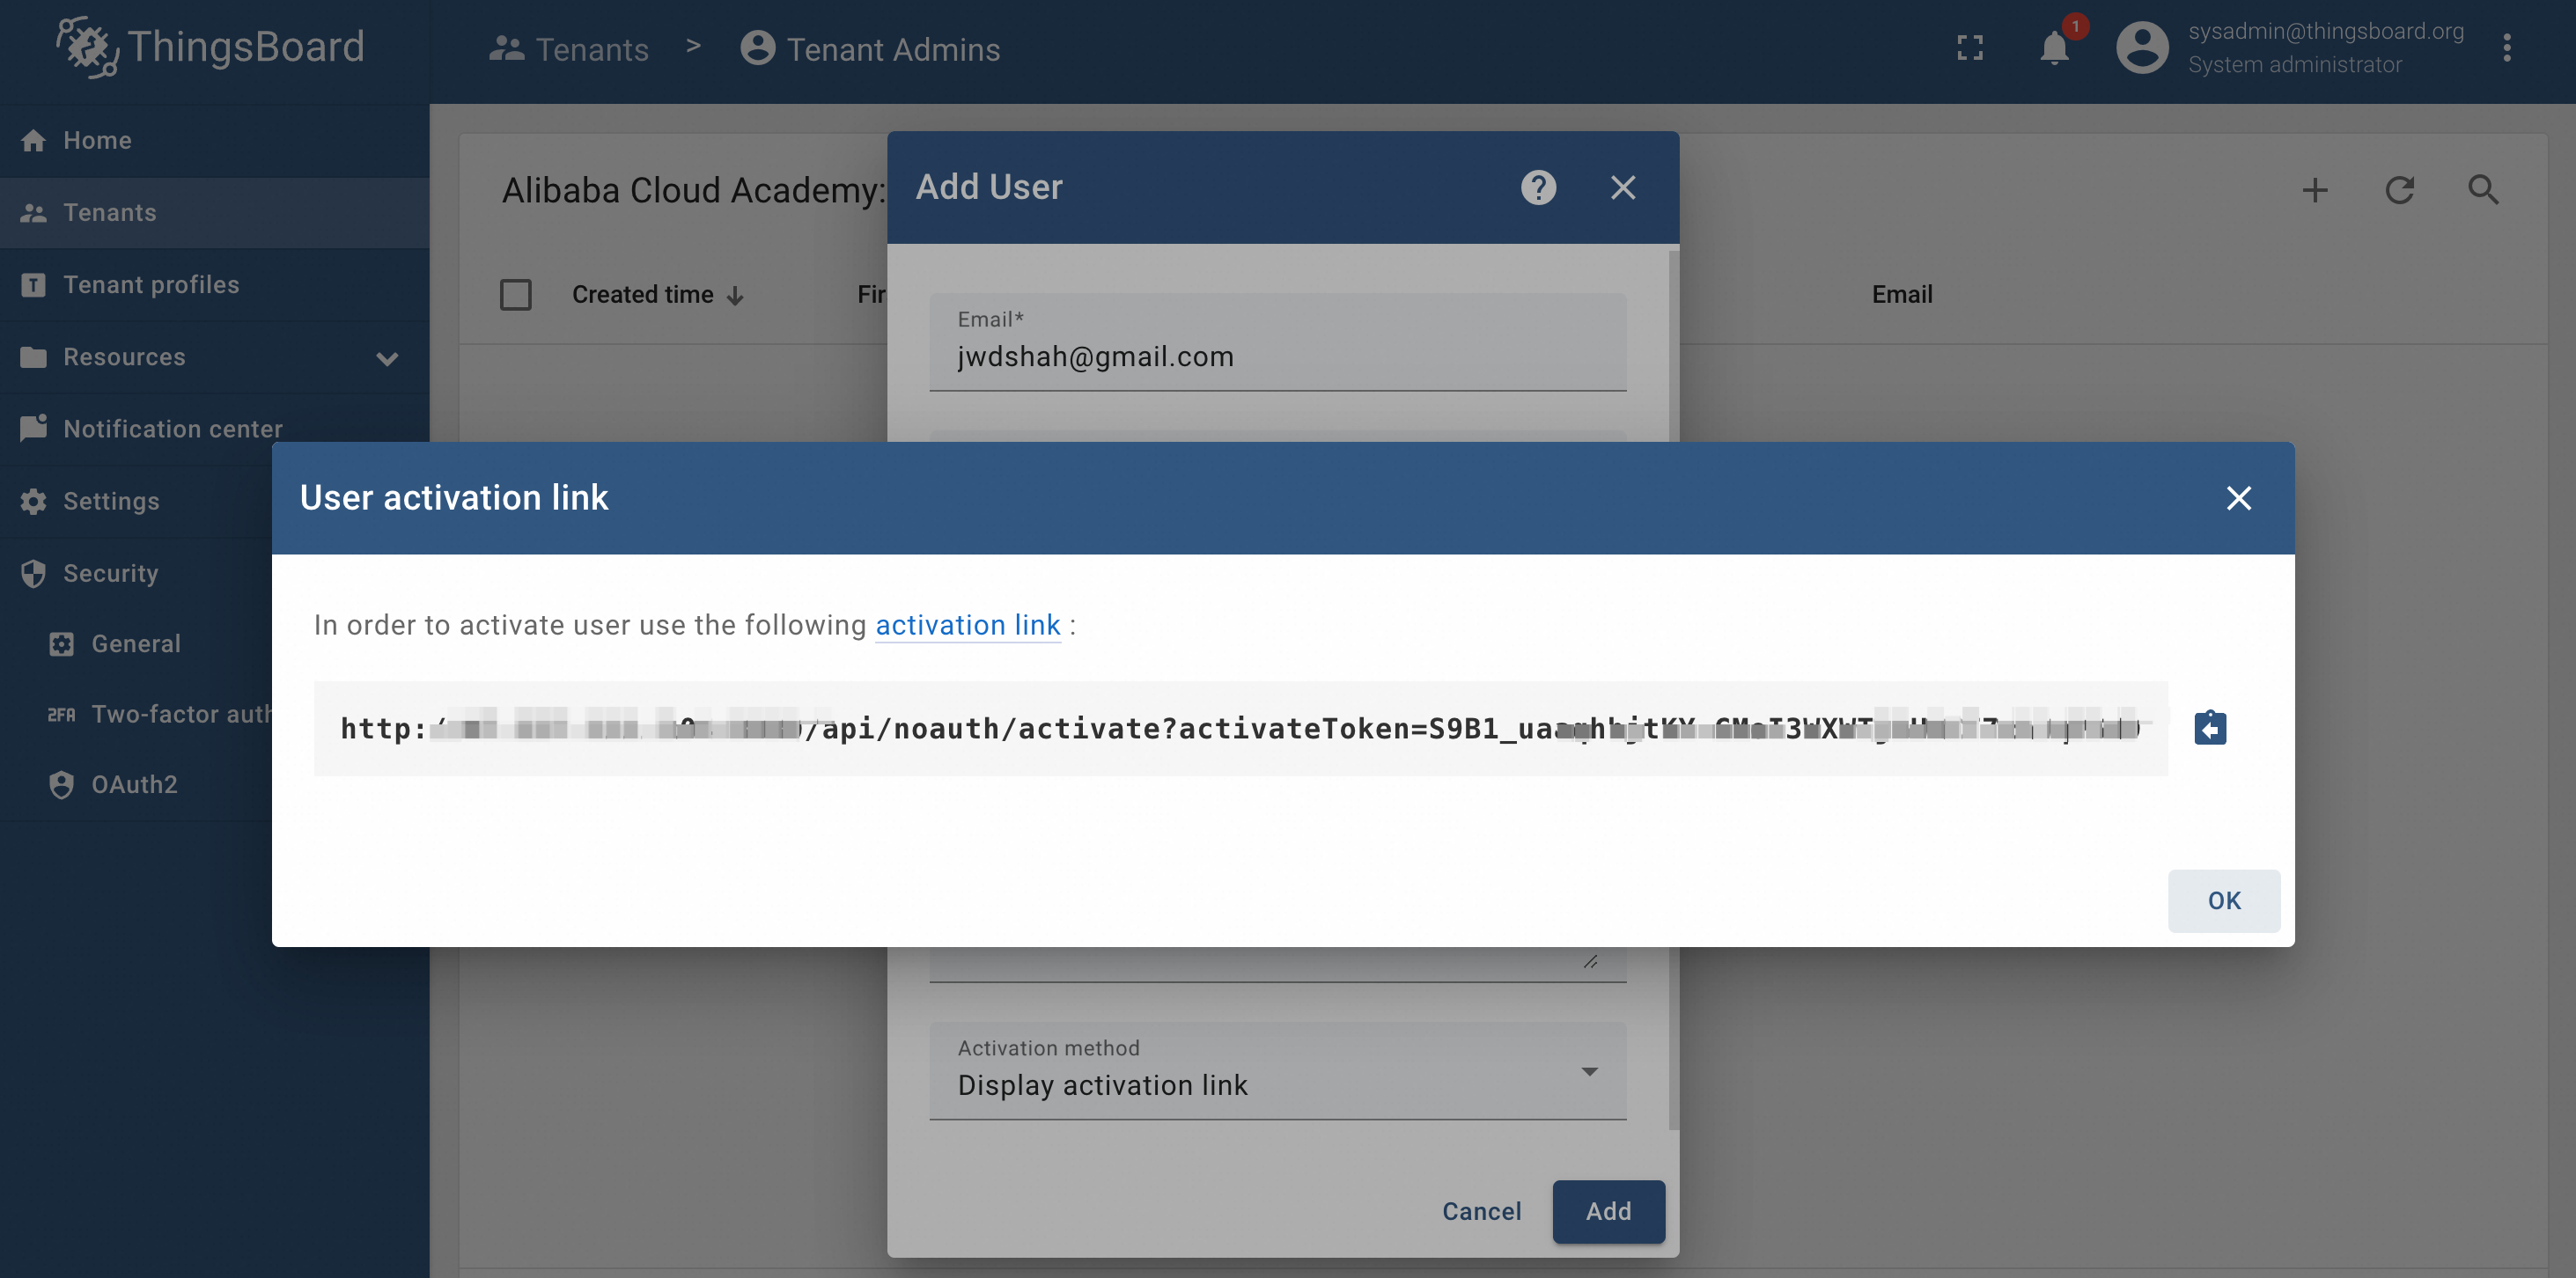
Copy the activation code and paste it into the browser and press enter. You will be prompted to enter a new password.
Provide the new password and press create password. It will direct us to the Tenant Administrator page as shown below:
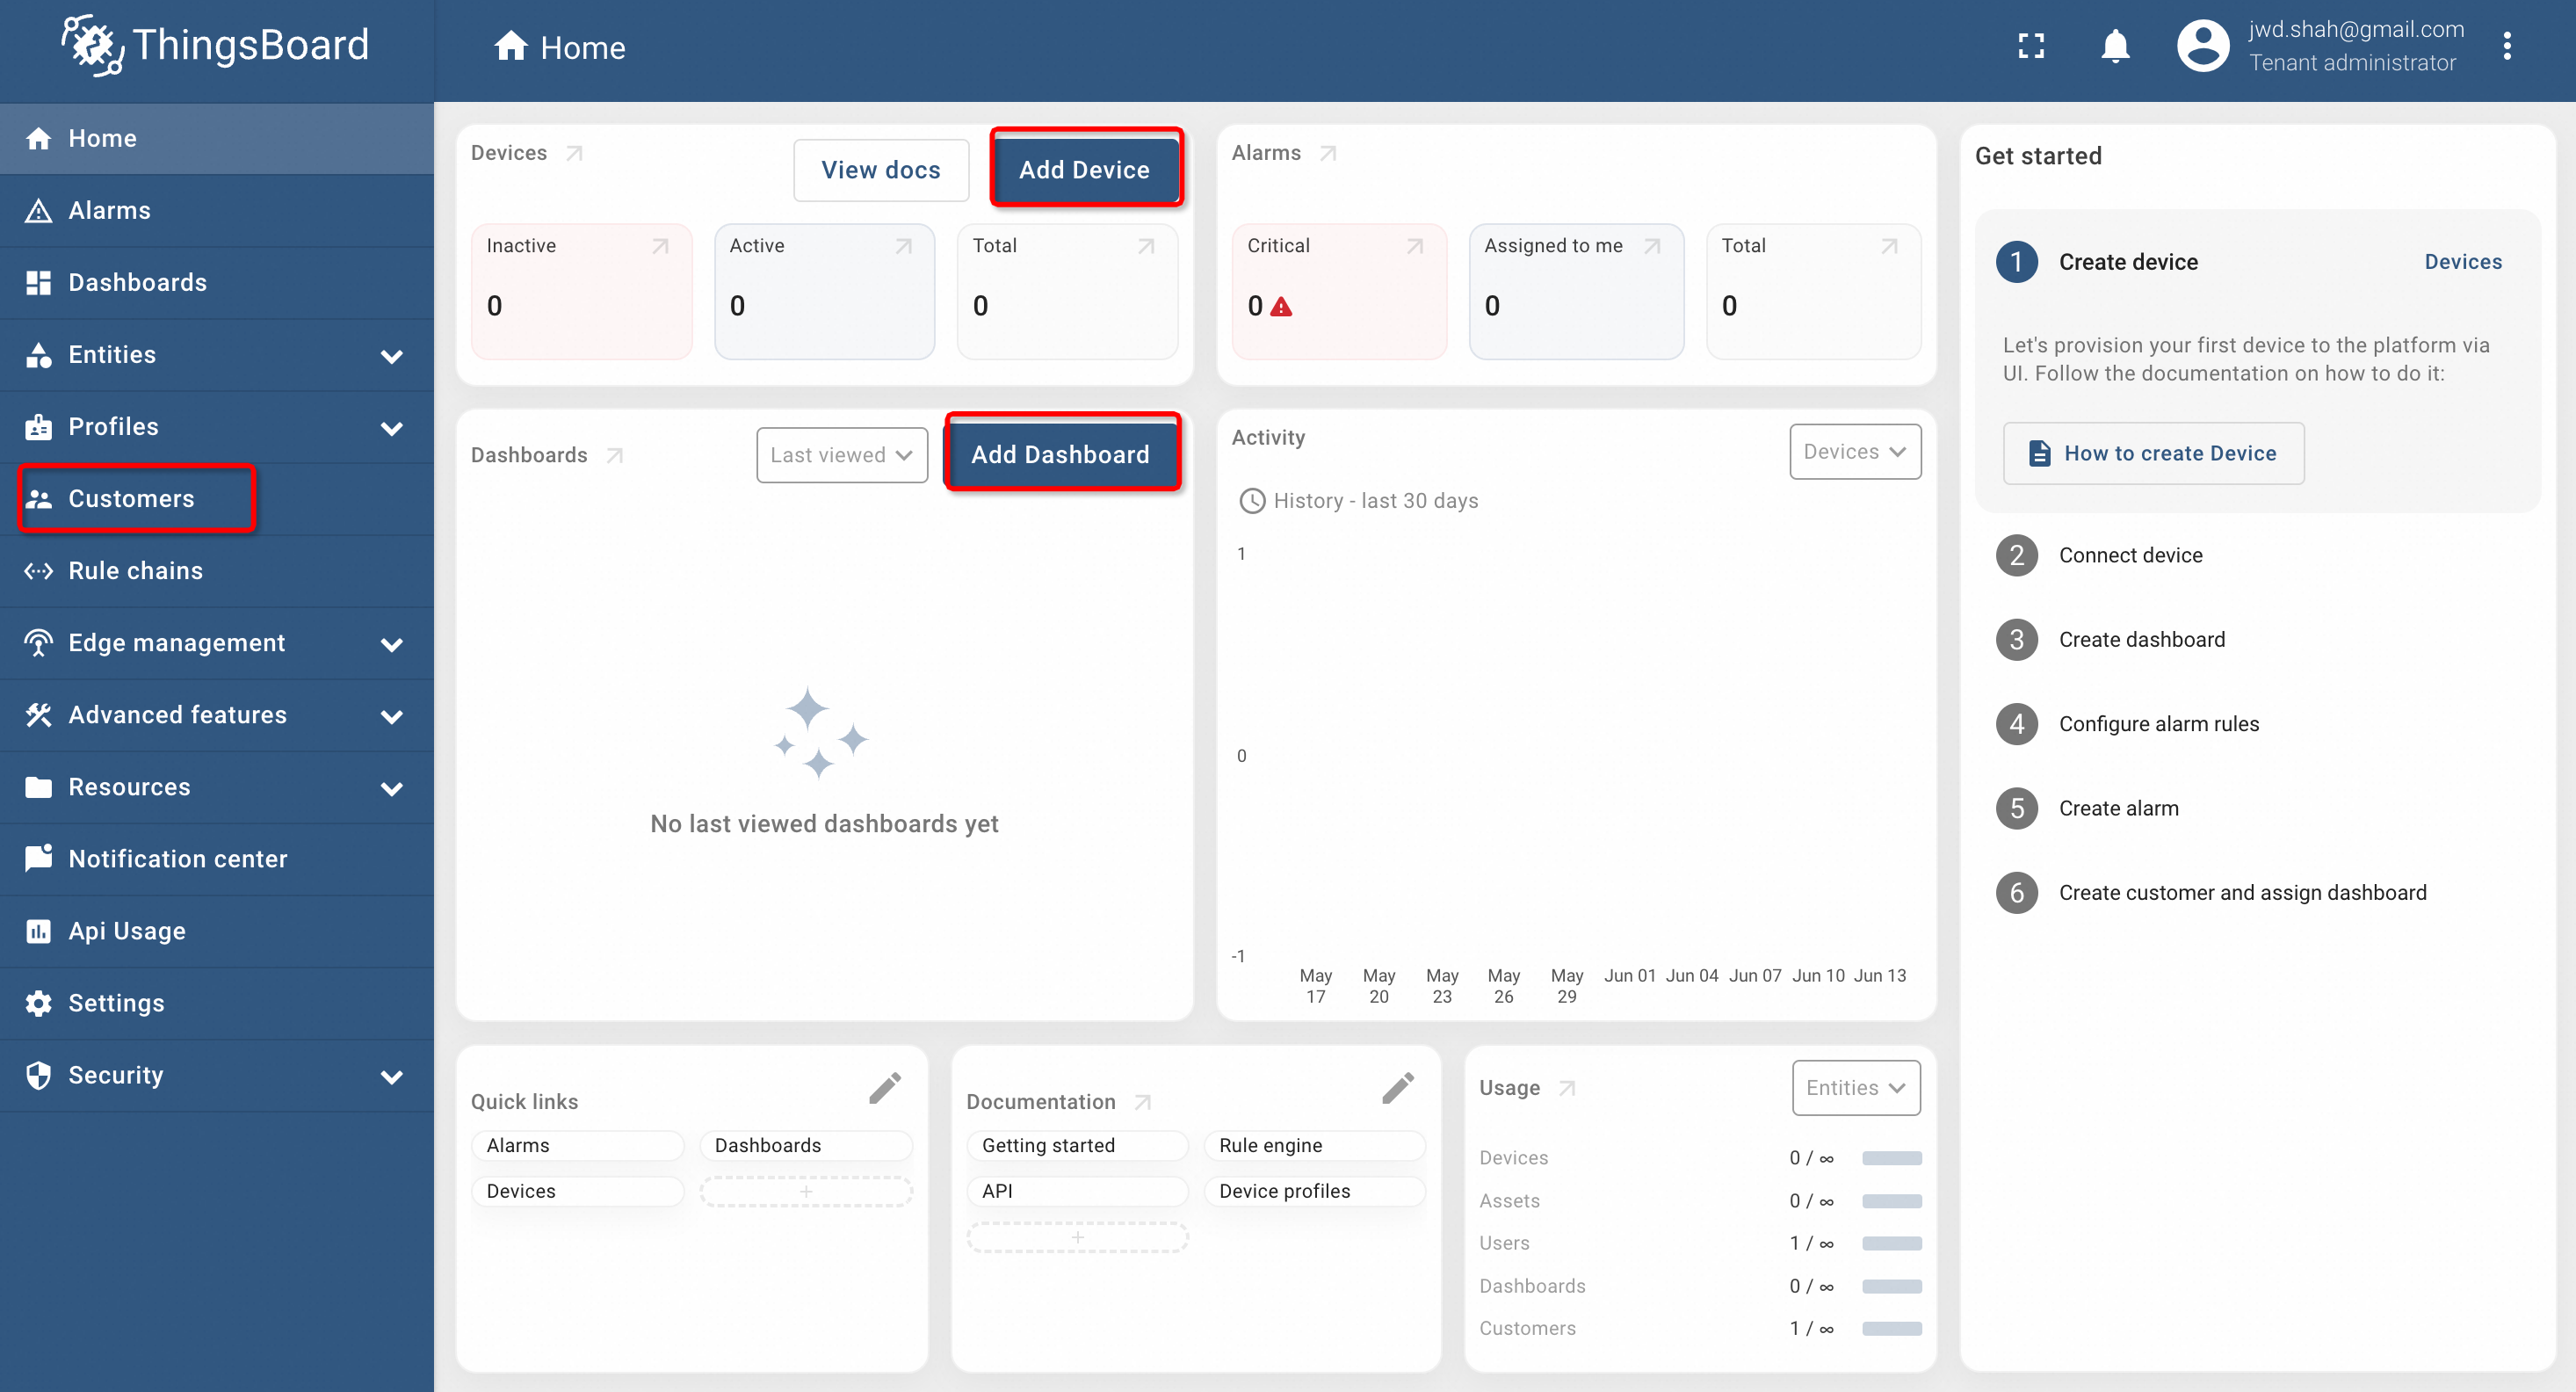
This page can be used to create Customers, Add Devices and Create Dashboard etc. For this demo, we will create a device and then push the data using MQTT to display it on the Dashboard.
Clicking on Add Device will display a page asking for the device name etc.
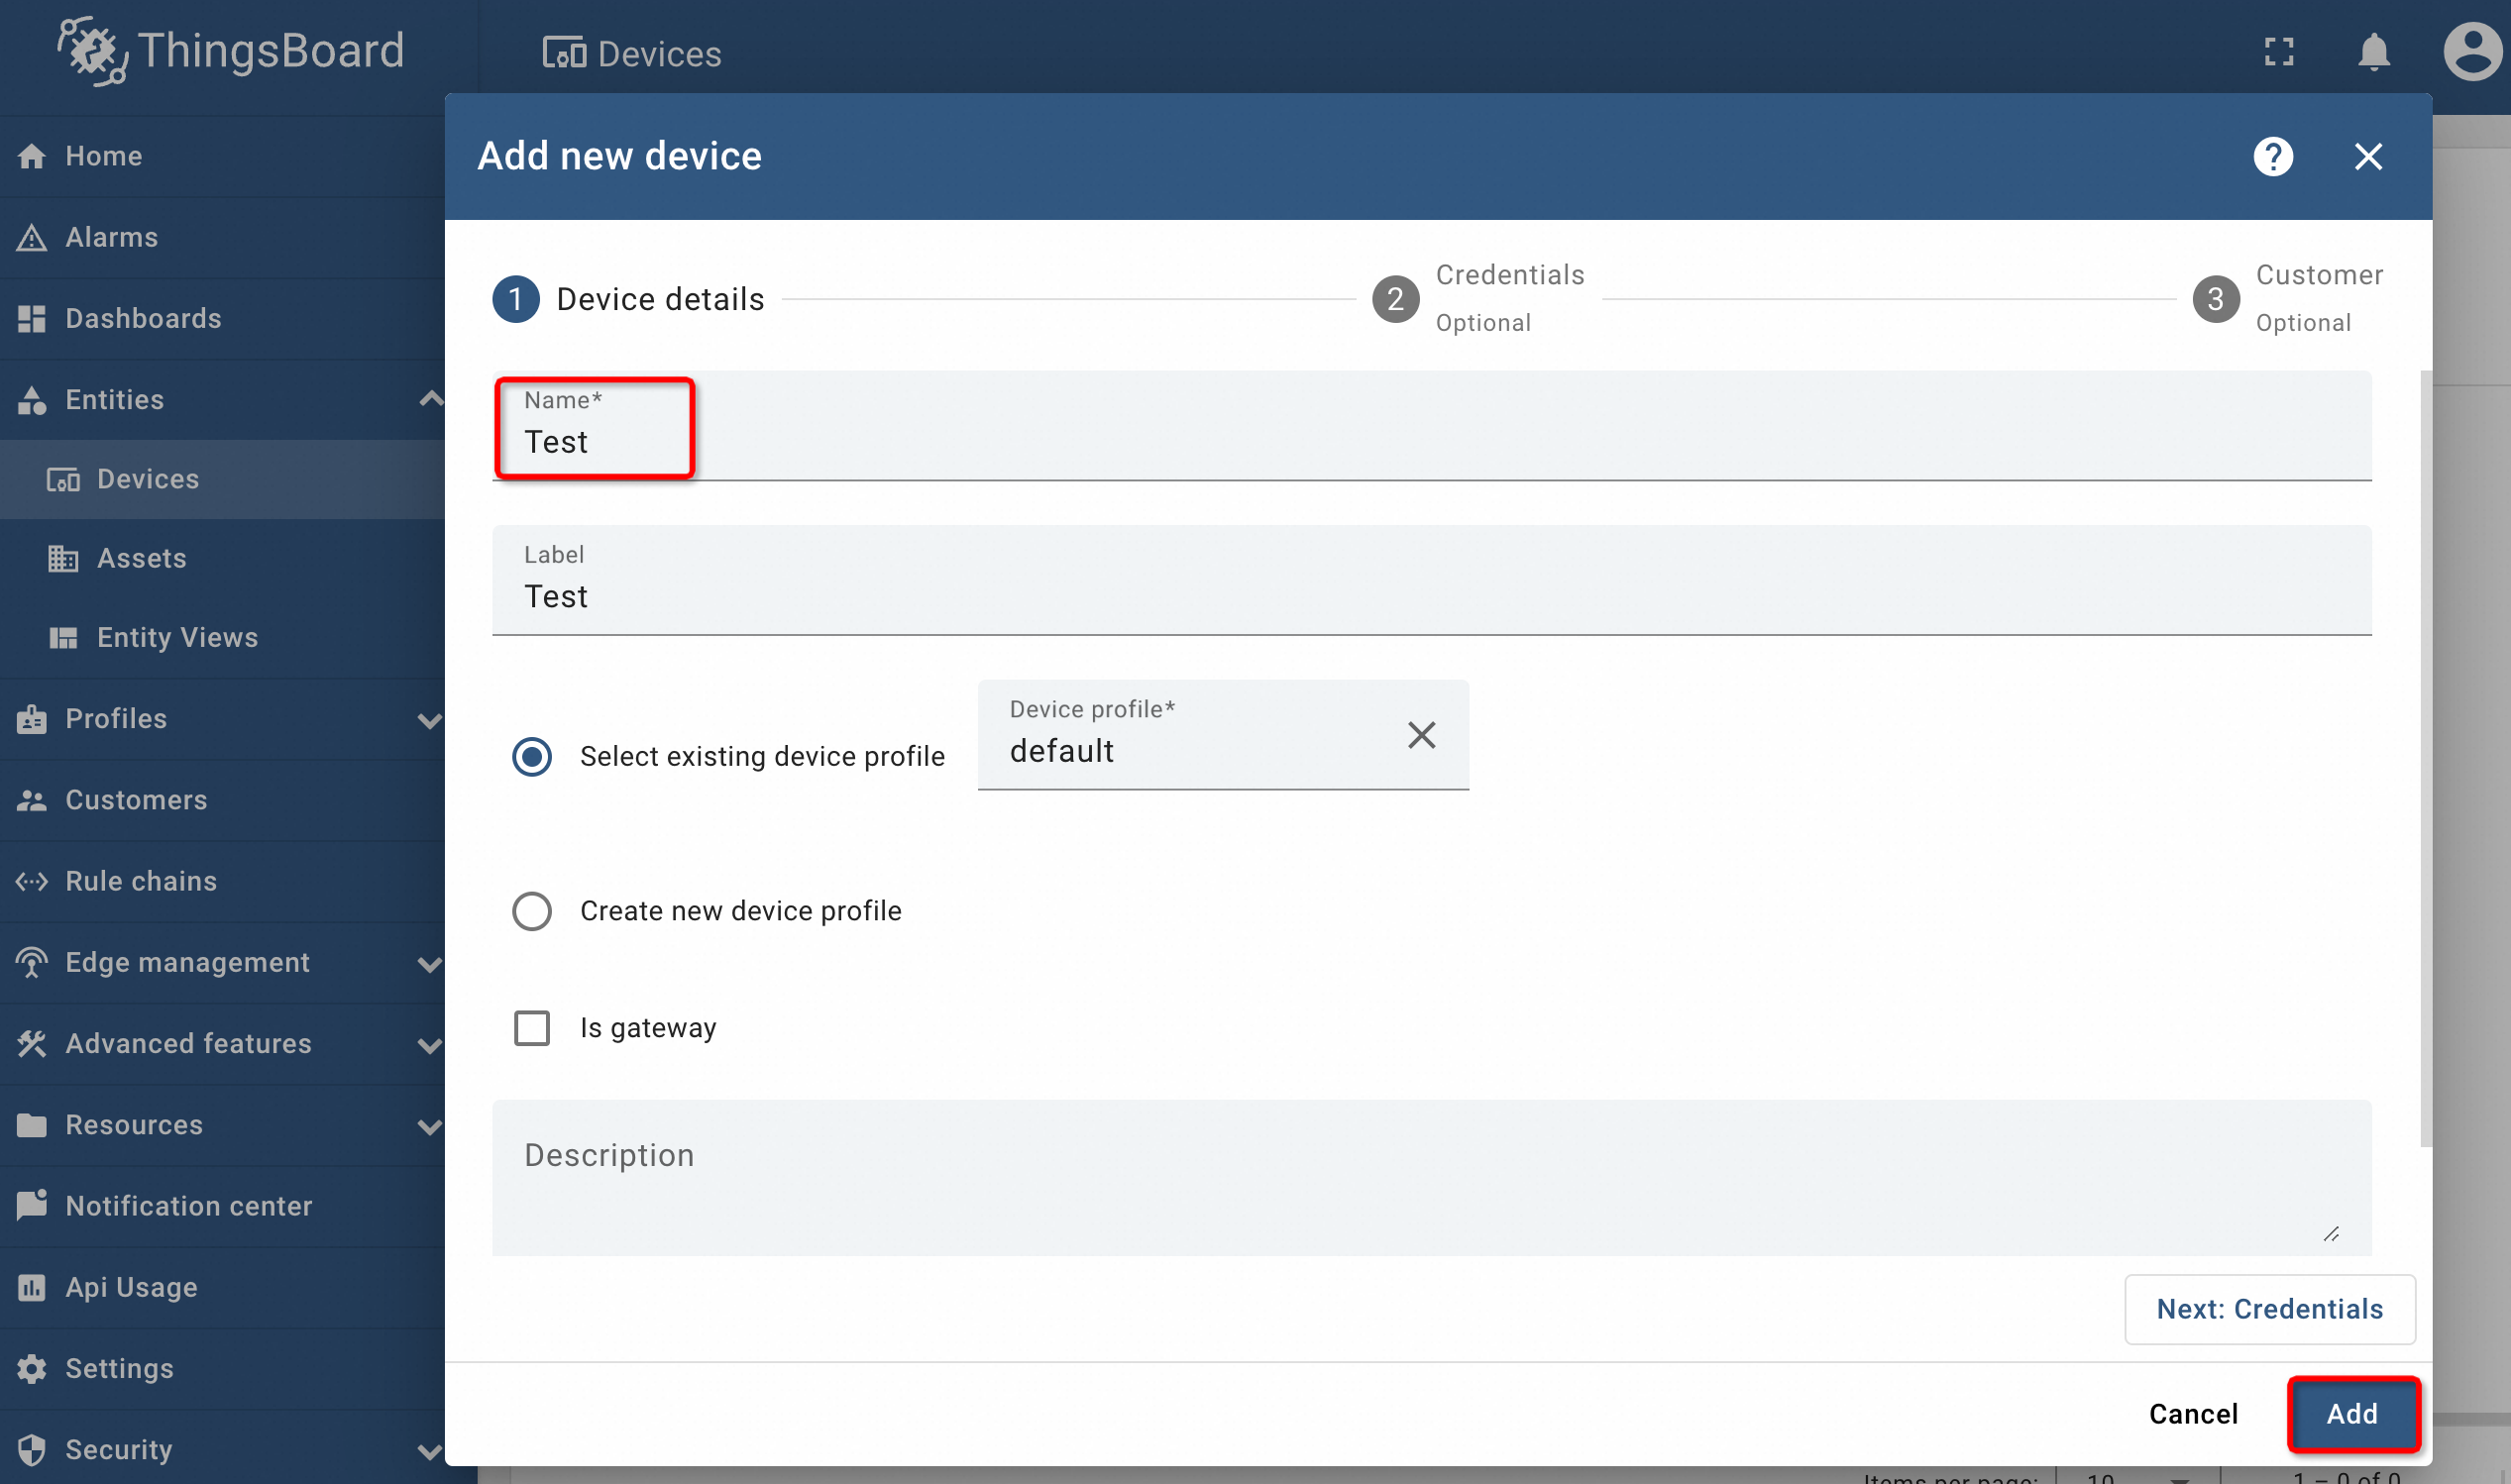
Once done, press Add button and the devices will be added.

Every newly created device will initially have "Inactive" status. If there are customers’ accounts, we can assign a device to a specific customer as well.
To send data to the device, we need the device access token and MQTT topic. ThingsBoard community edition uses v1/devices/me/telemetry as the MQTT topic that can be used by the sensors to publish data.
To get the device credentials, click on the name of the device and copy the access token:
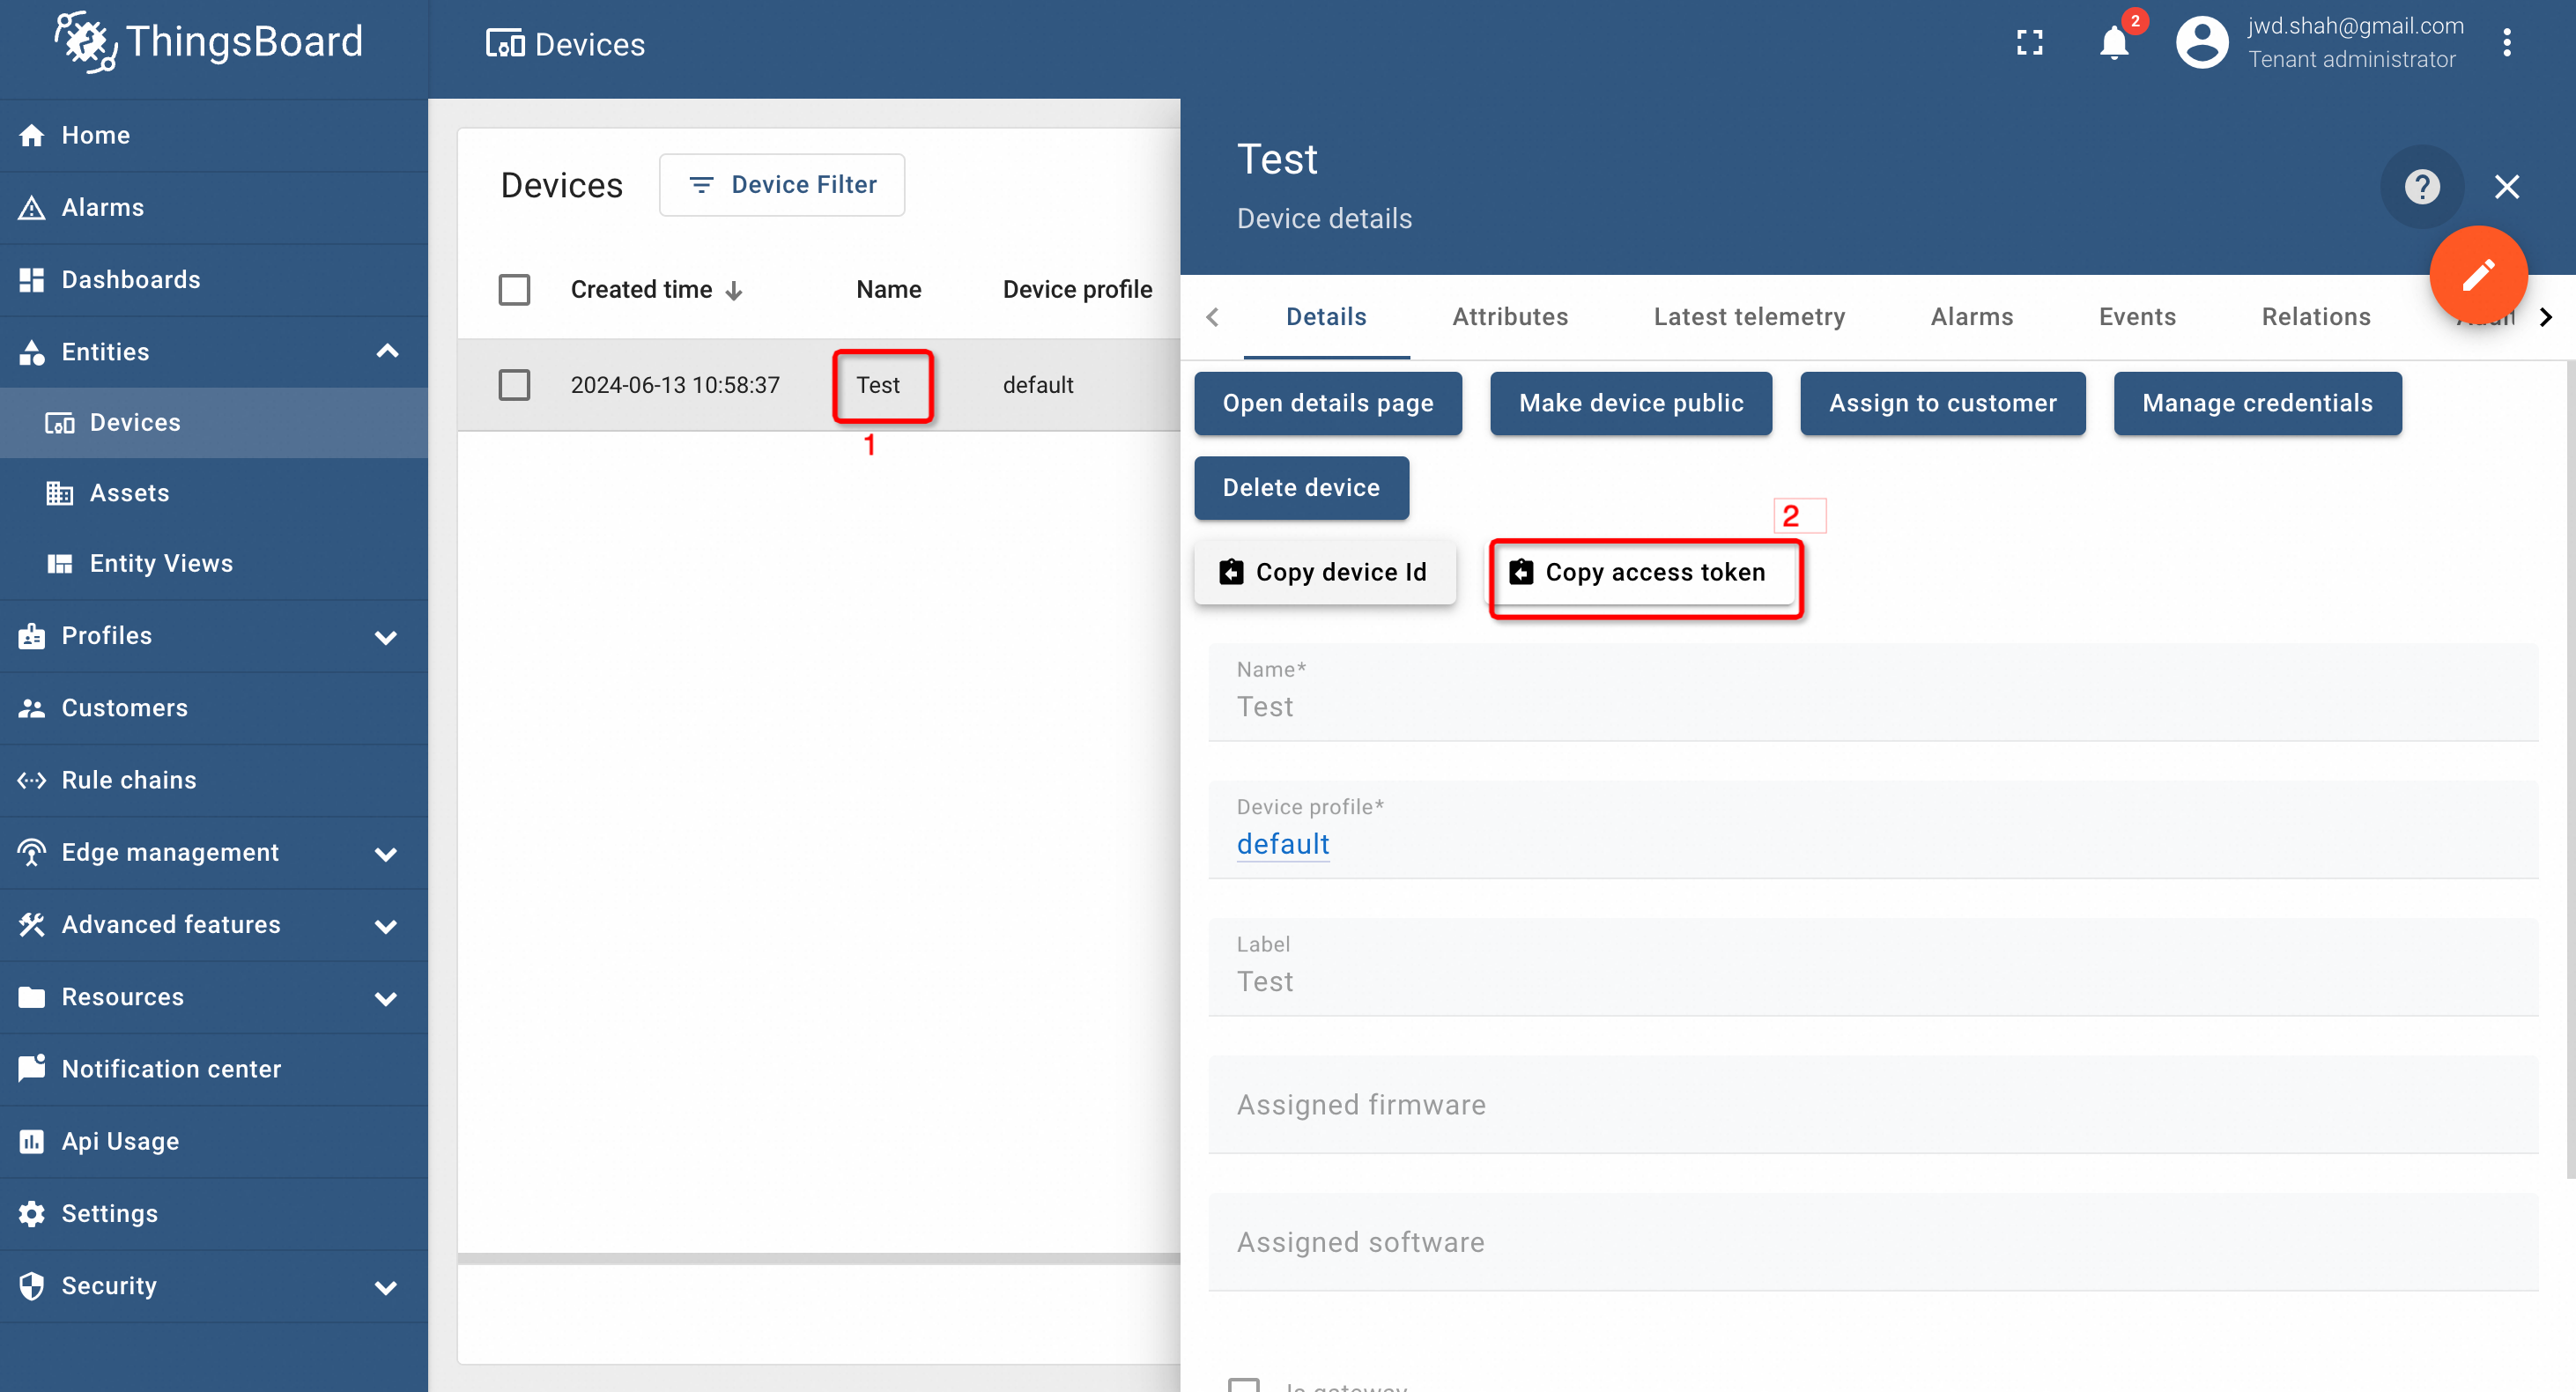
Save the device token as we will need information later on.
To connect a client to ThingsBoard and send telemetry data to the device, we can either use mosquitto client for Commnad line interface or can install open-source software like MQTTX. We will go with the later method.
1. Install MQTTX client:
Depending on the operating system, the GUI version MQTTX can be downloaded from the website https://mqttx.app/
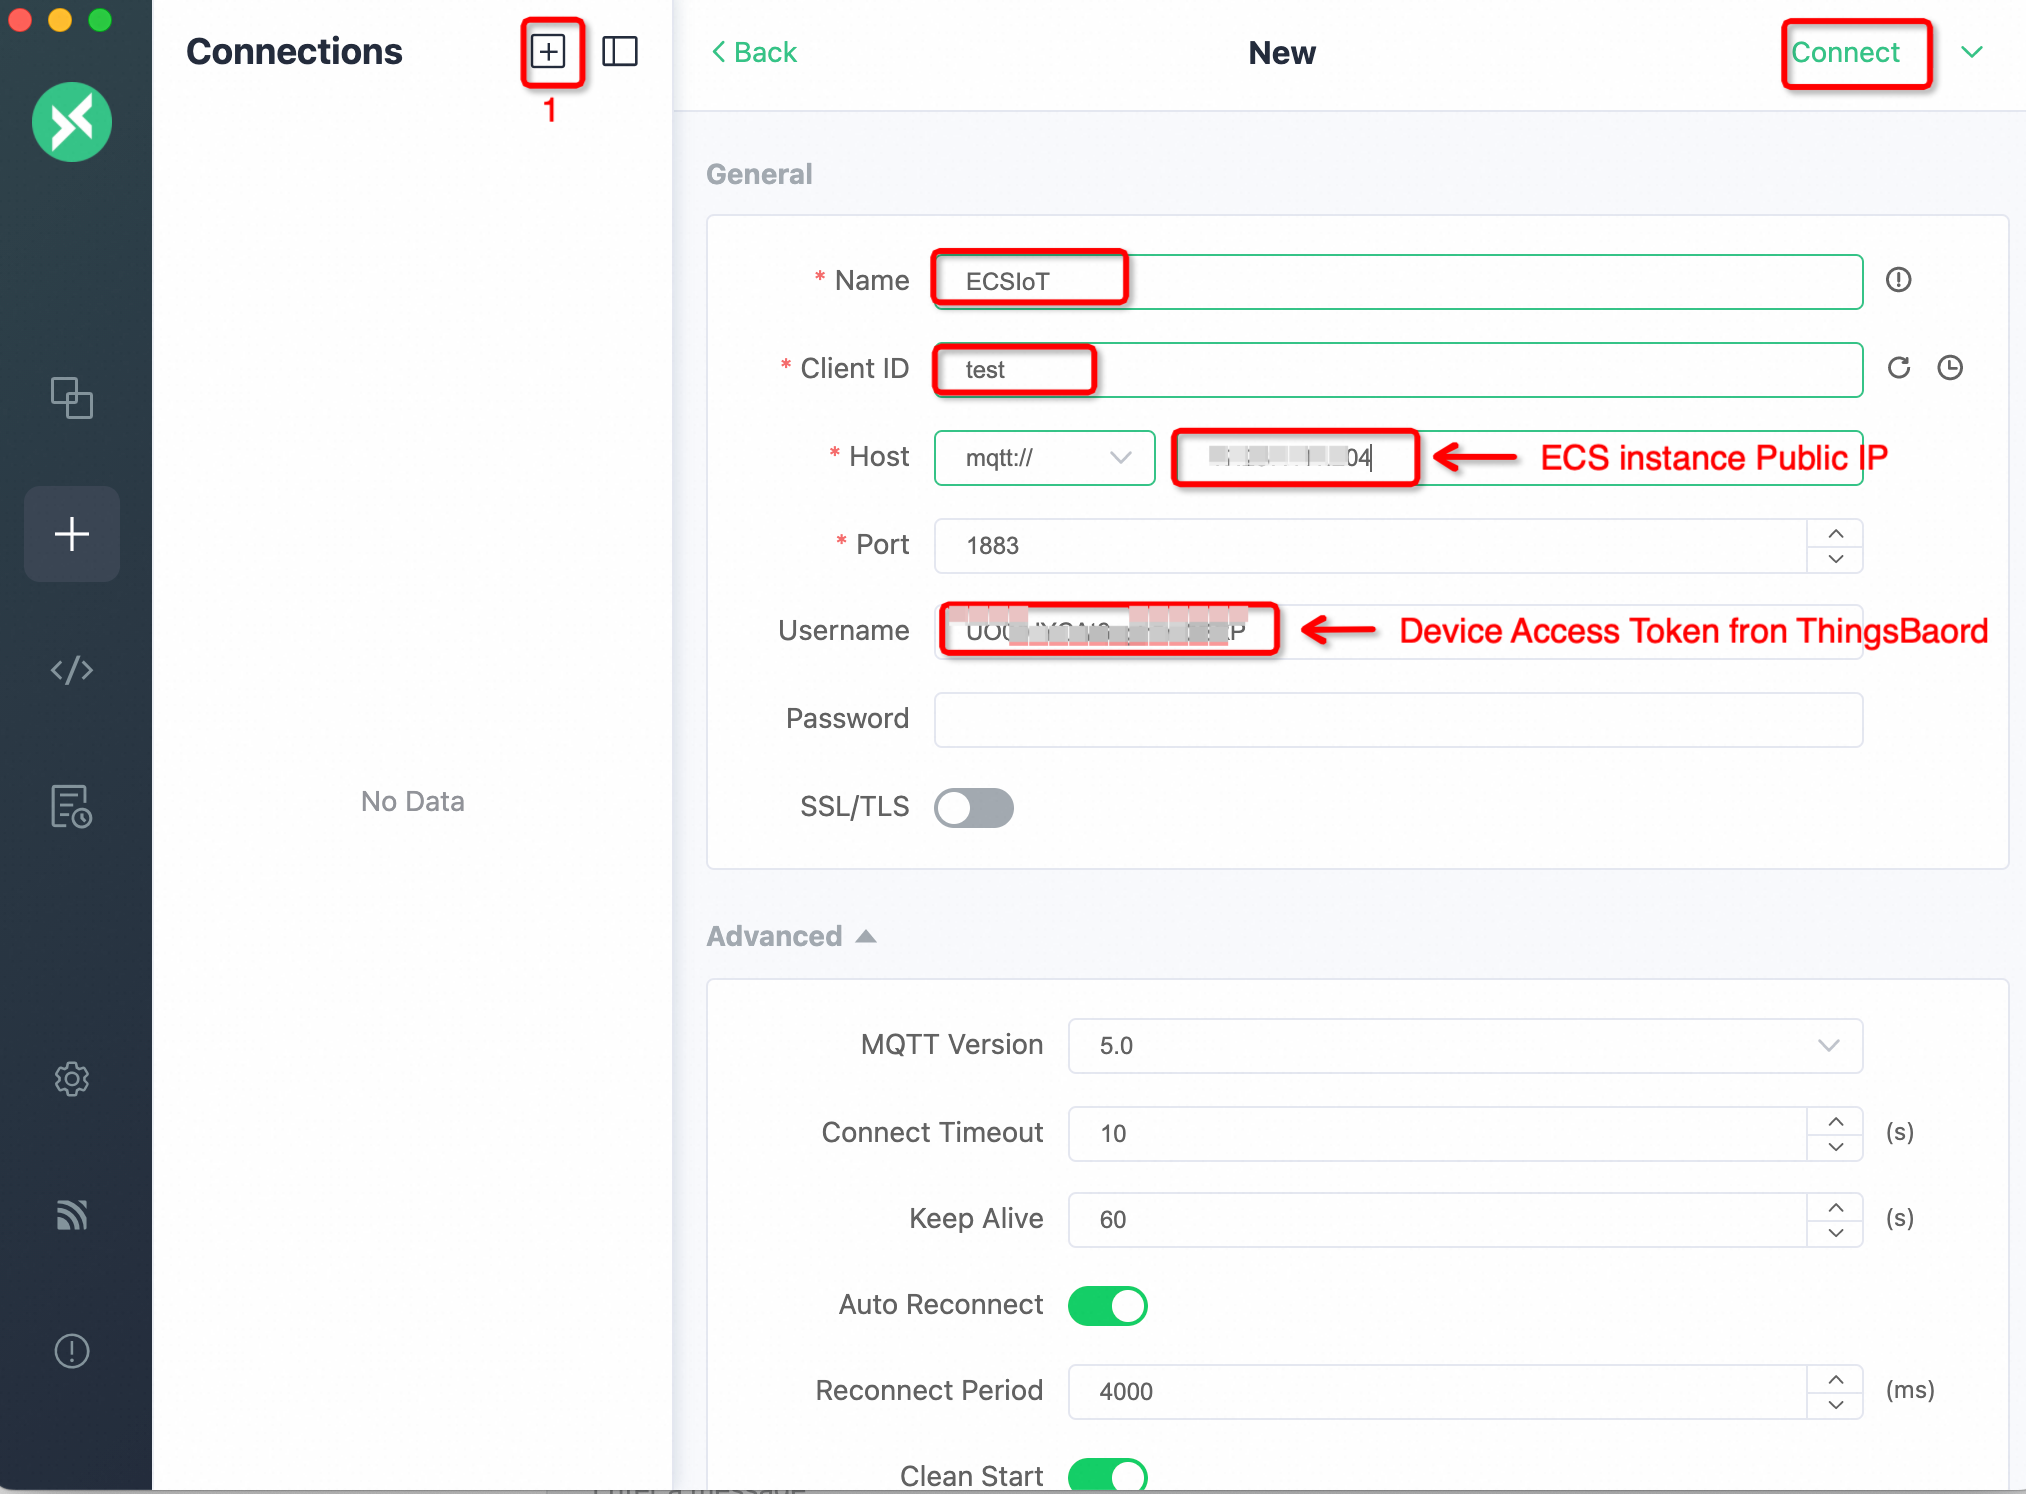
Once downloaded and installed, we can use it as an MQTT client to send data to the ThingsBoard device. To configure MQTTX, we need the ECS public IP address and the Device Access token from ThingsBoard Device (as shown in Step-11).
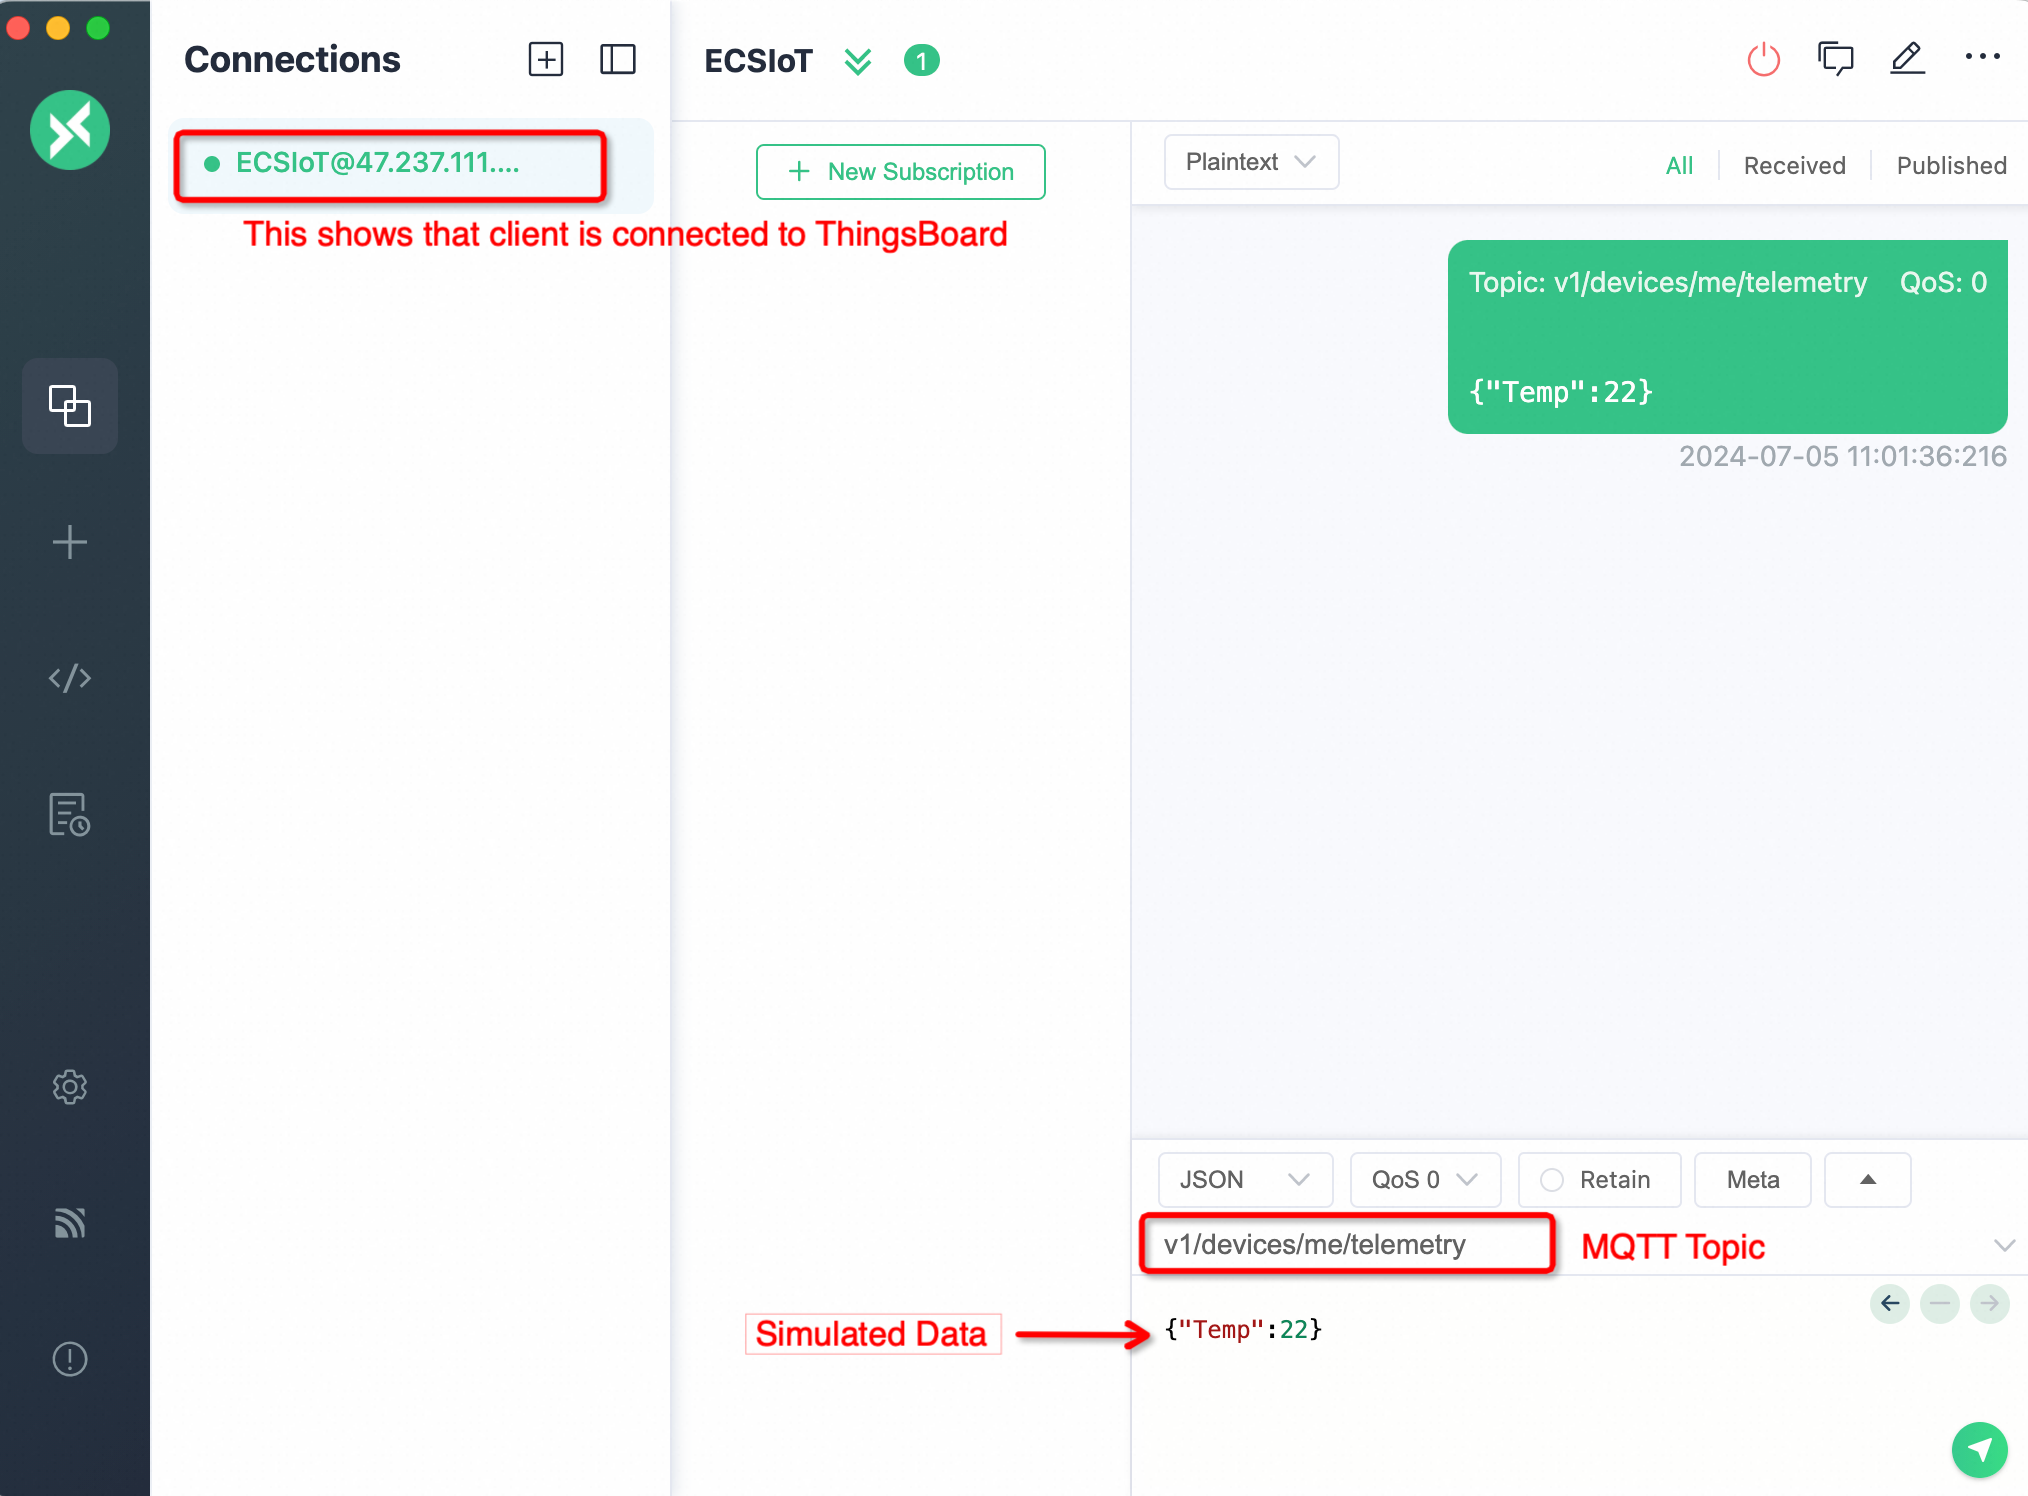
The following figure shows the connection configuration details of MQTTX. Note that the Device Access token is being used as the Username.
2. Publish telemetry data using MQTTX:
To publish data, we need to configure the MQTT topic, as shown below. The data to ThingsBoard can be sent in the json format e.g. {“Temp”:22}
3. Checking Data and Creating Dashboard on ThingsBoard
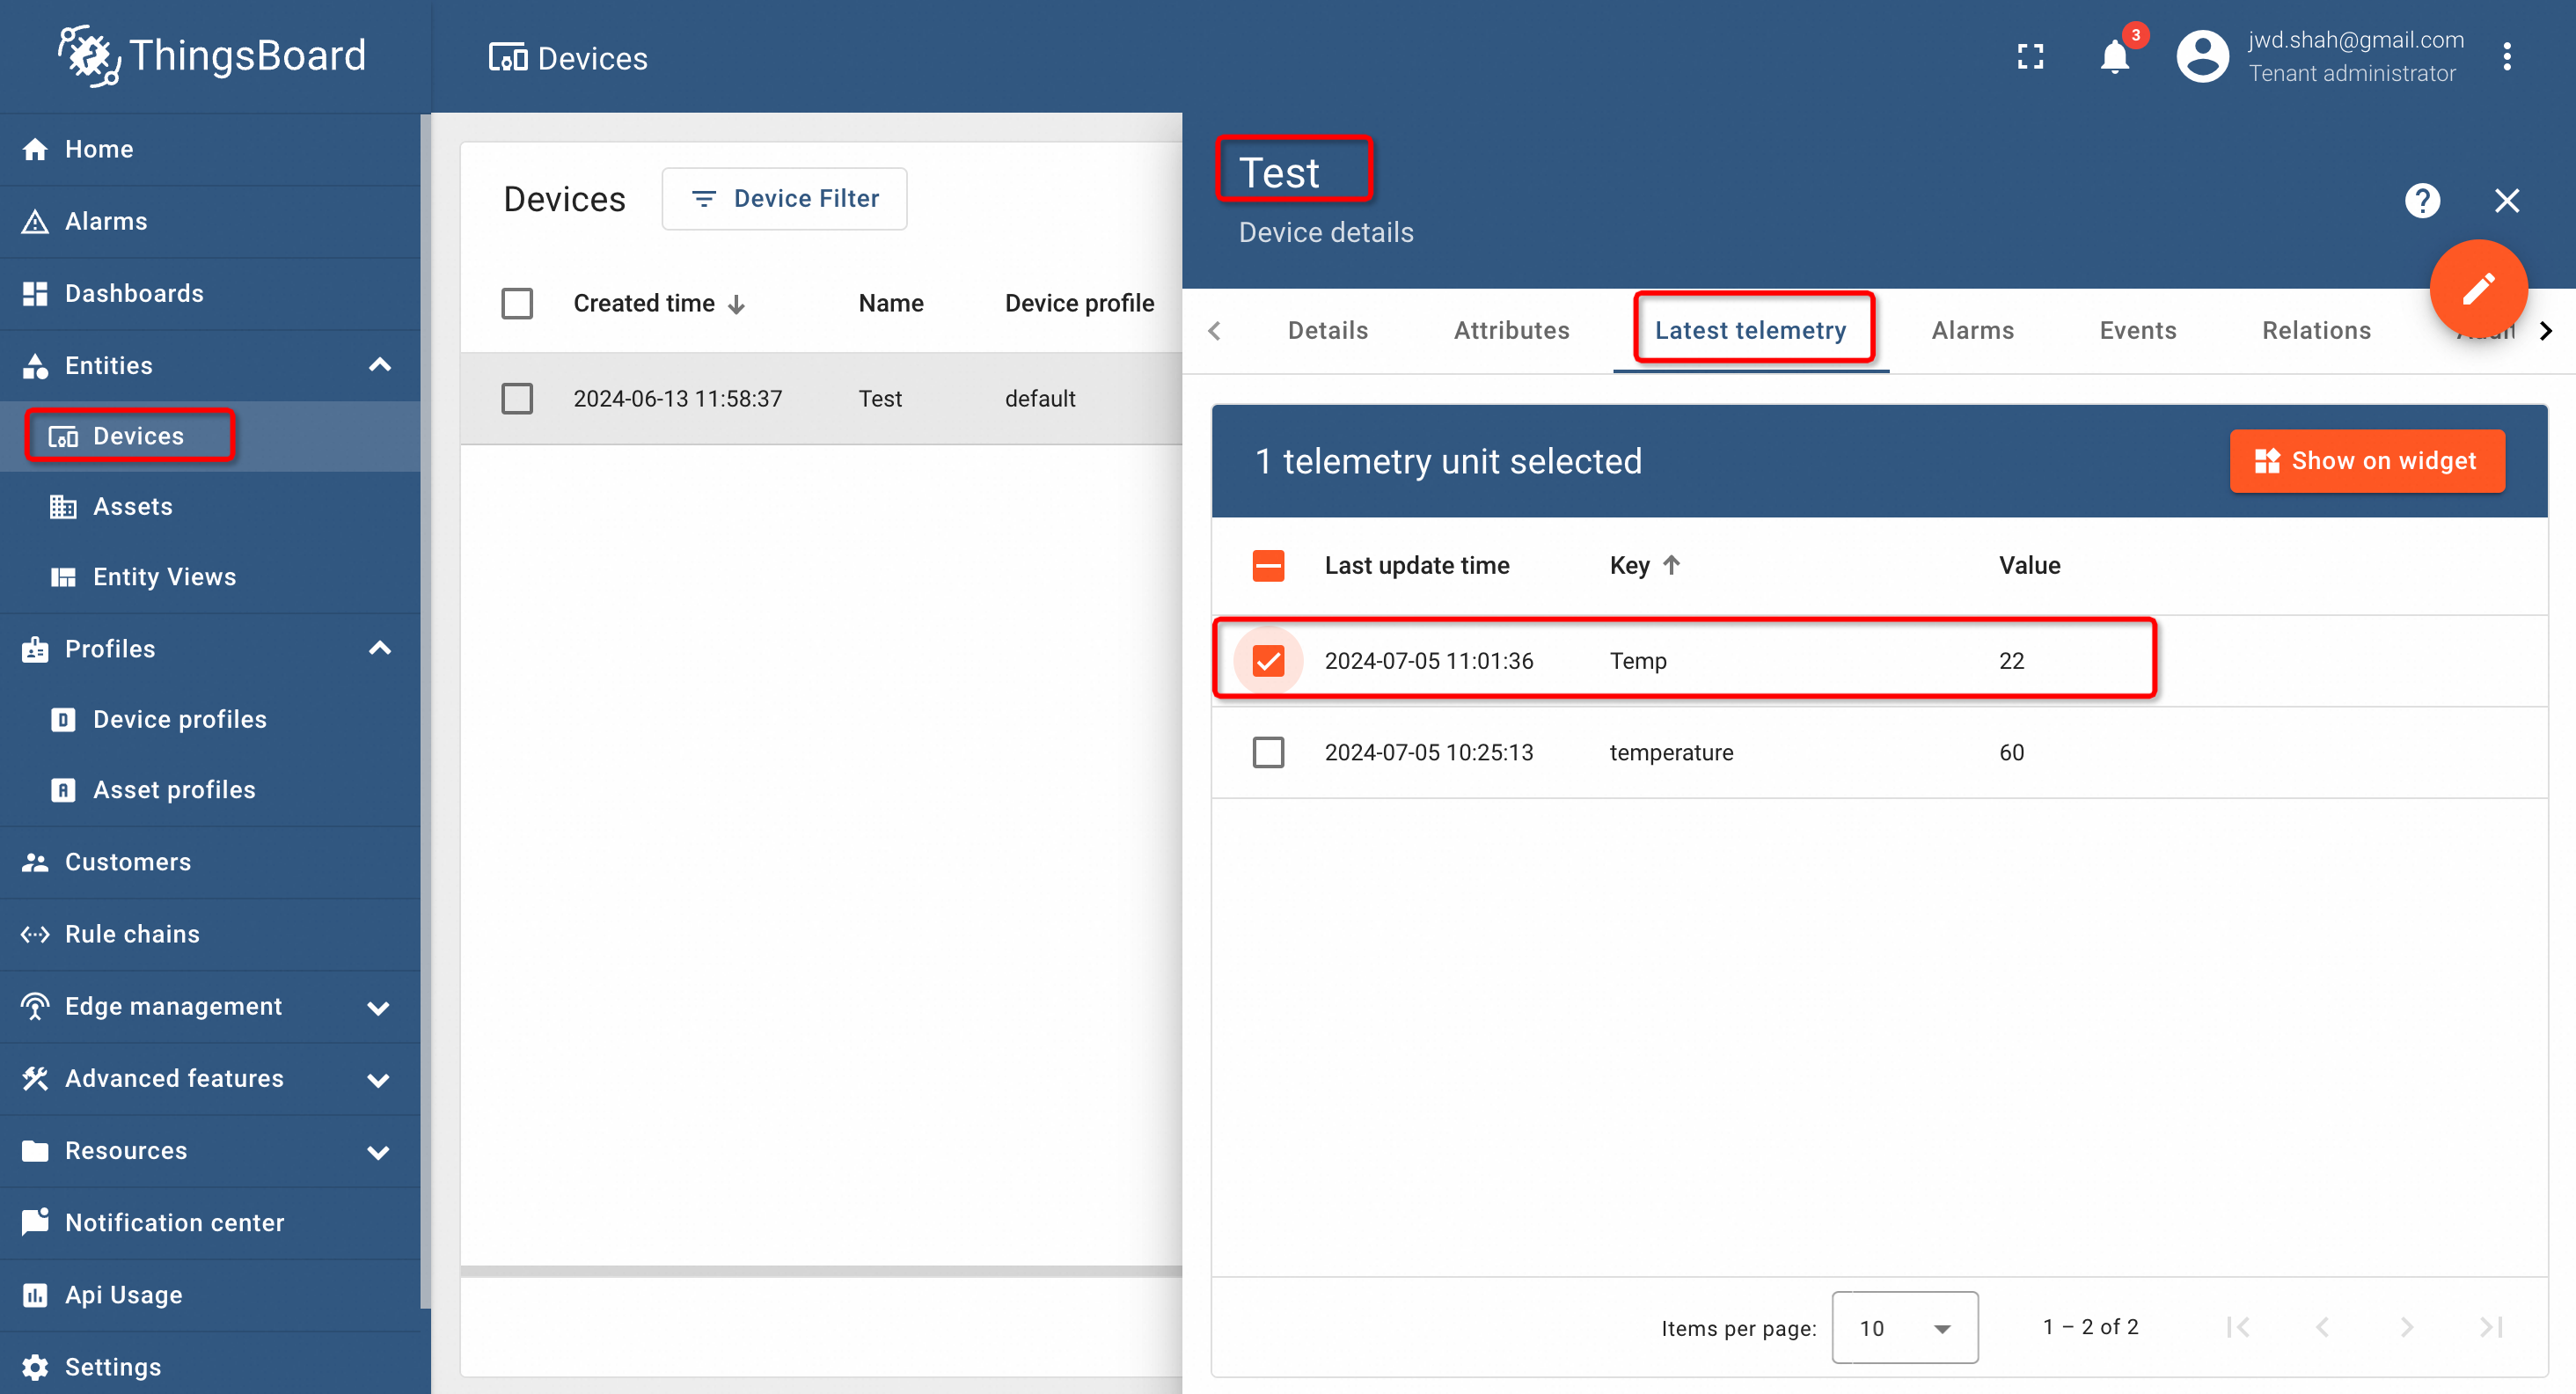
To see and visualize the telemetry data on the ThingsBoard, select the device that we created already, go to the Latest Telemetry data and we may be able to see the data published by the MQTTX along with the timestamp. When we click on the checkbox, the box Show on Widget will appear, as shown below:
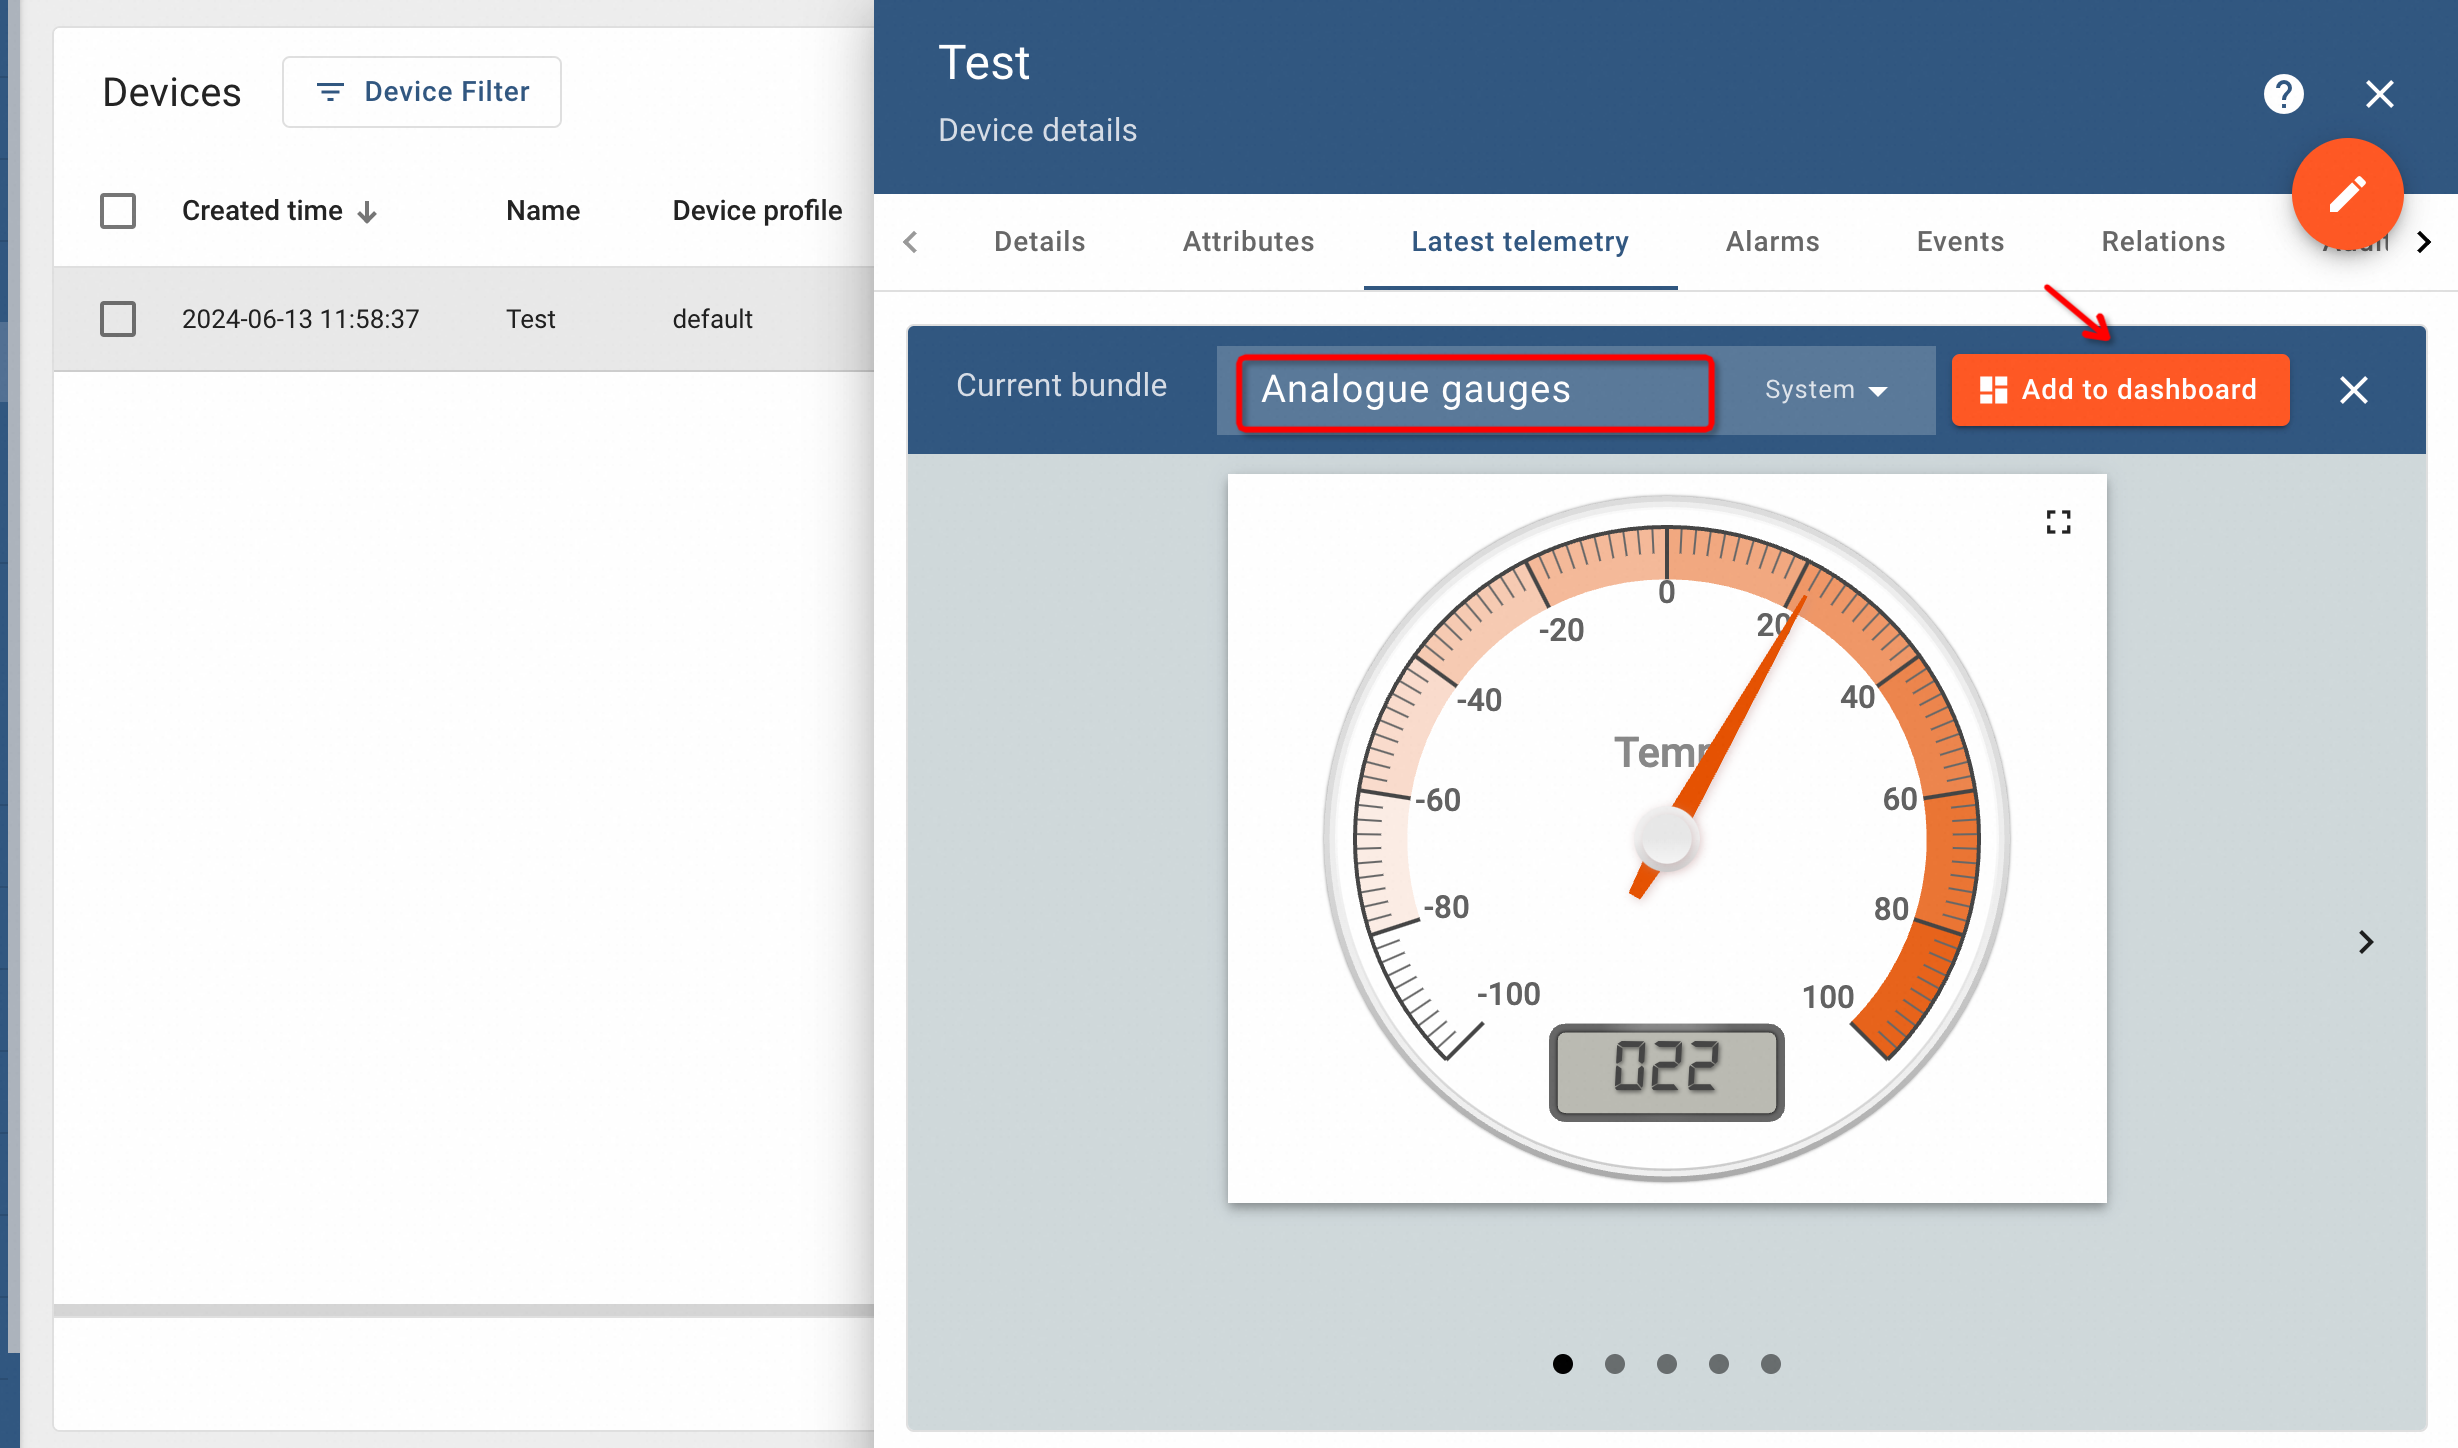
Clicking on Show on Widget, will display options for the visualization. Select Analogue gauges and click Add to dashboard, as shown below:
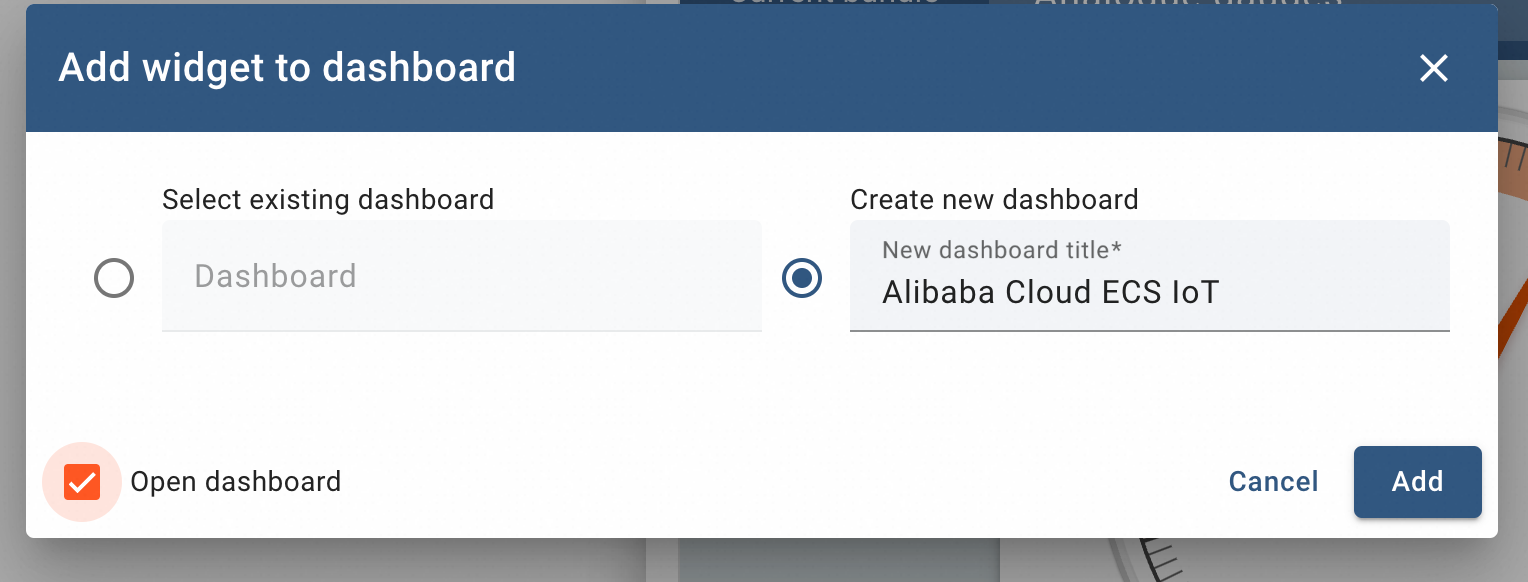
ThingsBoard will ask for the option of creating Dashboard. Select Create New Dashboard, give a title and click Add button.
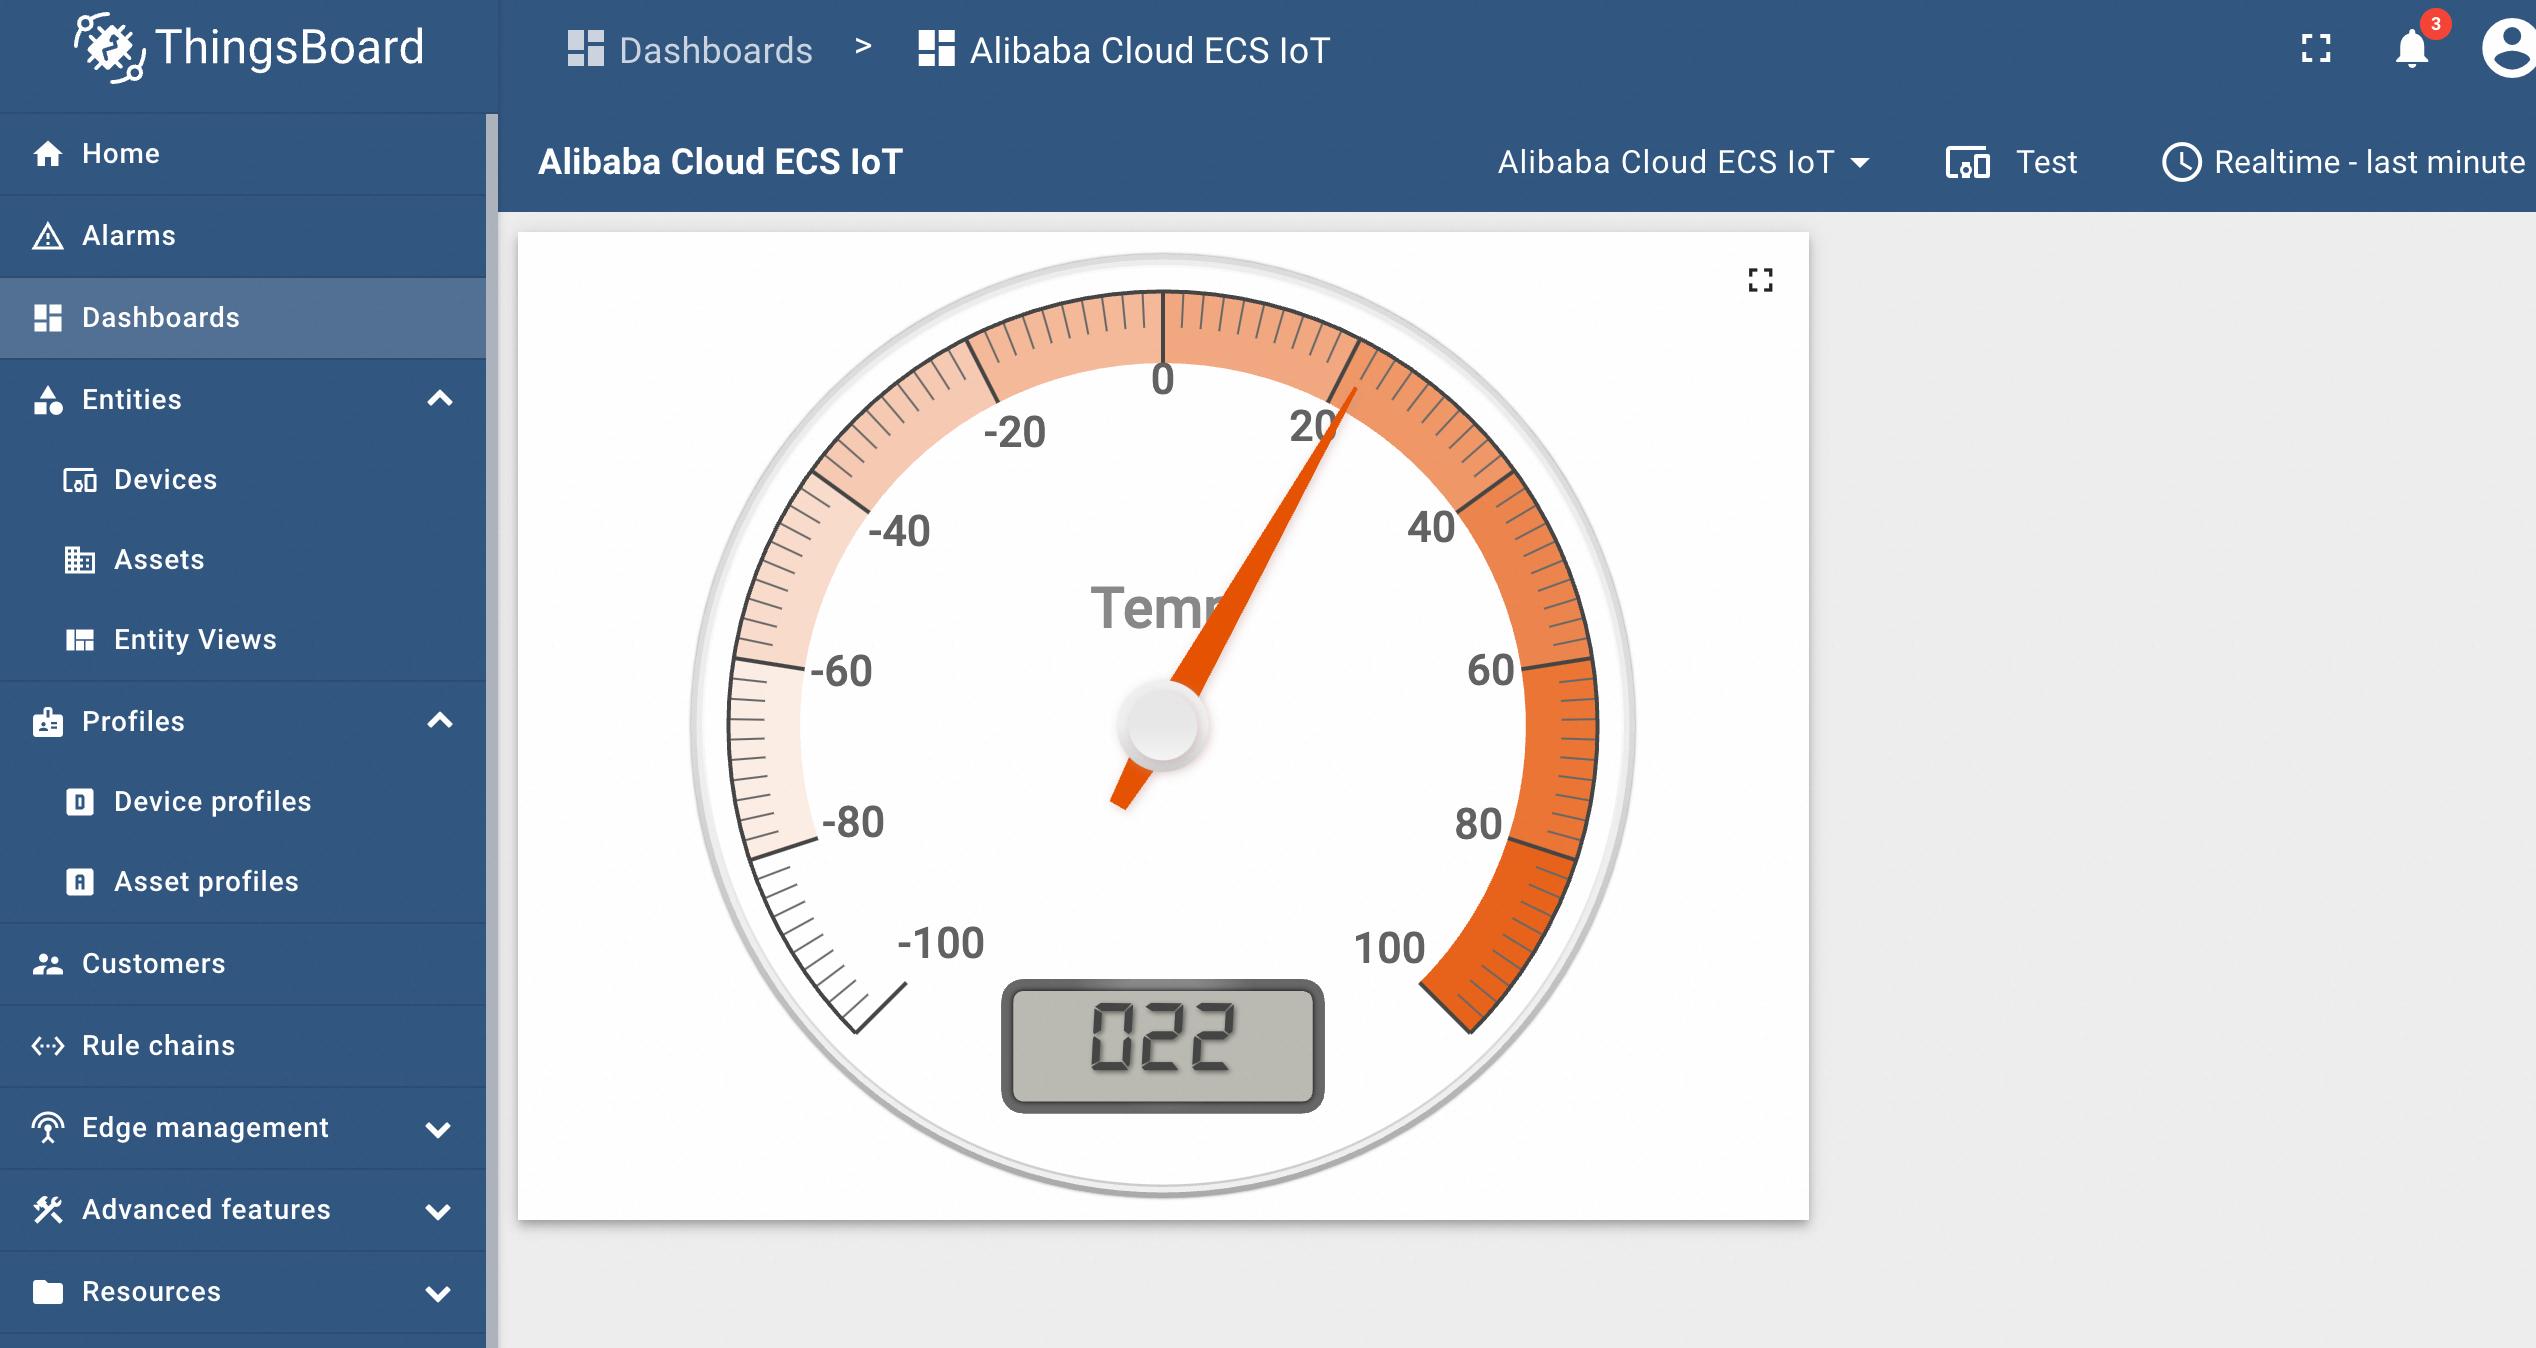
The Dashboard can made public and can be shared with others.
By following these steps, you should have a fully functional ThingsBoard Community Edition setup on your ECS instance. You can now start managing your IoT devices and visualize the telemetry data effectively.
Data Visualization with Alibaba Cloud ECS: From Installation to Data Analysis
Alibaba Cloud Community - February 3, 2023
Alibaba Cloud Community - July 19, 2024
Alibaba Cloud Community - December 1, 2022
Alibaba Cloud Indonesia - September 27, 2023
Alibaba Clouder - November 28, 2019
GXIC - November 2, 2018
 IoT Platform
Provides secure and reliable communication between devices and the IoT Platform which allows you to manage a large number of devices on a single IoT Platform.
Learn More IoT Solution
A cloud solution for smart technology providers to quickly build stable, cost-efficient, and reliable ubiquitous platforms
Learn More AliwareMQ for IoT
A message service designed for IoT and mobile Internet (MI).
Learn More AnalyticDB for PostgreSQL
An online MPP warehousing service based on the Greenplum Database open source program
Learn MoreMore Posts by JwdShah
Santhakumar Munuswamy August 12, 2024 at 6:36 am
Thank you for sharing