In the previous article, we have discussed how to deploy a local Java application directly to an Alibaba Cloud ECS instance. We have also seen how to use this plug-in to deploy applications on Enterprise Distributed Application Service (EDAS). This tutorial explains how to deploy a Java application that is developed in a local IntelliJ IDEA environment to an Alibaba Cloud ECS instance.
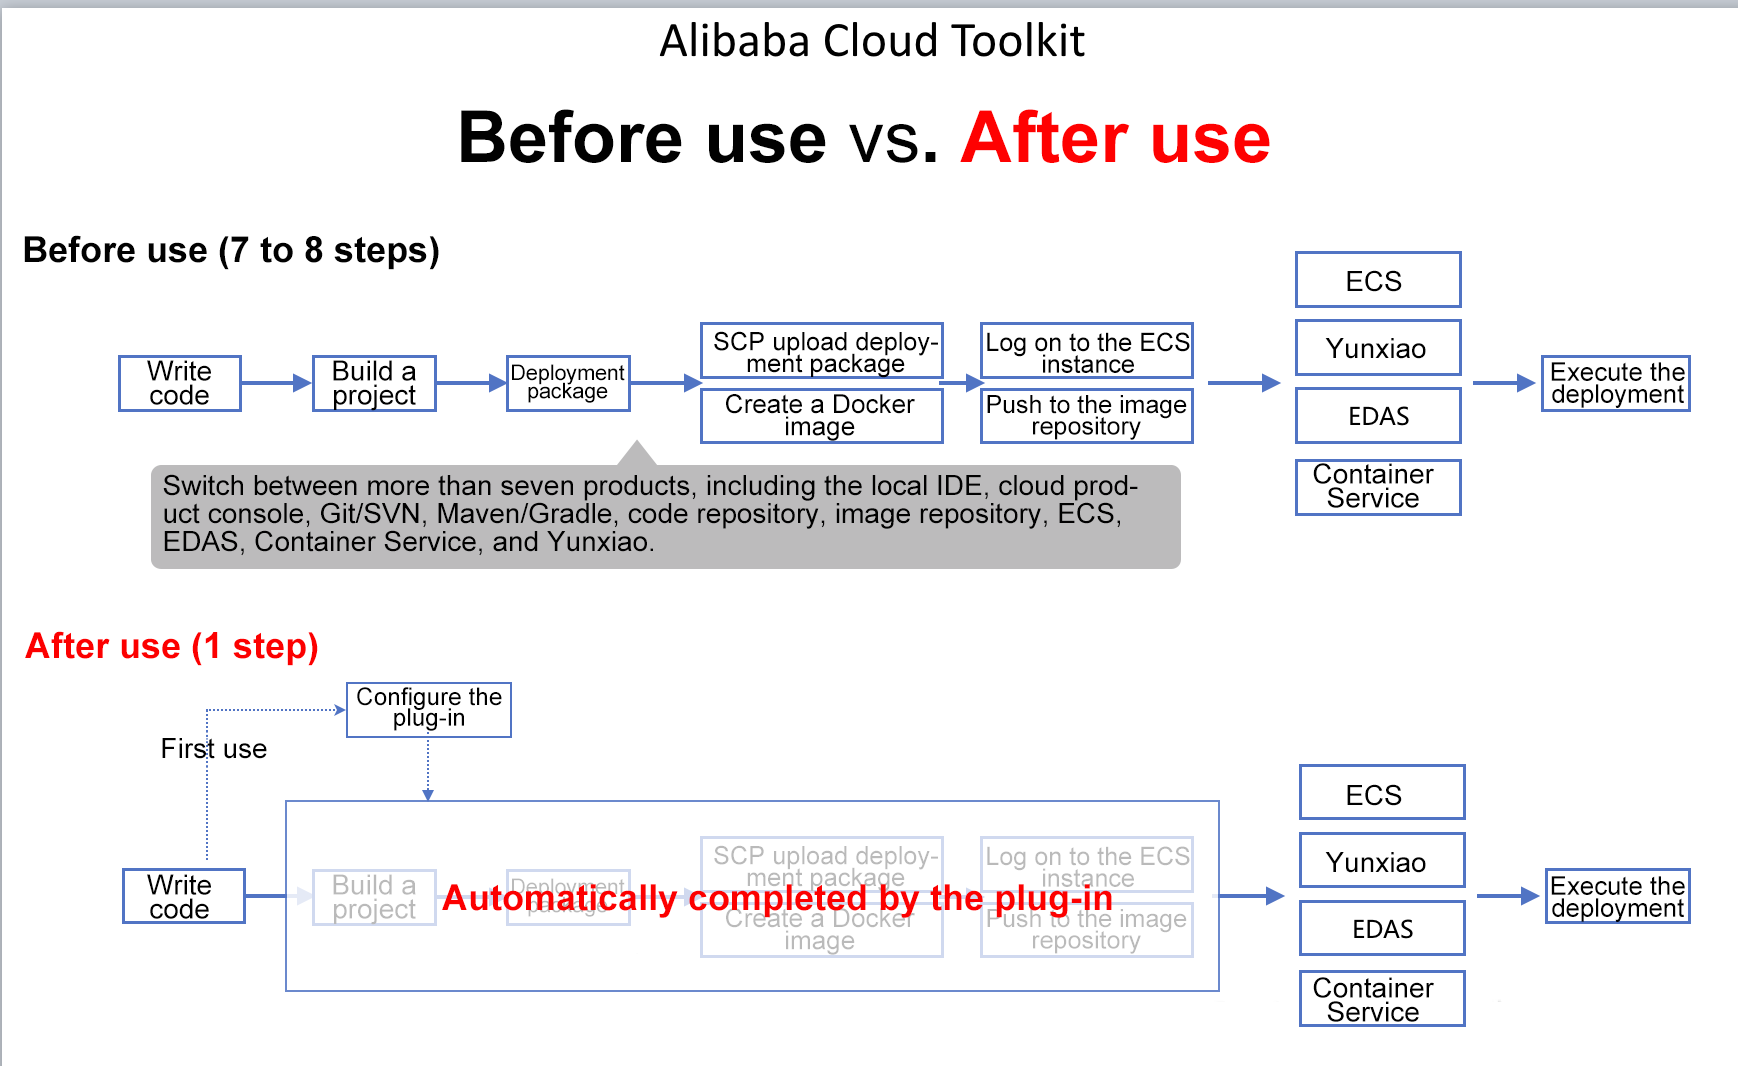
The coding method is similar no matter whether you compile Java applications that run on the cloud or locally. Therefore, this article takes a Java servlet for printing "Hello World" on a Web page as an example to explain the deployment method.
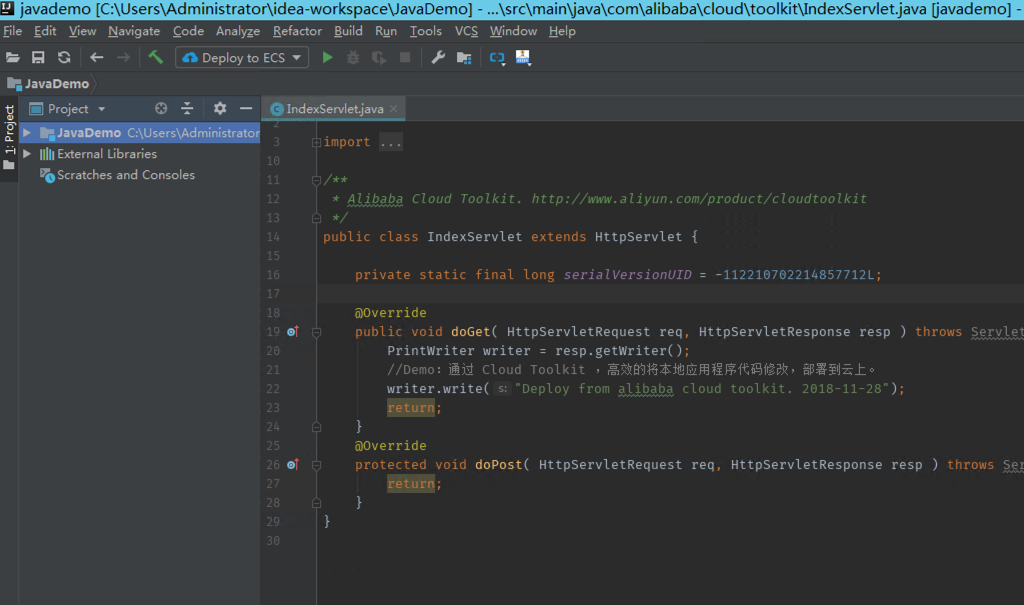
public class IndexServlet extends HttpServlet {
    private static final long serialVersionUID = -112210702214857712L;

    @Override
    public void doGet( HttpServletRequest req, HttpServletResponse resp ) throws ServletException, IOException {
        PrintWriter writer = resp.getWriter();
        // Demo: Use Alibaba Cloud Toolkit to modify the code of a local application and deploy the application to the cloud.
        writer.write("Deploy from alibaba cloud toolkit. 2018-10-24");
        return;
    }
    @Override
    protected void doPost( HttpServletRequest req, HttpServletResponse resp ) throws ServletException, IOException {
        return;
    }}
You can download the source code through this link.
The preceding code is a standard Java project used to print the string "Hello World" on a Web page.
Alibaba Cloud provides an Intellij IDEA-based plug-in to help developers efficiently deploy applications written in the local IDE to ECS instances.
URL of the plug-in: https://www.aliyun.com/product/cloudtoolkit_en
The installation process of this Intellij IDEA-based plug-in is similar to that of a common plug-in, and will not be detailed here.
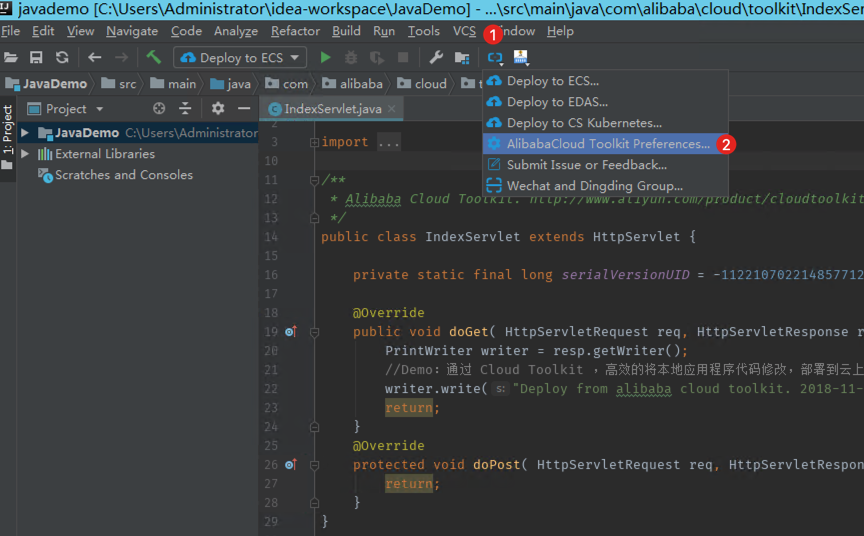
After installing the plug-in, click the Alibaba Cloud icon on the toolbar, as shown in the figure below.
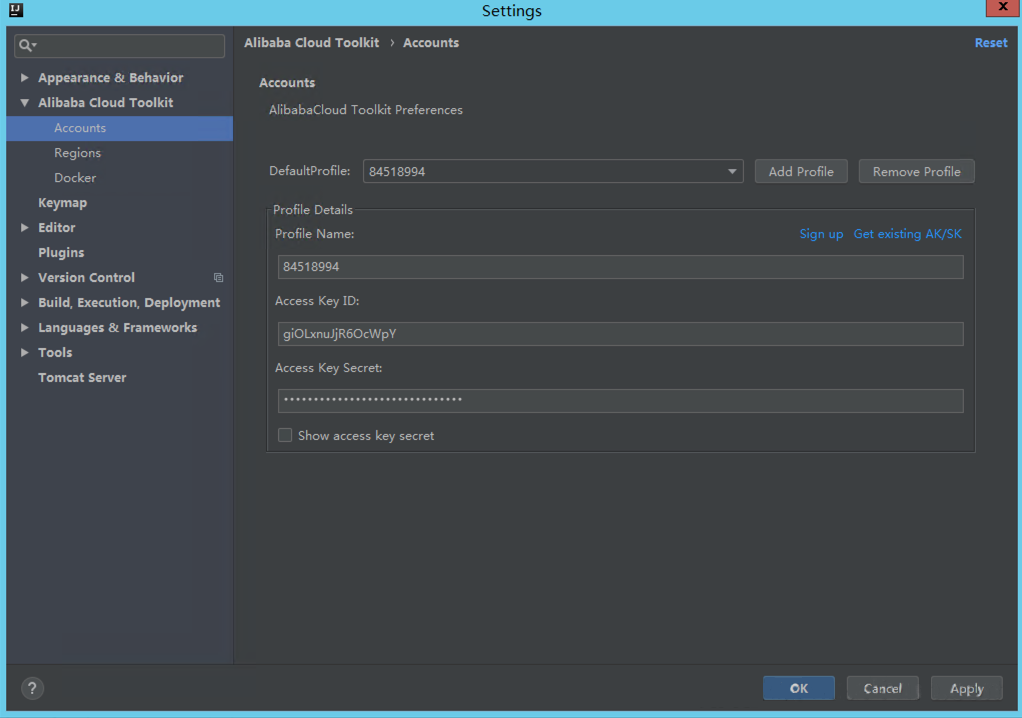
When the following page is displayed, configure the AK and SK of your Alibaba Cloud account to complete the configuration of preferences.( If you are using a RAM user account, enter the AK and SK of the RAM user.)
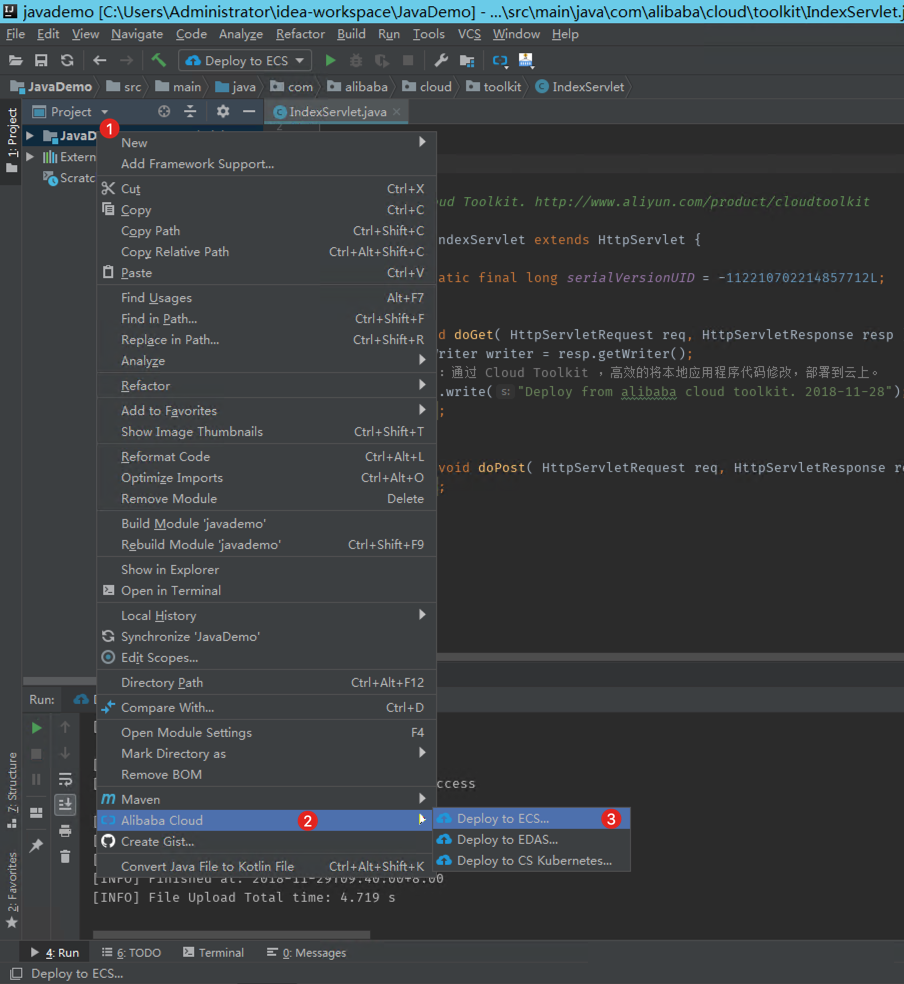
In IntelliJ IDEA, right-click the project name and choose Alibaba Cloud > Deploy to ECS from the shortcut menu. The following deployment window is displayed:
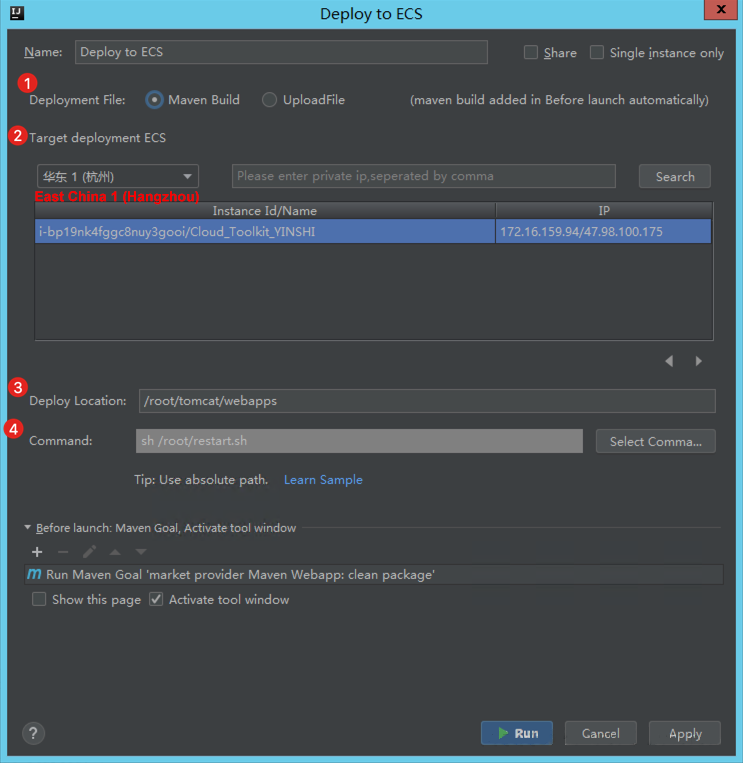
In the Deploy to ECS dialog box, set the deployment parameters and click Deploy to complete the initial deployment.
Alibaba Cloud Vietnam - July 19, 2023
Alibaba Clouder - November 12, 2019
Apache Flink Community China - April 19, 2022
Alibaba Clouder - May 24, 2019
Alibaba Cloud Native Community - January 26, 2024
Alibaba Cloud Community - December 20, 2022
 Robotic Process Automation (RPA)
Robotic Process Automation (RPA) allows you to automate repetitive tasks and integrate business rules and decisions into processes.
Learn More Managed Service for Prometheus
Multi-source metrics are aggregated to monitor the status of your business and services in real time.
Learn More Application Real-Time Monitoring Service
Build business monitoring capabilities with real time response based on frontend monitoring, application monitoring, and custom business monitoring capabilities
Learn More Resource Management
Organize and manage your resources in a hierarchical manner by using resource directories, folders, accounts, and resource groups.
Learn MoreMore Posts by Nick(倪超)