Spring Cloud and Spring Boot are currently the most popular microservice development frameworks. This article will show you how to deploy a Spring Boot or Spring Cloud application to Alibaba Cloud in Eclipse.
The coding method is similar no matter whether you compile Spring Boot applications that run on the cloud or locally. Therefore, this article takes the Spring Boot application for printing "Hello World" on a Web page as an example to explain the deployment method. In this example, the built-in Tomcat container is started to process the HTTP request and print the string "Hello World" on a Web page.
The built-in Tomcat listens to requests from the root directory
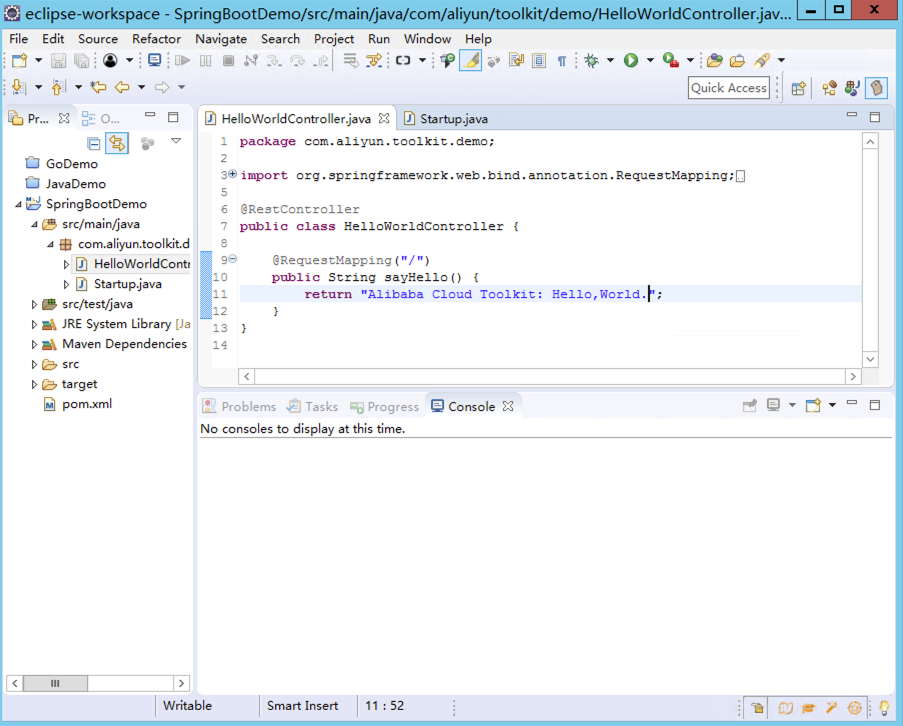
package com.aliyun.toolkit.demo;

import org.springframework.web.bind.annotation.RequestMapping;
import org.springframework.web.bind.annotation.RestController;

@RestController
public class HelloWorldController {

    @RequestMapping("/")
    public String sayHello() {
        return "Alibaba Cloud Toolkit: Hello,World.";
    }
}
Spring Boot startup class
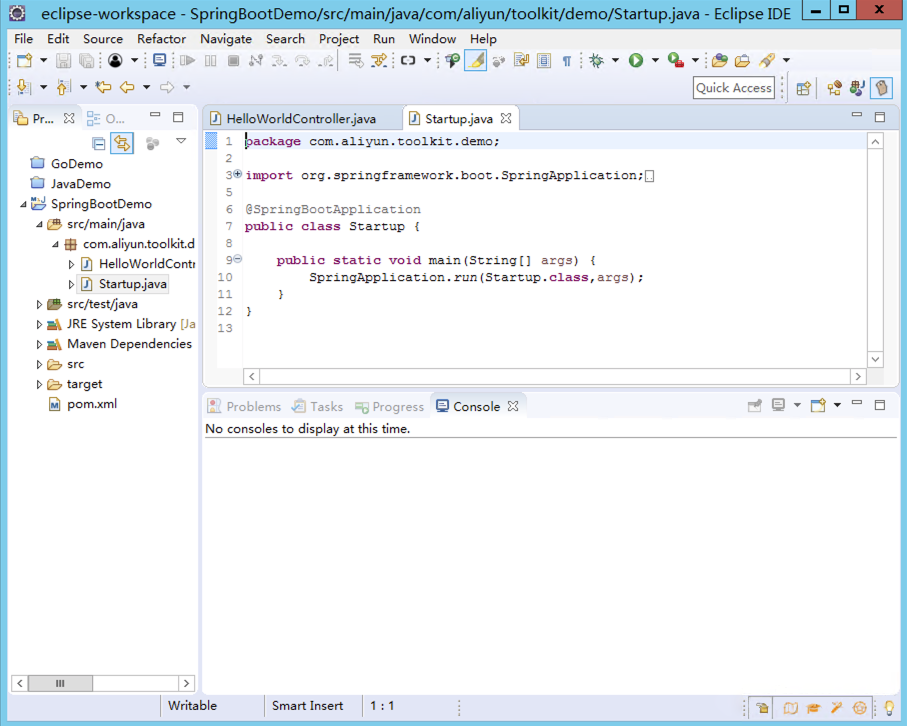
package com.aliyun.toolkit.demo;

import org.springframework.boot.SpringApplication;
import org.springframework.boot.autoconfigure.SpringBootApplication;

@SpringBootApplication
public class Startup {

    public static void main(String[] args) {
        SpringApplication.run(Startup.class,args);
    }
}
Download a Spring Boot demo project
The preceding code is a standard Spring Boot project.
Alibaba Cloud provides an Eclipse-based plug-in to help developers efficiently deploy applications written in the local IDE to ECS instances.
URL of the plug-in: https://www.aliyun.com/product/cloudtoolkit_en
The installation process of this Eclipse-based plug-in is similar to that of a common plug-in, and therefore will not be detailed here.
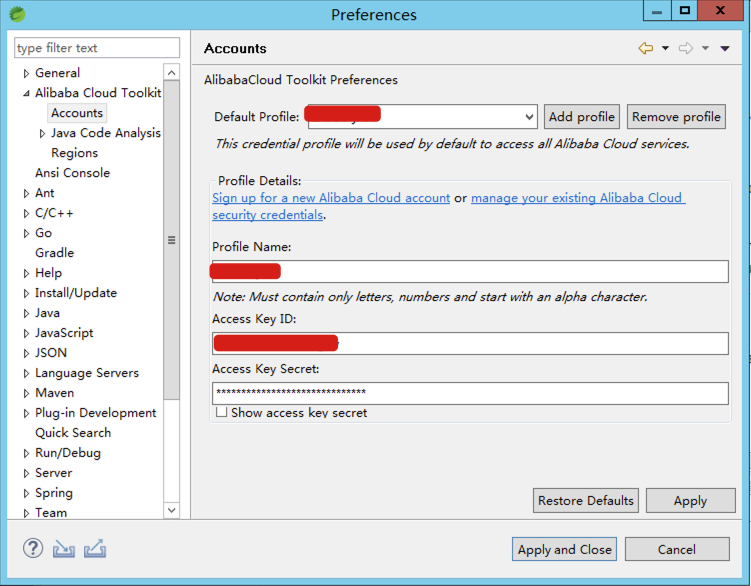
After installing the plug-in, configure the preferences by choosing:
Top menu > Window > Preferences > Alibaba Cloud Toolkit > Accounts.
When the following page is displayed, configure the AK and SK of your Alibaba Cloud account to complete the configuration of preferences.( If you are using a RAM user account, enter the AK and SK of the RAM user.)
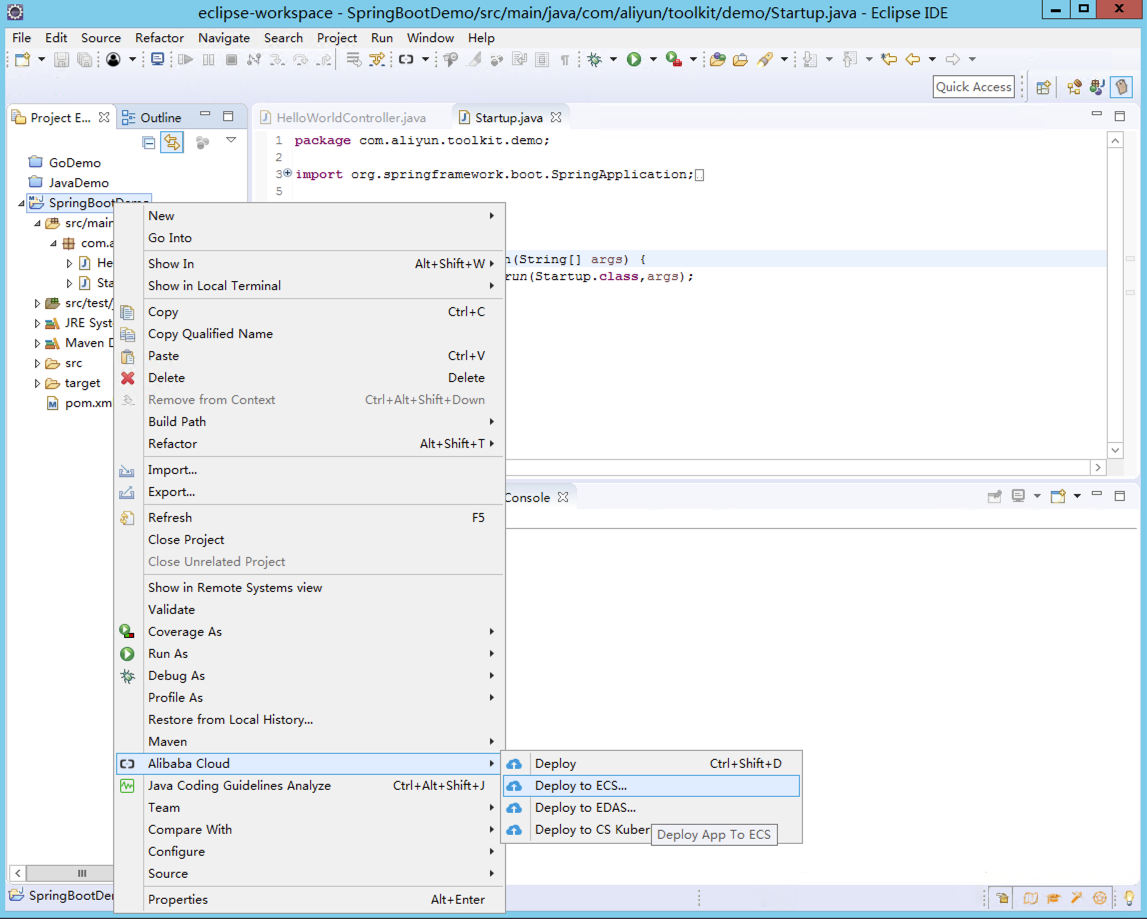
In Eclipse, right-click the project name and choose Alibaba Cloud > Deploy to ECS from the shortcut menu. The following deployment window is displayed:
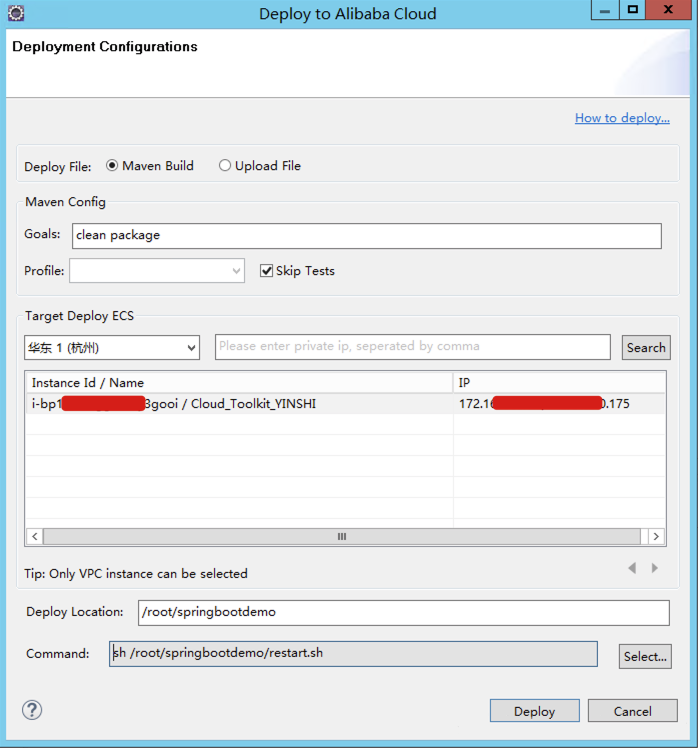
In the Deployment Configurations dialog box, set the deployment parameters, and click Deploy to deploy the application.
The /root/springbootdemo/restart.sh file contains the following content:
source ~/.bash_profile
killall java
nohup java -jar /root/springbootdemo/springbootdemo-0.0.1-SNAPSHOT.jar > nohup.log 2>&1 &Alibaba Clouder - September 7, 2020
Alibaba Clouder - November 7, 2019
Nick - June 27, 2019
Alibaba Container Service - April 28, 2020
Alibaba Clouder - January 11, 2019
Alibaba Clouder - August 26, 2021
 Microservices Engine (MSE)
MSE provides a fully managed registration and configuration center, and gateway and microservices governance capabilities.
Learn More Robotic Process Automation (RPA)
Robotic Process Automation (RPA) allows you to automate repetitive tasks and integrate business rules and decisions into processes.
Learn More Resource Management
Organize and manage your resources in a hierarchical manner by using resource directories, folders, accounts, and resource groups.
Learn More EDAS
EDAS
A PaaS platform for a variety of application deployment options and microservices solutions to help you monitor, diagnose, operate and maintain your applications
Learn MoreMore Posts by Nick(倪超)