For traditional client games, the background server architecture is normally complicated, and in-depth network communication is required between servers. If unicast communication is used, a server needs to know the changes made to other servers at any time, lowering the elasticity of the entire architecture. To achieve flexible development and reduce host computing resources, many client game servers still use UDP broadcast communication.
In the current classic network and VPC network environments of Alibaba Cloud, L2 multicast and broadcast are not supported because the underlying switches are L3 switches. To meet the customers' multicast and broadcast requirements, you can use the unicast mode to simulate the multicast mode. The basic implementation principle is as follows:

In the Windows environment, the multicast tool consists of the server udptopoint and the client udptomulti. The server must be installed on an ECS instance for sending multicast packets, while the client is installed on the ECS for receiving multicast packets.
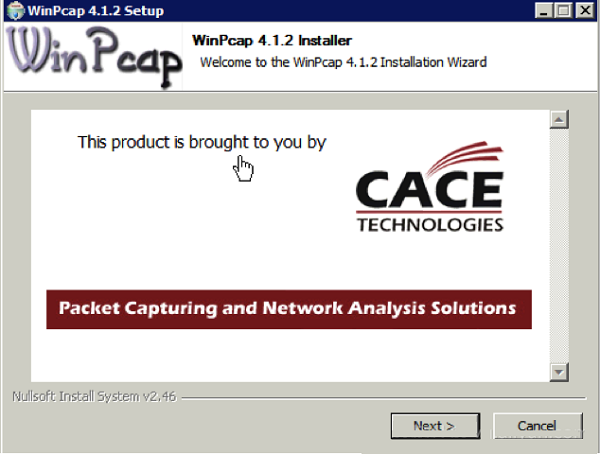
Install the Windows multicast agent by using the installation package. Double-click the installers udptopoint-1.3.1.exe and udptomulti-1.1.1.exe. Then, install the server and client as prompted. Their installation directories are C:udptopoint and C:udptomulti, respectively.
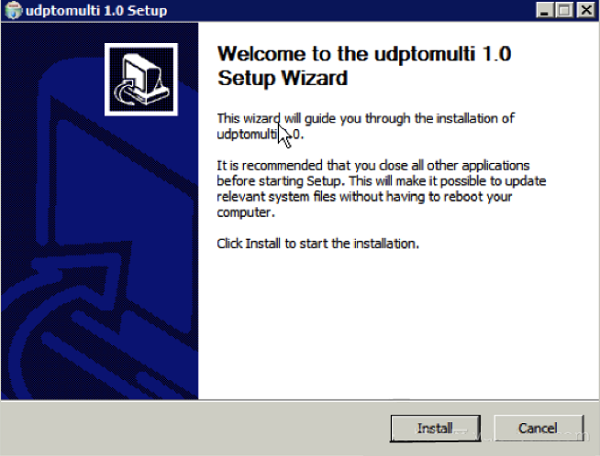
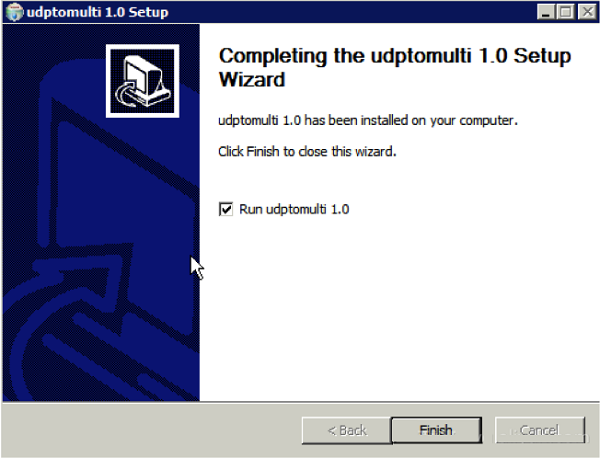
Notes:
Configuring the Server
After installing the multicast tool successfully, run udptopoint.exe, and the multicast-to-unicast background service automatically runs. Then, Choose Task Manager > Services to check the running status of the current service.
You must configure multicast groups on the server and add multicast members to the groups by using the configuration file named server_cfg.json.txt. The structure of the configuration file is as follows:
Structure of the server configuration file:
 {
  "multi_group_array":[
    {
      "group_ip":"224.2.2.1",
      "group_port":4321,
      "server_port":4322,
      "member_array":[
        "172.16.1.1",
        "172.16.1.2",
        "172.16.1.3"
      ]
    }
  ]
}
Parameters in the configuration file are described as follows.
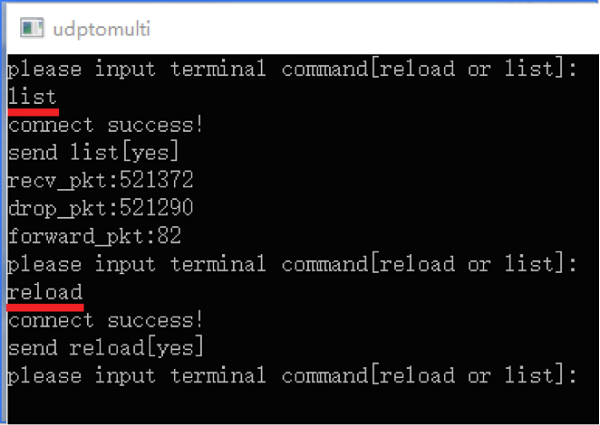
The currently supported commands are "reload" and "list".
The reload command is used to reload the configuration file. Run this command each time after modifying the configuration file.
The list command is used to display the information about the packets sent or received by the current agent system.
Usage instructions:
Enter the reload or list command on the terminal.
Configuring the Client
After the multicast tool is successfully installed, run udptomulti.exe, and the multicast-to-unicast background service automatically runs. Then, choose Task Manager > Services, and you can check the running status of the current service.
On the client, configure the added multicast groups by using the json array in the configuration file, client_cfg.json.txt. The structure of the configuration file is as follows:
Structure of the client configuration file:
{
    "multi_server_info_array":[
    {
    "server_ip":"10.65.251.14",
    "server_port":6000,
        "group_ip":"192.168.1.255",
        "group_port":6001
    }
  ]
}
Description:
The currently supported commands are "reload" and "list".
The reload command is used to reload the configuration file. Run this command each time after modifying the configuration file.
The list command is used to display the information about the packets sent or received by the current agent system.
Both the server and client of the Linux multicast tool are packed into a primary RPM package. The currently available RPM package is multicast_usr_tool-1.0.1-1.x86_64.rpm (version 1.0.1). The installation process is as follows:
sudo rpm -ivh multicast_usr_tool-1.0.3-1.el6.x86_64.rpmYou can run rpm-Q multicast_usr_tool-1.0.3-1.el6.x86_64 to check whether the RPM package has been successfully installed. After the RPM package is successfully installed, the server and client programs for the user-state multicast tool are automatically installed to the system.
After the multicast tool is successfully installed, the client installation directory is /usr/local/bin, and the configuration file directory is /etc/multicast/.
Run the cd /usr/local/bin command to access the directory where the client is located.
Run the source ~/.bashrc command.
Start the client and server as follows:
For the client: Run the following command with root permissions to manually start the client: nohup multic_admin -R > /dev/null &
For the server: Run the following command with root permissions to start the server: service multis_monitord start
Stop the client or server as follows:
To manually stop the client, run the ps aux|grep multic_admin command to locate the PID of the process, and then run the kill pid command.
To stop the server, run the service multis_monitord stop command with root permissions.
Check the running status using service multis_monitord status
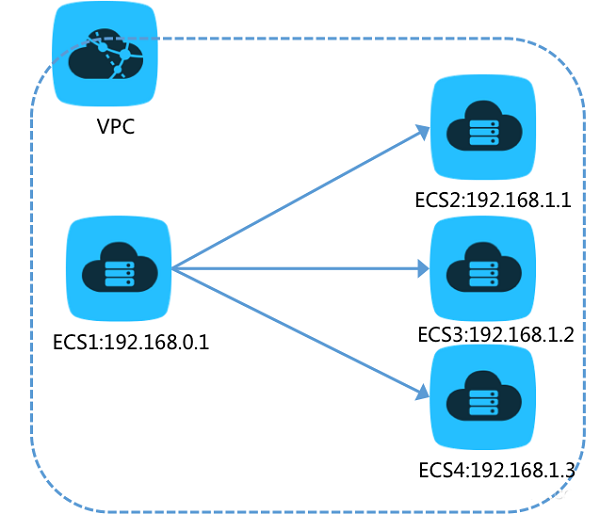
As shown in the preceding figure, ECS1 is the multicast source, while ECS2, ECS3, and ECS4 are the multicast members. The multicast IP address is 224.1.2.3 and the multicast port is port 7134. The multicast server must be installed on ECS1, and the multicast clients must be installed on ECS2, ECS3, and ECS4. To do this, perform the following procedure:
For Windows, modify the server_cfg.json.txt file in the udptopoint directory. For Linux, modify the /etc/multicast/server_cfg.json.txt file. The modified configuration is as follows:
{
    "multi_group_array": [
        {
"group_ip": "224.1.2.3",
"server_port": 7134,
            "group_port": 7134,
            "member_array": [
                "192.168.1.1",
                "192.168.1.2",
                "192.168.1.3"
            ],
        }
    ]
}
After completing the modification, you must use the reload tool to load the modified configuration file to the running server program:
For Linux, run the following command: server_reload_list and input the reload command.
For Windows, run the following command: send_reload_point_cfg and input the reload command.
If the prompt "connection refused" is displayed, check whether the udptopoint service is running properly.
The following uses ECS2 as an example to explain how to modify the client configuration file. For Windows, modify the client_cfg.json.txt file in the udptopoint directory. For Linux, modify the /etc/multicast/client_cfg.json.txt file. The modified configuration is as follows:
client_cfg.json.txt
{
    "multi_server_info_array": [
        {
            "group_ip": "224.1.2.3",
            "group_port": 7134,
            "server_ip": "192.168.0.1",
            "server_port": 7134
        }
    ]
}
After completing the modification, you must use the reload tool to load the modified configuration file to the running server program:
For Linux, run the following command: client_reload_list and input the reload command.
For Windows, run the following command: send_reload_multi_cfg and input the reload command.
If the prompt "connection refused" is displayed, check whether the udptomulti service is running properly.
Precaution: Server_port must be consistent on both the client and server. Otherwise, no packets can be received.
The system generates log files. For Windows, client_log.txt in the C:udptomulti directory and server_log.txt in the C:udptopoint directory will be generated. For Linux, client_log.txt and server_log.txt both in the /etc/multicast/ directory will be generated.
After completing the service configuration, you can use the packet capturing tool to test the service. We recommend that you use Wireshark for Windows systems and the tcpdump command for Linux systems.
If communication fails, perform troubleshooting by completing the following steps:
After the transformation of the multicast tool, ECS instances on the customer's classic network can communicate with each other in broadcast mode.
3 Ways to Protect against Data Loss through Disaster Recovery

2,593 posts | 792 followers
FollowAlibaba Clouder - August 3, 2018
Michelle - August 1, 2018
Wei Kuo - August 30, 2019
Aliware - June 17, 2021
Alibaba Cloud Native Community - July 12, 2022
Alibaba Cloud Community - October 22, 2025

2,593 posts | 792 followers
Follow ECS(Elastic Compute Service)
Elastic and secure virtual cloud servers to cater all your cloud hosting needs.
Learn More VPC
VPC
A virtual private cloud service that provides an isolated cloud network to operate resources in a secure environment.
Learn MoreLearn More
More Posts by Alibaba Clouder