1. Go to the Custom Launch tab of the instance buy page.
Note:
If you have not created an Alibaba Cloud account, create one first. For more information, see Sign up with Alibaba Cloud.
2. In the Basic Configurations step, configure parameters and click Next.
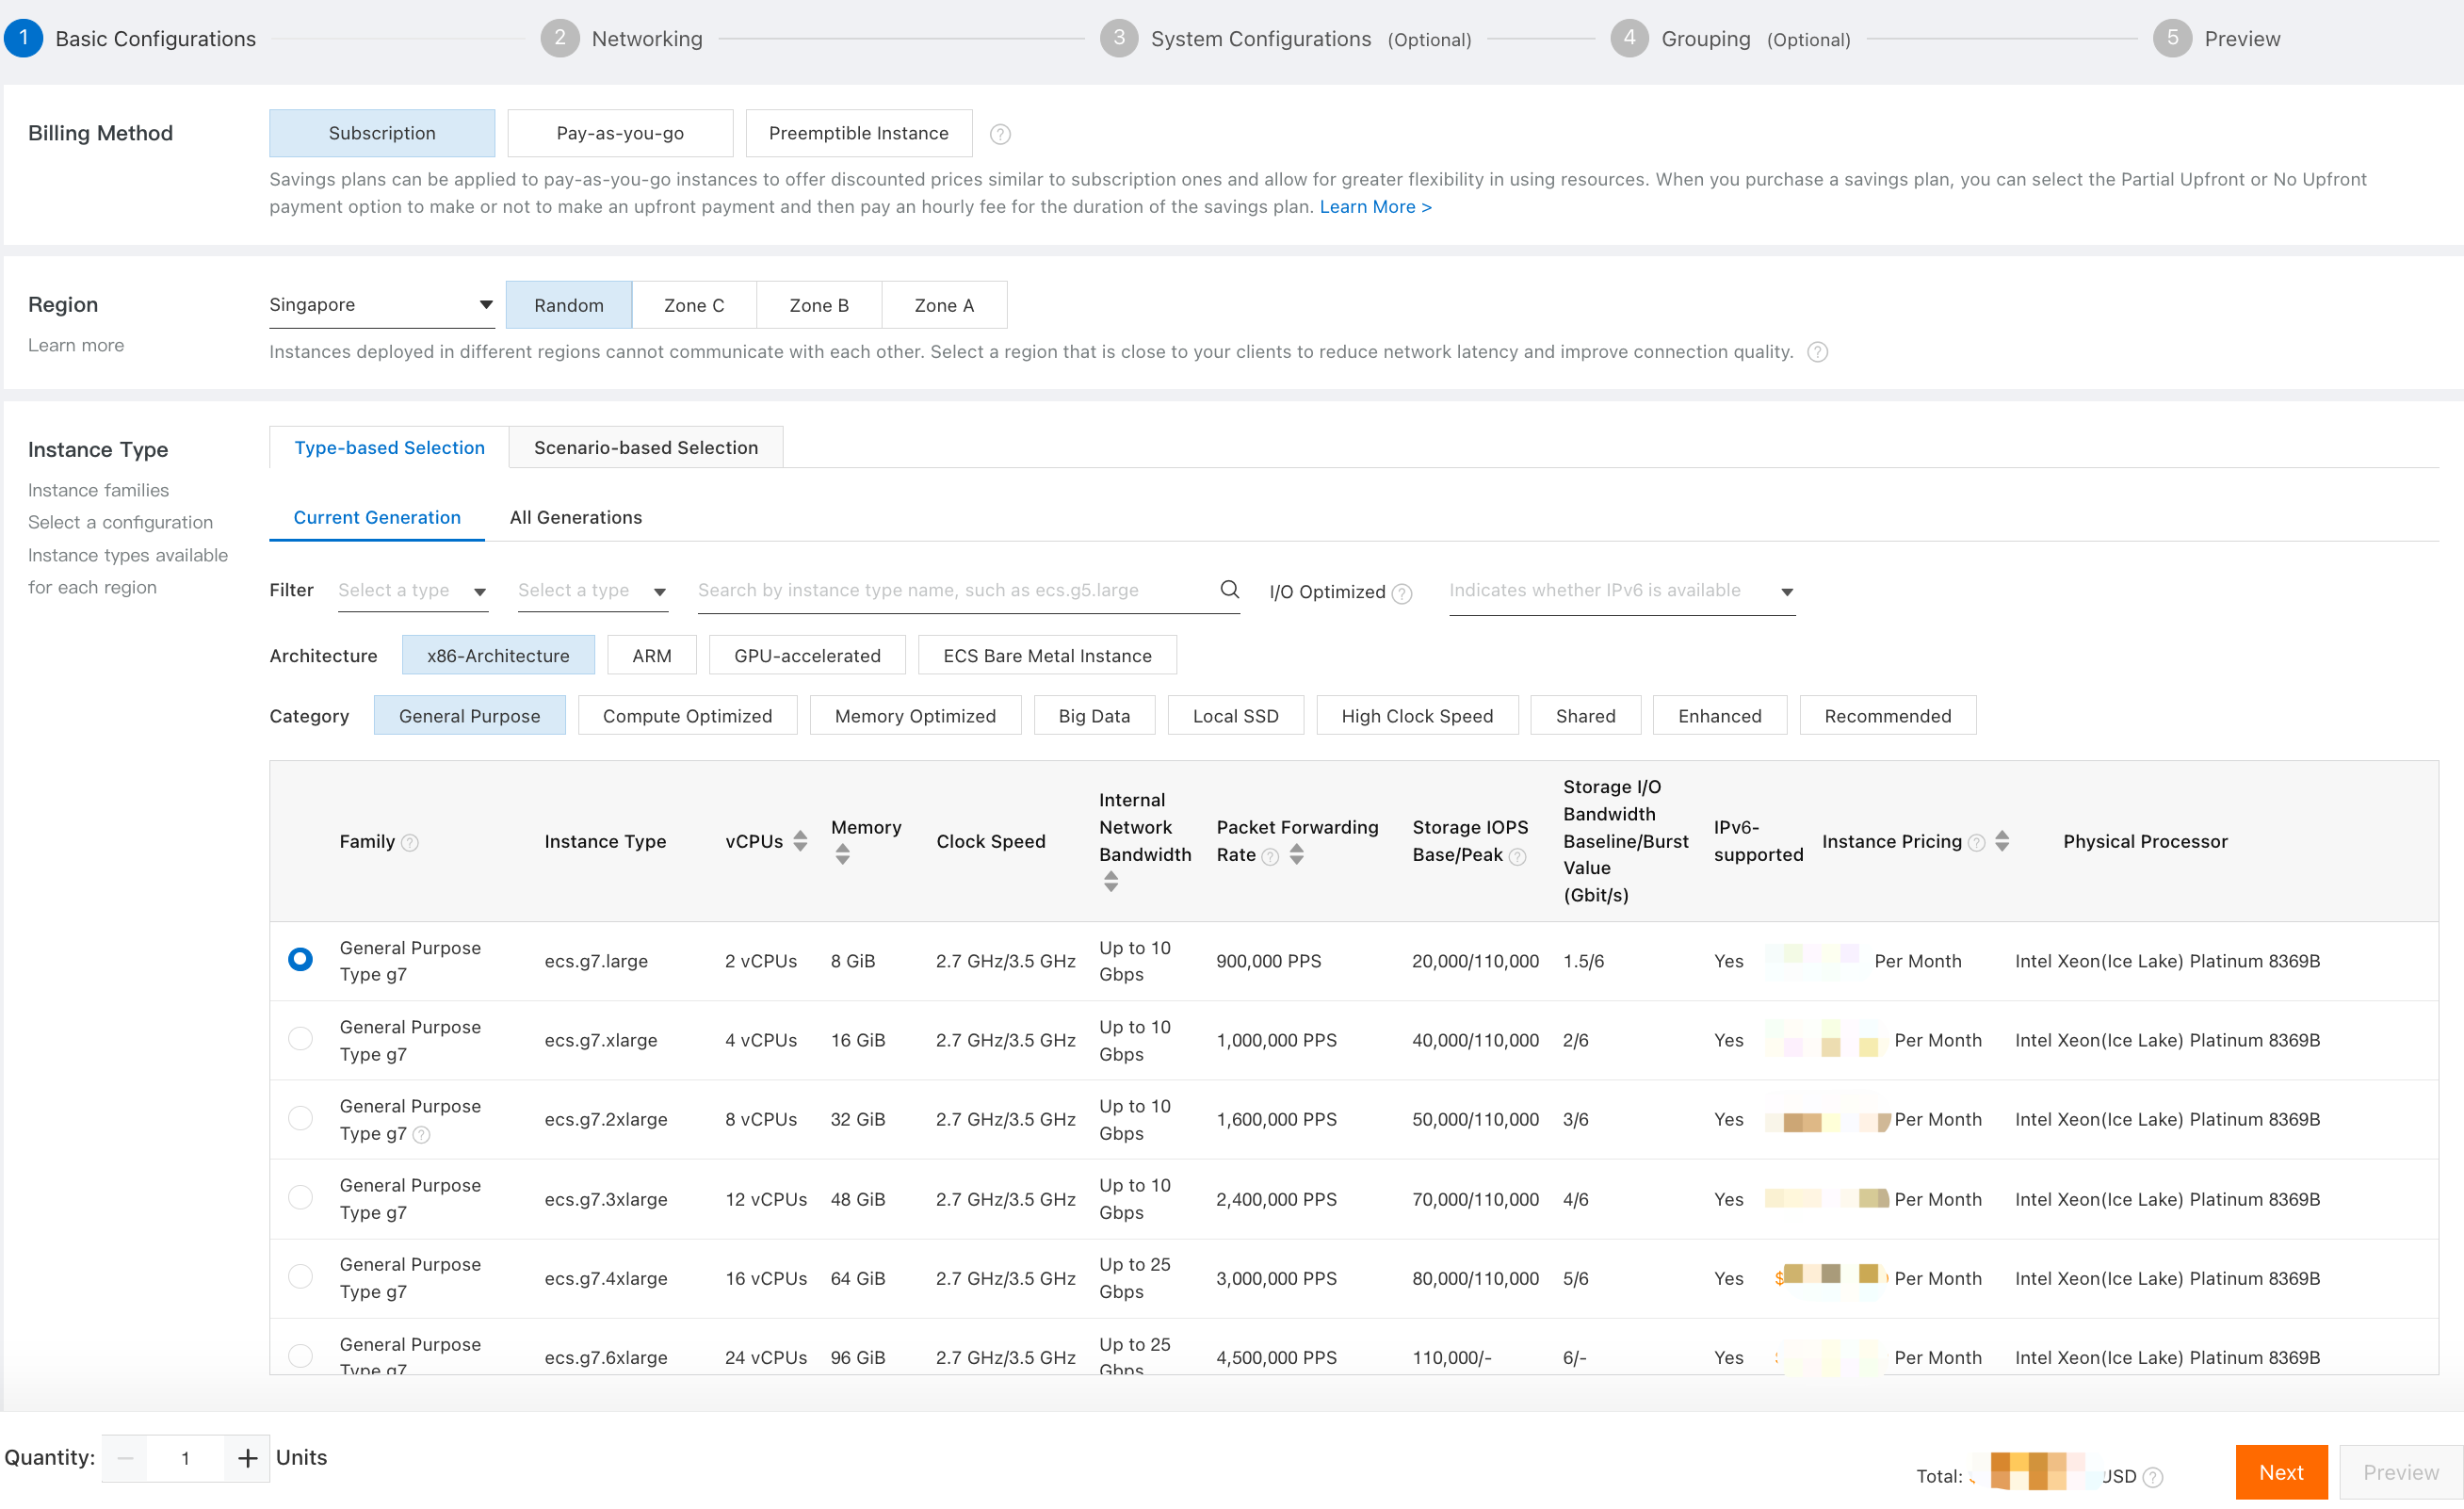
The following table describes the parameters of which you must take note. You can use the default values for parameters not described in this table.
| Parameter | Description |
|---|---|
| Region | Select a region close to the geographical location of your customer. This way, you can provide services to your customer with a higher access speed and lower latency. In this example, the Singapore region is used. |
| Instance Type | Select an appropriate instance type. For BPoS Node, we recommend selecting the ecs.g7.large instance type that has 2 vCPUs and 8 GiB of memory. |
| Quantity | Accept a default value of 1 |
| Image | Select an image. Public Image: Select a public image. Public images contain a clean operating system without additional software. Public images for Linux and Windows operating systems are provided. Custom Image: Select a custom image. Custom images contain an operating system installed with application environments. In this example, the Ubuntu 22.04 64-bit public image is recommended. |
| Storage | Select an ultra disk as the system disk. The default disk size is 40 GiB. |
| Duration | The Duration is determined by the running time of the node. Since the minimum pledge period of the node is 100 days, we recommended choosing more than three months. |
3. In the Networking step, configure the public IP address and bandwidth settings, as shown in the following figure. Then, click Next.
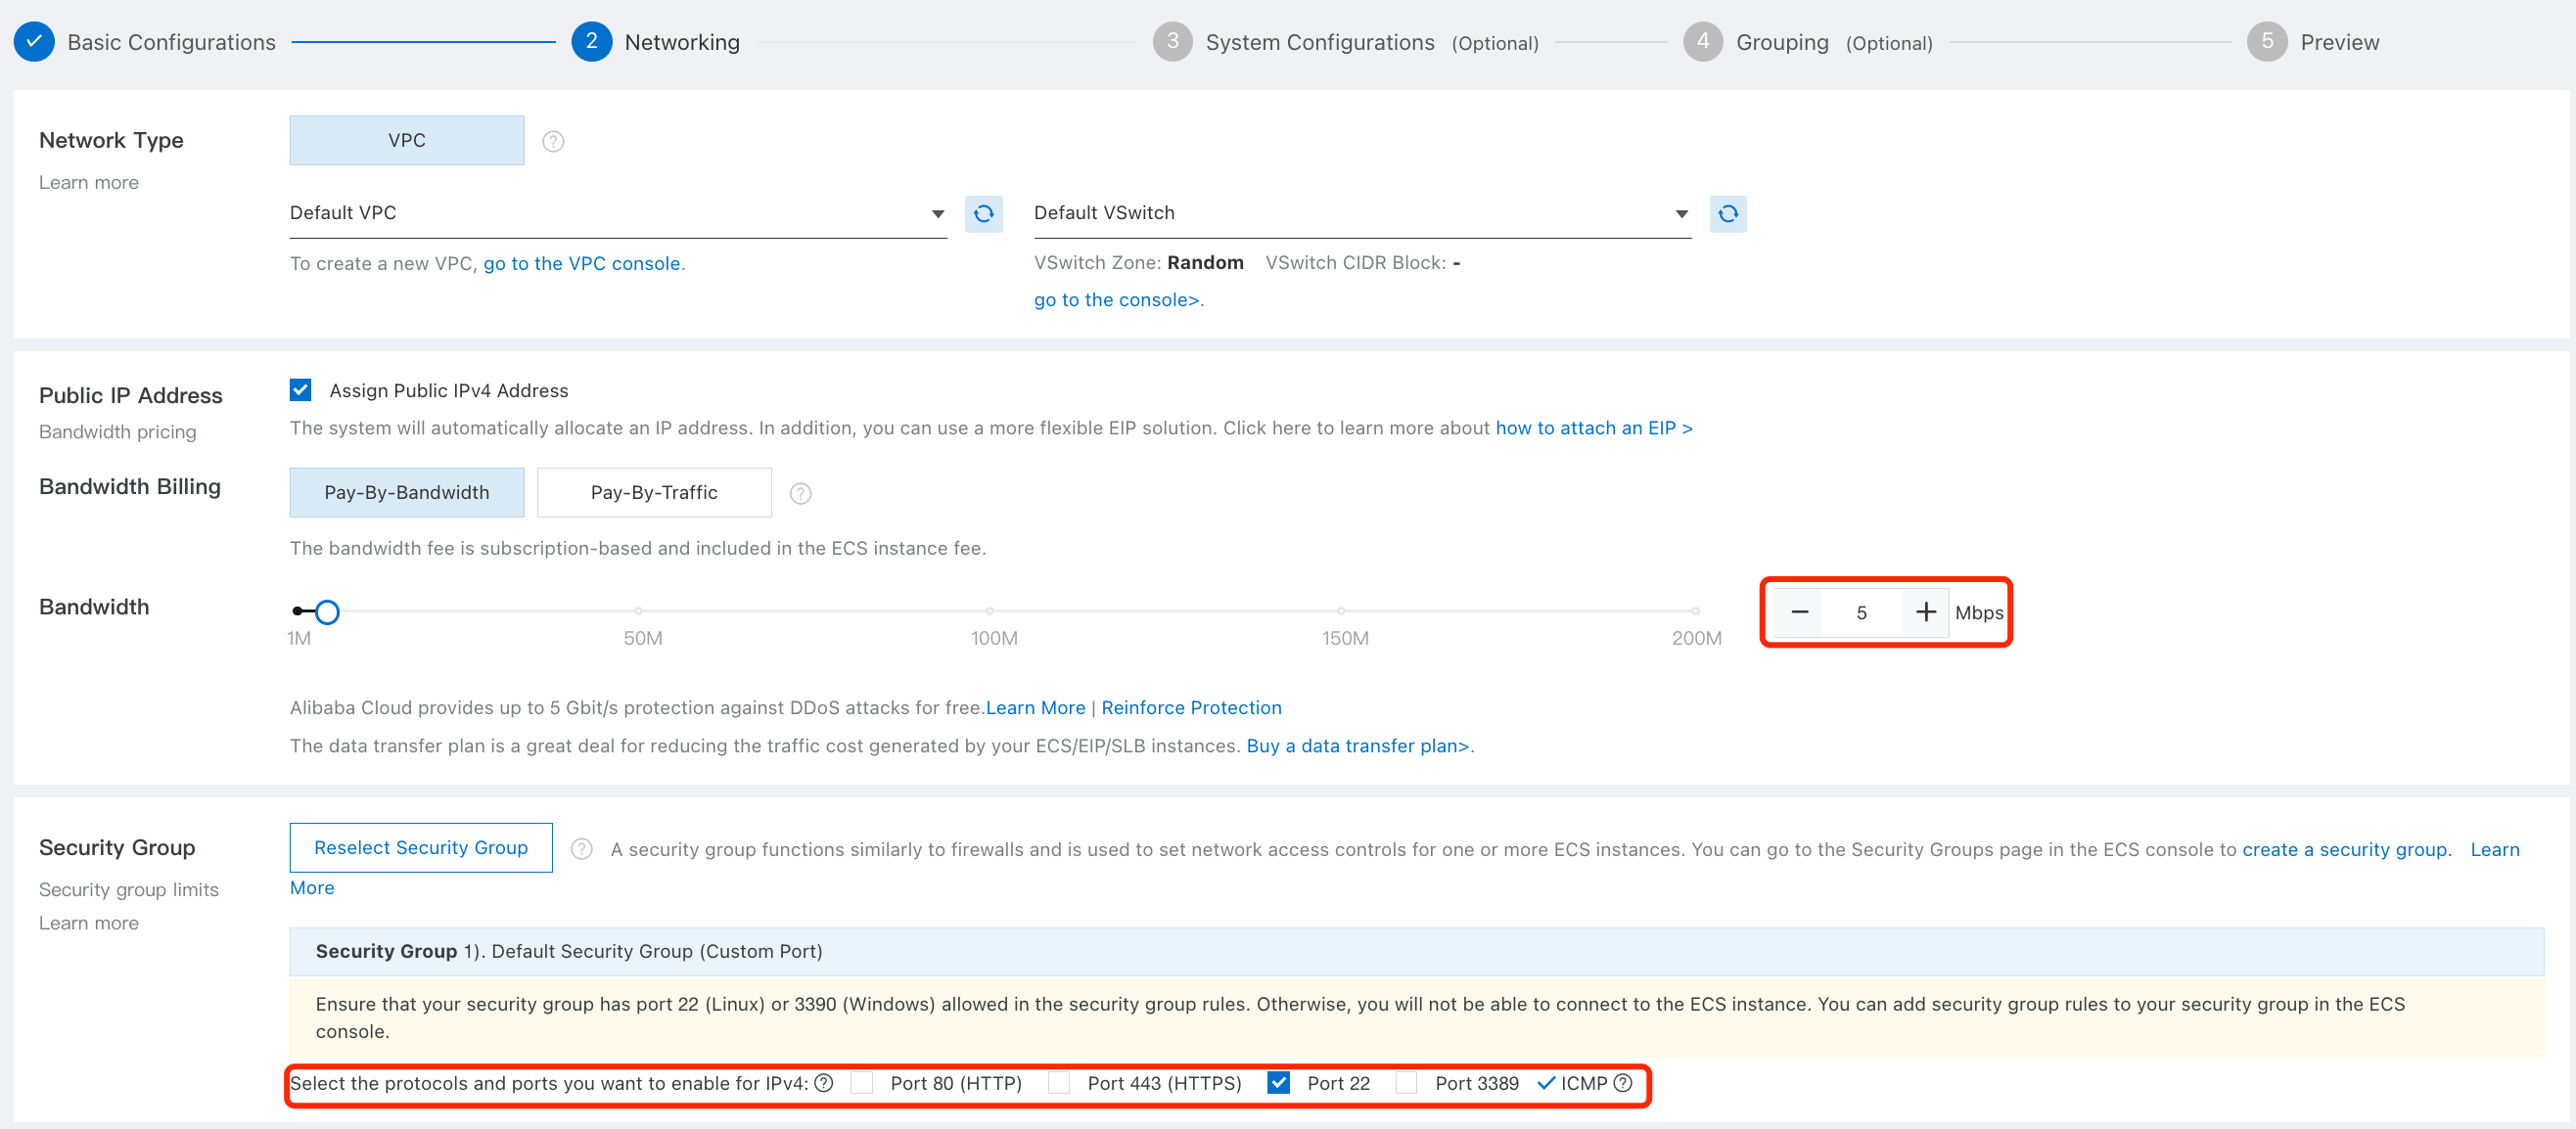
In the Public IP Address section, select Assign Public IPv4 Address and specify a public bandwidth value. You can use the default settings for the Network Type and Security Group parameters.
| Parameter | Description |
|---|---|
| Network Type | A virtual private cloud (VPC) is created by default. |
| Public IP Address | Specify a public bandwidth value. The default public bandwidth value is 1 Mbit/s. |
| Security Group | A default security group is created. |
4. In the System Configurations (Optional) step, set the logon password of the instance and click Preview.

5. In the Preview step, read and select the ECS Terms of Service and Product Terms of Service. Then, click Create Order.
6. Confirm and pay for the order.
1. Open a terminal or command prompt on your local machine.
2. Retrieve the server's public IP address or domain name provided by Alibaba Cloud.
3. Use the SSH (Secure Shell) command to establish a secure connection to the server. The SSH command syntax is as follows:
$ ssh username@server_ip_addressReplace username with the appropriate username for your server, and server_ip_address with the actual IP address or domain name of your Alibaba Cloud server. The username is root in this example.
4. If this is your first time connecting to the server, you may be prompted to confirm the server's authenticity by verifying its fingerprint. Type "yes" to proceed.
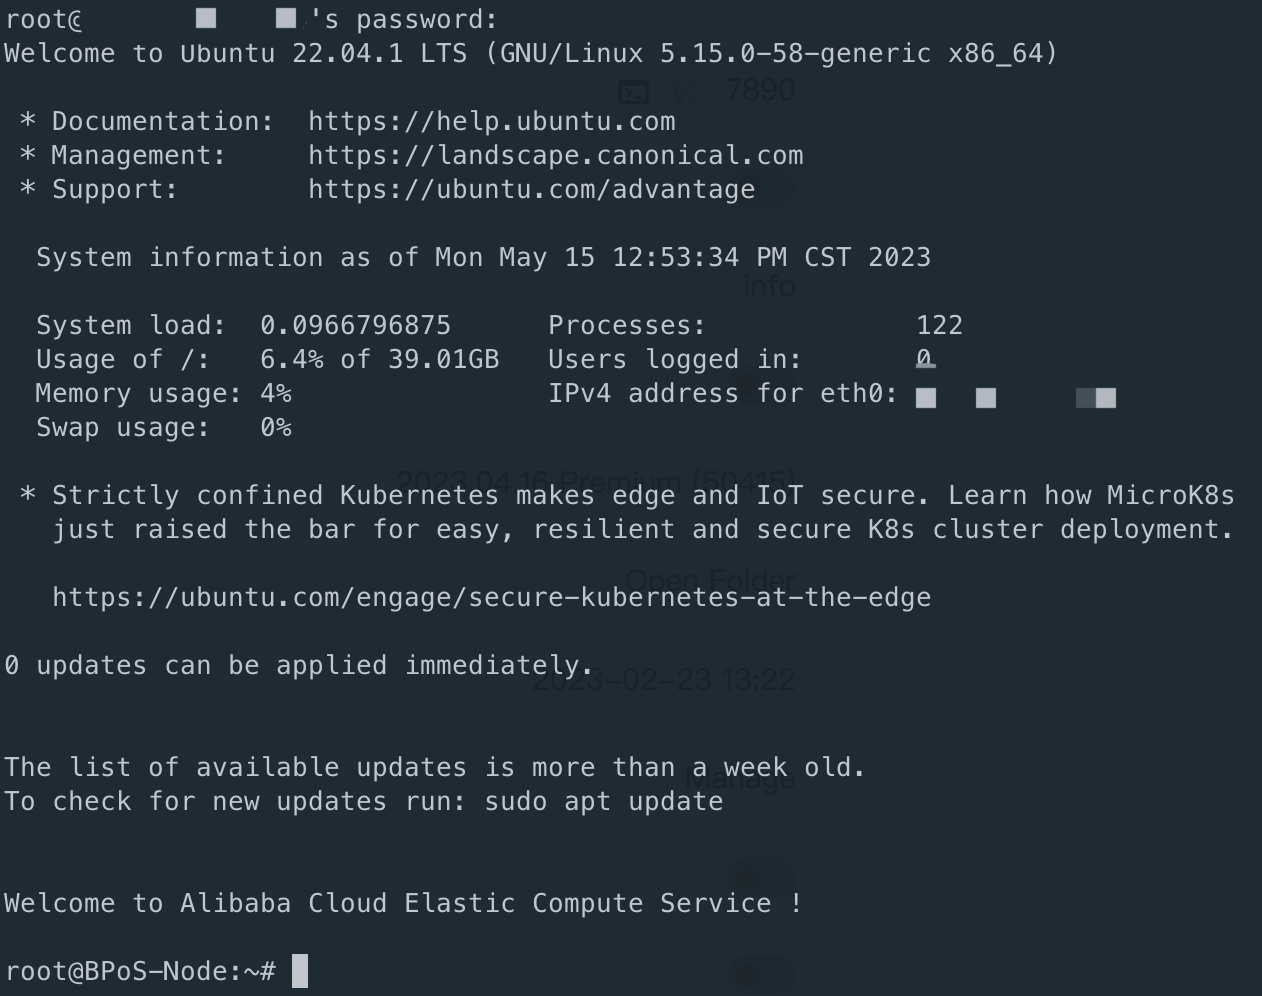
5. Next, you will be prompted to enter the password for the specified username. Type the password carefully, as no characters will be displayed on the screen while typing. Press Enter once you have entered the password.
6. If the provided credentials are correct, you will be logged in to the Alibaba Cloud server, and you will see a command-line interface (shell) where you can execute commands and interact with the server.
$ apt update && apt install jq lsof apache2-utils -y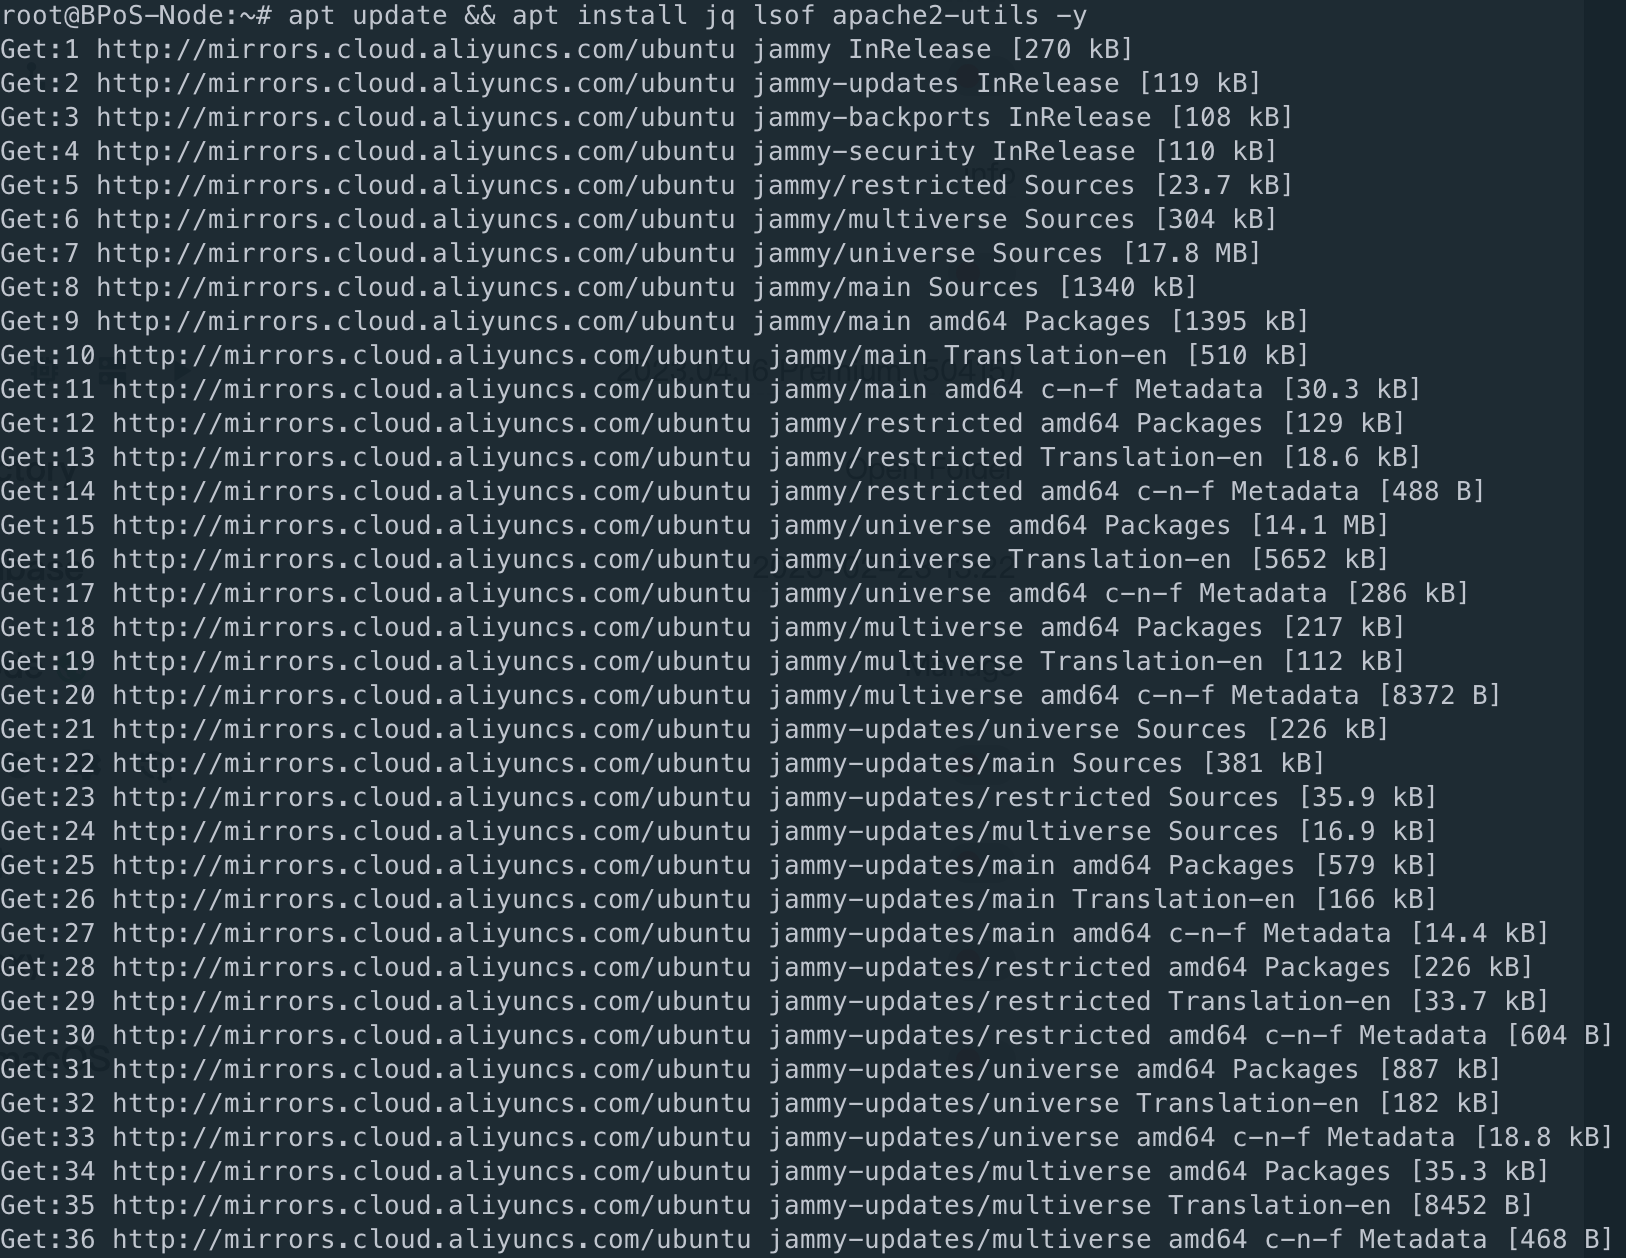
If the memory is 8GiB, we recommend adding an 8GiB swap.
$ sudo fallocate -l 8G /swapfile
$ sudo chmod 600 /swapfile
$ sudo mkswap /swapfile
$ sudo swapon /swapfile
$ sudo cp /etc/fstab /etc/fstab.bak
$ echo '/swapfile swap swap defaults 0 0' | sudo tee -a /etc/fstab
The following shell command will download the current version of the script and make it executable.
$ mkdir ~/node
$ cd ~/node
$ curl -O https://raw.githubusercontent.com/elastos/Elastos.Node/master/build/skeleton/node.sh
$ chmod a+x node.shThe init command will do the following jobs automatically:
$ ~/node/node.sh ela init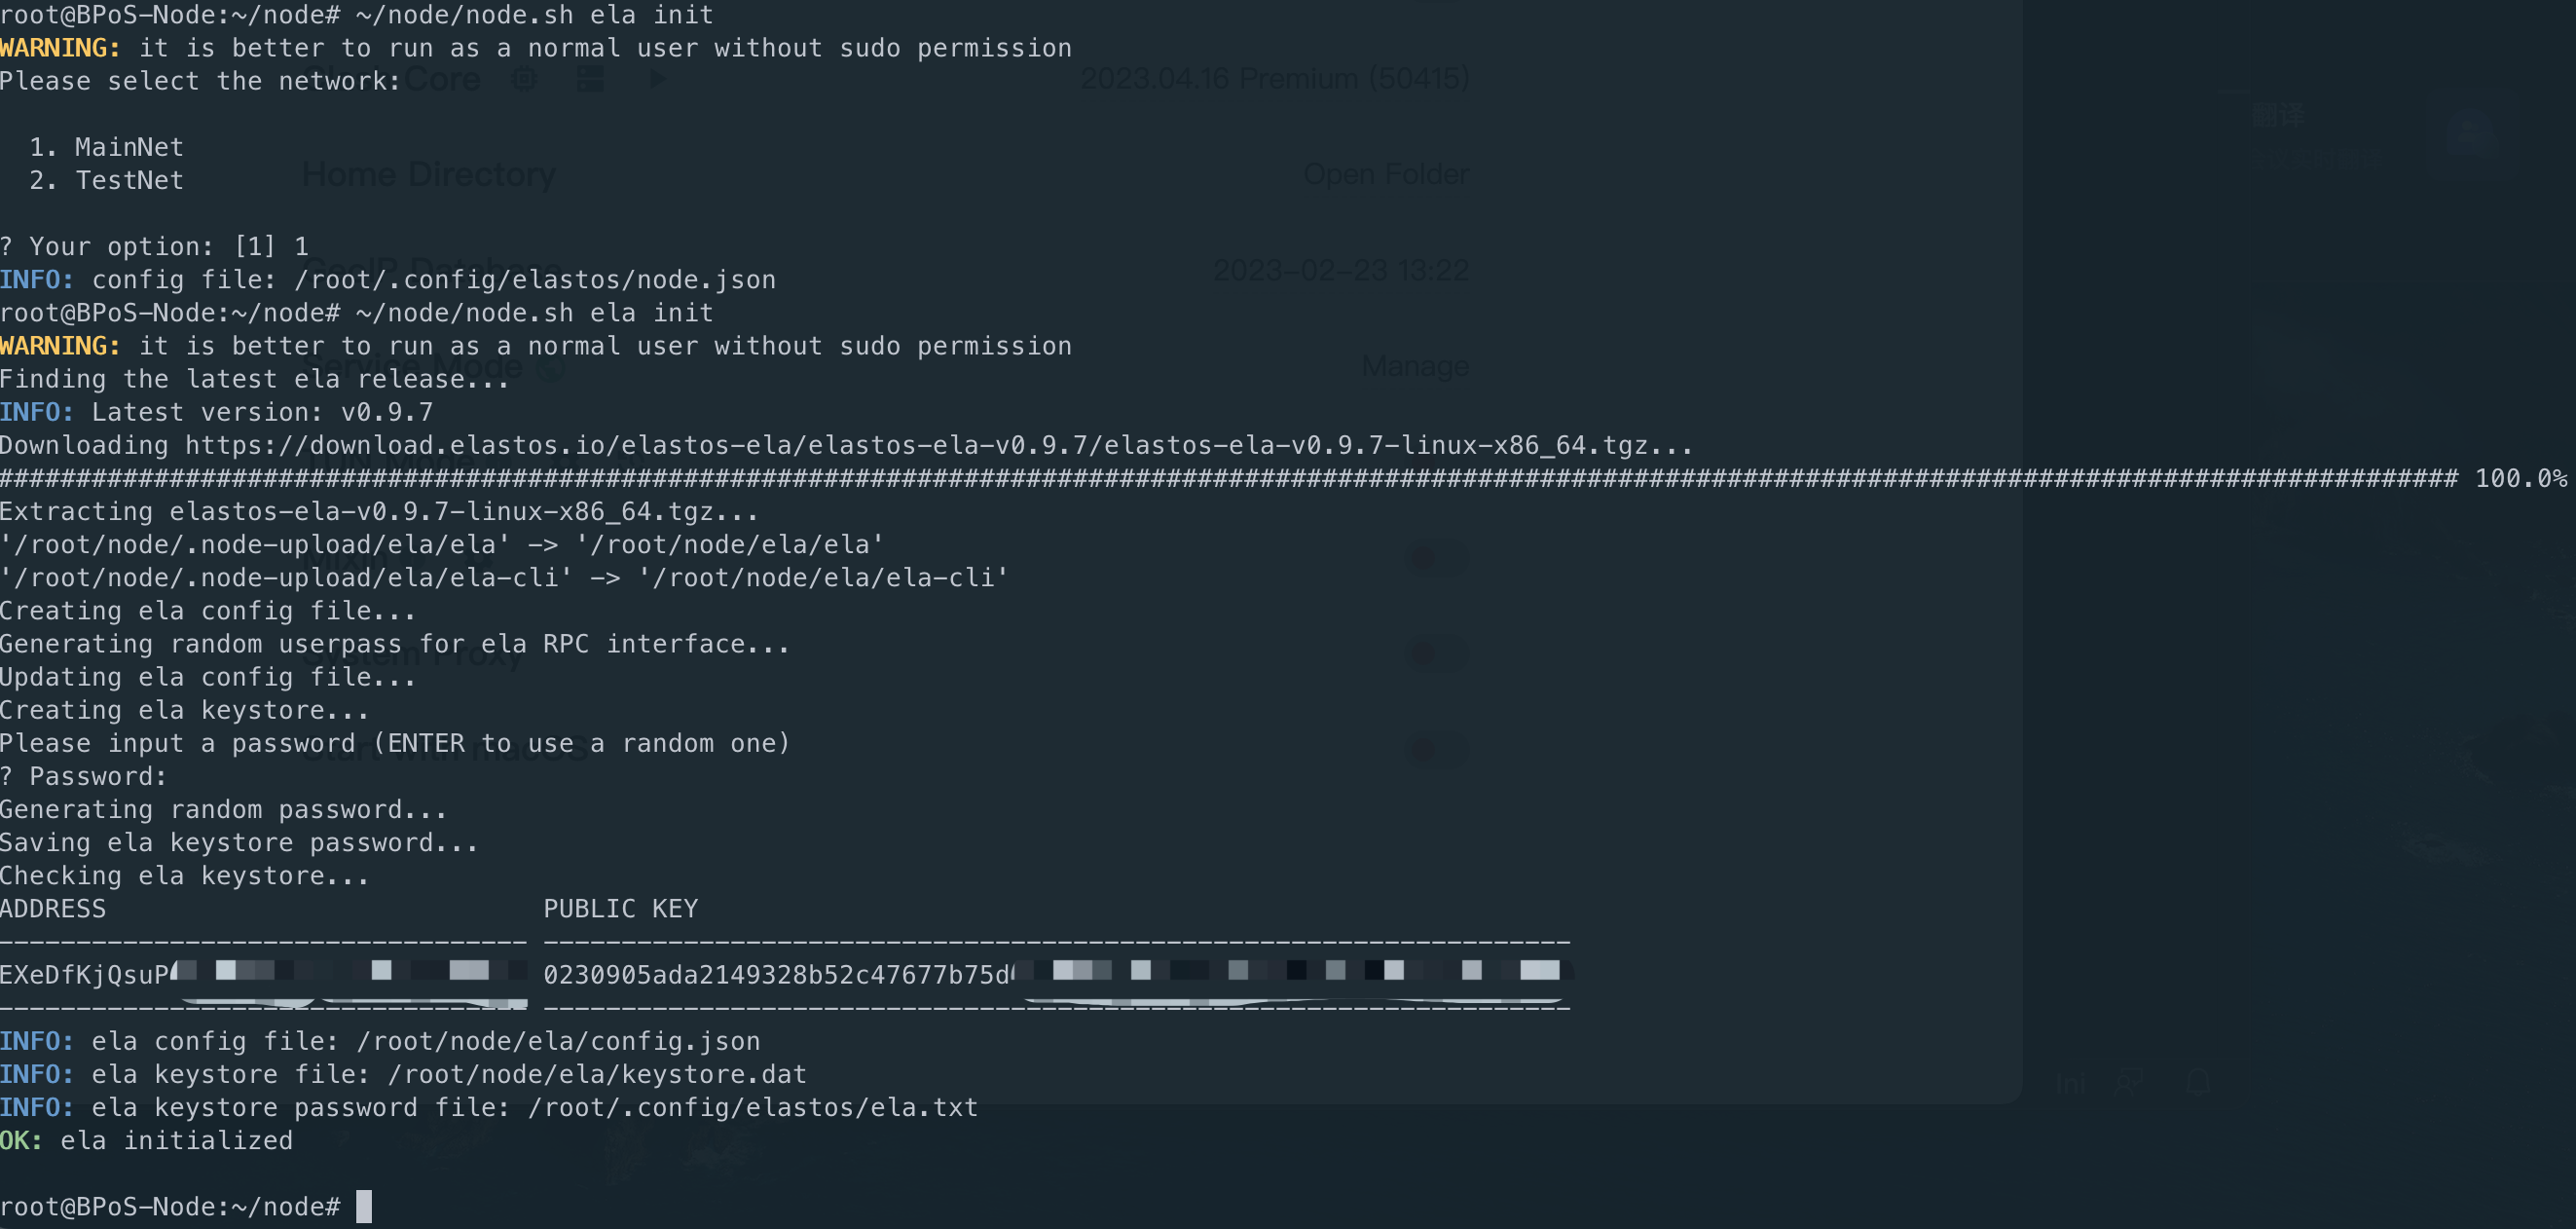
This node will connect to the Mainnet by default (without specifying any parameters).
Make sure your 20338 and 20339 ports are open to the public

The start command will start the program (chain) in the background.
$ ~/node/node.sh ela start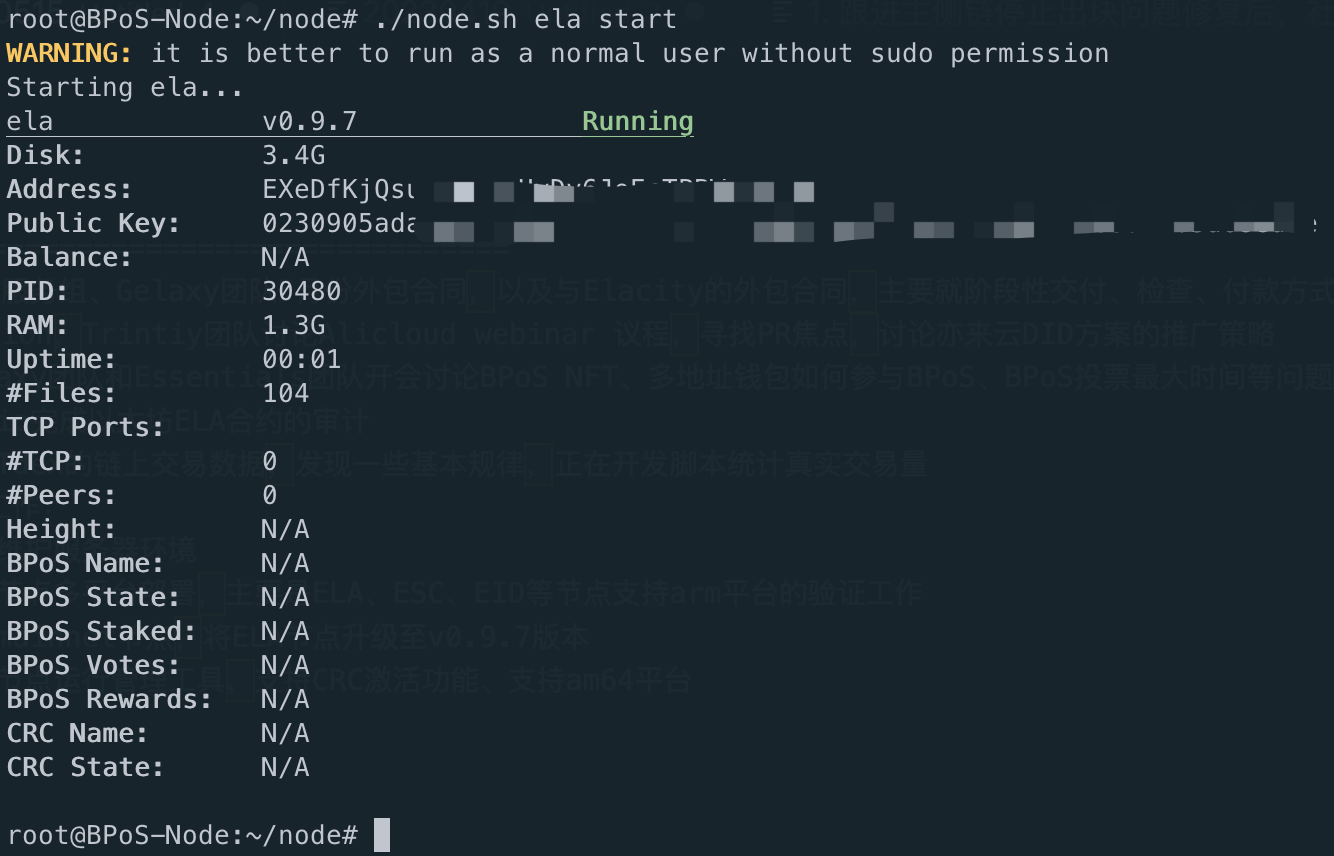
When the node starts, it begins synchronizing blocks. The log is listed below:
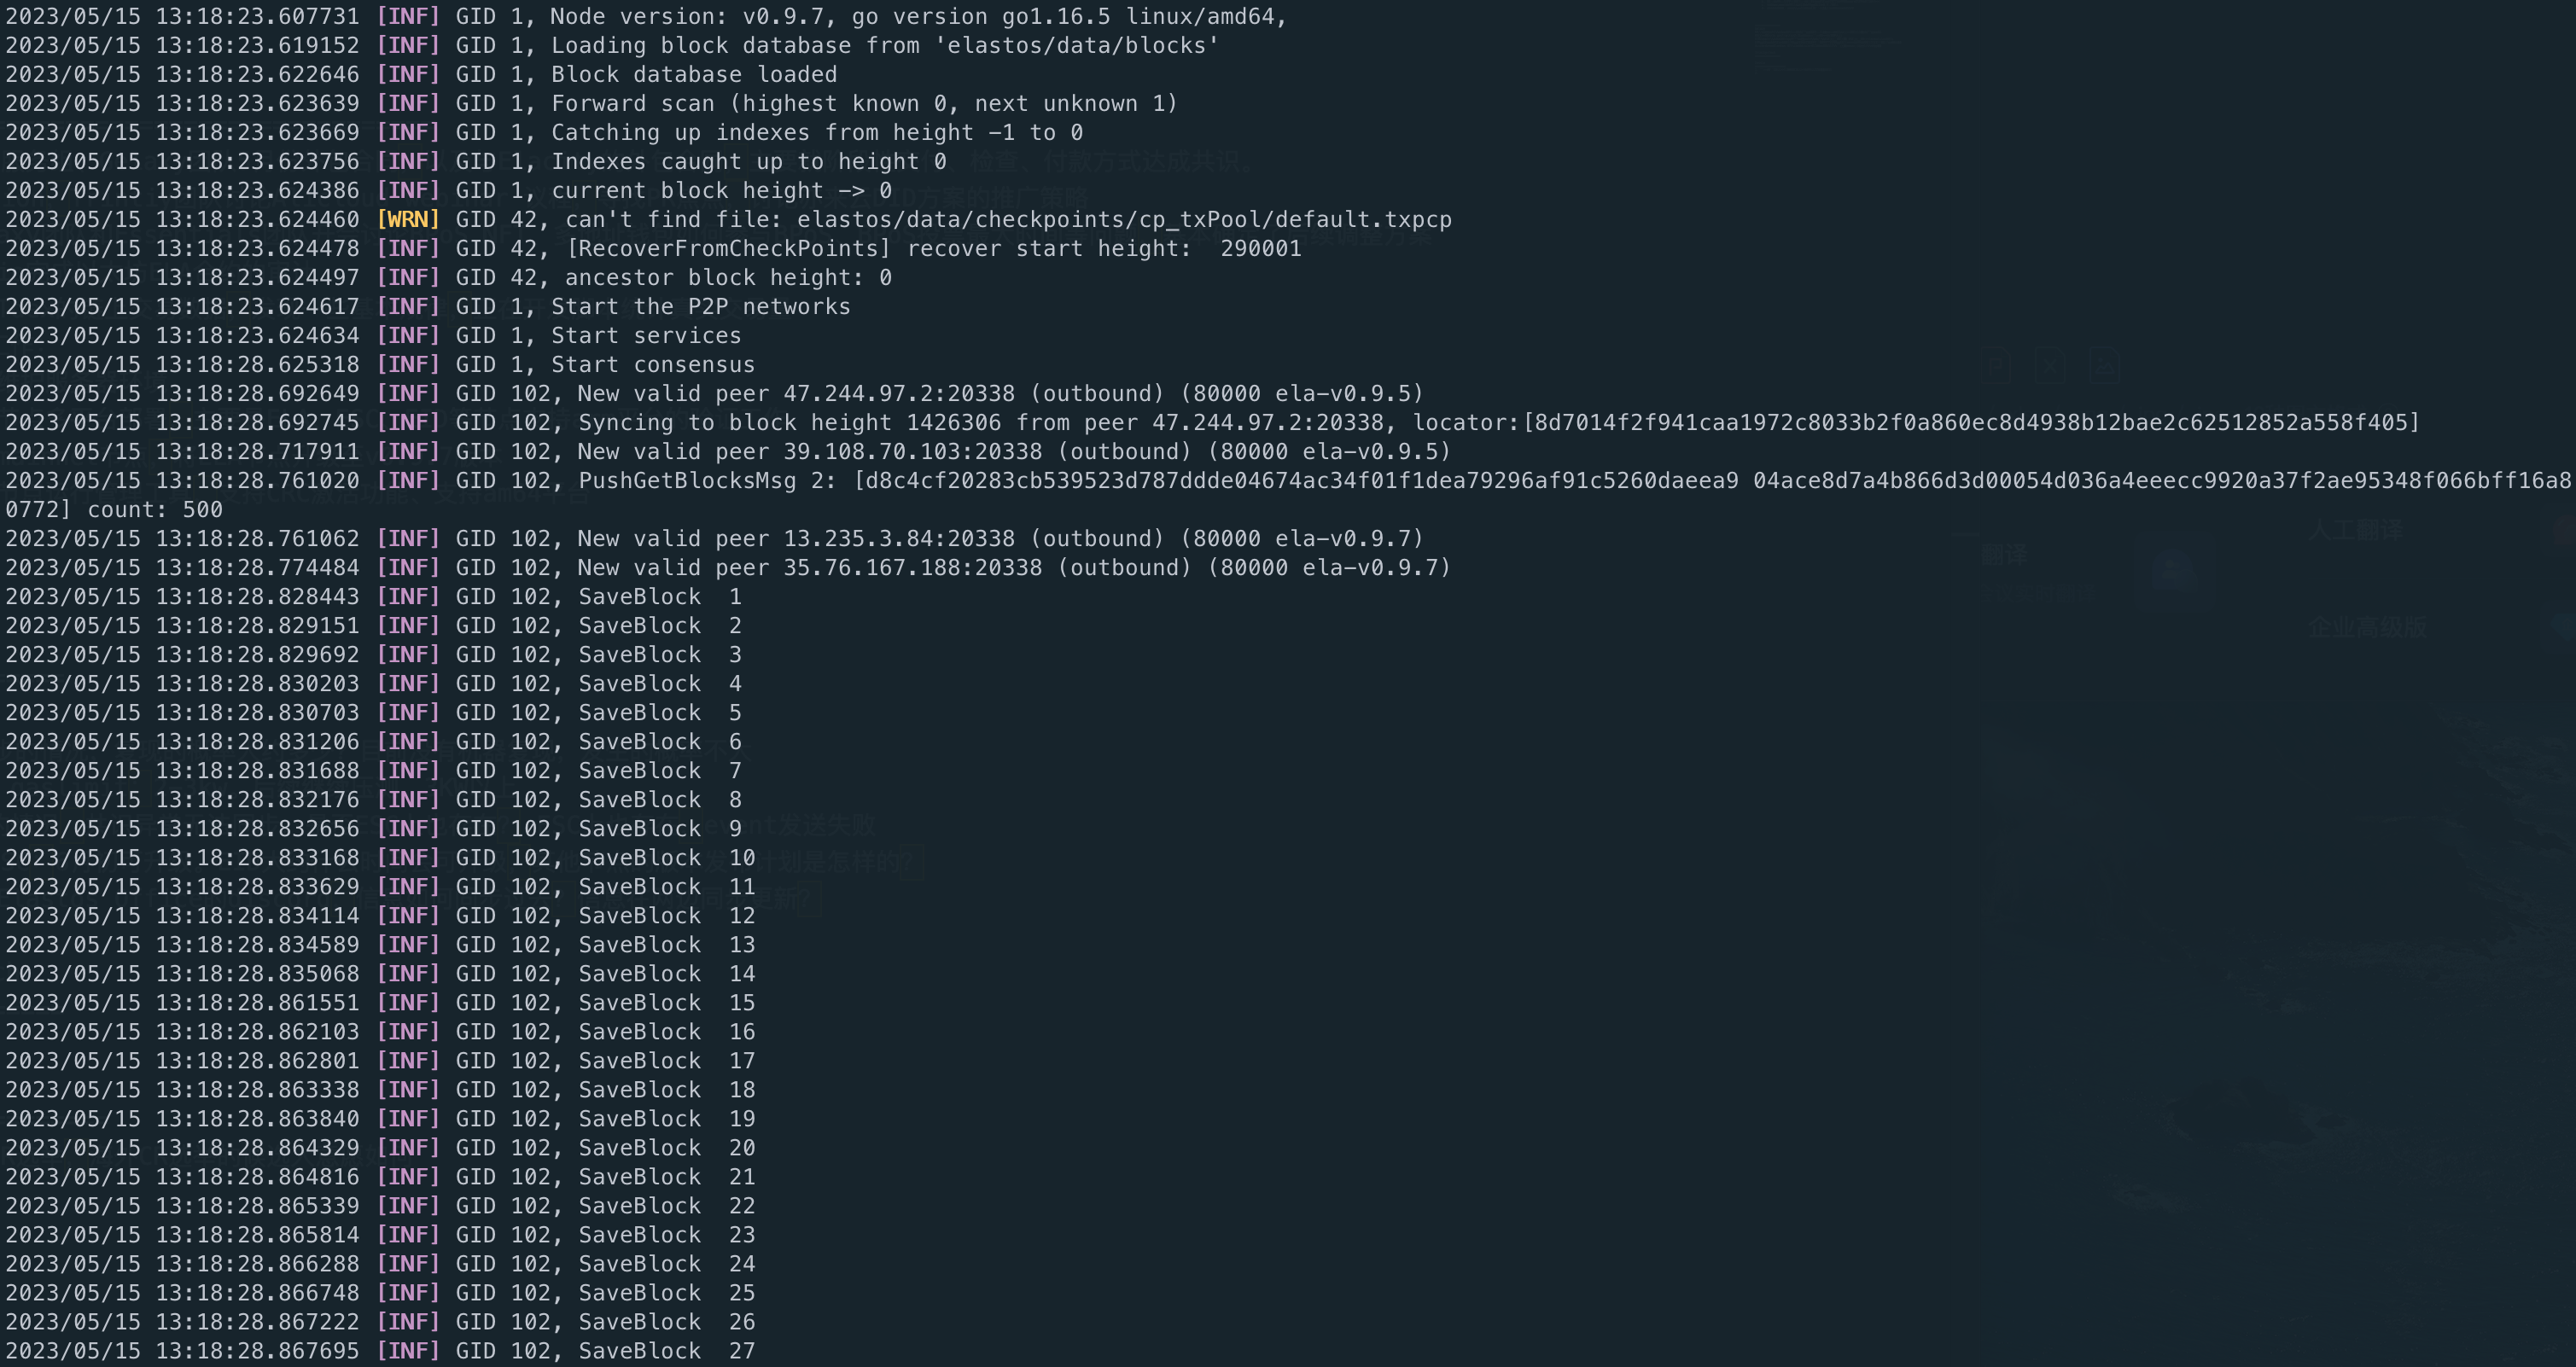
2023/05/15 13:18:23.607731 [INF] GID 1, Node version: v0.9.7, go version go1.16.5 linux/amd64,
2023/05/15 13:18:23.619152 [INF] GID 1, Loading block database from 'elastos/data/blocks'
2023/05/15 13:18:23.622646 [INF] GID 1, Block database loaded
2023/05/15 13:18:23.623639 [INF] GID 1, Forward scan (highest known 0, next unknown 1)
2023/05/15 13:18:23.623669 [INF] GID 1, Catching up indexes from height -1 to 0
2023/05/15 13:18:23.623756 [INF] GID 1, Indexes caught up to height 0
2023/05/15 13:18:23.624386 [INF] GID 1, current block height -> 0
2023/05/15 13:18:23.624460 [WRN] GID 42, can't find file: elastos/data/checkpoints/cp_txPool/default.txpcp
2023/05/15 13:18:23.624478 [INF] GID 42, [RecoverFromCheckPoints] recover start height:  290001
2023/05/15 13:18:23.624497 [INF] GID 42, ancestor block height: 0
2023/05/15 13:18:23.624617 [INF] GID 1, Start the P2P networks
2023/05/15 13:18:23.624634 [INF] GID 1, Start services
2023/05/15 13:18:28.625318 [INF] GID 1, Start consensus
2023/05/15 13:18:28.692649 [INF] GID 102, New valid peer 47.244.97.2:20338 (outbound) (80000 ela-v0.9.5)
2023/05/15 13:18:28.692745 [INF] GID 102, Syncing to block height 1426306 from peer 47.244.97.2:20338, locator:[8d7014f2f941caa1972c8033b2f0a860ec8d4938b12bae2c62512852a558f405]
2023/05/15 13:18:28.717911 [INF] GID 102, New valid peer 39.108.70.103:20338 (outbound) (80000 ela-v0.9.5)
2023/05/15 13:18:28.761020 [INF] GID 102, PushGetBlocksMsg 2: [d8c4cf20283cb539523d787ddde04674ac34f01f1dea79296af91c5260daeea9 04ace8d7a4b866d3d00054d036a4eeecc9920a37f2ae95348f066bff16a80772] count: 500
2023/05/15 13:18:28.761062 [INF] GID 102, New valid peer 13.235.3.84:20338 (outbound) (80000 ela-v0.9.7)
2023/05/15 13:18:28.774484 [INF] GID 102, New valid peer 35.76.167.188:20338 (outbound) (80000 ela-v0.9.7)
2023/05/15 13:18:28.828443 [INF] GID 102, SaveBlock  1
2023/05/15 13:18:28.829151 [INF] GID 102, SaveBlock  2
2023/05/15 13:18:28.829692 [INF] GID 102, SaveBlock  3
2023/05/15 13:18:28.830203 [INF] GID 102, SaveBlock  4
2023/05/15 13:18:28.830703 [INF] GID 102, SaveBlock  5
2023/05/15 13:18:28.831206 [INF] GID 102, SaveBlock  6
This will take approximately two days to complete block synchronization.
The status command will show all programs (chains) are Running. Watch the Height to make sure the chains are synchronized.
$ ~/node/node.sh ela status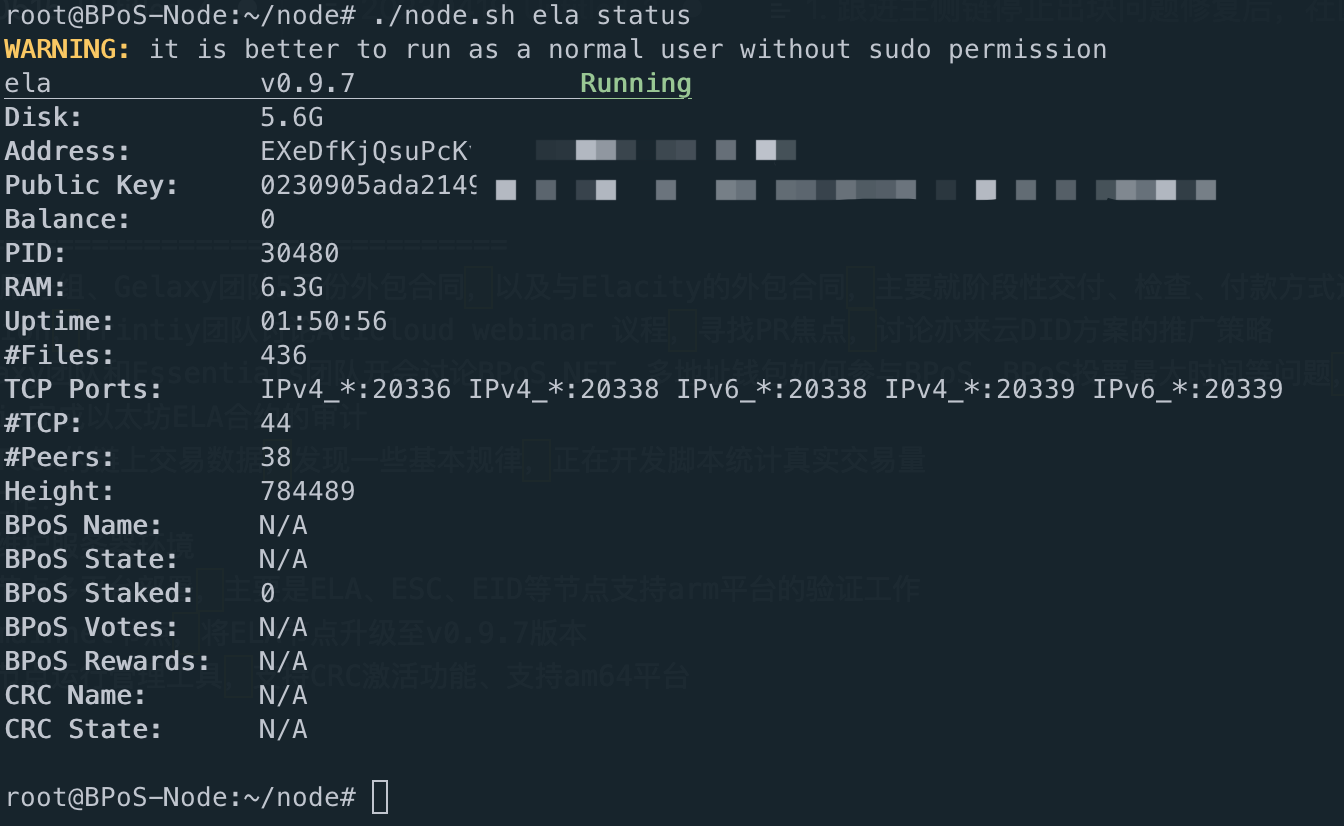
If the node's height matches the latest block height displayed on the blockchain explorer, it indicates that the node has completed synchronization. Please contact the blockchain Dev team via Elastos Discord if you have any issues.
Your node is running and synchronized now. If you want to use your node as a validator on the main net, check out this tutorial to find out how to add your node as a validator using Essentials wallet.
You can use ~/node/node.sh ela stop to stop the node.
1 posts | 0 followers
FollowAlibaba Cloud Community - May 19, 2023
Alex - August 26, 2019
Alibaba Clouder - August 13, 2020
Alibaba Clouder - February 13, 2019
Alibaba Clouder - April 20, 2018
Alibaba Cloud Native Community - November 24, 2023
1 posts | 0 followers
Follow IDaaS
IDaaS
Make identity management a painless experience and eliminate Identity Silos
Learn More Elastic Desktop Service
A convenient and secure cloud-based Desktop-as-a-Service (DaaS) solution
Learn More Edge Node Service
An all-in-one service that provides elastic, stable, and widely distributed computing, network, and storage resources to help you deploy businesses on the edge nodes of Internet Service Providers (ISPs).
Learn More Blockchain as a Service
BaaS provides an enterprise-level platform service based on leading blockchain technologies, which helps you build a trusted cloud infrastructure.
Learn More