You can use the protection rules provided by Web Application Firewall (WAF) to customize your rule groups for a specific protection feature, such as Protection Rules Engine, also known as web application protection. If default protection rule groups do not meet your business requirements, we recommend that you customize protection rule groups to protect your website.

Prerequisites

  • A WAF instance is purchased. The instance must meet the following requirements:
    • The instance uses the subscription billing method.
    • If the instance is deployed in the Chinese mainland, the instance must be of the Business edition or higher.
    • If the instance is deployed outside the Chinese mainland, the instance must be of the Enterprise edition or higher.
  • Your website is added to WAF. For more information, see Tutorials.

Background information

Only the Protection Rules Engine feature supports custom protection rule groups. For more information about Protection Rules Engine, see Configure the protection rules engine feature.

Use a custom rule group

Before you can use a custom rule group, you must complete the following steps:
  1. Create a rule group: Create a custom rule group for a specific protection feature.
  2. Apply the rule group: Apply the created rule group to your website.

Create a rule group

  1. Log on to the WAF console. In the top navigation bar, select the resource group and the region to which your WAF instance belongs. The region can be Chinese Mainland or Outside Chinese Mainland.
  2. In the left-side navigation pane, choose System Management > Protection Rule Group.
  3. Optional:On the Protection Rule Group page, click the tab of the protection feature for which you want to create a custom rule group.
    Note You can skip this step because only the web application protection feature supports custom protection rule groups. The Web Application Protection tab automatically appears.
    The tab displays default and custom rule groups.
    • Default rule group: Default rule groups are Loose rule group, Medium rule group, and Strict rule group.
      You can click a value in the Built-in Rule Number column to view information about the built-in rules of the default rule group.
      Note Default rule groups cannot be edited or deleted.
    • Custom rule group: You can create a custom rule group on the Protection Rule Group page.
  4. Click Create Rule Group.
    Note You can create a maximum of 10 rule groups for the web application protection feature.
  5. Complete the Create Rule Group wizard.
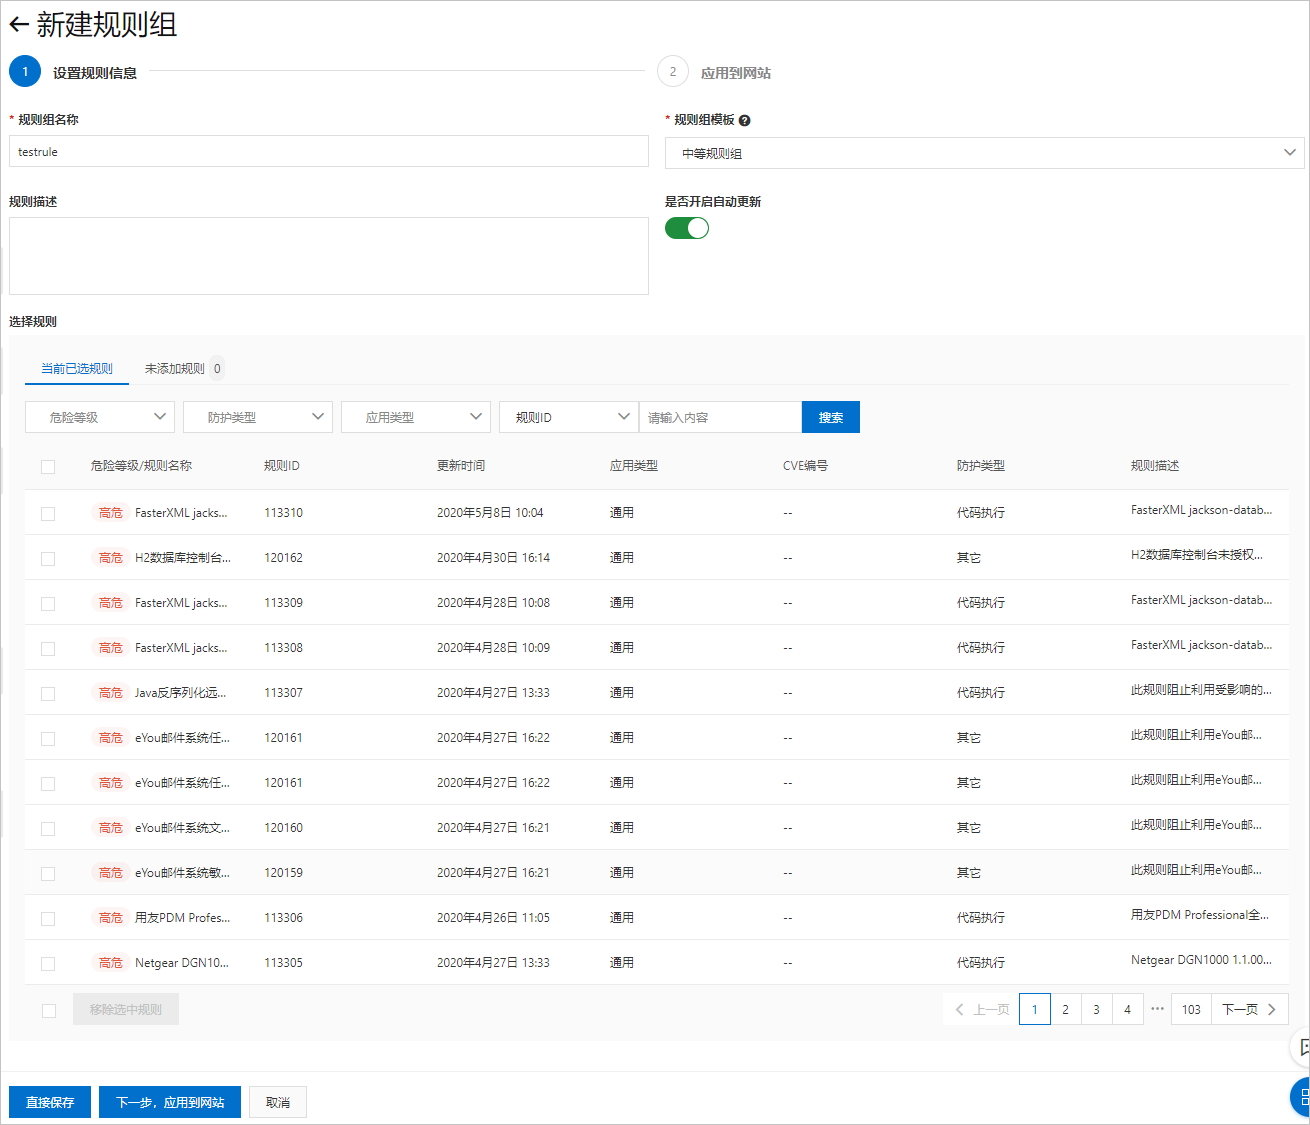
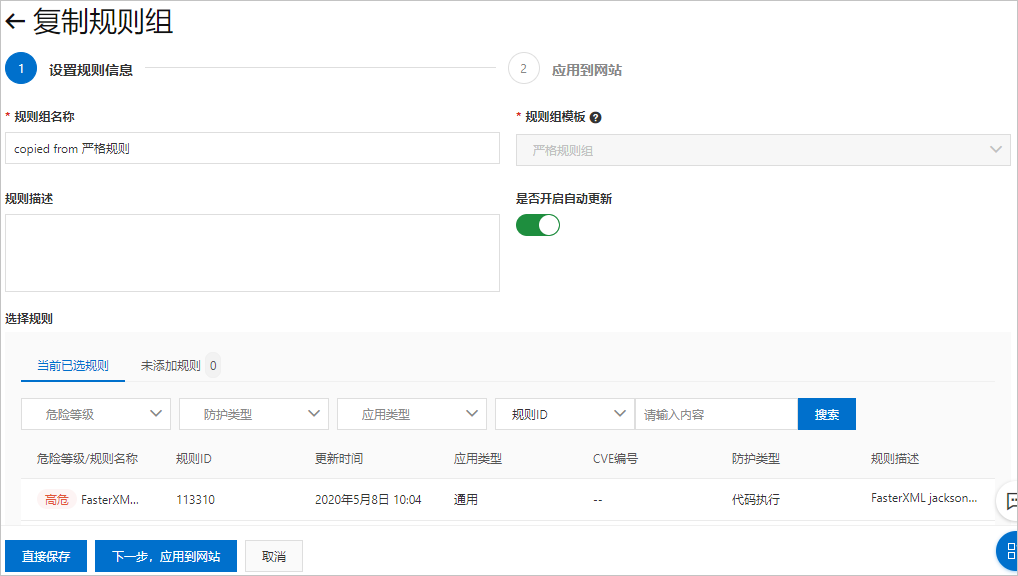
    1. Specify rule information. Configure the following parameters and click Next: Apply to Websites.
      ParameterDescription
      Rule Group NameEnter a name for the rule group.

      The name is used to identify the rule group. We recommend that you enter an informative name.

      Rule Group TemplateSelect a rule group template from which you want to select rules for the rule group. Valid values:
      • Strict rule group
      • Medium rule group
      • Loose rule group

      Different rule group templates contain different rules. After you select the rule group template and turn on Automatic Update, each time a rule in the rule group template is updated, the rule is also updated in the created rule group.

      DescriptionEnter a description for the rule group.
      Automatic UpdateIf you turn on this switch, each time a rule in the rule group template is updated, the rule is also updated in the created rule group.
      Note Some custom rule groups do not support the automatic update feature. In this case, we recommend that you create custom rule groups to replace these rule groups.
      Select RuleSpecify rules for the rule group.

      The Selected Rules tab lists all rules in the rule group template that you select. You must select rules that are not applicable or may cause false positives, and click Remove Selected Rules.

      You can use the filter or search feature to find the rules that you want to remove. You can filter rules by Protection Type, Application Type, or Risk Level. You can also enter the name or ID of a rule to search for the rule.
      • Risk Level: indicates the risk level of web attacks. Valid values: High, Medium, and Low.
      • Protection Type: indicates the type of web attacks. Valid values: SQL Injection, Cross-site Script, Code Execution, Local File Inclusion, Remote File Inclusion, Webshell, and Others.
      • Application Type: indicates the type of the protected web application. Valid values: Common, Wordpress, Dedecms, Discuz, Phpcms, Ecshop, Shopex, Drupal, Joomla, Metinfo, Struts2, Spring Boot, Jboss, Weblogic, Websphere, Tomcat, Elastic Search, Thinkphp, Fastjson, ImageMagick, PHPwind, phpMyAdmin, and Others.
      Note If you do not want to immediately apply a rule group after you create it, click Save to complete the wizard. If you want to apply the rule group later, you can edit the rule group again.
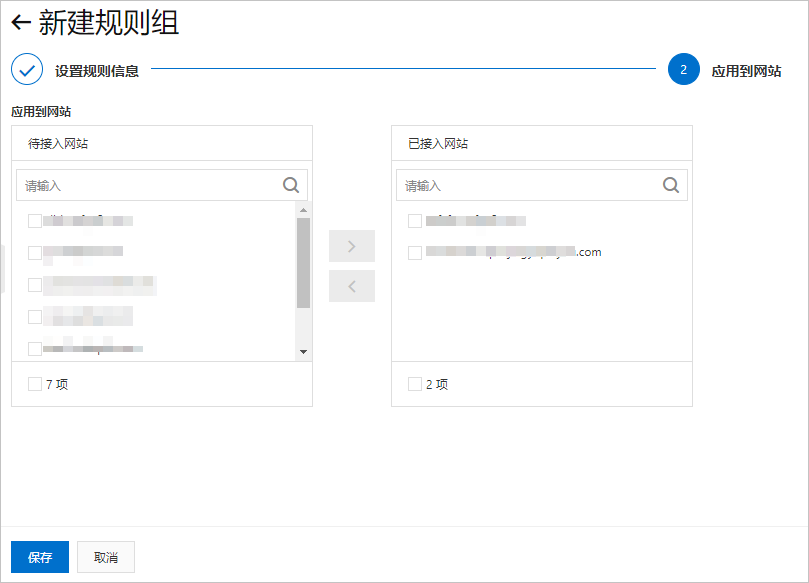
    2. Optional:Apply the created rule group to a website. To do this, you must select the website from the Websites not Added to WAF section and add the website to the Websites Added to WAF section.
      Important You can apply only one rule group to a website.
    3. Click Save.
    You can view the created rule group in the rule group list and select the website to which you want to apply the rule group. For more information, see Apply the rule group.

    After the rule group is created, you can view the time when the rule group was created in the Updated On: column on the Protection Rule Group page and determine whether to update the rule group.

Apply the rule group

After you create a custom rule group, you can apply it by using one of the following methods:
  • On the Protection Rule Group page, apply the rule group to a website. The following procedure is provided for this scenario.
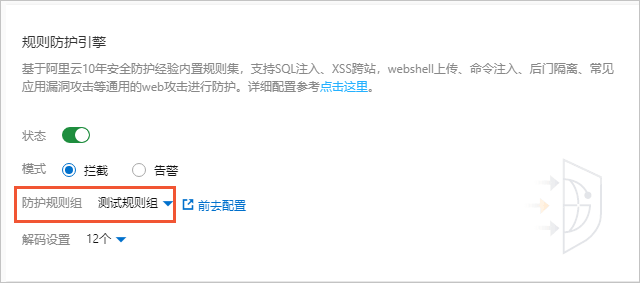
  • On the Website Protection page, select the rule group from the Protection Rule Group drop-down list in the Protection Rules Engine card.

    For more information, see Configure the protection rules engine feature.

  1. Log on to the WAF console. In the top navigation bar, select the resource group and the region to which your WAF instance belongs. The region can be Chinese Mainland or Outside Chinese Mainland.
  2. In the left-side navigation pane, choose System Management > Protection Rule Group.
  3. Optional:On the Protection Rule Group page, click the tab of the protection feature for which you want to apply a rule group.
    Note You can skip this step because only the web application protection feature supports custom protection rule groups. The Web Application Protection tab automatically appears.
  4. In the rule group list, find the rule group that you want to apply and click Apply to Website in the Action column.
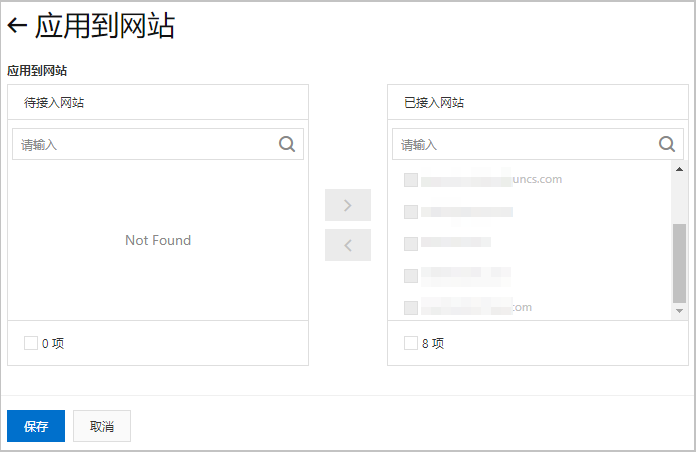
  5. On the Apply to Website page, select the website to which you want to apply the rule group from the Websites not Added to WAF section, add the website to the Websites Added to WAF section, and then click Save.
    Important You must apply one rule group to each website.
    After the rule group is applied, you can view the website in the Website column in the rule group list.

What to do next

You can perform the following operations to manage the created rule group on the Protection Rule Group page:

  • Copy: allows you to copy the configurations of the rule group.

    You can change the settings for Rule Group Name, Description, and Automatic Update. However, you cannot change the setting for Rule Group Template or the rule settings. If you want to change the rule settings, we recommend that you copy the rule group and change the rule settings in the copied rule group.

  • Edit: allows you to change the name, description, and rule settings of the rule group. Default rule groups cannot be edited.
  • Delete: allows you to delete the rule group. Default rule groups cannot be deleted.

    Before you delete a custom rule group, make sure that it is not applied to a website. If the rule group is applied to a website, apply a different rule group to the website before you delete the rule group.