RDS PostgreSQL支援中介軟體ShardingSphere,本文介紹如何基於ShardingSphere進行開發。
前提條件
RDS PostgreSQL所有版本執行個體均支援ShardingSphere。背景資訊
ShardingSphere適合分區徹底、資料庫邏輯分區極其清晰的業務,支援如下功能:
- 資料分區
- 分庫和分表
- 讀寫分離
- 分區策略定製化
- 無中心化分布式主鍵
- 分散式交易
- 標準化事務介面
- XA強一致事務
- 柔性事務
- 資料庫治理
- 配置動態化
- 編排和治理
- 資料脫敏
- 可視化鏈路追蹤
- Auto Scaling(規劃中)
更多詳情請參見ShardingSphere官方手冊。
ShardingSphere模式介紹
ShardingSphere支援多種模式,建議根據實際業務情況選擇。各模式介紹如下表。
| 類別 | Sharding-JDBC | Sharding-Proxy | Sharding-Sidecar |
| 支援資料庫 | 任意實現JDBC規範的資料庫(MySQL、PostgreSQL、Oracle、SQL Server等) | MySQL、PostgreSQL | MySQL、PostgreSQL |
| 串連消耗數 | 高 | 低 | 高 |
| 異構語言支援 | 僅Java | 任意 | 任意 |
| 效能 | 損耗低 | 損耗略高 | 損耗低 |
| 無中心化 | 是 | 否 | 是 |
| 靜態入口 | 無 | 有 | 無 |
設定配置模板
- ECS執行個體上使用如下命令進入模板目錄。
cd apache-shardingsphere-incubating-4.0.0-sharding-proxy-bin cd conf - 使用ll命令查看目錄內所有檔案。結果樣本如下:
total 24 -rw-r--r-- 1 501 games 3019 Jul 30 2019 config-encrypt.yaml -rw-r--r-- 1 501 games 3582 Apr 22 2019 config-master_slave.yaml -rw-r--r-- 1 501 games 4278 Apr 22 2019 config-sharding.yaml -rw-r--r-- 1 501 games 1918 Jul 30 2019 server.yaml說明- config-encrypt.yaml:資料脫敏設定檔
- config-master_slave.yaml:讀寫分離設定檔
- config-sharding.yaml:資料分區設定檔
- server.yaml:公用設定檔
- 修改設定檔。說明 設定檔的詳細說明請參見ShardingSphere官方手冊,本文僅以資料分區和公用配置進行簡單說明。
- 資料分區樣本
schemaName: #邏輯資料來源名稱 dataSources: #資料來源配置,可配置多個data_source_name。 <data_source_name>: #與Sharding-JDBC配置不同,無需設定資料庫串連池。 url: #資料庫URL串連 username: #資料庫使用者名稱 password: #資料庫密碼 connectionTimeoutMilliseconds: 30000 #連線逾時毫秒數 idleTimeoutMilliseconds: 60000 #空閑串連回收逾時毫秒數 maxLifetimeMilliseconds: 1800000 #串連最大存活時間毫秒數 maxPoolSize: 65 #最大串連數 shardingRule: #省略資料分區配置,與Sharding-JDBC配置一致。 - 公用配置樣本
- Proxy屬性
#省略與Sharding-JDBC一致的配置屬性 props: acceptor.size: #用於設定接收用戶端請求的背景工作執行緒個數,預設為CPU核心數*2。 proxy.transaction.type: #預設為LOCAL事務,允許LOCAL,XA,BASE三個值,XA採用Atomikos作為交易管理員,BASE類型需要拷貝實現ShardingTransactionManager的介面的jar包至lib目錄中。 proxy.opentracing.enabled: #是否開啟鏈路追蹤功能,預設為不開啟。 check.table.metadata.enabled: #是否在啟動時檢查分表中繼資料一致性,預設值: false。 proxy.frontend.flush.threshold: # 對於單個大查詢,每多少個網路包返回一次。 - 許可權驗證
# 用於執行登入Sharding Proxy的許可權驗證。配置使用者名稱、密碼、可訪問的資料庫後,必須使用正確的使用者名稱、密碼才可登入Proxy。

authentication:
  users:
    username: # 自訂使用者名稱
      password: **** # 使用者對應的密碼
    sharding: # 自訂使用者名稱
      password: sharding # sharding使用者對應的密碼
      authorizedSchemas: sharding_db, masterslave_db # 該使用者授權可訪問的資料庫,多個用逗號分隔。預設將擁有root許可權,可訪問全部資料庫。
- Proxy屬性
- 資料分區樣本
準備測試環境
- ECS執行個體安裝Java測試環境
sudo yum install -y java - 配置PostgreSQL 12執行個體
- 建立帳號:r1
- 帳號對應密碼:PW123321!
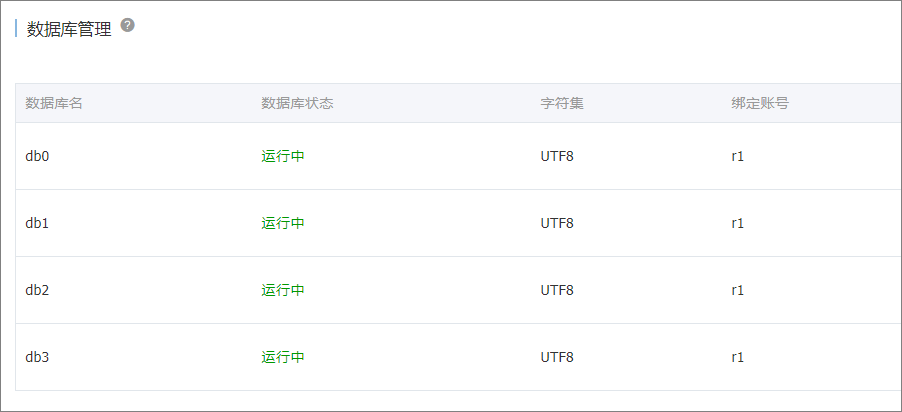
- 建立資料庫:db0、db1、db2、db3,並且owner為r1。
- 執行個體白名單放通ECS的IP。
說明- 建立方法請參見快速建立RDS PostgreSQL執行個體和建立帳號和資料庫。
- 放通ECS的IP請參見設定白名單。
- 使用vi命令編輯公用設定檔。
vi /home/apache-shardingsphere-incubating-4.0.0-sharding-proxy-bin/conf/server.yaml - 參考如下樣本,配置公用設定檔。
authentication:
  users:
    r1:
      password: PW123321!
      authorizedSchemas: db0,db1,db2,db3
props:
  executor.size: 16
  sql.show: false
水平分區測試
- 修改資料分區設定檔。
- 使用vi命令開啟公用設定檔。
vi /home/apache-shardingsphere-incubating-4.0.0-sharding-proxy-bin/conf/config-sharding.yaml - 參考如下樣本,配置公用設定檔。
schemaName: sdb

dataSources:
  db0:
    url: jdbc:postgresql://pgm-bpxxxxx.pg.rds.aliyuncs.com:1433/db0
    username: r1
    password: PW123321!
    connectionTimeoutMilliseconds: 30000
    idleTimeoutMilliseconds: 60000
    maxLifetimeMilliseconds: 1800000
    maxPoolSize: 65
  db1:
    url: jdbc:postgresql://pgm-bpxxxxx.pg.rds.aliyuncs.com:1433/db1
    username: r1
    password: PW123321!
    connectionTimeoutMilliseconds: 30000
    idleTimeoutMilliseconds: 60000
    maxLifetimeMilliseconds: 1800000
    maxPoolSize: 65
  db2:
    url: jdbc:postgresql://pgm-bpxxxxx.pg.rds.aliyuncs.com:1433/db2
    username: r1
    password: PW123321!
    connectionTimeoutMilliseconds: 30000
    idleTimeoutMilliseconds: 60000
    maxLifetimeMilliseconds: 1800000
    maxPoolSize: 65
  db3:
    url: jdbc:postgresql://pgm-bpxxxxx.pg.rds.aliyuncs.com:1433/db3
    username: r1
    password: PW123321!
    connectionTimeoutMilliseconds: 30000
    idleTimeoutMilliseconds: 60000
    maxLifetimeMilliseconds: 1800000
    maxPoolSize: 65

shardingRule:
  tables:
    t_order:
      actualDataNodes: db${0..3}.t_order${0..7}
      databaseStrategy:
        inline:
          shardingColumn: user_id
          algorithmExpression: db${user_id % 4}
      tableStrategy:
        inline:
          shardingColumn: order_id
          algorithmExpression: t_order${order_id % 8}
      keyGenerator:
        type: SNOWFLAKE
        column: order_id
    t_order_item:
      actualDataNodes: db${0..3}.t_order_item${0..7}
      databaseStrategy:
        inline:
          shardingColumn: user_id
          algorithmExpression: db${user_id % 4}
      tableStrategy:
        inline:
          shardingColumn: order_id
          algorithmExpression: t_order_item${order_id % 8}
      keyGenerator:
        type: SNOWFLAKE
        column: order_item_id
  bindingTables:
    - t_order,t_order_item
  defaultTableStrategy:
    none:
- 使用vi命令開啟公用設定檔。
- 啟動ShardingSphere,監聽8001連接埠。
cd ~/apache-shardingsphere-incubating-4.0.0-sharding-proxy-bin/bin/ ./start.sh 8001 - 測試連接資料庫。
psql -h 127.0.0.1 -p 8001 -U r1 sdb - 建立表。
create table t_order(order_id int8 primary key, user_id int8, info text, c1 int, crt_time timestamp);
create table t_order_item(order_item_id int8 primary key, order_id int8, user_id int8, info text, c1 int, c2 int, c3 int, c4 int, c5 int, crt_time timestamp);
說明 建立表會根據配置的策略,在目標庫中自動建立水平分區。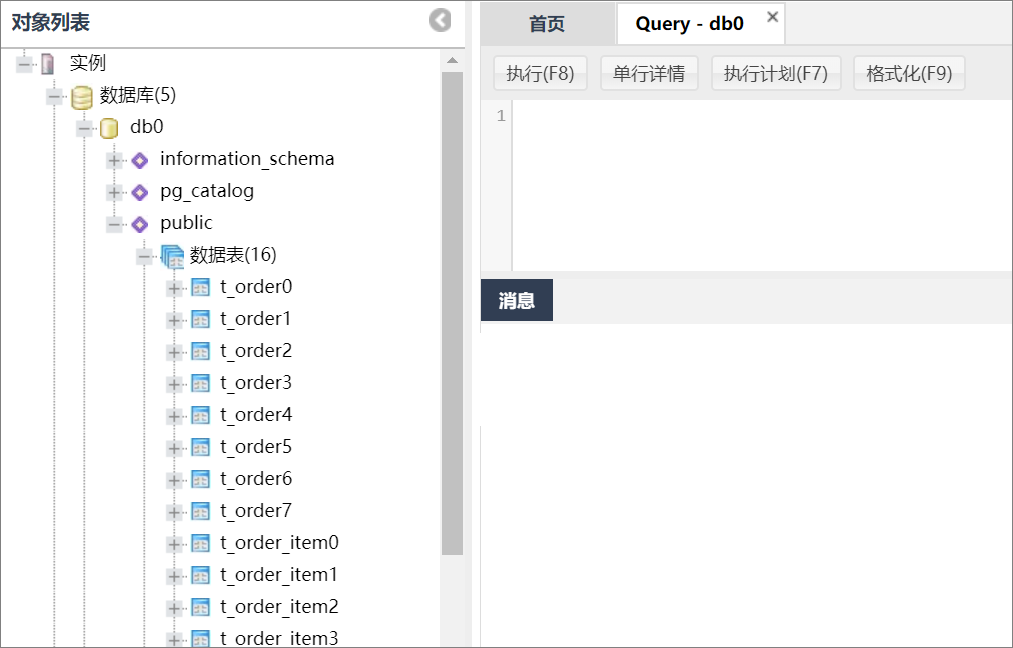
常見問題
- 如果想知道ShardingSphere的解析SQL、路由SQL的語句,請參見如下配置:
- 使用vi命令開啟公用設定檔。
vi /home/apache-shardingsphere-incubating-4.0.0-sharding-proxy-bin/conf/server.yaml - 參考如下樣本,配置公用設定檔。
authentication:
  users:
    r1:
      password: PW123321!
      authorizedSchemas: db0,db1,db2,db3
props:
  executor.size: 16
  sql.show: true  # 表示把解析的SQL列印到日誌
- 使用vi命令開啟公用設定檔。
- 如果需要做寫入、查詢等測試,請參見如下命令:
- 寫入樣本
insert into t_order (user_id, info, c1, crt_time) values (0,'a',1,now()); insert into t_order (user_id, info, c1, crt_time) values (1,'b',2,now()); insert into t_order (user_id, info, c1, crt_time) values (2,'c',3,now()); insert into t_order (user_id, info, c1, crt_time) values (3,'c',4,now()); - 查詢樣本1
select * from t_order;結果樣本order_id | user_id | info | c1 | crt_time --------------------+---------+------+----+---------------------------- 433352561047633921 | 0 | a | 1 | 2020-02-09 19:48:21.856555 433352585668198400 | 1 | b | 2 | 2020-02-09 19:48:27.726815 433352610813050881 | 2 | c | 3 | 2020-02-09 19:48:33.721754 433352628370407424 | 3 | c | 4 | 2020-02-09 19:48:37.907683 (4 rows) - 查詢樣本2
sdb=> select * from t_order where user_id=1;結果樣本order_id | user_id | info | c1 | crt_time --------------------+---------+------+----+---------------------------- 433352585668198400 | 1 | b | 2 | 2020-02-09 19:48:27.726815 (1 row)
- 寫入樣本
- 如果需要查看ShardingSphere日誌,路徑如下:
/home/apache-shardingsphere-incubating-4.0.0-sharding-proxy-bin/logs/stdout.log - 如果需要使用pgbench壓測,請參見如下命令:
- 建立測試sql檔案並開啟。
vi test.sql - 參考如下樣本,配置pgbench壓測命令。
\set user_id random(1,100000000)
\set order_id random(1,2000000000)
\set order_item_id random(1,2000000000)
insert into t_order (user_id, order_id, info, c1 , crt_time) values (:user_id, :order_id,random()::text, random()*1000, now()) on conflict (order_id) do update set info=excluded.info,c1=excluded.c1,crt_time=excluded.crt_time;
insert into t_order_item (order_item_id, user_id, order_id, info, c1,c2,c3,c4,c5,crt_time) values (:order_item_id, :user_id,:order_id,random()::text, random()*1000,random()*1000,random()*1000,random()*1000,random()*1000, now()) on conflict(order_item_id) do nothing;

pgbench -M simple -n -r -P 1 -f ./test.sql -c 24 -j 24  -h 127.0.0.1 -p 8001 -U r1 sdb -T 120
progress: 1.0 s, 1100.9 tps, lat 21.266 ms stddev 6.349
progress: 2.0 s, 1253.0 tps, lat 18.779 ms stddev 7.913
progress: 3.0 s, 1219.0 tps, lat 20.083 ms stddev 13.212
- 建立測試sql檔案並開啟。