自訂步驟用於在功能測試中,通過編寫代碼,滿足非通用性需求。自訂步驟作為一個功能測試步驟插入到正常的用例指令碼中執行,一般用於實現與業務或用例情境相關的常用邏輯。
前提條件
操作步驟
在指定應用的用例管理頁簽,選擇自訂步驟子頁簽。
在自訂步驟頁簽,單擊建立自訂步驟,開啟建立自訂步驟右側欄。
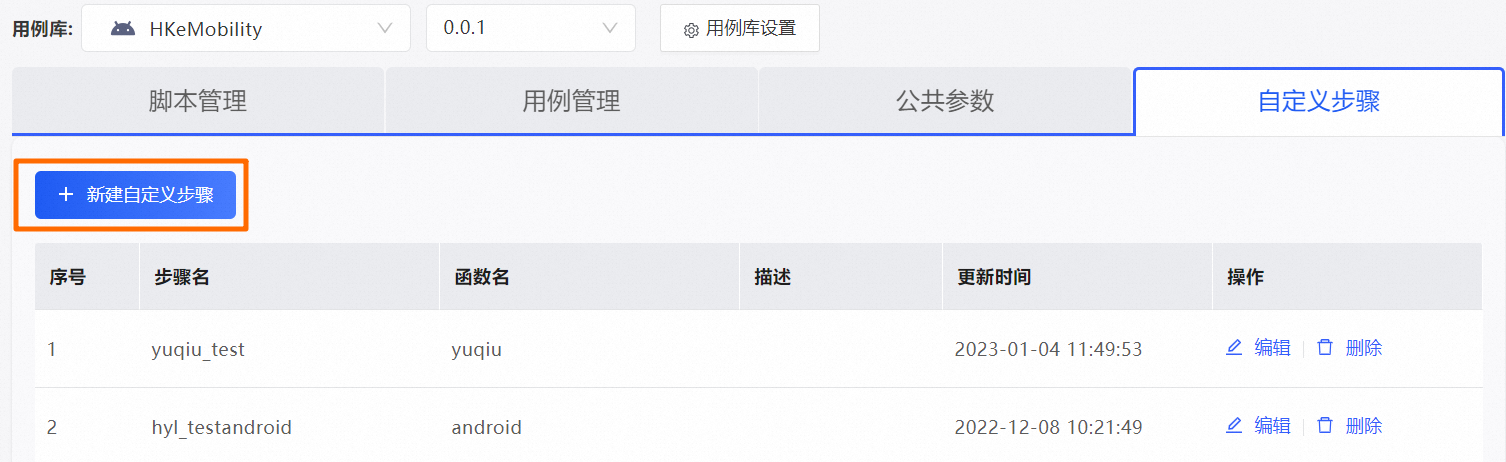
在建立自訂步驟右側欄,填寫相關資訊。
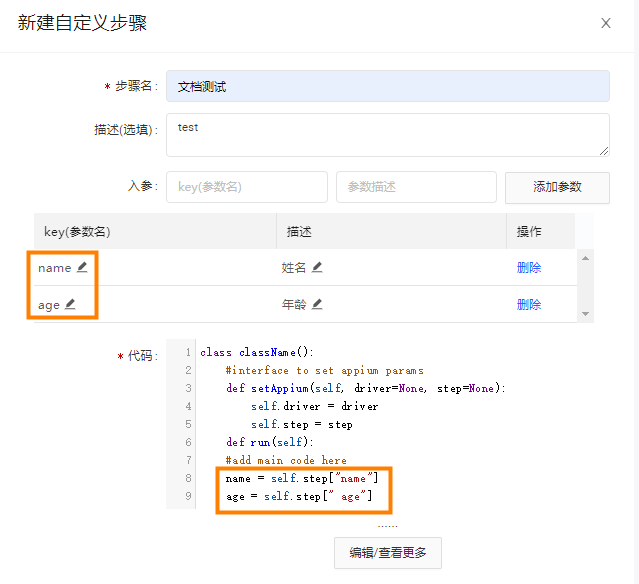
配置說明如下:
選項 | 說明 |
步驟名 | 用於設定自訂步驟的名稱。 |
描述 | 用於添加自訂步驟的說明資訊,便於後續查詢回顧。 |
入參 | 用於設定自訂步驟的輸入參數。 【操作說明】
|
代碼 | 用於添加自訂步驟的代碼。 【操作說明】單擊編輯/查看更多按鈕,開啟代碼編輯右側欄。 |
4:單擊確定,儲存自訂步驟。
代碼編寫規範
自訂步驟的代碼需基於appium引擎與python 2.7語言開發。
自訂步驟在Android/iOS平台的應用工程內為全域共用,因此自訂步驟的代碼函數名不能重複。
自訂步驟的代碼須符合python類的文法與約定。例如:
class className():
    def setAppium(self, driver=None, step=None):
        self.driver = driver
        self.step = step

    def run(self):
        #code
其中,必選項說明如下:
選項
說明
className類名,用於標識一個自訂步驟,全域唯一。
setAppium初始化介面,在執行這個操作前,指令碼會通過setAppium傳入當前操作可能需要的參數:
driver:即appium driver,用於與appium通訊並執行appium相關操作。step:即當前步驟的參數,是一個{key(string):value(string)}形式的dict。
說明除標準庫外,Mobile Testing在appium client的執行環境中,提供安裝以下第三方庫:Appium-Python-Client、selenium、matplotlib、cv2、numpy、pycurl、subprocess32、MySQL-python、cx-Oracle/ibm_db
程式碼範例
樣本1:通過調用driver實現簡單滑動。
class test():
    #interface to set appium params
    def setAppium(self, driver=None, step=None):
        self.driver = driver
        self.step = step

    def run(self):
        #add main code here
        #第一次左滑
        #擷取螢幕的高
        x = driver.get_window_size()['width']
        print float(6.0/7)*x
        # 擷取螢幕寬
        y = driver.get_window_size()['height']
        # 滑屏,大概從螢幕右邊2分之一高度,往左側滑動,滑動後顯示的是熱點tab
driver.swipe(0.89*x, 0.5*y, 0.12*x, y/2, 500)樣本2:計算兩個參數param1和param2的差,並將傳回值儲存到參數result中。
import desired_capabilities
class minus():
    def setAppium(self, driver=None, step=None):
        self.driver = driver
        self.step = step

    def run(self):
        result = step.get("param1") - step.get("param2")
        step.put("result", result)
樣本3:開啟webview偵錯模式。
from AppiumLib import AppiumLib
from time import sleep
class OpenWebviewDebug():
    def setAppium(self, driver=None, step=None):
        if driver is not None:
            self.driver = driver
            self.appiumLib = AppiumLib(self.driver)
        if step is not None:
            self.step = step

    def run(self):
        platform = self.step.get("platform")
        self.appiumLib.openWebviewDebug(platform)
        # 點擊 永久生效
        self.appiumLib.touch(xpath="//android.widget.CheckBox[@text='永久生效' or @content-desc='永久生效']")
        # 點擊 確定
        self.appiumLib.touch(xpath="//android.widget.TextView[@text='確定' or @content-desc='確定']")
        sleep(2)
設定入參platform, 則platform會作為step的一個key傳入到當前操作中,在描述中通過 ${platform},該參數會被解析為線上錄製的一個可巨集指令引數提供給測試使用。
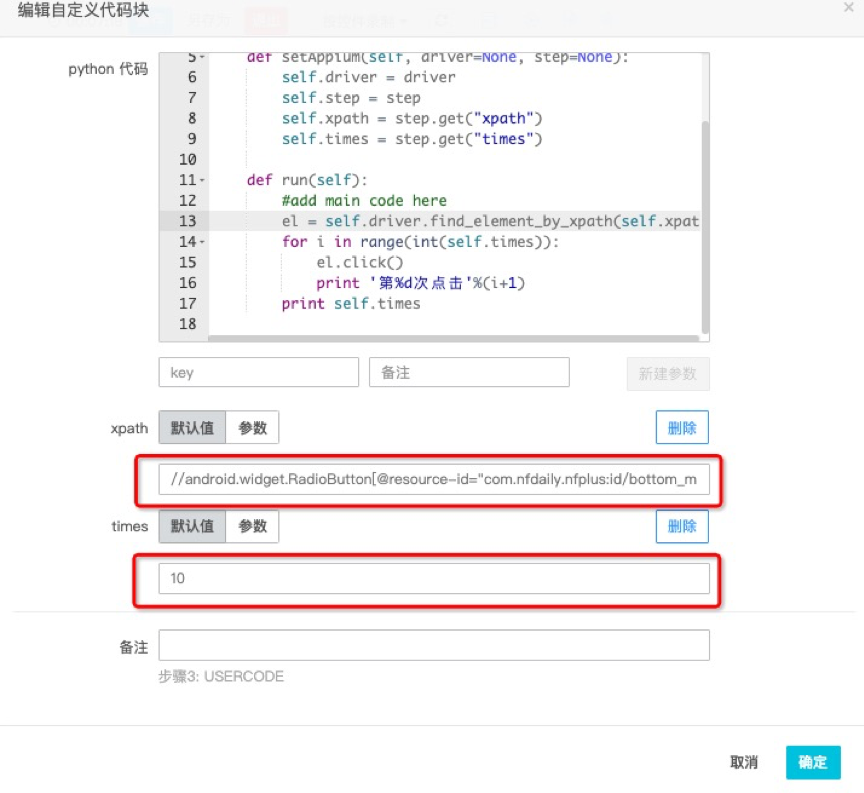
樣本4:連續點擊某一控制項。
import AppiumLib
class clicksByxpath():
        #interface to set appium params
        def setAppium(self, driver=None, step=None):
            self.driver = driver
            self.step = step
            self.xpath = step.get("xpath")
            self.times = step.get("times")

        def run(self):
            #add main code here
            el = self.driver.find_element_by_xpath(self.xpath)
            for i in range(int(self.times)):
                el.click()
                print '第%d次點擊'%(i+1)
            print self.times
平台展示:Xpath可以使用線上錄製,點擊控制項後的產生步驟,複製步驟中的xpath粘貼過來即可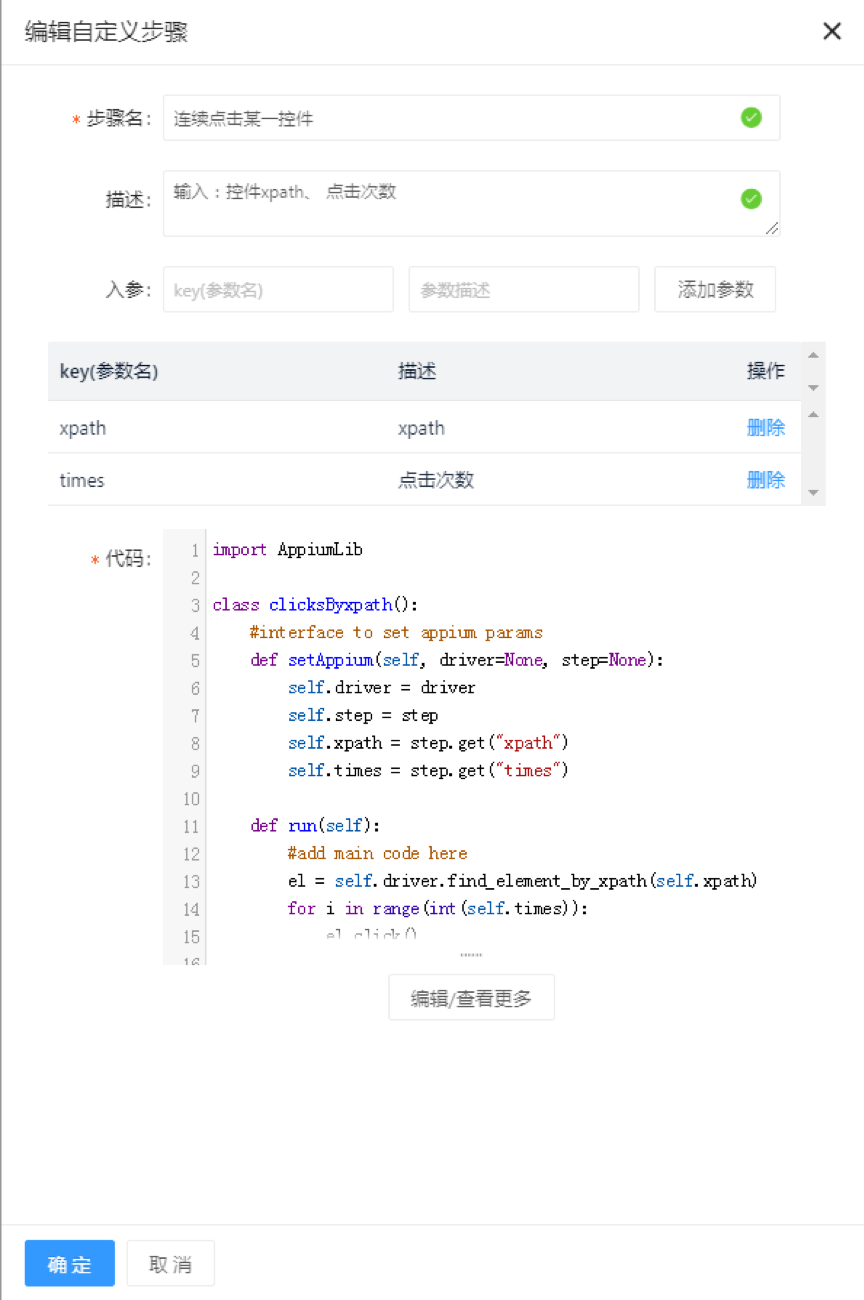
針對步驟進行編輯: