裝置與雲端基於Alink協議進行物模型資料通訊,包括裝置上報屬性或事件訊息到雲端,從雲端下發設定屬性或調用服務訊息到裝置。本實踐案例提供Java Demo,介紹物模型資料通訊代碼配置。
前提條件
- 已開通物聯網平台服務。
- 已安裝Java開發環境。
建立產品和裝置
首先,需建立產品和裝置,為產品定義功能(即物模型)。
下載、安裝Demo SDK
本樣本提供的SDK Demo中包含了服務端SDK Demo和裝置端SDK Demo。
- 單擊下載iotx-api-demo,並解壓縮。
- 開啟Java開發工具,匯入解壓縮後的iotx-api-demo檔案夾。
- 在pom.xml檔案中,添加以下Maven依賴,匯入阿里雲雲端SDK和裝置端SDK。
<!-- https://mvnrepository.com/artifact/com.aliyun/aliyun-java-sdk-iot --> <dependency> <groupId>com.aliyun</groupId> <artifactId>aliyun-java-sdk-iot</artifactId> <version>7.33.0</version> </dependency> <dependency> <groupId>com.aliyun</groupId> <artifactId>aliyun-java-sdk-core</artifactId> <version>3.5.1</version> </dependency> <dependency> <groupId>com.aliyun.alink.linksdk</groupId> <artifactId>iot-linkkit-java</artifactId> <version>1.2.0</version> <scope>compile</scope> </dependency> - 在java/src/main/resources/目錄下的config檔案中,填入初始化資訊。
user.accessKeyID = <your accessKey ID>
user.accessKeySecret = <your accessKey Secret>
iot.regionId = <regionId>
iot.productCode = Iot
iot.domain = iot.<regionId>.aliyuncs.com
iot.version = 2018-01-20
參數 說明 accessKeyID 您的阿里雲帳號的AccessKey ID。 將游標定位到您的帳號頭像上,選擇AccessKey管理,進入安全資訊管理頁,可建立或查看您的AccessKey。
accessKeySecret 您的阿里雲帳號的AccessKey Secret。查看方法同上AccessKey ID。 regionId 您的物聯網裝置所屬地區ID。地區ID的表達方法,請參見地區和可用性區域。
裝置端SDK上報屬性和事件
配置裝置端SDK串連物聯網平台,上報屬性和事件訊息。
Demo中,java/src/main/com.aliyun.iot.api.common.deviceApi目錄下的ThingTemplate檔案是裝置端上報屬性和事件的Demo。
- 設定串連資訊。
將代碼中productKey、deviceName、deviceSecret和url替換為您的裝置認證資訊和MQTT接入網域名稱。接入網域名稱擷取方法,請參見查看和配置執行個體終端節點資訊(Endpoint),接入網域名稱必須攜帶連接埠1883。
public static void main(String[] args) { /** * 裝置認證資訊。 */ String productKey = "your productKey"; String deviceName = "your deviceName"; String deviceSecret = "your deviceSecret"; /* TODO: 替換為您物聯網平台執行個體的接入地址 */ String url = "iot-6d***ql.mqtt.iothub.aliyuncs.com:1883"; /** * mqtt串連資訊。 */ ThingTemplate manager = new ThingTemplate(); DeviceInfo deviceInfo = new DeviceInfo(); deviceInfo.productKey = productKey; deviceInfo.deviceName = deviceName; deviceInfo.deviceSecret = deviceSecret; /** * 伺服器端的Java HTTP用戶端使用TSLv1.2。 */ System.setProperty("https.protocols", "TLSv2"); manager.init(deviceInfo, url); } - 初始化串連。
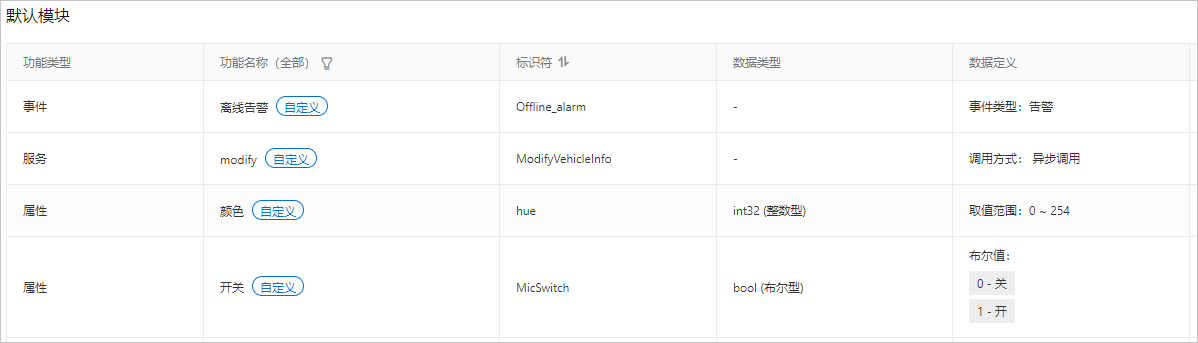
public void init(final DeviceInfo deviceInfo, String url) {
        LinkKitInitParams params = new LinkKitInitParams();
        /**
         * 設定mqtt初始化參數。
         */
        IoTMqttClientConfig config = new IoTMqttClientConfig();
        config.productKey = deviceInfo.productKey;
        config.deviceName = deviceInfo.deviceName;
        config.deviceSecret = deviceInfo.deviceSecret;
        config.channelHost = url;
        /**
         * 是否接受離線訊息。
         * 對應mqtt的cleanSession欄位。
         */
        config.receiveOfflineMsg = false;
        params.mqttClientConfig = config;
        ALog.setLevel(LEVEL_DEBUG);
        ALog.i(TAG, "mqtt connetcion info=" + params);

        /**
         * 設定初始化,傳入裝置認證資訊。
         */
        params.deviceInfo = deviceInfo;

        /**建立串連。**/
        LinkKit.getInstance().init(params, new ILinkKitConnectListener() {
            public void onError(AError aError) {
                ALog.e(TAG, "Init Error error=" + aError);
            }

            public void onInitDone(InitResult initResult) {
                ALog.i(TAG, "onInitDone result=" + initResult);

                List<Property> properties =   LinkKit.getInstance().getDeviceThing().getProperties();

                ALog.i(TAG, "裝置屬性列表" + JSON.toJSONString(properties));

                List<Event> getEvents  =   LinkKit.getInstance().getDeviceThing().getEvents();

                ALog.i(TAG, "裝置事件列表" + JSON.toJSONString(getEvents));

                /*屬性上報。TODO: 需確保所報的屬性, 比如MicSwitch, 是產品的物模型的一部分. 否則會返回錯誤 */
                handlePropertySet("MicSwitch", new ValueWrapper.IntValueWrapper(1));

                /* 事件上報. TODO: 需確保所報的事件, 比如Offline_alarm, 是產品的物模型的一部分. 否則會返回錯誤 */
                Map<String,ValueWrapper> values = new HashMap<>();
                values.put("eventValue",new ValueWrapper.IntValueWrapper(0));
                OutputParams outputParams = new OutputParams(values);
                handleEventSet("Offline_alarm",outputParams);
            }
        });
    }
說明 代碼中的屬性和事件標識符需與物模型中定義的標識符一致。 - 設定裝置端上報屬性。
/** * Alink JSON方式裝置端上報屬性。 * @param identifier:屬性標識符。 * @param value:上報屬性值。 * @return */ private void handlePropertySet(String identifier, ValueWrapper value ) { ALog.i(TAG, "上報屬性identity=" + identifier); Map<String, ValueWrapper> reportData = new HashMap<>(); reportData.put(identifier, value); LinkKit.getInstance().getDeviceThing().thingPropertyPost(reportData, new IPublishResourceListener() { public void onSuccess(String s, Object o) { // 屬性上報成功。 ALog.i(TAG, "上報成功 onSuccess() called with: s = [" + s + "], o = [" + o + "]"); } public void onError(String s, AError aError) { // 屬性上報失敗。 ALog.i(TAG, "上報失敗onError() called with: s = [" + s + "], aError = [" + JSON.toJSONString(aError) + "]"); } }); } - 設定裝置端上報事件。
/**
     * Alink JSON方式裝置端上報事件。
     * @param identifyID:事件標識符。
     * @param params:事件上報參數。
     * @return
     */
    private void handleEventSet(String identifyID, OutputParams params ) {
        ALog.i(TAG, "上報事件 identifyID=" + identifyID + "  params=" + JSON.toJSONString(params));


        LinkKit.getInstance().getDeviceThing().thingEventPost( identifyID,  params, new IPublishResourceListener() {

            public void onSuccess(String s, Object o) {
                // 事件上報成功。
                ALog.i(TAG, "上報成功 onSuccess() called with: s = [" + s + "], o = [" + o + "]");
            }

            public void onError(String s, AError aError) {
                // 事件上報失敗。
                ALog.i(TAG, "上報失敗onError() called with: s = [" + s + "], aError = [" + JSON.toJSONString(aError) + "]");
            }
        });
    }
雲端SDK下發設定屬性和調用服務指令
- 初始化SDK用戶端。
Demo中,java/src/main/com.aliyun.iot.client目錄下IotClient檔案是SDK用戶端初始化Demo。
public class IotClient { private static String accessKeyID; private static String accessKeySecret; private static String regionId; private static String domain; private static String version; public static DefaultAcsClient getClient() { DefaultAcsClient client = null; Properties prop = new Properties(); try { prop.load(Object.class.getResourceAsStream("/config.properties")); accessKeyID = prop.getProperty("user.accessKeyID"); accessKeySecret = prop.getProperty("user.accessKeySecret"); regionId = prop.getProperty("iot.regionId"); domain = prop.getProperty("iot.domain"); version = prop.getProperty("iot.version"); IClientProfile profile = DefaultProfile.getProfile(regionId, accessKeyID, accessKeySecret); DefaultProfile.addEndpoint(regionId, regionId, prop.getProperty("iot.productCode"), prop.getProperty("iot.domain")); // 初始化client。 client = new DefaultAcsClient(profile); } catch (Exception e) { LogUtil.print("初始化client失敗!exception:" + e.getMessage()); } return client; } public static String getRegionId() { return regionId; } public static void setRegionId(String regionId) { IotClient.regionId = regionId; } public static String getDomain() { return domain; } public static void setDomain(String domain) { IotClient.domain = domain; } public static String getVersion() { return version; } public static void setVersion(String version) { IotClient.version = version; } } - 初始化封裝CommonRequest公用類。
Demo中,java/src/main/com.aliyun.iot.api.common.openApi目錄下的AbstractManager檔案是封裝雲端API的CommonRequest公用類的Demo。
public class AbstractManager { private static DefaultAcsClient client; static { client = IotClient.getClient(); } /** * 介面請求地址。action:介面名稱。 * domain:線上地址。 * version:介面版本。 */ public static CommonRequest executeTests(String action) { CommonRequest request = new CommonRequest(); request.setDomain(IotClient.getDomain()); request.setMethod(MethodType.POST); request.setVersion(IotClient.getVersion()); request.setAction(action); return request; } - 配置雲端SDK調用物聯網平台雲端API,下發設定屬性和調用服務的指令。
java/src/main/com.aliyun.iot.api.common.openApi目錄下的ThingManagerForPopSDk是雲端SDK調用API設定裝置屬性和調用裝置服務的Demo檔案。
- 調用SetDeviceProperty設定裝置屬性值。
public static void SetDeviceProperty(String InstanceId, String IotId, String ProductKey, String DeviceName , String Items) { SetDevicePropertyResponse response =null; SetDevicePropertyRequest request=new SetDevicePropertyRequest(); request.setDeviceName(DeviceName); request.setIotId(IotId); request.setItems(Items); request.setProductKey(ProductKey); request.setIotInstanceId(InstanceId); try { response = client.getAcsResponse(request); if (response.getSuccess() != null && response.getSuccess()) { LogUtil.print("設定裝置屬性成功"); LogUtil.print(JSON.toJSONString(response)); } else { LogUtil.print("設定裝置屬性失敗"); LogUtil.error(JSON.toJSONString(response)); } } catch (ClientException e) { e.printStackTrace(); LogUtil.error("設定裝置屬性失敗!" + JSON.toJSONString(response)); } } - 調用SetDevicesProperty大量設定裝置屬性值。
/** * 大量設定裝置屬性。 * * @param ProductKey:要設定屬性的裝置所隸屬的產品Key。 * @param DeviceNames:要設定屬性的裝置名稱列表。 * @param Items:要設定的屬性資訊,組成為key:value,資料格式為JSON String,必須傳入。 * * @Des:描述。 */ public static void SetDevicesProperty(String InstanceId, String ProductKey, List<String> DeviceNames, String Items) { SetDevicesPropertyResponse response = new SetDevicesPropertyResponse(); SetDevicesPropertyRequest request = new SetDevicesPropertyRequest(); request.setDeviceNames(DeviceNames); request.setItems(Items); request.setProductKey(ProductKey); request.setIotInstanceId(InstanceId); try { response = client.getAcsResponse(request); if (response.getSuccess() != null && response.getSuccess()) { LogUtil.print("大量設定裝置屬性成功"); LogUtil.print(JSON.toJSONString(response)); } else { LogUtil.print("大量設定裝置屬性失敗"); LogUtil.error(JSON.toJSONString(response)); } } catch (ClientException e) { e.printStackTrace(); LogUtil.error("大量設定裝置屬性失敗!" + JSON.toJSONString(response)); } } - 調用InvokeThingService調用裝置服務。
/** * @param Identifier:服務的Identifier,必須傳入。 * @param Args:要啟用服務的入參資訊,必須傳入。 */ public static InvokeThingServiceResponse.Data InvokeThingService(String InstanceId, String IotId, String ProductKey, String DeviceName, String Identifier, String Args) { InvokeThingServiceResponse response =null; InvokeThingServiceRequest request = new InvokeThingServiceRequest(); request.setArgs(Args); request.setDeviceName(DeviceName); request.setIotId(IotId); request.setIdentifier(Identifier); request.setProductKey(ProductKey); request.setIotInstanceId(InstanceId); try { response = client.getAcsResponse(request); if (response.getSuccess() != null && response.getSuccess()) { LogUtil.print("服務執行成功"); LogUtil.print(JSON.toJSONString(response)); } else { LogUtil.print("服務執行失敗"); LogUtil.error(JSON.toJSONString(response)); } return response.getData(); } catch (ClientException e) { e.printStackTrace(); LogUtil.error("服務執行失敗!" + JSON.toJSONString(response)); } return null; } - 調用InvokeThingsService批量調用裝置服務。
     /**
     * @param Identifier:服務的Identifier,必須傳入。
     * @param Args:要啟用服務的入參資訊,必須傳入。
     */
    public static void InvokeThingsService(String InstanceId, String IotId, String ProductKey, List<String> DeviceNames,
                                           String Identifier, String Args) {
        InvokeThingsServiceResponse response =null;
        InvokeThingsServiceRequest request = new InvokeThingsServiceRequest();
        request.setArgs(Args);
        request.setIdentifier(Identifier);
        request.setDeviceNames(DeviceNames);
        request.setProductKey(ProductKey);
        request.setIotInstanceId(InstanceId);

        try {
            response = client.getAcsResponse(request);

            if (response.getSuccess() != null && response.getSuccess()) {
                LogUtil.print("批量調用裝置服務成功");
                LogUtil.print(JSON.toJSONString(response));
            } else {
                LogUtil.print("批量調用裝置服務失敗");
                LogUtil.error(JSON.toJSONString(response));
            }

        } catch (ClientException e) {
            e.printStackTrace();
            LogUtil.error("批量調用裝置服務失敗!" + JSON.toJSONString(response));
        }
    }
- 調用SetDeviceProperty設定裝置屬性值。
設定屬性和調用服務的請求樣本:
public static void main(String[] args) {
        /**上線裝置的裝置名稱和所屬產品的ProductKey。*/
        String deviceName = "2pxuAQB2I7wGPmqq***";
        String deviceProductkey = "a1QbjI2***";

        /**對於企業版執行個體和新版公用執行個體,設定InstanceId為具體執行個體ID值,您可在物聯網平台控制台的執行個體概覽頁面,查看當前執行個體的ID。
         *對於舊版公用執行個體,設定InstanceId為空白值""。
         */
        String InstanceId = "iot-***tl02";

        //1 設定裝置的屬性。
        SetDeviceProperty(InstanceId, null, deviceProductkey, deviceName,"{\"hue\":0}");
        //2 大量設定裝置屬性。
        List<String>  deviceNames = new ArrayList<>();
        deviceNames.add(deviceName);
        SetDevicesProperty(InstanceId, deviceProductkey, deviceNames, "{\"hue\":0}");
        //3 調用裝置的服務。
        InvokeThingService(InstanceId, null, deviceProductkey, deviceName, "ModifyVehicleInfo", "{}");
        //4 批量調用裝置的服務。
        List<String>  deviceNamesService = new ArrayList<>();
        deviceNamesService.add(deviceName);
        InvokeThingsService(InstanceId, null, deviceProductkey, deviceNamesService, "ModifyVehicleInfo", "{}");
    }
運行調試
裝置端SDK和雲端SDK配置完成後,運行各SDK。
查看結果:
- 查看本地日誌。

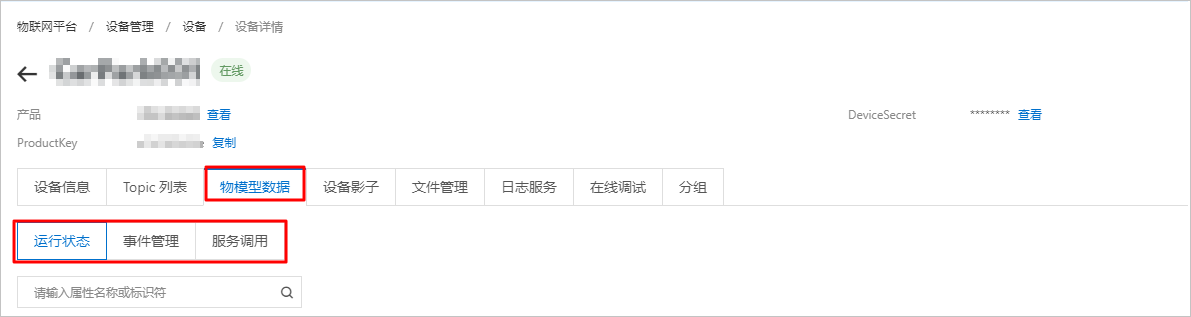
- 在物聯網平台控制台,對應裝置的裝置詳情頁面,單擊預設模組:
- 運行狀態頁簽下,查看裝置最後一次上報的屬性值和屬性資料記錄。
- 事件管理頁簽下,查看裝置上報的事件記錄。
- 服務調用頁簽下,查看雲端下發的服務調用記錄。