企業版轉寄路由器路由表支援添加自訂路由條目。您可以在企業版轉寄路由器路由表中添加一條靜態路由或黑洞路由,方便您靈活地控制網路流量。
為企業版轉寄路由器添加自訂路由條目
登入雲企業網管理主控台。
在云企业网实例頁面,找到目標雲企業網執行個體,單擊目標執行個體ID。
在頁簽,找到目標地區的轉寄路由器執行個體,單擊目標執行個體ID。
在轉寄路由器執行個體詳情頁面,單擊转发路由器路由表頁簽。
在頁簽左側地區,單擊目標路由表ID,在路由表詳情頁面的路由條目頁簽下,單擊建立路由條目。
在添加路由條目對話方塊,配置路由條目資訊,然後單擊確定。
配置項
說明
路由表
系統預設選擇當前路由表。
所屬轉寄路由器
系統預設選擇當前轉寄路由器執行個體。
路由條目名稱
輸入路由條目的名稱。
目的地址CIDR
輸入路由條目的目標網段,支援輸入IPv4網段或IPv6網段。例如192.168.10.0/24、240b:****:14::/64。
是否為黑洞路由
是:表示該路由為黑洞路由,所有去往該路由的流量均會被丟棄。
否:表示該路由不為黑洞路由,需要您設定路由的下一跳串連。
下一跳串連
選擇路由的下一跳串連。
路由條目描述
輸入路由條目的描述資訊。
查看企業版轉寄路由器路由條目
登入雲企業網管理主控台。
在云企业网实例頁面,找到目標雲企業網執行個體,單擊目標執行個體ID。
在頁簽,找到目標地區的轉寄路由器執行個體,單擊目標執行個體ID。
在轉寄路由器執行個體詳情頁面,單擊转发路由器路由表頁簽。
在頁簽左側地區,單擊目標路由表ID。
在路由表詳情頁面的路由條目頁簽下,查看當前路由表的路由條目資訊。
控制台預設僅展示路由條目的部分屬性資訊,您可以在路由條目列表右上方單擊
 表徵圖,調整清單項目,查看路由條目的所有屬性資訊。
欄位
說明
路由條目ID/名稱
顯示路由條目的ID和名稱。
您可以在路由條目ID下單擊
 表徵圖,添加或修改自訂路由條目的名稱。
目標網段
顯示路由條目的目標網段。
下一跳
顯示路由條目下一跳所關聯的網路執行個體串連。
類型
顯示路由條目下一跳的類型。
串連執行個體:表示當前路由的下一跳指向網路執行個體串連。
黑洞:表示當前路由條目為黑洞路由。
所有去往黑洞路由的流量,均會被丟棄。
下一跳資源ID/名稱
顯示路由條目下一跳所關聯的網路執行個體資源ID和名稱。
下一跳資源類型
顯示路由條目下一跳所關聯的網路執行個體資源類型。
Virtual Private Cloud
專線網關(ECR)
虛擬私人網路(VPN)
邊界路由器(VBR)
TR
表示轉寄路由器執行個體。
路由類型
顯示路由條目的類型。
自動學習:通過轉寄路由器學習到的路由。
靜態配置:使用者自訂路由。
路由狀態
顯示路由條目的狀態。
路由屬性
顯示路由條目的屬性。
可單擊查看詳情查看路由的屬性資訊,例如AS Path、Community、優先順序等。
描述
顯示路由條目的描述資訊。
您可以單擊
表徵圖,添加或修改自訂路由條目的描述資訊。建立時間
顯示自訂路由條目的建立時間。
路由源資源ID/名稱
顯示產生當前路由的源資源ID和名稱。
路由源資源類型
顯示產生當前路由的源資源所屬的資源類型。
Virtual Private Cloud
專線網關(ECR)
虛擬私人網路(VPN)
邊界路由器(VBR)
TR
表示轉寄路由器執行個體。
首碼列表
如果該列顯示了首碼列表ID,則表示當前路由條目由首碼列表產生。
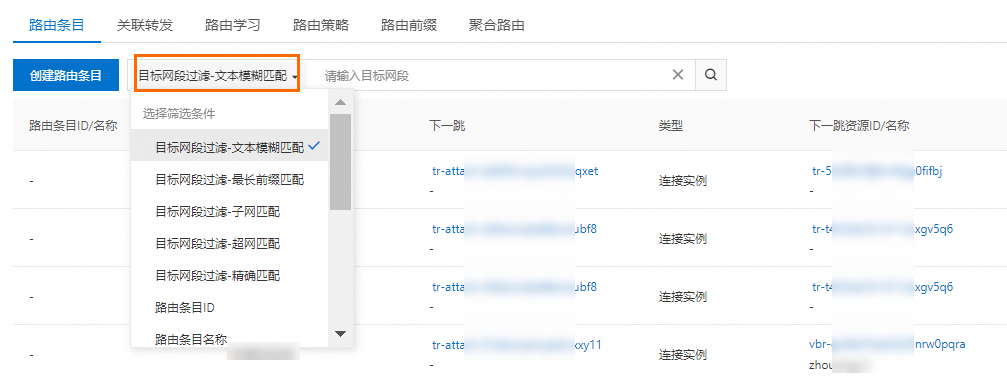
在路由條目較多的情境下,支援搜尋查看目標網段資訊。
查看基礎版轉寄路由器路由條目
登入雲企業網管理主控台。
在云企业网实例頁面,找到目標雲企業網執行個體,單擊目標執行個體ID。
在頁簽,找到目標地區的轉寄路由器執行個體,單擊目標執行個體ID。
在轉寄路由器執行個體詳情頁面,單擊转发路由器路由表頁簽。
在路由條目頁簽下,查看當前地區內的路由條目資訊。
欄位
說明
目標網段
顯示路由條目的目標網段。
下一跳
顯示路由條目下一跳所關聯的網路執行個體。
類型
顯示路由條目下一跳所關聯的網路執行個體類型。
CCN:表示雲串連網執行個體。
VPC:表示專用網路執行個體。
VBR:表示邊界路由器執行個體。
BR:表示轉寄路由器執行個體。
local_service:表示系統路由。
路由類型
顯示路由條目的類型。
雲企業網:通過轉寄路由器學習到的路由。
自訂:使用者自訂路由。
系統:系統自動添加的路由。
狀態
顯示路由條目的狀態。
匹配策略
顯示路由條目匹配到的路由策略。
如果當前路由有匹配到的路由策略,可單擊查看詳情查看匹配的路由策略。
路由屬性
顯示路由條目屬性。
可單擊查看詳情查看路由的屬性資訊,例如AS Path、Community、優先順序等。
去其他地區策略
顯示路由條目匹配到的去往其他地區的策略。
去其他地區狀態
顯示該路由條目去往其他地區的狀態。
可用:該路由條目可被傳播至其他地區。
禁止:該路由條目不允許被傳播至其他地區。
刪除企業版轉寄路由器自訂路由條目
登入雲企業網管理主控台。
在云企业网实例頁面,找到目標雲企業網執行個體,單擊目標執行個體ID。
在頁簽,找到目標地區的轉寄路由器執行個體,單擊目標執行個體ID。
在轉寄路由器執行個體詳情頁面,單擊转发路由器路由表頁簽。
在頁簽左側地區,單擊目標路由表ID。
在路由表詳情頁面的路由條目頁簽下,找到目標路由條目,然後在操作列單擊刪除。
在刪除路由條目對話方塊,確認路由條目資訊,然後單擊確認。
相關文檔
CreateTransitRouterRouteEntry:在企業版轉寄路由器的路由表中添加路由條目。
UpdateTransitRouterRouteEntry:修改企業版轉寄路由器路由表中路由條目的名稱和描述資訊。
DeleteTransitRouterRouteEntry:刪除企業版轉寄路由器路由表中靜態配置的路由條目。
ListTransitRouterRouteEntries:查詢企業版轉寄路由器路由表中的路由條目資訊。
DescribeCenRegionDomainRouteEntries:查詢雲企業網執行個體中具體地區內路由條目的詳細資料。