WebAssembly For Proxies是一種新外掛程式規範,它允許開發人員使用WebAssembly編寫可移植外掛程式,並且在各種Proxy 伺服器中運行。ASM支援WebAssembly For Proxies規範。本文介紹如何在ASM中使用Golang為網格代理編寫Wasm外掛程式。
前提條件
已添加叢集到ASM執行個體,且ASM執行個體版本為1.18及以上。
已啟用Sidecar注入。具體操作,請參見配置Sidecar注入策略。
已建立入口網關。
已部署httpbin應用,且可以正常訪問。
已建立阿里雲Container Registry企業版(企業版執行個體支援OCI鏡像)。具體操作,請參見建立企業版執行個體。
背景資訊
WebAssembly(Wasm)是一種新興的可移植的二進位可執行檔格式。這些代碼將會在一個記憶體安全(對於主機)的沙箱中以接近原生運行速度執行,使用的資源嚴格受限,且通過明確定義的API與主機通訊。
使用Wasm外掛程式有以下好處:
敏捷性:無需重啟Envoy就可以完成外掛程式二進位更新,不會影響當前請求處理。
可靠性和隔離性:外掛程式運行在沙箱內,即使外掛程式崩潰,Envoy本身不會受到影響。
安全性:Proxy沙箱提供的API很明確,外掛程式行為可控。
多樣性:支援使用多種語言編寫外掛程式(C++、Go、Rust等)。
關於Wasm外掛程式的更多資訊,請參見WebAssembly-in-Envoy.md和OVERVIEW.md。
樣本介紹
本文將編寫一個基於Go語言的Wasm外掛程式,編寫完成後產生Wasm二進位檔案,然後打包到鏡像中。該鏡像需要上傳至鏡像服務的OCI鏡像倉庫。上傳之後,在ASM中配置WasmPlugin資源,將該外掛程式應用至指定的網格代理上。
本文將開發一個外掛程式用於判斷請求中是否存在allow: true Header。如果不存在,返回403和指定的body;如果存在,則正常訪問httpbin應用。
步驟一:開發環境準備
使用Go語言開發Envoy的Wasm外掛程式需要提前安裝以下工具:
Go:編寫Go語言專案依賴Go編譯器及相關工具,詳情請參見The Go Programming Language。
Docker:本文主要使用Docker構建和推送OCI鏡像。
TinyGo:編寫本專案依賴Go語言工具,但是Go代碼編譯成Wasm並不能使用Go官方提供的編譯器,還需要使用TinyGo,詳情請參見Quick install guide。
關於Wasm外掛程式依賴的SDK,請參見proxy-wasm-go-sdk。本文將提供完整的代碼,如果您需要使用其他SDK能力,請自行參考該專案。
步驟二:編寫外掛程式代碼
建立一個檔案夾,使用以下內容,建立main.go檔案。
在建立的檔案夾下執行以下命令,擷取SDK相關依賴。
go mod init
go mod tidy
執行以下命令,編譯代碼得到Wasm二進位檔案。
tinygo build -o plugin.wasm -scheduler=none -target=wasi main.go您可以看到產生一個plugin.wasm檔案。該檔案即為Wasm的二進位可執行檔。
步驟三:製作OCI鏡像並推送至阿里雲Container Registry
在步驟二建立的檔案夾下,使用以下內容,建立Dockerfile檔案。
FROM scratch
ADD ./plugin.wasm ./plugin.wasm
執行以下命令,製作鏡像。
docker build -t header-authorization:v0.0.1 .建立鏡像倉庫。具體操作,請參見使用Coraza Wasm外掛程式在ASM網關上實現WAF能力的步驟一.2的a、b步驟。
本文使用的命名空間為
test-oci,倉庫名稱為header-authorization。建立完之後介面顯示如下: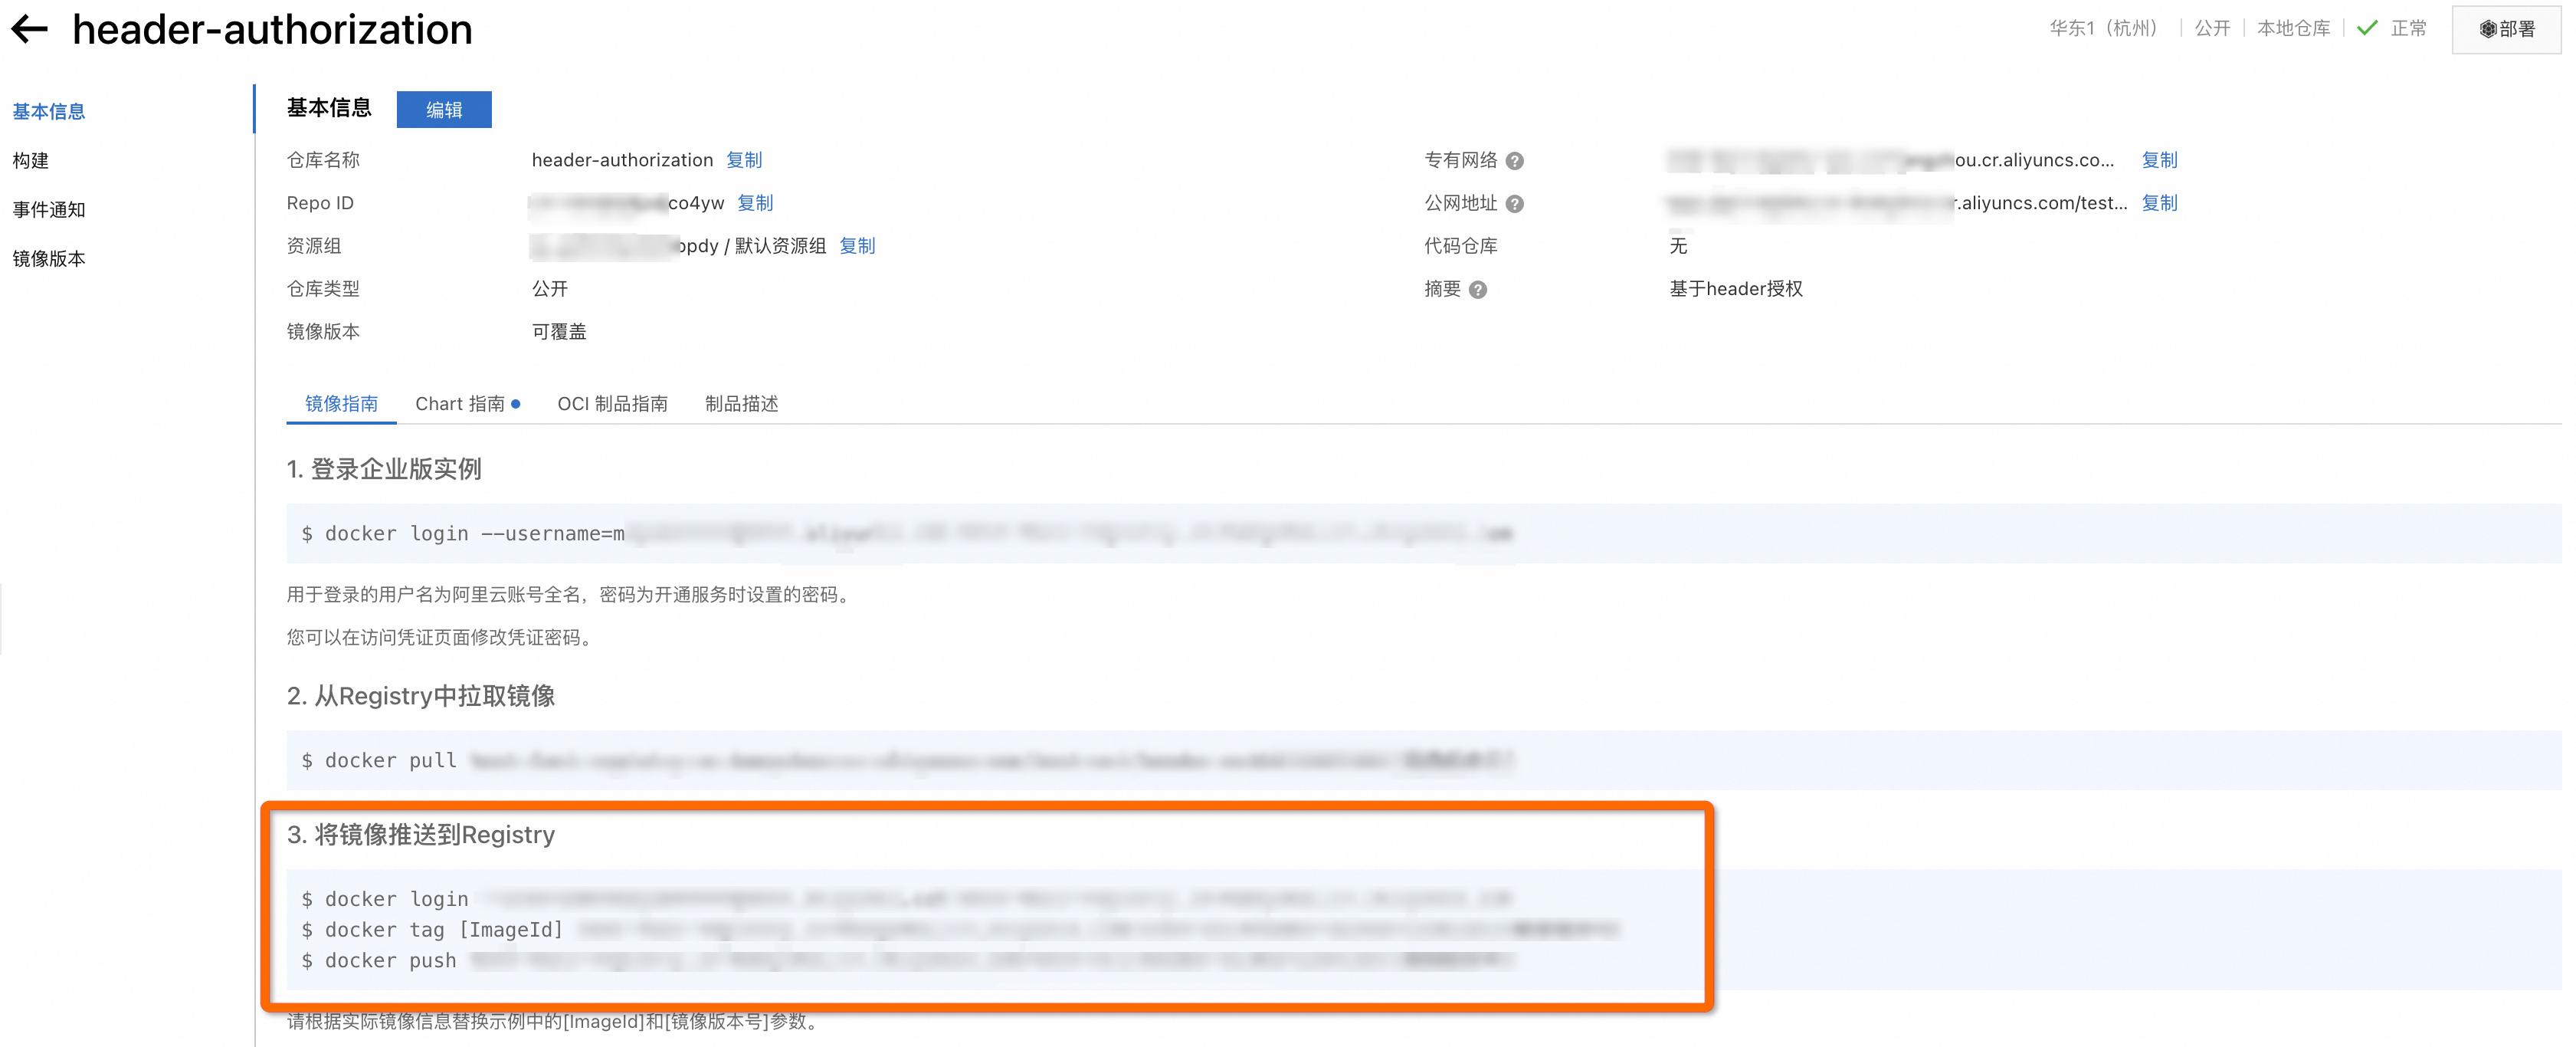
您可以參考圖中的將鏡像推送到Registry步驟完成鏡像推送。
步驟四:將Wasm外掛程式應用在網關上
配置鏡像拉取許可權。具體操作,請參見步驟二:配置鏡像拉取許可權。
本文使用的Secret名稱為
wasm-secret,具體命令如下:kubectl create secret docker-registry -n istio-system wasm-secret --docker-server=${鏡像服務執行個體網域名稱} --docker-username=${使用者名稱} --docker-password=${密碼}使用以下內容,建立asm-plugin.yaml。
apiVersion: extensions.istio.io/v1alpha1
kind: WasmPlugin
metadata:
  name: header-authorization
  namespace: istio-system
spec:
  imagePullPolicy: IfNotPresent
  imagePullSecret: wasm-secret
  selector:
    matchLabels:
      istio: ingressgateway
  url: oci://${鏡像服務執行個體網域名稱}/test-oci/header-authorization:v0.0.1
  phase: AUTHN
在ASM執行個體對應的KubeConfig環境下,執行以下命令,將WasmPlugin應用到ASM執行個體。
kubectl apply -f wasm-plugin.yaml
步驟五:驗證外掛程式是否生效
使用網關所在資料面叢集的KubeConfig,執行以下命令,開啟網關的Wasm組件debug日誌。
kubectl -n istio-system exec ${網關pod名稱} -c istio-proxy -- curl -XPOST "localhost:15000/logging?wasm=debug"執行以下命令,訪問網關的httpbin應用。
curl ${ASM網關IP}/status/418預期輸出:
Forbidden by ASM Wasm Plugin查看網關Pod日誌。
日誌樣本如下:
2024-03-08T08:16:46.747394Z	debug	envoy wasm external/envoy/source/extensions/common/wasm/context.cc:1168	wasm log istio-system.header-authorization: request header: 'allow' is , only true can passthrough	thread=24
{"bytes_received":"0","bytes_sent":"28","downstream_local_address":"xxxxxxx","downstream_remote_address":"xxxxxxxx","duration":"0","istio_policy_status":"-","method":"GET","path":"/status/418","protocol":"HTTP/1.1","request_id":"780c8493-13e4-4f97-9771-486efe30347c","requested_server_name":"-","response_code":"403","response_flags":"-","route_name":"httpbin","start_time":"2024-03-08T08:16:46.747Z","trace_id":"-","upstream_cluster":"outbound|8000||httpbin.default.svc.cluster.local","upstream_host":"-","upstream_local_address":"-","upstream_service_time":"-","upstream_response_time":"-","upstream_transport_failure_reason":"-","user_agent":"curl/8.4.0","x_forwarded_for":"xxxxxx","authority_for":"xxxxxx"}
執行以下命令,訪問網關的httpbin應用。
curl ${ASM網關IP}/status/418 -H "allow: true"預期輸出:
    -=[ teapot ]=-

       _...._
     .'  _ _ `.
    | ."` ^ `". _,
    \_;`"---"`|//
      |       ;/
      \_     _/
        `"""`
預期輸出表明可以正常訪問httpbin應用。
TinyGo的記憶體流失問題說明
當前TinyGo編譯出的Envoy Wasm外掛程式存在記憶體泄露問題。proxy-wasm-go-sdk社區目前建議使用nottinygc進行編譯最佳化。具體操作步驟如下:
在main.go檔案開頭添加如下
import代碼。import _ "github.com/wasilibs/nottinygc"如果提示沒有相關依賴,可以運行
go mod tidy命令自動下載。執行以下命令,進行編譯。
tinygo build -o plugin.wasm -gc=custom -tags='custommalloc nottinygc_envoy' -target=wasi -scheduler=none main.go以上命令主要設定了
-gc、-tags兩個選項。更多資訊,請參見nottinygc。