After you configure a DingTalk chatbot to send alert notifications, you can specify DingTalk groups to receive alert notifications. This topic describes how to configure a DingTalk chatbot to send alert notifications.
Add a custom DingTalk chatbot and obtain the webhook URL
Perform the following steps to add a custom DingTalk chatbot and obtain the webhook URL:
- Run the DingTalk client on a PC, go to the DingTalk group to which you want to add an alert chatbot, and then click the Group Settings icon in the upper-right corner.
- In the Group Settings panel, click Group Assistant.
- In the Group Assistant panel, click Add Robot.
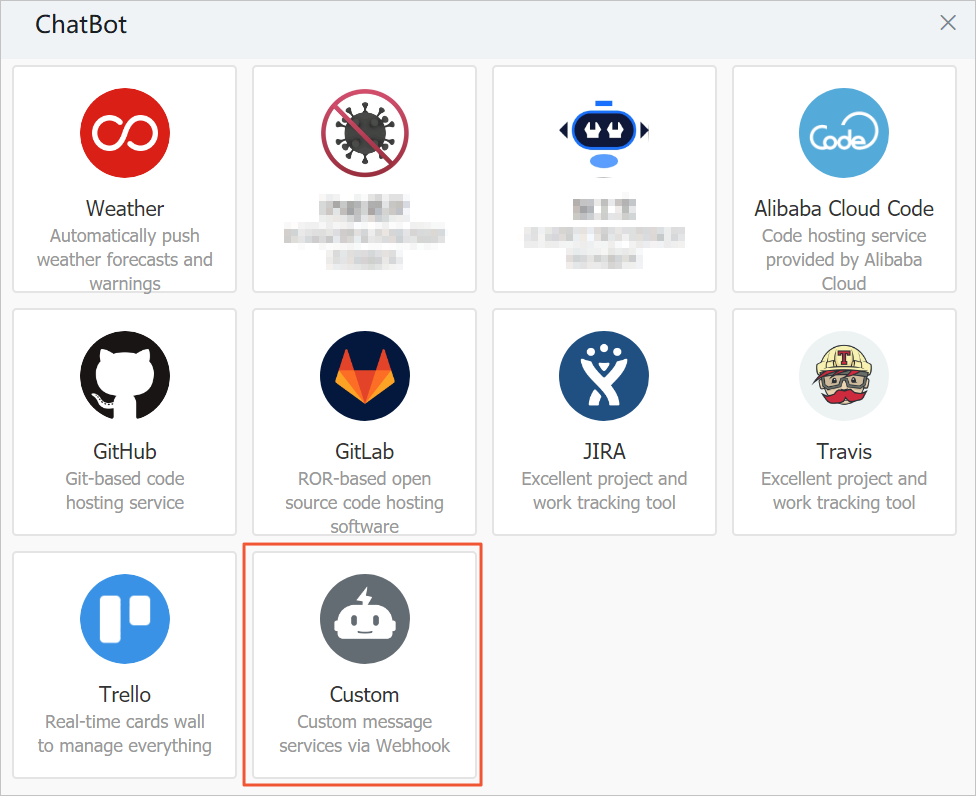
- In the ChatBot dialog box, click the + icon in the Add Robot card. Then, click Custom.

- In the Robot details dialog box, click Add.
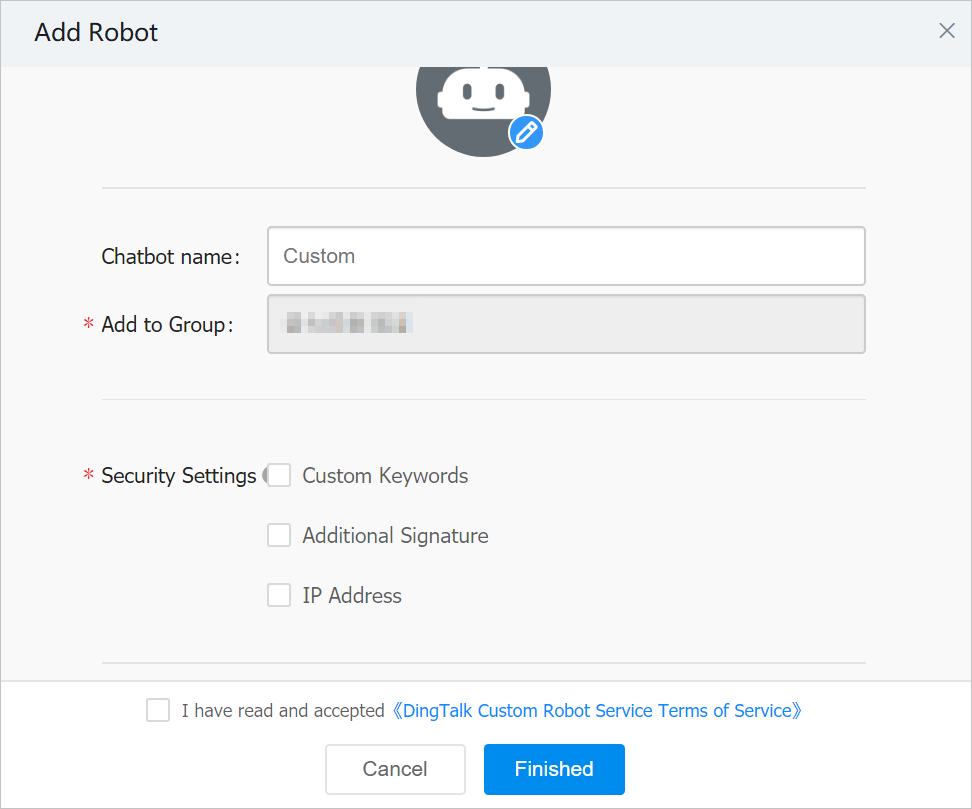
- In the Add Robot dialog box, edit the profile picture, enter a chatbot name, and then select at least one of the options in the Security Settings section. Read the DingTalk Custom Robot Service Terms of Service and select I have read and accepted DingTalk Custom Robot Service Terms of Service. Click Finished.

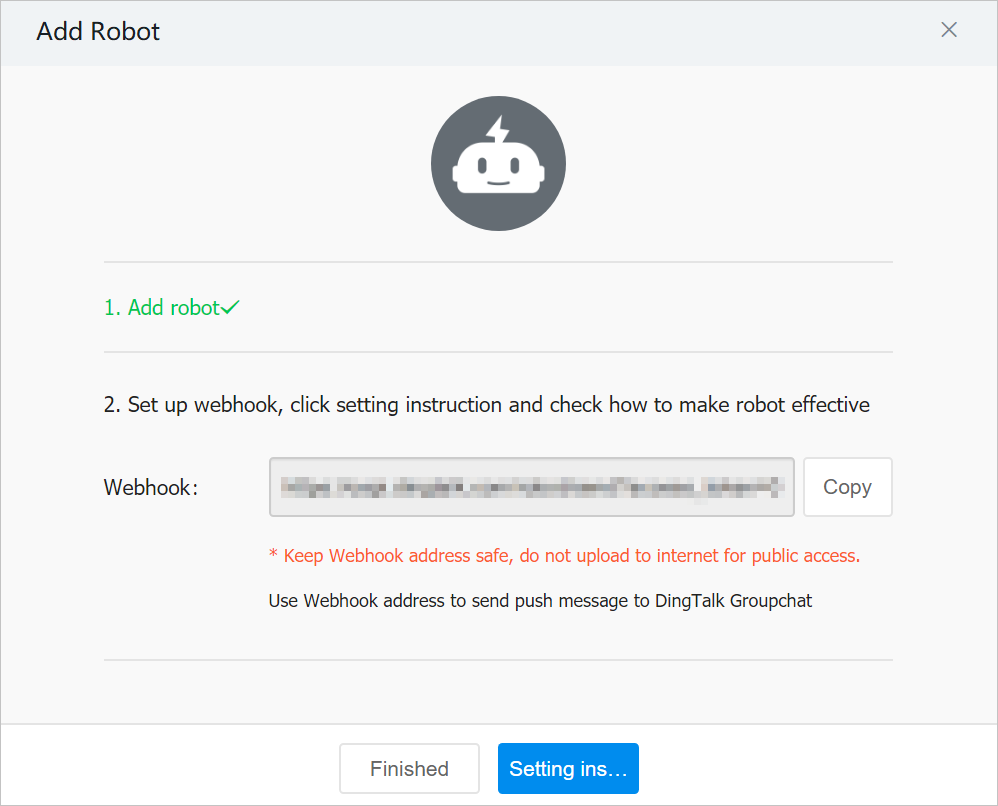
- In the Add Robot dialog box, click Copy to save the webhook URL of the chatbot and then click Finished.

Create a contact
You can create a contact or add the webhook URL to the existing contact information. In this example, a contact is created.
- Log on to the ARMS console.
- In the left-side navigation pane, choose .
- On the Contacts tab, click Create Contact in the upper-right corner.
- In the Create Contact dialog box, enter the webhook URL obtained in Add a custom DingTalk chatbot and obtain the webhook URL. Then, click OK.
Create a contact group
You must create a contact group, because notifications for alerts triggered by an alert rule can be sent to alert contact groups instead of alert contacts.
- Log on to the ARMS console.
- In the left-side navigation pane, choose .
- On the Contact Groups tab, click New Contact Group in the upper-right corner.
- In the Create Contact Group dialog box, enter a name in the Group Name field, search for the contact created in Create a contact, add the contact to the Contact Members list, and then click OK.
Create an alert rule
If no alert rule is created, create an alert rule first. You can configure DingTalk chatbots to send alert notifications for Browser Monitoring, Application Monitoring, and Prometheus Service. In this example, an Application Monitoring alert rule is created.
- Log on to the ARMS console.
- In the left-side navigation pane, choose .
- On the Alarm Policies page, click Create Alarm in the upper-right corner.
- In the Create Alarm dialog box, set the parameters and click Save.
Edit an alert rule
Perform the following steps to edit an alert rule. In this example, an application monitoring alert rule is edited.
- Log on to the ARMS console.
- In the left-side navigation pane, choose .
- Optional:On the Alarm Policies page, enter the alert rule name in the search box and click Search. Note You can enter part of an alert rule name in the search box to perform a fuzzy search.
- Find the alert rule that you want to edit and click Edit in the Actions column.
- In the Edit Alarm dialog box, modify related parameters and click Save.
- Select Ding Ding Robot for the Notification Mode parameter.
- In the Notification Receiver section, add the contact group created in Create a contact group to the receiver list. In the Contact Groups list, click the name of the contact group. If the contact group appears in the Selected Groups list, the setting is successful.
Result
