This topic describes how to configure and use a desktop client (Windows client or macOS client).
In this topic, the Windows client of Alibaba Cloud Workspace V7.7 is used as an example. If your experience does not match the description in this topic, you may be using a different Alibaba Cloud Workspace client or your client is outdated. You must update your client to the latest version.
Client GUI
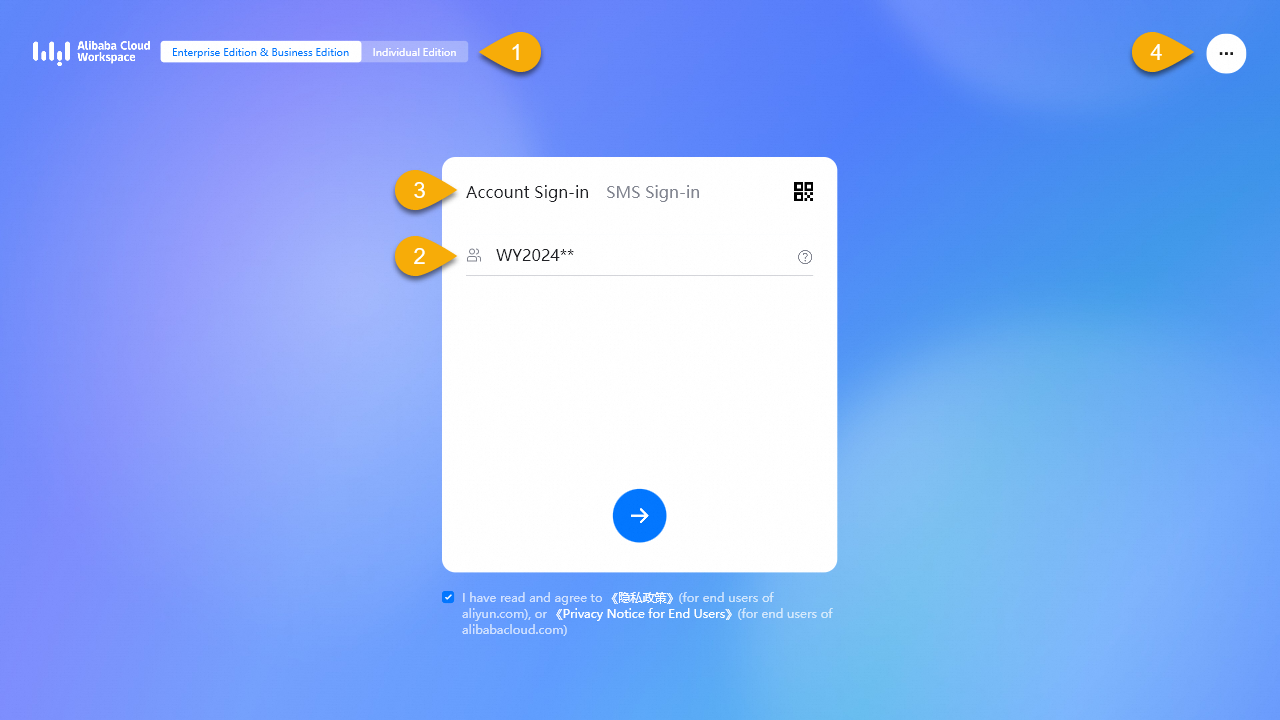
Logon interface 1
|
| ||
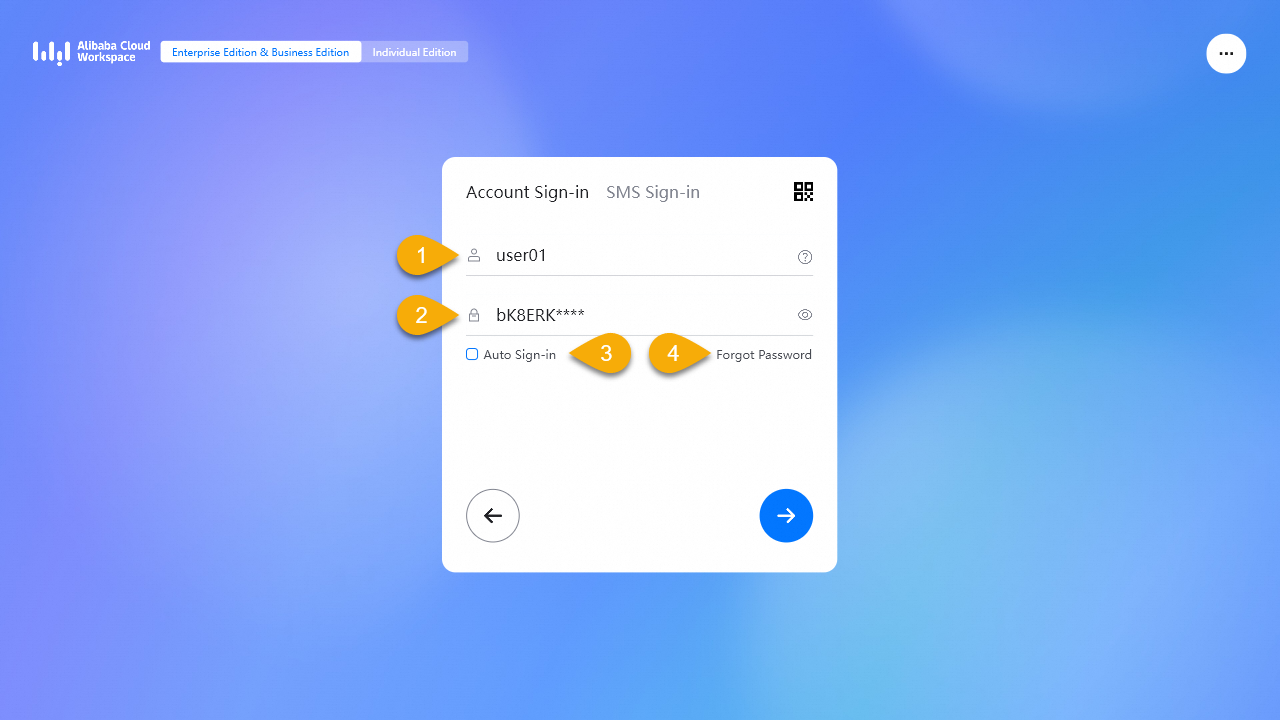
| Logon interface 2
| ||
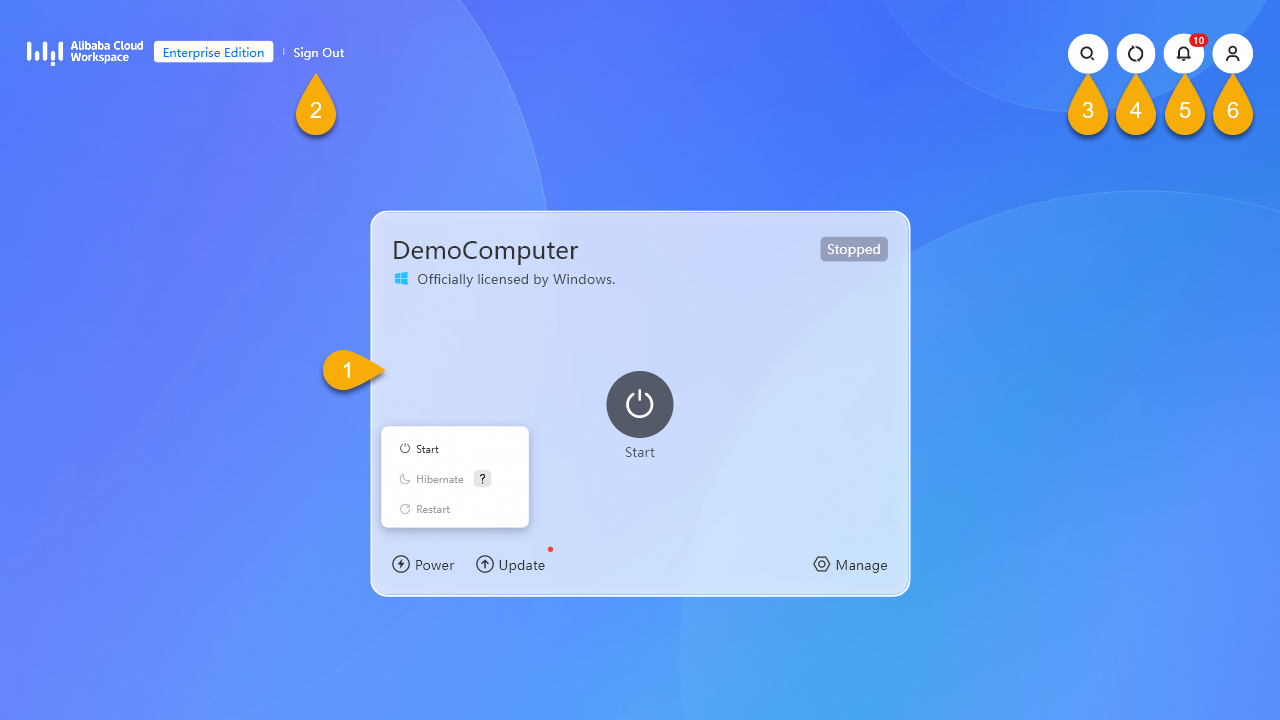
Cloud resource list
|
| ||
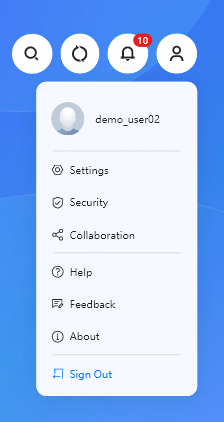
The Profile menu provides portals to Account Summary, Settings, and Feedback. | Profile
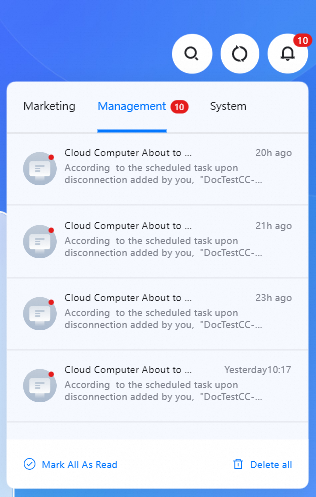
| Notification center
| The notification center displays the following categories of messages: Marketing, Management, and System. |
Log on to a client and connect to cloud resources
Log on to a client
The following steps describe how to log on to a client by using the simplified logon method. For information about how to log on to a client by using alternative logon methods, see Alternative logon methods and advanced features.
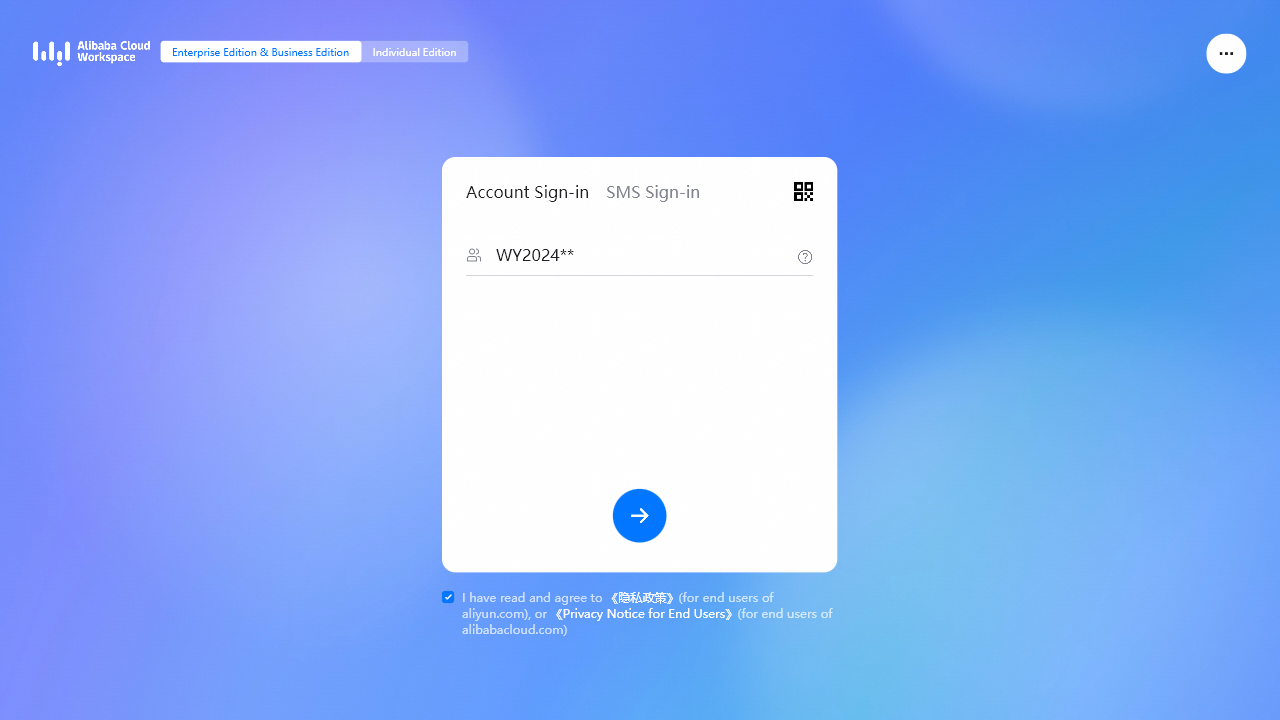
Open the Windows client, select Enterprise Edition in the upper part of the page, select the service agreement check box, enter an organization ID or office network ID from the received logon credentials, and then click the icon.
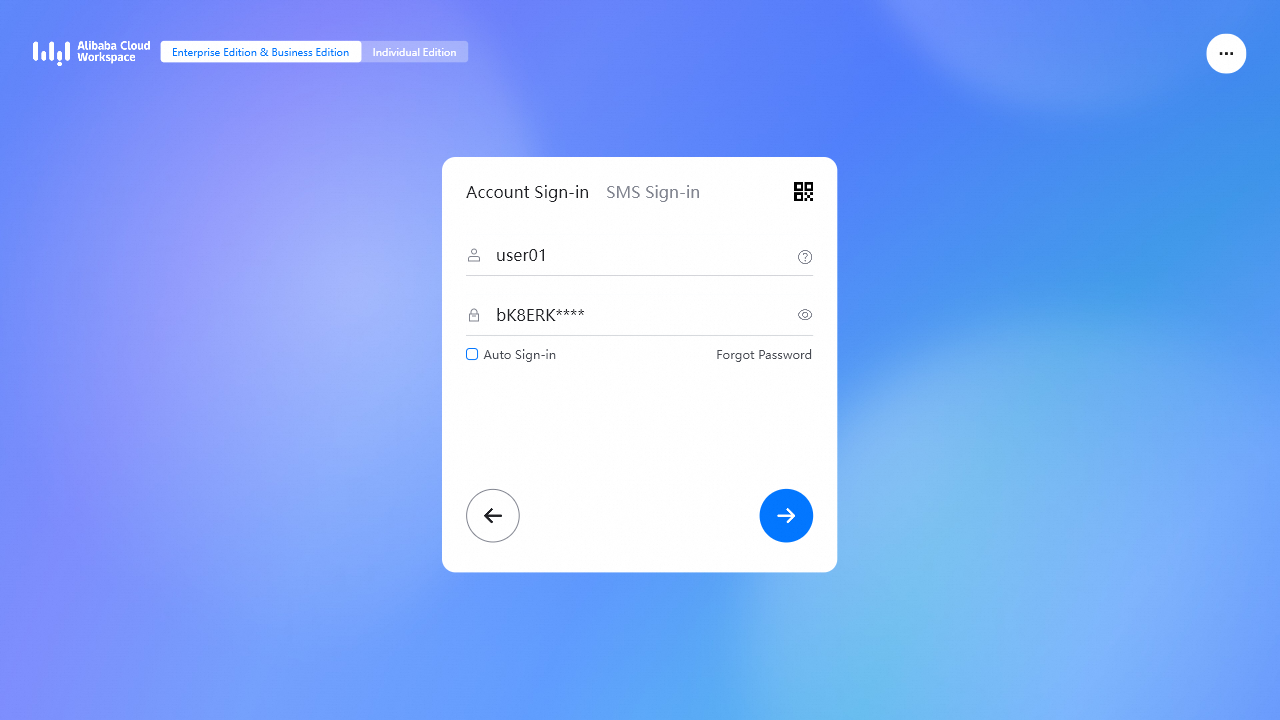
Enter the username and password, and then click the icon.
NoteIf you log on to the client for the first time, use the initial password provided. You will then be prompted to specify a new password by following on-screen instructions. The initial password is valid for three days. If the initial password expires, click Forgot Password to obtain a new initial password.
After you log on to the client, cloud resources, such as cloud computers and cloud phones that your administrator assigns to you are displayed.
On the cloud resource list, click the connect icon on a cloud resource card to use the resource.
Configure automatic logon
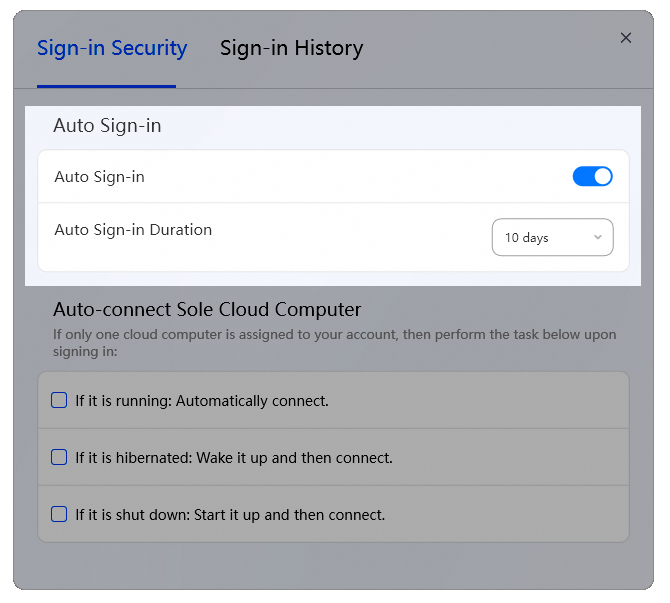
If you enable Auto Sign-in, you do not need to re-enter the logon credentials for a specific period of time after a successful logon.
Launch the client and select Auto Sign-in on the logon page.
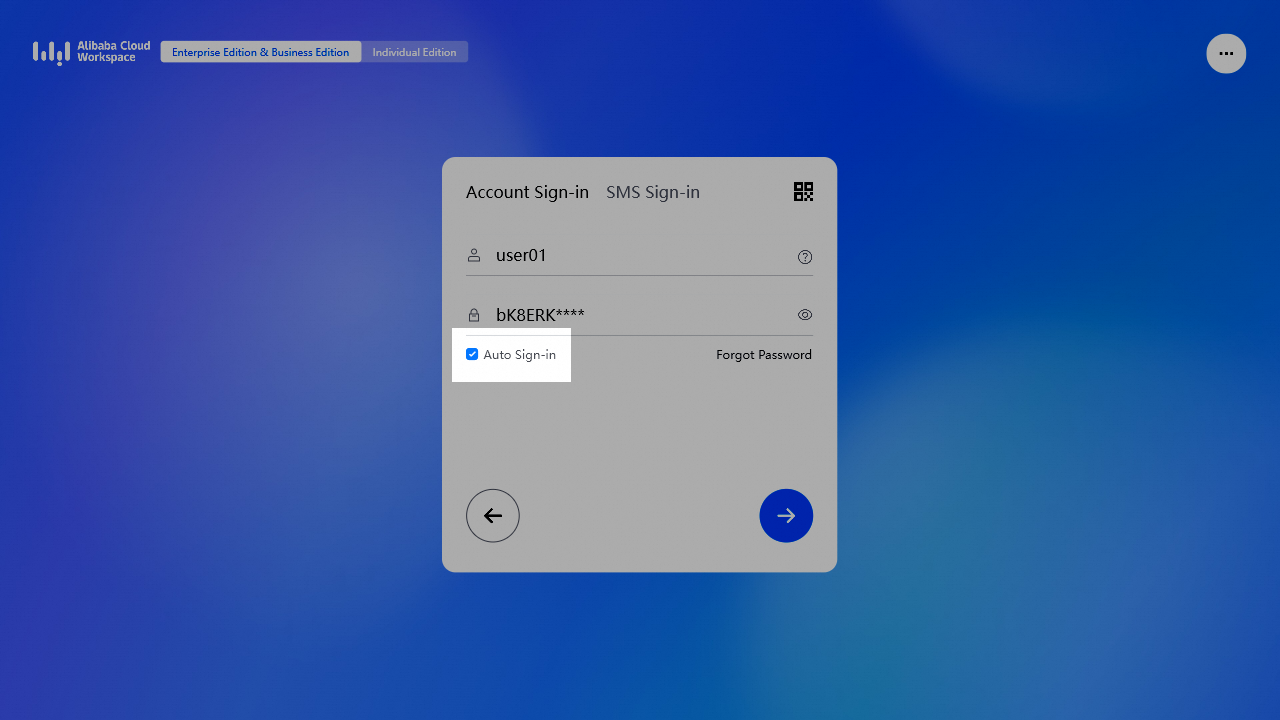
(Optional) Change the validity period for automatic logon based on your business requirements. The default validity period is 10 days. You can change the automatic logon period after a successful logon. To change the validity period, click the icon in the upper-right corner of the cloud resource list page. Then, choose . In the Auto Sign-in section, specify a new validity period for automatic logon.
Log off from the client
On the cloud resource list page, use one of the following methods to log off from the client:
In the upper-left corner of the cloud resource list page, click Sign Out. In the message that appears, click Sign Out.
In the upper-right corner of the page, click the icon and then click Sign Out. In the message that appears, click Sign Out.
Change the logon password
You can change only passwords of convenience accounts on the client. If you use an enterprise Active Directory (AD) account, you can change the password the first time you log on to the client or when the password expires. In other cases, contact the administrator to change the password.
Password forgotten
On the logon page, click Forgot Password.
In the Reset Password dialog box, enter the username and email address, and click Confirm.
If the entered information passes authentication, a new initial password is sent to the email address you specified.
Password not forgotten
In the upper-right corner, click the icon and then click the username.
In the Account Summary window, click the icon next to the Password parameter.
In the Change Password dialog box, enter the original password and the new password. Then, click Confirm Submit.
NoteThe password must be at least 10 characters in length and contain at least three types of the following characters: uppercase letters, lowercase letters, digits, and special characters. The new password cannot be the same as the original password.
When you confirm the new password, re-enter the password. We recommend that you do not copy and paste the password.
Connect to cloud resources
After you log on to the client, cloud resources, such as cloud computers, that your administrator assigns to you are displayed.
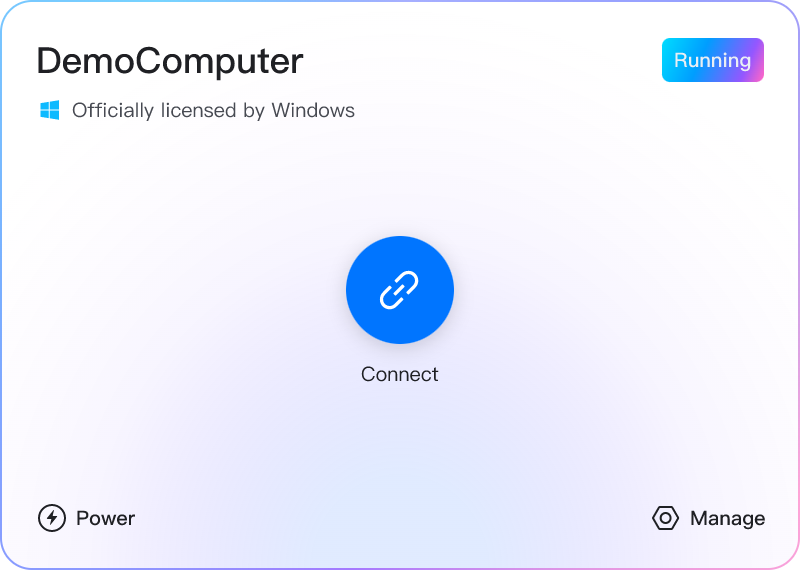
On the cloud resource list, click the connect icon on a cloud resource card to use the resource.
Automatically connect to a cloud computer
If you have only one cloud computer in your account, you can configure automatic connection upon a successful logon.
Select one of the following operations to proceed:
Before logon: In the upper-right corner of the client logon page, click the icon and then click Settings.
After logon: In the upper-right corner of the client logon page, click the icon and then click Security.
In the Auto-connect Sole Cloud Computer section of the Sign-in Security tab, select one or more of the following options based on your business requirements:
If the cloud computer is running: Automatically connect.
If the cloud computer is hibernated: Wake it up and then connect.
If the cloud computer is shut down: Start it up and then connect.
Networks and peripherals
Diagnose network conditions
Use the built-in diagnosis tool of the client to detect network conditions.
Select one of the following operations to proceed:
Before logon: In the upper-right corner of the client logon page, click the icon and then click Settings.
After logon: In the upper-right corner of the client logon page, click the icon and then click Security.
In the Settings window, choose .
Then, click Diagnose to view the diagnosis results in the window.
Configure the network proxy
Select one of the following operations to proceed:
Before logon: In the upper-right corner of the client logon page, click the icon and then click Settings.
After logon: In the upper-right corner of the client logon page, click the icon and then click Security.
In the Settings window, choose .
Enable the proxy service and complete other configurations as prompted.
NoteYou can configure an HTTP or SOCKS proxy.
Use network commands
Run the telnet or ping command to perform operations such as remote logon and network connectivity check.
Select one of the following operations to proceed:
Before logon: In the upper-right corner of the client logon page, click the icon and then click Settings.
After logon: In the upper-right corner of the client logon page, click the icon and then click Security.
In the Settings window, choose .
Enter a command and click Send Command. In the Result section, you can view the execution result.
Manage USB peripherals
After a USB peripheral, such as an audio and video device, storage device, or printer, is connected to your on-premises computer that runs the client, you can view the device information on the client. The information includes the name, type, vendor ID (VID), and product ID (PID). You can also configure the redirection mode and application mode of the peripheral.
Select one of the following operations to proceed:
Before logon: In the upper-right corner of the client logon page, click the icon and then click Settings.
After logon: In the upper-right corner of the client logon page, click the icon and then click Security.
In the Settings window, click Peripherals.
In the Local USB Peripherals list, perform the following operations based on your business requirements:
Disable a USB peripheral: Select the peripheral and click Disable. You can also undo the preceding operation based on your business requirements.
Configure the redirection mode:
Device Redirection: This mode ensures fast transmission. If you select this mode, you do not need to install a peripheral driver on the cloud computer.
USB Port Redirection: This mode ensures peripheral compatibility. If you select this mode, you may need to install a peripheral driver on the cloud computer.
Configure the application mode (only for cameras): You can set the application mode of a camera to Camera or Scanner.
View account info and messages and configure the display language
View information about an account
After logon: In the upper-right corner, click the icon and then click the username.
In the Account Summary window, view your account information.
View messages
After you log on to the client, click Notifications (displayed as a bell icon) to view all messages about the current account in the notification center. The following categories of messages are displayed:
Management messages: the messages about your cloud computers managed by administrators, expiration reminders, and execution results. For example, you can receive such messages when your administrator performs the following operations: configures scheduled tasks, authorizes users to use cloud computers or enterprise drives, changes policies, changes resource specifications, assigns or reclaims resources, and performs operations on your cloud computers.
System messages: the messages about the system information of your cloud computer, such as image updates, update tasks, and update results.
Marketing messages: the messages about sales activities, such as discounts or promotions.
In the lower part of the notification window, you can click Mark All As Read to mark all messages as read messages. You can click Delete all to delete all messages at the same time.
Configure the display language
You can switch the language between Simplified Chinese and English.
Select one of the following operations to proceed:
Before logon: In the upper-right corner of the client logon page, click the icon and then click Settings.
After logon: In the upper-right corner of the client logon page, click the icon and then click Security.
In the Settings window, choose .
In the Preferred Language section, select your preferred language.
NoteThis language setting applies to the client GUI and the DesktopAssistant menu.
Update the client
You can view the client version and the release notes. You can also check whether a version is available for update.
Select one of the following operations to proceed:
Before logon: In the upper-right corner of the client logon page, click the icon and then click About.
After logon: In the upper-right corner of the cloud resource list page, click the icon and then click About.
In the About window, view the client version. You can click Check for Update to check whether a new version is available.
Submit suggestions and feedback
After logon: In the upper-right corner of the cloud resource list page, click the icon and then click Feedback.
In the Feedback window, enter your suggestions or feedback and click Submit.
