ApsaraVideo VOD provides various media processing features, such as transcoding, snapshotting, and automated review. To simplify media processing, ApsaraVideo VOD offers workflows that allow you to customize processing flows in the console. This topic describes how to use workflows.
What is a workflow
Workflows are designed to streamline and instantiate most media processing features. You can create custom processing flows in advance and apply them to specific videos. This avoids repetitive and complex API calls and provides a one-stop media processing service. Workflows also provide a robust conditional logic mechanism. You can customize the trigger conditions for each subsequent node, which lets you flexibly create scenario-based processing flows.
Common workflow scenarios
Serial review and transcoding
In this flow, after a video is ingested into ApsaraVideo VOD, it is first reviewed and then transcoded. For more information, see Workflow configuration examples.

Parallel review and transcoding
In this flow, after a video is ingested into ApsaraVideo VOD, the video is reviewed and transcoded in parallel.

Parallel source file distribution and transcoding
This flow uses the source file as a playback stream and outputs other streams based on the configured transcoding nodes.

Workflow process
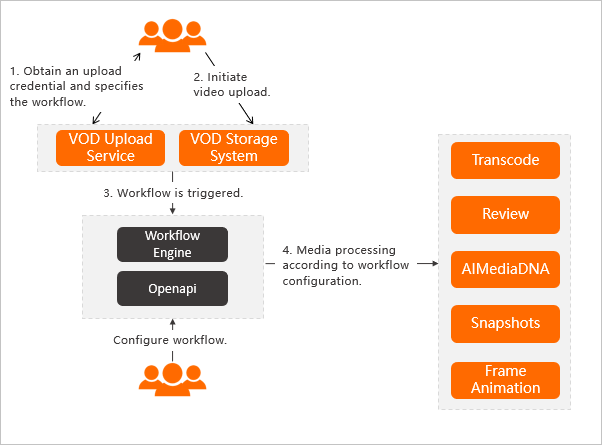
Preparation: Configure a workflow in the console.
A user requests an upload credential and specifies a workflow. The ApsaraVideo VOD service then returns the upload credential.
The user initiates a video upload.
The workflow is automatically triggered after the upload is complete.
The ApsaraVideo VOD workflow engine automatically performs operations, such as media processing and video AI, based on the workflow configuration.
How to use
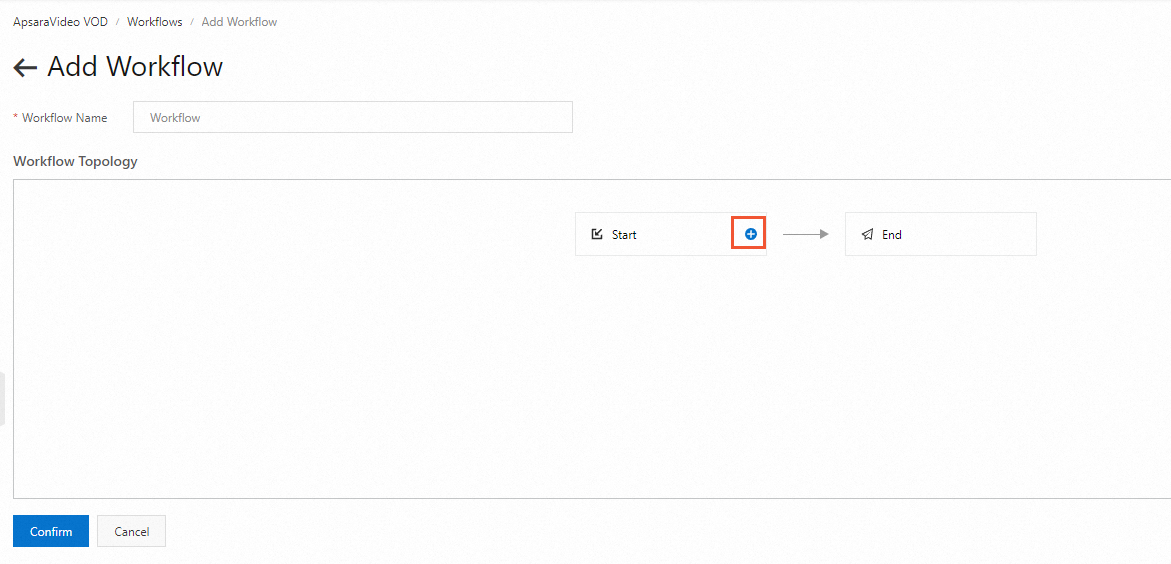
Create a workflow.
You can create workflows only in the ApsaraVideo VOD console.
Submit a workflow task.
After you create a workflow, you can use it to submit a processing task for a video. You can submit the task during or after the video upload.
Submit a workflow processing task in the console
Submit a workflow task during video upload
Log on to the ApsaraVideo VOD console.
In the navigation pane on the left, choose Media Files > Audio/Video and click Upload Audio/Video.
Click Add Audio/Video. Configure the required parameters, including the upload method and storage address. Then, select Use Workflow and specify the workflow you created.
For more information about supported upload formats and parameter descriptions, see Upload media files in the console.

Add your audio or video files and click Upload.
Submit a workflow task after video upload
Log on to the ApsaraVideo VOD console.
In the left navigation pane, choose Media Files > Audio/Video.
On the Audio/Video list page, find the audio or video file that you want to manage and click Processing in the Actions column.
Select Use Workflow and then select the workflow created in the previous step.
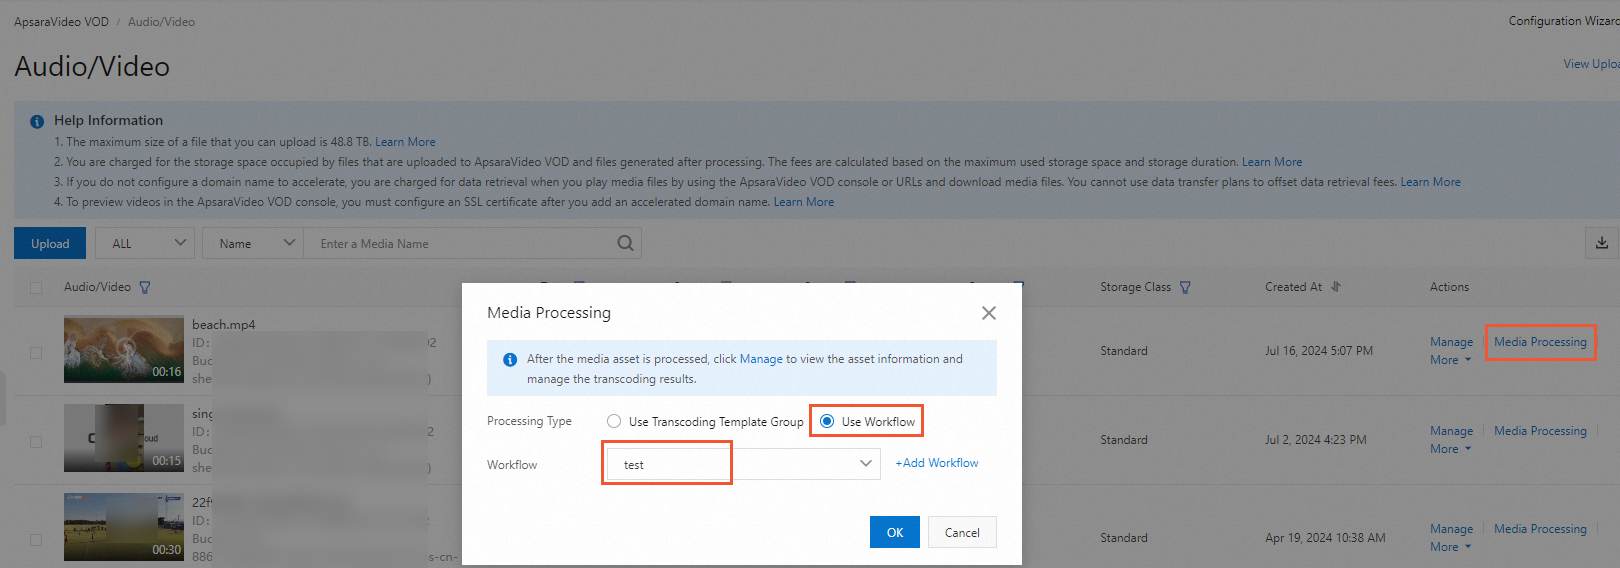
Click OK.
Submit a workflow processing task using OpenAPI
Submit a workflow task during video upload
NoteThe Obtain A/V Upload URL and Credential API operation obtains an upload URL and credentials and creates basic information for a media asset. This operation does not upload the file, so you must implement the upload logic yourself. For a complete example of an API-based upload, see Upload media assets using the ApsaraVideo VOD API.
When you call the CreateUploadVideo or UploadMediaByURL operation to upload audio or video files, set the
WorkflowIdparameter to the ID of the target workflow. After the files are uploaded, ApsaraVideo VOD automatically processes them using the specified workflow.
Submit a workflow task after video upload
Call the SubmitWorkflowJob operation and set the
WorkflowIdparameter to the ID of the target workflow. This immediately starts processing the audio or video file using the specified workflow.
Workflow configuration examples
Serial review and transcoding
This example shows how to configure a serial review and transcoding workflow. In this workflow, a video is first reviewed. If the video passes the review, it is then transcoded. Follow these steps:
On the workflow editing page, click the + button to the right of the Start node. In this example, add an automated review node.
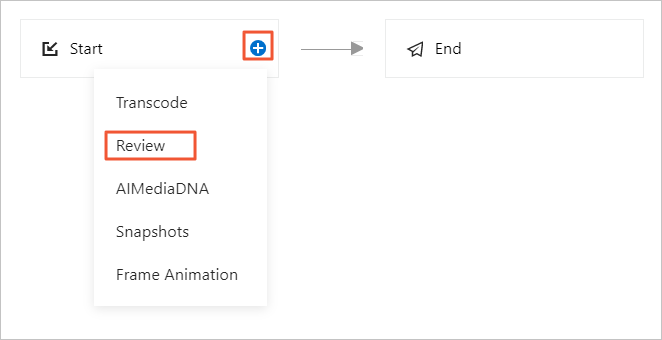
After you add the node, click the Edit button and select a review template.

Click the + button to the right of the review node to add a transcoding node.
After you add the node, click the Edit button to configure the execution condition.
ImportantThe Execution Condition option appears. This condition specifies the status of the parent node that is required to trigger the current node. You can select a trigger condition based on your requirements.
To transcode a video only after it passes the review, set the trigger condition to Parent Node Review Passed. This ensures that transcoding starts only after the review is passed. You must also select the transcoding template group to use.
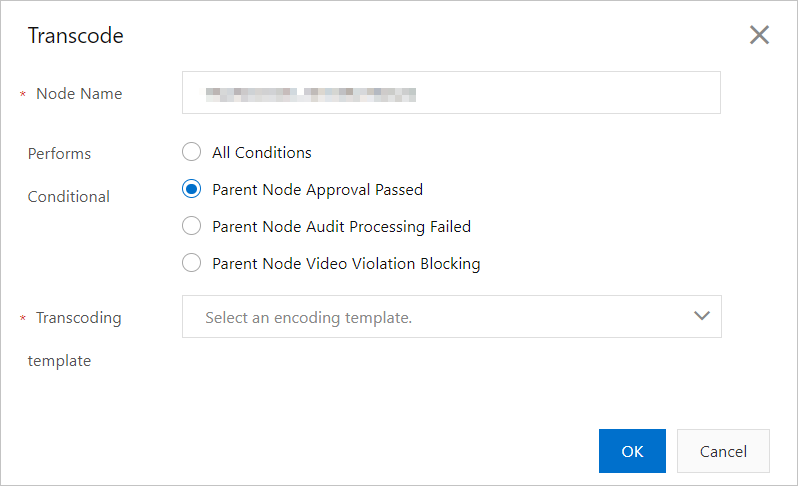
The following table describes other execution conditions.
Scenario description
Execution condition
Condition description
Parent node is Review
Any Condition
The node can be executed under any condition.
Parent Node Review Passed
The node can be executed only if the parent node review passed.
Parent Node Review Operation Failed
The node can be executed only if the parent node review failed. This can happen if the source file has issues, but it is not a common scenario.
Parent Node Video Blocked for Violation
The parent node review is complete, the video is confirmed to be non-compliant, and it has been automatically blocked. This is often used for scenarios such as transcoding a non-compliant video to a lower bitrate definition for manual review.
Parent node is Transcode
Any Condition
The node can be executed under any condition.
Parent Node Transcoding Succeeded
This node can be executed only after the parent node transcoding is successful.
Parent Node Transcoding Failed
This node can be executed only if the parent node transcoding fails. This is not commonly used.
After you configure the workflow topology, click Confirm. A workflow ID is generated. Record this ID because you will need it to specify the workflow for uploads.

Parallel review and transcoding
To run review and transcoding in parallel, add a Review node and a Transcode node as child nodes of the Start node, as shown in the following figure.

You must edit each node to select the required templates, such as review templates and transcoding template groups.
