The ApsaraVideo VOD online editing service provides professional video editing capabilities. You can edit and combine materials, such as audio, video, images, and text, to produce new videos. This topic describes how to edit videos in the ApsaraVideo VOD console.
Billing
The ApsaraVideo VOD online editing service offers basic and advanced editing, which are billed separately. For more information about pricing, see Editing and production. For a list of features available in each category, see Features.
Limits
The online editing feature is not supported in specific regions. Make sure that the feature is supported in the region where ApsaraVideo VOD is activated before you use the feature. For more information, see Service regions.
Prerequisites
The media assets that you want to use are uploaded to the ApsaraVideo VOD media asset library. When you upload the assets, specify a transcoding template group to ensure that their status is Normal. The ID of the non-transcoding template group is VOD_NO_TRANSCODE. For more information, see Overview of media upload.
Online editing stores produced videos in the ApsaraVideo VOD system bucket. Ensure that the system bucket is enabled. For more information, see Manage storage buckets.
To transcode the produced video upon export, you must first add a transcoding template. For more information, see Manage templates.
Procedure
Log on to the ApsaraVideo VOD console.
In the upper-left corner, select a region.
In the navigation pane on the left, choose Production Center > Video Editor.
To open the video editing project page, click Edit New Video or click Resume Editing in the Actions column.

The video editing page is divided into the following areas:
No.
Description
①
Materials area
②
Preview area
③
Property editing area
④
Editing operations area
Import materials.
In the upper-right corner of the materials area, click Import Materials to open the media asset list for the current region. Select the required materials.
If the media asset list does not contain the required materials, upload them to the media asset library. For more information, see Upload files using the ApsaraVideo VOD console.
Add materials to the editing operations area.
Click
 on a material or drag the material to a track in the editing operations area.
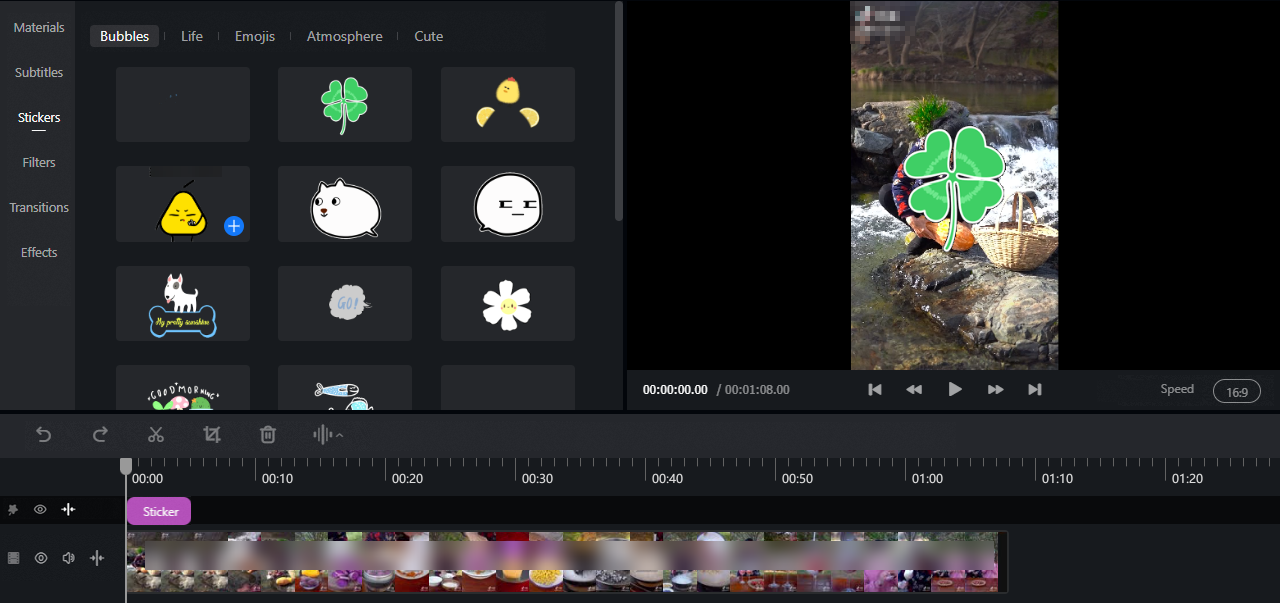
You can also add public resources, such as stickers, filters, and effects, to create multitrack materials and preview the result in real time.
Edit materials.
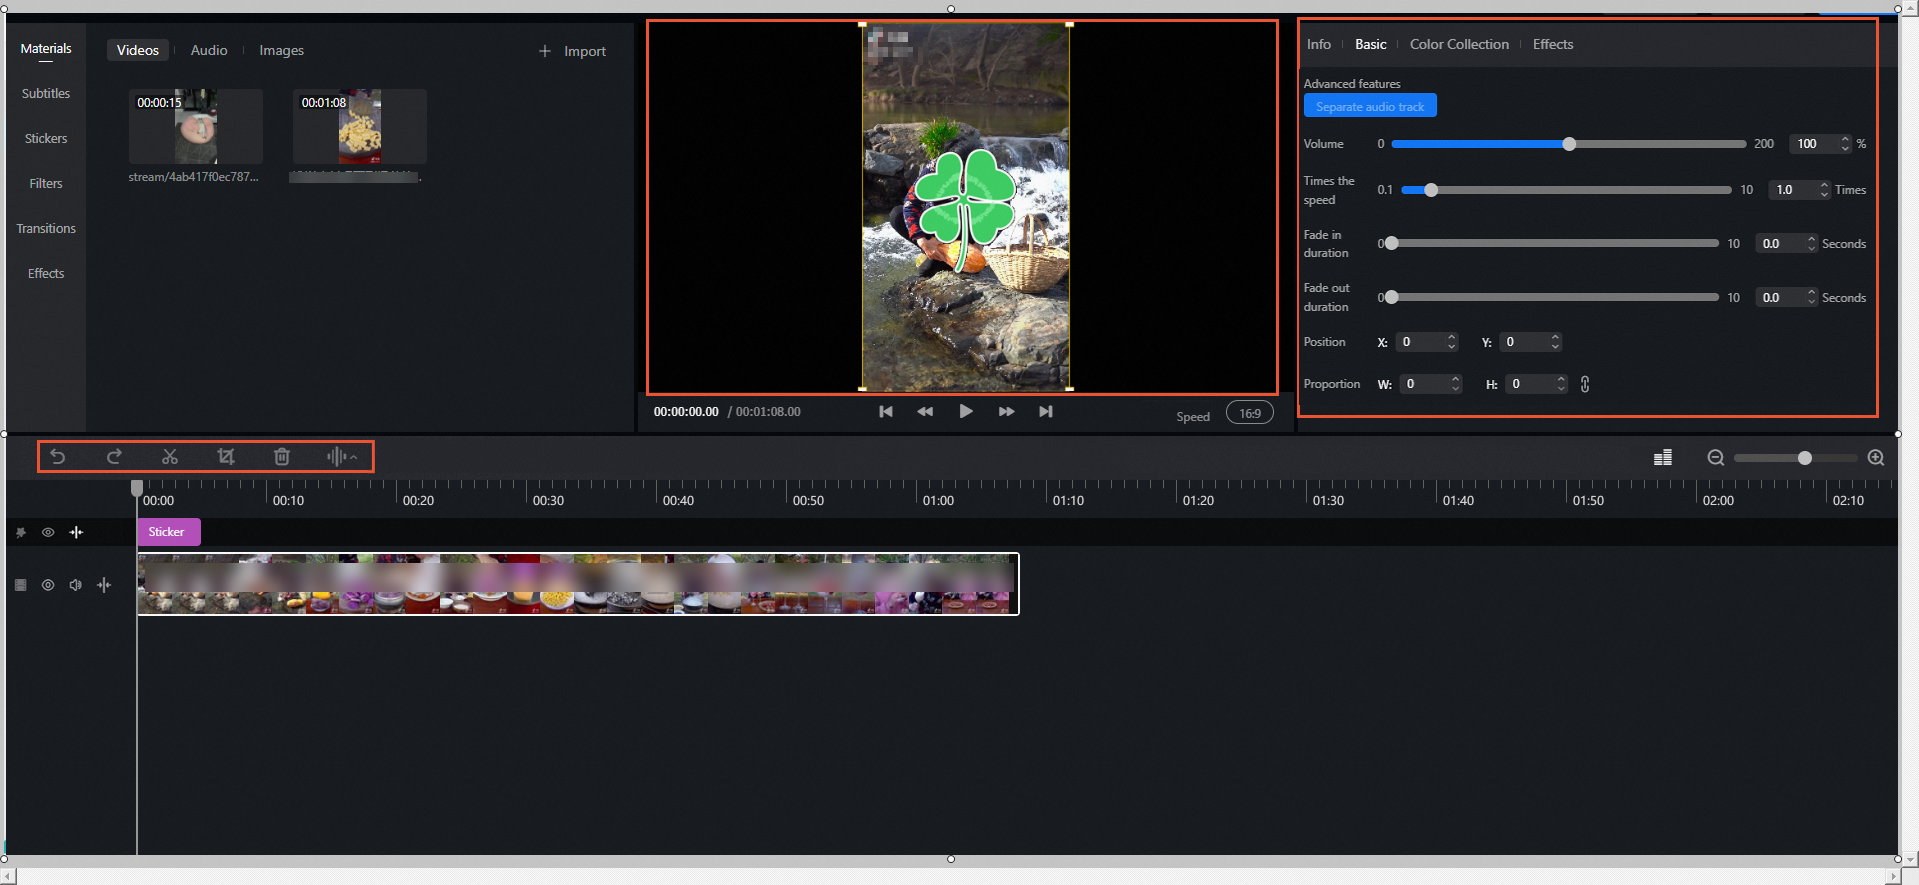
Clip, preview, or adjust material properties
Select a material on a track in the editing operations area. Use the tools in the upper-left corner of this area to clip or delete the video. In the preview area, you can preview, drag, scale, or reposition the material. In the property editing area, you can adjust its properties.
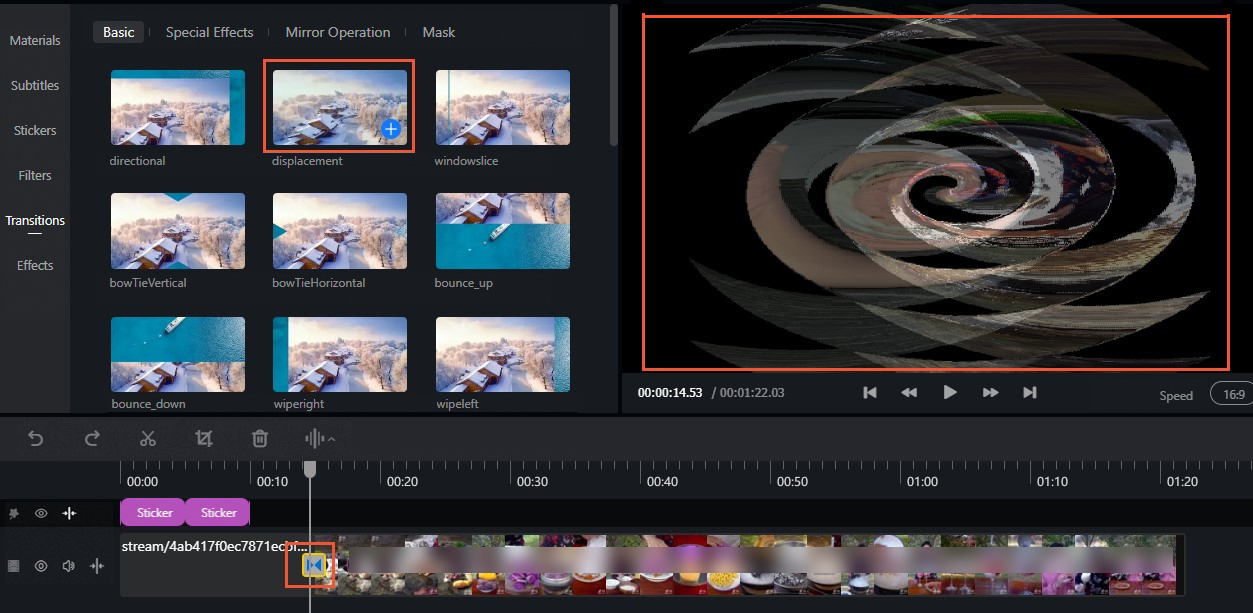
Add transition effects
In the editing operations area, select the video or image to which you want to add a transition. In the materials area, click Transitions. Select a transition effect, such as Whirlpool, and preview it in the preview area.
Display the audio waveform of a video
In the editing operations area, select a video. Click
 and select the waveform type to display. The corresponding waveform is displayed below the video on the track.
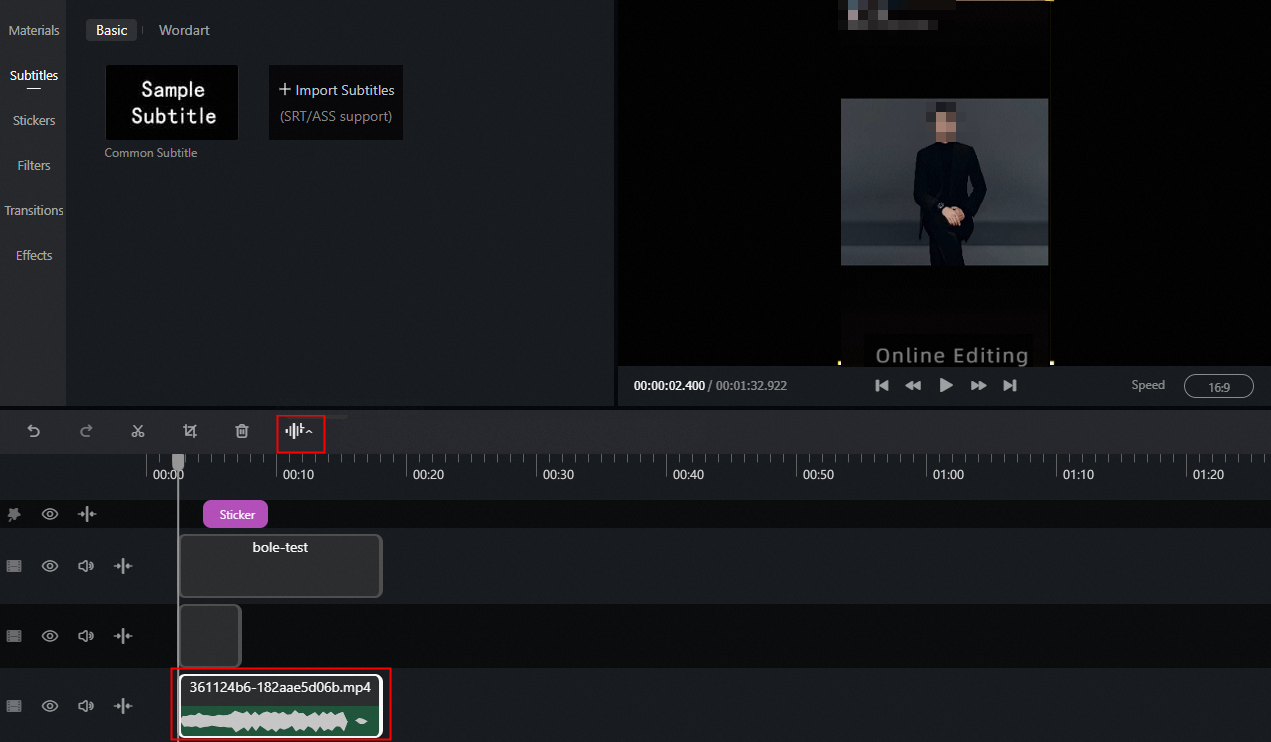
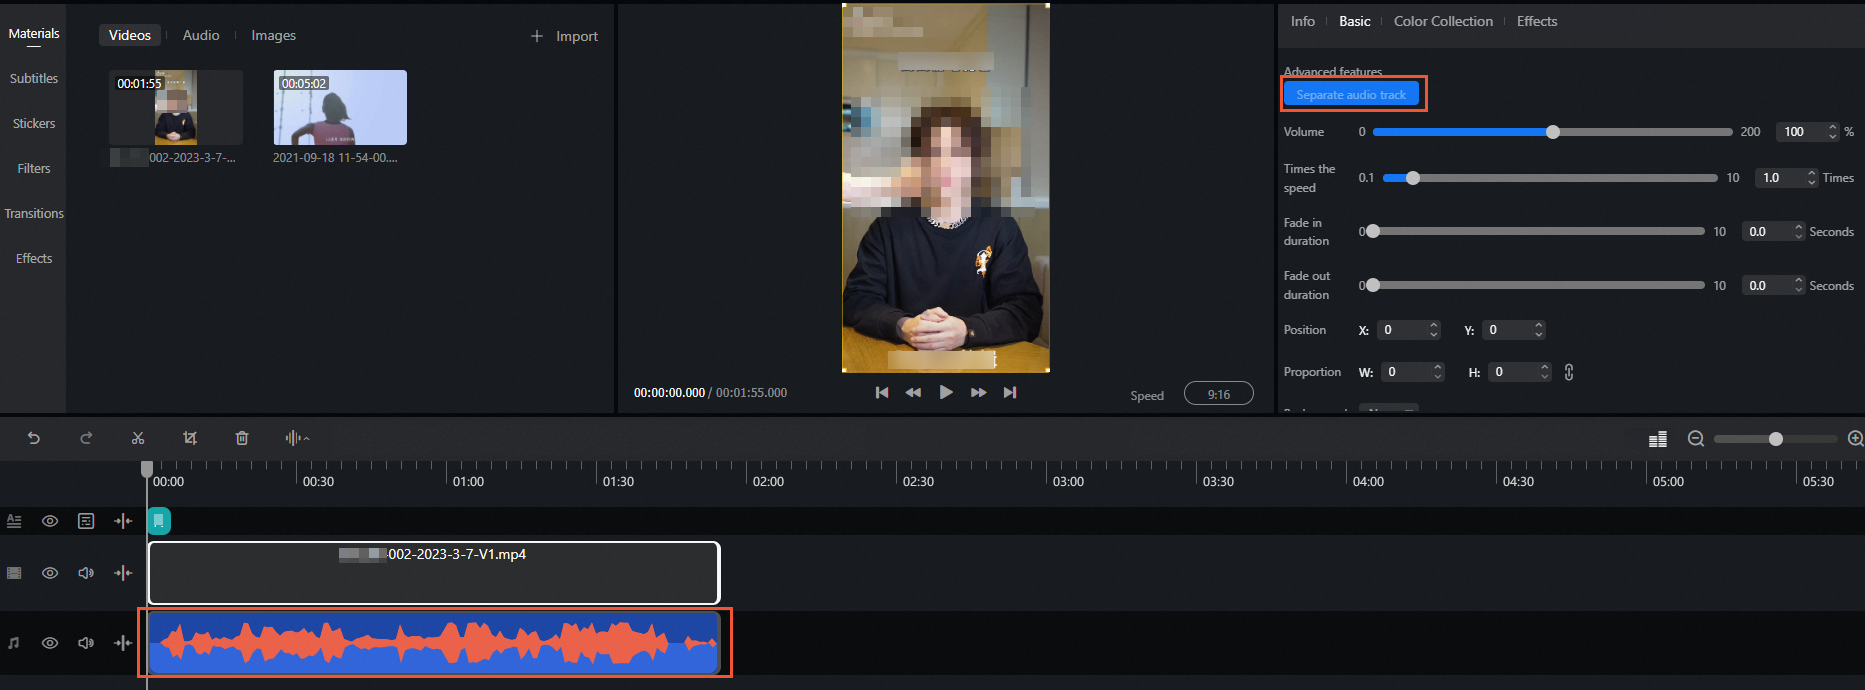
Separate an audio track from a video
In the editing operations area, select a video. On the Basic tab of the property editing area, click Separate Audio Track. The separated audio track is automatically loaded onto a new track.
After you finish editing, click Save in the upper-right corner to save the current editing project.
You can also click Export Video in the upper-right corner and configure the production parameters to export the produced video to the media asset library.
References
Media production (Online editing): Describes the online editing feature, including its system architecture, feature list, and core workflows.