When you submit a certificate application, you must specify a contact so that the certificate authority (CA) staff can contact you to review and approve your certificate application. The contact can also be used for receiving certificate-related notifications and communicating with technical support. This topic describes how to create, modify, and delete a contact.
Create a contact
After you create a contact, the contact information is saved for later use, such as for reviewing and approving certificate applications, communicating with technical support, and receiving certificate-related notifications. Make sure that the contact information is authentic and valid.
You can create a contact by using one of the following methods:
Method 1: Log on to the Certificate Management Service console and go to the Contact Management page to create a contact. The following procedure is based on this method.
Method 2: When you submit a certificate application, select Create Contact from the Contact drop-down list and specify the contact information. If you use this method, the system automatically saves the contact information that you enter to the Contact Management page. You do not need to enter the information again the next time you submit a certificate application.
Log on to the Certificate Management Service console.
In the left-side navigation pane, choose .
On the Contact Management page, click Create Contact.
In the Create Contact dialog box, configure the parameters and click OK.
Parameter
Description
Contact Name
Specify a name for the contact.
Email Address
Specify the email address that is used to receive notifications. Make sure that the email address is unique and valid within the current Alibaba Cloud account. You cannot specify this email address the next time you create a contact within the current Alibaba Cloud account.
You must click Verify to verify whether the email address is valid.
Mobile Number
Specify the phone number that is used to receive notifications. Make sure that the phone number is unique and valid within the current Alibaba Cloud account. You cannot specify this phone number the next time you create a contact within the current Alibaba Cloud account.
Add Notification Bot
Specify a webhook URL of a DingTalk, Lark, or WeCom chatbot. You can specify up to five webhook URLs. For more information about how to specify a webhook URL, see Obtain a webhook URL.
After you specify a webhook URL, you can receive notifications that are related to the certificate by using the chatbot.
Obtain a webhook URL
DingTalk
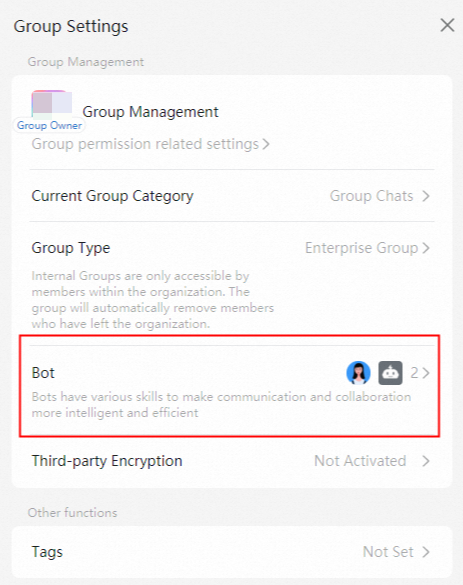
In the upper-right corner of your DingTalk group, click the
 icon.
icon. 
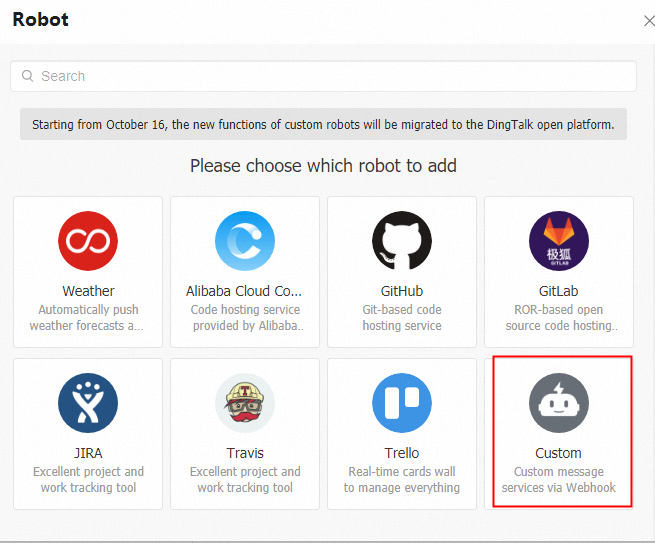
Click Add Robot.
In the Robot dialog box, click Custom.
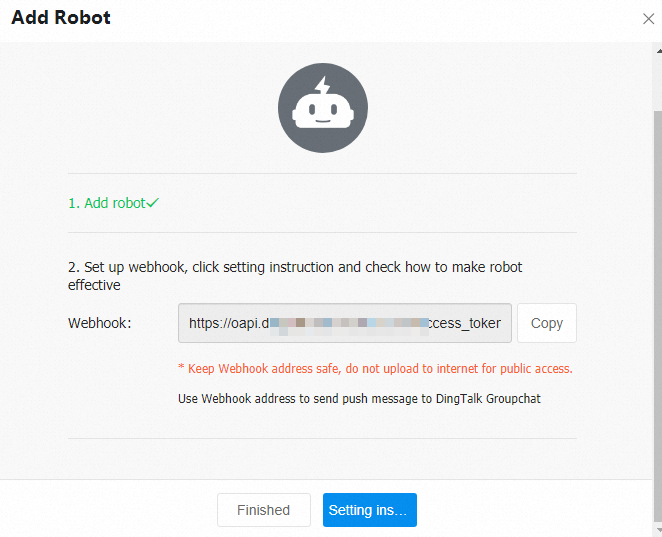
Configure the Chatbot name parameter, select Custom Keywords, enter a custom keyword, and then click Finished. You can enter webhook, certificate, or Certificate as the custom keyword.
After the DingTalk chatbot is created, you can obtain the webhook URL of the chatbot. After you obtain the webhook URL, you can add the webhook URL when you create a contact. This way, the contact can receive certificate-related notifications in the DingTalk group.
Lark
In the upper-right corner of your Lark group, click the
 icon, and then click Settings.
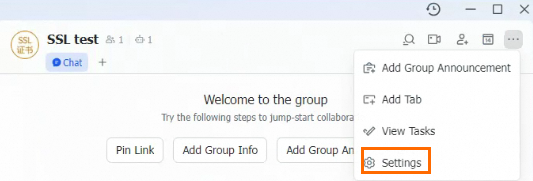
In the Settings panel, click Bots.
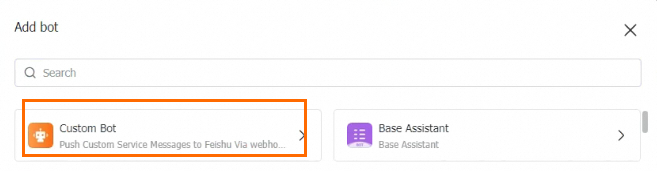
Click Add Bot. In the Add bot dialog box, click Custom Bot.
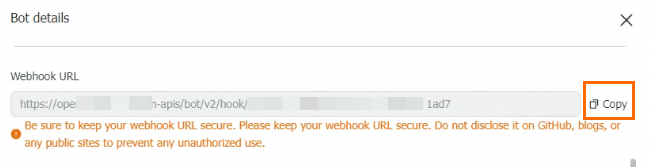
Specify a name and description for the bot, and click Add.
Click Copy next to the Webhook URL field. Then, click Finish.
WeCom
Click the
icon in the upper-right corner of the WeCom group, and then click Add Group Robot. 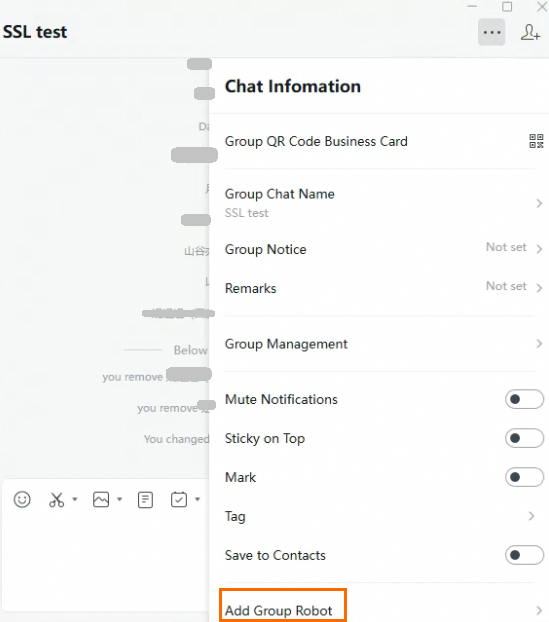
In the dialog box that appears, click New Robot.
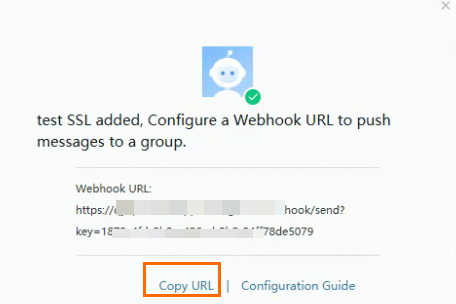
In the Create Robot dialog box, enter a name for the robot, and then click Add Robot.
In the message that appears, Click Copy URL.
Modify a contact
When you modify the Email Address, you must follow the on-screen instructions to verify whether the new email address is valid.
Log on to the Certificate Management Service console.
In the left-side navigation pane, choose .
In the contact list, find the contact and click Edit in the Actions column.
In the Edit dialog box, modify the contact information and click OK.
Delete a contact
After you delete a contact, the contact can no longer receive notifications from Certificate Management Service, such as certificate-related notifications. Proceed with caution.
Log on to the Certificate Management Service console.
In the left-side navigation pane, choose .
In the contact list, find the contact and click Delete in the Actions column.
In the Confirmation message, click Delete.