SchedulerX supports scheduled tasks, multi-language scripts, and HTTP interfaces. It also supports scheduling native Kubernetes Jobs or pods. This topic describes how to deploy SchedulerX in a Kubernetes environment.
Scenarios
Scheduling Kubernetes Jobs with SchedulerX offers the following advantages.
Edit script pods online
Kubernetes Jobs are often used for data processing and operations and maintenance (O&M), and are usually implemented as scripts. The native method requires you to package the script into an image and configure the script command in a YAML file. To modify the script, you must rebuild and republish the image. An example is shown below.
When you use SchedulerX, you do not need to build images or write YAML scripts. You can simply edit the script (Shell, Python, PHP, or Node.js) directly in the SchedulerX console, and the script then runs automatically as a pod. To modify the script, you can re-edit it in the SchedulerX console. The changes take effect during the next scheduled run. This approach improves development efficiency for Kubernetes Jobs. When you use Kubernetes tasks in SchedulerX, you do not need to understand the underlying details of containers, which lowers the barrier to using container technology.
Visual task orchestration
In Kubernetes, the mainstream solution for workflow orchestration is Argo, as shown in the following example.
SchedulerX supports drag-and-drop orchestration of Kubernetes tasks using a visual interface. This is more convenient than the mainstream solution of code-based workflow orchestration. In addition, when a task is running, the visual workflow graph helps you quickly identify bottlenecks and improves O&M efficiency.
Alerting and monitoring
When you use SchedulerX to schedule pods or Jobs, you can reuse its monitoring and alerting features.
Supported alert channels: text message, phone call, email, and Webhook (DingTalk, WeCom, or Lark).
Supported alert policies: failure alerts and execution timeout alerts.
Log service
When you use SchedulerX to schedule pods or Jobs, SchedulerX automatically collects pod logs, so you do not need to activate an additional log service. If a pod fails to run, you can troubleshoot the failure directly in the SchedulerX console.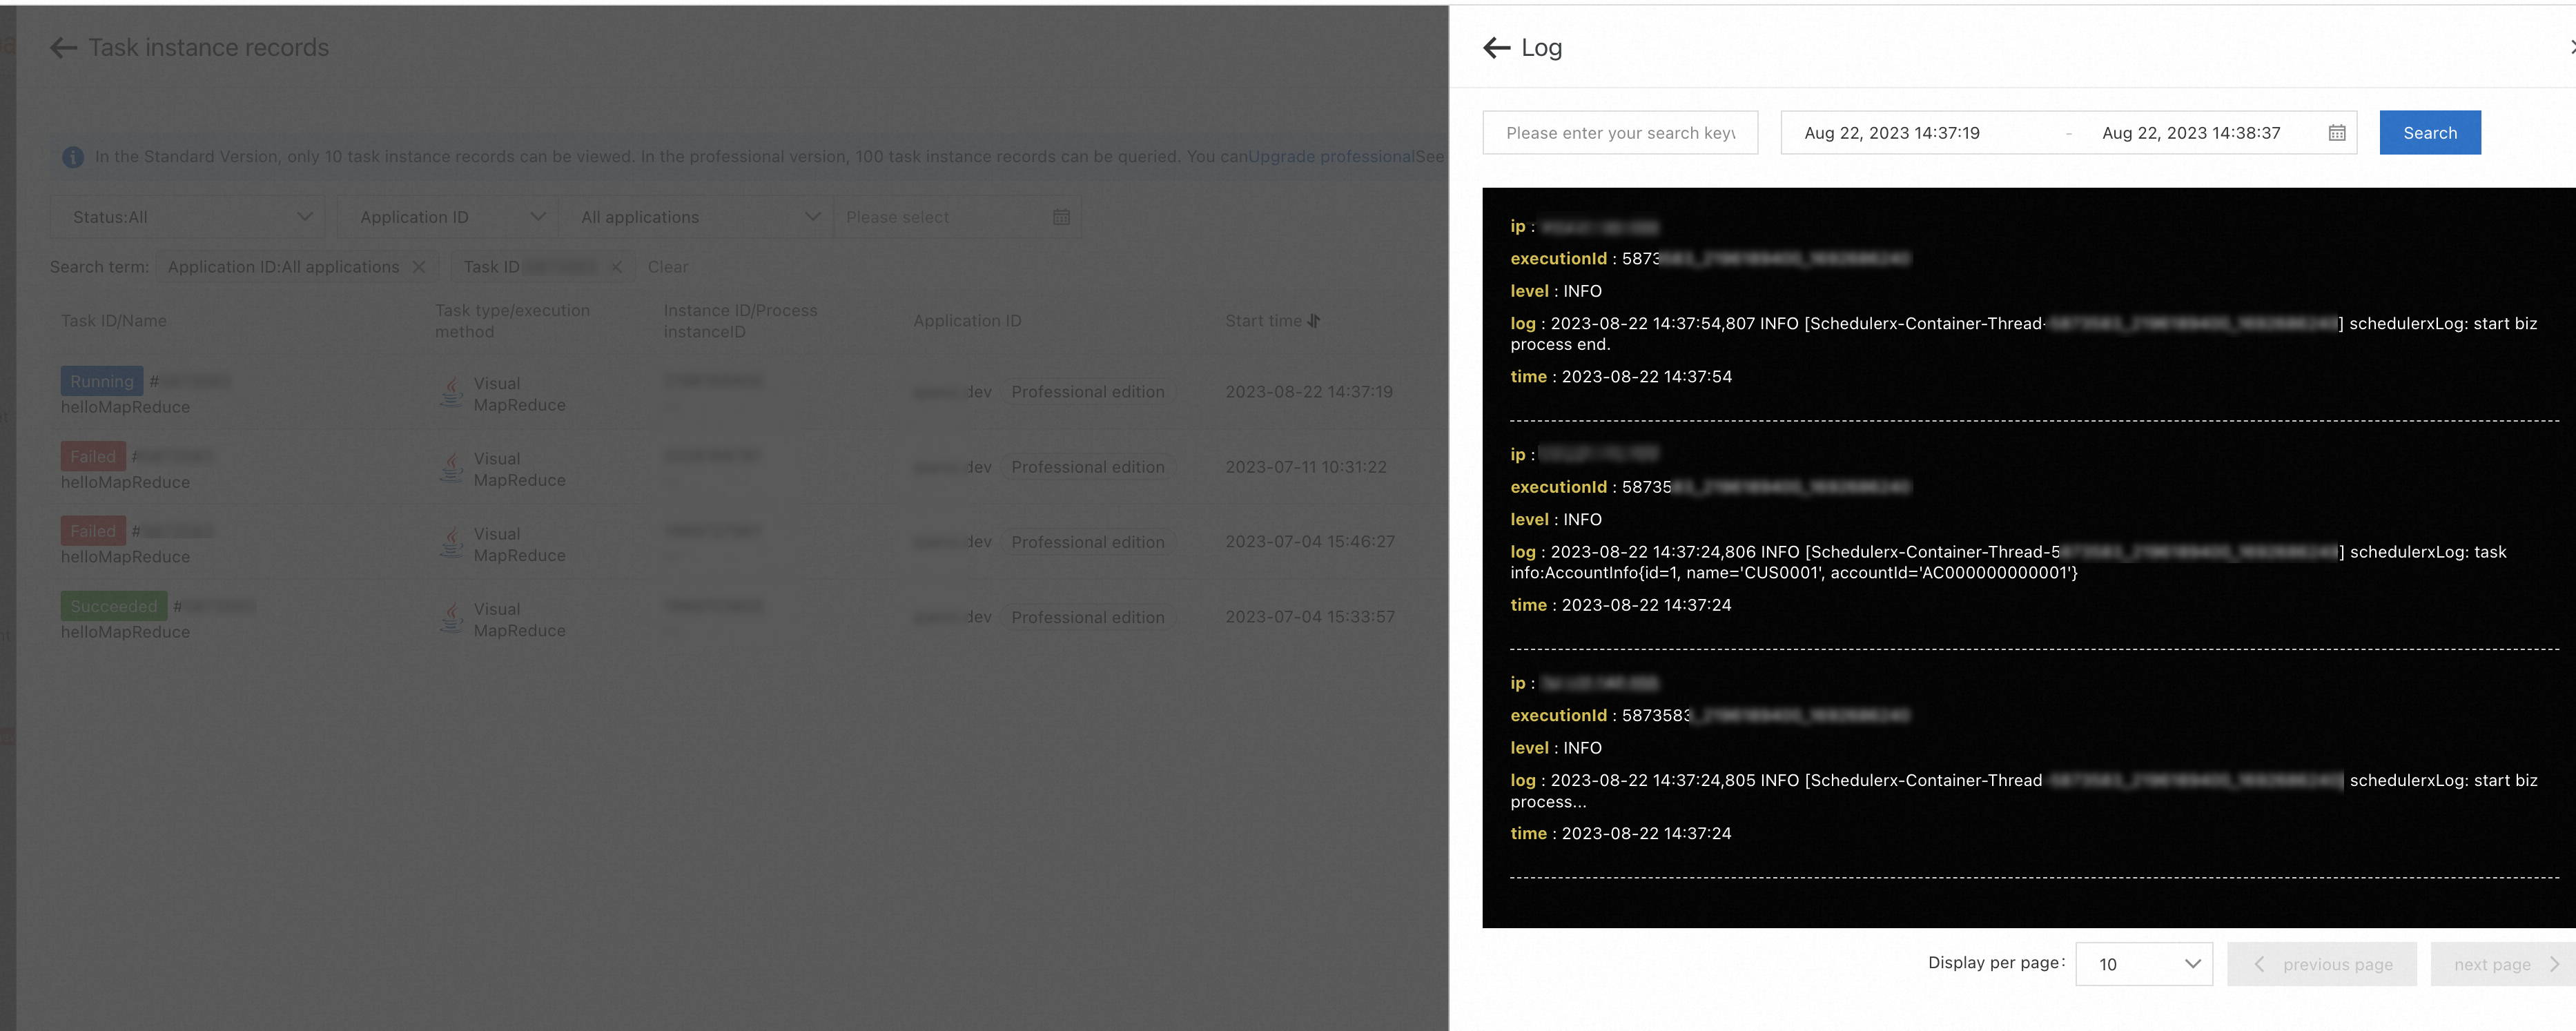
Monitoring dashboard
You can monitor your tasks in real time using the built-in task monitoring dashboard in SchedulerX.
Hybrid deployment of offline and online tasks
SchedulerX provides hybrid scheduling for both offline and online scheduled tasks, supporting Java and Kubernetes task types. A business application usually includes multiple scheduled tasks. If a scheduled task runs at a high frequency, you can run it in the same process as the business application. However, these in-process calls consume the CPU and memory of the online application and cannot be isolated from the main business logic. Therefore, if a scheduled task consumes significant resources and runs at a low frequency, such as once per hour or once per day, you can run the task in a new pod. This isolates the task in a separate process from the original online application.
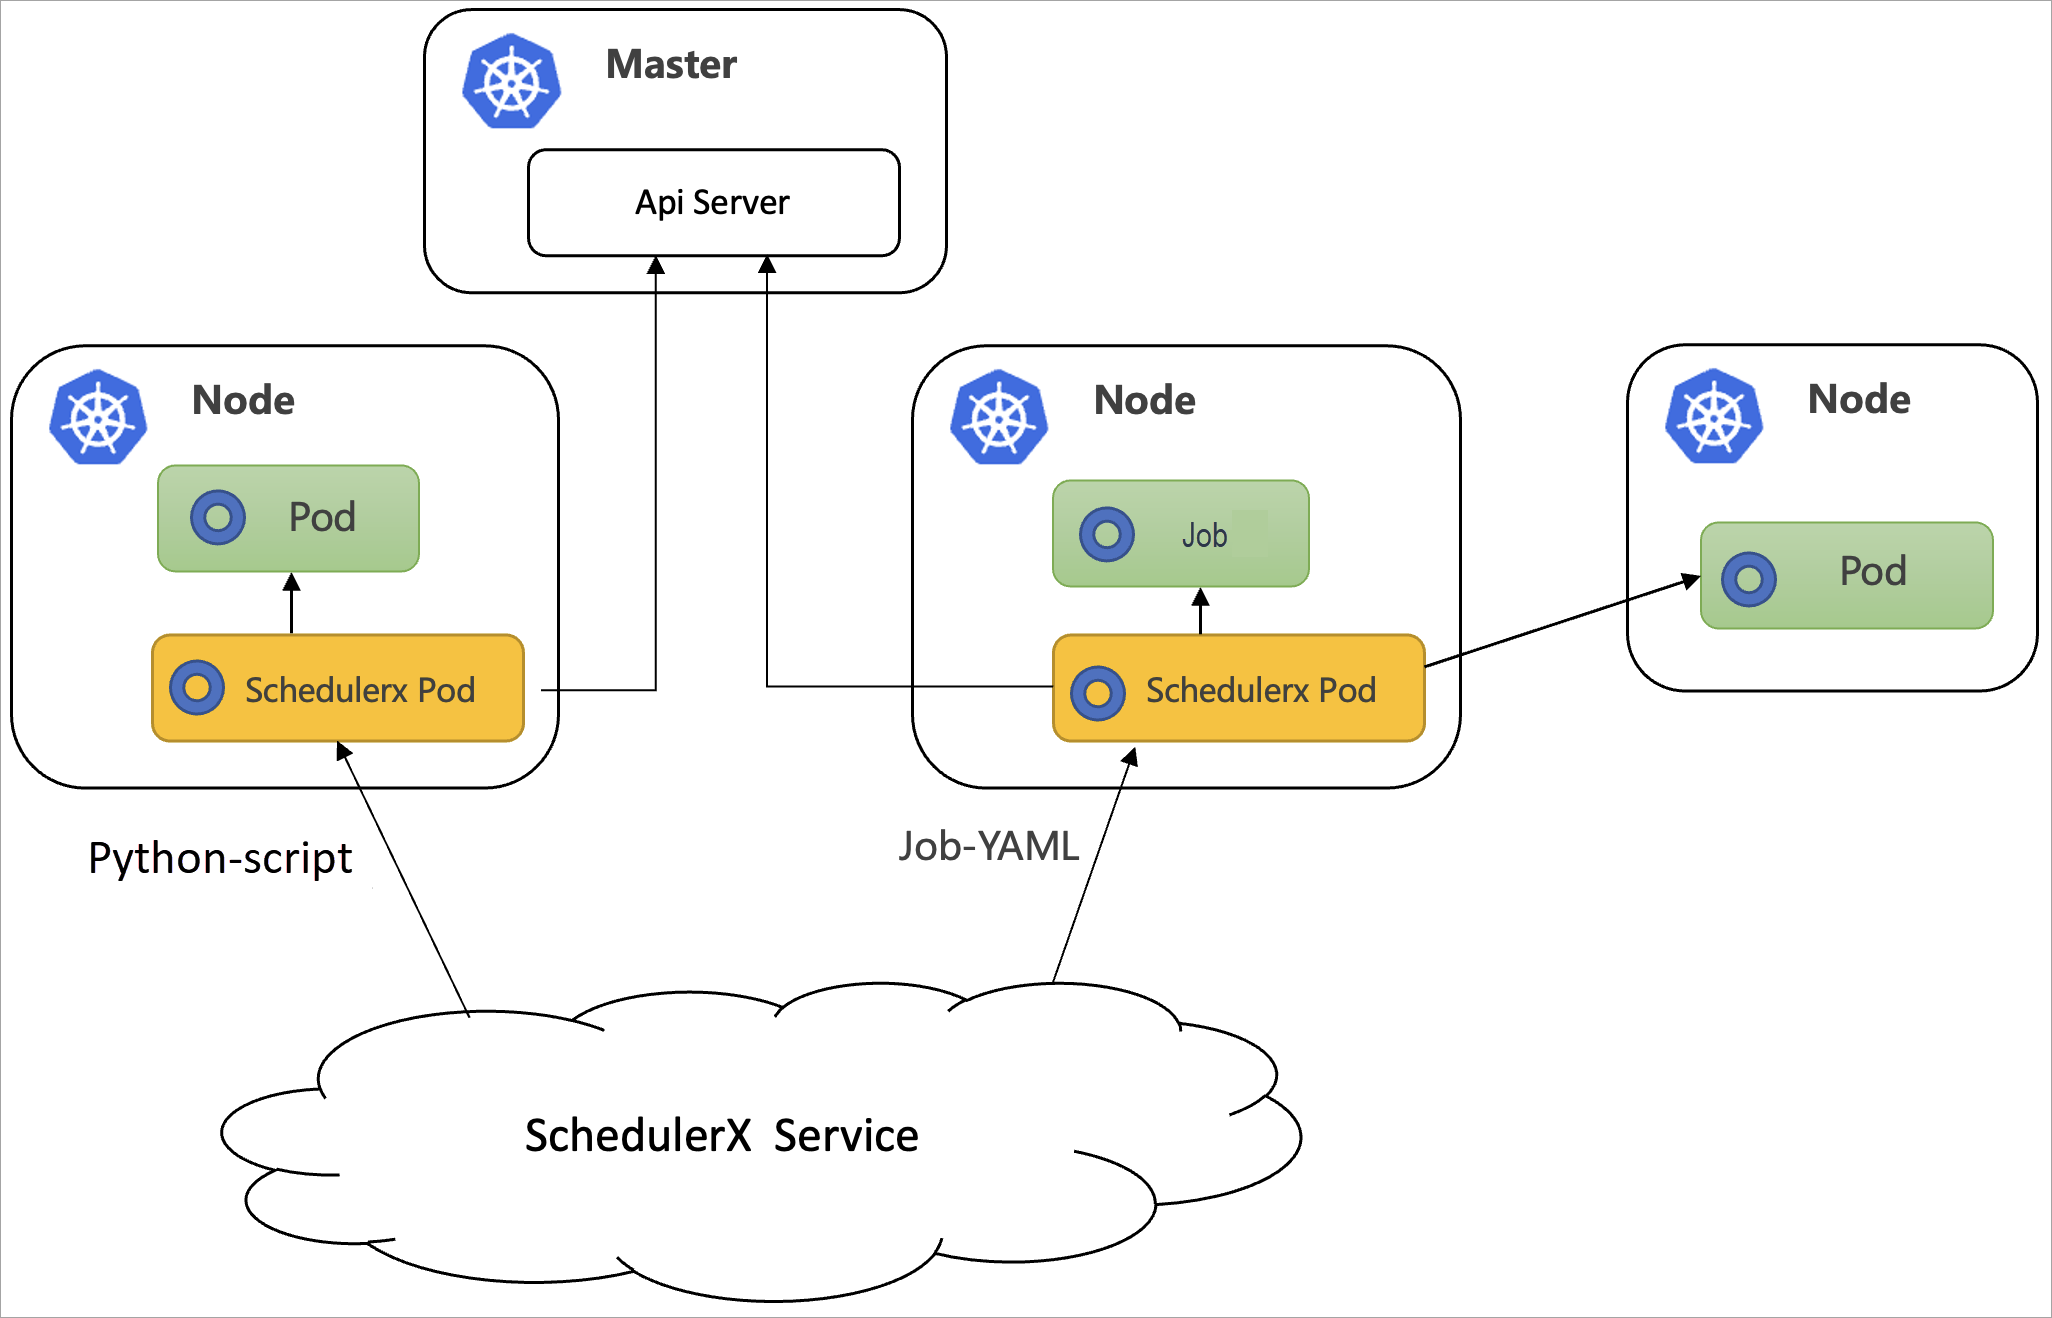
Method 1: Deploy SchedulerX using a deployment (Recommended)
When you use a non-Java application type, you can deploy a schedulerx-agent.yaml file using a deployment. SchedulerX starts the application in a separate pod. The process is shown in the following figure.
Prerequisites
You have created a Kubernetes cluster. This can be an Alibaba Cloud Container Service for Kubernetes (ACK) cluster or a self-managed Kubernetes cluster. For more information, see Create a Kubernetes cluster.
You have activated SchedulerX.
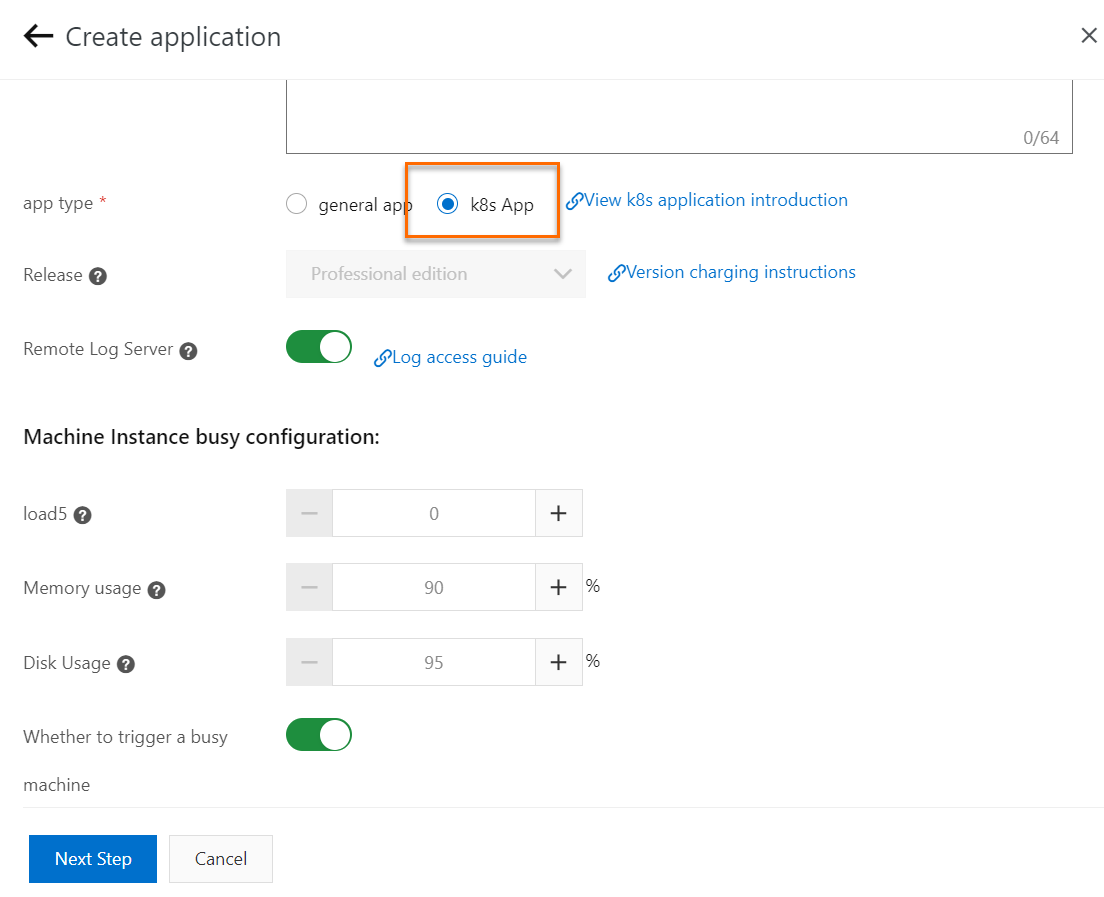
You have created an application of the Kubernetes type in the Distributed Task Scheduling Platform console. For more information, see Create an application.
Step 1: Configure the ServiceAccount
SchedulerX Kubernetes tasks rely on a ServiceAccount for authentication and authorization. By default, Kubernetes tasks run using the SchedulerX ServiceAccount of the namespace.
In the Kubernetes cluster and in the corresponding namespace, you need to run schedulerx-serviceaccount.yaml only once. To isolate namespaces and schedule pods or Jobs only within the target namespace, run the following sample YAML code.
To schedule across namespaces, use ClusterRole and ClusterRoleBinding.
Step 2: Install schedulerx-agent.yaml
The configuration of schedulerx-agent.yaml is as follows.
SchedulerX agent image variables
Chip architecture | Region | Description |
X86_64 | Mainland China | schedulerx-registry.cn-hangzhou.cr.aliyuncs.com/schedulerx2/agent:latest-amd64 |
Regions outside the Chinese mainland | schedulerx-registry.ap-southeast-1.cr.aliyuncs.com/schedulerx2/agent:latest-amd64 | |
ARM64 | Mainland China | schedulerx-registry.cn-hangzhou.cr.aliyuncs.com/schedulerx2/agent:latest-arm64 |
Regions outside the Chinese mainland | schedulerx-registry.ap-southeast-1.cr.aliyuncs.com/schedulerx2/agent:latest-arm64 |
SchedulerX agent env variables
Variable | Description |
${SCHEDULERX_ENDPOINT} | The region where you deployed the application and its corresponding Endpoint. For example, addr-sh-internal.edas.aliyun.com. For more information, see List of Endpoints. |
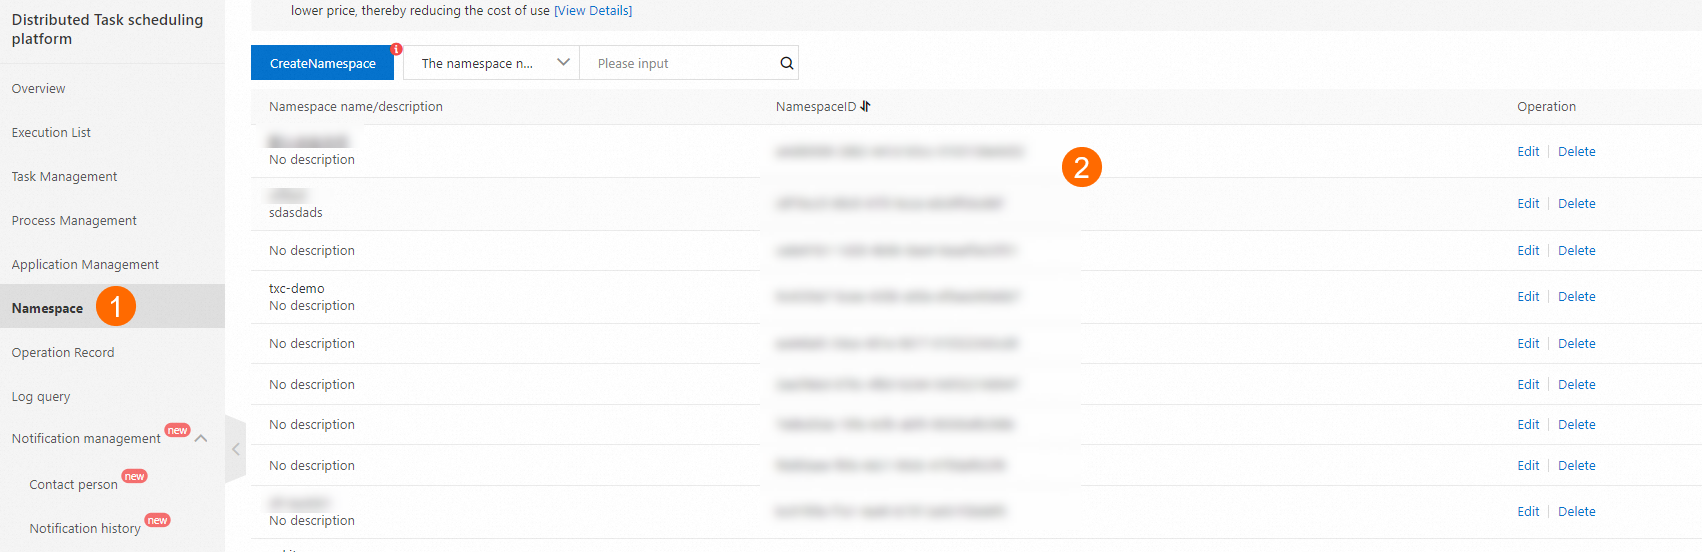
${SCHEDULERX_NAMESPACE} | The ID of the namespace. You can obtain it on the Namespaces page in the SchedulerX console. |
${SCHEDULERX_GROUPID} | The ID of the application. You can obtain it on the Application Management page in the SchedulerX console. |
${SCHEDULERX_APPKEY} | The key of the application. You can obtain it on the Application Management page in the SchedulerX console. |
After the deployment is complete, you can view the instance on the Application Management page in the SchedulerX console to confirm that the connection is successful.
Method 2: Deploy SchedulerX using a Helm package
Prerequisites
You have created a Kubernetes cluster. This can be an Alibaba Cloud Container Service for Kubernetes (ACK) cluster or a self-managed Kubernetes cluster. For more information, see Create a Kubernetes cluster.
You have activated SchedulerX.
You have created an application of the Kubernetes type in the Distributed Task Scheduling Platform console. For more information, see Create an application.
You have installed the Helm package manager.
Step 1: Download the SchedulerX Helm package
Run the following command to download the SchedulerX Helm package.
wget https://schedulerx2.oss-cn-hangzhou.aliyuncs.com/helm/schedulerxchart-2.0.0.tgzStep 2: Install the SchedulerX Helm package
Obtain the connection parameters for the application from the Distributed Task Scheduling Platform console.
Log on to the Distributed Task Scheduling Platform.
In the top navigation bar, select a region.
In the navigation pane on the left side, click Application Management.
On the Application Management page, find the application and click Connection Settings in the Actions column. In the upper-left corner of the Connection Settings page, select Kubernetes.
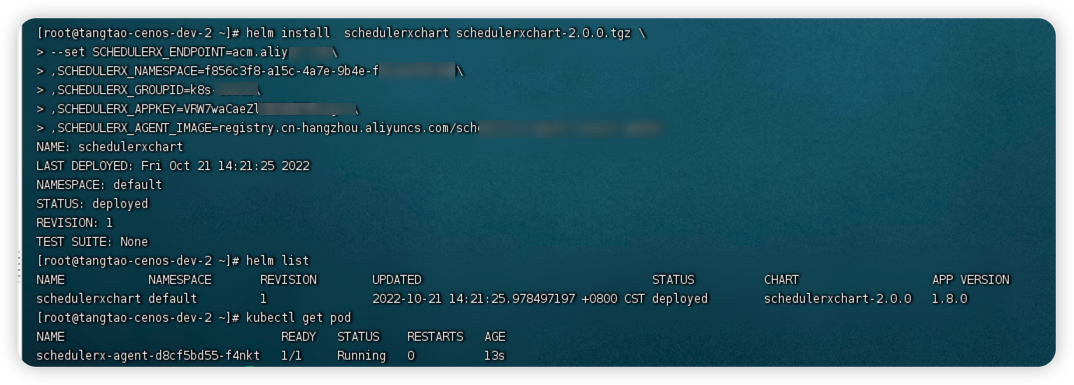
Run the following installation command.
NoteReplace the connection parameters in the installation command with the parameters of your target application.
The default registry address in the connection settings is for an amd64 image on the public network. Select the appropriate registry address based on the region and architecture of your machine.
helm install  schedulerxchart schedulerxchart-2.0.0.tgz \
--set SCHEDULERX_ENDPOINT=acm.aliyun.com\
,SCHEDULERX_NAMESPACE=f856c3f8-a15c-4a7e-9b4e-f812a9f8****\
,SCHEDULERX_GROUPID=k8s-test3\
,SCHEDULERX_APPKEY=****\
,SCHEDULERX_AGENT_IMAGE=schedulerx-registry.cn-hangzhou.cr.aliyuncs.com/schedulerx2/agent:latest-amd64
The following figure shows a screenshot of the installation process.
SchedulerX agent image variables
Chip architecture
Region
Description
x86_64
Regions in China
schedulerx-registry.cn-hangzhou.cr.aliyuncs.com/schedulerx2/agent:latest-amd64
Regions outside the Chinese mainland
schedulerx-registry.ap-southeast-1.cr.aliyuncs.com/schedulerx2/agent:latest-amd64
arm64
Regions in China
schedulerx-registry.cn-hangzhou.cr.aliyuncs.com/schedulerx2/agent:latest-arm64
Regions outside the Chinese mainland
schedulerx-registry.ap-southeast-1.cr.aliyuncs.com/schedulerx2/agent:latest-arm64
SchedulerX agent env variables
Variable
Description
${SCHEDULERX_ENDPOINT}
The region where you deployed the application and its corresponding Endpoint. For example, addr-sh-internal.edas.aliyun.com. For more information, see List of Endpoints.
${SCHEDULERX_NAMESPACE}
The ID of the namespace. You can obtain it on the Namespaces page in the SchedulerX console.
${SCHEDULERX_GROUPID}
The ID of the application. You can obtain it on the Application Management page in the SchedulerX console.
${SCHEDULERX_APPKEY}
The key of the application. You can obtain it on the Application Management page in the SchedulerX console.
SCHEDULERX_AGENT_IMAGE
The registry address.
After the installation is complete, you can view the instance in the SchedulerX console.
Method 3: Deploy SchedulerX using the Java SDK
If your application is a Java application and you need to schedule Java programs in addition to Kubernetes tasks, you can use the Java software development kit (SDK) for deployment. SchedulerX runs in the same process as your online business. The process is shown in the following figure.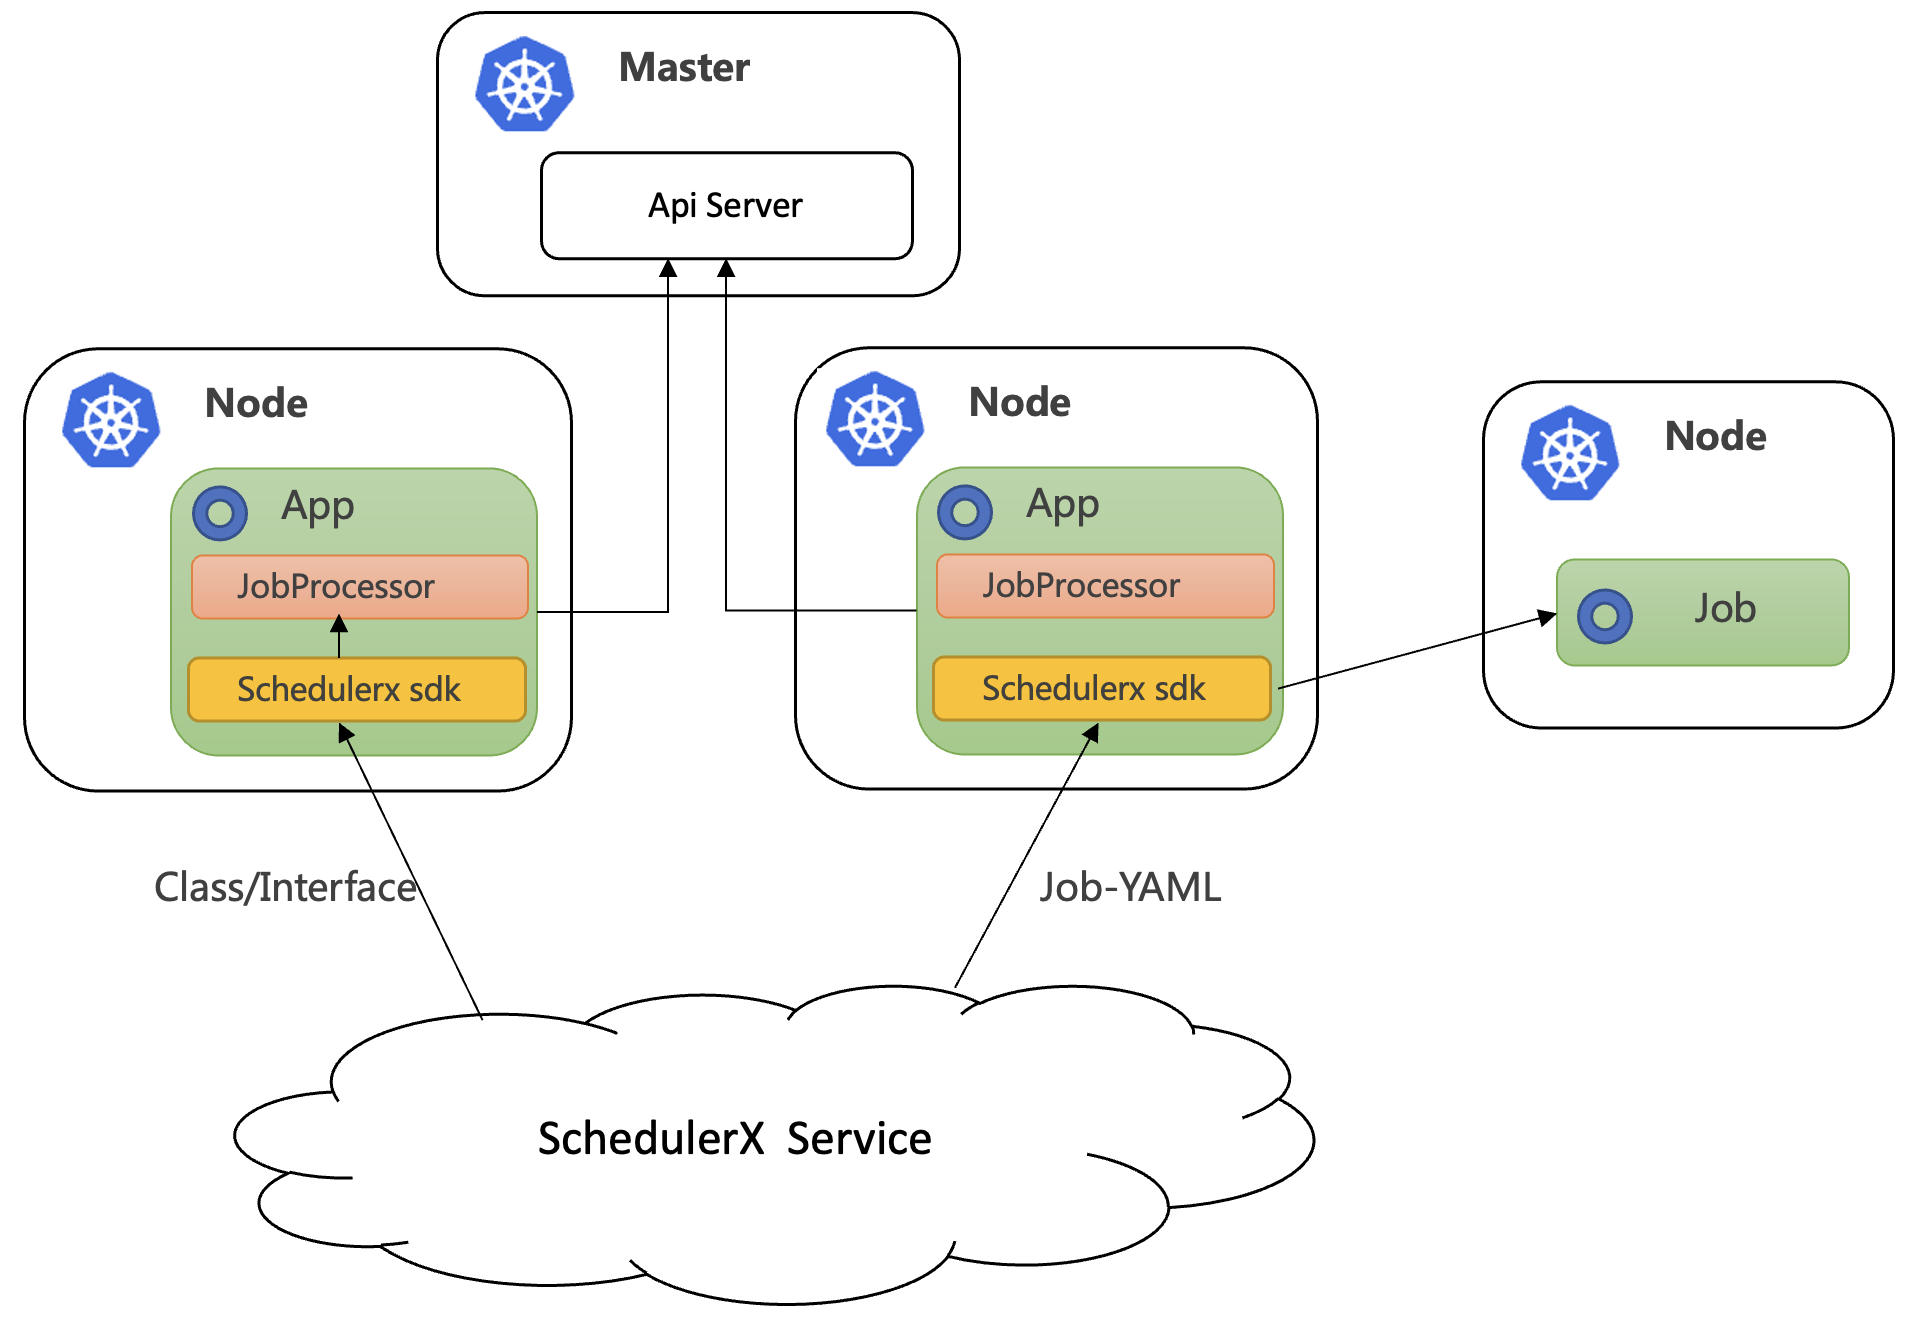
Prerequisites
You can create a Kubernetes cluster, which can be an ACK cluster or a self-managed Kubernetes cluster. For more information, see Create a Kubernetes cluster.
You can create a K8s application in the Distributed Task Scheduling Platform. For more information, see Create Application.
Connect to SchedulerX
For information about how to connect using the SDK, see Connect a Spring Boot application to SchedulerX.
To use Kubernetes tasks, you also need the schedulerx-plugin-kubernetes dependency, as shown below.
For `schedulerx2.version`, use the latest client version. For more information, see Release notes.
<dependency>
  <groupId>com.aliyun.schedulerx</groupId>
  <artifactId>schedulerx2-spring-boot-starter</artifactId>
  <version>${schedulerx2.version}</version>
</dependency>
<dependency>
  <groupId>com.aliyun.schedulerx</groupId>
  <artifactId>schedulerx2-plugin-kubernetes</artifactId>
  <version>${schedulerx2-plugin-kubernetes.version}</version>
</dependency>
What to do next: Create a Kubernetes task
To run the following scripts, you need to create a Kubernetes task on the Task Management page. For more information, see Task management.
Shell script
If you want to run a Shell script in a pod, create a Kubernetes task on the Task Management page. Set Resource Type to Shell-Script. You can use the default image busybox or replace it with your own image.
Click Run Once. You can see that the pod starts in the Kubernetes cluster. The pod name is schedulerx-shell-{JobId}.
On the Task Management page in the SchedulerX console, you can query the execution history and view the pod logs.
Python script
If you want to run a Python script in a pod, create a Kubernetes task on the Task Management page. Set Resource Type to Python-Script. You can use the default Python image or replace it with your own image.
Click Run Once. You can see that the pod starts in the Kubernetes cluster. The pod name is schedulerx-python-{JobId}.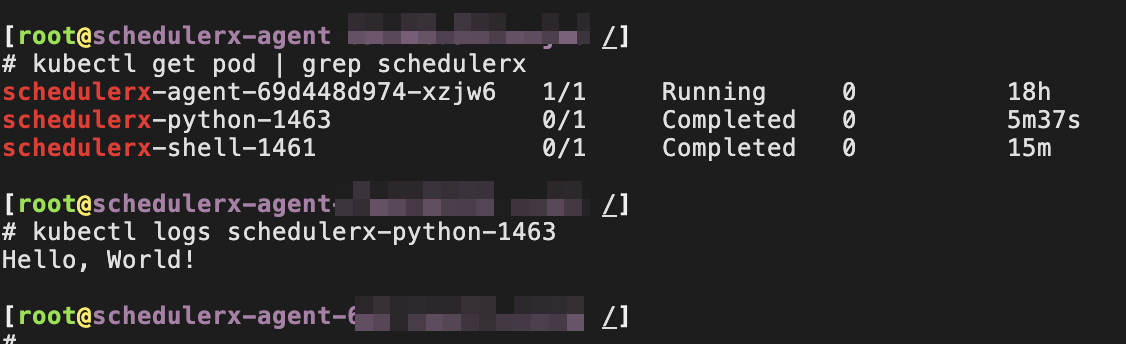
On the Task Management page in the SchedulerX console, you can query the execution history and view the pod logs.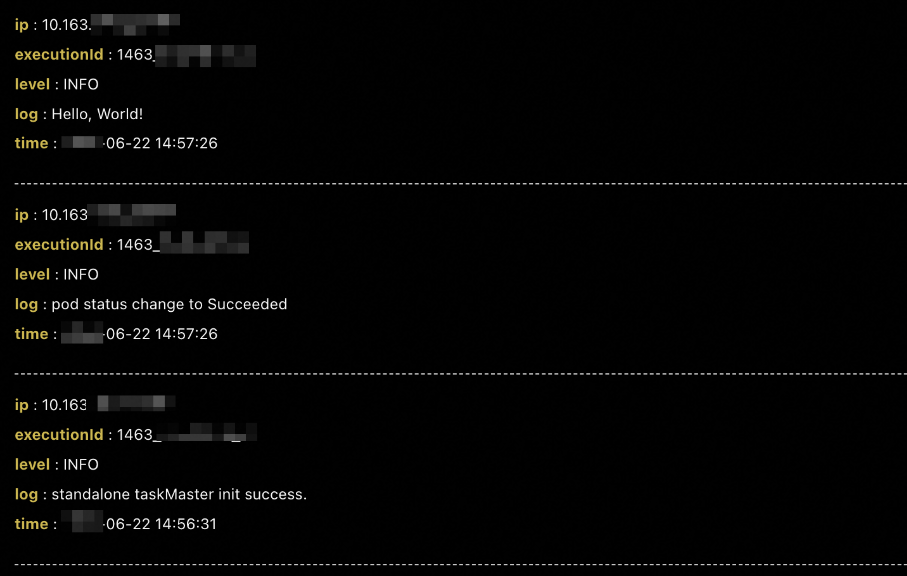
PHP script
If you want to run a PHP script in a pod, create a Kubernetes task on the Task Management page. Set Resource Type to PHP-Script. You can use the default image php:7.4-cli or replace it with your own image.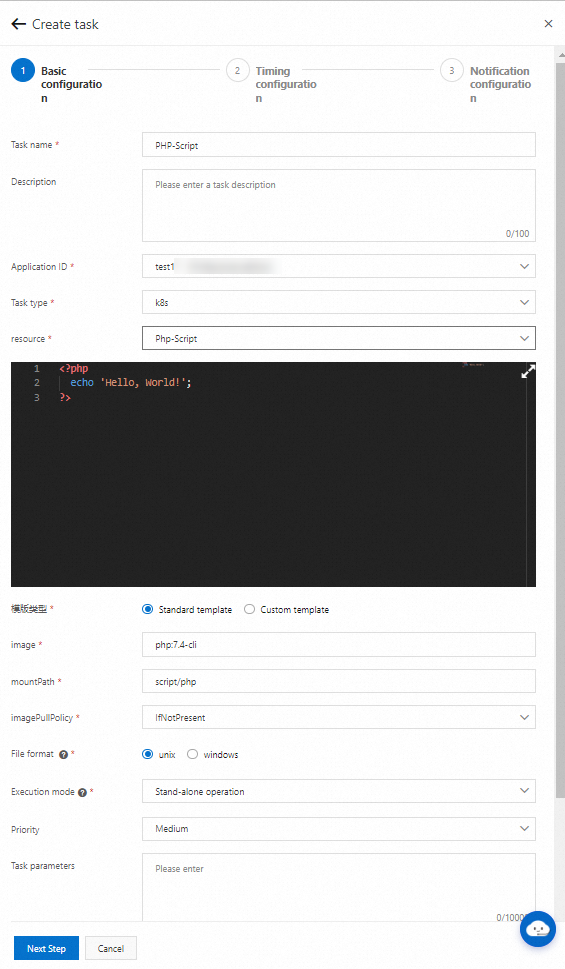
Click Run Once. You can see that the pod starts in the Kubernetes cluster. The pod name is schedulerx-php-{JobId}.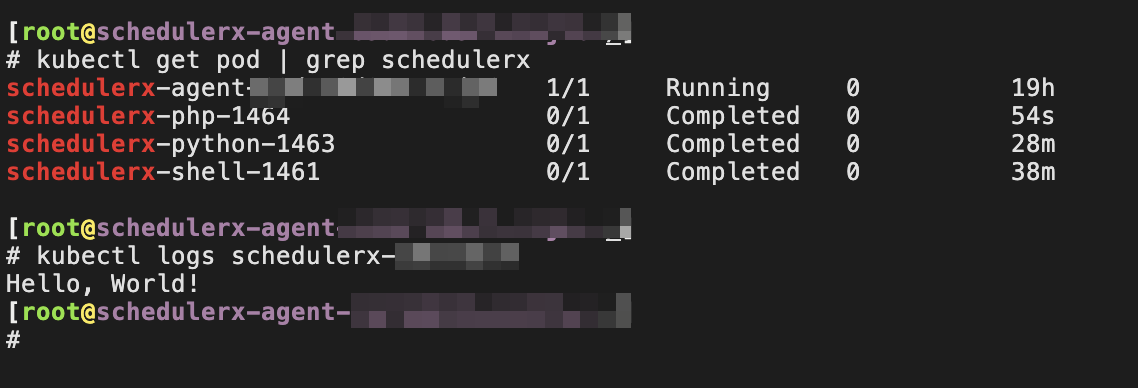
On the Task Management page in the SchedulerX console, you can query the execution history and view the pod logs.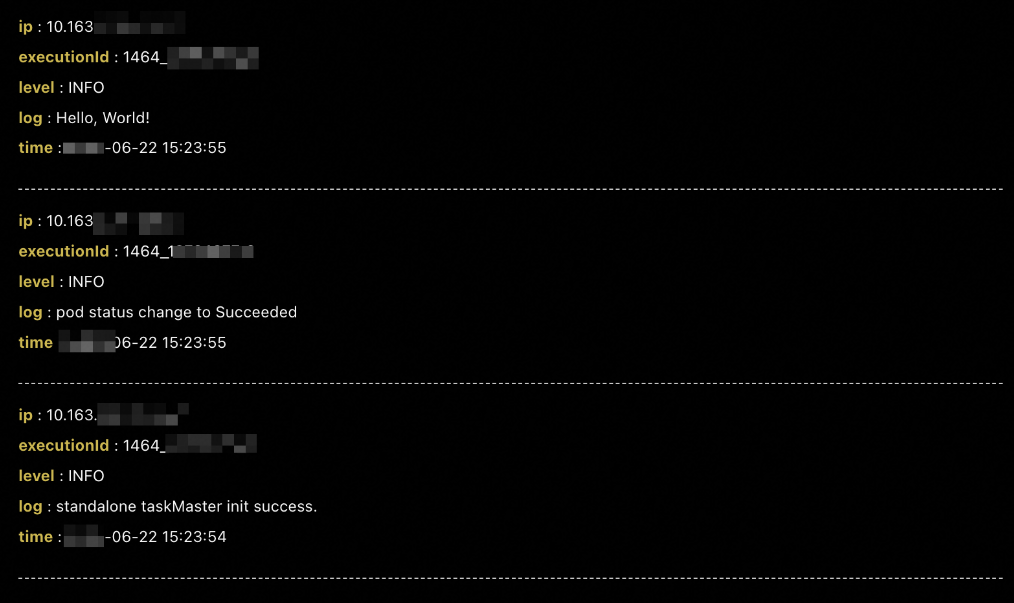
Node.js script
If you want to run a Node.js script in a pod, create a Kubernetes task on the Task Management page. Set Resource Type to Nodejs-Script. You can use the default image node:16 or replace it with your own image.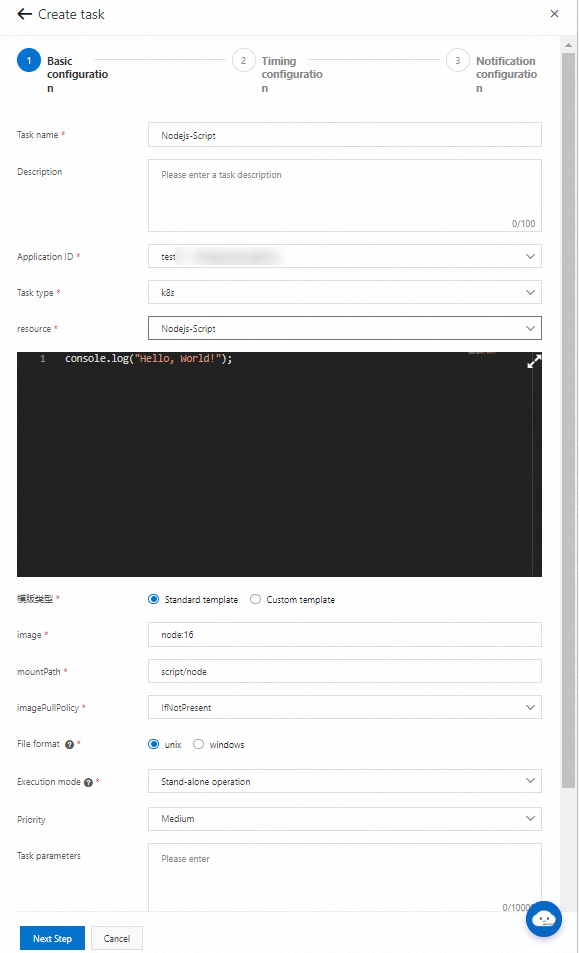
Click Run Once. You can see that the pod starts in the Kubernetes cluster. The pod name is schedulerx-node-{JobId}.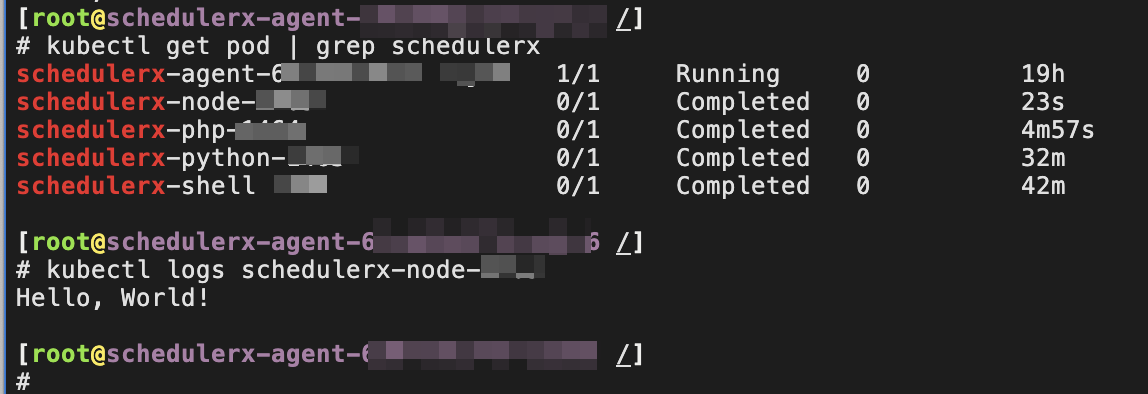
On the Task Management page in the SchedulerX console, you can query the execution history and view the pod logs.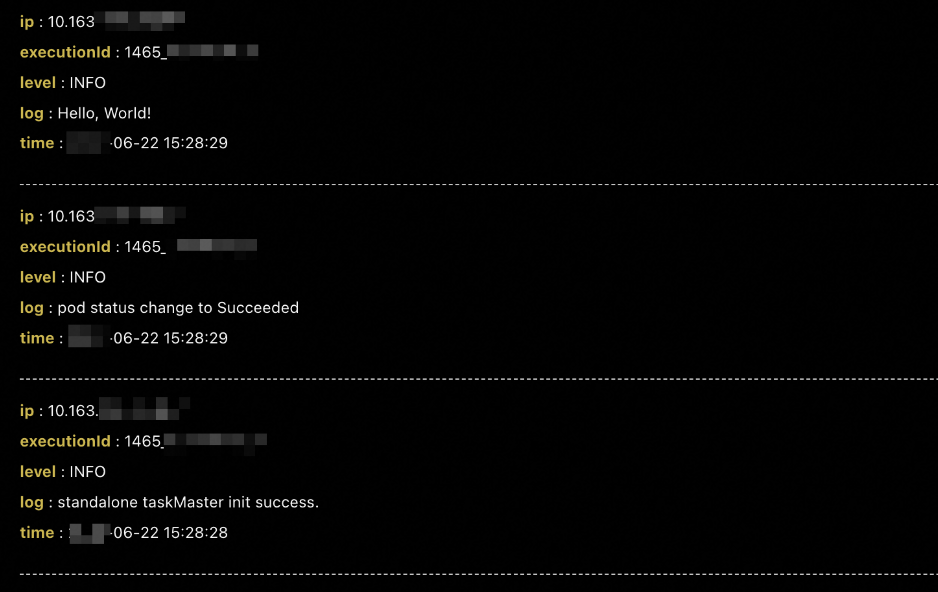
Job-YAML
You can also run native Kubernetes Jobs using SchedulerX. Create a Kubernetes task on the Task Management page and set Resource Type to Job-YAML.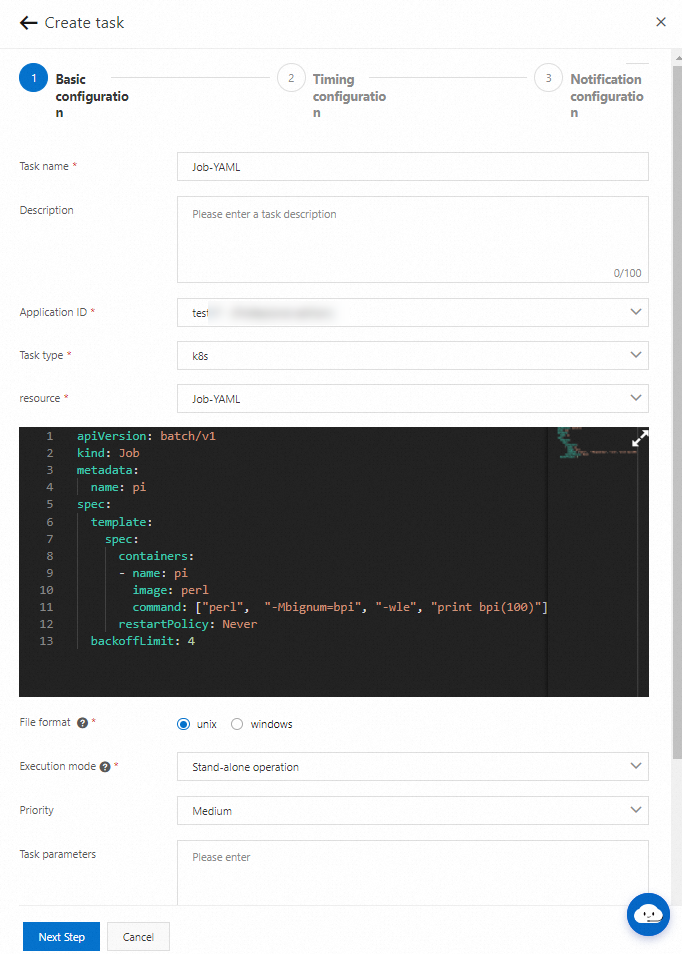
Click Run Once. You can see that the Job and pod have started successfully in the Kubernetes cluster.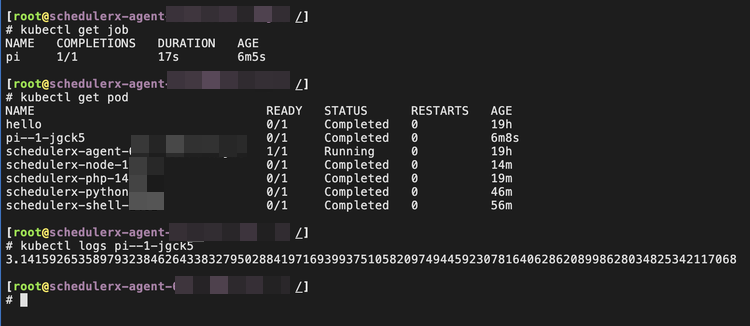
On the Task Management page in the SchedulerX console, you can query the execution history and view the pod logs.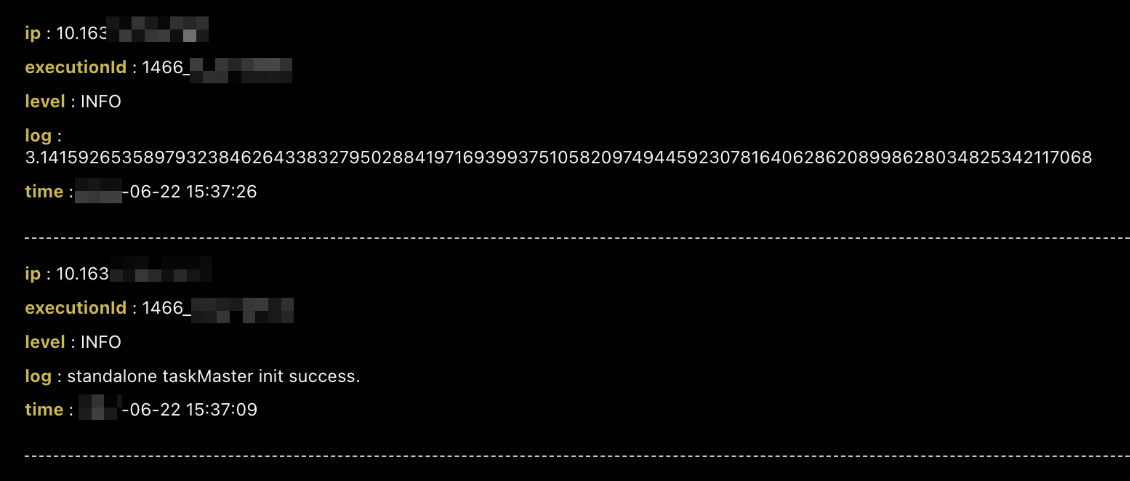
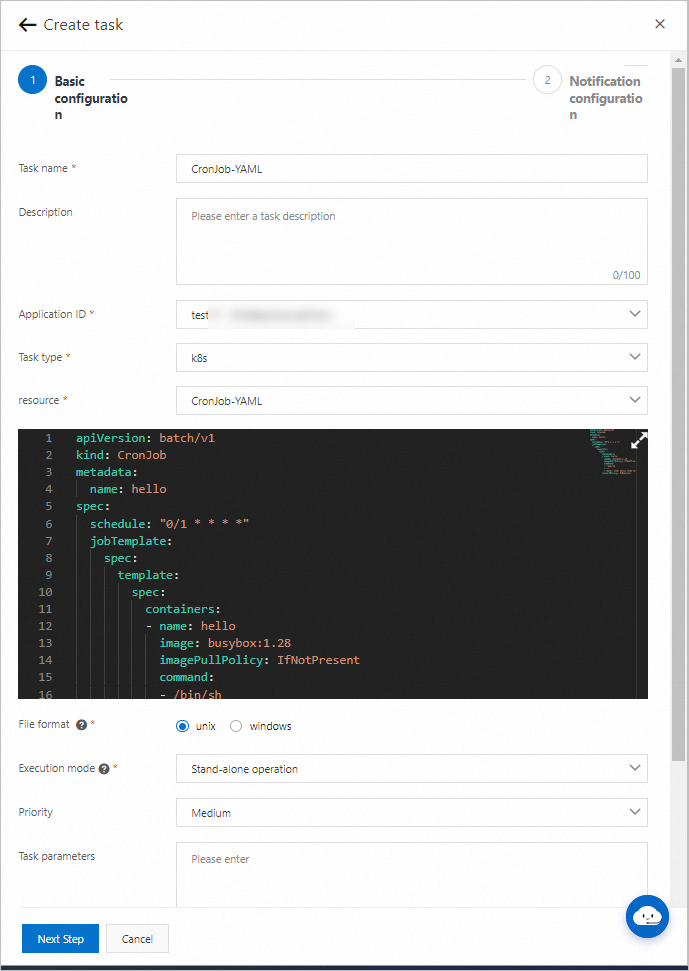
CronJob-YAML
You can also run native Kubernetes CronJobs using SchedulerX. Create a Kubernetes task on the Task Management page and set Resource Type to CronJob-YAML.
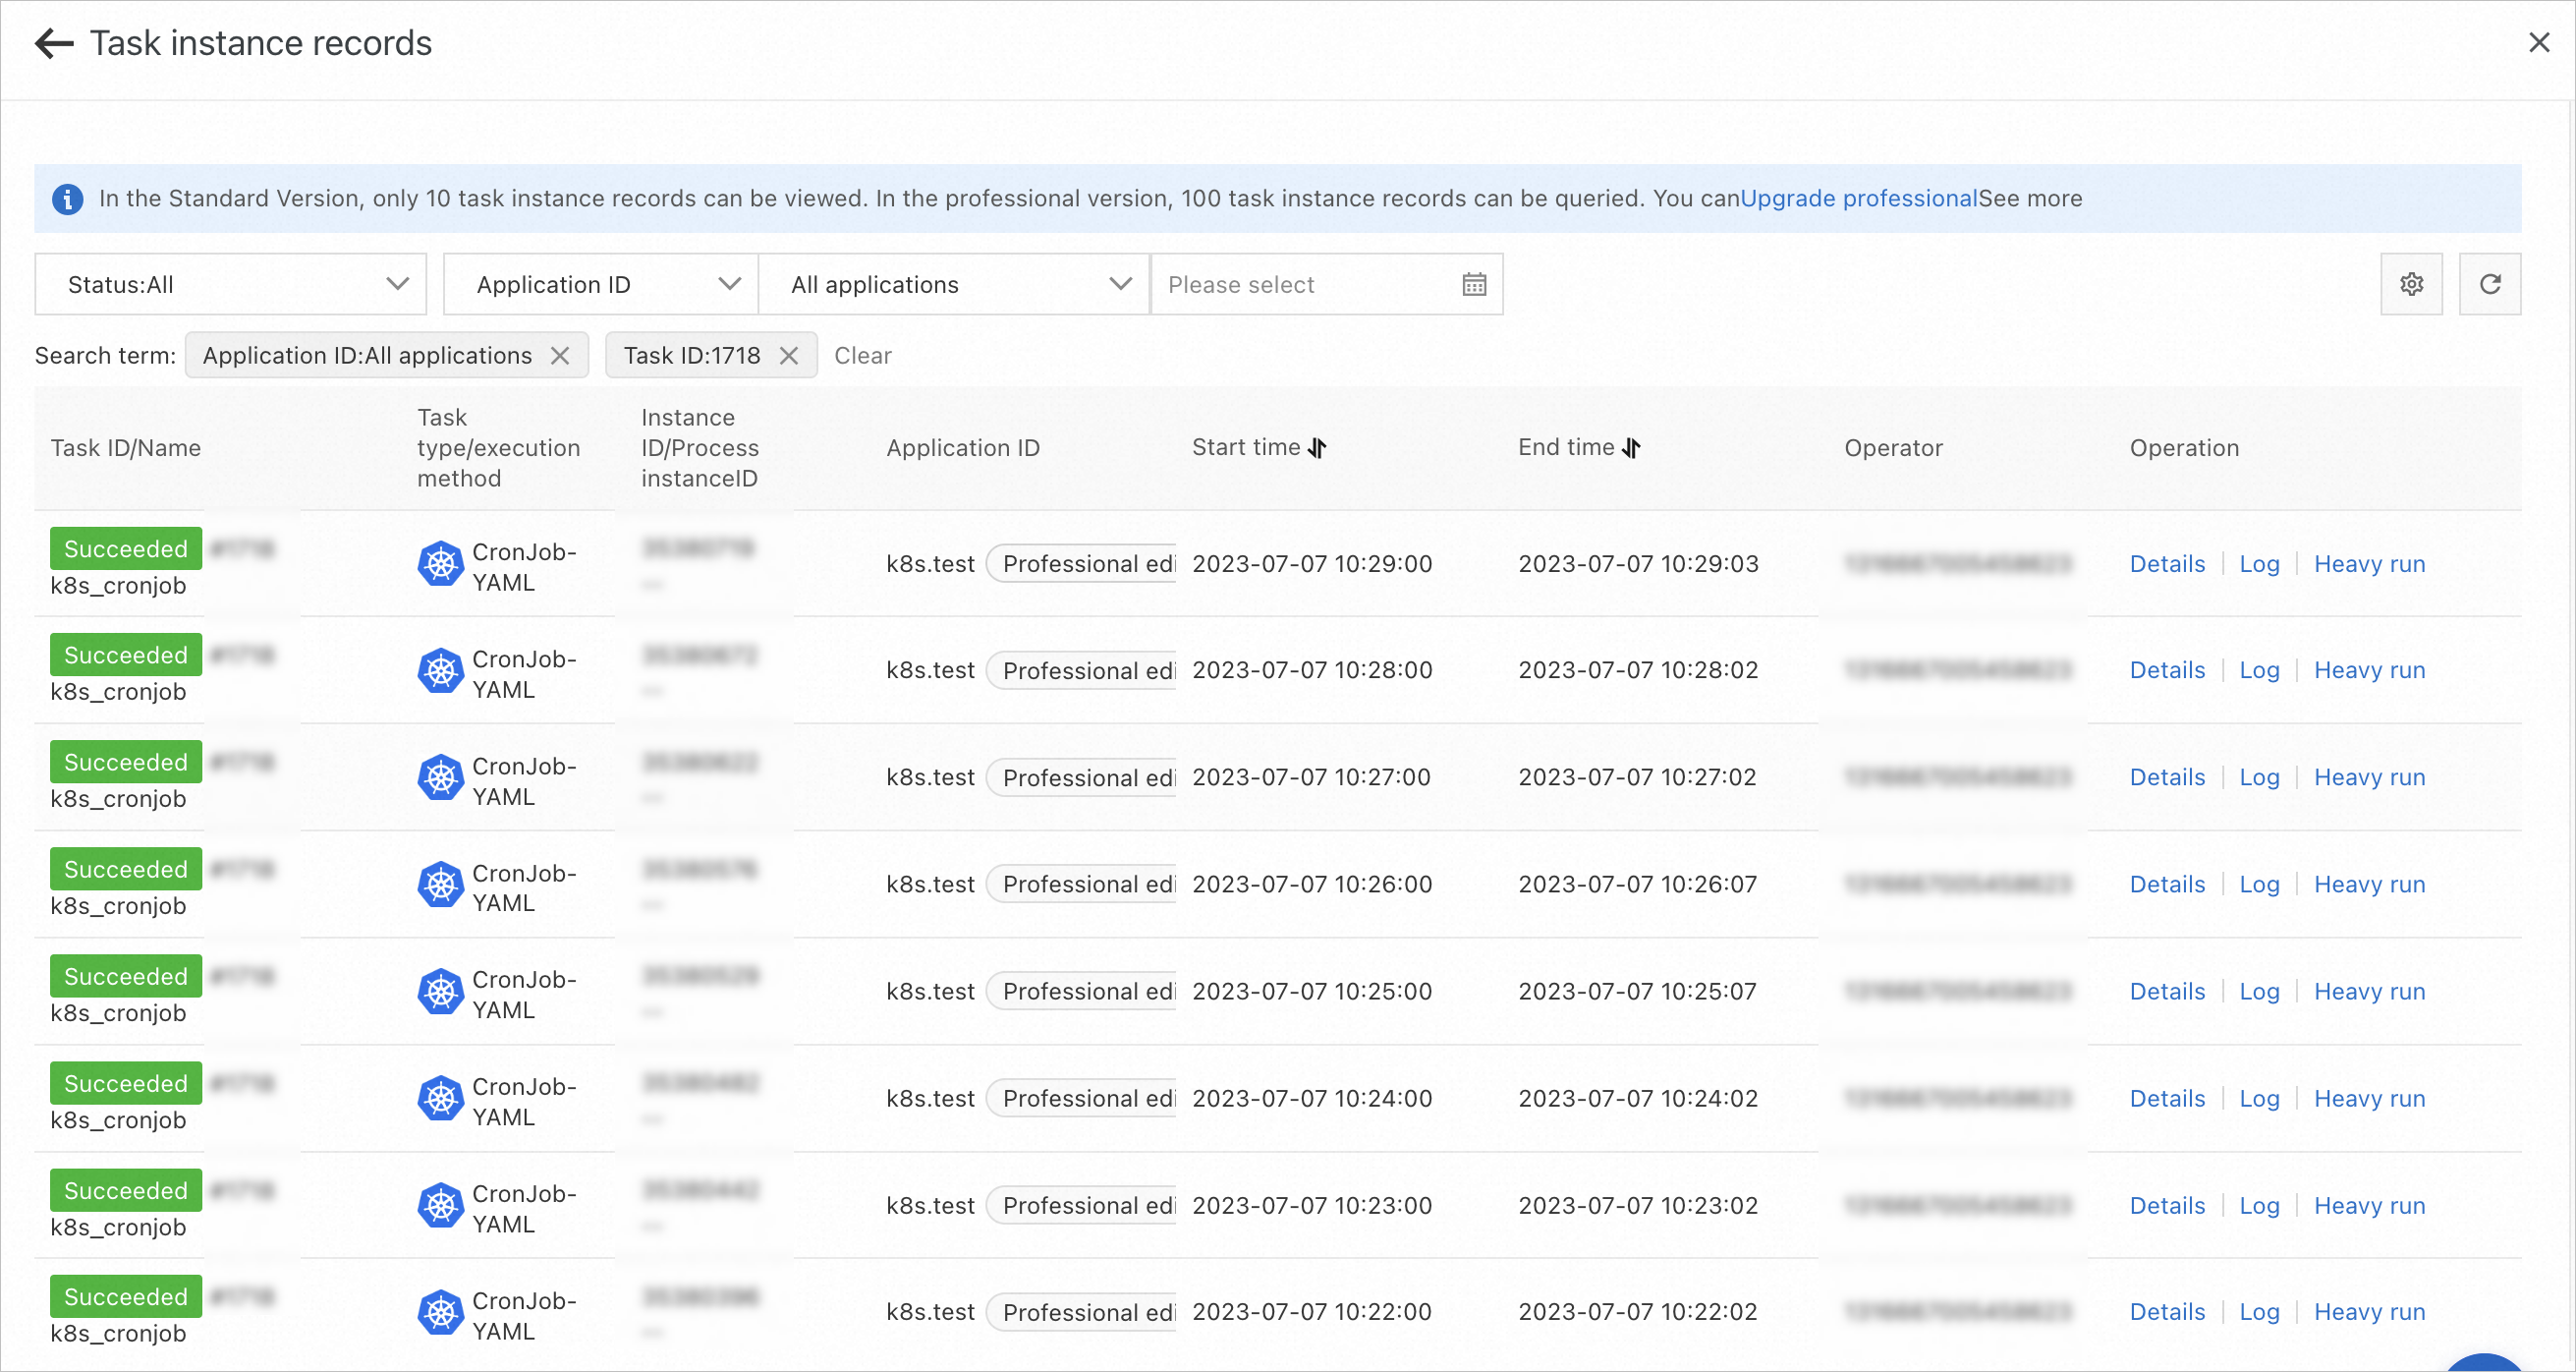
Click Run Once. On the Task Instance Records page, you can see that the pod has started successfully.
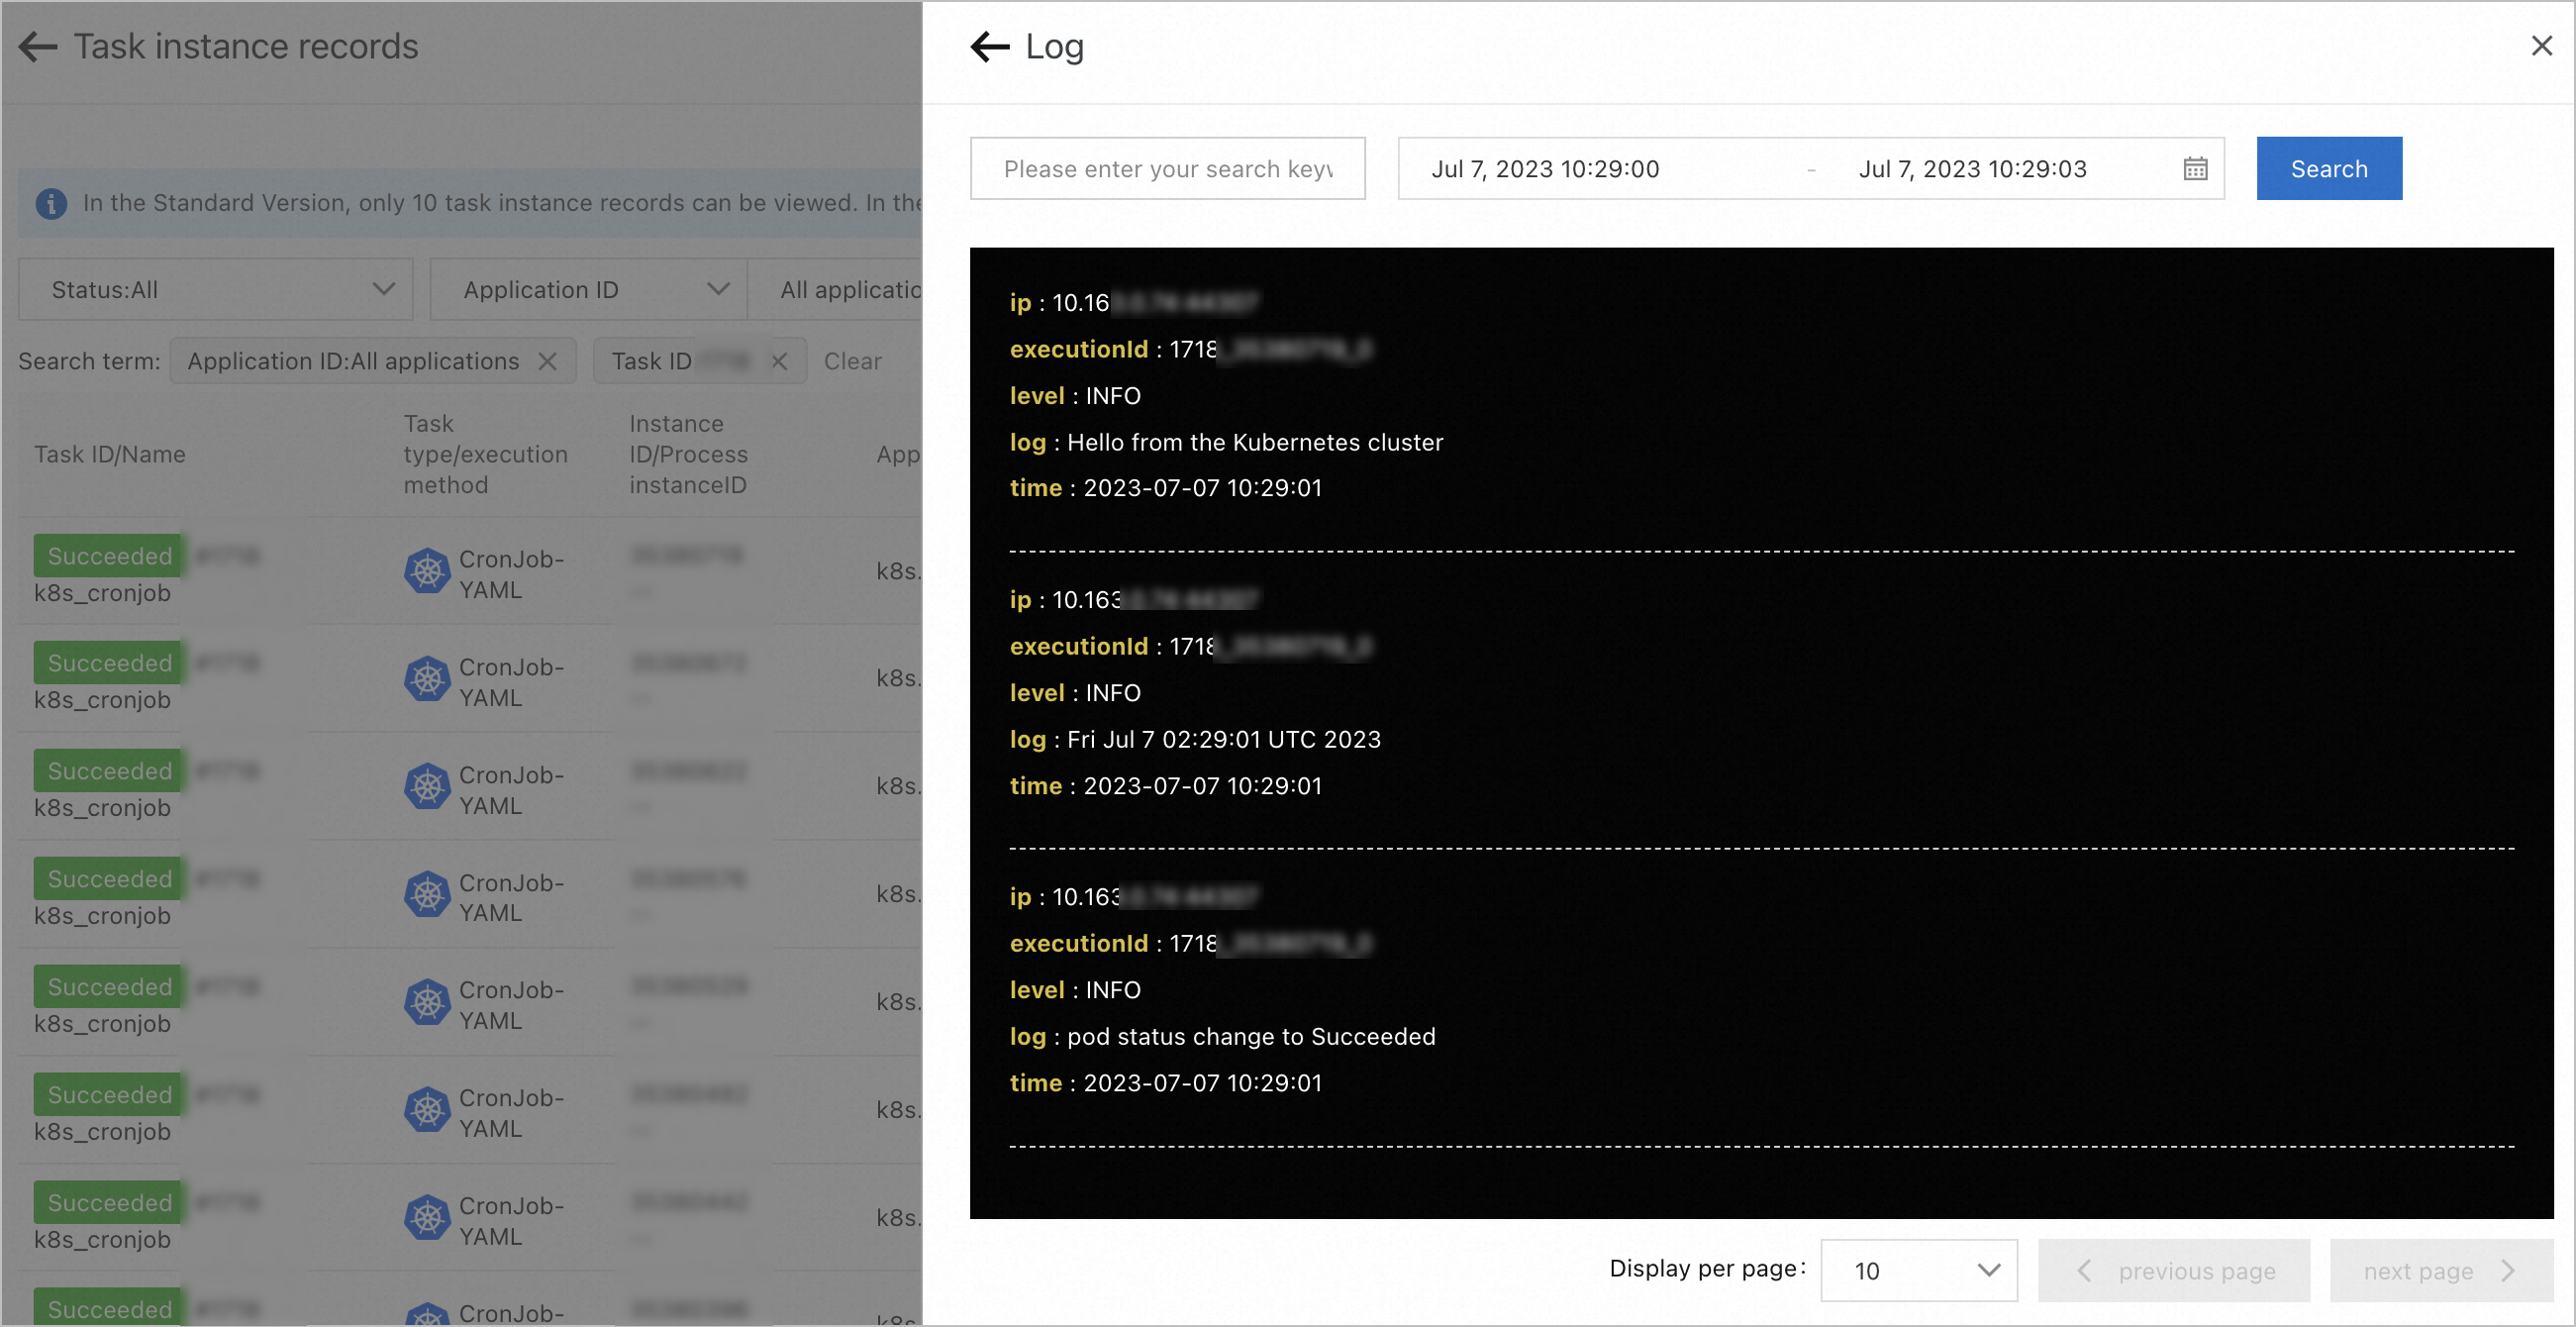
On the Task Management page in the SchedulerX console, you can query the execution history and view the pod logs.
Pod-YAML
You can also run native Kubernetes pods using SchedulerX. Create a Kubernetes task on the Task Management page and set Resource Type to Pod-YAML.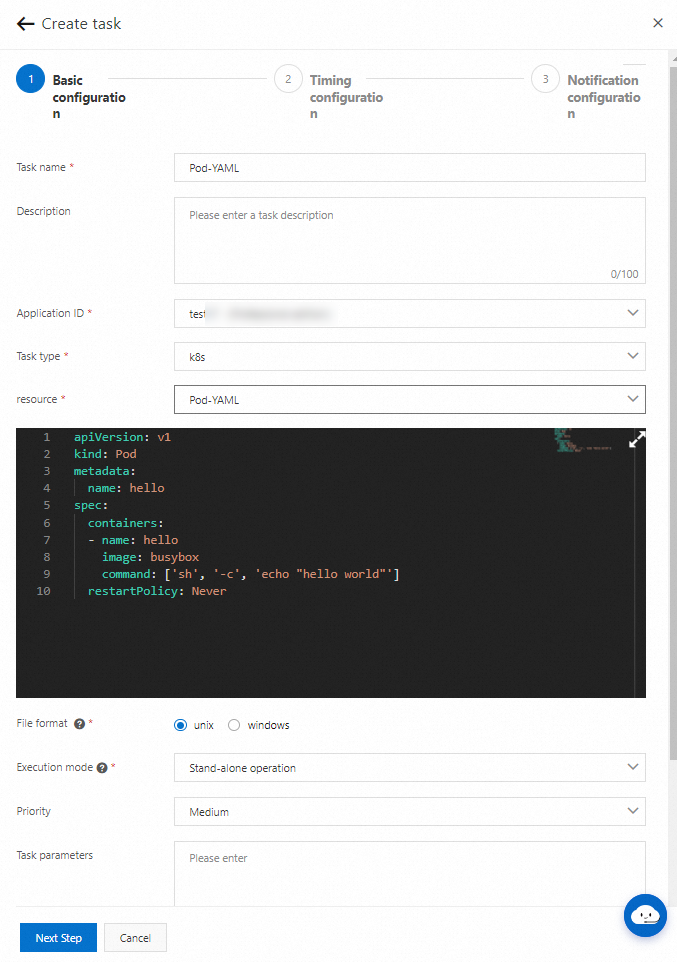
Click Run Once. You can see that the pod has started successfully in the Kubernetes cluster.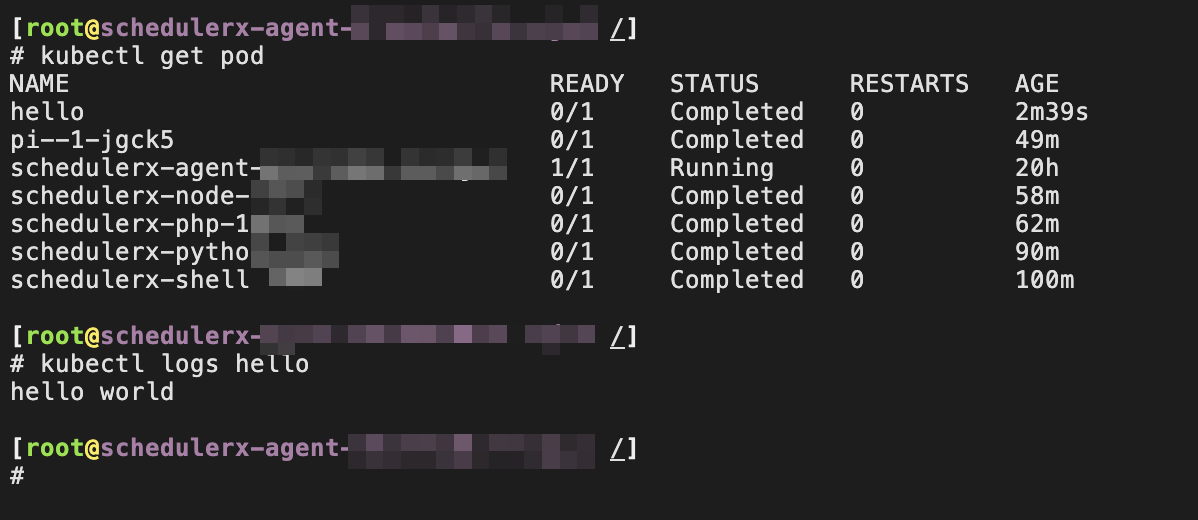
On the Task Management page in the SchedulerX console, you can query the execution history and view the pod logs.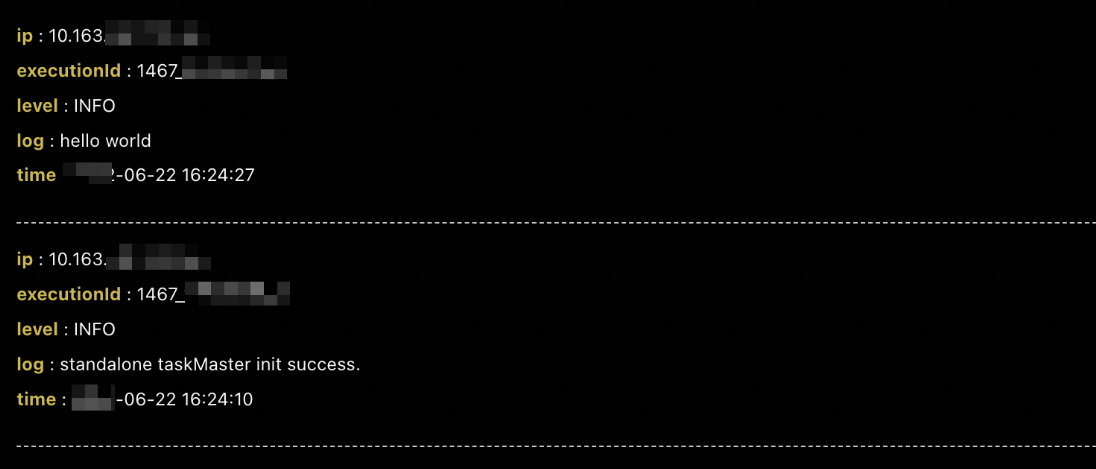
Note the following when you run Kubernetes pods using SchedulerX.
Avoid running pods with long lifecycles, such as web applications that never terminate after they start.
Set the restart policy to Never. Otherwise, the pod will restart continuously.