To analyze data across various tables, you can use a JOIN operation to combine them and create a comprehensive model for data analysis.
Prerequisites
You have created a dataset. For more information, see Create and Manage Datasets.
Background information
Quick BI supports LEFT JOIN, INNER JOIN, and FULL JOIN. This example demonstrates the three join methods using a student table and a course score table to build a model. 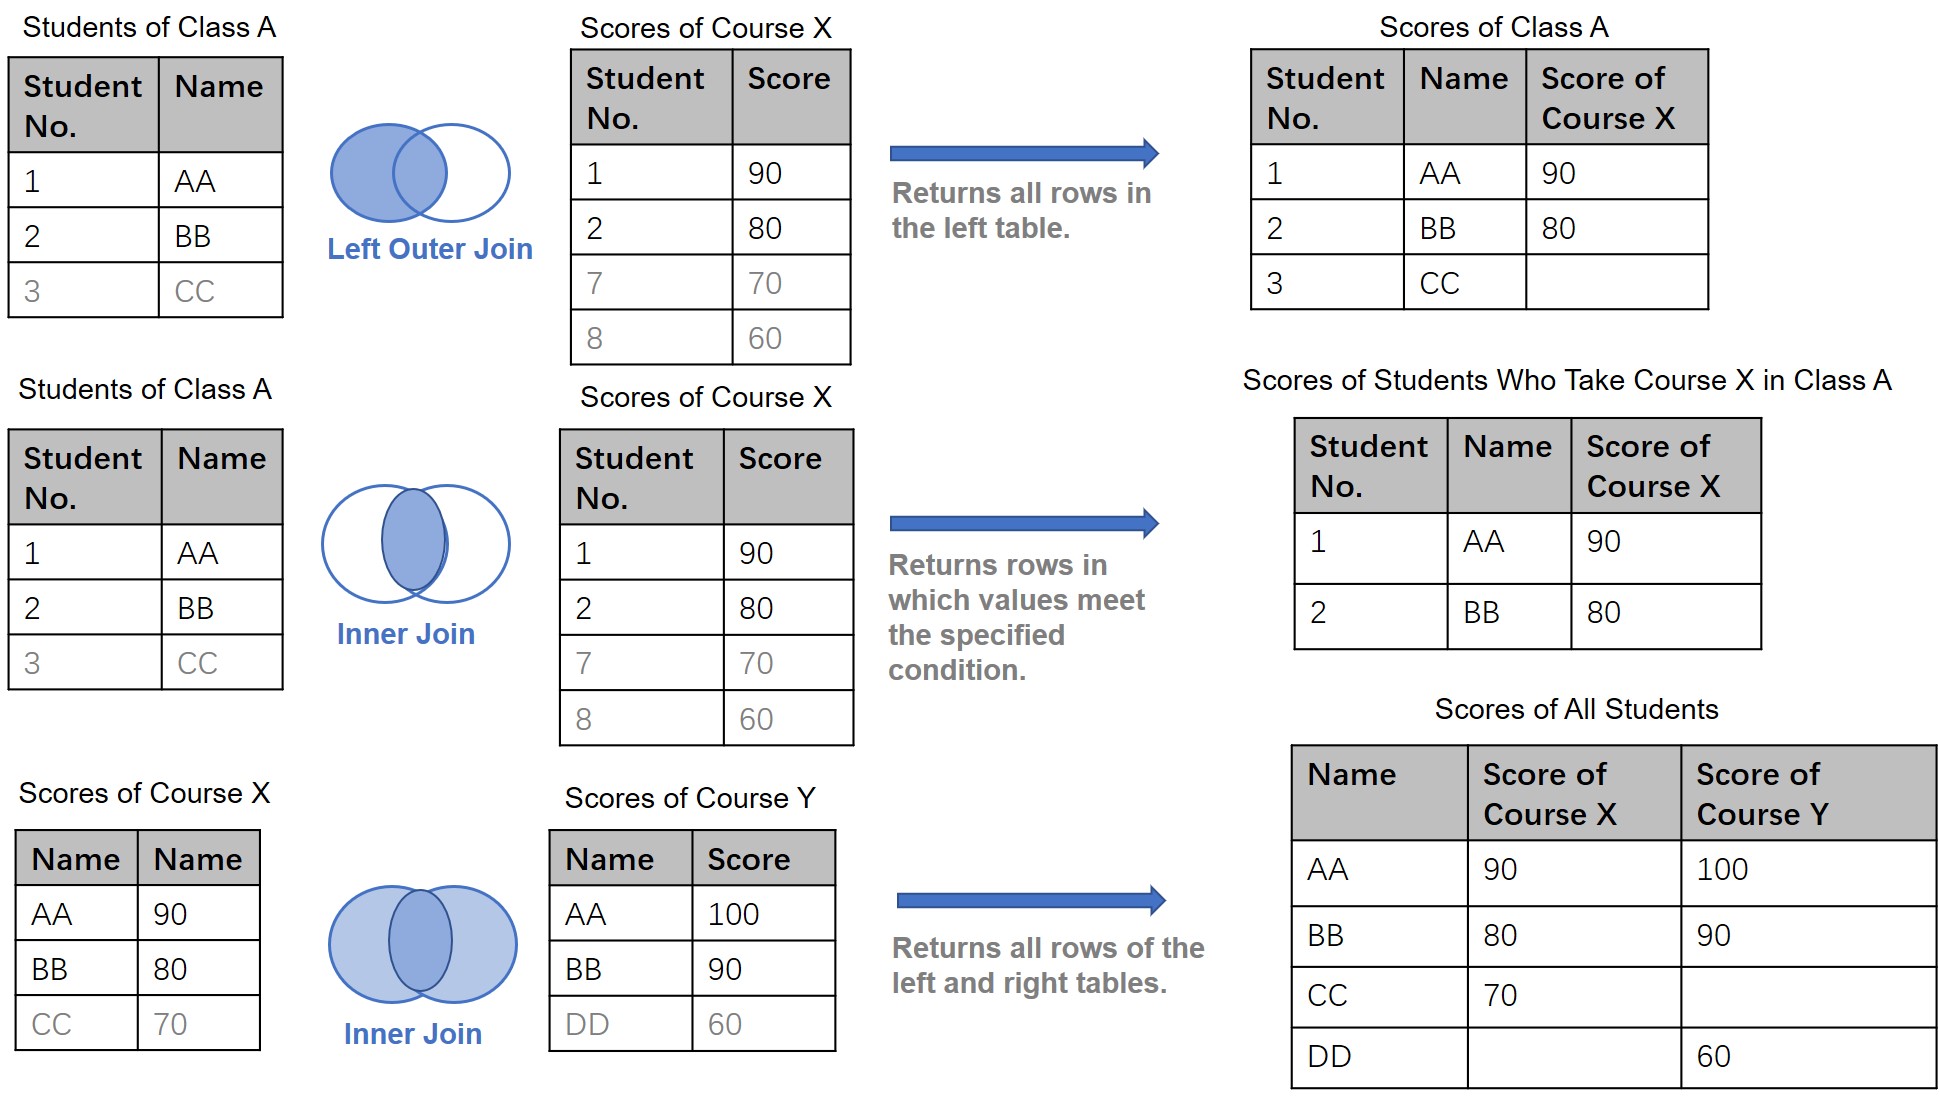
The figure above illustrates the principles of the JOIN operations. The original columns of the joined tables are preserved.
Limits
MySQL data sources do not support Full Outer Join operations.
A maximum of five layers can be set for associated tables.
Procedure
Select a data source.
Select or create the tables to associate.
You can associate a table with another table, a table with one created by SQL code, or a table created by SQL code with another similarly created table.
NoteFor more information about editing SQL code, see Use Custom SQL Statement to Create a Dataset.
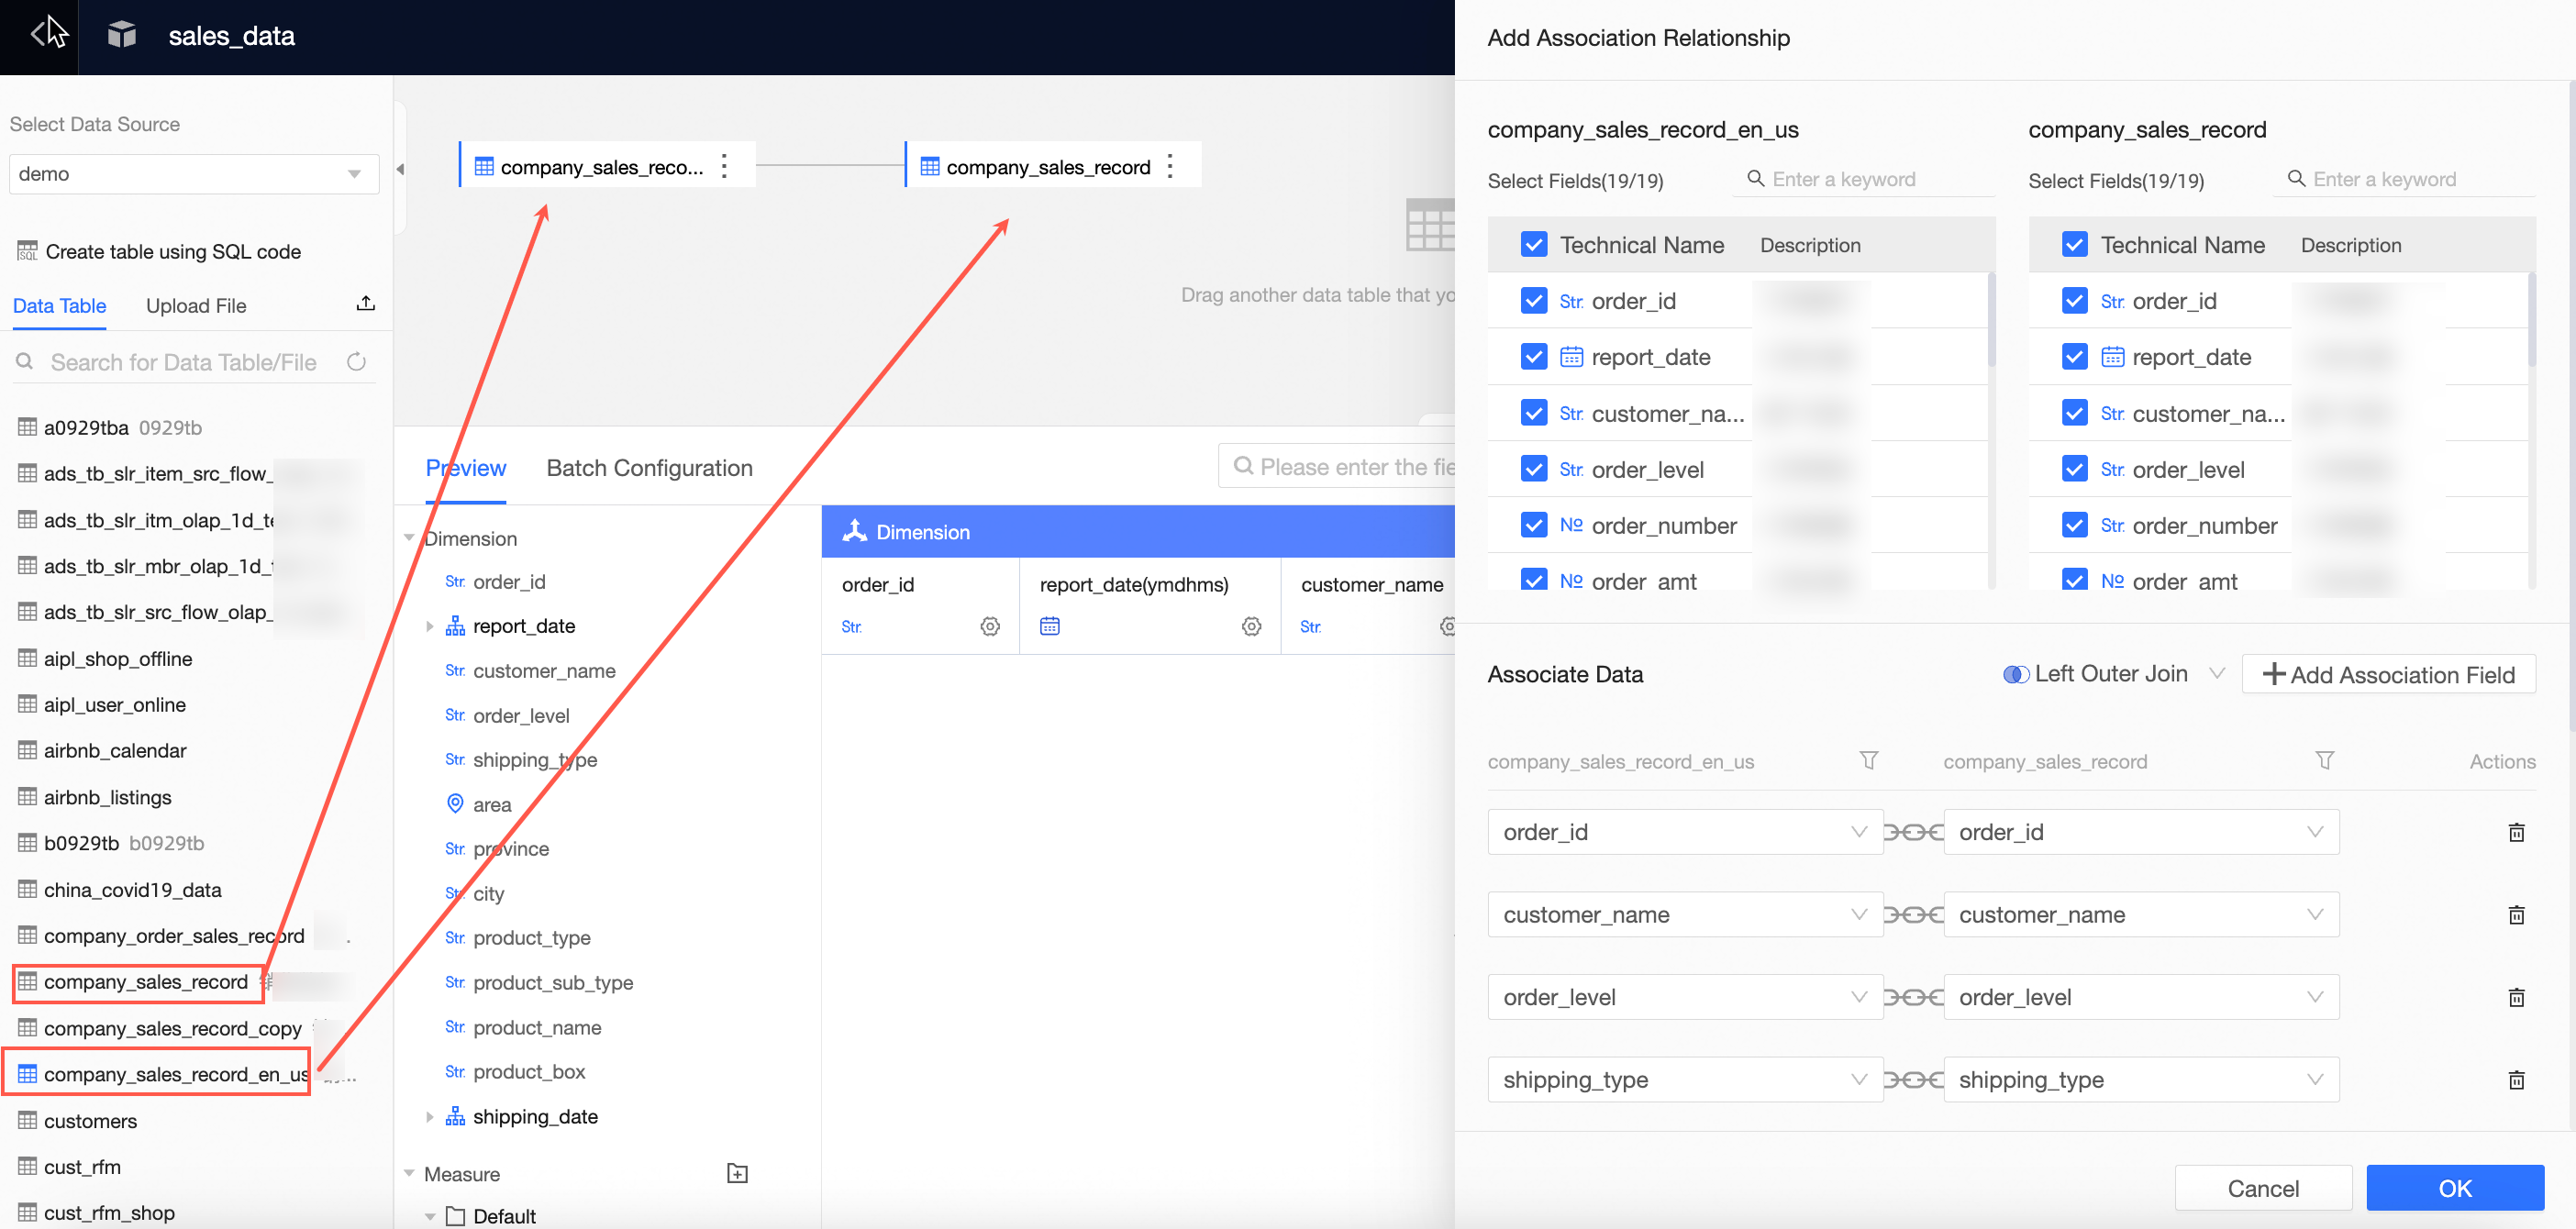
To associate one table with another:
On the dataset edit page, drag tables onto the canvas as shown in the figure below.
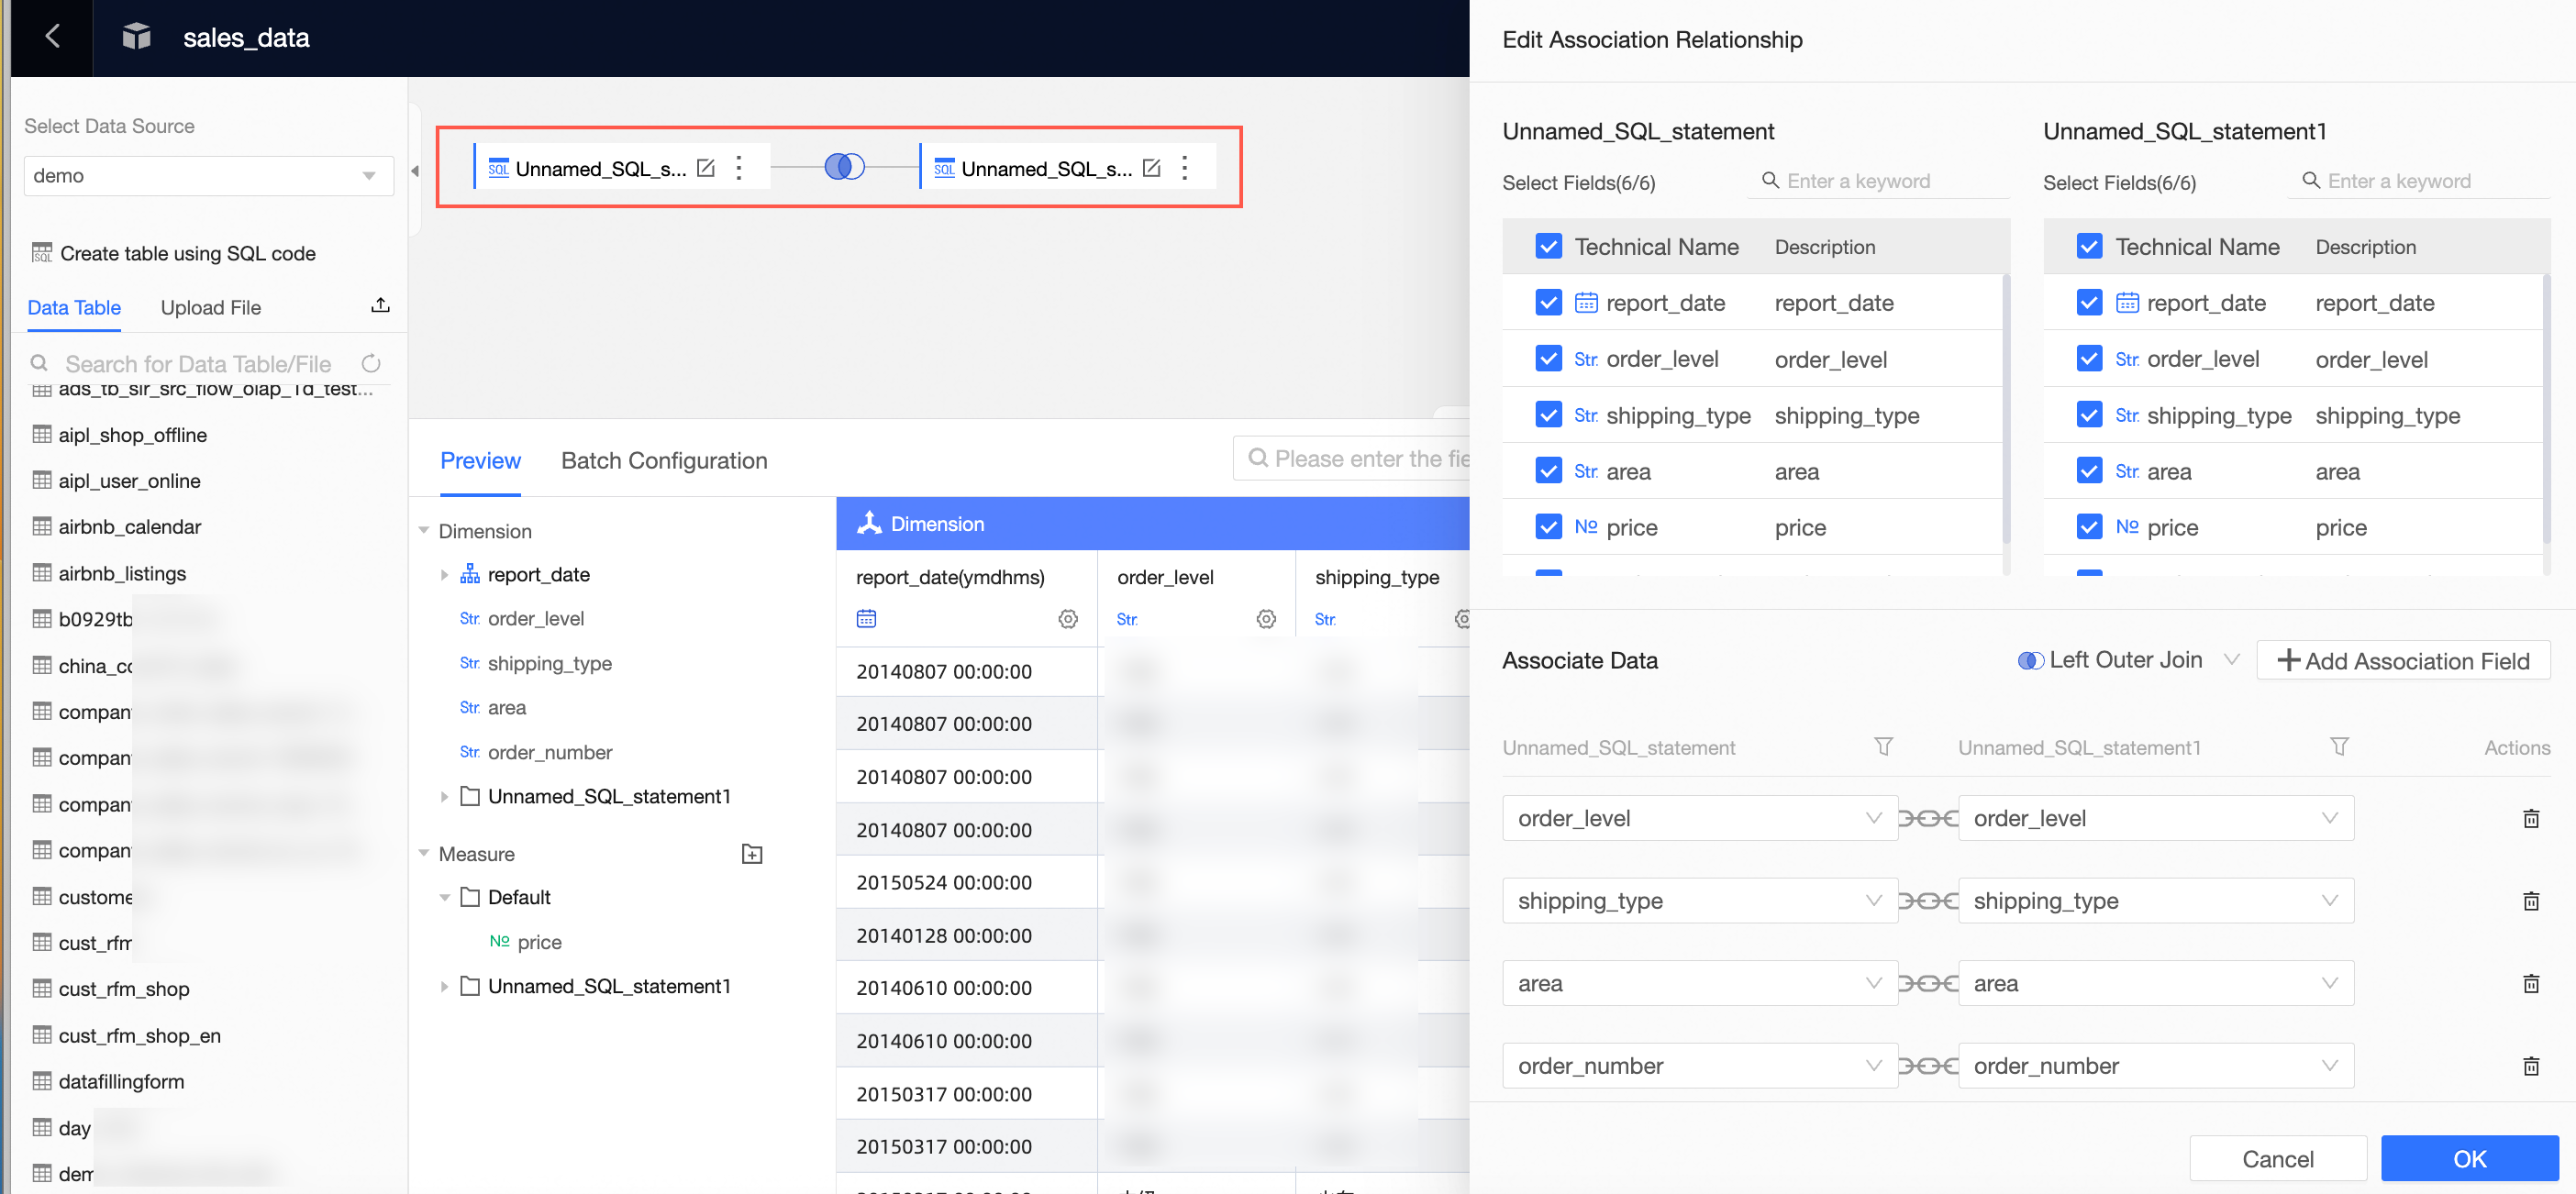
To associate a table with one created by SQL code:
Double-click or drag the table to the canvas.
Double-click or drag the SQL code created table to the canvas.
Enter the SQL on the editing page, click Run, and confirm the edit to complete the table creation.
To associate a table created by SQL code with a table:
Click to create a dataset using SQL code, enter the SQL, click Run, and confirm the edit to complete the table creation.
Double-click or drag the table to the canvas.
To associate a table created by SQL code with another table created by SQL code:
Click to create a dataset using SQL code, enter the SQL, click Run, and confirm the edit to complete the table creation.
Double-click or drag the SQL code created table to the canvas.
Enter the SQL on the editing page, click Run, and confirm the edit to complete the table creation.
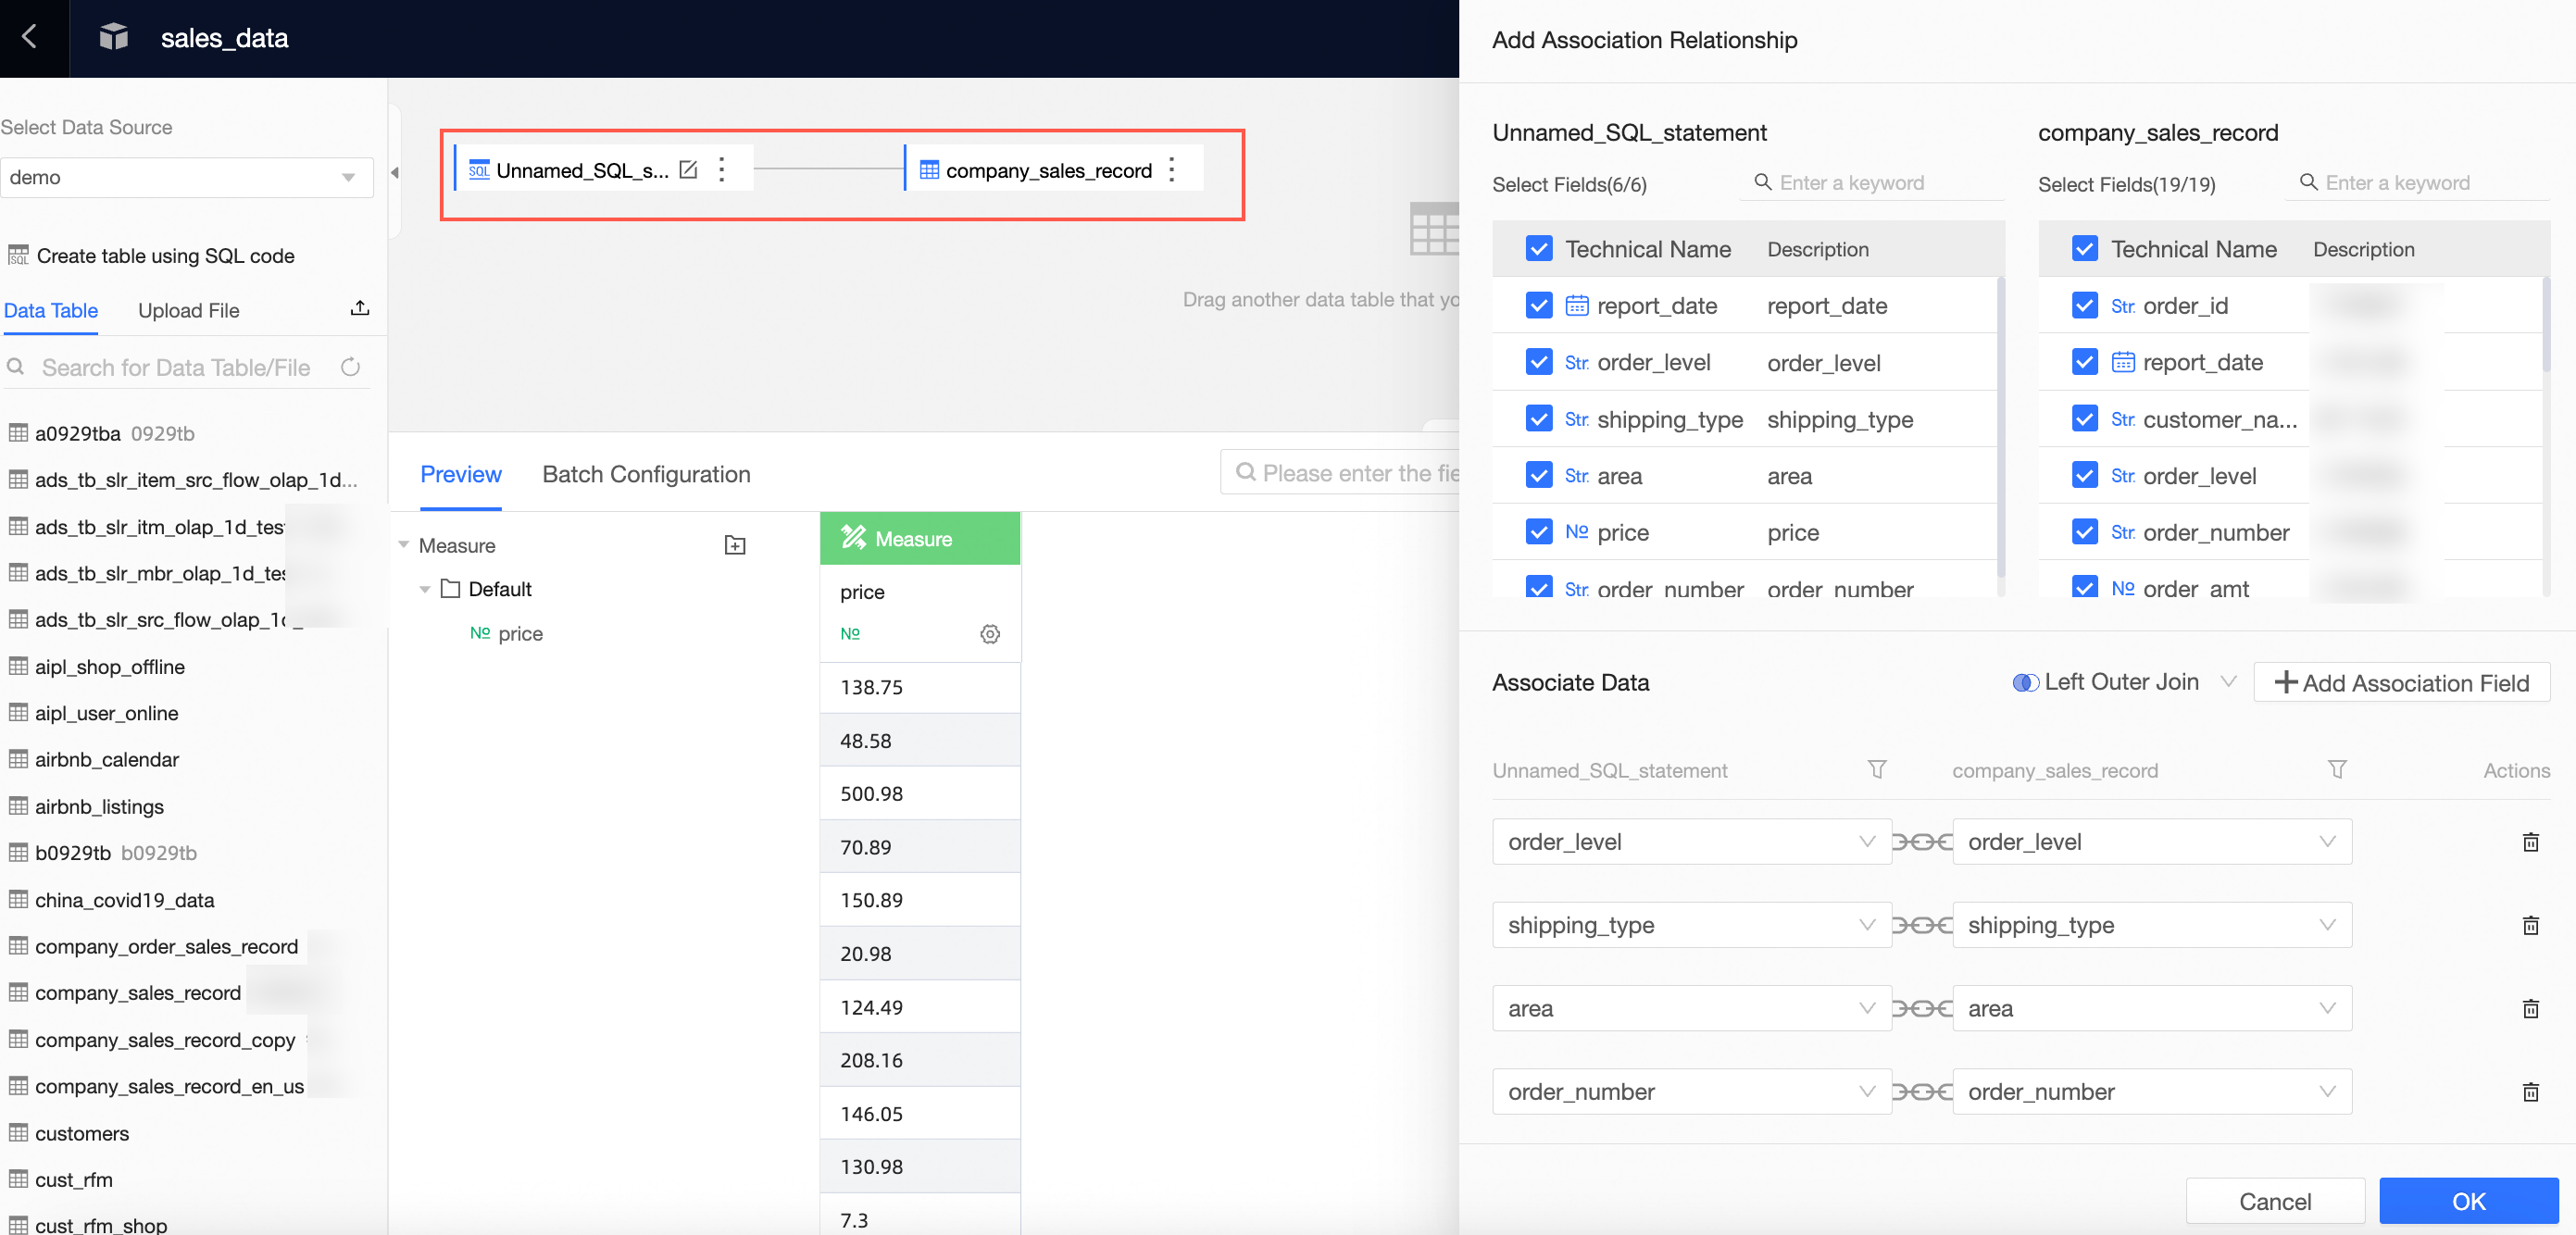
In the Add Association panel, configure data association as shown in the figure below.
 Note
NoteConfigure the association as a LEFT JOIN (
 ), INNER JOIN (
 ), or FULL JOIN (
 ).
).MySQL does not support FULL JOIN (
).
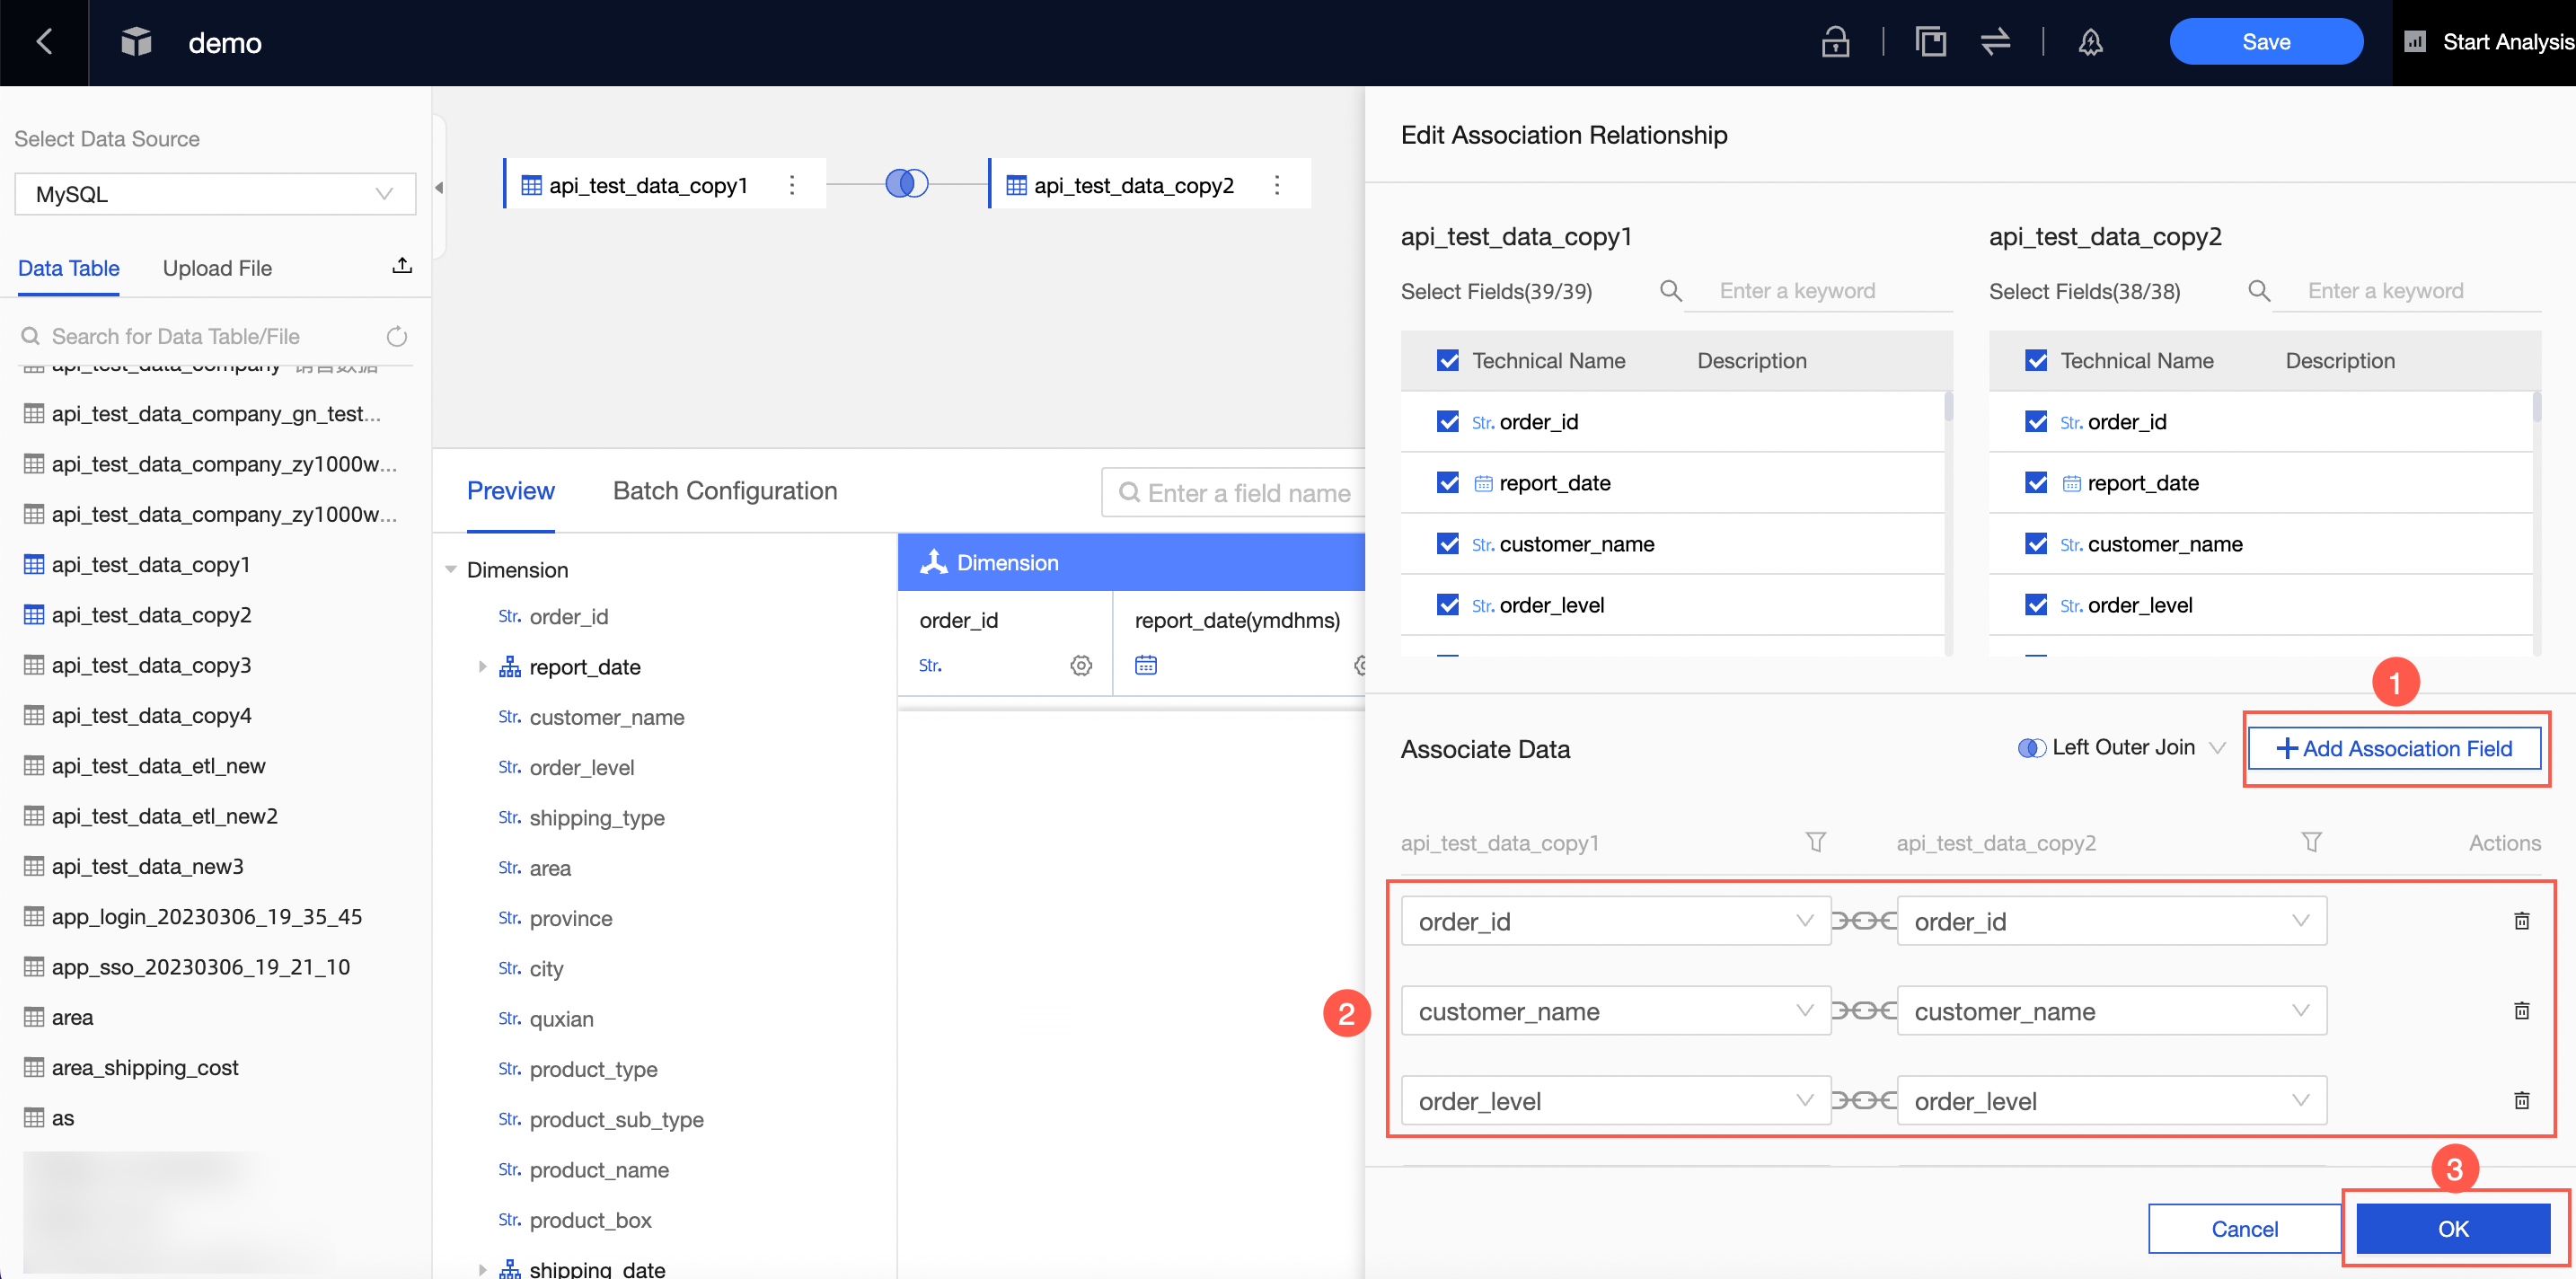
Once the configuration is complete, click the association icon (e.g., ![]() ) on the canvas to view the association details.
) on the canvas to view the association details.
To remove a node, hover the mouse over the table and click the delete icon (![]() ).
).
Only the last node in the model can be deleted.
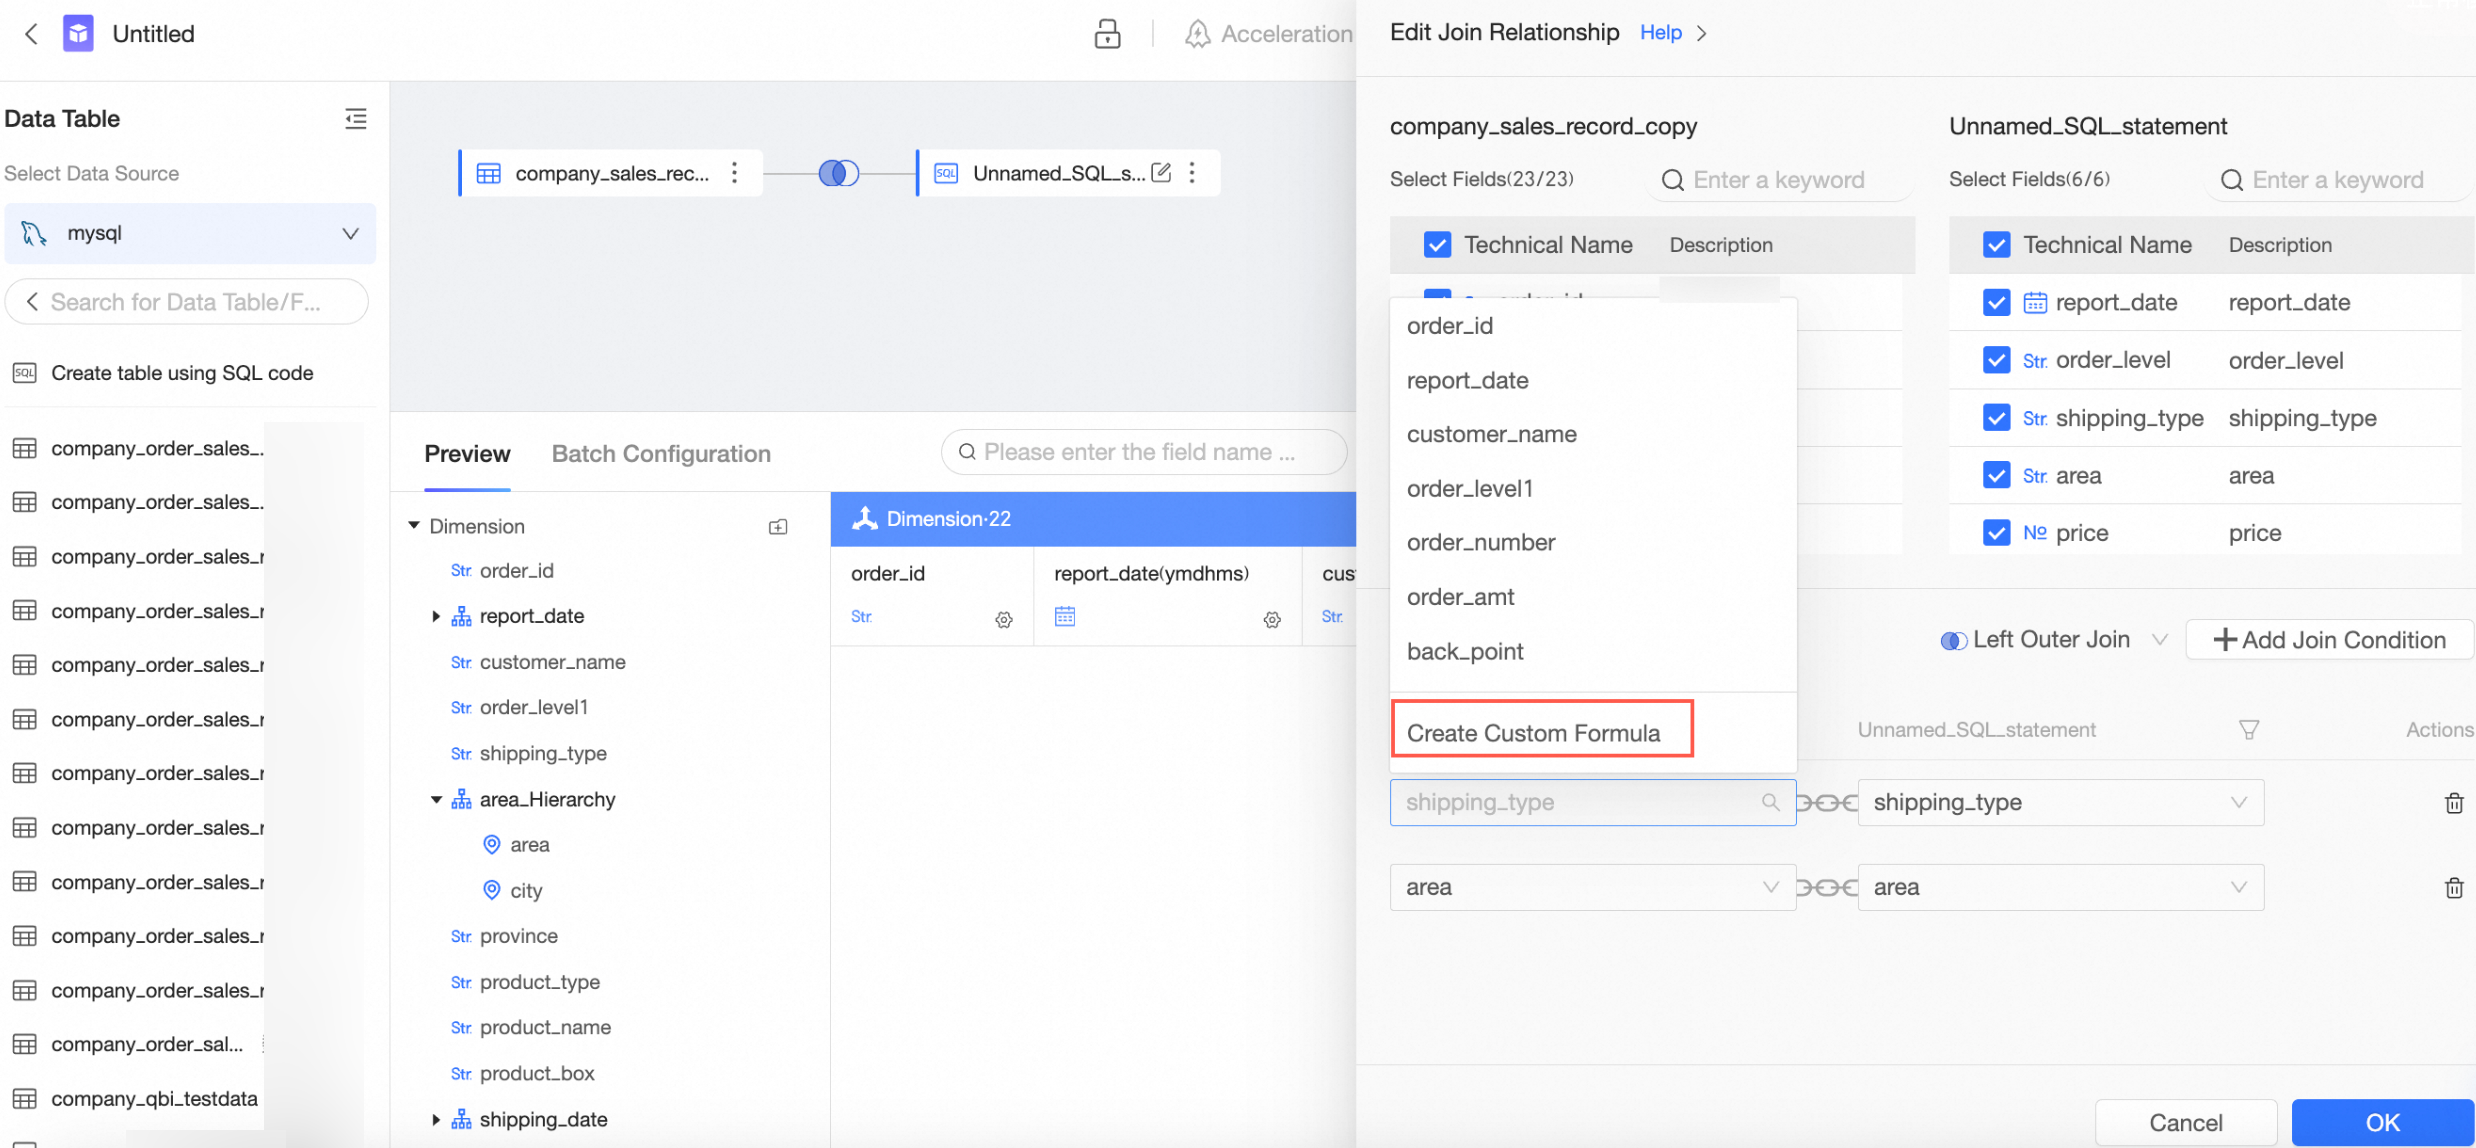
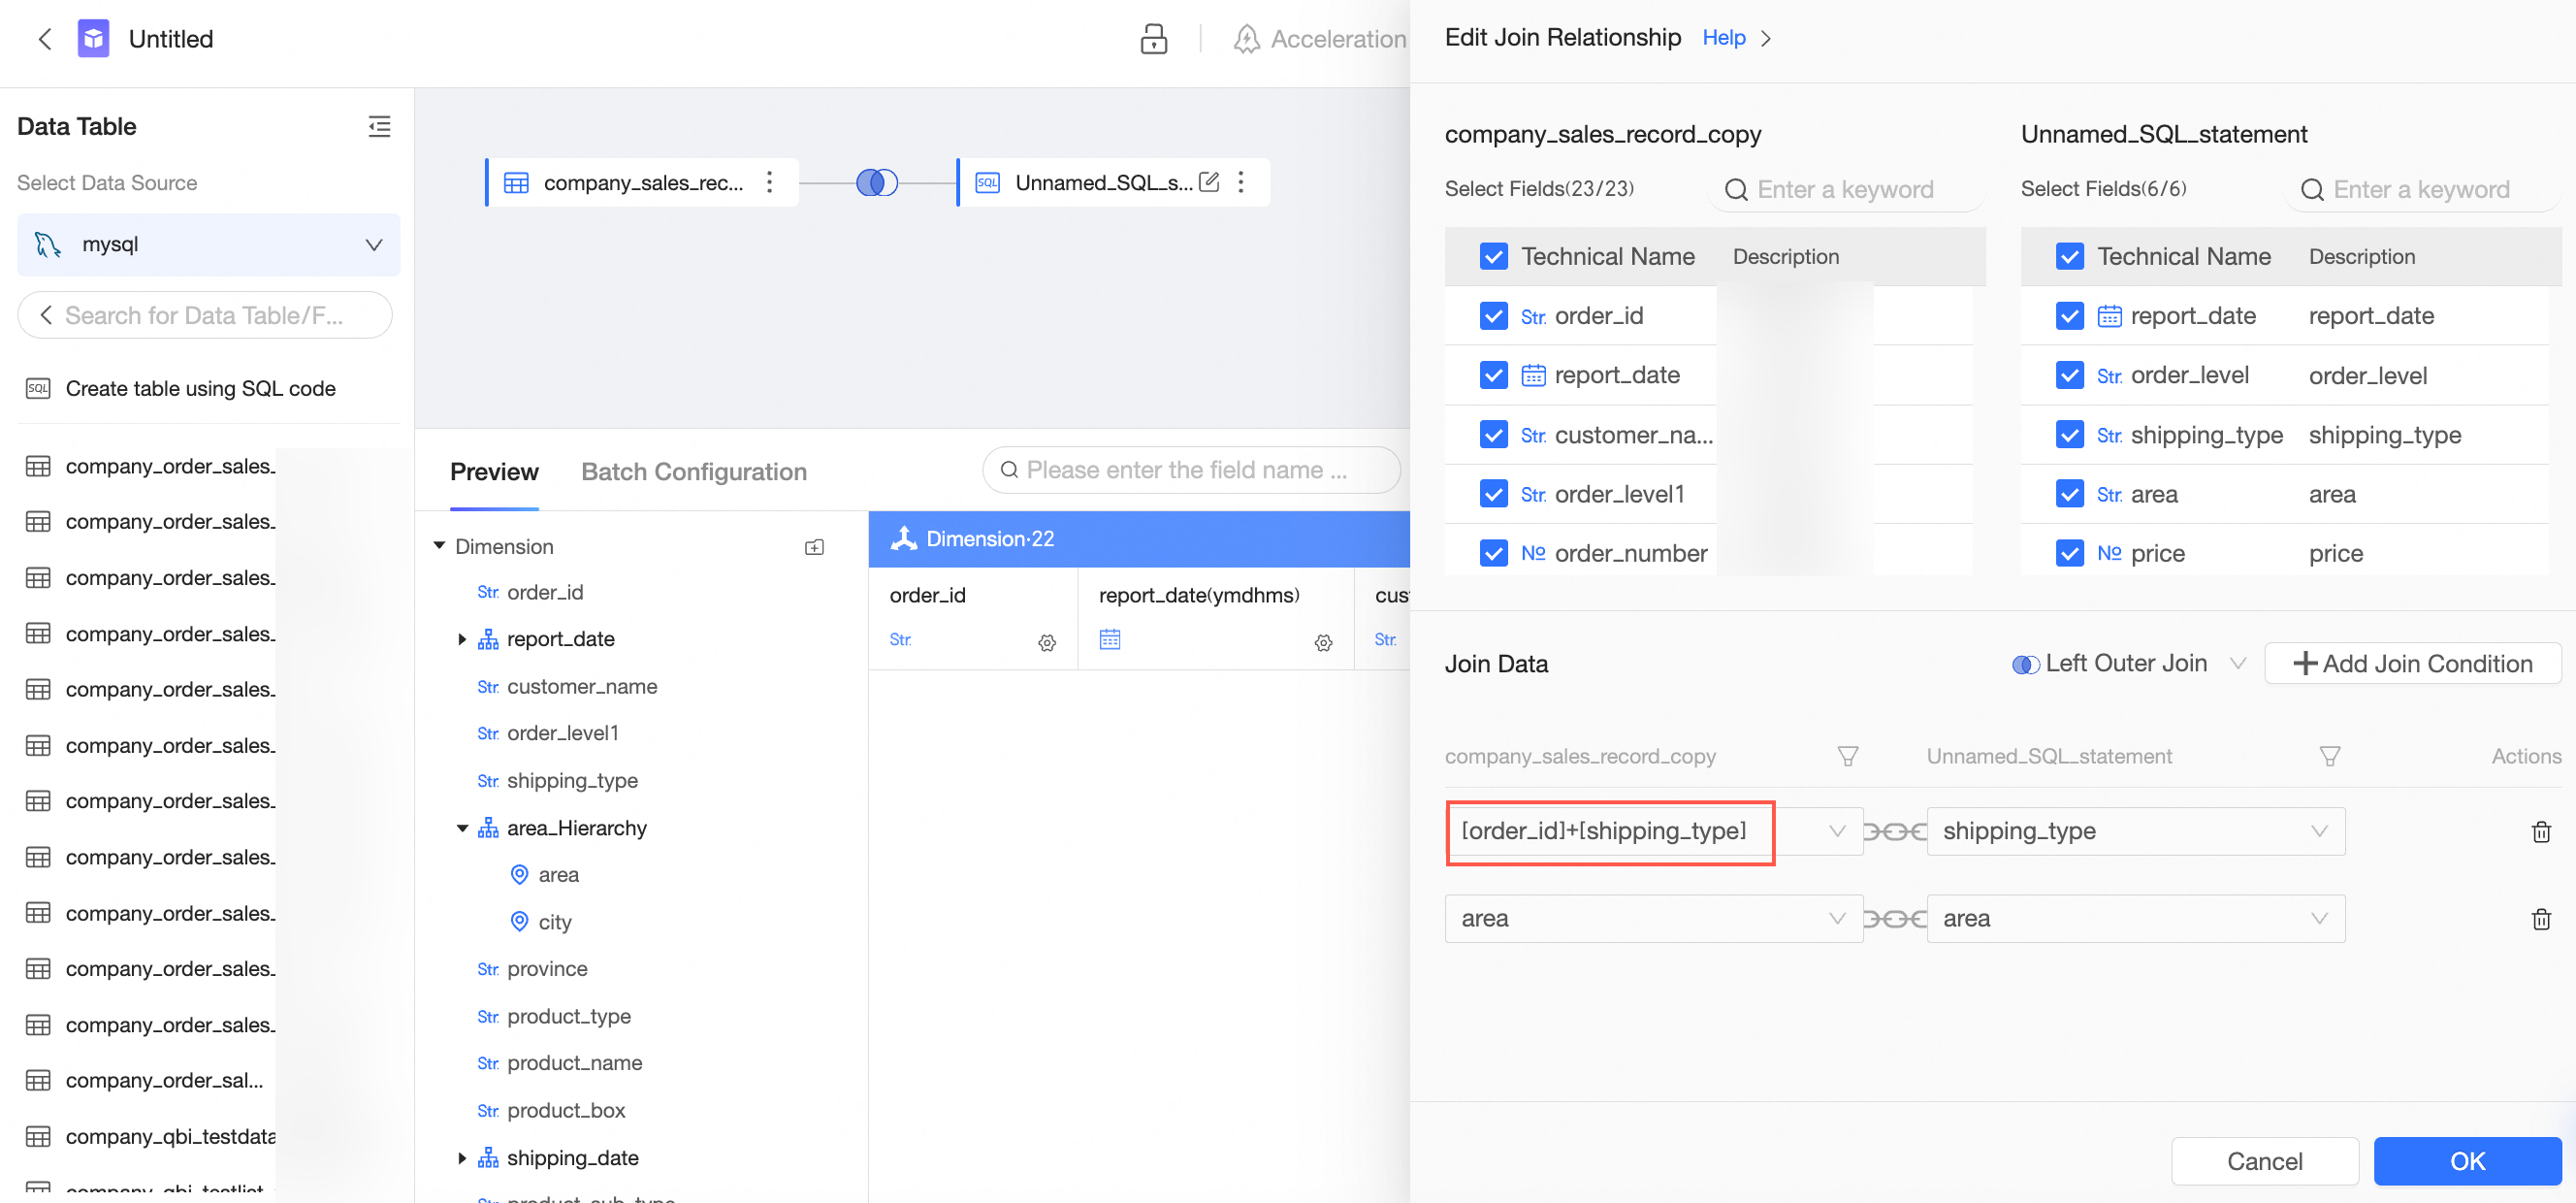
Custom join conditions
Create custom formulas as fields for the join conditions you want to configure.
To associate a field, choose Create Custom Calculation from the drop-down menu.
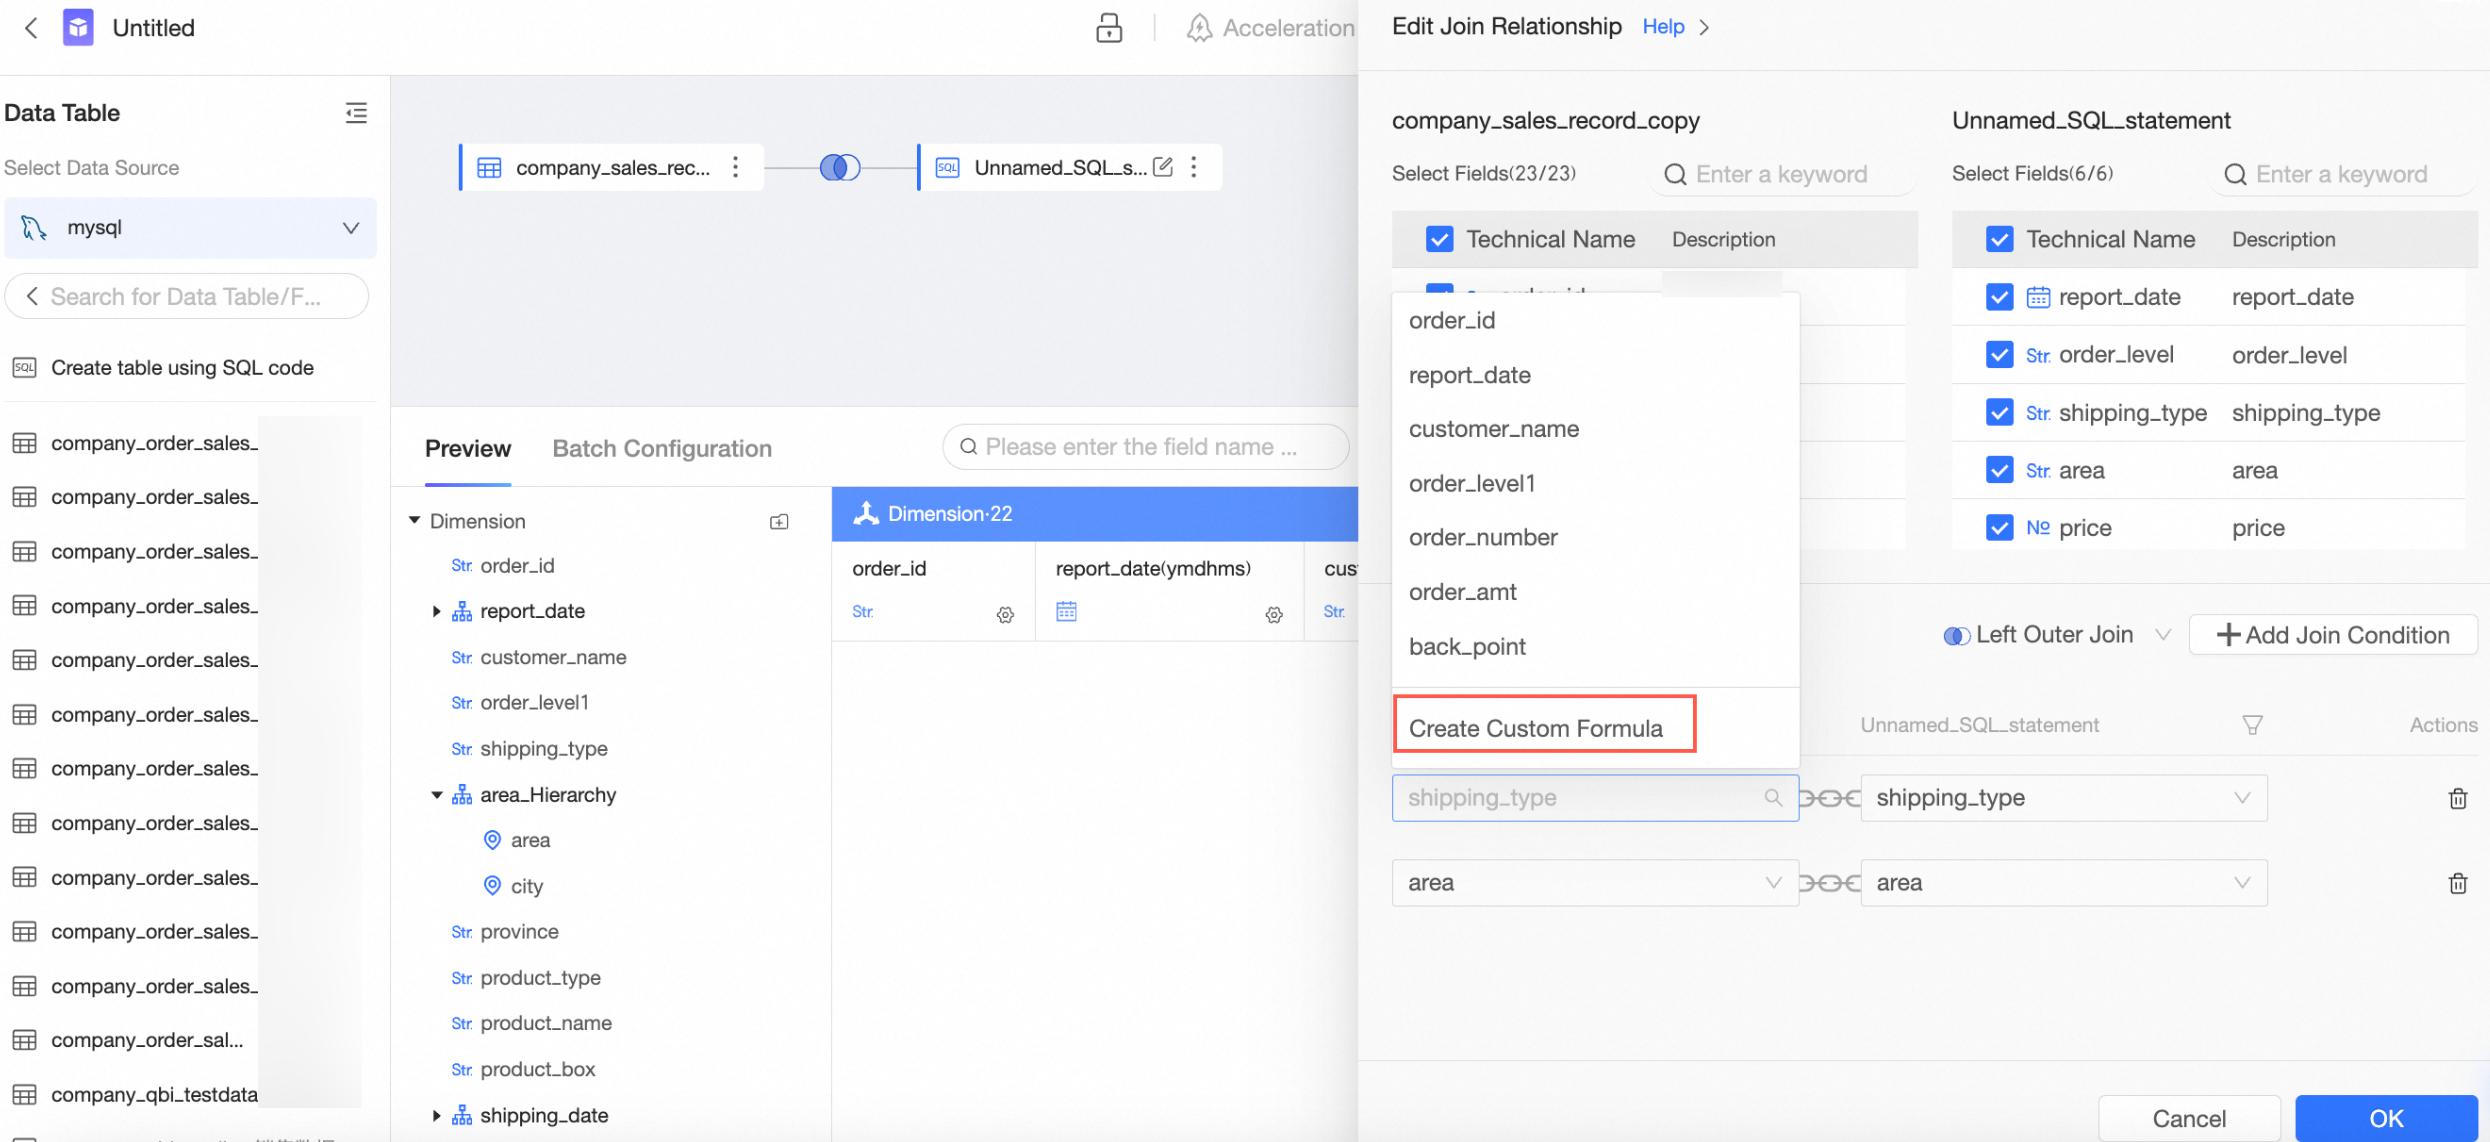
Input the field expression, then click on the Confirm button.
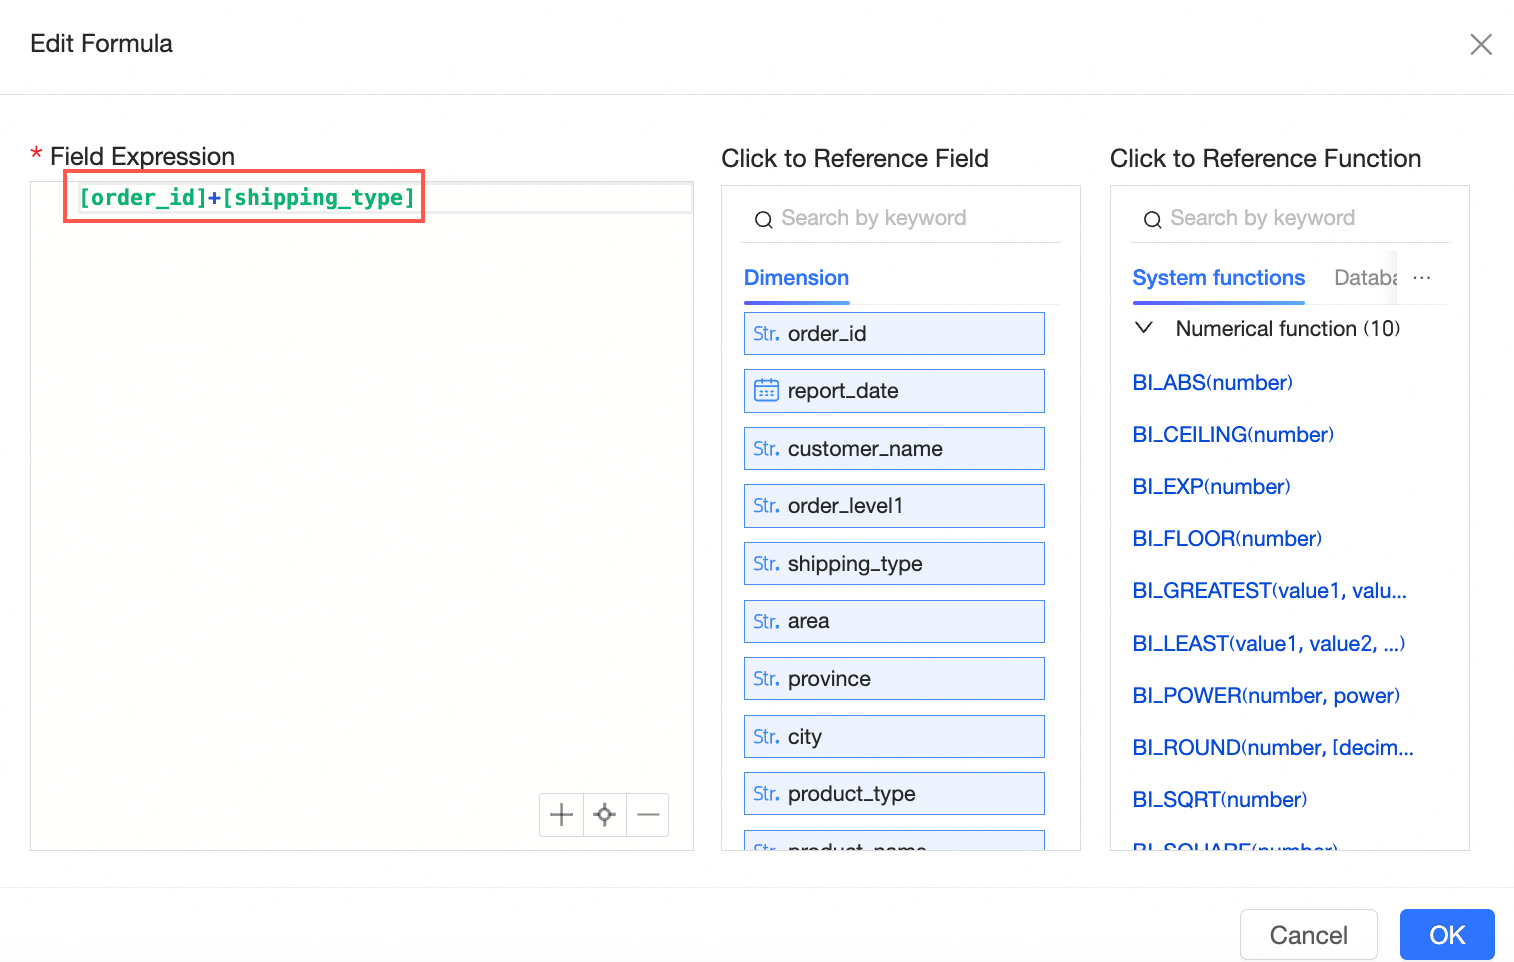
Click "Confirm" to view the new field expression within the associated fields.
You can edit the custom calculation as well.

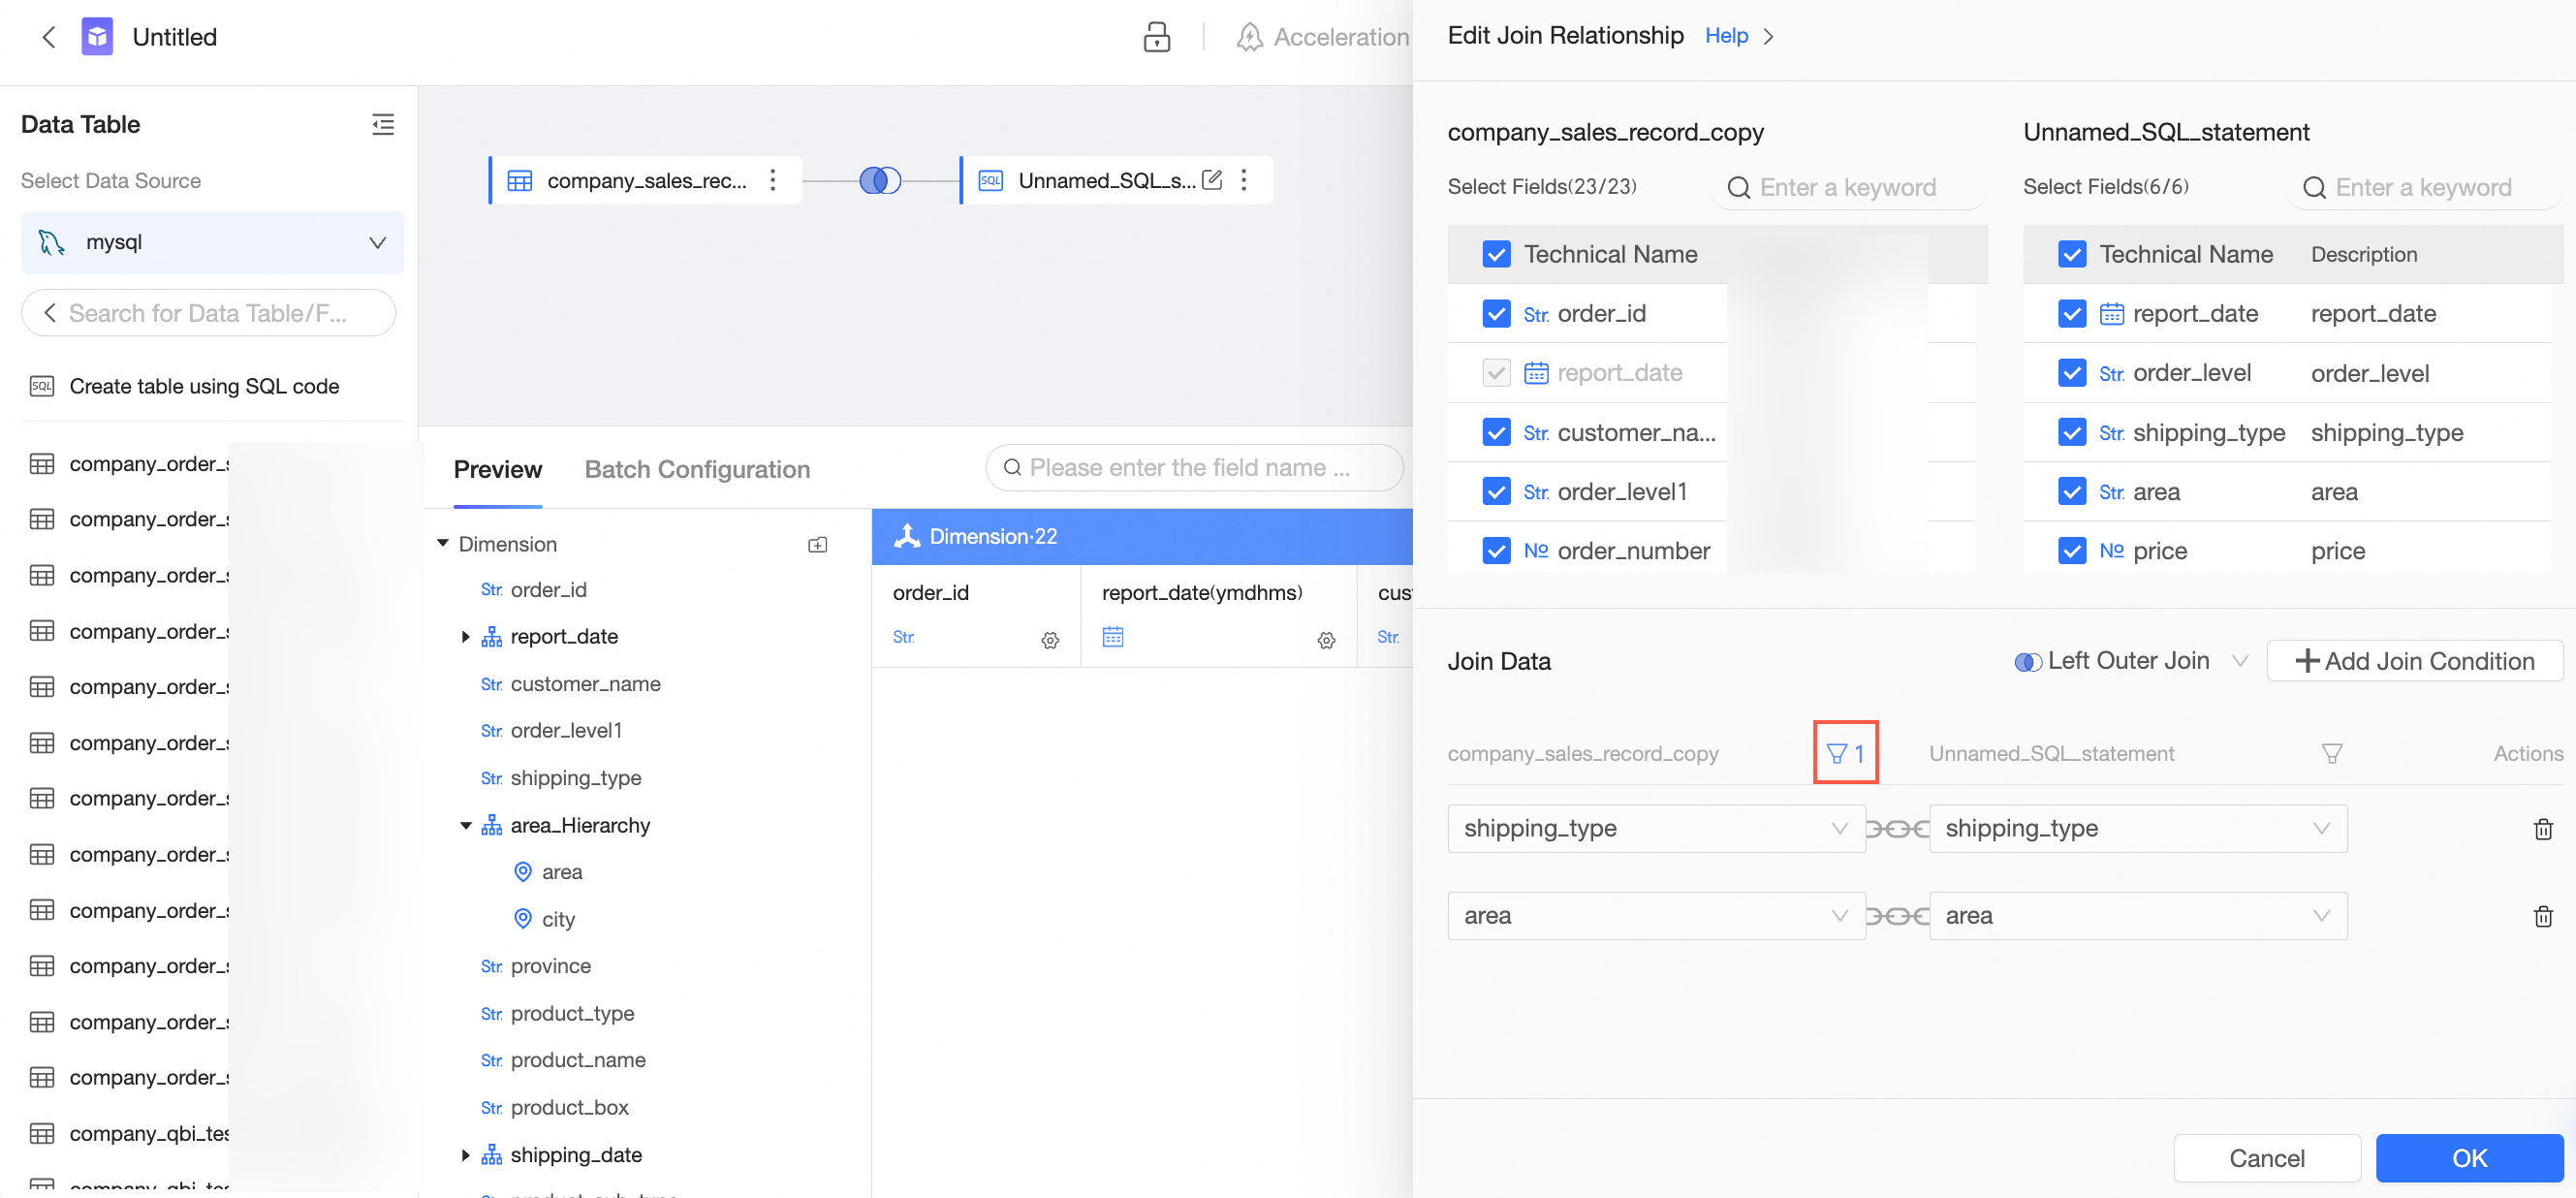
Pre-association filtering
You can establish filter conditions for each table when associating them, with the filtering process occurring prior to the association. 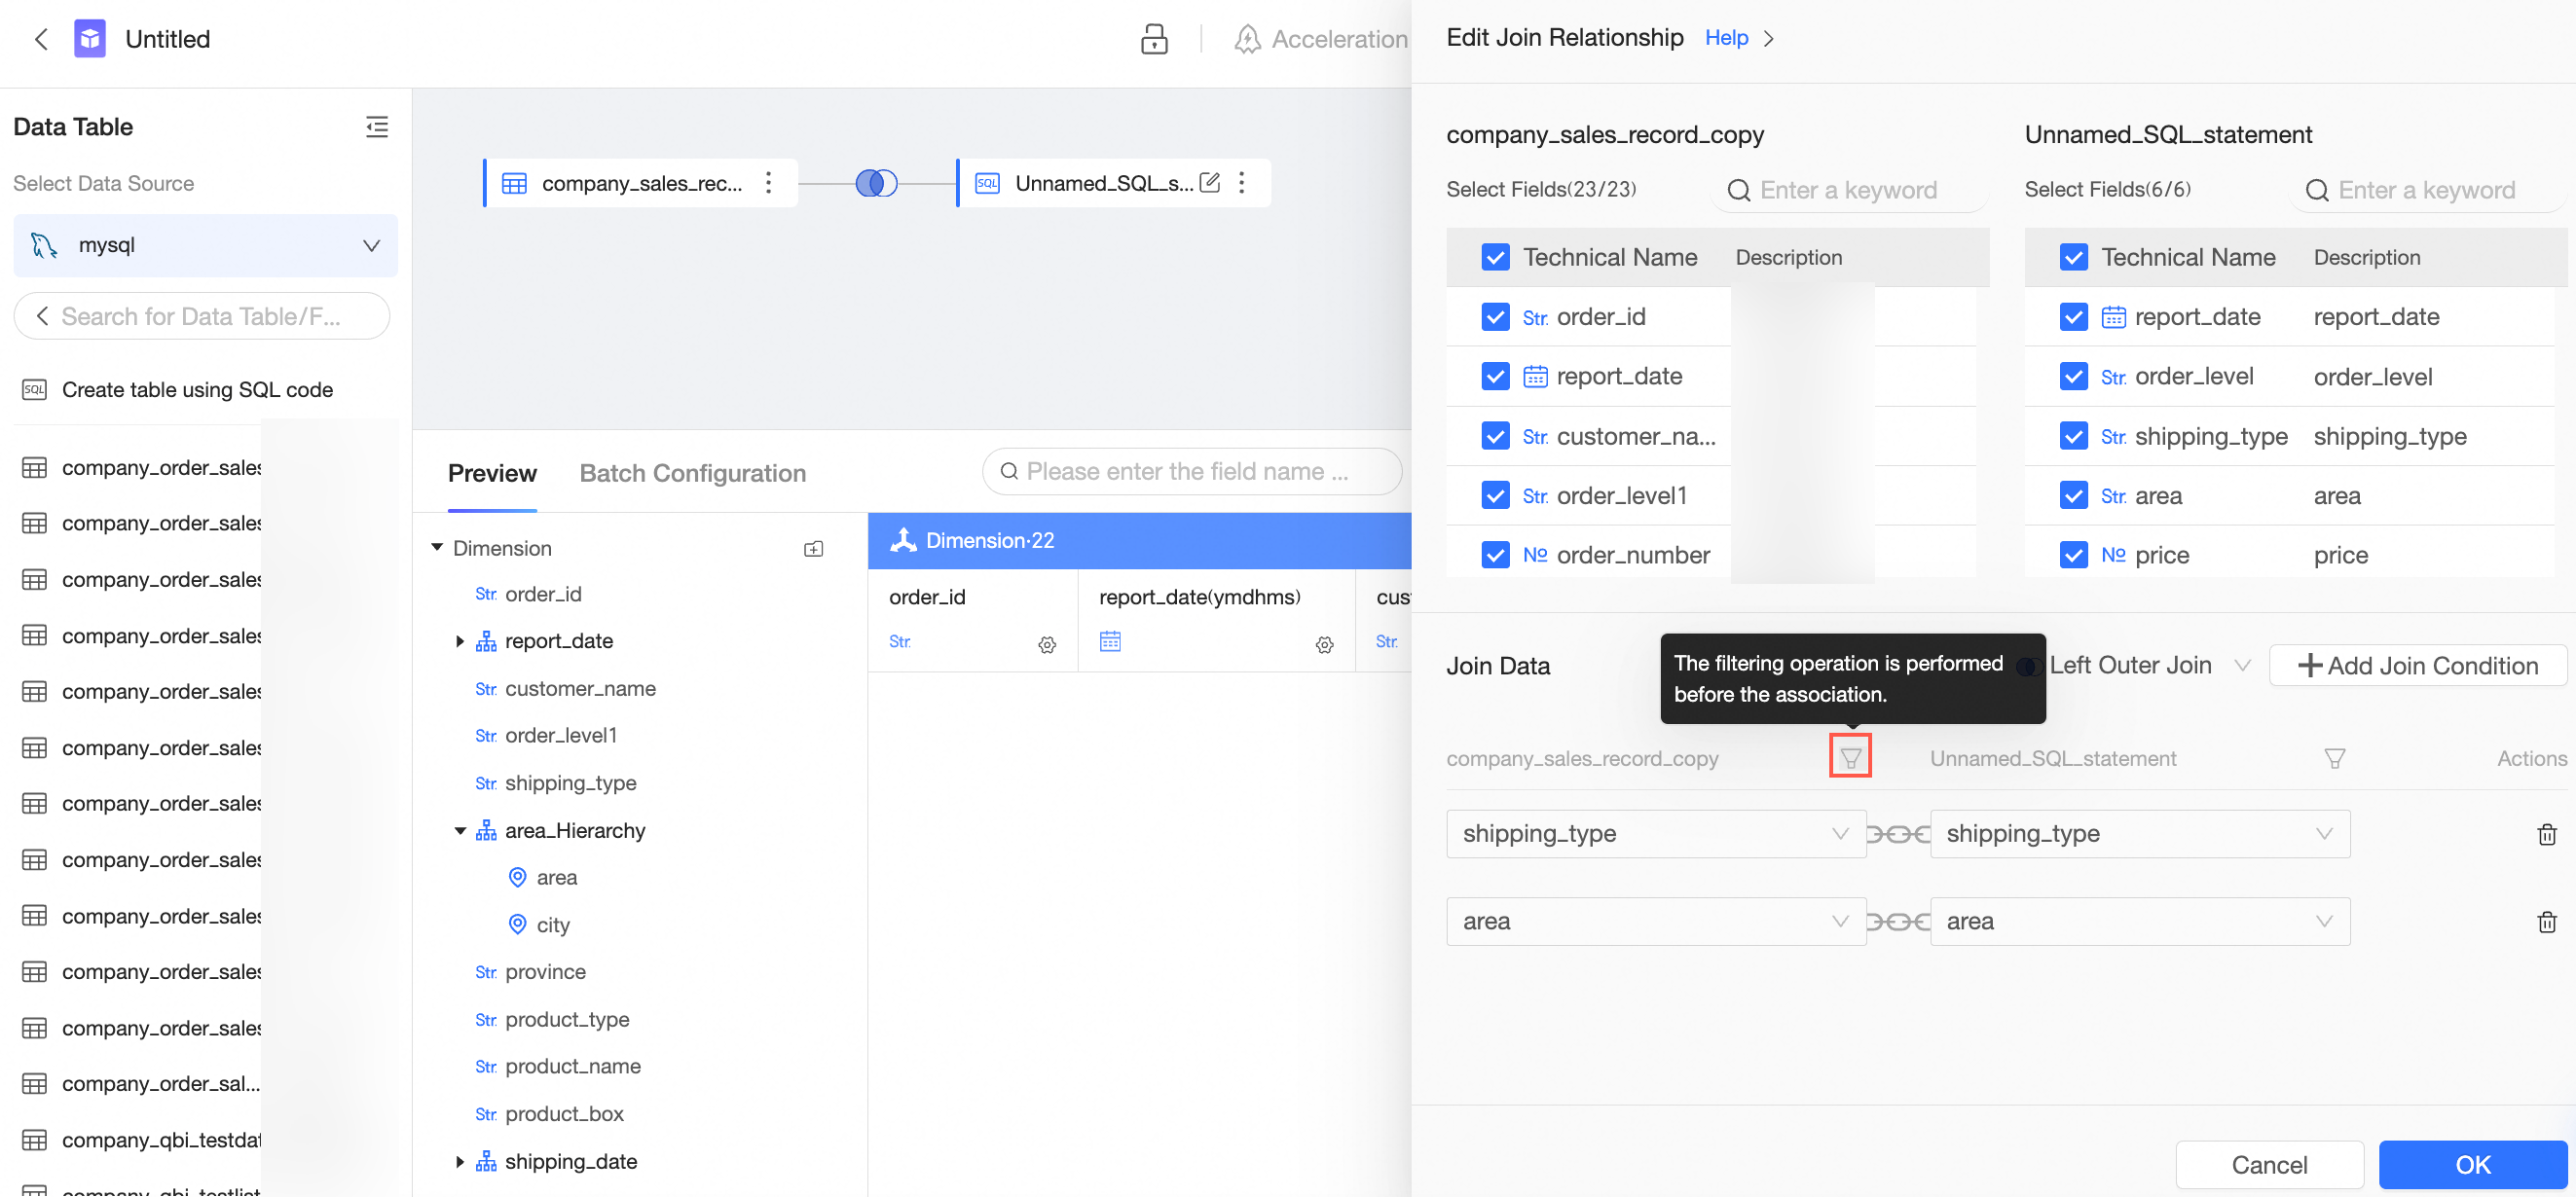
Click the
 icon next to the table associated with the field.
Configure the filter condition.
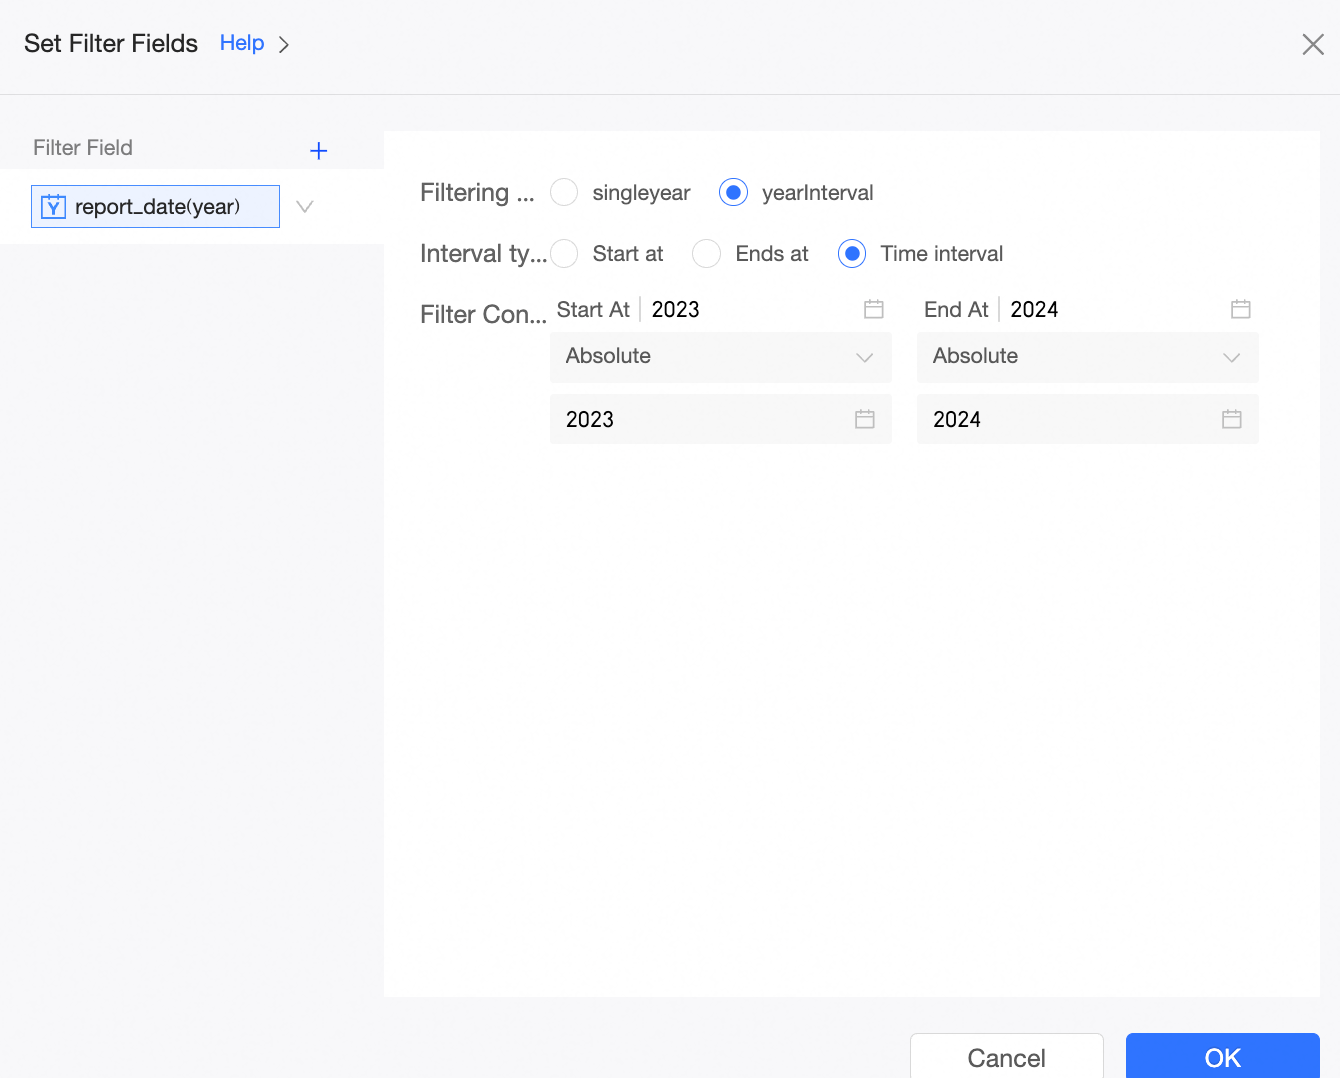
You can click Confirm to finalize the settings for the pre-association filter condition.