PolarDB for PostgreSQL provides the transparent data encryption (TDE) feature. TDE encrypts and decrypts data files in real time. It encrypts data files when they are written to disks, and decrypts data files when they are loaded to the memory from disks. After you enable TDE for your cluster, the size of data files in your cluster does not increase. You can use TDE without the need to modify the configurations of your application.
Prerequisites
Key Management Service (KMS) is activated. For more information, see Purchase a dedicated KMS instance.
The PolarDB cluster is authorized to access KMS. For more information, see Authorize a PolarDB cluster to access KMS.
Your PolarDB for PostgreSQL cluster meets the following version requirement:
Database engine
Revision version
PostgreSQL 14
14.12.23.1 or later
Background information
TDE performs data-at-rest encryption at the database layer. This prevents potential attackers from bypassing the database to read sensitive information from storage. TDE can encrypt sensitive data within tablespaces and data stored in disks and backups. TDE also automatically decrypts data to plaintext for applications and users that have passed the database authentication. The operating system and unauthorized users are not allowed to access the encrypted data in plaintext form.
PolarDB for PostgreSQL uses keys generated and managed by KMS for TDE encryption. PolarDB does not provide the keys and certificates required for encryption. You can authorize PolarDB to use the keys that are automatically generated by Alibaba Cloud or the keys that are generated by using your own key information.
Usage notes
You cannot disable TDE after it is enabled.
In I/O bound workload scenarios, TDE may affect database performance after it is enabled.
Procedure
For information about how to enable TDE when you create a cluster, see Create a cluster. The following section describes how to enable TDE for an existing PolarDB cluster.
After you enable TDE for a PolarDB cluster, the cluster automatically restarts. Proceed with caution.
Log on to the PolarDB console.
In the left-side navigation pane, click Clusters.
In the upper-left corner, select the region in which the cluster is deployed.
Find the cluster and click its ID.
In the left-side navigation pane, choose .
Click the TDE Settings tab and turn on TDE Status.

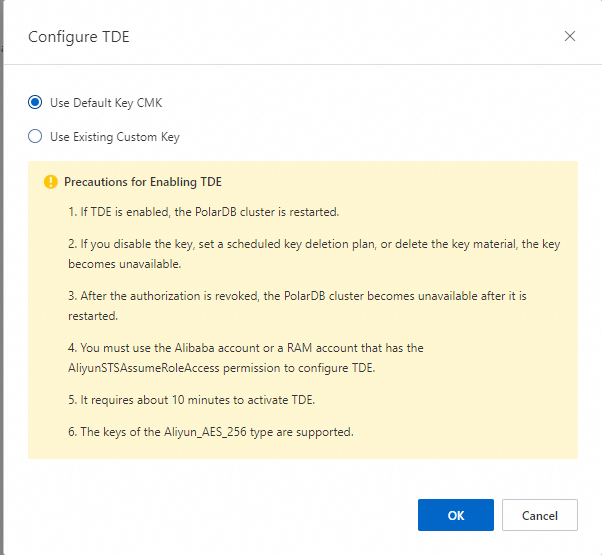
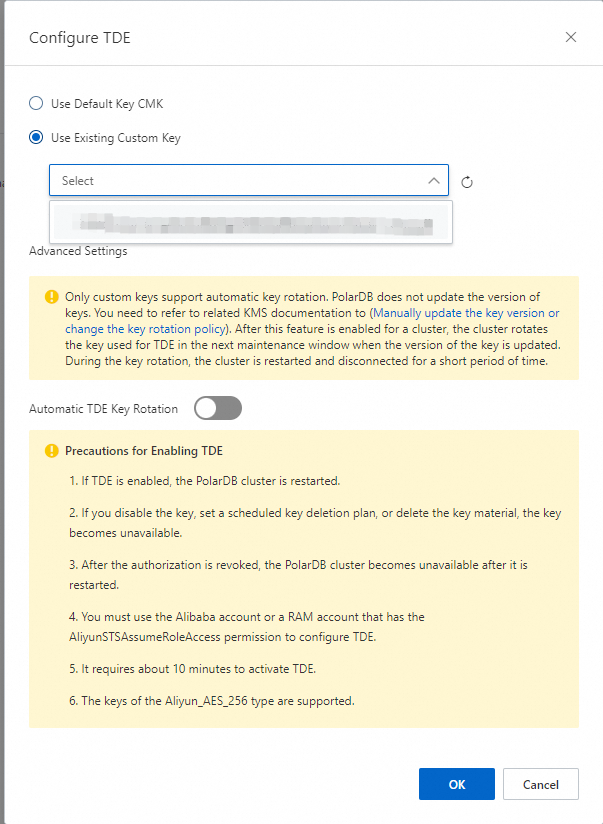
In the Configure TDE dialog box, select Use Default Key CMK or Use Existing Custom Key.
After you select Use Default Key CMK, click OK.

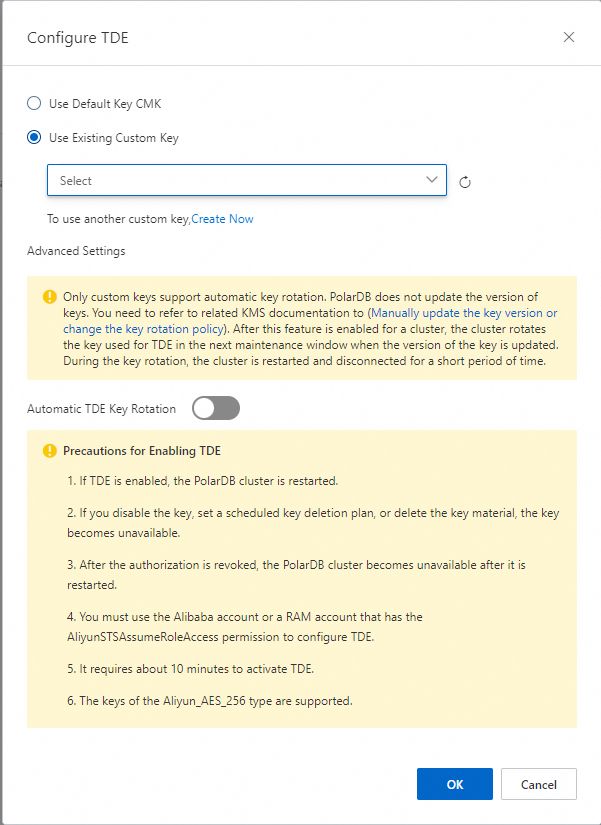
After you select Use Existing Custom Key, select a key generated by KMS from the drop-down list and click OK.

Keys of the Aliyun_AES_256 type are supported.
If you use an existing custom key, make sure that the following conditions are met:
You use an Alibaba Cloud account or an account to which the AliyunSTSAssumeRoleAccess policy is attached.
If you disable the key, set a scheduled key deletion plan, or delete the key material, the key becomes unavailable.
If you revoke the authorization to a PolarDB cluster, the cluster becomes unavailable after you restart the cluster.
If you do not have a custom key, you need to click Create Now to go to the KMS console to create a key and import your own key material. For more information, see Create a CMK.
Approximately 10 minutes are required to enable TDE.
View TDE status
Log on to the PolarDB console.
In the left-side navigation pane, click Clusters.
In the upper-left corner, select the region in which the cluster is deployed.
Find the cluster and click its ID.
In the left-side navigation pane, choose .
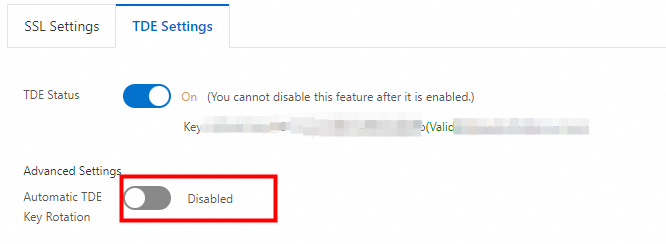
On the TDE Settings tab, view TDE Status.
Switch to a custom key
Log on to the PolarDB console.
In the left-side navigation pane, click Clusters.
In the upper-left corner, select the region in which the cluster is deployed.
Find the cluster and click its ID.
In the left-side navigation pane, choose .
On the TDE Settings tab, click Switch to Custom Key to the right of TDE Status.
In the Configure TDE dialog box, select Use Existing Custom Key, select a key generated by KMS from the drop-down list, and then click OK.
NoteFor information about how to use an existing custom key, see the "Procedure" section of this topic.
Advanced settings
You can enable automatic TDE key rotation only if you select Use Existing Custom Key.
PolarDB does not update the primary key version of the custom key. You can manually update the key version or change the key rotation policy. For more information, see Configure key rotation.
After a PolarDB cluster detects that the primary key version of the custom key is updated, the TDE key is rotated within the next maintenance window. After the rotation, the PolarDB cluster restarts.
You can use one of the following methods to enable automatic TDE key rotation:
When you enable TDE and immediately configure TDE in the Configure TDE dialog box, select Use Existing Custom Key and turn on Automatic TDE Key Rotation in the Advanced Settings section.

After you enable TDE and select Use Existing Custom Key, turn on Automatic TDE Key Rotation on the TDE Settings tab.

FAQ
After I enable TDE, can I use common database tools such as Navicat?
Yes, you can use common database tools after you enable TDE.
After I enable TDE, why is my data still in plaintext?
After you enable TDE, your data is stored in ciphertext. However, when the data is queried, it is decrypted and then loaded in plaintext to the memory.
Related operations
Operation | Description |
Enables the TDE feature or modifies the TDE settings for a PolarDB cluster. | |
Queries the TDE settings of a PolarDB cluster. | |
Creates a PolarDB cluster with the TDE feature enabled. Note The DBType parameter must be set to PostgreSQL. |