This topic explains how to add, configure, and delete authentication services.
Add an authentication service
Log on to the Phone Number Verification Service console.
In the left navigation pane, choose Authentication Services. Then, click Add Authentication Service.
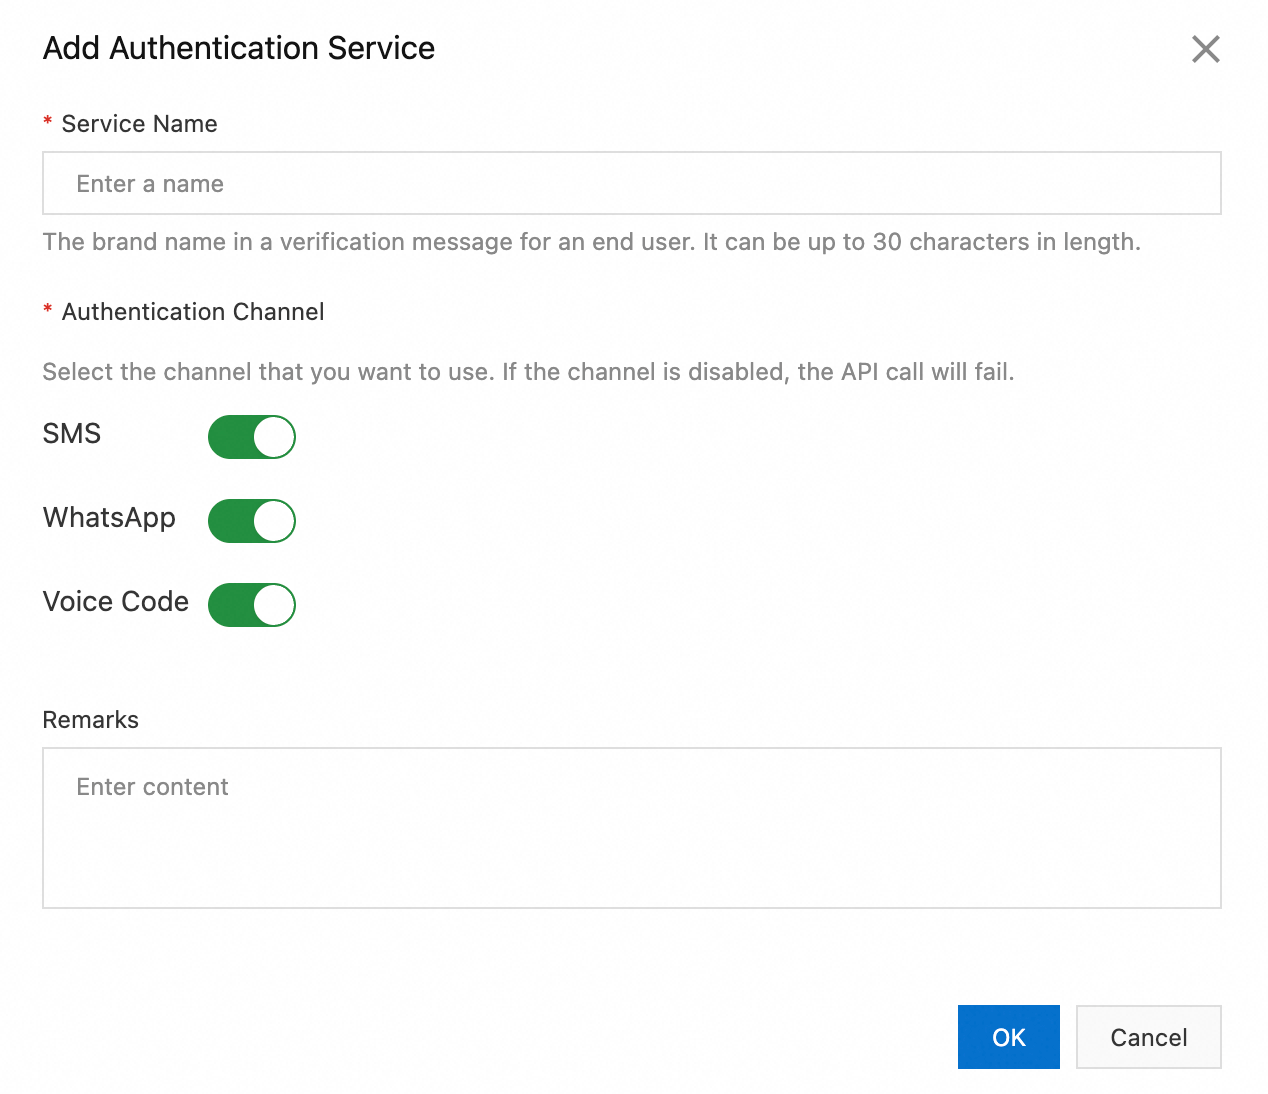
Set the following parameters:
Service Name: Enter a name for the authentication scheme, up to 30 characters long. This name appears as the brand name in verification messages.
Authentication Channel: Select the desired channels. If a channel is disabled, API calls for that channel will fail.
Click OK.
On the Authentication Services page, the new authentication service appears.
Configure an authentication service
After creating an authentication service, configure its settings.
SMS settings
On the Authentication Services page, find the target service and click Configure in the Actions column.
On the settings page, click the SMS tab.
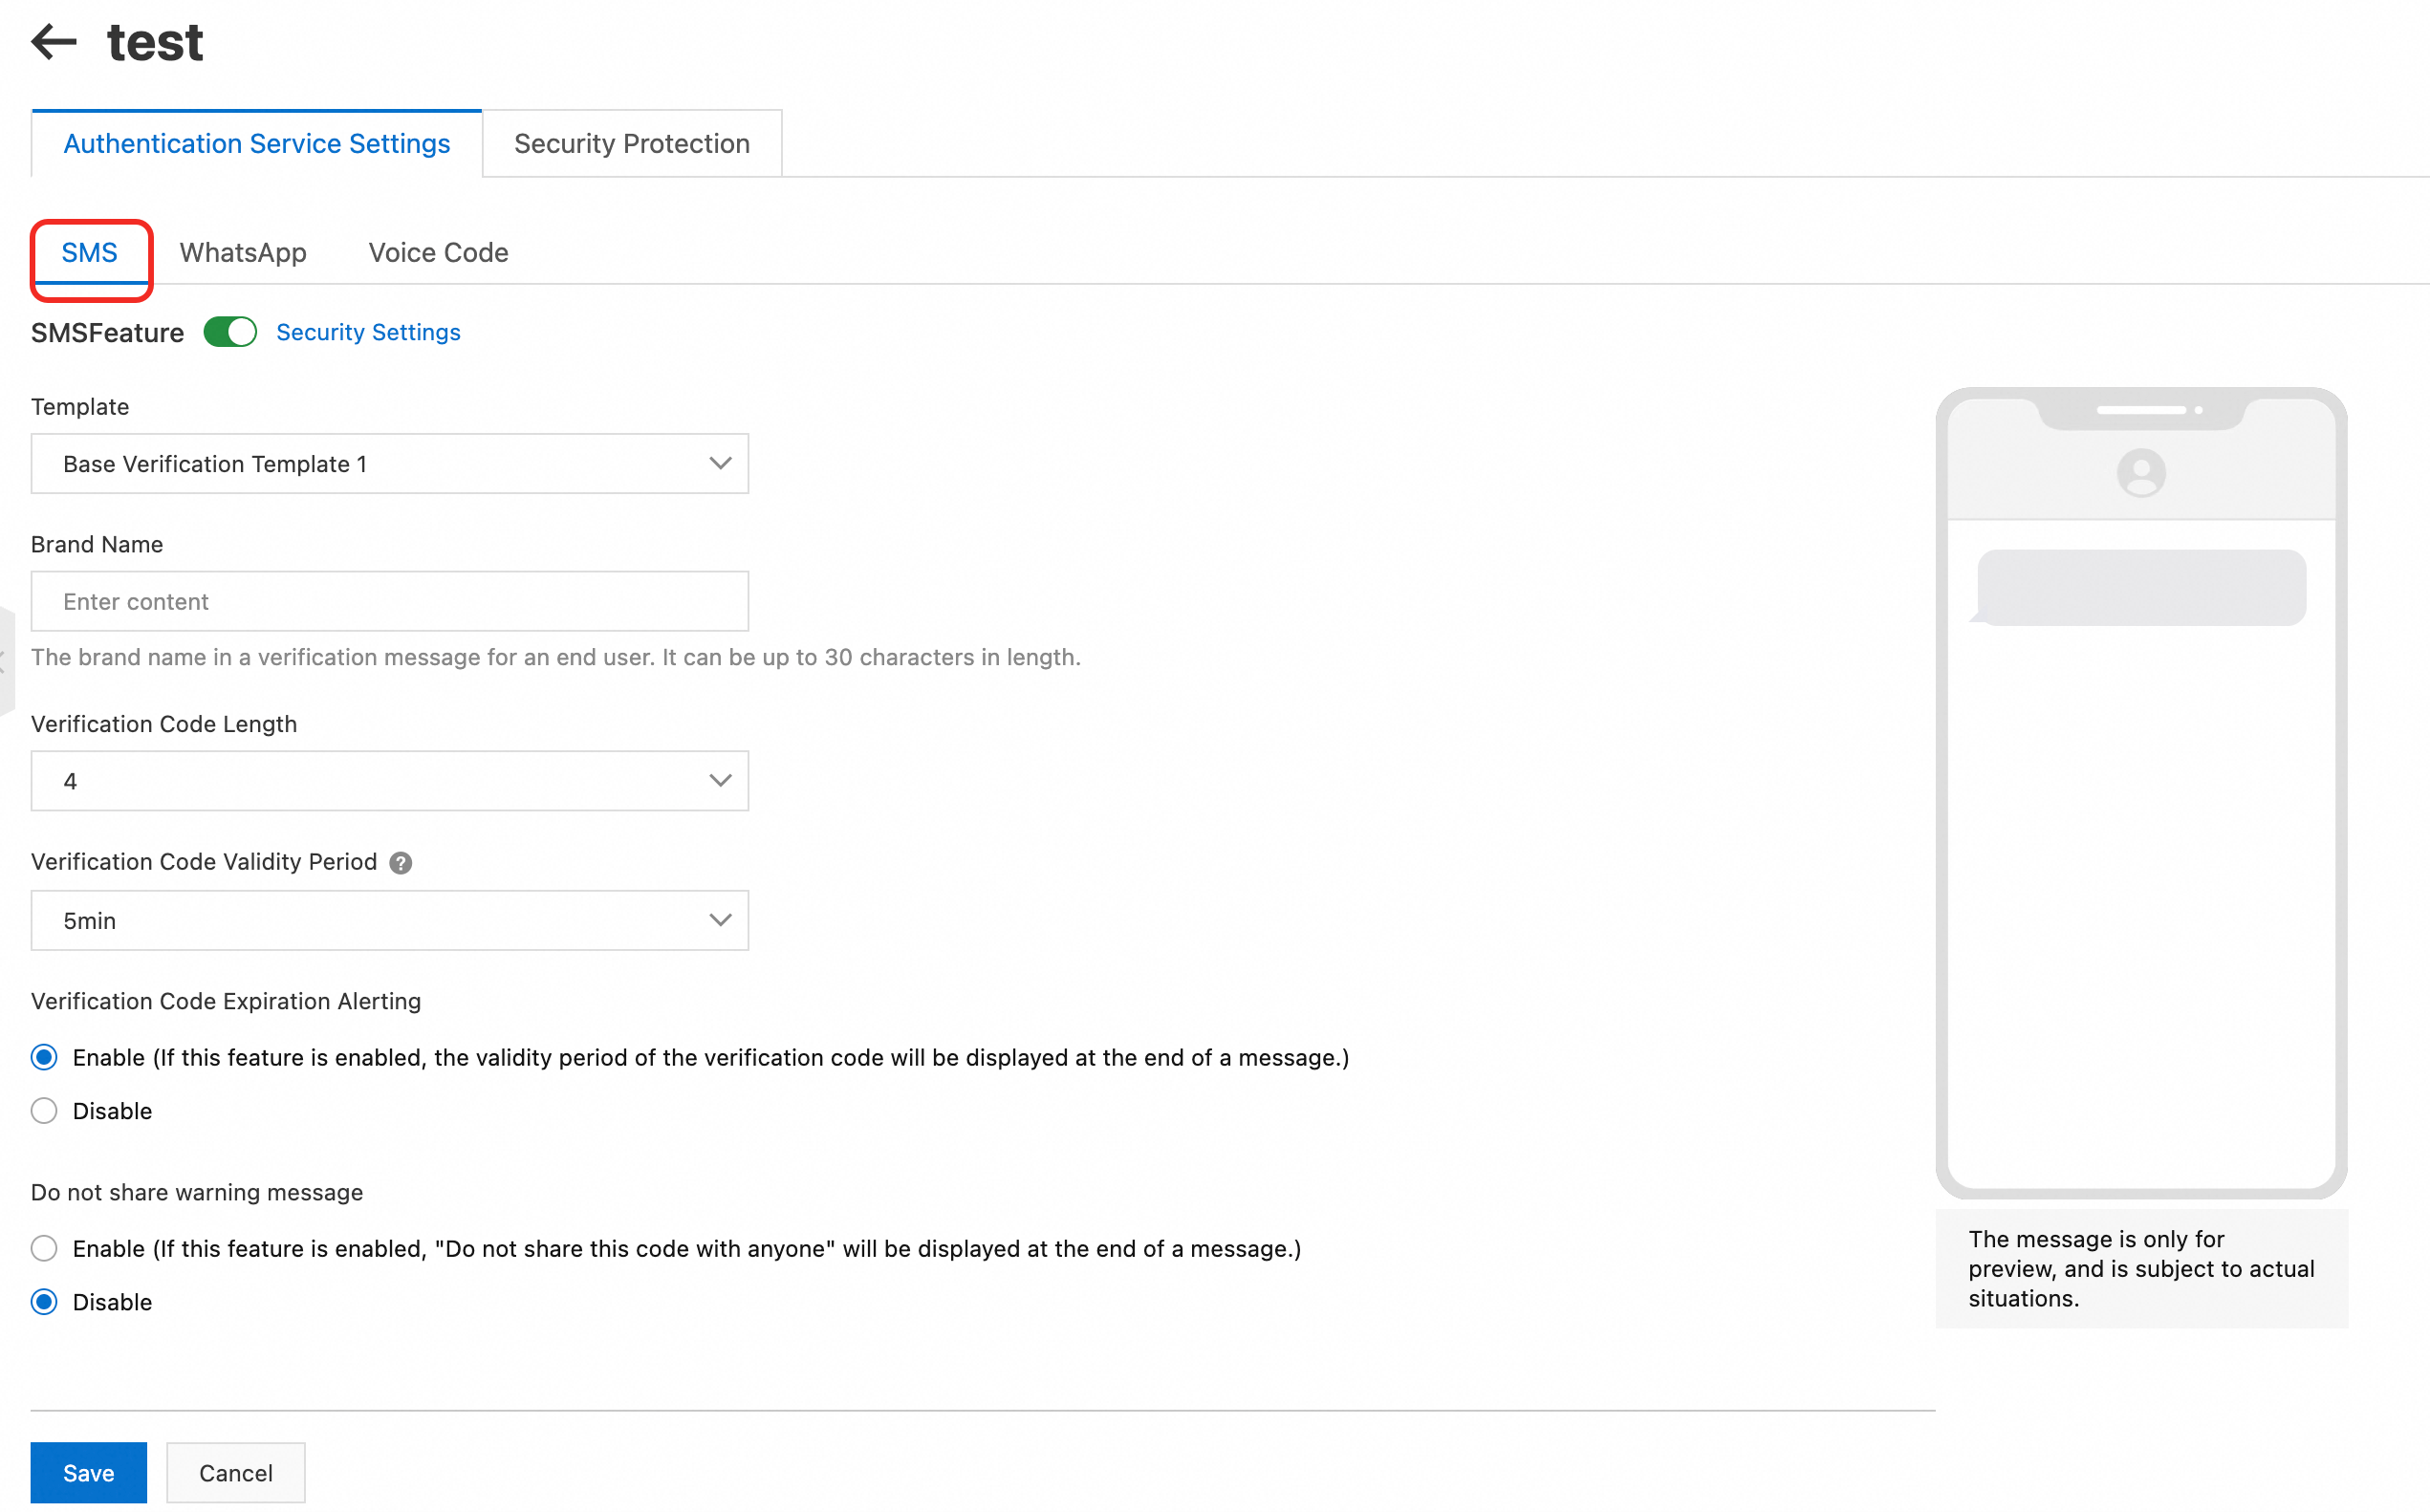
Configure the following parameters.
Parameter
Description
SMS Feature
Enables sending verification codes through the SMS channel.
Click Security Settings to open the Security Protection page. Then, configure settings such as Security Block, Landline Number Verification, and Destination Country Blacklist.
Template
Select an SMS template.
Brand Name
Enter a brand name, which is displayed in verification messages. The name can be up to 30 characters long.
Verification Code Length
Select the length of the verification code. Valid values: 4 to 10 characters.
Verification Code Validity Period
Select the validity period for the verification code.
Verification Code Expiration Alerting
Enable: Appends a validity period warning to the end of the message.
Disable: Does not append a validity period warning to the message.
Do not share warning message
Enable: Appends "Do not share this code with anyone" to the end of the message.
Disable: Does not append the warning.
Click Save.
WhatsApp settings
On the Authentication Services page, find the target service and click Configure in the Actions column.
On the settings page, click the WhatsApp tab.
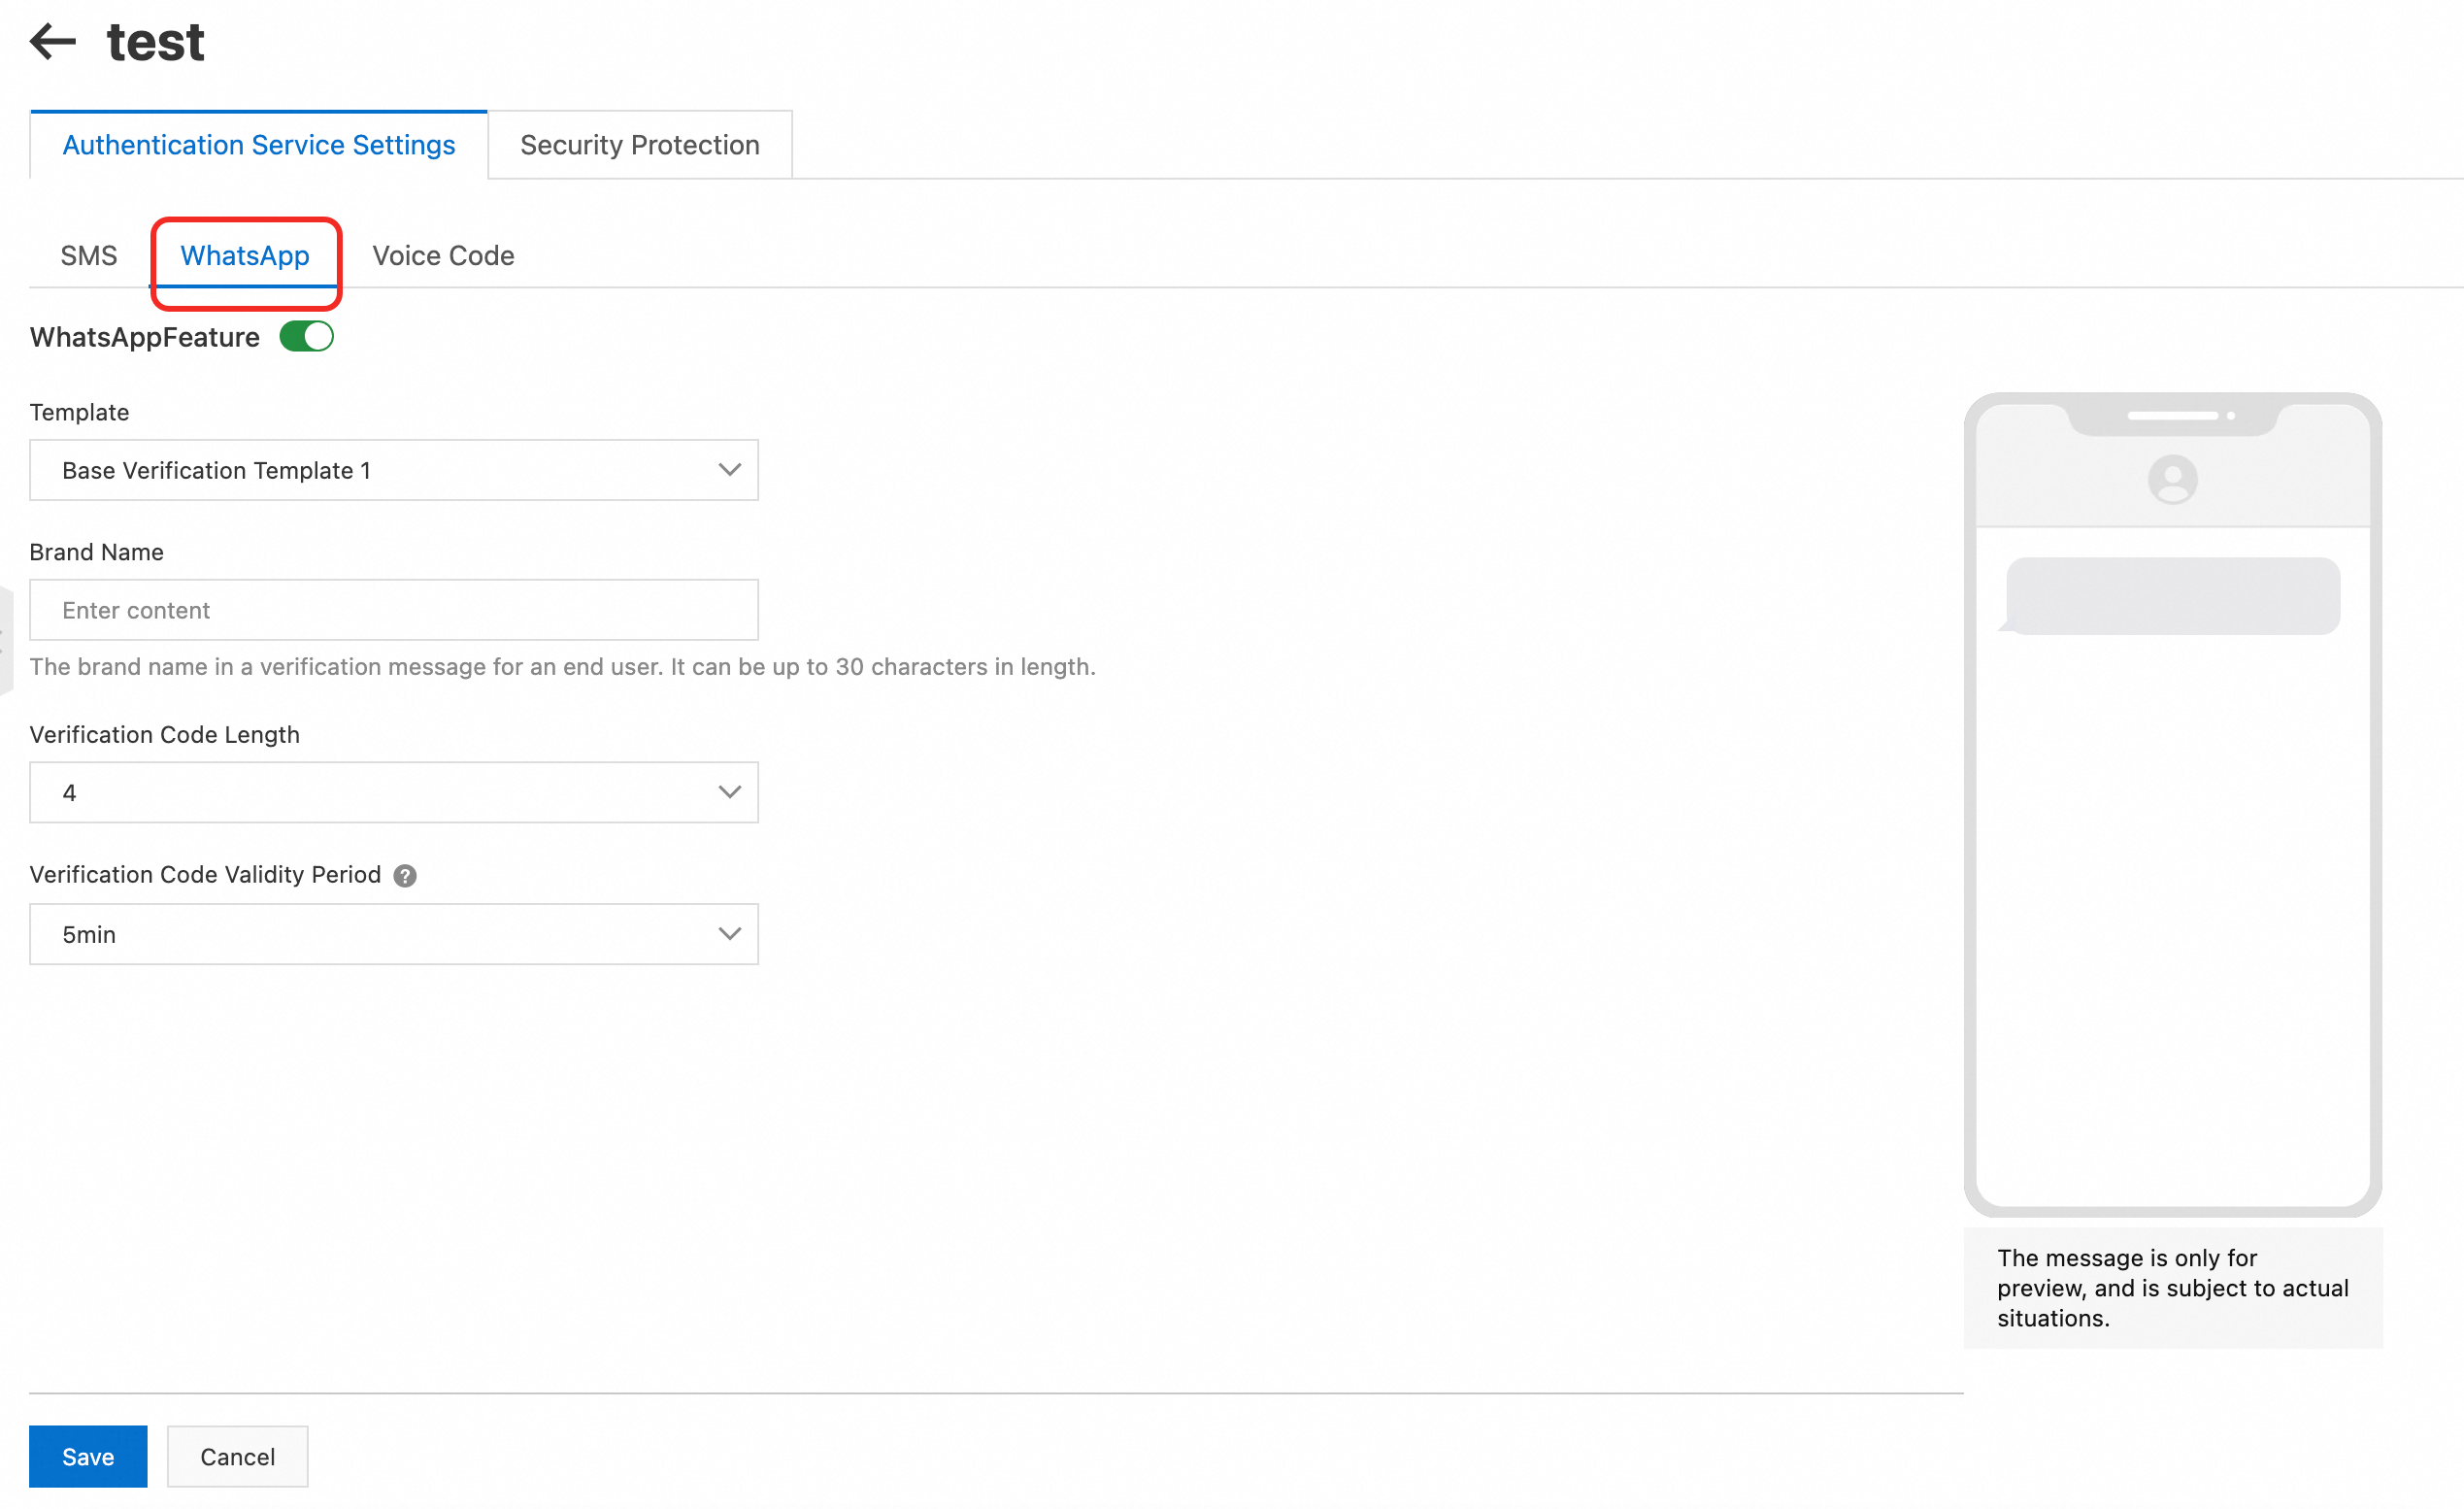
Configure the following parameters.
Parameter
Description
WhatsApp Feature
Enables sending verification codes through the WhatsApp channel.
Template
Select a message template.
Brand Name
Enter a brand name, which is displayed in verification messages. The name can be up to 30 characters long.
Verification Code Length
Select the length of the verification code. Valid values: 4 to 10 characters.
Verification Code Validity Period
Select the validity period for the verification code.
Click Save.
Voice Code settings
On the Authentication Services page, find the target service and click Configure in the Actions column.
On the settings page, click the Voice Code tab.
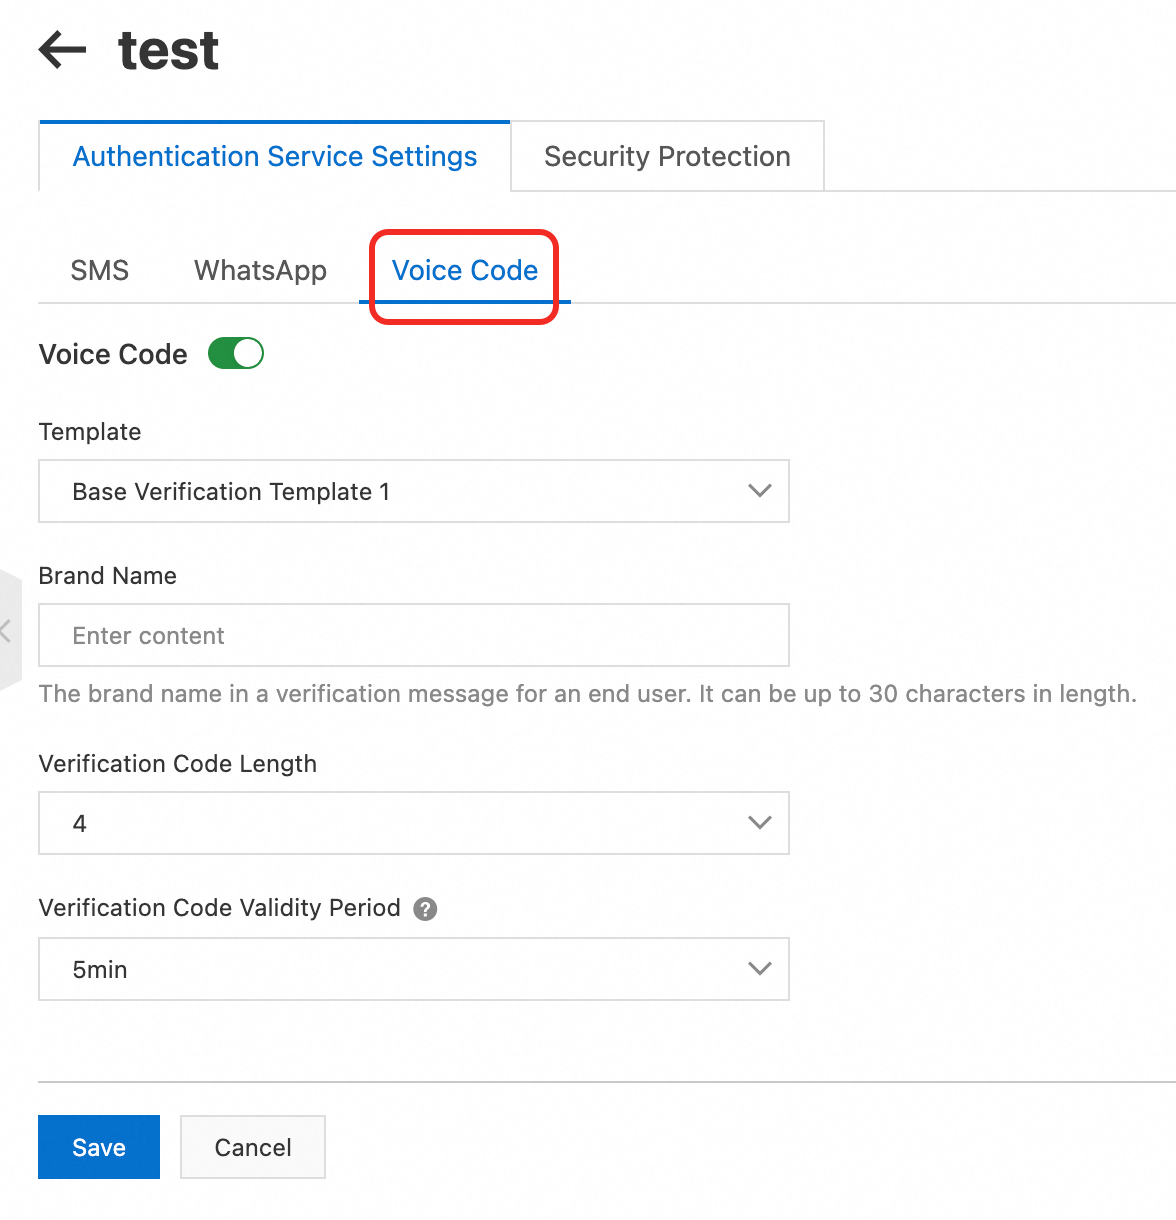
Configure the following parameters.
Parameter
Description
Voice Code
Enables sending verification codes through the Voice Code channel.
Template
Select a message template.
Brand Name
Enter a brand name, which is displayed in verification messages. The name can be up to 30 characters long.
Verification Code Length
Select the length of the verification code. Valid values: 4 to 10 characters.
Verification Code Validity Period
Select the validity period for the verification code.
Click Save.
Security protection settings
On the Authentication Services page, find the target service and click Configure in the Actions column. Then, click the Security Protection tab.
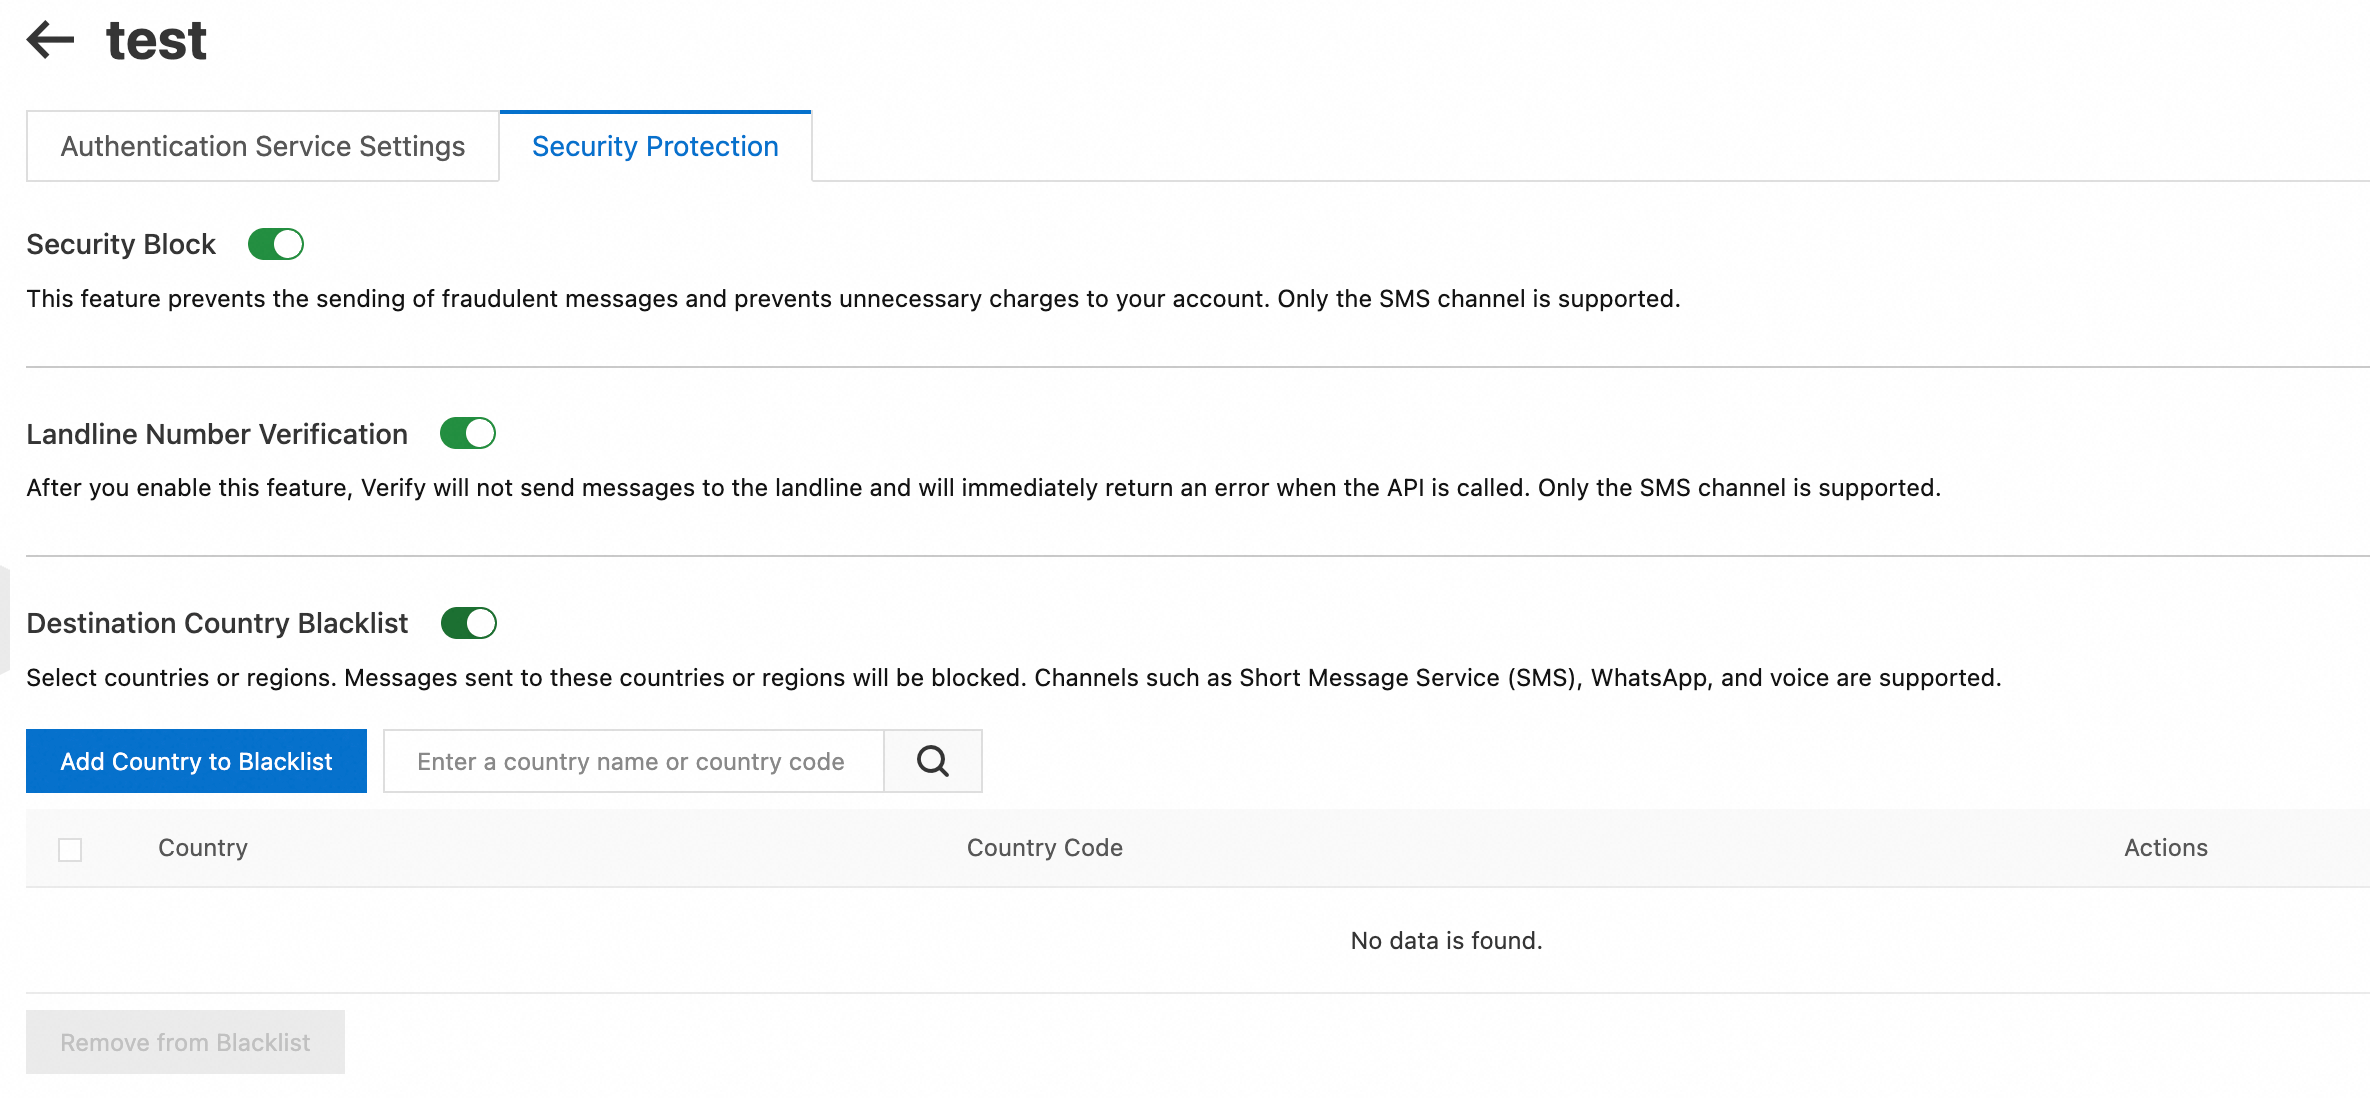
Configure settings such as Security Block, Landline Number Verification, and Destination Country Blacklist.
To add a country to the blacklist, click Add Country to Blacklist.
To remove a country, click Remove from Blacklist.
Delete an authentication service
Authentication services cannot be modified after creation. To make changes, delete the existing service and create a new one. Then, integrate the new service into your development environment.
To delete the service, on the Authentication Services page, click Delete in the Actions column.
After an authentication service is deleted, it can no longer be used for verifications. This action is irreversible.