This topic describes how to use the temporary bandwidth upgrade feature of OOS (OOS) to temporarily upgrade the bandwidth. You can schedule the upgrade to take effect in a specific period every day or on specific days. You can specify the start time and days by using an CRON expression.OOS
Limits
The temporary bandwidth upgrade feature applies only to ECS instances, Tair (Redis OSS-compatible) instances, and EIP instances.
ECS
Only the public bandwidth of ECS instances that use the pay-by-bandwidth method can be temporarily upgraded. ECS instances that use the pay-by-traffic method do not support the temporary bandwidth upgrade feature.
The public bandwidth of ECS instances that reside in the classic network cannot be upgraded from 0 Mbit/s. To upgrade the bandwidth, you must restart ECS instances in the ECS console or by using ECS API operations for the changes to take effect.
ECS instances must use the subscription billing method. ECS instances whose billing method is pay-as-you-go do not support the temporary bandwidth upgrade feature.
Procedure
Log on to the CloudOps Orchestration Service console.
In the left-side navigation pane, choose . On the Common O&M Tasks page, click Temporary Bandwidth Upgrade. On the Temporary Bandwidth Upgrade page, click Create.

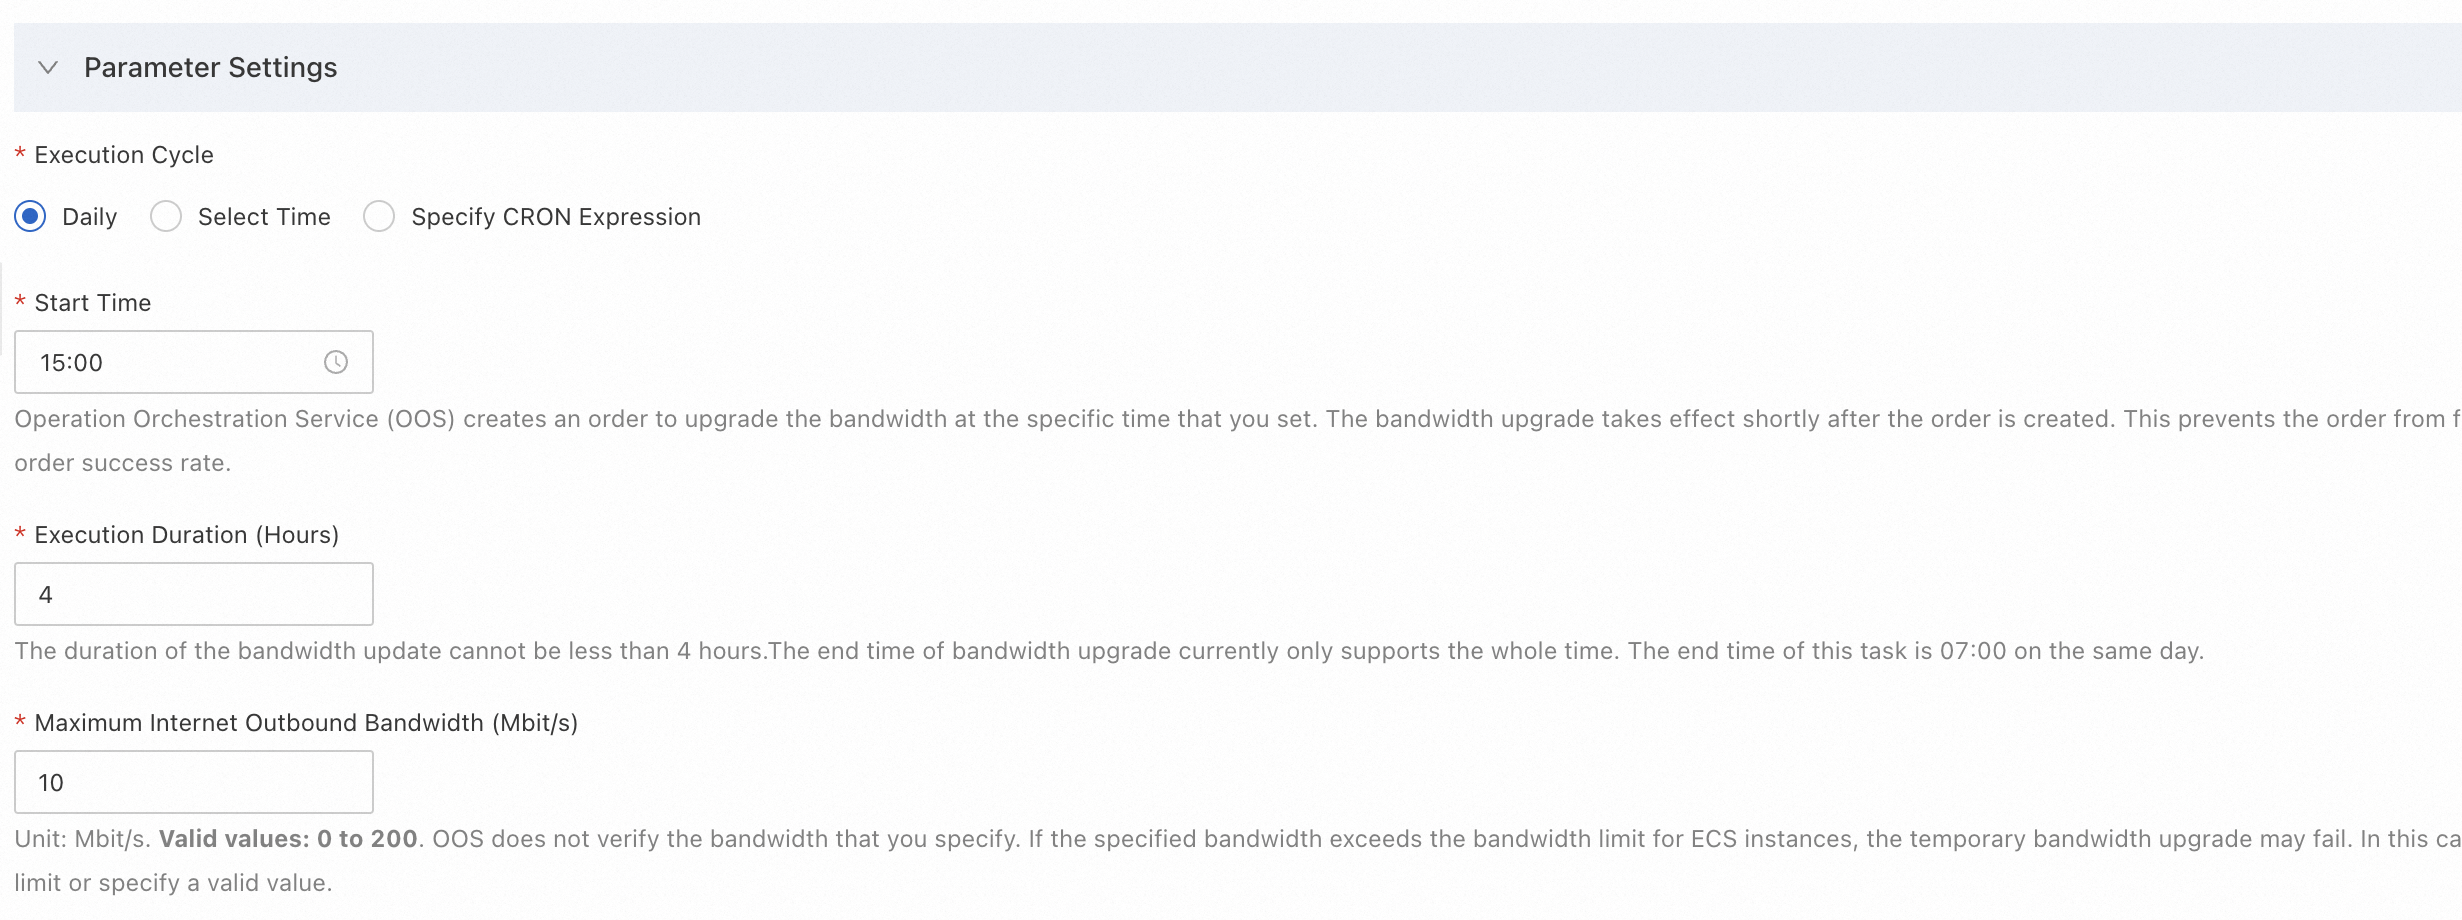
Configure the parameters.
If you set Resource Type to ECS Instance, you must set Execution Cycle, Start Time, Execution Duration (Hours), End Time, and Maximum Internet Outbound Bandwidth (Mbit/s).
ImportantUnit: Mbit/s. Valid values: 0 to 200. OOS does not verify the bandwidth that you specify. If the bandwidth that you specified exceeds the limits of ECS instances, the temporary bandwidth upgrade may fail. In this case, you can submit a ticket in the ECS console to increase the bandwidth limit or specify a valid bandwidth value.

If you set Resource Type to ApsaraDB for Redis Instance or EIP, you must set the Scheduled Task Type parameter and specify the Additional Bandwidth and Duration of Bandwidth Upgrade parameters.

Set the Permissions parameter to Specify RAM Role and Use Permissions Granted to This Role and select a RAM role from the drop-down list.
In this example, OOSServiceRole is selected.
If no RAM roles are available, create a RAM role for OOS. For more information, see Use RAM to grant permissions to OOS. You can directly click Create Role to go to the RAM console and create a RAM role for OOS. For more information about the required policy, see the following JSON scripts:
ECS instances
{
    "Version": "1",
    "Statement": [
        {
            "Action": "oos:*",
            "Resource": "*",
            "Effect": "Allow"
        },
        {
            "Action": "ram:PassRole",
            "Resource": "*",
            "Effect": "Allow",
            "Condition": {
                "StringEquals": {
                    "acs:Service": "oos.aliyuncs.com"
                }
            }
        },
        {
            "Action": [
                "ecs:DescribeInstances",
                "ecs:ModifyInstanceNetworkSpec"
            ],
            "Resource": "*",
            "Effect": "Allow"
        }
    ]
}
Tair (Redis OSS-compatible) instances
{
  "Version": "1",
  "Statement": [
    {
      "Action": [
        "kvstore:DescribeInstances",
        "kvstore:EnableAdditionalBandwidth"
      ],
      "Resource": "*",
      "Effect": "Allow"
    }
  ]
}
EIP instances
{
  "Version": "1",
  "Statement": [
    {
      "Action": [
        "vpc:DescribeEipAddresses",
        "vpc:ModifyEipAddressAttribute"
      ],
      "Resource": "*",
      "Effect": "Allow"
    }
  ]
}
Click Select Instances. In the Select Instances section, select Manually Select Instances, and select the instance that you want to manage.
You can use different methods, such as Manually Select Instances, Specify Instance Tags, and Specify Resource Group, to select instances.

Click Advanced(Optional).
You can set the Rate control type parameter to Concurrency-based Control or Batch-based Control and specify the number of concurrent tasks or batch sizes. You can also specify the maximum number of errors that are allowed before the specified task is stopped. For more information about related terms, see Loop.
In this example, the Rate control type parameter is set to Concurrency-based Control.

View the bandwidth fee in the lower-right corner of the page and click Create.
