If data security is not a high priority for your business, use a NAT Gateway to access a File Storage NAS (NAS) file system directly over the Internet. This topic describes how to configure a NAT Gateway to enable a data center to access an Alibaba Cloud NAS file system.
Create a file system and a mount target
Create a file system. For more information, see Create a General-purpose NAS file system in the console.
Create a mount target in a virtual private cloud (VPC). For more information, see Create a mount target.
(Optional) Configure a whitelist
In NAS, a permission group acts as a whitelist that controls access from different IP addresses or CIDR blocks and ensures data security. Configure a custom permission group as needed.
Log on to the NAS console.
Create a permission group.
In the left-side navigation pane, choose .
In the top navigation bar, select a region.
On the Permission Group page, click the General-purpose NAS or Extreme NAS tab. Then, click Create Permission Group.
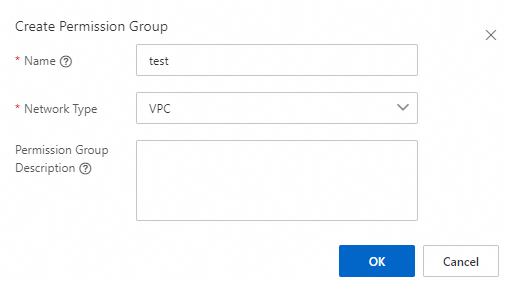
In the Create Permission Group dialog box, configure the required parameters.
For more information about the parameters, see Key parameters.
Add rules to the permission group.
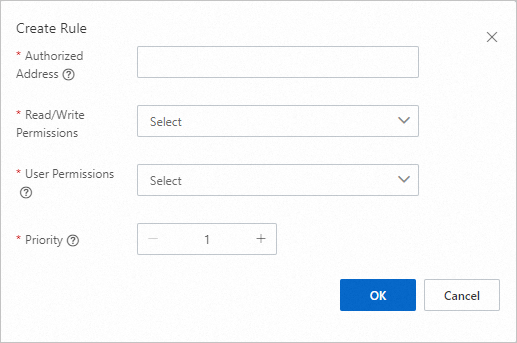
Find the permission group that you created and click Manage Rules in the Actions column. On the page that appears, click Create Rule. In the Create Rule dialog box, configure the parameters described in the following table.
For more information about the rule parameters, see Manage rule parameters.
Click OK.
Select and apply a permission group.
Go to the File System List page. Find the target file system and click Manage.
On the Mount Targets page, find the mount target and click Modify Permission Group in the Actions column. Then, select the permission group that you created.
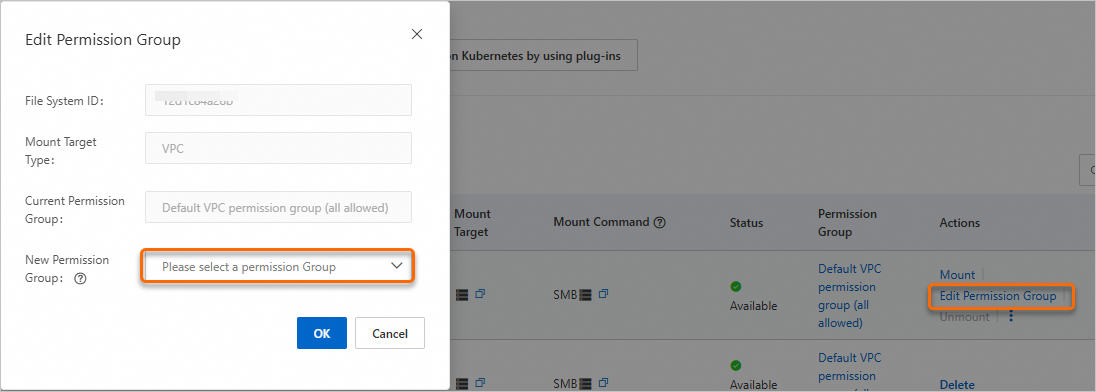
Click OK.
Configure a NAT gateway
Perform the following steps to mount the NAS file system on a Windows or Linux client that is connected to the Internet. After the file system is mounted, upload and download files.
Log on to the VPC console.
Create a NAT gateway. For more information, see Internet NAT gateway.
NoteThe VPC must be the same as the one that the NAS is in.
Associate an elastic IP address (EIP) with the NAT gateway. For more information, see Request an EIP.
Create a DNAT entry. For more information, see Create and manage DNAT entries.
The following table describes the key parameters.
Configuration
Description
Select EIP
The public IP address of the EIP.
Select Private IP Address
Select Manually Enter and enter the IP address of the mount target.
Run the
pingcommand on an Elastic Compute Service (ECS) instance to obtain the IP address of the mount target. Sample command:ping 0dc404****-****.cn-hangzhou.nas.aliyuncs.comFor more information about mount target addresses, see Manage mount targets.
Port Settings
Custom Port: (Recommended)
NFS file system:
Public Port: ports 111 and 2049.
Private Port: ports 111 and 2049.
Protocol Type: TCP.
SMB file system:
Public Port: port 4456.
Private Port: port 445.
Protocol: TCP.
Any Port: This option is not recommended.
All requests to the EIP are forwarded to the destination NAS file system. We recommend that you specify ports.
Mount the file system
NFS file system
Install an NFS client. For more information, see Install an NFS client.
If an NFS client is already installed, skip this step.
Mount the NFS file system. For more information about mount command parameters, see Parameters.
mount -t nfs4 100.10.xx.xx:/ /mnt100.10.xx.xx is the public IP address of the EIP. Replace it with the actual public IP address.
/mnt is the local mount directory. Replace it with the actual directory.
SMB file system
Start the Workstation and TCP/IP NetBIOS Helper services. For more information, see Enable the Workstation and TCP/IP NetBIOS Helper services.
Check whether local port 445 is in use.
Run the command:
netstat -ano | findstr ":445"If output similar to the following is returned, local port 445 is in use.
TCP    0.0.0.0:445            0.0.0.0:0              LISTENING       4
  TCP    [::]:445               [::]:0                 LISTENING       4
In the output,
4is the process ID (PID) of the program that is using port 445.
If local port 445 is in use, run the following command in Command Prompt, or press the
Win+Rkeyboard shortcut and enterservices.mscto open the Services window and view the status of the Server service.sc query LanmanServerIf the Server service is in the RUNNING state, run the following command in Command Prompt, or press the
Win+Rkeyboard shortcut and enterservices.mscto open the Services window. Then, stop and disable the Server service. Restart the server and confirm that port 445 is no longer in use.net stop LanmanServer && sc config LanmanServer start= disabledIf the Server service is in the STOPPED state, or if port 445 is still in use after you restart the server, run the following command to view the program that is using port 445. After you confirm that the program can be stopped, stop the program and restart the server.
tasklist /FI "PID eq 4"In the command,
4is the PID returned by thenetstat -ano | findstr ":445"command. Replace it with the actual PID.
Configure local port forwarding.
Port 445, the default port for the SMB protocol, is a vulnerable port that is disabled by many Internet Service Providers (ISPs) by default. If your data center accesses the NAS file system over the Internet through a NAT gateway, you must configure port forwarding on your local machine.
On a local Windows client, use
netshto forward traffic from local port 445 to a different port, such as 4456.netsh interface portproxy add v4tov4 listenaddress=192.168.xx.xx listenport=445 connectaddress=100.10.xx.xx connectport=4456In the command,
192.168.xx.xxis the IP address of the local server and100.10.xx.xxis the public IP address of the EIP. Replace them with the actual IP addresses. You can also use127.0.0.1as the local server IP address.NoteIf the public port in the DNAT entry is set to 445 or Any Port, local port forwarding is not required. Directly use the public IP address of the EIP to mount the file system.
Mount the SMB file system. For more information, see Mount an SMB file system.
net use D: \\192.168.xx.xx\myshareD is the destination drive letter on the current Windows system. Replace it with the actual drive letter.
192.168.xx.xx is the IP address of the local server. You can also use 127.0.0.1. Replace it with the actual IP address.
myshare is the SMB share name. Do not change this name.
Verify the mount result
NFS file system
Run the mount -l command. If output similar to the following is returned, the file system is mounted. After the file system is mounted, perform read and write operations.

SMB file system
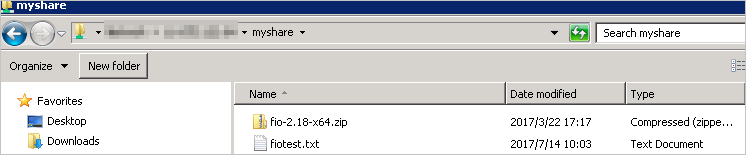
If you can access the SMB file system in File Explorer, the file system is mounted. After the file system is mounted, perform read and write operations.
If the mounted drive is not found, enter \\192.168.xx.xx\myshare in File Explorer to access it. In this path, 192.168.xx.xx is the IP address of the local server. Replace it with the actual IP address.