This topic describes how to capture messages using a third-party tool.
This document may contain information about third-party products. This information is for reference only. Alibaba Cloud makes no warranties, express or implied, regarding the performance or reliability of third-party products or any potential impact from operations performed on these products.
Background
When you develop mobile app projects using the mPaaS framework, you may encounter errors. Capturing HTTP messages is an important method for understanding and troubleshooting these errors, especially when an issue involves interactions between the client and the server or gateway. For example, if a request fails, you can analyze the request and response messages. This lets you check for errors in the request, verify that the server responded correctly, and confirm that the return value is as expected. This process helps you determine the root cause of the problem.
HTTP message capture tools
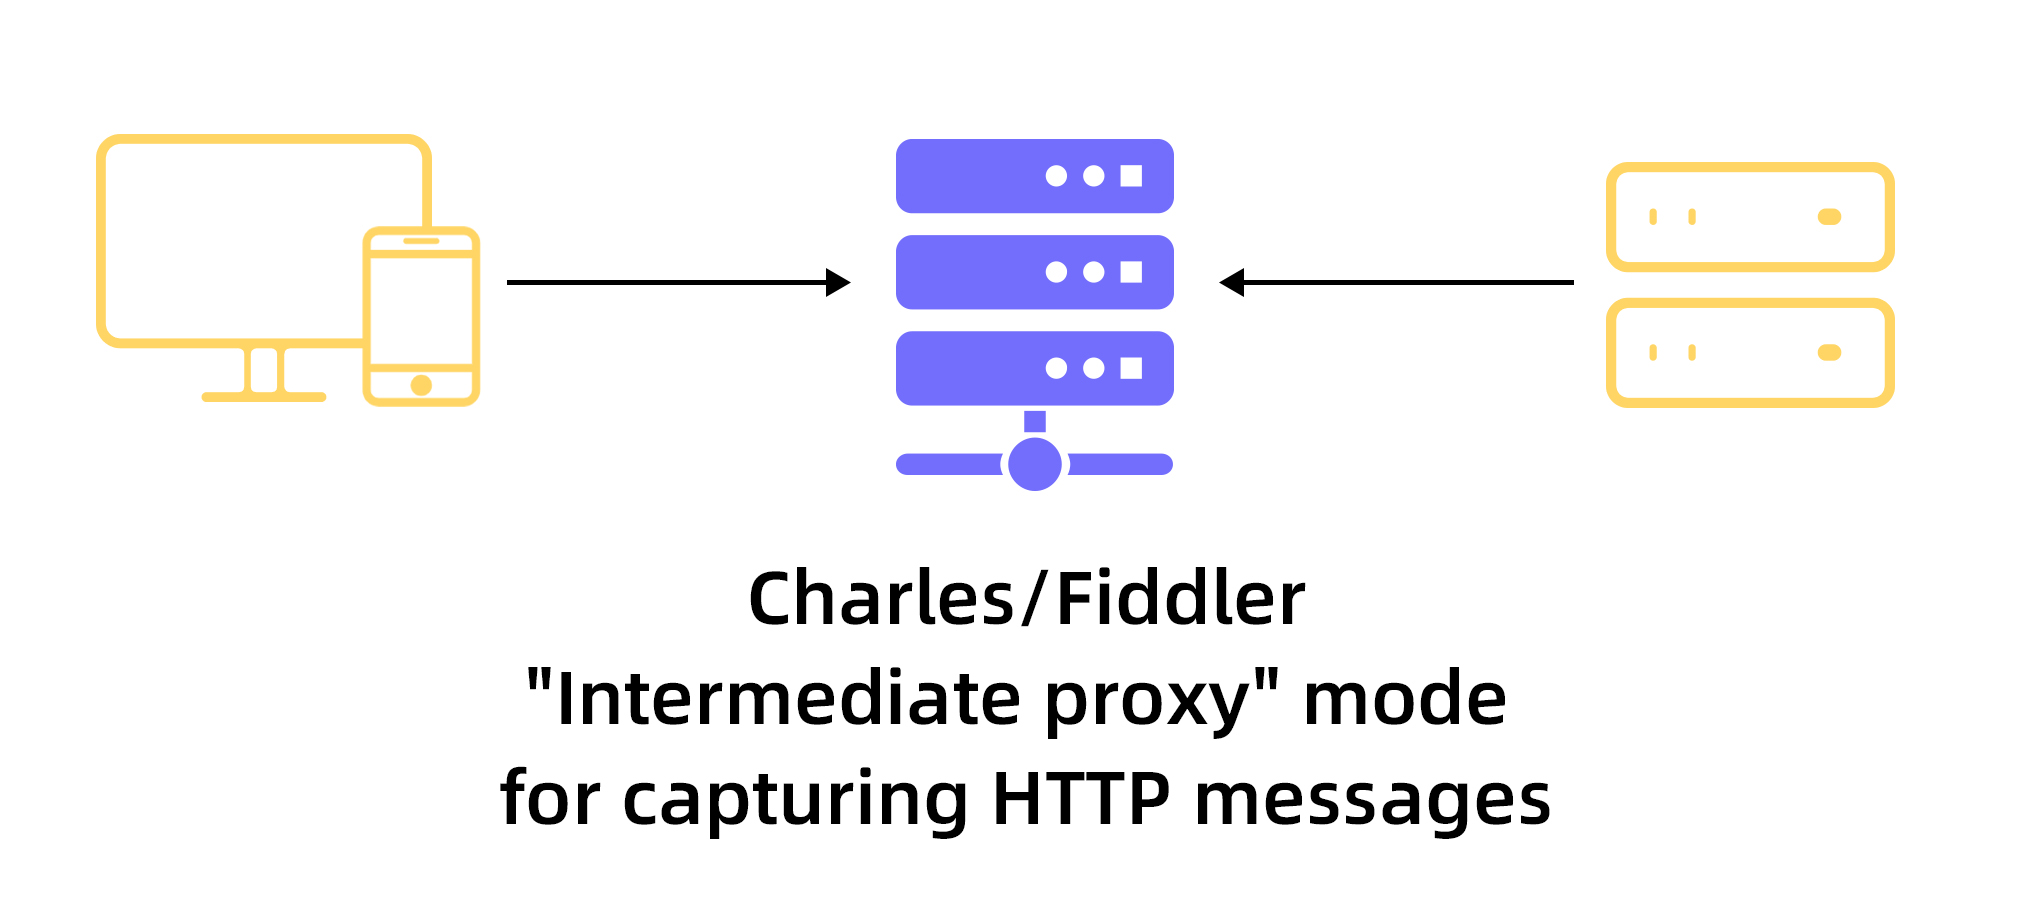
Common tools for capturing HTTP messages include Charles and Fiddler. These tools work based on a similar principle:
They set up a local HTTP proxy. All HTTP messages that pass through this proxy can be intercepted and parsed.
To parse HTTPS messages, you must first configure the Charles or Fiddler root Certificate Authority (CA) certificate on the client. This configuration ensures that the client trusts the information forwarded by the man-in-the-middle, which allows the messages to be decrypted.

Charles and Fiddler can only decrypt and display the HTTPS messages. In practice, developers may first perform an offline encryption operation on the data, such as using the data encryption feature of Mobile Gateway Service (MGS), and then communicate over HTTPS. Charles and Fiddler cannot decrypt this original content. They can only display the content after it has been encrypted offline.
Charles (macOS platform)
This section uses Charles version 4.5.5 as an example to describe its principles, installation, configuration, and the setup process for HTTPS decryption. Charles is a vital tool for analyzing HTTP messages on macOS. It plays a crucial role in troubleshooting many issues and helps developers efficiently locate and solve problems.
References:
Installation and basic interface
You can download the Charles .dmg installation package from the official Charles website. Then, run the package to install Charles on your system.
When you start Charles for the first time, it requests permission to set the system proxy. You must grant this permission. After startup, when HTTP requests pass through Charles, they appear in the main Charles interface, as shown in the following figure:
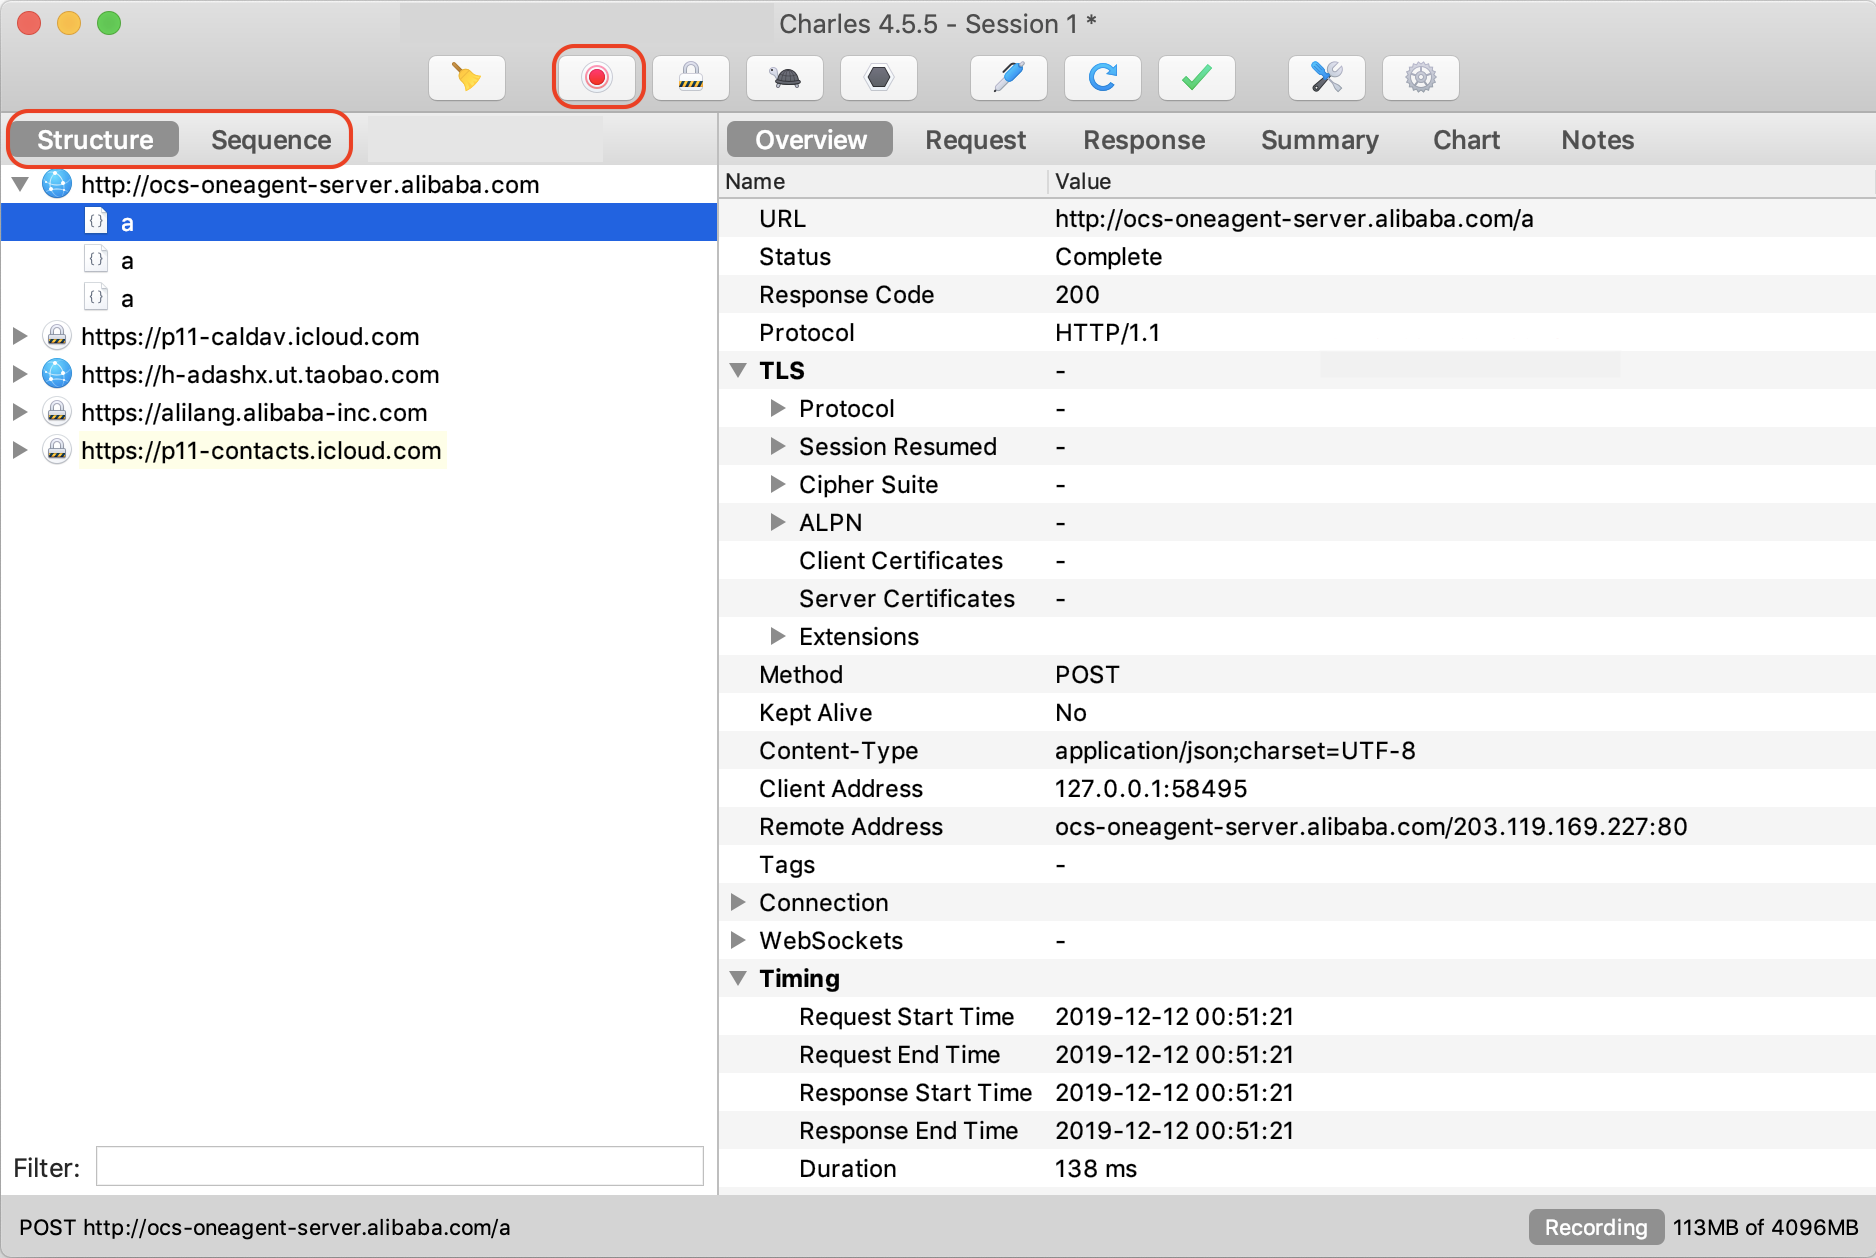
A red circle indicates that messages are being captured.
The pane on the left shows HTTP message entries. A lock icon indicates an undecrypted HTTPS message.
Client configuration
HTTP requests from an emulator running on your local machine go through the system proxy by default. You do not need to configure proxy information manually.
For physical mobile devices, such as iPhones or Android phones, you must configure the proxy manually. This ensures that all network requests from the device are forwarded through the Charles proxy.
Ensure that the mobile device can directly access the Mac device where Charles is installed using its IP address. To do this, connect the mobile device and the Mac to the same network.
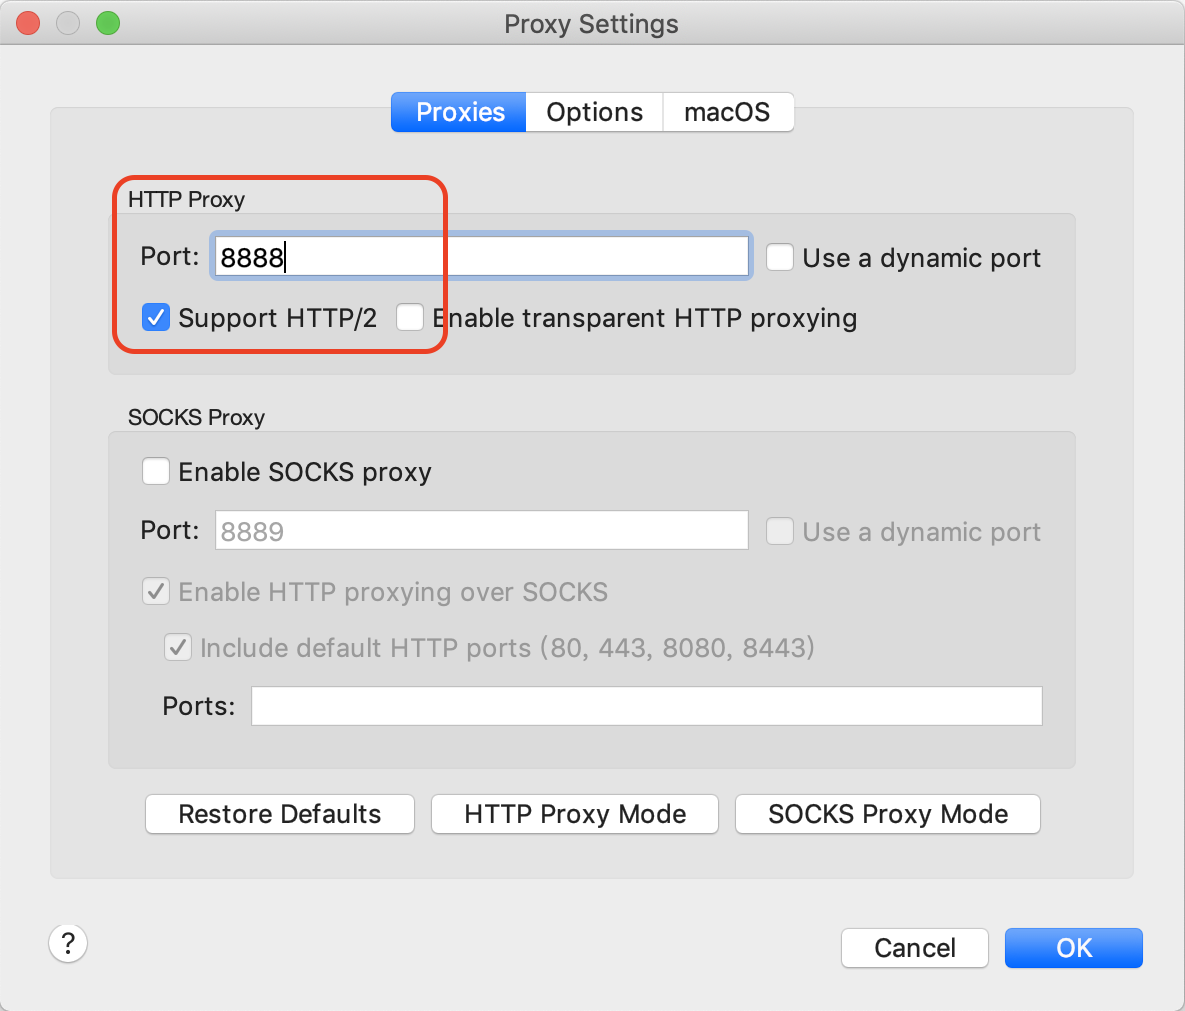
You can view the Charles proxy configuration to obtain the proxy port number. To do this, click Proxy > Proxy Settings to open the Proxy Settings page, as shown in the following figure:
NoteThe default port number is 8888.
You can open your system's network settings to view the local IP address:
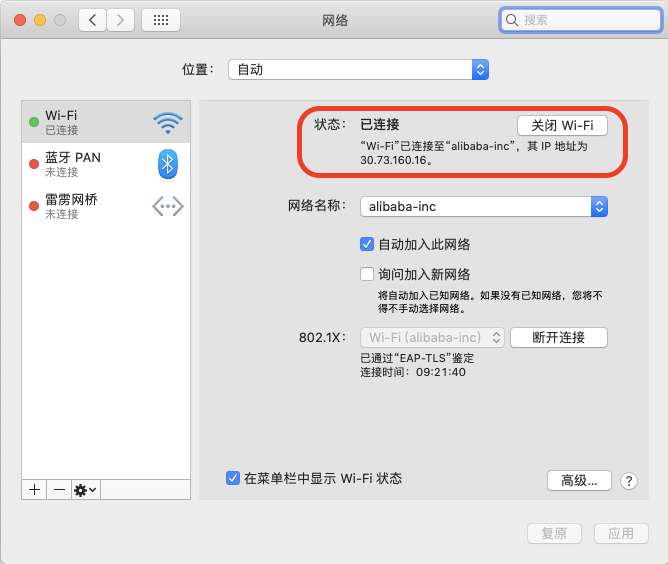
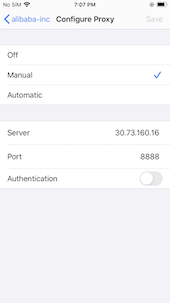
You can configure the proxy on your mobile device. For an iOS device, go to Settings > Wi-Fi and select your Wi-Fi network's settings. Then, add the IP address and port number of the proxy, which is the Mac that runs Charles.
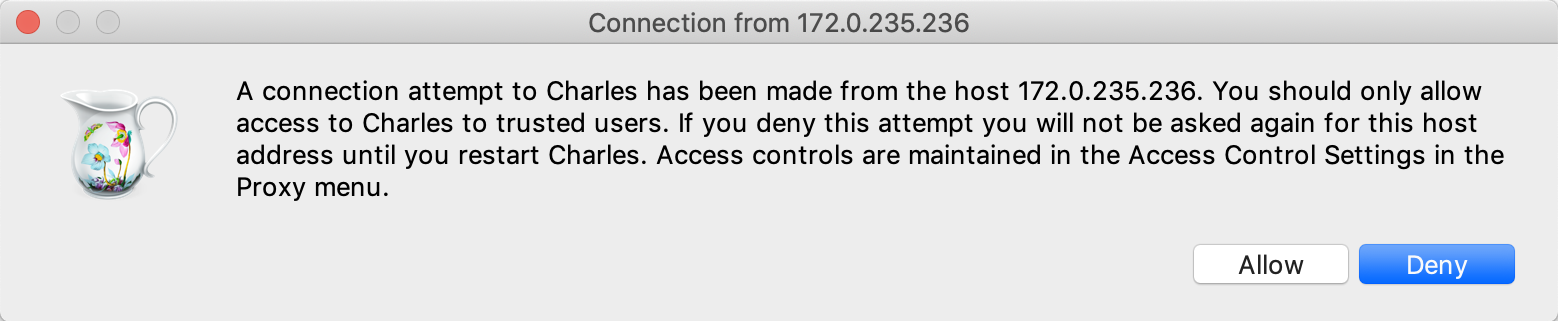
After the mobile device is configured, the first request from the device that reaches Charles triggers a prompt. You must click Allow:
You can now see HTTP requests from the mobile device in Charles. For example, if you visit
http://www.antfin.com/in the phone's browser, the request appears in Charles, as shown in the following figure: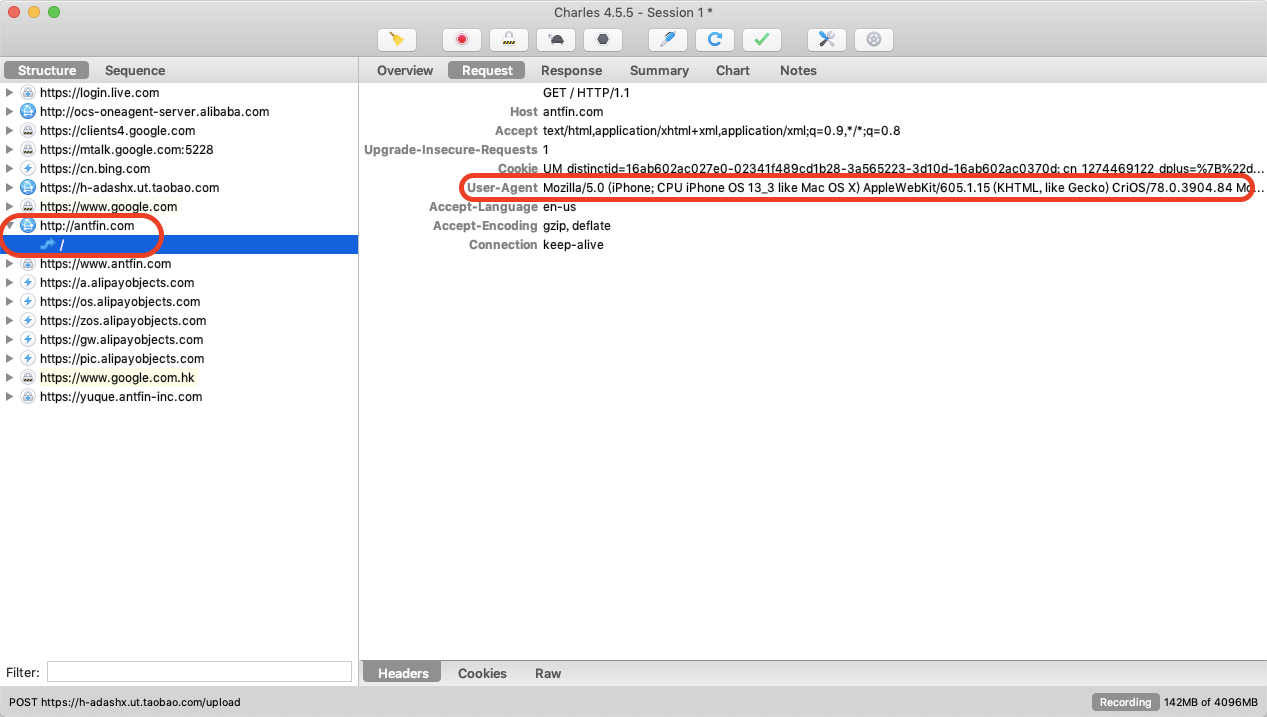
Configure SSL Proxying
By default, Charles does not decrypt HTTPS messages. To analyze the content of HTTPS messages, you must configure the SSL Proxying feature. This process involves two main parts:
Install and trust the Charles Root CA on the device (required for both emulators and physical devices).
Configure the HTTPS sites that you want to decrypt in Charles.
Configure the device
With Charles running, use a browser on your mobile device to visit
chls.pro/ssl. For iOS, you must use Safari. The browser automatically downloadscharles-proxy-ssl-proxying-certificate.pemand prompts you to install theCharles Proxy Customer Root Certificate.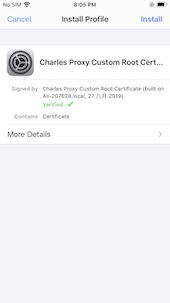
On Android, you must name the certificate and install it in the user trusted credentials, also known as the Customer Certificate.
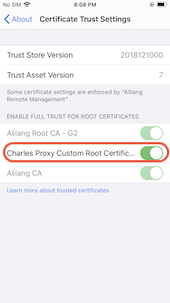
For iOS 10 and later, go to Settings > General > About > Certificate Trust Settings. Enable full trust for the Charles certificate that you installed in the previous step.
Note that for an Android App, you must add a network security configuration to trust user credentials. Follow these steps:
In your Portal project, add a Network Security Configuration XML resource to
res/xml/network_security_config.xml. The XML content is as follows:<network-security-config> <debug-overrides> <trust-anchors> <!-- Trust user added CAs while debuggable only --> <certificates src="user" /> </trust-anchors> </debug-overrides> </network-security-config>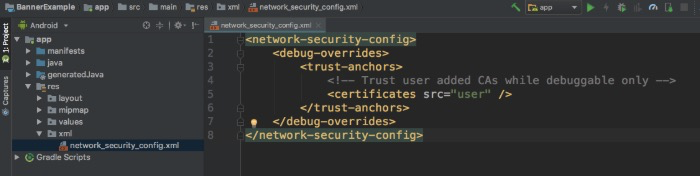
Update the
AndroidManifest.xmlfile to use the network security configuration:<?xml version="1.0" encoding="utf-8"?> <manifest ... > <application ... android:networkSecurityConfig="@xml/network_security_config" ... > ... </application> </manifest>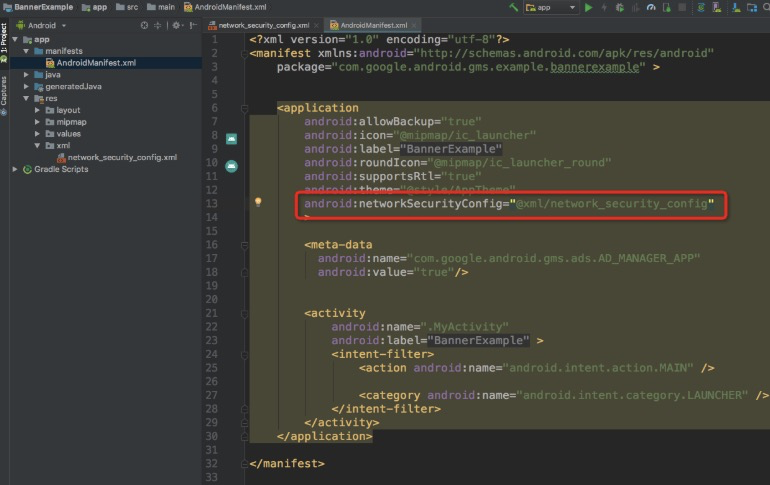
Click here to download the sample code for trusting the User CA.
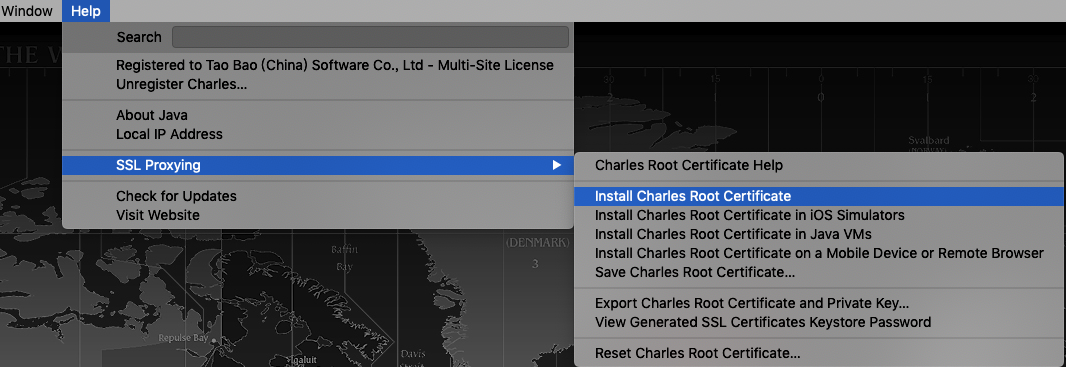
If your local machine (Mac) needs to trust the Charles certificate, go to Help > SSL Proxying > Install Charles Root Certificate to install the certificate.
Configure Charles
In the Charles menu bar, select Proxy > SSL Proxy Settings…. On the SSL Proxying tab, select the Enable SSL Proxying checkbox, and then add the domain names and ports for which you want to decrypt HTTPS messages.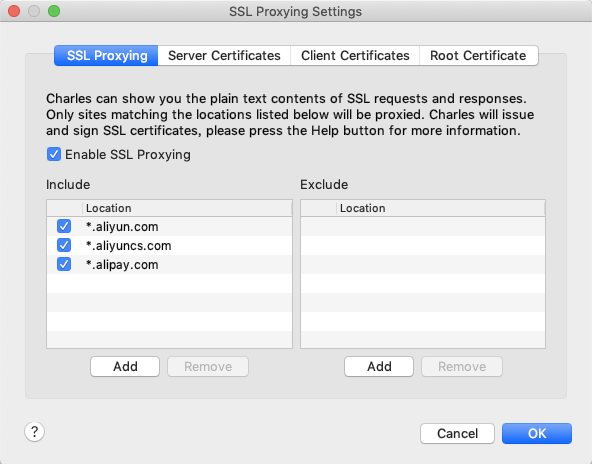
For mPaaS public cloud users, add the following domain names:
*.aliyun.com*.alipay.com*.aliyuncs.com
For Apsara Stack users, follow the preceding configuration and add your custom domain names.
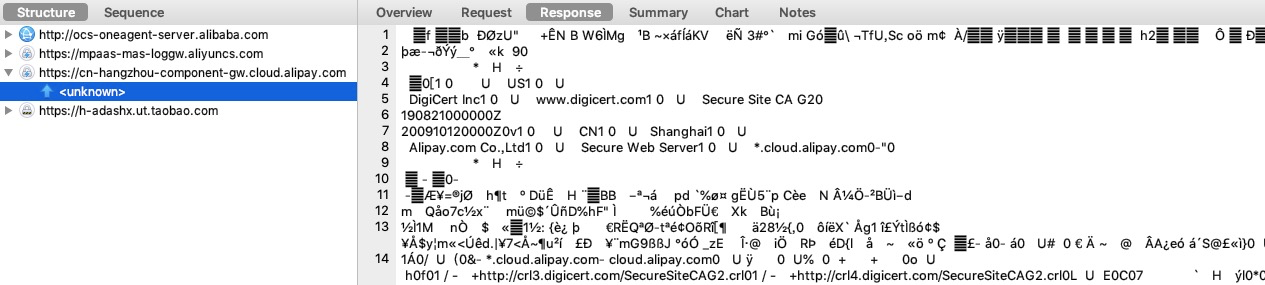
After you complete the configuration, you can view the content of HTTPS messages in Charles. For example:
Before configuration: The HTTPS message is garbled.
After configuration: The HTTPS message content is decrypted.
