This topic describes how to use DataHub to migrate log data to MaxCompute.
Prerequisites
The following permissions are granted to the account authorized to access MaxCompute:
CreateInstance permission on MaxCompute projects
Permissions to view, modify, and update MaxCompute tables
For more information, see MaxCompute permissions.
Background information
DataHub is a platform that is designed to process streaming data. After data is uploaded to DataHub, the data is stored in a table for real-time processing. DataHub executes scheduled tasks within five minutes to synchronize the data to a MaxCompute table for offline computing.
To periodically archive streaming data in DataHub to MaxCompute, you need only to create and configure a DataHub connector.
Data type mappings
MaxCompute | DataHub |
BIGINT | BIGINT |
STRING | STRING |
BOOLEAN | BOOLEAN |
DOUBLE | DOUBLE |
DATETIME | TIMESTAMP |
DECIMAL | DECIMAL |
TINYINT | TINIINT |
SMALLINT | SMALLINT |
INT | INTEGER |
FLOAT | FLOAT |
BLOB | STRING |
MAP | Not supported |
ARRAY | Not supported |
Procedure
On the odpscmd client, create a table that is used to store the data synchronized from DataHub. For example, you can execute the following statement to create a table:
CREATE TABLE test(f1 string, f2 string, f3 double) partitioned by (ds string);Create a project in the DataHub console.
Log on to the DataHub console. In the upper-left corner, select a region.
In the left-side navigation pane, click Projects.
In the upper-right corner of the Projects page, click Create Project.
In the Create Project panel, configure Name and Description, and click Create.
Create a topic.
On the Projects page, find the desired project and click View in the Actions column.
On the project details page, click Create Topic in the upper-right corner.
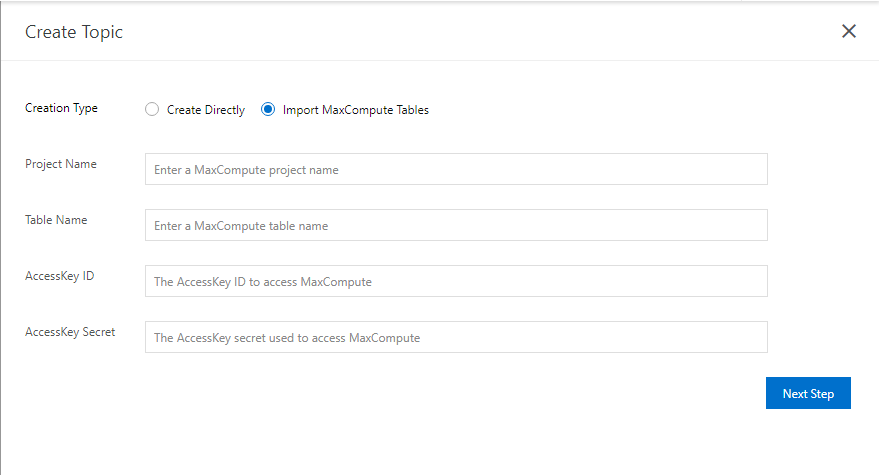
In the Create Topic panel, select Import MaxCompute Tables for Creation Type and configure other parameters.

Click Next Step to complete topic configurations.
NoteSchema corresponds to a MaxCompute table. The field names, data types, and field sequence specified by Schema must be consistent with those of the MaxCompute table. You can create a DataConnector only if the three conditions are met.
You are allowed to migrate the topics of the TUPLE and BLOB types to MaxCompute tables.
A maximum of 20 topics can be created by default. If you require more topics, submit a ticket.
The owner of a DataHub topic or the Creator account has the permissions to manage a DataConnector. For example, you can create or delete a DataConnector.
Write data to the newly created topic.
On the Topic List tab of the project details page, find the newly created topic and click View in the Actions column.
On the topic details page, click Connector in the upper-right corner.
In the Create Connector panel, click MaxCompute, configure the parameters, and then click Create.
View DataConnector details.
In the left-side navigation pane, click Projects.
On the Projects page, find the desired project and click View in the Actions column.
On the Topic List tab, find the topic and click View in the Actions column.
On the topic details page, click the Connector tab.
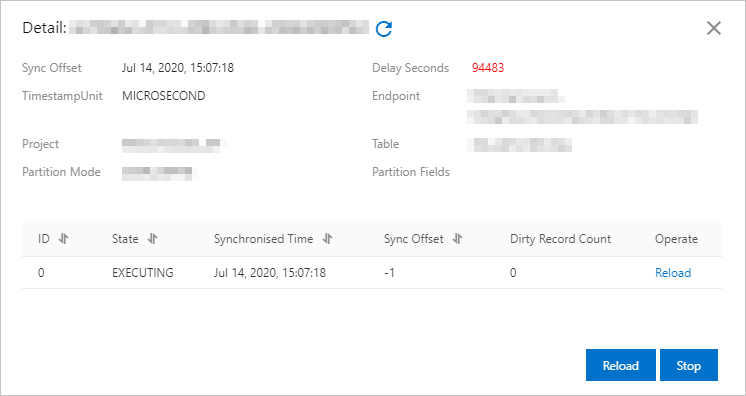
Find the newly created DataConnector and click View to view DataConnector details.
By default, DataHub migrates data to MaxCompute tables at five-minute intervals or when the amount of data reaches 60 MB. Sync Offset indicates the number of migrated data entries.

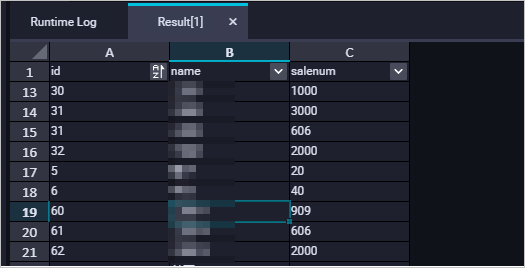
Execute the following statement to check whether the log data is migrated to MaxCompute:
SELECT * FROM test;If the result shown in the following figure is displayed, the log data is migrated to MaxCompute.
