The custom terms feature lets you display your company's terms, such as a privacy policy or Terms of Service, on the logon page of Identity as a Service (IDaaS) Employee Identity and Access Management (EIAM). When a user logs on successfully, they are considered to have agreed to the terms. This feature helps you meet your compliance requirements.
Before you begin
Before you configure custom terms, prepare the following items:
Prepare content | Description |
Term content | Prepare a prompt for the terms and one or more links to the terms that require user agreement. |
Trial or Enterprise instance | The custom term feature is available only for Trial and Enterprise instances. Try an instance or upgrade an instance. |
Add custom terms
On the page, click Add Policy.
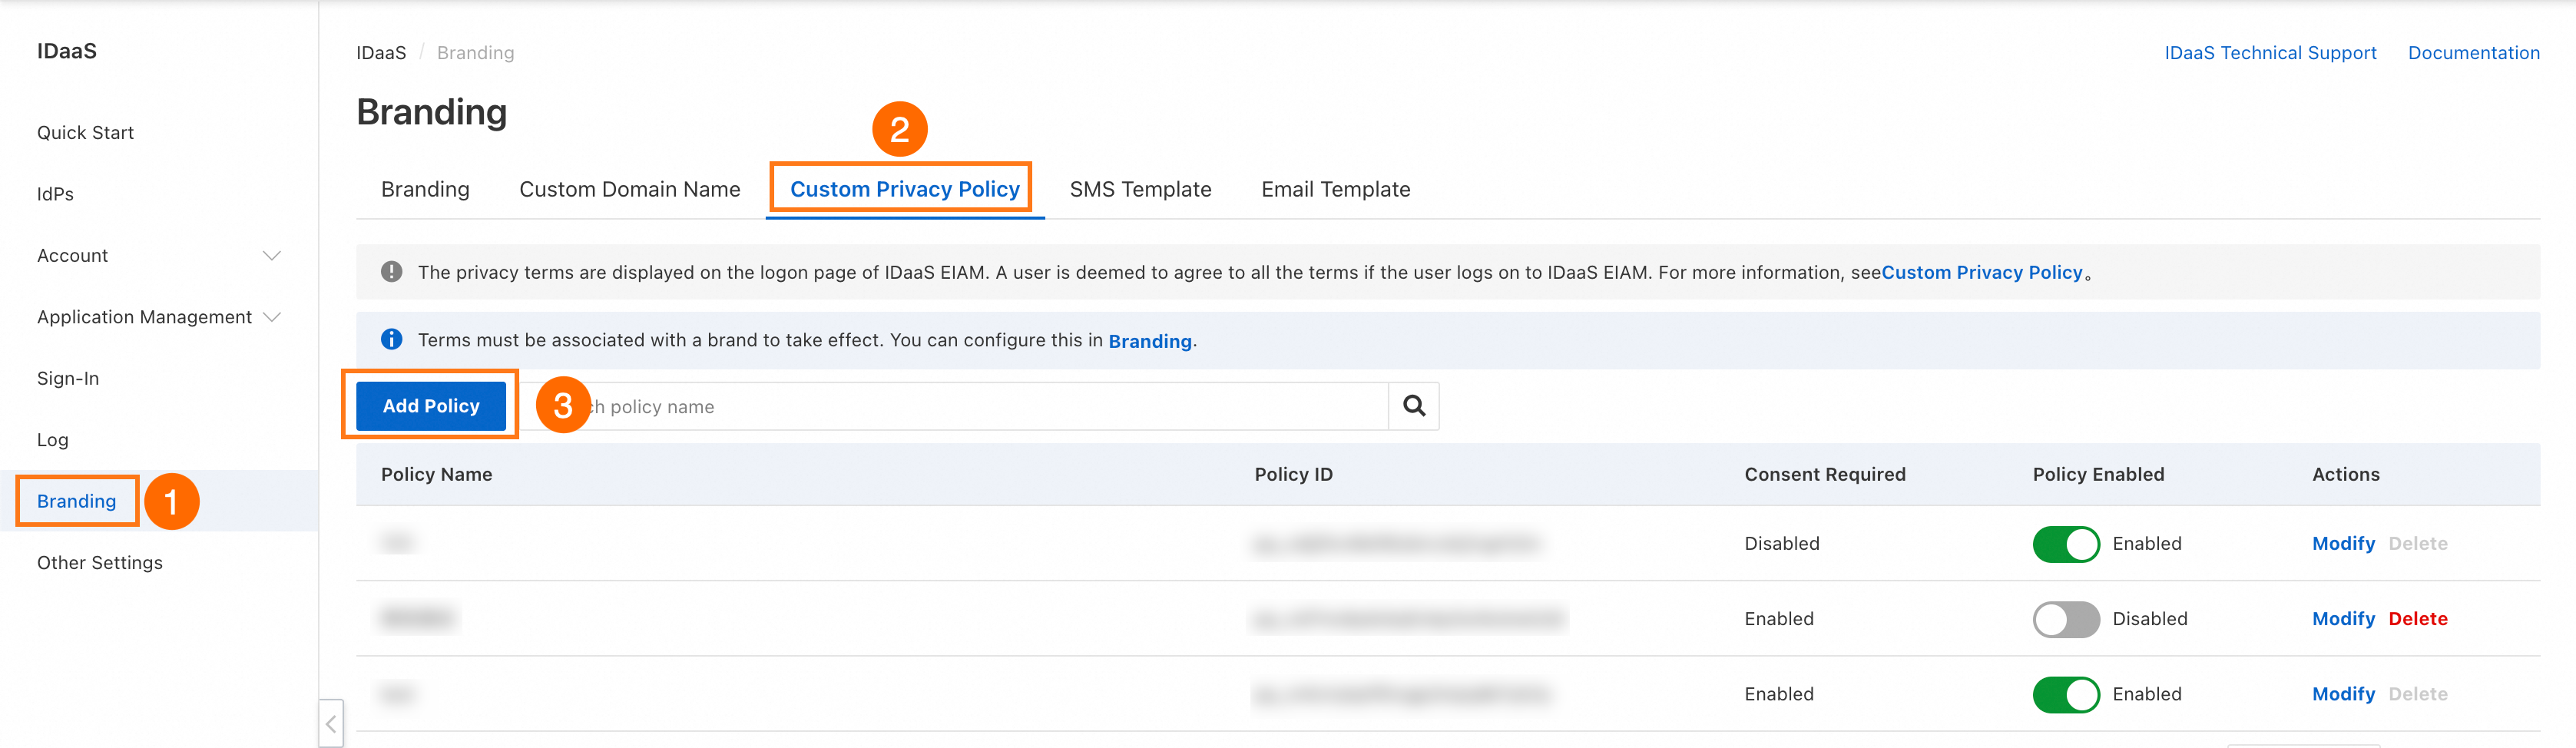
In the Add Custom Policy panel that appears, configure the parameters as described in the following table.
Parameter
Description
Term Name
The name of the custom term. You can enter up to 128 characters.
Select Default Language
Select the default language for the custom term. You can configure multiple languages. If a language is not configured for a term, the term is displayed in the default language.
Select Language
Configure the languages that the term supports. You can select Simplified Chinese and English. You can add multiple languages, but you cannot select the same language more than once.
Reminder
This prompt appears on the IDaaS EIAM logon page. The term items are appended to this prompt.
Terms
After users agree to the terms, they can view the terms or revoke their consent in the application portal. If a user revokes consent, they are automatically logged out. You can also delete a term. If you delete a term, all consent records for that term are purged.
Consent Required
If you enable this option, users must select the checkbox for the term item before they can log on.
Click Save.
Enable custom terms
On the page, find the term that you want to enable and turn on the switch in the Policy Enabled column
 .
.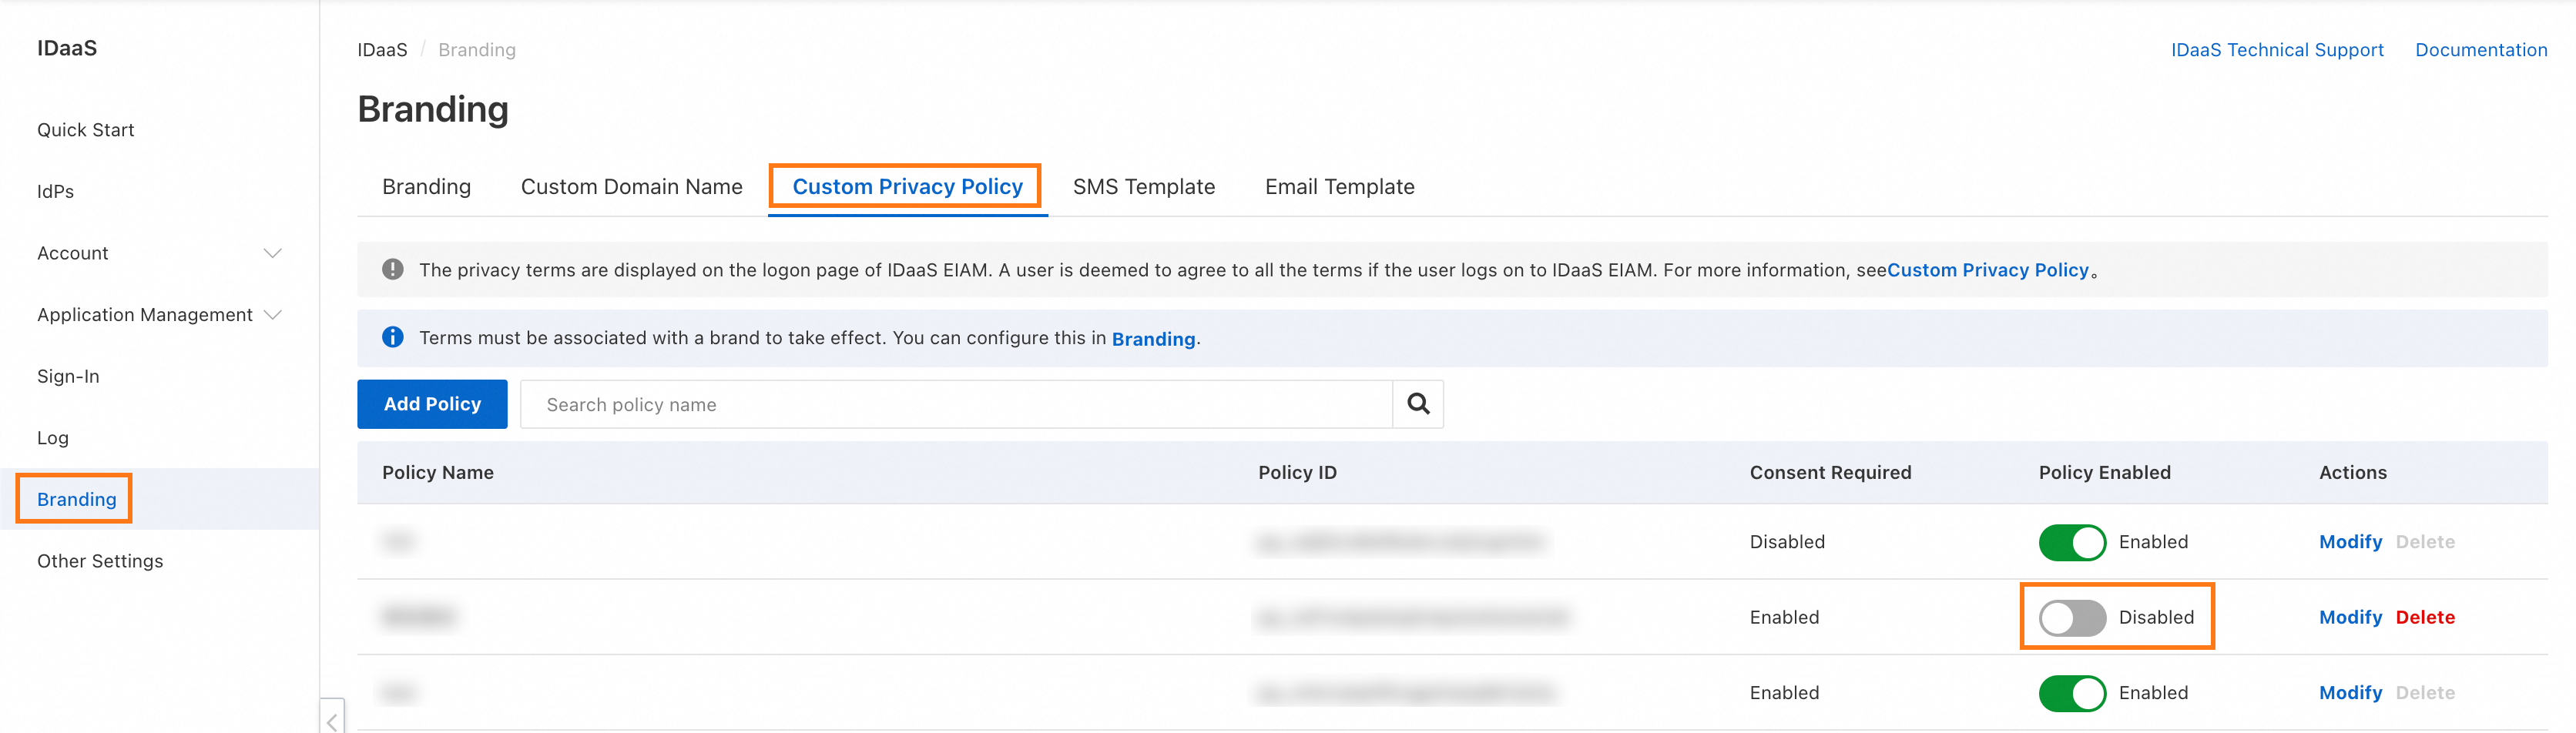
In the Enable dialog box that appears, click OK.
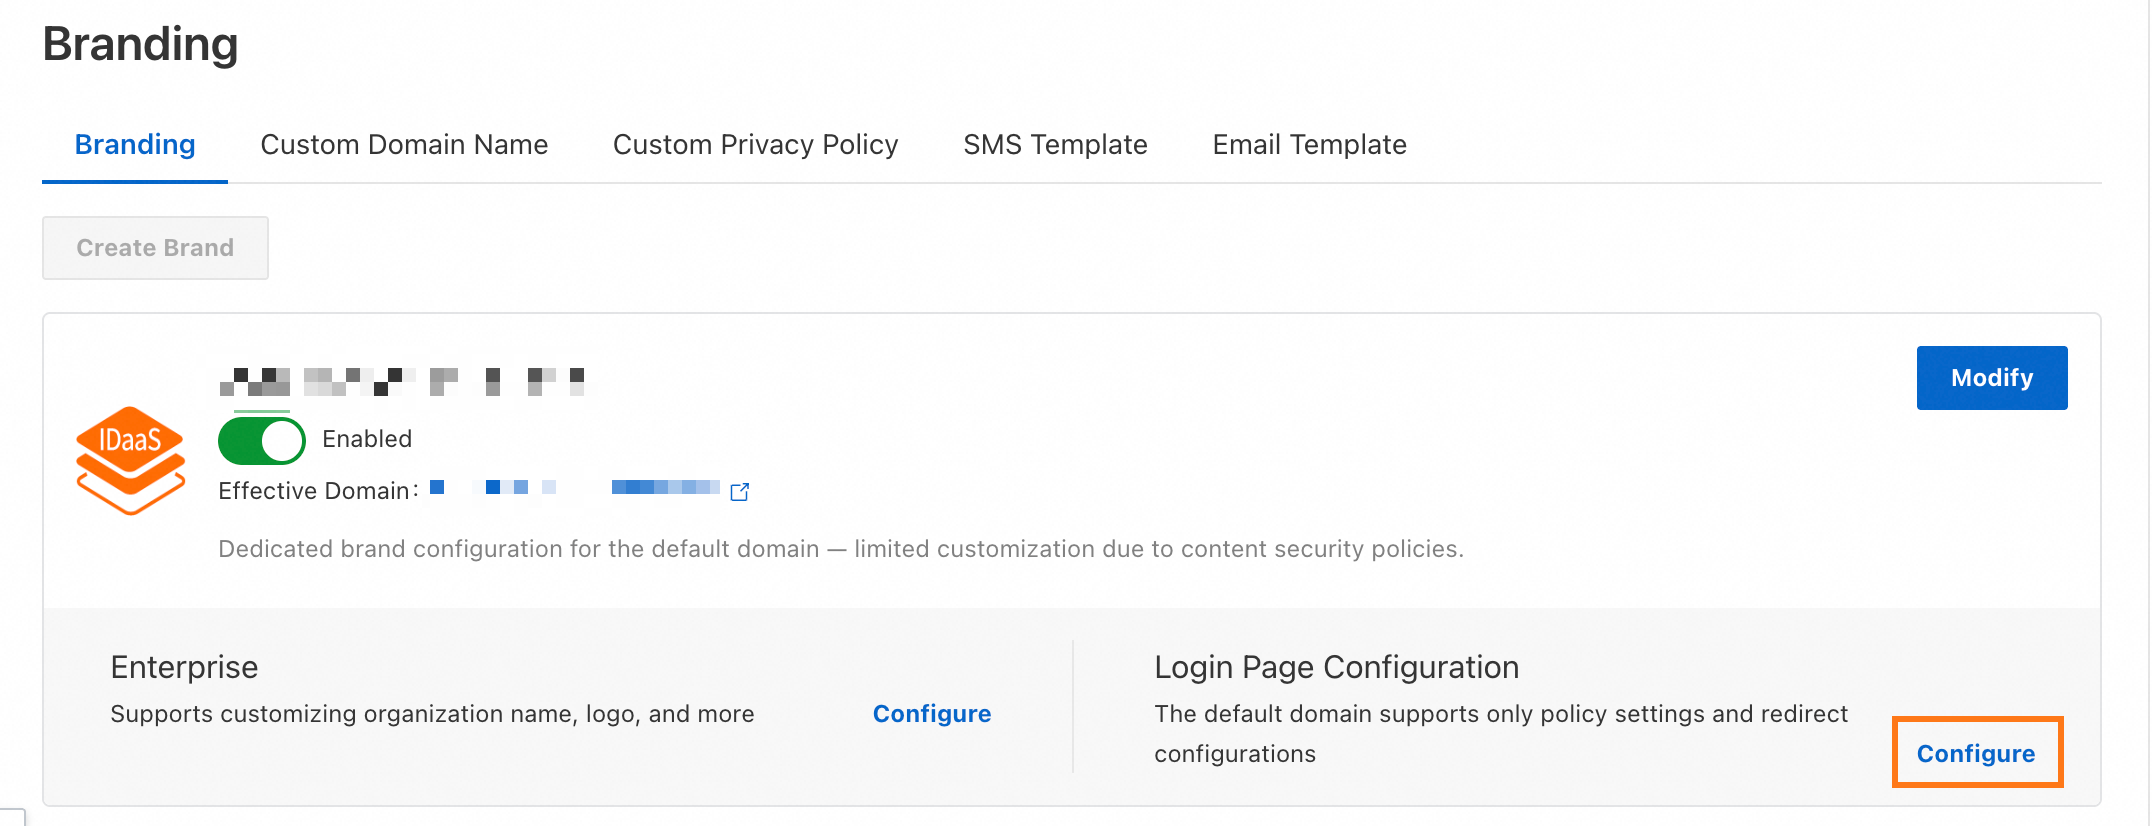
On the page, find the target brand and click Configure in the Login Page Configuration section.
On the Login Page Configuration page, go to the Policy Configuration tab. Select the custom term to attach and click Save and Publish.
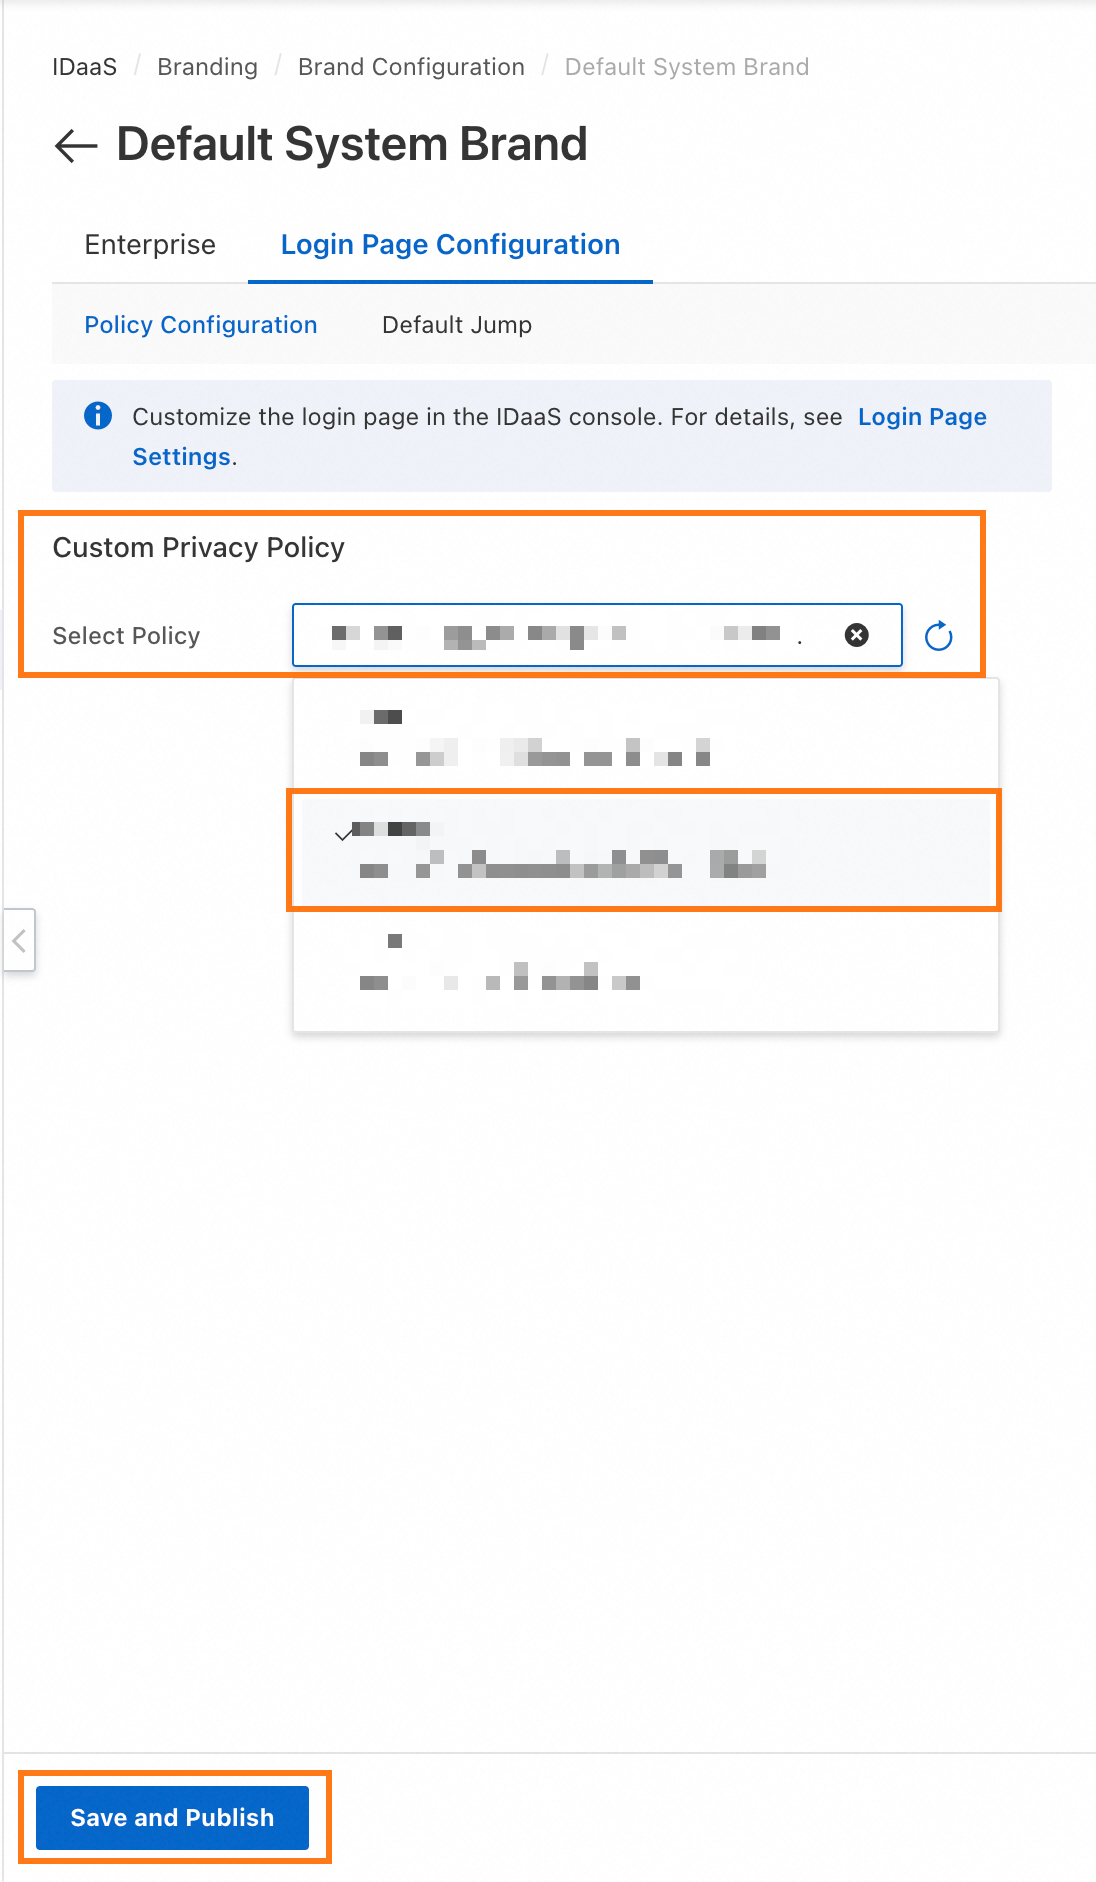
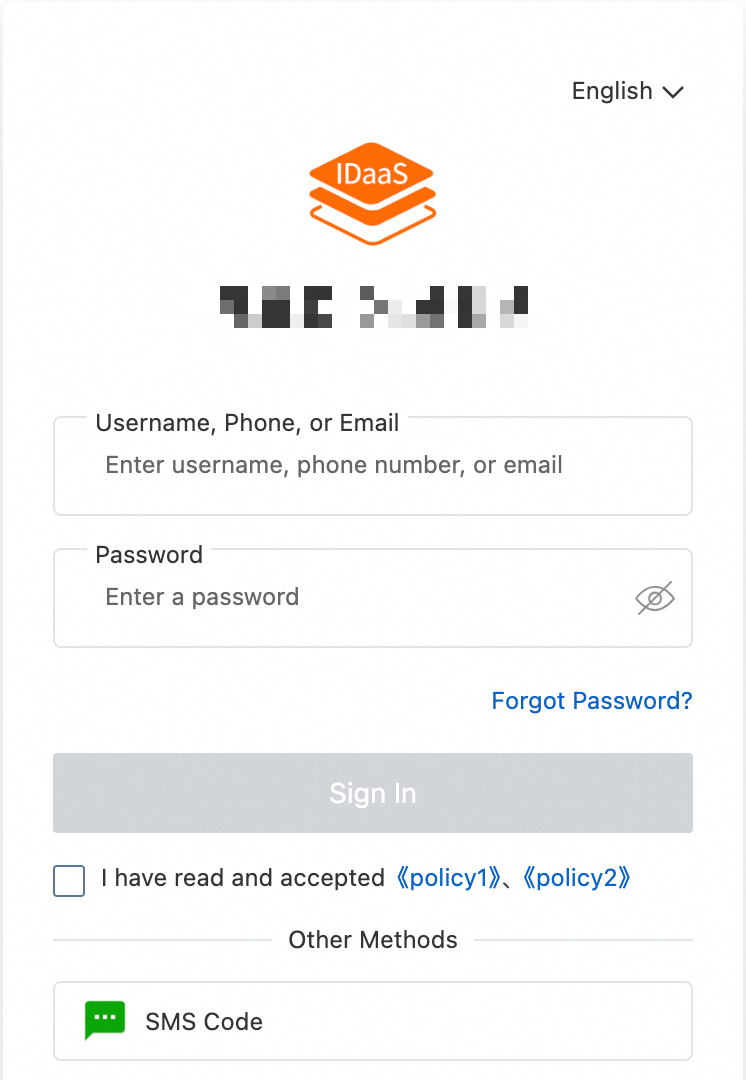
After you complete the configuration, the terms are displayed on the IDaaS EIAM logon page. When a user logs on successfully, they are considered to have agreed to the terms.
View and revoke terms
After logging on, users can view the terms they have agreed to on the My Account page of the application portal. Users can revoke their consent to the terms. When a user revokes their consent, they are immediately logged out of their IDaaS account.
IDaaS EIAM only provides the ability to consent to and revoke terms. To purge related data, such as mobile phone numbers or mailboxes, after a user revokes consent, you must monitor the audit logs. An administrator must then manually purge the data.
View audit logs for terms
When a user revokes consent to the terms, an administrator can view the revocation record in the User Behavior section on the Log Management Operations page.