After you create a custom event bus in EventBridge, you can configure a custom event rule to push events generated by a specific event source to a Lark group. This topic describes how to publish an event generated by an event source and then push the event to a Lark group.
Background information
A Lark chatbot is a dedicated tool for a Lark group. A Lark chatbot can push messages to the current Lark group by calling the webhook URL without the need for approval from the tenant administrator.
EventBridge supports event targets of the HTTP type. You can use EventBridge to push events to a Lark chatbot to implement the change-based alerting feature by using webhook URLs. Event targets of the HTTP type support HTTP and HTTPS URLs that can be accessed over the Internet and in Alibaba Cloud virtual private clouds (VPCs). You can integrate the webhook URLs into various applications to meet different business requirements. For more information, see Route events to HTTP endpoints.
Scenarios
You can connect a Lark chatbot to EventBridge in the following scenarios:
Scenarios in which you want to obtain event information by using a Lark chatbot. You can integrate enterprise systems into Lark by using a Lark chatbot to obtain a one-stop user experience.
Scenarios in which low-cost development is required. In scenarios in which low-cost development is required, you need to develop only the server-side code for excellent interactions with a chatbot. After you integrate the chatbot with Lark, other members in the enterprise can easily use the chatbot.
This topic describes how to publish events to Lark by using EventBridge.
Process
Create a custom event bus to receive events generated by a custom application or to process existing messages.
Create a Lark chatbot to receive events from the custom event bus and send notifications to the Lark group.
Configure an event rule for the custom event bus that you created.
Verify the result to check whether events can be pushed to the Lark group.
Prerequisites
A Lark account is registered and a Lark group is created.
EventBridge is activated and the required permissions are granted to a Resource Access Management (RAM) user. For more information, see Activate EventBridge and grant permissions to a RAM user.
Step 1: Create a custom event bus
Log on to the EventBridge console.
In the left-side navigation pane, click Event Buses. On the Event Buses page, select a region in the top navigation bar and click Quickly Create in the Custom Event Buses section.

In the Create Custom Event Bus wizard, perform the following steps:
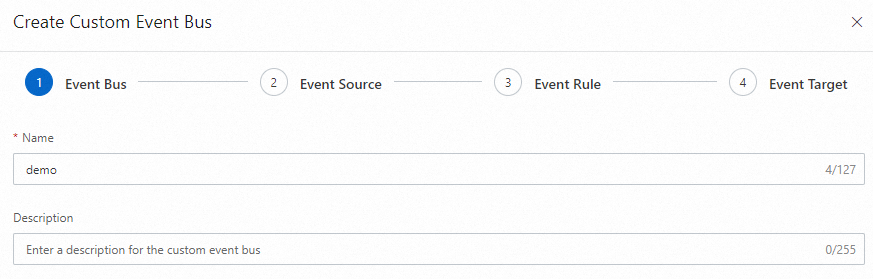
In the Event Bus step, configure the Name and Description parameters and click Next Step.
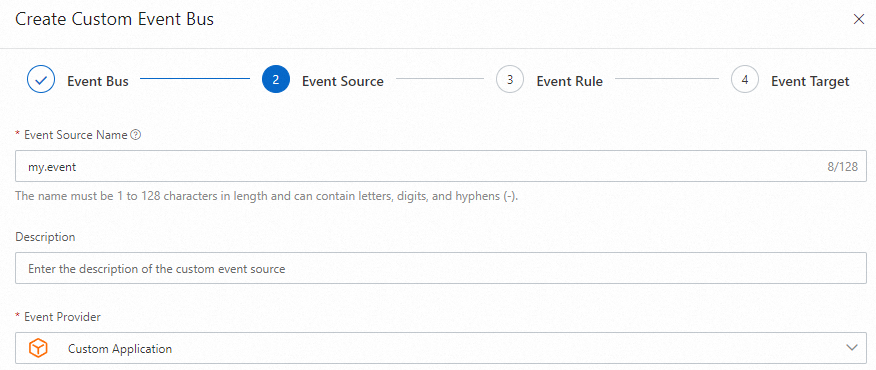
In the Event Source step, configure the Event Source Name parameter, set the Event Provider parameter to Custom Application, and then click Next Step.
In the Event Rule step, click Skip. In the Skip Subsequent Steps message, click OK.
NoteIn this example, an event rule and an event target are not created on the custom event bus.
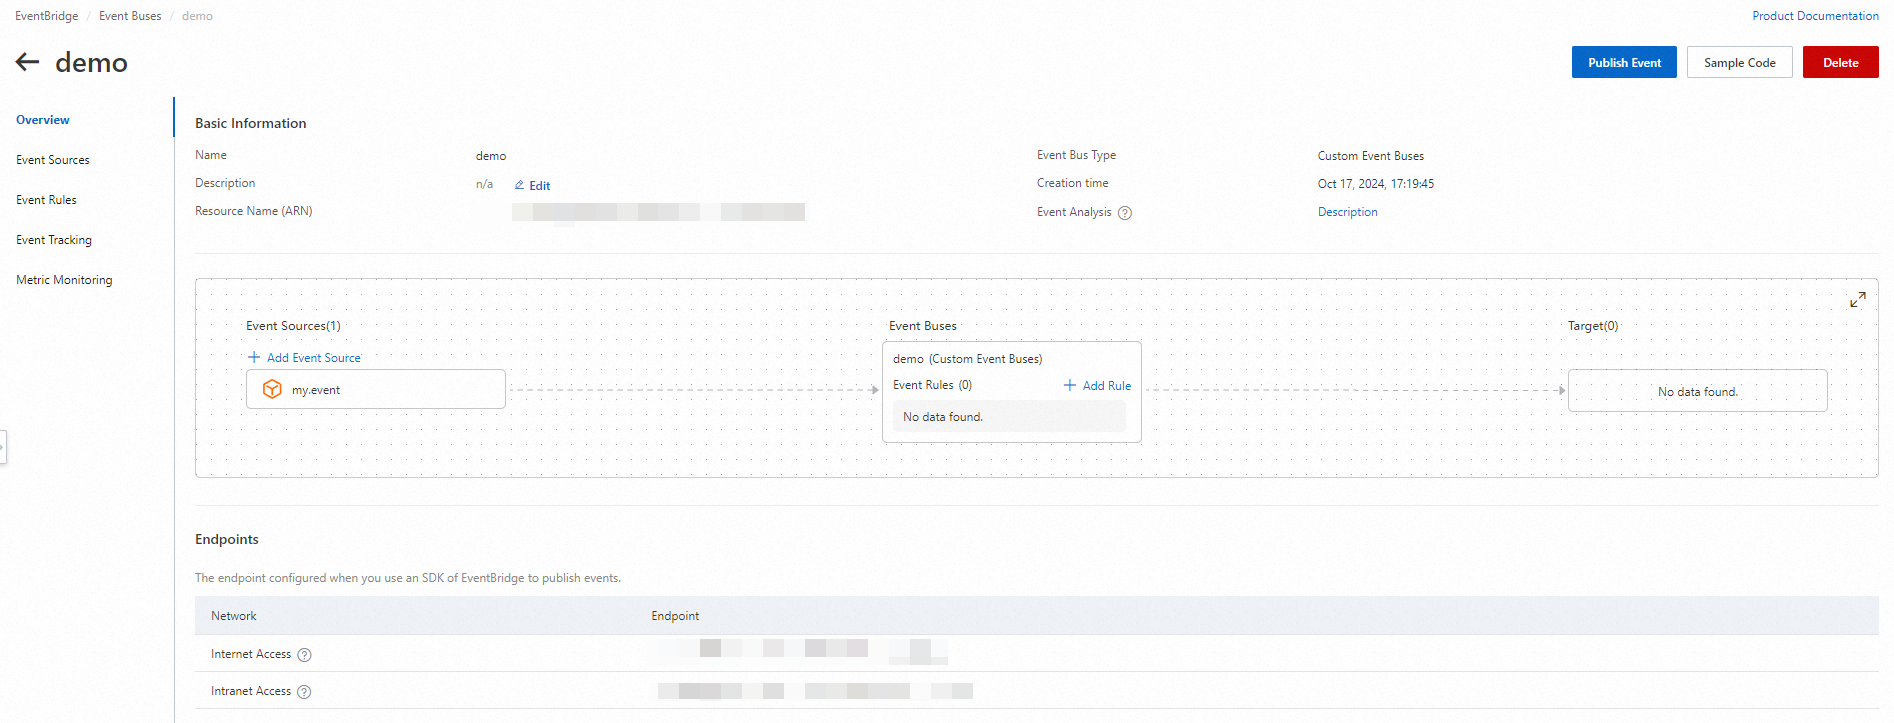
View the custom event bus that you created.
Step 2: Create a Lark chatbot
Log on to Lark for PC and select the Lark group to which you want to add a chatbot.
In the upper-right corner of the Lark group that you want to manage, choose
 > Settings.
 In the Settings panel, click Bots.
In the Add Bot panel, click Custom Bot.
In the panel that appears, enter the name and description of the custom chatbot and click Add.
In the panel that appears, copy the webhook URL and configure the Security settings parameter based on your business requirements. Then, click Finish.
Step 3: Configure an event rule
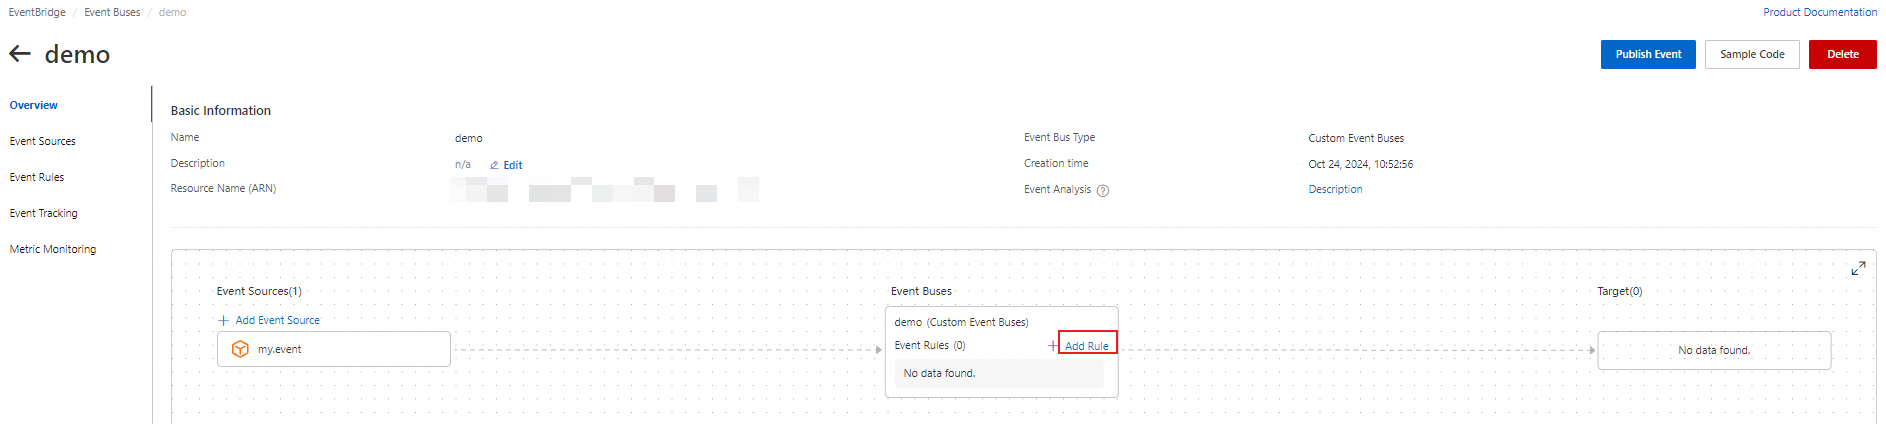
Go to the Overview page of the custom event bus that you created and click Add Rule.
In the Create Rule wizard, perform the following steps:
In the Configure Basic Info step, specify the name of the rule and click Next Step.
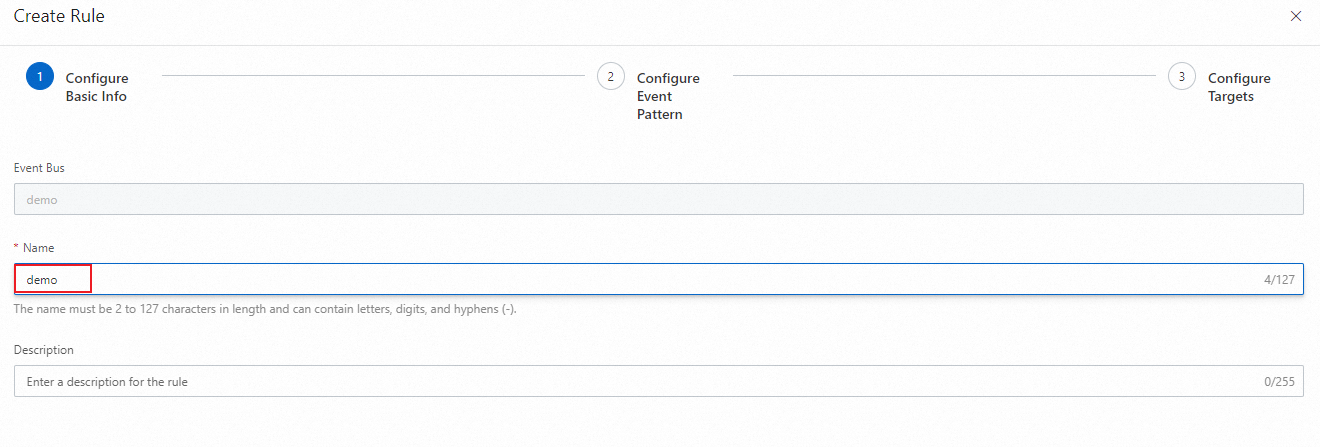
In the Configure Event Pattern step, click Next Step.
ImportantIn this example, the event pattern is not configured. In the production environment, you must configure the Event Source and Event Type parameters in the Configure Event Pattern step based on your business requirements.
In the Configure Targets step, set the Service Type parameter to HTTPS and the URL parameter to the webhook URL that you copied in Step 2, set the Body parameter to Template, configure parameters in the Variables and Template code editors, and then click Create.
NoteFor information about how to configure the template, see Template.
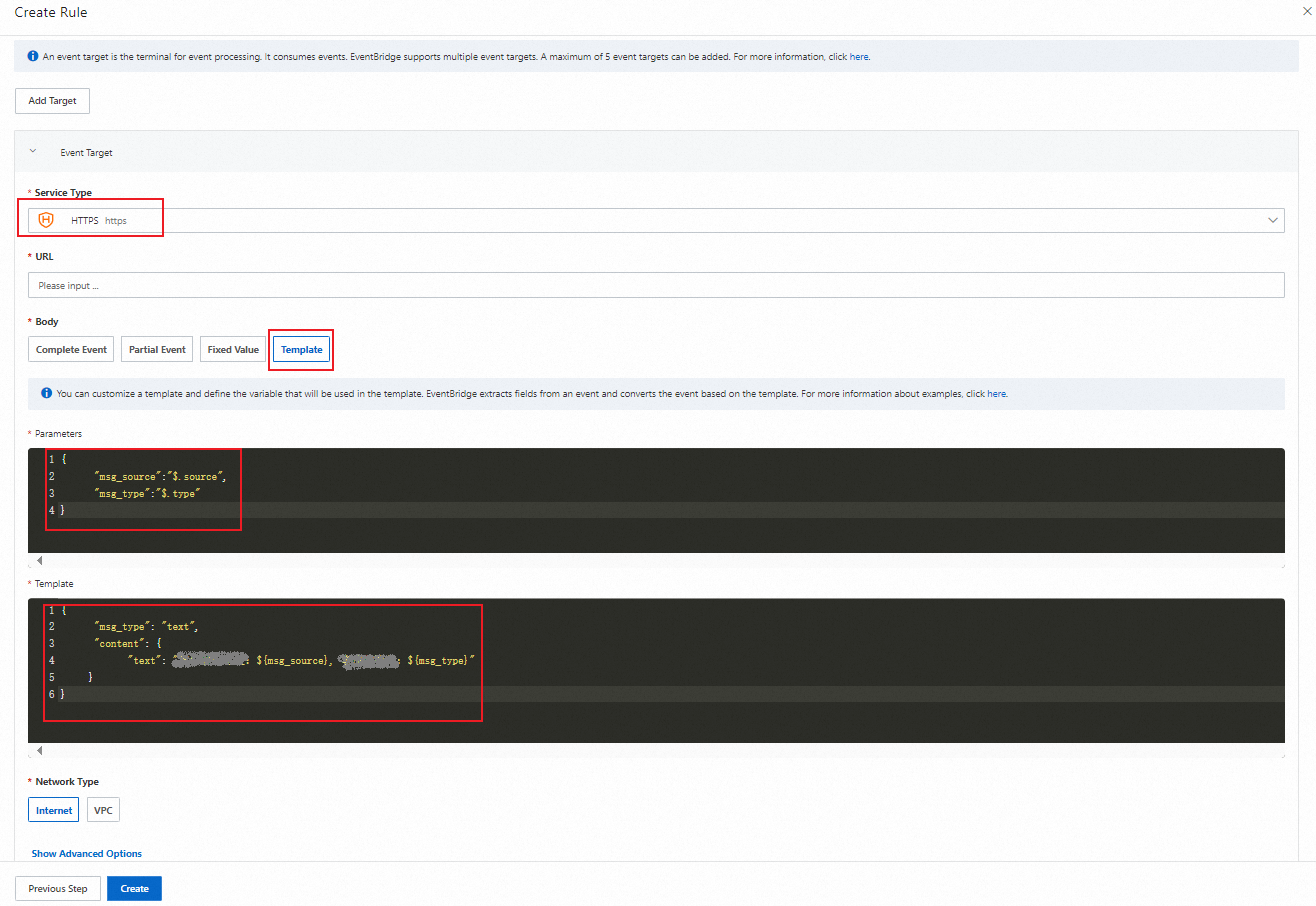
Variables:
{ "msg_source":"$.source", "msg_type":"$.type" }Template:
{ "msg_type": "text", "content": { "text": "Event source: ${msg_source}. Event Type: ${msg_type}" } }NoteIn this example, the configurations in the template are simple. In the production environment, you must configure the template based on your business requirements.
Step 4: Verify the result
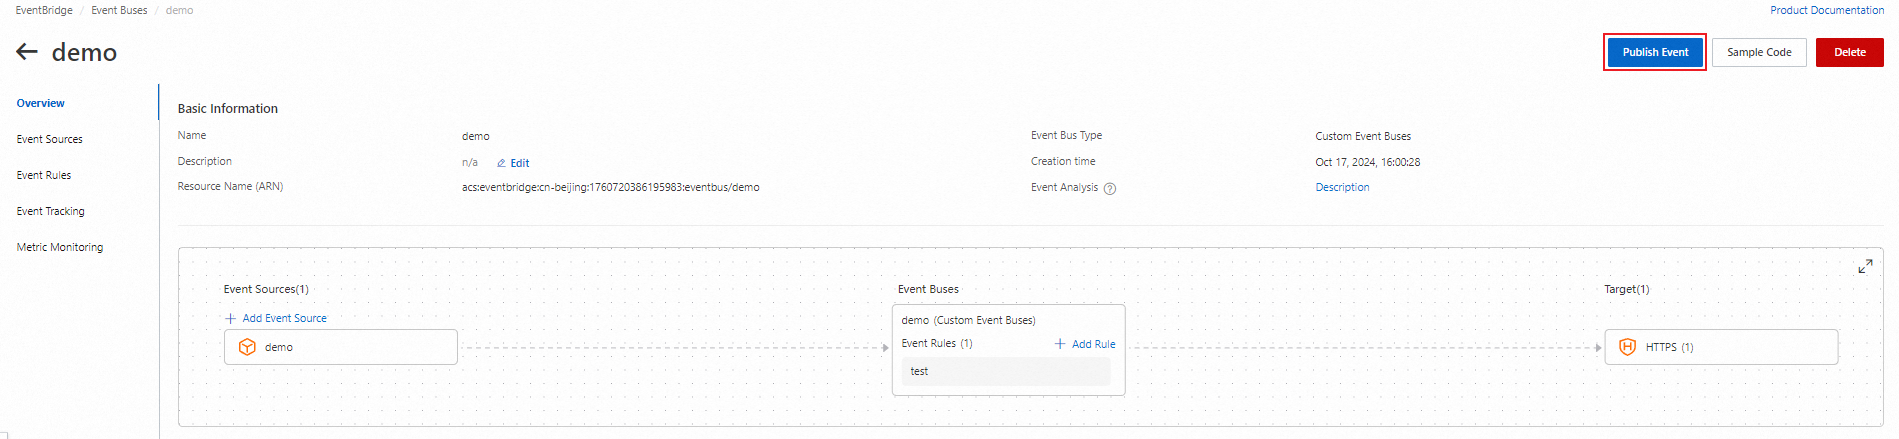
On the Overview page of the custom event bus that you created, click Publish Event.
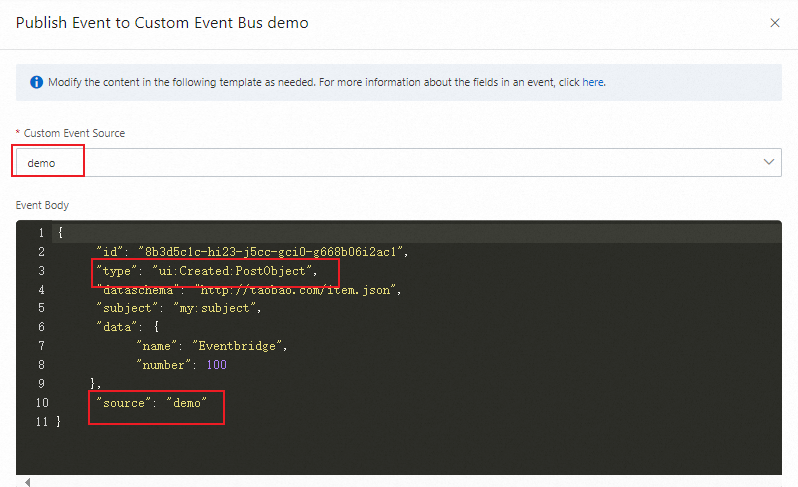
In the Publish Event to Custom Event Bus panel, select the custom event source that you created from the Custom Event Source drop-down list, configure parameters in the Event Body code editor, and then click OK.
View the pushed event in the Lark group.