If your Kibana service restarts due to an exception or manual deletion, its configuration indices (e.g., .kibana_1, .kibana_2) may be reset. This results in the loss of index patterns, dashboards, and user roles. This topic explains how to restore these configurations from a snapshot or by using the Reindex API.
Background
Kibana stores its internal data in a physical index (typically .kibana_1) but accesses it via the alias .kibana.
If .kibana_1 is corrupted or deleted:
Kibana may automatically generate a new, empty
.kibana_1index upon restart.The alias
.kibanawill point to this new, empty index.Your custom dashboards and settings will appear to be missing.
Prerequisites
Snapshots: You must have automatic snapshots enabled or a manual backup containing a healthy version of the
.kibana_1index.Permissions: You need administrative access to the Elasticsearch cluster.
Cluster state: If the index does not exist at all, restart the Kibana service once to initialize the default index structure.
Procedure
Method 1: Restore directly from a snapshot
Log on to the Kibana console of your Elasticsearch cluster and go to the Kibana homepage.
In the left navigation menu, click Dev tools.
On the Console tab, find the latest snapshot taken before the error occurred:
GET _cat/snapshots/aliyun_auto_snapshot?valiyun_auto_snapshot: the default repository for Alibaba Cloud ES.After successful execution, the system returns details about all snapshots in the repository, such as the id and status.
NoteRecord the id of the most recent snapshot taken before the Kibana exception occurred. You will need it later.

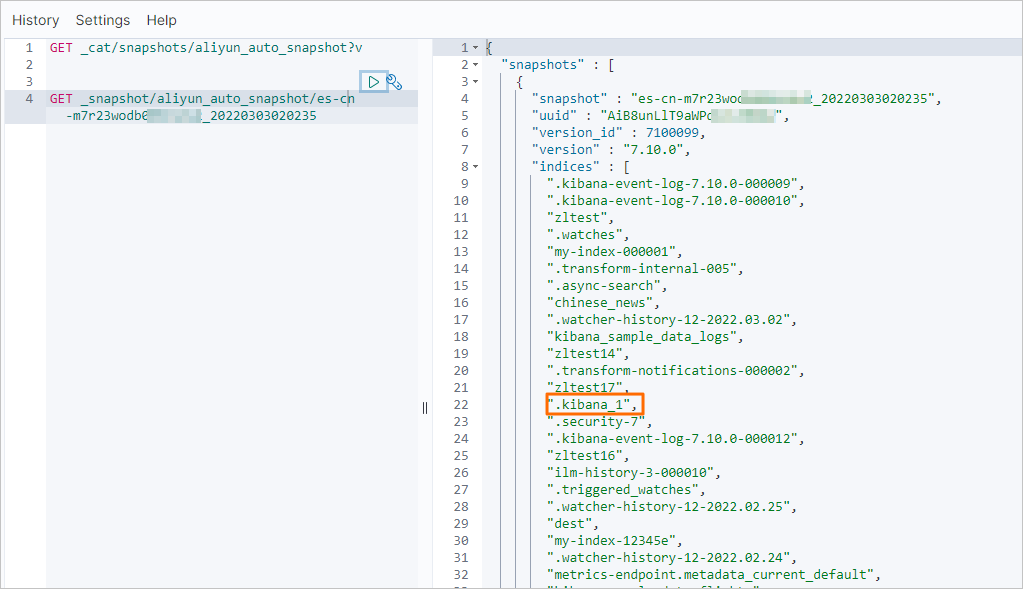
Verify that
.kibana_1exists within that snapshot:GET _snapshot/aliyun_auto_snapshot/<yourSnapshotId><yourSnapshotId>: the id of the most recent snapshot taken before the Kibana exception occurred. Enter the id you recorded in Step 3. For example, es-cn-m7r23wodb006n****_20220303020235.
After successful execution, the result shown in the following figure is returned. You can proceed to the next step only if the result includes a .kibana_1-related index.
To overwrite an index, you must first close it:
ImportantClosing this index may cause the Kibana UI to become unresponsive. If you lose access to the UI, complete the following steps using cURL command to restore the .kibana_1 index. For more information, see FAQ.
POST /.kibana_1/_closeAfter successful execution, the following result is returned.
{
  "acknowledged" : true,
  "shards_acknowledged" : true,
  "indices" : {
    ".kibana_1" : {
      "closed" : true
    }
  }
}
Restore the .kibana_1 index from the snapshot:
POST _snapshot/aliyun_auto_snapshot/<yourSnapshotId>/_restore
{
   "indices": ".kibana_1",
   "rename_pattern": ".kibana_1",
   "rename_replacement": ".kibana_1"
}
Parameter
Description
<yourSnapshotId>
ID of the snapshot for automatic backup ID: Enter the ID that you retrieved in Step 3.
indices
The name of the index to restore.
rename_pattern
Optional. A regular expression to match the name of the index to restore.
rename_replacement
Optional. A rule to rename matched indexes.
After successful execution,
"accepted" : trueis returned.Verify restoration.
In the upper-left corner of the Kibana console, click the
 icon.
icon. In the left navigation menu, choose .
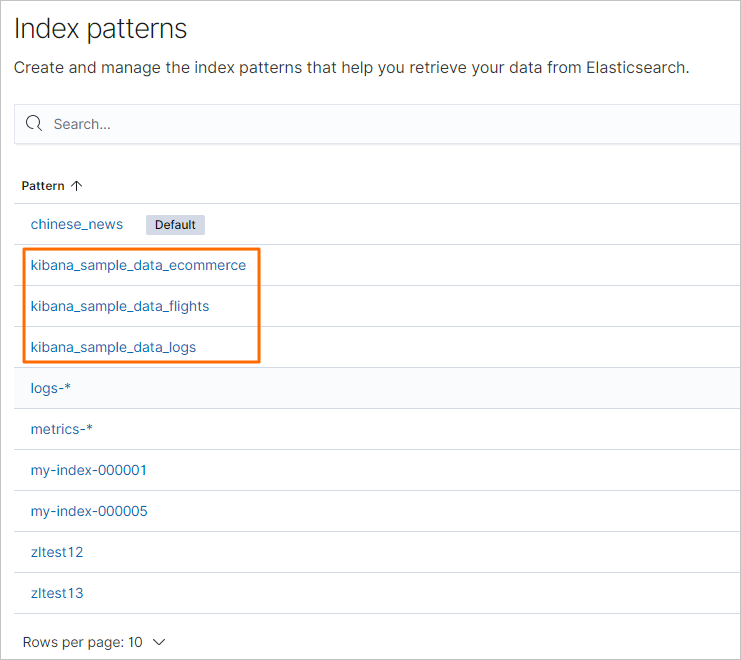
In the Kibana section, click Index Patterns.
On the Index patterns page, click a pattern whose name starts with kibana_ to check whether data is restored.
Method 2: Recover via reindex
Use this method if you want to avoid overwriting the current index directly or if you want to verify the data before applying it.
Query the details of the latest snapshot and check whether the .kibana_1 index exists in the Elasticsearch cluster.
For instructions, see Steps 1 to 4 in Method 1: Restore directly from a snapshot.
NoteYou can proceed to the next step only if a .kibana_1-related index exists in the cluster.
Restore the .kibana_1 index to a backup index named kibana_backup.
POST _snapshot/aliyun_auto_snapshot/<yourSnapshotId>/_restore
{
   "indices": ".kibana_1",
   "rename_pattern": ".kibana_1",
   "rename_replacement": "kibana_backup"
}
Parameter
Description
<yourSnapshotId>
The ID of the automatic backup snapshot. Enter the ID that you obtained in Step 1.
indices
The name of the index to restore.
rename_pattern
Optional. A regular expression to match the name of the index to restore.
rename_replacement
The name of the backup index.
After successful execution,
"accepted" : trueis returned.Restore to the live index.
Copy the data from the backup index to the active Kibana index:
POST _reindex
{
  "source": {
    "index": "kibana_backup"
  },
  "dest": {
    "index": ".kibana_1"
  }
}
After successful execution, the following result is returned.
{
  "took" : 731,
  "timed_out" : false,
  "total" : 33,
  "updated" : 33,
  "created" : 0,
  "deleted" : 0,
  "batches" : 1,
  "version_conflicts" : 0,
  "noops" : 0,
  "retries" : {
    "bulk" : 0,
    "search" : 0
  },
  "throttled_millis" : 0,
  "requests_per_second" : -1.0,
  "throttled_until_millis" : 0,
  "failures" : [ ]
}
Delete the backup index.
DELETE kibana_backupAfter successful execution,
"accepted" : trueis returned.View the restoration result.
Verify whether Kibana index patterns are restored. If they are, the restore succeeded. For instructions, see Step 7 in Restore the .kibana_1 index using a snapshot.
FAQ

A: When .kibana_1 is closed, Kibana cannot function. You must run the restore command via cURL from an ECS instance in the same VPC:
curl -u <user>:<password> -XPOST "http://<host>:<port>/_snapshot/aliyun_auto_snapshot/<yourSnapshotId>/_restore" -H 'Content-Type: application/json' -d'{"indices": ".kibana_1","rename_pattern": ".kibana_1","rename_replacement": ".kibana_1"}'For more information, see Connect to a cluster from the command line.