The network connectivity feature lets you establish a connection between Serverless Spark and your virtual private cloud (VPC). This connection enables you to access data sources and servers or call other services within the VPC. This topic provides an example of how to connect Spark SQL and Application JAR jobs to a Hive Metastore (HMS) in your VPC by configuring network connectivity.
Prerequisites
A data source must be prepared. This topic uses a DataLake cluster as an example. The cluster must be created on the EMR on ECS page, include the Hive service, and use the Built-in MySQL database for Metadata. For more information, see Create a cluster.
Limitations
Currently, you can only use vSwitches in the following zones.
Step 1: Add a network connection
Go to the Network Connectivity page.
Log on to the EMR console.
In the navigation pane on the left, choose .
On the Spark page, click the name of the target workspace.
On the EMR Serverless Spark page, click Network Connection in the navigation pane on the left.
On the Network Connection page, click Create Network Connection.
In the Create Network Connection dialog box, configure the parameters and click OK.
Parameter
Description
Name
Enter a name for the new connection.
VPC
Select the same VPC as your EMR cluster.
If no VPC is available, click Create VPC to go to the VPC console and create one. For more information, see VPCs and vSwitches.
NoteIf your Serverless Spark needs to access the Internet, make sure the network connection has public network access. For example, you can deploy an Internet NAT gateway in the VPC. This allows the Serverless Spark instance to access the Internet through the gateway. For more information, see Use the SNAT feature of an Internet NAT gateway to access the Internet.
vSwitch
Select a vSwitch in the same VPC as the EMR cluster.
If no vSwitch is available in the current zone, go to the VPC console and create one. For more information, see Create and manage vSwitches.
ImportantYou can only select vSwitches in specific zones. For more information, see Limitations.
The network connection is added when its Status changes to Succeeded.

Step 2: Add a security group rule for the EMR cluster
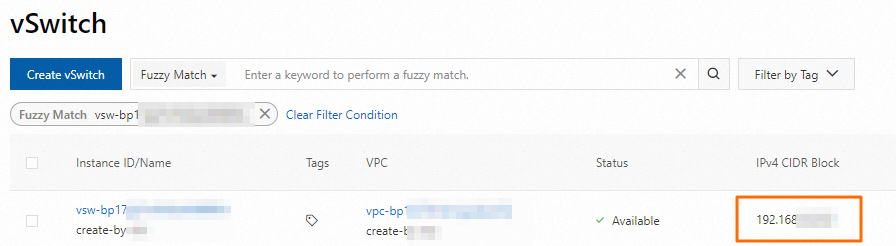
Obtain the CIDR block of the vSwitch specified in the network connection.
You can log on to the VPC console and go to the vSwitches page to obtain the CIDR block of the vSwitch.
Add a security group rule.
Log on to the EMR on ECS console.
On the EMR on ECS page, click the ID of the target cluster.
On the Basic Information tab, in the Security section, click the link next to Cluster Security Group.
On the Security Group Details page, in the Rules section, click Add Rule. Configure the following parameters and click OK.
Parameter
Description
Protocol
Specify the allowed network communication protocol. The default is TCP.
NoteIf your network connection is used for Kerberos authentication, select the UDP protocol and open port 88. For more information about Kerberos authentication, see Enable Kerberos authentication.
Source
Enter the CIDR block of the vSwitch that you obtained in the previous step.
ImportantTo prevent security risks from external attacks, do not set the Authorization Object to 0.0.0.0/0.
Destination (Current Instance)
Specify the destination port to allow access. For example, 9083.
(Optional) Step 3: Connect to the Hive service and query table data
You can skip this step if you have already created and configured a Hive table.
Use Secure Shell (SSH) to log on to the master node of the cluster. For more information, see Log on to a cluster.
Run the following command to enter the Hive command line:
hiveRun the following command to create a table:
CREATE TABLE my_table (id INT,name STRING);Run the following commands to insert data into the table:
INSERT INTO my_table VALUES (1, 'John');
INSERT INTO my_table VALUES (2, 'Jane');
Run the following command to query the data:
SELECT * FROM my_table;
(Optional) Step 4: Prepare and upload the resource file
If you plan to use a JAR job, you must prepare a resource file. You can skip this step if you plan to use the SparkSQL job type.
Create a new Maven project on your local machine.
Run the
mvn packagecommand. After the project is compiled and packaged, the sparkDataFrame-1.0-SNAPSHOT.jar file is generated.On the EMR Serverless Spark page for the target workspace, click Artifacts in the navigation pane on the left.
On the Artifacts page, click Upload File.
Upload the
sparkDataFrame-1.0-SNAPSHOT.jarfile.
Step 5: Create and run a job
JAR job
On the EMR Serverless Spark page, click Development in the navigation pane on the left.
Click New.
Enter a name, select as the job type, and then click OK.
In the new job development tab, configure the following parameters, leave the other parameters at their default settings, and then click Run.
Parameter
Description
Main JAR Resource
Select the resource file you uploaded in the previous step. For example, sparkDataFrame-1.0-SNAPSHOT.jar.
Main Class
The main class specified when you submit the Spark job. This example uses com.example.DataFrameExample.
Network Connection
Select the name of the network connection you added in Step 1.
Spark Configuration
Configure the following parameters.
spark.hadoop.hive.metastore.uris thrift://*.*.*.*:9083
spark.hadoop.hive.imetastoreclient.factory.class org.apache.hadoop.hive.ql.metadata.SessionHiveMetaStoreClientFactory
In this parameter,
*.*.*.*is the private IP address of the HMS service. Replace it with the actual IP address. This example uses the private IP address of the master node of an EMR cluster. You can find this IP address on the Nodes page of the EMR cluster. Click the icon next to the emr-master node group to view the IP address.
After the job runs, go to the Execution Records section at the bottom of the page and click Logs in the Actions column.
On the Log Exploration tab, you can view the log.
SparkSQL job
Create and start an SQL session. For more information, see Manage SQL sessions.
Network Connection: Select the network connection that you added in Step 1.
Spark Configuration: Configure the following parameters.
spark.hadoop.hive.metastore.uris thrift://*.*.*.*:9083
spark.hadoop.hive.imetastoreclient.factory.class org.apache.hadoop.hive.ql.metadata.SessionHiveMetaStoreClientFactory
In this code,
*.*.*.*represents the internal IP address of the HSM service. Replace it with the actual IP address. This example uses the internal IP address of the master node of the EMR cluster. You can obtain this IP address on the Nodes page of the EMR cluster by clicking the icon next to the emr-master node group.
On the EMR Serverless Spark page, click Development in the navigation pane on the left.
On the Development tab, click the
 icon.
icon.In the New dialog box, enter a name, such as users_task, leave the type as the default SparkSQL, and click OK.
In the new job development tab, select the catalog, database, and the running SQL session instance. Then, enter the following command and click Run.
SELECT * FROM default.my_table;NoteWhen you deploy SQL code based on an external metastore to a workflow, ensure that your SQL statement specifies the table name in the
db.table_nameformat. You must also select a default database from the Catalog option in the upper-right corner. The format must becatalog_id.default.The returned information is displayed in the Execution Results section at the bottom of the page.
