You can build a JAR package that contains your business logic and upload it to develop Spark JAR jobs. This topic provides two examples of how to develop and deploy a JAR job.
Prerequisites
A workspace is created. For more information, see Workspace Management.
A business application has been developed and packaged into a JAR file.
Procedure
Step 1: Develop a JAR package
E-MapReduce (EMR) Serverless Spark does not provide an integrated development environment (IDE) for JAR packages. Therefore, you must write the Spark application code and package it into a JAR file on a local or standalone development platform. This topic provides two examples.
In the pom.xml file of your Maven project, you must add Spark-related dependencies. Because the Serverless Spark runtime environment has these dependencies built-in, you can set the scope to provided. This prevents duplicate packaging and version conflicts while ensuring the dependencies are available during the compilation and testing phases.
<dependency>
    <groupId>org.apache.spark</groupId>
    <artifactId>spark-core_2.12</artifactId>
    <version>3.5.2</version>
    <scope>provided</scope>
</dependency>
<dependency>
    <groupId>org.apache.spark</groupId>
    <artifactId>spark-sql_2.12</artifactId>
    <version>3.5.2</version>
    <scope>provided</scope>
</dependency>
<dependency>
    <groupId>org.apache.spark</groupId>
    <artifactId>spark-hive_2.12</artifactId>
    <version>3.5.2</version>
    <scope>provided</scope>
</dependency>
Query a DLF table
public class HiveTableAccess {
    public static void main(String[] args) {
        SparkSession spark = SparkSession.builder()
                .appName("DlfTableAccessExample")
                .enableHiveSupport()
                .getOrCreate();
        spark.sql("SELECT * FROM test_table").show();
        spark.stop();
    }
}
Calculate the approximate value of pi (π)
import org.apache.spark.api.java.JavaRDD;
import org.apache.spark.api.java.JavaSparkContext;
import org.apache.spark.sql.SparkSession;

import java.util.ArrayList;
import java.util.List;

/**
 * Computes an approximation to pi
 * Usage: JavaSparkPi [partitions]
 */
public final class JavaSparkPi {

  public static void main(String[] args) throws Exception {
    SparkSession spark = SparkSession
      .builder()
      .appName("JavaSparkPi")
      .getOrCreate();

    JavaSparkContext jsc = new JavaSparkContext(spark.sparkContext());

    int slices = (args.length == 1) ? Integer.parseInt(args[0]) : 2;
    int n = 100000 * slices;
    List<Integer> l = new ArrayList<>(n);
    for (int i = 0; i < n; i++) {
      l.add(i);
    }

    JavaRDD<Integer> dataSet = jsc.parallelize(l, slices);

    int count = dataSet.map(integer -> {
      double x = Math.random() * 2 - 1;
      double y = Math.random() * 2 - 1;
      return (x * x + y * y <= 1) ? 1 : 0;
    }).reduce((integer, integer2) -> integer + integer2);

    System.out.println("Pi is roughly " + 4.0 * count / n);

    spark.stop();
  }
}
Click SparkExample-1.0-SNAPSHOT.jar to download the test JAR package.
Step 2: Upload the JAR package
Go to the file upload page.
Log on to the EMR console.
In the navigation pane on the left, choose .
On the Spark page, click the name of the target workspace.
On the EMR Serverless Spark page, click Artifacts in the navigation pane on the left.
On the Artifacts page, click Upload File.
In the Upload File dialog box, click the upload area to select a local JAR package, or drag the JAR package into the area.
In this example, the SparkExample-1.0-SNAPSHOT.jar package is uploaded.
Step 3: Develop and run a job
On the EMR Serverless Spark page, click Development in the navigation pane on the left.
On the Development tab, click the
 icon.
icon.Enter a name, select as the Type, and click OK.
In the upper-right corner, select a queue.
For more information about how to add a queue, see Manage resource queues.
On the new job tab, configure the following parameters, leave the other parameters at their default values, and then click Run.
Parameter
Description
Main JAR Resource
Select the JAR package that you uploaded in the previous step. In this example, select SparkExample-1.0-SNAPSHOT.jar.
Main Class
The main class that is specified when you submit a Spark job.
To calculate the approximate value of pi (π): In this example, enter
org.example.JavaSparkPi.To query a Hive table: In this example, enter
org.example.HiveTableAccess.
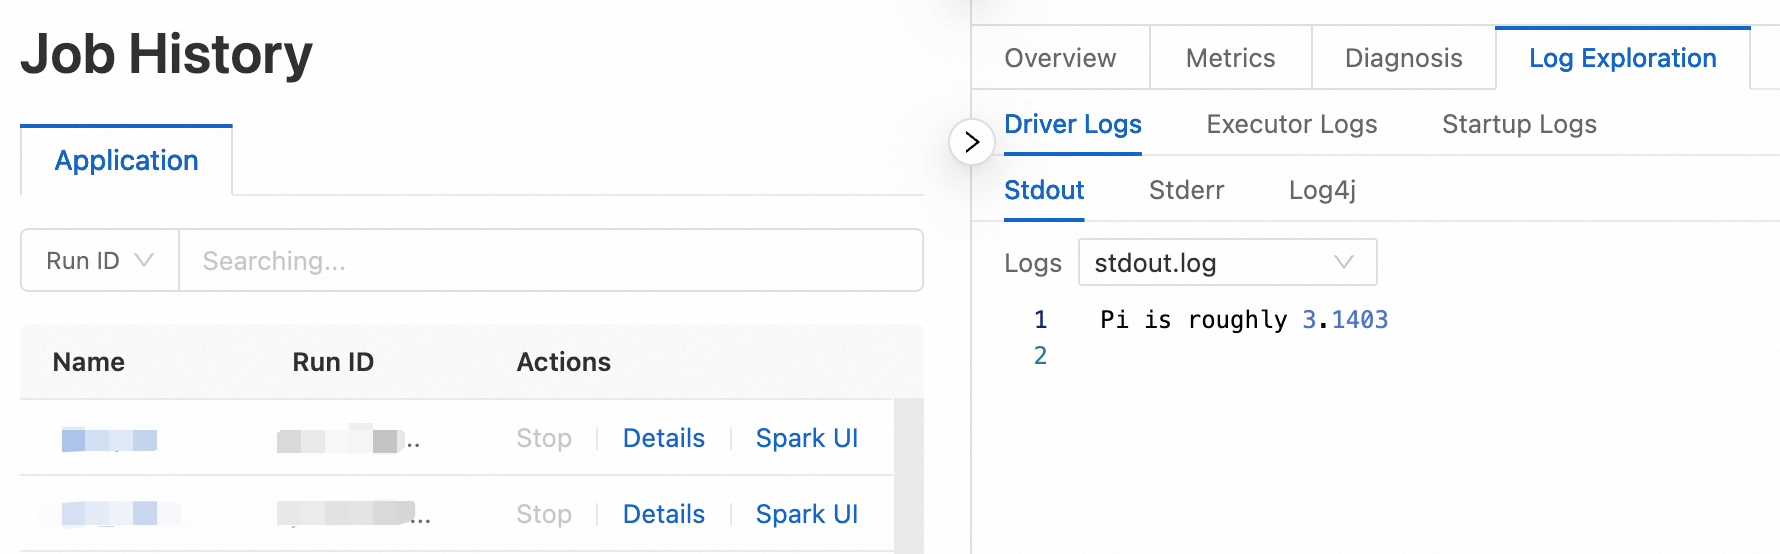
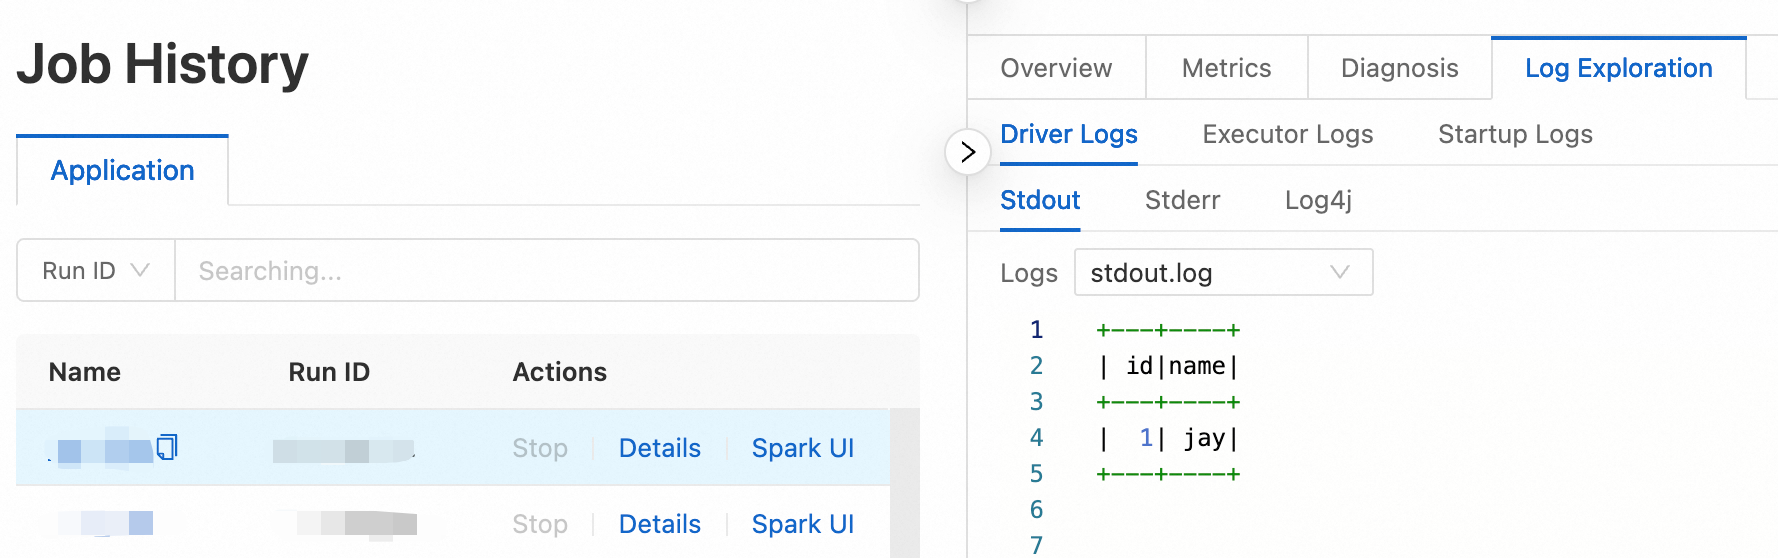
After the job runs, in the Execution Records section, click Logs in the Actions column to view the log information.
Step 4: Publish the job
A published job can be used as a node in a workflow.
After the job is complete, click Publish in the upper-right corner.
In the dialog box that appears, enter release information and click OK.
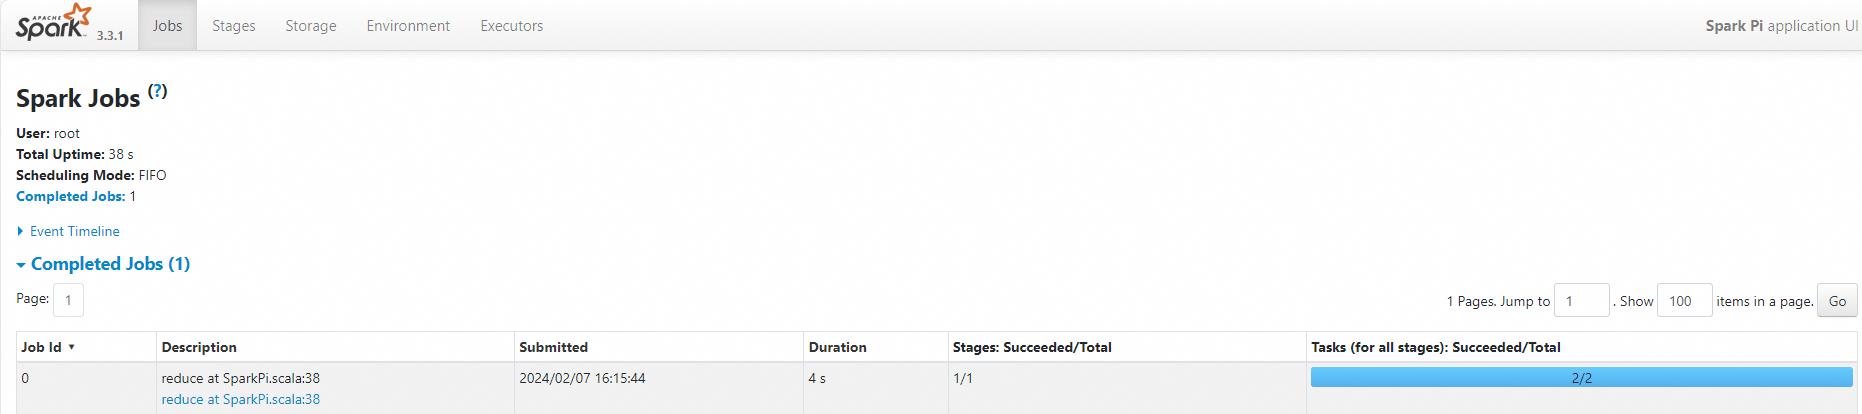
(Optional) Step 5: View the Spark UI
After the job runs successfully, you can view its execution details on the Spark UI.
In the navigation pane on the left, click Job History.
On the Application page, find the target job and click Spark UI in the Actions column.
On the Spark Jobs page, you can view the job details.
References
After a job is published, you can use it for workflow scheduling. For more information, see Manage workflows. For an example of the complete development process for job orchestration, see Get started with SparkSQL development.