E-MapReduce (EMR) Workflow provides built-in time parameters, task parameters (local parameters), workflow parameters (global parameters), and project parameters. EMR Workflow also supports the parameter passing feature.
Configure parameters
Built-in time parameters
Define parameters
You do not need to define built-in time parameters. You can directly use them in tasks.
Use parameters
EMR Workflow supports the built-in time parameters in the $[...] format. A built-in time parameter in the $[yyyyMMddHHmmss] format can be split and recombined into multiple formats, such as $[yyyyMMdd], $[HHmmss], and $[yyyy-MM-dd]. You can use one of the following methods to modify a built-in time parameter:
Use the
add_months()function. This function is used to add or subtract months. In the following examples, the first parameter[yyyyMMdd]in the parenthesis indicates the format of the returned time. The second parameter in the parenthesis indicates the number of months to be added or subtracted.Add N years:
$[add_months(yyyyMMdd,12*N)]Subtract N years:
$[add_months(yyyyMMdd,-12*N)]Add N months:
$[add_months(yyyyMMdd,N)]Subtract N months:
$[add_months(yyyyMMdd,-N)]
Add +Number or -Number to a custom time parameter.
Add N weeks:
$[yyyyMMdd+7*N]Subtract N weeks:
$[yyyyMMdd-7*N]Add N days:
$[yyyyMMdd+N]Subtract N days:
$[yyyyMMdd-N]Add N hours:
$[HHmmss+N/24]Subtract N hours:
$[HHmmss-N/24]Add N minutes:
$[HHmmss+N/24/60]Subtract N minutes:
$[HHmmss-N/24/60]
Task parameters
Task parameters, which are also known as local parameters, are valid for nodes. By default, the custom parameters that are defined when you create a node apply only to the current node. If you specify that the parameters can be passed to the descendant nodes of the current node, the parameters can be applied to the descendant nodes of the current node.
Define parameters
In the Current node settings dialog box, click the ![]() icon below Custom Parameters to add one or more custom parameters. The following figure shows how to define a custom parameter.
icon below Custom Parameters to add one or more custom parameters. The following figure shows how to define a custom parameter.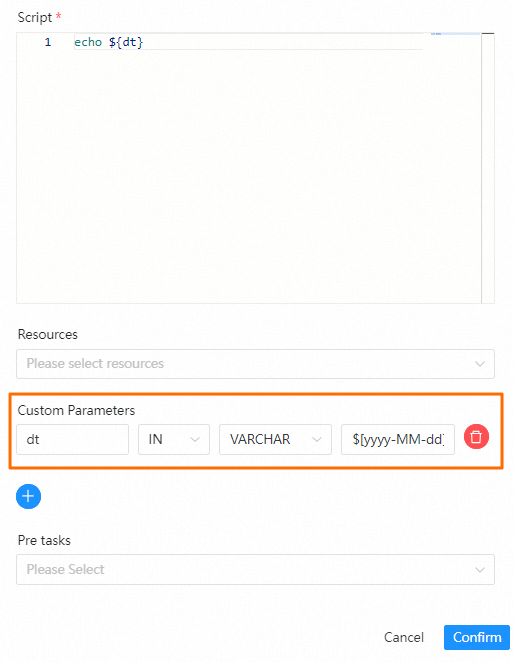
Custom parameter defined in this example:
dt: the name of the custom parameter.IN: specifies that the parameter applies only to the current node. A value of OUT specifies that the parameter can be passed to the descendant nodes of the current node.VARCHAR: the data type of the parameter.$[yyyy-MM-dd]: the value of the parameter.
Use parameters
When you create a node, specify local parameters in the ${...} format.
Workflow parameters
Workflow parameters, which are also known as global parameters, are valid for all nodes of a workflow and are configured when you save the workflow.
Define parameters
When you save a workflow, you can add one or more global parameters and specify the names and values of the parameters.
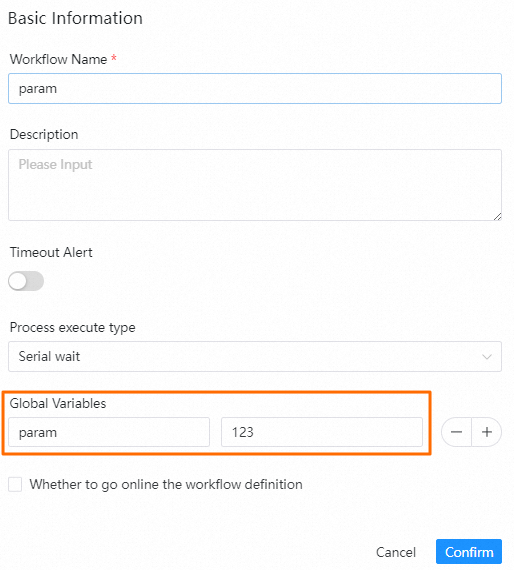
Use parameters
When you save a workflow, specify global parameters in the ${...} format.
Project parameters
Project parameters are valid for all workflows in a project.
Define parameters
To define a project parameter, perform the following operations: On the details page of a project, choose in the left-side navigation pane. On the Project Parameter page, click Create Parameter. In the Create Parameter dialog box, configure the Parameter Name and Parameter Value parameters.
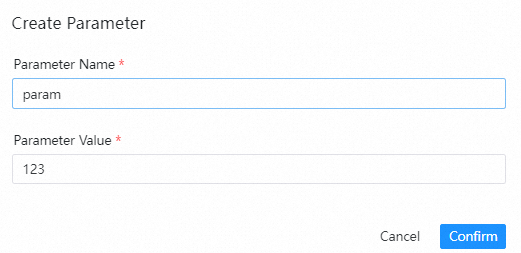
Use parameters
When you create a node, specify project parameters in the ${...} format.
Pass parameters
EMR Workflow allows you to pass parameters between nodes. You can pass the parameters of a node to the descendant nodes of the node.
When you define a custom parameter for a node, select OUT to specify that the custom parameter can be passed to the descendant nodes of the current node. In addition, you must enter an echo statement in the script for the current node. The echo statement is in the format of echo "#{setValue(key=value)}". In this statement, key indicates the name of the custom parameter of the OUT type. value indicates the value that you want to pass to the descendant nodes of the current node, which can be a constant, a value of another task parameter, or a value of a variable in the bash script. To use the parameters that are passed from a node to its descendant nodes, you need to only specify the parameters in the ${...} format for the descendant nodes.
Examples:
Pass a constant
When you create a node, define a custom parameter named res of the OUT type and enter echo "#{setValue(res=1234)}" in the script. This way, you can pass the res parameter whose value is 1234 to the descendant nodes of the current node.
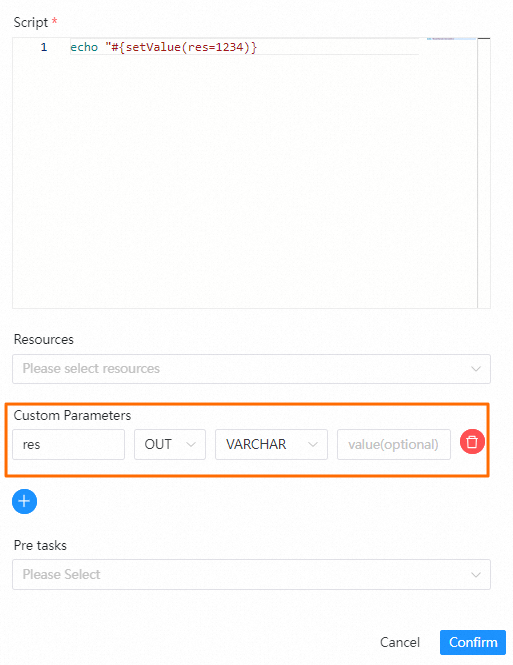
Pass a task parameter
When you create a node, define a custom parameter named param of the IN type and set its value to 123. Then, define another custom parameter named res of the OUT type and enter echo "#{setValue(res=${param})}" in the script. This way, you can use the res parameter to pass the param parameter whose value is 123 to the descendant nodes of the current node.

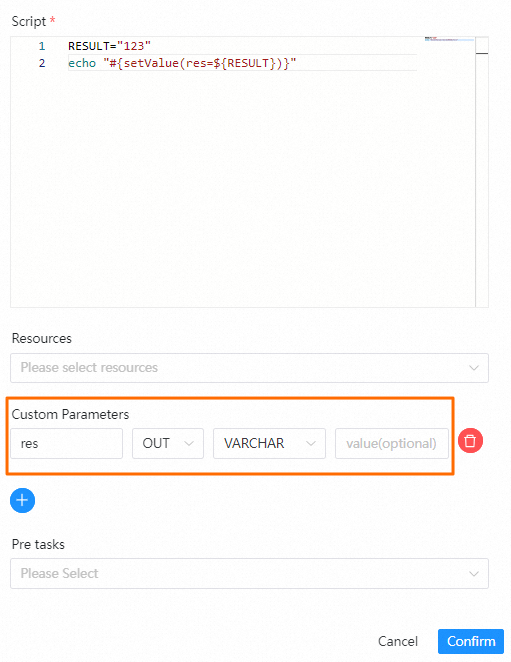
Pass a variable in the bash script
When you create a node, define a custom parameter named res of the OUT type and enter echo "#{setValue(res=${RESULT})}" in the script. This way, you can use the res parameter to pass the RESULT variable whose value is 123 to the descendant nodes of the current node.
Parameter priority
When you use EMR Workflow, the following types of parameters are involved:
If multiple parameters of different types have the same name, the specified parameter values are applied based on the following priority: Task parameters (local parameters) > Parameters passed to the descendant nodes of a node > Workflow parameters (global parameters) > Project parameters.