To unlock the full capabilities of your GPU and ensure smooth graphics rendering for high-performance computing workloads, such as AI, or for applications like OpenGL, Direct3D, and cloud gaming, install the GRID driver. This topic describes how to use Cloud Assistant to quickly install the GRID driver.
Before using Cloud Assistant to install the GRID driver, review its features. For more information, see Cloud Assistant overview. The Cloud Assistant plugin is pre-installed when you create a GPU-accelerated instance.
Supported instances
Cloud Assistant can install the GRID driver only on Linux vGPU-accelerated instances of the following instance families: sgn8ia, vgn6i-vws, vgn7i-vws, and sgn7i-vws. For more information, see vGPU-accelerated instance families (vgn and sgn series). The following table lists the supported GRID driver and CUDA versions for these instances.
Instance family | Public image version | NVIDIA GRID driver version | CUDA version |
sgn8ia |
| 535.183.06 | 12.2 |
vgn6i-vws, vgn7i-vws, and sgn7i-vws |
| 470.256.03 | 11.4 |
You do not need to install a GRID driver on Linux GPU-accelerated compute-optimized instances, such as gn7i, gn6i, ebmgn7i, and ebmgn6i. The standard driver from the official NVIDIA website supports graphics acceleration. For more information, see GPU-accelerated compute-optimized instance families (gn, ebm, and scc series).
Procedure
Log on to the ECS console.
In the left-side navigation pane, choose .
In the top-left corner of the page, select the region where your target instance is located.

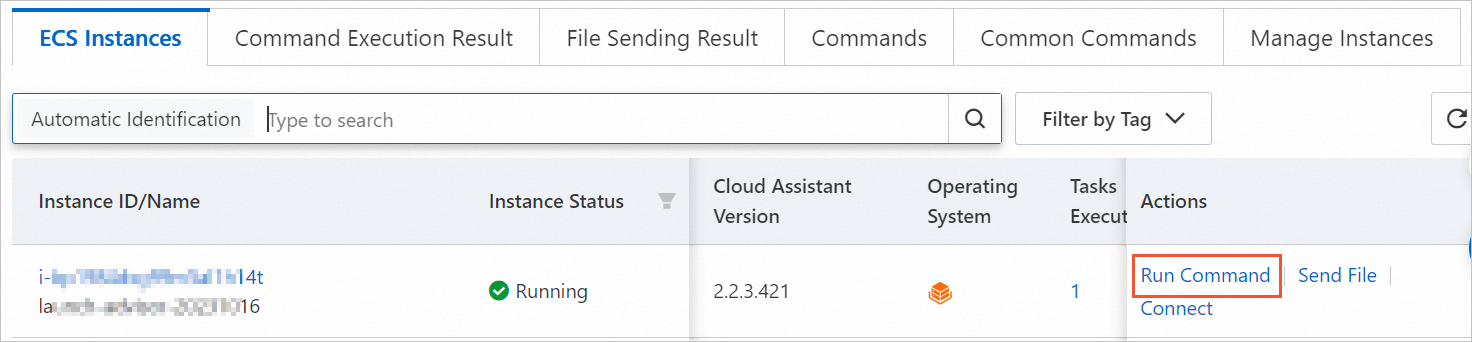
On the ECS Instances tab, find the target instance and click Run Command in the Actions column.
In the Create Command pane, configure the parameters in the Command Information section.
Configure the main parameters as described below and keep the default values for the other parameters. For more information, see Create a command in the ECS console.
ImportantYou must set the parameters to the exact values provided below. Otherwise, the Cloud Assistant command may fail to run.
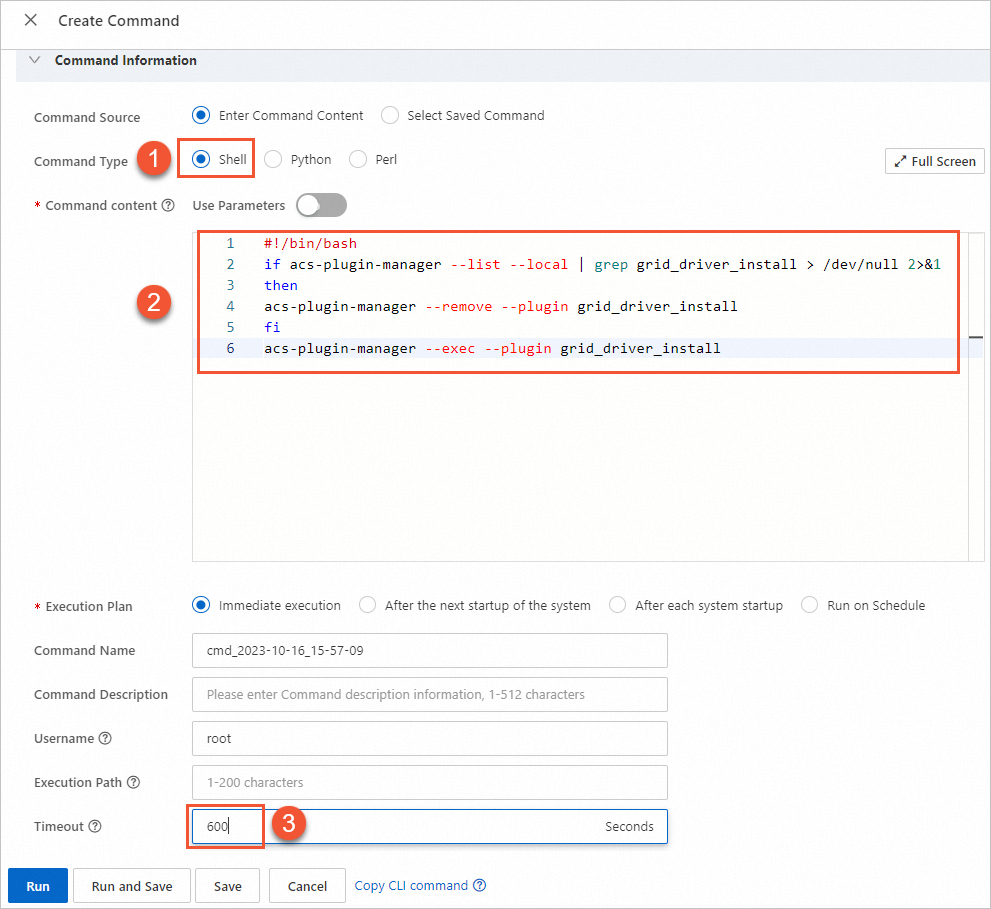
① Command Type: Select Shell.
② Command content: Paste the following command. For more examples of Shell commands, see View the system configurations of ECS instances.
Cloud Assistant command for sgn8ia instances:
if acs-plugin-manager --list --local | grep gpu_grid_driver_install > /dev/null 2>&1
then
    acs-plugin-manager --remove --plugin gpu_grid_driver_install
fi

acs-plugin-manager --exec --plugin gpu_grid_driver_install
Cloud Assistant command for vgn6i-vws, vgn7i-vws, and sgn7i-vws instances:
if acs-plugin-manager --list --local | grep grid_driver_install > /dev/null 2>&1
then
    acs-plugin-manager --remove --plugin grid_driver_install
fi

acs-plugin-manager --exec --plugin grid_driver_install
③ Timeout: The maximum execution time in seconds. If the command takes longer than this time to run, Cloud Assistant forcibly terminates the process. Set the value to 600.
NoteThe Timeout value must be a positive integer in seconds. The value can range from 10 to 86,400 (24 hours).
Click Run install the GRID driver by using the Cloud Assistant command.
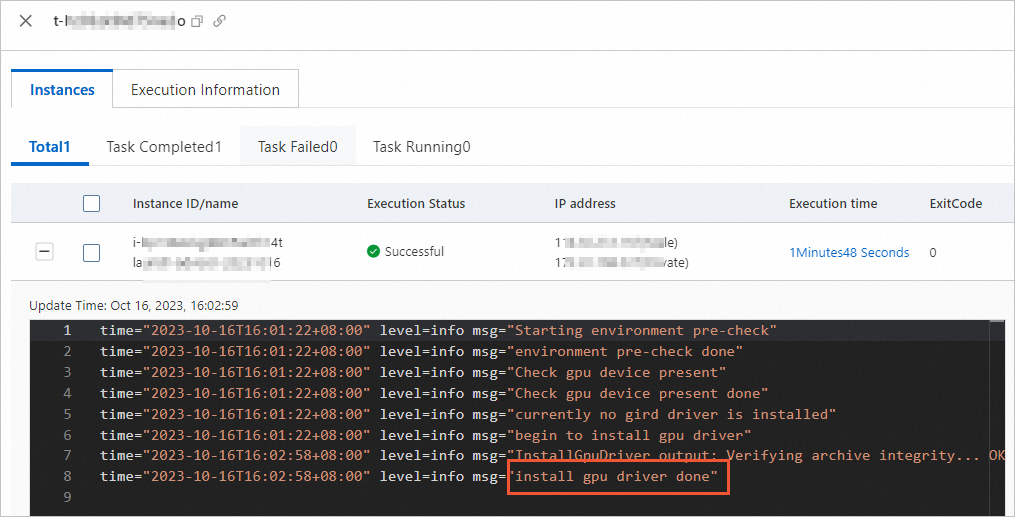
After the command finishes, you can view the execution result on the execution details page.
ImportantIf another version of the GRID driver is already installed on the instance, Cloud Assistant automatically uninstalls the existing version before installing the latest one.
Connect to the GPU-accelerated instance.
For more information, see Connect to a Linux instance using Workbench.
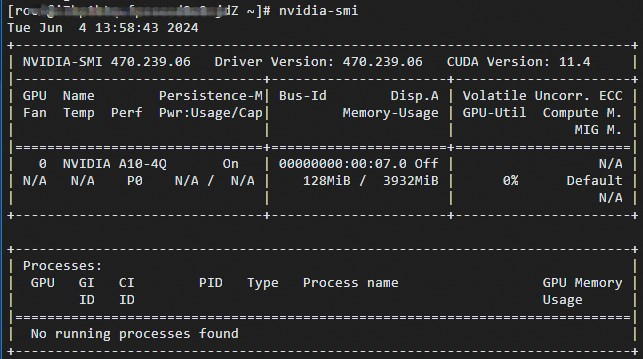
Run the following command to verify that the GRID driver is installed.
nvidia-smiIf the command output is similar to the following, the GRID driver has been installed or upgraded successfully.
Verify the installation
This section describes how to use a GLX test program to verify graphics acceleration on an Ubuntu 18.04 64-bit instance after installing the GRID driver.
Prepare the graphics test environment.
Run the following command to install x11vnc:
apt-get install x11vncRun the
lspci | grep NVIDIAcommand to find the GPU BusID.In this example, the GPU BusID is00:07.0.In this example, the GPU BusID is
00:07.0.Configure the X Server environment and reboot the system.
Run the
nvidia-xconfig --enable-all-gpus --separate-x-screenscommand.Edit the
/etc/X11/xorg.conffile and add the GPU BusID in theSection "Device"block. For example:BusID "PCI:0:7:0".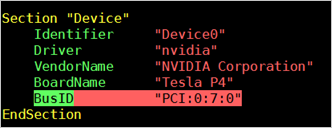
Run the
rebootcommand.
Run the following command to install the GLX test program.
apt-get install mesa-utilsRun the
startxcommand to start X Server.If the
startxcommand is not found, runapt-get install xinitto install it.The
startxcommand might return ahostname: Name or service not knownerror. This error does not prevent the X Server from starting. To resolve it, run thehostnamecommand to find your instance's hostname. Then, edit the/etc/hostsfile and replace the hostname entry after127.0.0.1with your actual hostname.
Open a new SSH client terminal and run the following command to start x11vnc.
x11vnc -display :1If output similar to the following figure appears, x11vnc has started successfully. You can now connect to the instance with a VNC client, such as VNC Viewer.

To allow VNC connections to the instance, log on to the ECS console, and in the security group of the instance, add a security group rule to allow inbound traffic on TCP port 5900.
For more information, see Add a security group rule.
On your local machine, use a VNC client, such as VNC Viewer, to connect to the instance at
<public_ip_address>:5900and access the KDE desktop.Use the
glxinfocommand to view the configurations supported by the current GRID driver.Open a new SSH client terminal.
Run the
export DISPLAY=:1command.Run the
glxinfo -tcommand to list the configurations supported by the current GRID driver.
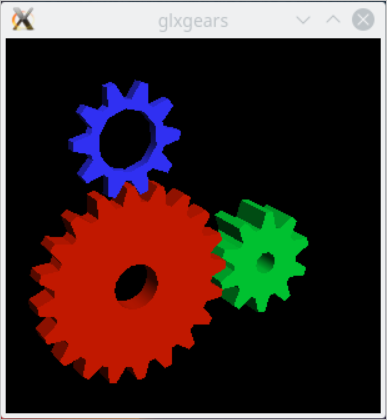
Follow these steps to test the GRID driver with the
glxgearscommand.On the KDE desktop, right-click the desktop and select Run Command.
Run the
glxgearscommand to start the gear graphics test program.If a window with moving gears appears, as shown in the following figure, the GRID driver is functioning correctly.
References
For Windows-based vGPU-accelerated instances, install a GRID driver to enable graphics acceleration for scenarios, such as OpenGL, Direct3D, and cloud gaming. For more information, see Install GRID drivers on Windows GPU-accelerated compute-optimized or vGPU-accelerated instances.
To automatically install the GRID driver when you create GPU-accelerated instances. For more information, see Create a GPU-accelerated instance.