You can install WinSCP on an on-premises Windows computer, use WinSCP to connect to a Linux Elastic Compute Service (ECS) instance, and then visually upload files from the on-premises computer to the instance or download files from the instance to the on-premises computer.
WinSCP
WinSCP is a client tool for transferring files from a Windows system to a Linux system. You can use WinSCP to securely copy files between on-premises and remote computers. Compared with FTP, WinSCP allows you to use a username and password to access a server without the need for additional configurations on the server.
Scenarios
File upload: You can use WinSCP to upload files from an on-premises Windows computer to a Linux ECS instance.
File download: You can use WinSCP to download files from a Linux ECS instance to an on-premises Windows computer.
Limits
File size:: No limits are imposed on the size of files that can be uploaded or downloaded by using WinSCP.
Transfer speed: No limits are imposed on the speeds at which WinSCP uploads or downloads files.
Maximum number of files: No limits are imposed on the maximum number of files that can be uploaded or downloaded by WinSCP.
Network: The Linux ECS instance on which you want to upload or download files must have a static public IP address (public IP address that is automatically assigned) or an elastic IP address (EIP).
WinSCP can be installed only on Windows. If your computer runs Linux or macOS, use other methods to transfer files. For more information, see Select a file transfer method.
Preparations
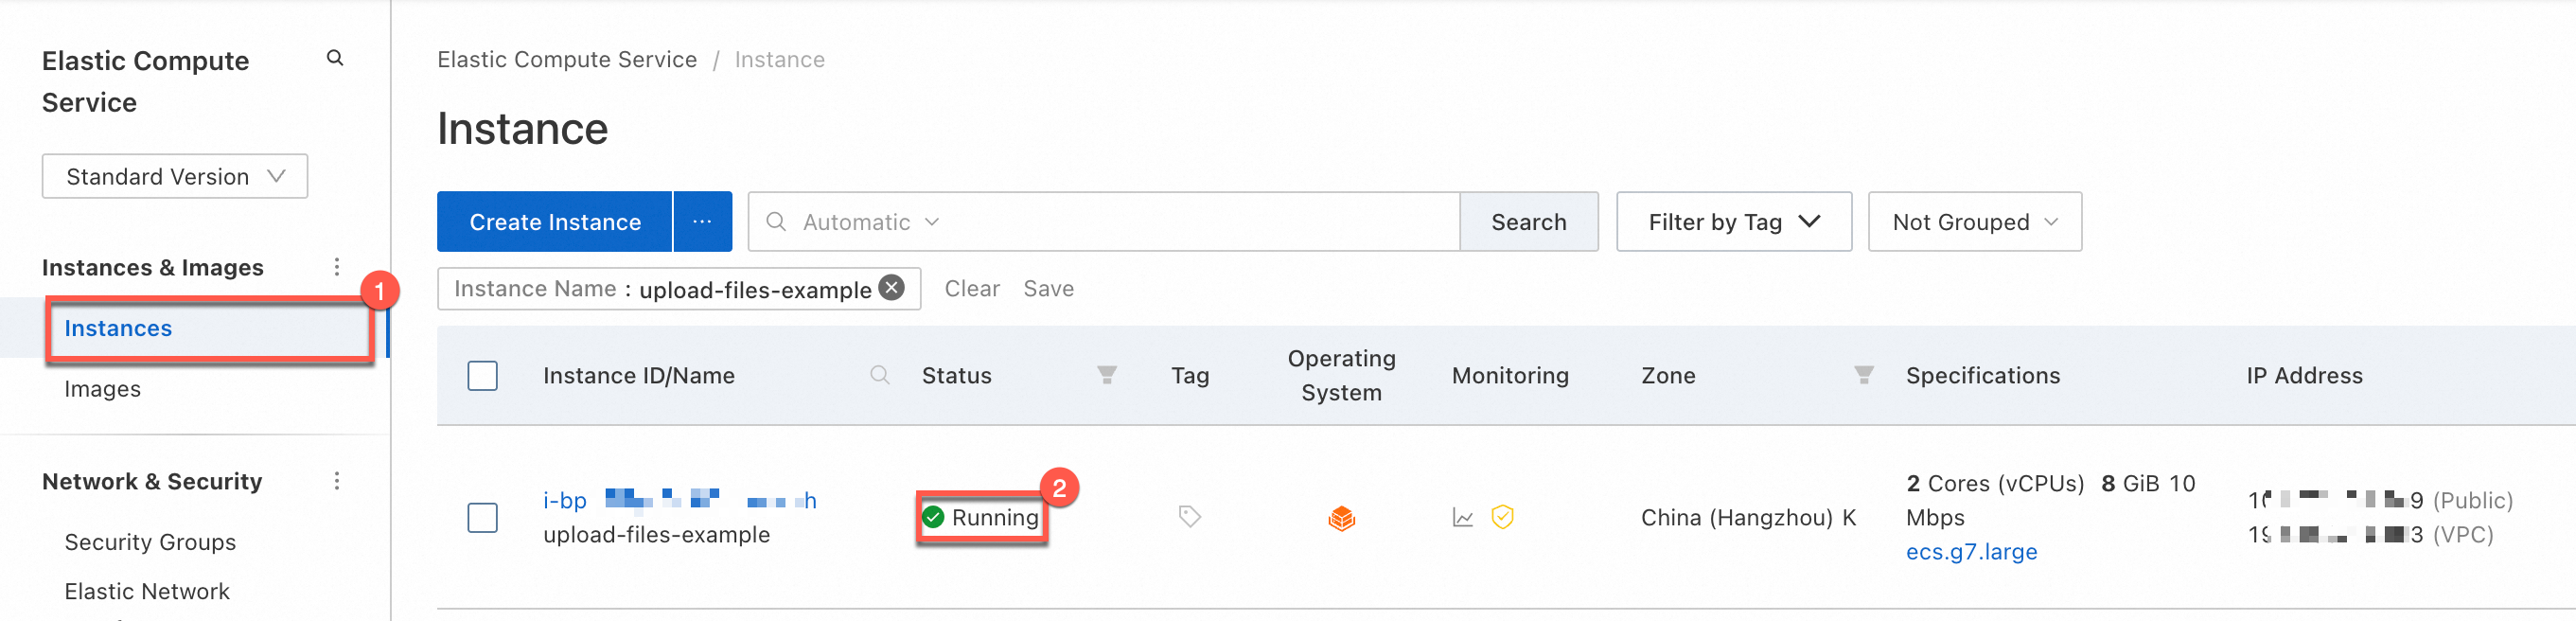
Check the status of a Linux ECS instance. The operations described in this topic can be performed on a Linux ECS instance only if the instance is in the Running state.
You can view the status of a Linux ECS instance on the Instance page in the ECS console. The following figure shows that a Linux ECS instance is in the Running state.
For information about how to check the status of an ECS instance, see View instance information.
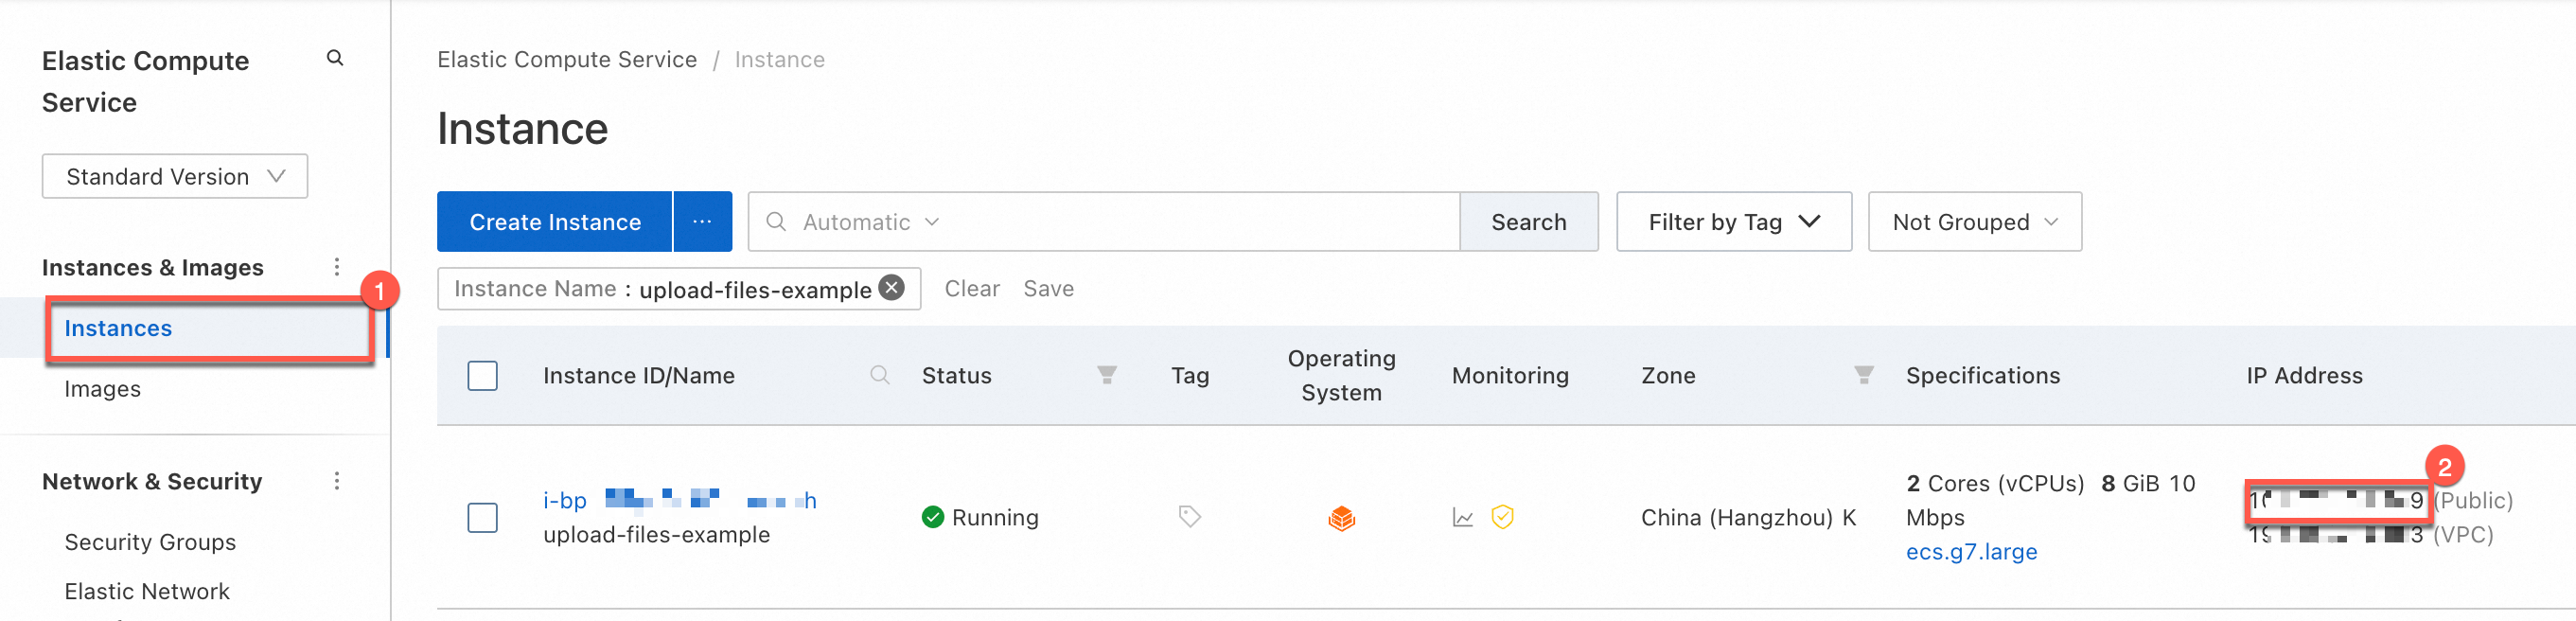
Obtain the public IP address of the Linux ECS instance. The public IP address of the Linux ECS instance is required to connect to the instance and perform the operations described in this topic.
You can view the public IP address of the Linux ECS instance in the IP Address column on the Instance page in the ECS console.
For information about how to check information about an ECS instance, see View instance information. For information about how to enable public bandwidth for an ECS instance to allow the instance to access the Internet, see Enable public bandwidth.
Check the security groups of the Linux ECS instance. Before you use WinSCP to upload files to the Linux ECS instance, check that the Secure Copy Protocol (SCP) or Secure File Transfer Protocol (SFTP) port is open in a security group of the instance. The default SCP or SFTP port is port 22.
In this topic, WinSCP is used to transfer files to a Linux ECS instance over SFTP. A rule must be added to a security group of the Linux ECS instance to open the SFTP port. The following table describes the rule. For information about how to add a security group rule, see Add a security group rule.
Action
Priority
Protocol type
Port range
Authorization object
Allow
1
Custom TCP
SFTP port, which is port 22 by default
Specify the public IP address of your on-premises computer or the CIDR block to which the public IP address belongs.
WarningIf you specify
0.0.0.0/0, access on the specified port is allowed for all IPv4 addresses, which poses security risks. Proceed with caution.You can obtain the public IP address of your on-premises computer from
https://cip.cc/.For example, if the public IP address of your on-premises computer is
118.xxx.xxx.xx8, add a rule to a security group of the Linux ECS instance, as shown in the following figure.
Procedure
If you want to upload a large file or a large number of files to a Linux ECS instance, compress the files into a compressed package and then upload the package to the instance. This improves transfer efficiency. For more information, see Compress and upload files.
Step 1: Use WinSCP to connect to the Linux ECS instance
Download and install the WinSCP client on your on-premises Windows computer.
For information about how to download and install the WinSCP client, visit the official WinSCP website.
Start WinSCP. The Login dialog box appears.
In the Session section, configure the parameters, as shown in the following figure.
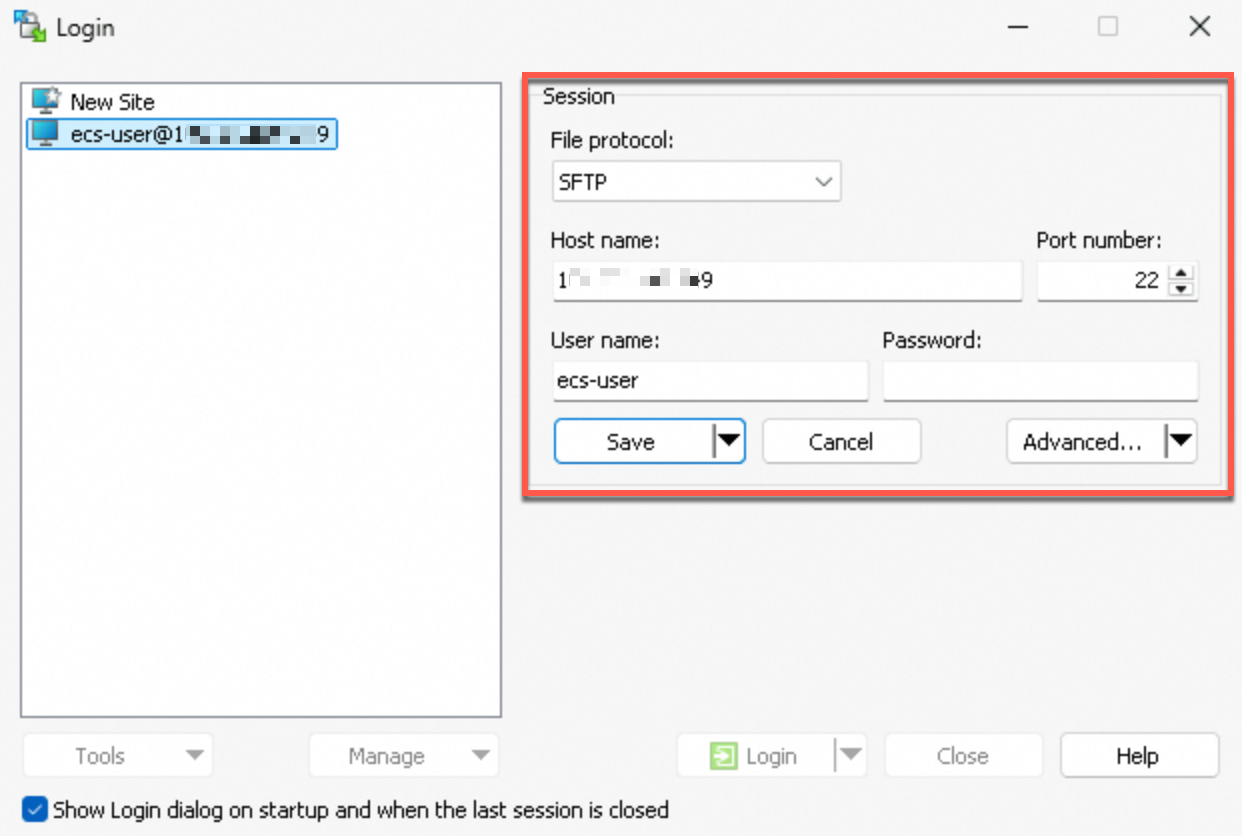
Take note of the following parameters:
File protocol: Select SFTP or SCP.
Host name: Enter the public IP address of the Linux ECS instance.
Port number:: Enter the SFTP or SCP port number. The default SFTP or SCP port number is 22.
User name: Enter a username for the Linux ECS instance. The default username is root.
Password: Enter the password that you specified for the username when you created the Linux ECS instance.
NoteIf you forget the password, you can reset the password. For more information, see Reset the logon password of an instance.
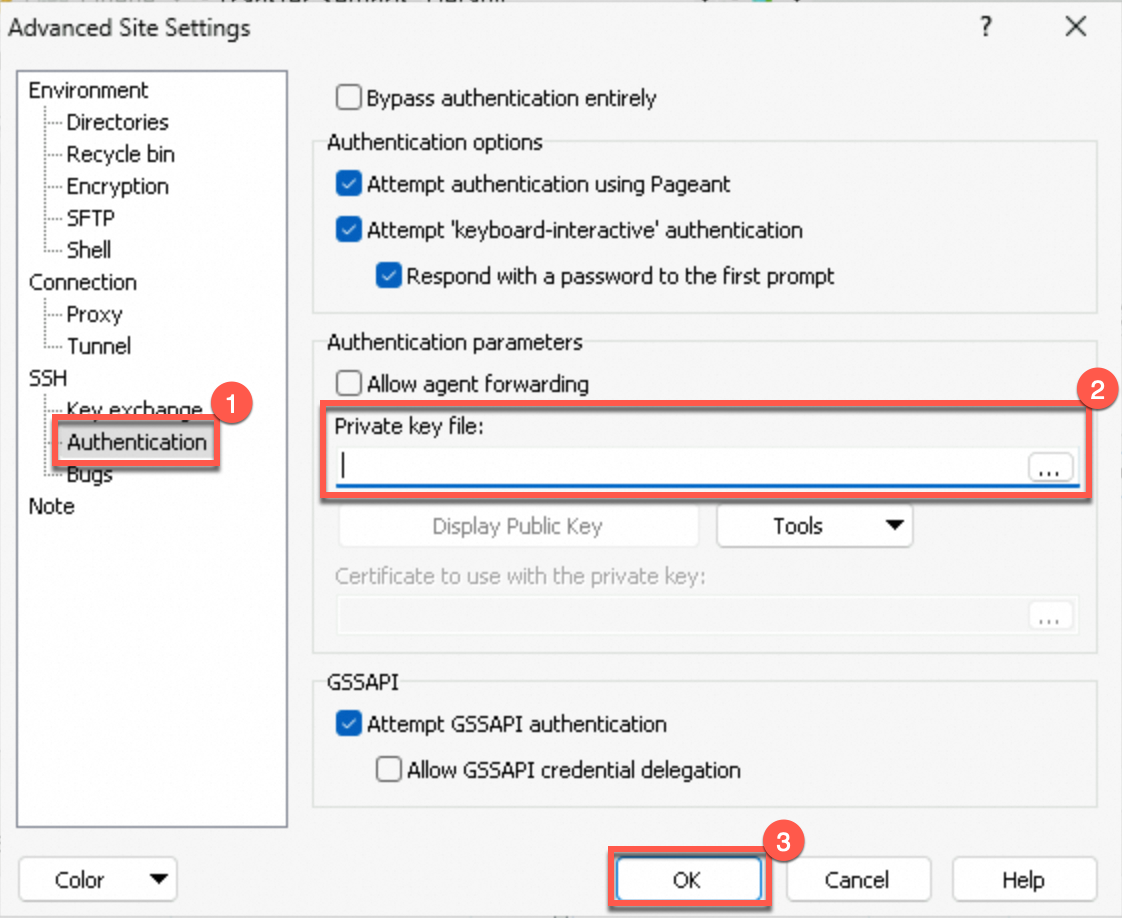
If you use a key as the logon credential of the Linux ECS instance, perform the following steps to configure the key:
In the Session section, click Advanced.
In the Advanced Site Settings dialog box, choose in the left-side navigation pane. In the Private key file field, upload the key file of the Linux ECS instance and click OK.
Log on to the Linux ECS instance without a password.
Click Save to save the connection information of the Linux ECS instance. This eliminates the need to reconfigure the connection information for subsequent connections to the instance.
Click Login.
The WinSCP file transfer page appears.
Step 2: Upload or download a file
On the WinSCP file transfer page, the directory tree on your on-premises Windows computer is displayed in the left-side pane and the directory tree on the Linux ECS instance is displayed in the right-side pane.
Upload a file to the Linux ECS instance
To upload a file from your on-premises Windows computer to the Linux ECS instance, drag the file from the left-side pane to the right-side pane.
Download the file to your on-premises Windows computer
To download a file from the Linux ECS instance to your on-premises Windows computer, drag the file from the right-side pane to the left-side pane.
FAQ
How do I transfer files to a directory as a user that has sudo permissions, such as ecs-user?
If you log on to the Linux ECS instance as a non-root user, such as ecs-user, you must obtain the sudo permissions before you can access specific directories. To obtain the sudo permissions, perform the following steps:
Determine the path of sftp-server on the Linux ECS instance.
Log on to the Linux ECS instance.
In this example, Workbench is used to log on to the instance. For more information, see Use Workbench to connect to a Linux instance over SSH.
Run the following command to search for sftp-server:
sudo cat /etc/ssh/sshd_config |grep -i sftp-serverThe following command output indicates the path of sftp-server.

In WinSCP, configure the SFTP server in the Advanced Site Settings dialog box when you configure the connection information to connect to the Linux ECS instance.
Click Advanced. The Advanced Site Settings dialog box appears.
In the left-side navigation pane, choose Environment > SFTP. In the SFTP server field in the Protocol options section, enter the path of sftp-server in the following format:
sudo su -c <Path of sftp-server obtained in the previous step>For example, if
sftp-serverresides in the/usr/libexec/openssh/sftp-serverpath, enter the following value in the SFTP server field:sudo su -c /usr/libexec/openssh/sftp-serverClick OK to log on to the Linux ECS instance.

References
After you upload files to a Linux ECS instance, you can back up the files. For more information, see Create a snapshot.
The operations described in this topic can be performed to transfer files only between an on-premises Windows computer and a Linux ECS instance. If an ECS instance runs Windows, use other methods to transfer files to the instance. For more information, see Select a file transfer method.
You can use OSS to store and manage files. For more information, see Get started by using the OSS console.