Image Builder is an all-in-one Alibaba Cloud service that allows you to create custom images, repair and test images, distribute images across regions, and share images with different Alibaba Cloud accounts. This topic describes how to create a custom image that contains an NGINX development environment and use the custom image to create an Elastic Compute Service (ECS) instance to check whether the NGINX development environment can be accessed.
Prerequisites
The first time you create image components or image templates, the system creates a service-linked role named AliyunServiceRoleForECSImageBuilder for Image Builder. This service-linked role grants Image Builder access to the required Alibaba Cloud resources. If you use a Resource Access Management (RAM) user, grant the RAM user permissions to use Image Builder so that you can manage the service-linked role for Image Builder. If you use an Alibaba Cloud account, the account is automatically granted permissions to use Image Builder. For more information, see Manage the service-linked role for Image Builder.
Procedure overview
In the following example, the following configurations are used:
Current region: China (Beijing)
Destination region to which to distribute the image: China (Hangzhou)
Public image: Alibaba Cloud Linux 3
Image content in the image template: NGINX development environment
Follow the following procedure to build an NGINX development environment by using the Image Builder service:
Step 1: Create an image component. Create an image component that contains the NGINX development environment in the China (Beijing) region.
Step 2: Create and execute an image template. Create an image template by using the image components that you create, run an image building task to create a custom image, and then distribute the custom image to the China (Hangzhou) region. In the following example, a custom image whose name prefix is
Nginx-imageis used.Step 3: Create an ECS instance and test the NGINX development environment. Create an ECS instance from the custom image in the China (Hangzhou) region and check whether the instance can access the NGINX development environment. If you can access the NGINX development environment, the custom image runs as expected.
Step 1: Create an image component
Go to ECS console - Image Builder.
In the top navigation bar, select the region and resource group of the resource that you want to manage.

On the Image Builder page, click the Image Components tab.
NoteWhen you first access Image Builder, click OK.
Click the Custom Components tab and click Create Component.
Create a build component.
Take note of the following parameters and sections. For information about other parameters, see (Optional) Create an image component.
Component Type: Select Build.
System Type: Select Linux.
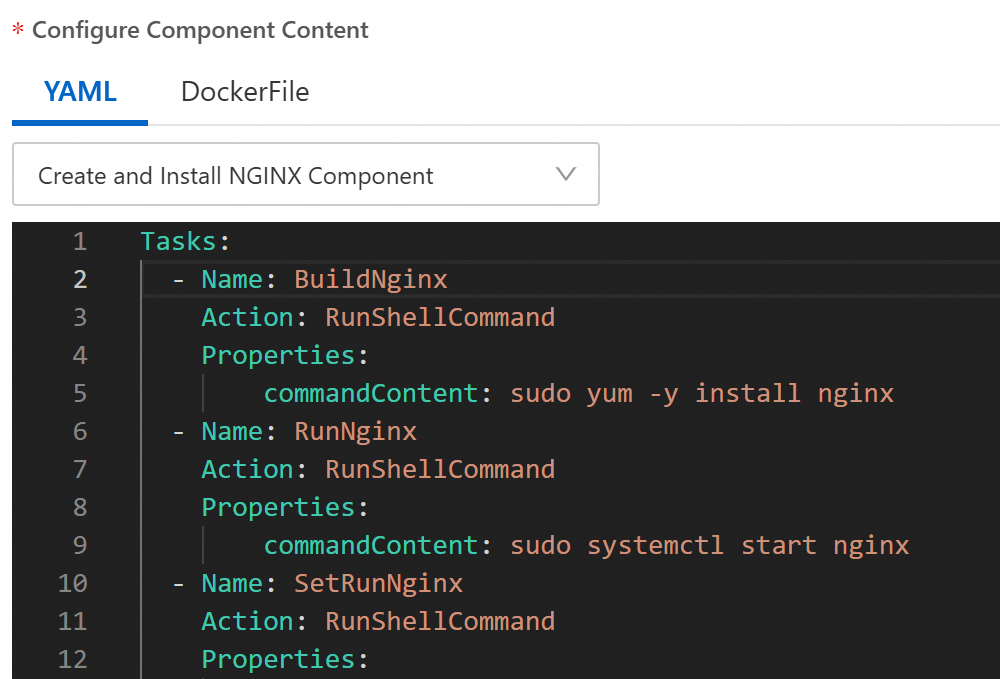
Configure Component Content: On the YAML tab, select Create and Install NGINX Component from the drop-down list, and click Confirm to run the following command to create the build component.
Create a test component.
Take note of the following parameters and sections. For information about other parameters, see (Optional) Create an image component.
Component Type: Select Test.
System Type: Select Linux.
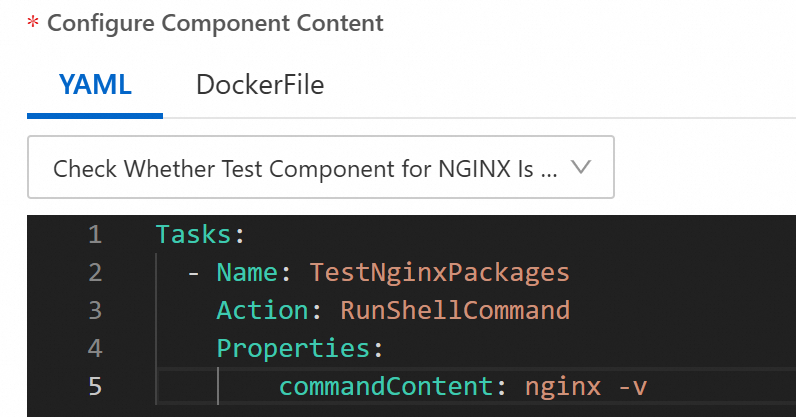
Configure Component Content: On the YAML tab, select Check Whether Test Component for NGINX Is Installed, and click Confirm to run the following command to create the test component.
Step 2: Create and execute an image template
On the Image Templates tab, click Create Image Template.
Configure the parameters and click OK.
Take note of the following parameters and sections. For information about other parameters, see Create an image template and execute an image building task.
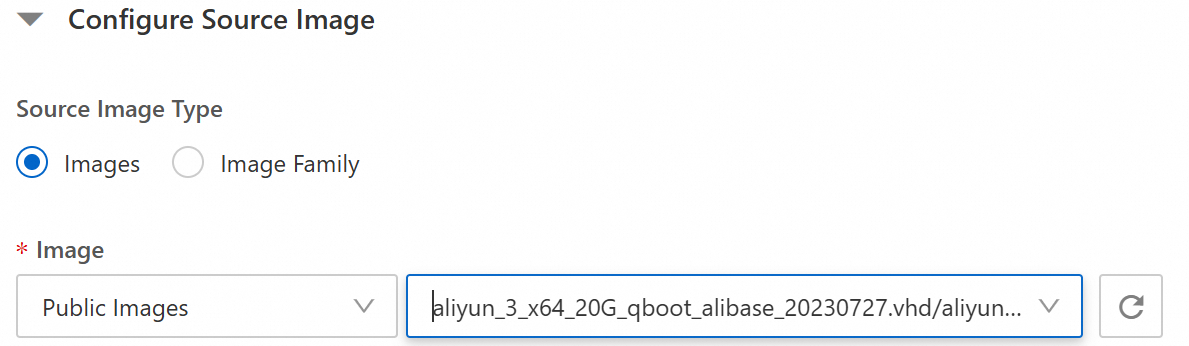
Configure Source Image: Select a source image type and an image based on your business requirements. The image template is created based on the source image.
In this example, Public Images and the ID of an Alibaba Cloud Linux 3 image are selected, as shown in the following figure.
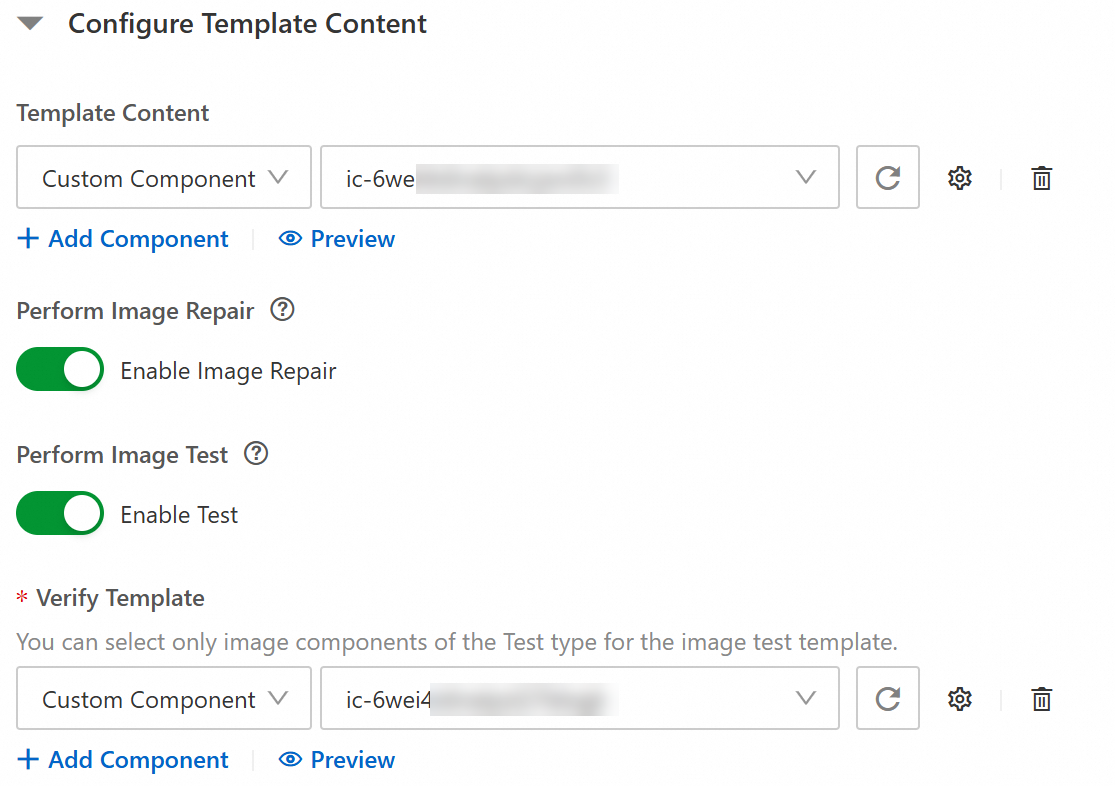
Configure Template Content: Click Add Component to add image components. Turn on or off the Enable Image Repair and Enable Test switches based on your business requirements. The following figure shows the sample values of the parameters.
Parameter
Description
Template Content
Select the build component created in Step 1.
Perform Image Repair
By default, the Enable Image Repair switch is turned on. Before you execute an image building task, the system automatically checks for and repairs common image-building issues and installs the required components.
Perform Image Test
By default, the Enable Test switch is turned on. After an image building task is completed, the system automatically uses the test component to check whether the image can be used as expected.
Verify Template
Select the test component created in Step 1.
In the Configure Intermediate Instance section, configure the Instance Type, System Disk Size, and Public Bandwidth (Mbps) parameters.
ImportantBy default, the Public Bandwidth (Mbps) parameter is set to 0, which specifies that the intermediate instances created during the image building process do not have Internet connectivity. If your image template content contains a command that requires Internet connectivity, set the Public Bandwidth (Mbps) parameter to a non-zero value. Otherwise, the image building task fails.
In this example, Internet connectivity is required to download dependencies. Set the Public Bandwidth (Mbps) parameter to a non-zero value.
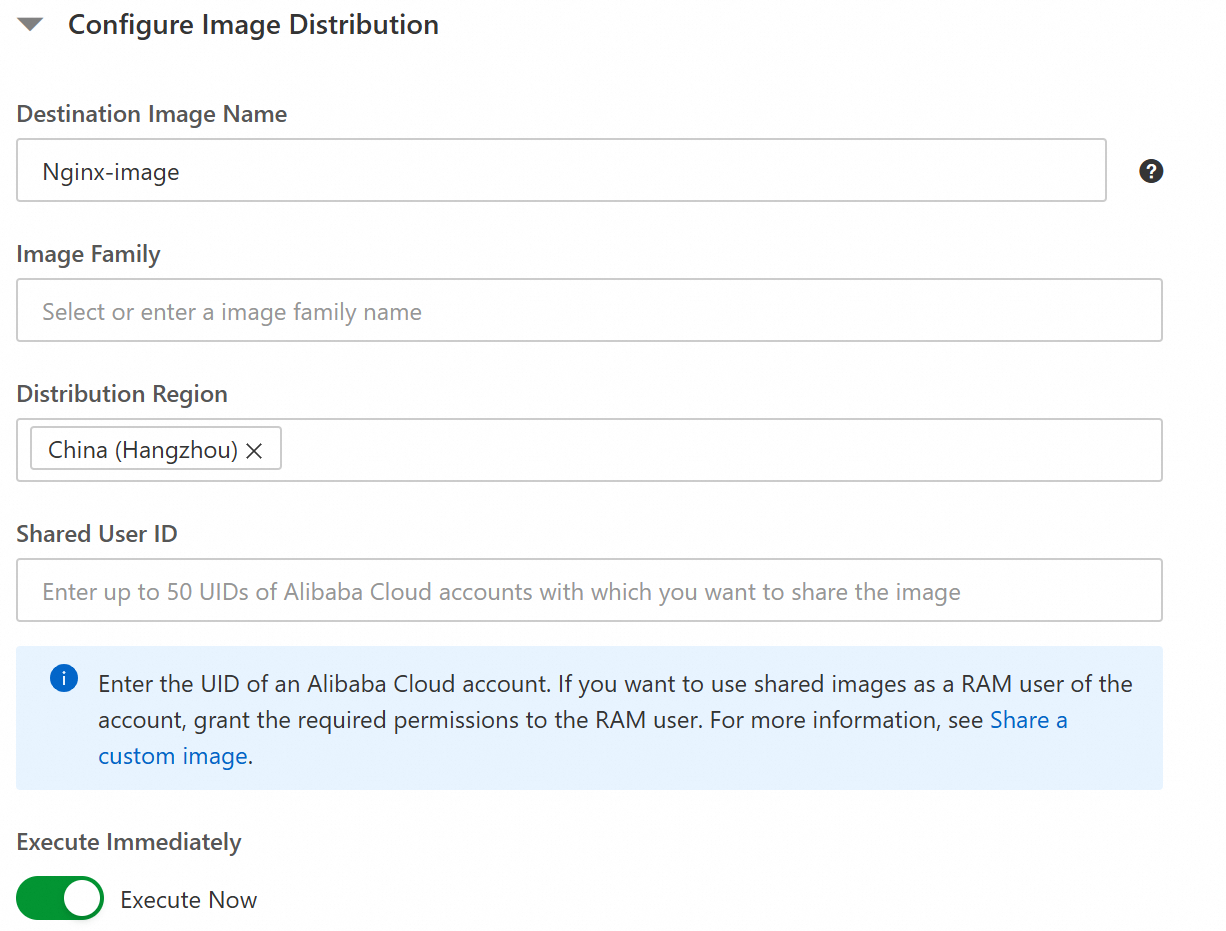
In the Configure Image Distribution section, you can configure the created images to be distributed to specified regions or to be shared with specified Alibaba Cloud accounts. The following figure shows the sample parameters.
Parameter
Description
Destination Image Name
Specify the name prefix of the images to be created. The image name contains the task ID and is generated in the format of
<Custom name prefix>_<Image building task ID>. In this example, the name prefix is set toNginx-image.Distribution Region
Select China (Hangzhou).
Execute Immediately
Turn on Execute Now.
On the Image Templates tab, find the created image template and click the ID of the image template. On the Building History tab of the image template details page, view the execution process of the image building task.
NoteThe task requires approximately 10 minutes to build an image.
If Success is displayed in the Status column and an image ID is generated, the image building task is successfully executed. You can click the image ID to view the details of the image.
If Failed is displayed in the Status column, you can check the error details displayed in the Execution Result column to identify and troubleshoot the issue.
In a distribution region, view the custom image that you created.
In the top navigation bar, select the China (Hangzhou) region.
On the Custom Images tab, view the new image whose name starts with
Nginx-image.
Step 3: Create an ECS instance and test the NGINX development environment
In the top navigation bar, select the region to which the image belongs. In this example, China (Hangzhou) is selected.
Click Create Instance in the Actions column corresponding to the customer image.
Create an instance based on your business requirements. Take note of the following items when you create the instance. For more information, see Create an instance from custom image or shared image.
The image information is automatically populated, without the need to enter image information.
You must assign a public IPv4 address to the instance. You can use the address to access the NGINX development environment that you built.
Add an inbound rule to a security group to open port 80.
On the Instance page, find the instance that you created and copy the public IP address of the instance in the IP Address column.
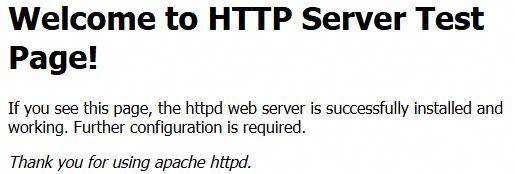
Open a browser on your computer, paste the
<Public IP address of the ECS instance>in the address bar, and then press the Enter key.If the page shown in the following figure appears, NGINX is installed and started as expected. This indicates that the custom image that you built by using the Image Builder service can be used.
 Note
NoteTo view the installed NGINX version, log on to the ECS instance and run the
nginx -vcommand.