This topic describes how to deploy Jenkins in a serverless Kubernetes (ASK) cluster,
and then create and deploy a simple application.
Precautions
No technical support is provided for Jenkins. The developers who use Jenkins need
to maintain Jenkins.
Step 1: Deploy Jenkins
- Run the following command to configure Jenkins Helm Repo:
helm repo add jenkins https://charts.jenkins.io
helm repo update
Expected output:
Hang tight while we grab the latest from your chart repositories...
...Successfully got an update from the "jenkins" chart repository
Update Complete. ⎈Happy Helming!⎈
Note The preceding repository is a Helm chart repository deployed outside China. Therefore,
the configuration may be time-consuming if you configure the repository from an ASK
cluster deployed in the Chinese mainland.
- Install Jenkins.
- Run the following command to create a namespace named
cicd:
- Create a NAS volume.
Create a NAS volume to store data in the Jenkins home directory. Otherwise, all Jenkins
configurations are lost after the Jenkins master pod is restarted.
- Run the following command to deploy Jenkins in the
cicd namespace: helm -n cicd install jenkins jenkins/jenkins \
--set persistence.existingClaim=pvc-nas \
--set controller.serviceType="LoadBalancer" \
--set controller.adminPassword="admin"
- persistence.existingClaim=pvc-nas: Set the value to the name of the persistent volume claim (PVC) that is used to mount
the NAS volume. In this example, the PVC is named pvc-nas and belongs to the
cicd namespace. This parameter is required.
- controller.serviceType="LoadBalancer": The default value is ClusterIP. This parameter is optional.
- controller.adminPassword="admin": The default password is randomly generated. This parameter is optional. For more
information about how to obtain the randomly generated default password, see Use a load balancer to access the Jenkins Service and obtain the randomly generated
default password.
For more information about other parameters, see helm-charts.
- Run the following command to query the status of the Jenkins pod and wait until the
Jenkins pods runs as normal:
kubectl -n cicd get po
Expected output:
NAME        READY   STATUS    RESTARTS   AGE
jenkins-0   2/2     Running   0          3m3s
- Use a web browser to access Jenkins and enter your username and password.
Step 2: Create a pipeline build
This section uses the first-pipeline pipeline build as an example to demonstrate how
to create a pipeline build. When you create a pipeline build, Jenkins dynamically
launches a slave pod in the ASK cluster and runs the build by default. After Jenkins
finishes running the build, it immediately releases the slave pod. For more information
about Jenkins configurations, see Jenkins.
- Log on to Jenkins and click New Item in the left-side navigation pane.
- In the Enter an item name section, enter first-pipeline, select Pipeline, and then click OK.
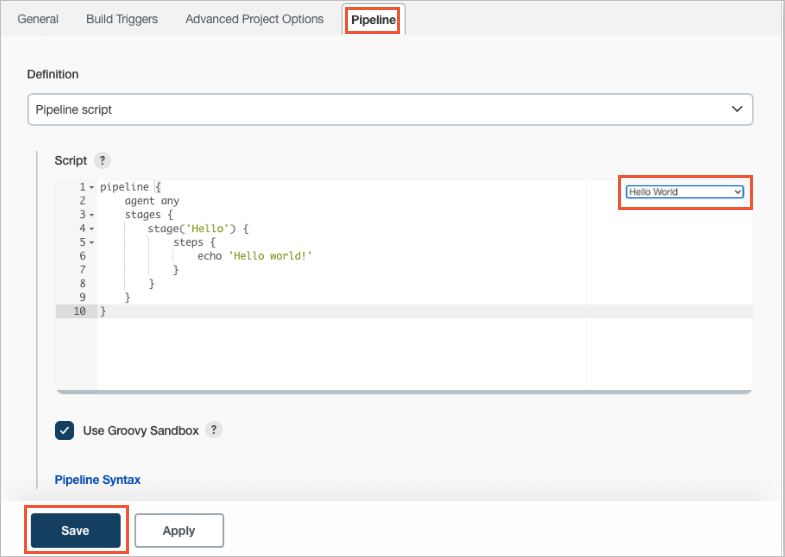
- On the top of the page, click the Pipeline tab, select the Hello World template, and then click Save.
- In the left-side navigation pane of the page, click Build Now to run the build.
- In the left-side navigation pane of the page, click Build History and then click 1# to go to the details page of the pipeline. The, click Console Output to view the build results.
Use a load balancer to access the Jenkins Service and obtain the randomly generated
default password
