This topic describes how to view and modify the information of a cluster that belongs to your account in the Elastic High Performance Computing (E-HPC) console.
View cluster information
After a cluster is created, you can view the basic information, node information, storage information, and cluster topology of the cluster. To view cluster information, perform the following steps:
Log on to the E-HPC console.
In the top navigation bar, select a region.
In the left-side navigation pane, click Cluster.
On the Cluster page, find the cluster that you want to view. Click Details.
On the Cluster Details page, view the cluster information.
Basic information: the information used to identify the cluster, including cluster ID, cluster status, region, VPC ID, vSwitch ID, SCC cluster, client version, description, and image.
Node information: the information about cluster nodes, including node types, node quantity, and instance specifications of nodes.
Storage information: the storage information of the cluster, including storage type, storage instance ID, mount target, mount protocol, and remote mount directory.
Client version information: the current version and the latest version of the E-HPC client.
Topology: the topology of the cluster. Information, such as compute nodes, logon nodes, management nodes, VPC ID, and storage instance ID is shown on the topology.
Modify cluster information
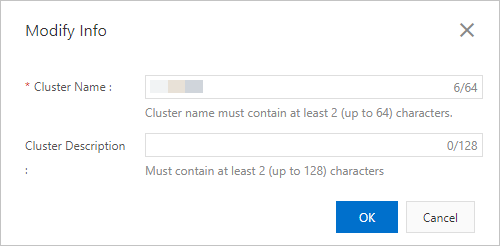
After a cluster is created, you can modify the name and description of the cluster based on your business requirements so that you can efficiently manage the cluster.
Log on to the E-HPC console.
In the top navigation bar, select a region.
In the left-side navigation pane, click Cluster.
On the Cluster page, find the cluster that you want to modify. Choose More > Modify Info.
In the Modify Info dialog box, enter a new cluster name and description. Click OK.
