Elastic High Performance Computing (E-HPC) allows you to add compute nodes to queues. Queues are a convenient method you can use to categorize compute nodes that run different jobs or perform different tasks. Queues also function as a filter condition for you to quickly locate desired nodes. This topic describes how to use queues to manage compute nodes by group, including creating and deleting queues, and moving nodes between queues.
Background information
The system automatically creates a default queue when you create an E-HPC cluster. By default, compute nodes are added to this queue.
Procedure
Open the Nodes page.
Log on to the E-HPC console.
In the top navigation bar, select a region.
In the left-side navigation pane, choose Resource Management > Nodes.
Select a cluster from the Cluster drop-down list.
Select Compute Node from the Node Type drop-down list.
Perform the following operations based on your requirements.
Create a queue
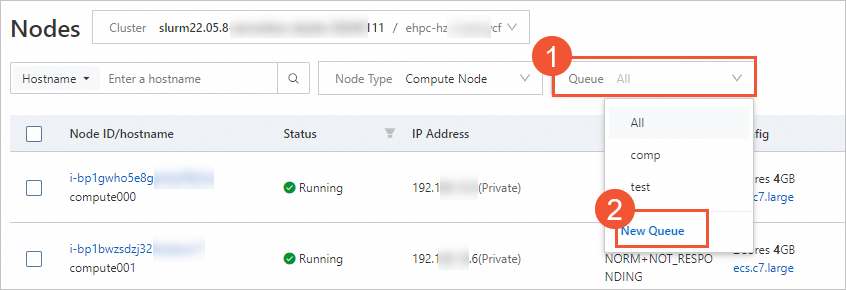
Select New Queue from the Queue drop-down list. In the dialog box that appears, configure the queue information and click Confirm.

Move compute nodes from a queue to another
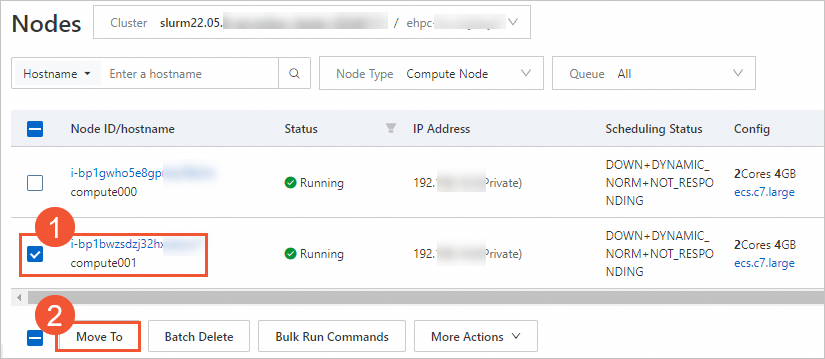
In the node list, select the compute nodes that you want to move and then click Move To in the lower part of the node list. In the dialog box that appears, select the queue to which you want to move the compute nodes and click Confirm.

Delete a queue
ImportantIf the queue that you want to delete contains nodes, you must move the nodes to another queue before you can delete the queue. You cannot delete the default queue in a cluster.
Select the queue that you want to delete from the Queue drop-down list, click Delete Queue in the upper-right corner of the page, and then confirm the tips to delete the queue.
