Data Disaster Recovery provides features such as full backup, incremental backup, and data restoration. This topic describes how to physically back up and restore an SQL Server database.
Prerequisites
The database version is SQL Server 2019, SQL Server 2017, SQL Server 2016, SQL Server 2014, SQL Server 2012, SQL Server 2008R2, SQL Server 2005, or SQL Server 2000.
NoteThe SQL Server database is an on-premises self-managed database or a self-managed database hosted on cloud servers. Cloud-managed databases are not supported.
The self-managed SQL Server database must run on the Windows operating system.
A backup gateway is installed. For more information, see Install a backup gateway.
NoteFor information about backup methods, see Select the backup method and backup schedule type.
Usage notes
Do not configure two or more backup schedules for the same SQL Server database. Otherwise, exceptions may occur during restoration.
Create a backup schedule
For more information, see Create a backup schedule.
When you purchase a backup schedule, set the Data Source Type parameter to SQL Server and the Backup Method parameter to Physical Backup.
Configure a backup schedule
Log on to the DMS console V5.0.
In the top navigation bar, choose .
NoteIf you use the DMS console in simple mode, move the pointer over the
 icon in the upper-left corner of the DMS console and choose .
 On the Backup Schedules page, find the ID of the backup schedule that you want to configure and click Configure Backup Schedule in the Actions column.
In the Configure Backup Source and Destination step of the Configure Backup Schedule wizard, configure the backup source and destination. Then, click Next in the lower-right corner of the page.

Section
Parameter
Description
N/A
Schedule Name
The name of the backup schedule. Data Disaster Recovery automatically generates a name. If you want to specify a custom name, we recommend that you use a name that can help easily identify the backup schedule. Backup schedule names do not need to be unique.
Backup Source Information
Backup Mode
The method used to back up data. By default, the backup method you selected when you purchased the backup schedule is used. In this example, the physical backup method is used.
Instance Region
The region in which the database that you want to back up resides. The Backup Gateways and database instance must reside in the same region.
Backup Gateway
The backup gateway. For more information, see Install a backup gateway.
Database Type
The type of the database. Default value: SQL Server.
Address
The endpoint used to connect to the database you want to back up. Default value:
localhost.Port Number
The port used to connect to the database that you want to back up. Default value: 1433.
Compliance warranty regarding cross-border data transfers
Read and agree to the compliance commitment.
Backup Destination Information
Backup Storage Type
The type of storage used to store the backup data. Valid values:
DBS Storage (recommended): Backup data is stored in Data Disaster Recovery without the need to create an Object Storage Service (OSS) bucket. You are charged based on the volume of your data that is stored in Data Disaster Recovery. For more information about the billing method, see Storage fees.
OSS For User: If you select this option, you must create an OSS bucket in the OSS console in advance. For more information, see Create buckets.
NoteIn this example, DBS Storage (recommended) is selected. If you select OSS For User, you must configure the OSS Bucket Name parameter. Only the Standard storage class is supported.
If the volume of data to be backed up is large, we recommend that you purchase subscription storage plans to offset fees. Storage plans are more cost-effective than the pay-as-you-go billing method.
Storage Encryption
The method used to encrypt the stored data. Valid values:
Encrypted (recommended): AES-256 is used to encrypt the stored data.
OSS supports the server-side encryption feature. When you upload an object to a bucket for which server-side encryption is enabled, OSS encrypts and stores the object. When you download the encrypted object from OSS, OSS decrypts the object and returns the decrypted object. For more information, see Server-side encryption.
Non-encrypted: The stored data is not encrypted.
In the Edit Backup Objects step, select the database or table that you want to back up in the Available section and click the right arrow to add the selected database or table to the Selected section. Then, click Next.
NoteIf the Available section is empty, check the permissions of the backup gateway. For more information, see Common errors and troubleshooting for Data Disaster Recovery.
If you back up an entire database, the permission data and stored procedures are also backed up.
In the Configure Backup Time step, configure the parameters, and then click Next in the lower-right corner of the page. The following table describes the parameters.
Parameter
Description
Full-scale Backup Frequency
The frequency of the backup schedule. Valid values: Periodic Backup and Single Backup.
NoteIf you select Periodic Backup, you must configure the Full Data Backup Recurrence, Start At, and incremental backup-related parameters.
Full Data Backup Recurrence
The days of the week on which Data Disaster Recovery runs the backup schedule.
Start At
The start time of the backup.
NoteIf a previous full data backup is incomplete at the start time of the next backup, Data Disaster Recovery skips the next backup.
Incremental Backup
Specifies whether to enable incremental backup. If you enable incremental backup, Data Disaster Recovery performs regular incremental backup operations based on the value of the Incremental Backup Interval parameter.
Incremental Backup Interval
The interval at which incremental backups are performed. If you set the interval to 10 minutes, Data Disaster Recovery performs an incremental backup every 10 minutes.
Does not automatically delete backed up incremental
Specifies whether to automatically delete the archived redo log files that are backed up. Valid values:
Enable: Data Disaster Recovery does not automatically delete the archived redo log files that are backed up.
Disable: Data Disaster Recovery automatically deletes the archived redo log files that are backed up. By default, archived redo log files backed up seven days ago are deleted.
NoteIf you want to change the default retention period of the archived redo log files that are backed up, contact technical support. For example, you can contact technical support to help you change the retention period to 14 days.
Enable compression
Specifies whether to enable compression during backup. Valid values:
Enable: recommended. Data is compressed during backup to reduce storage space.
Disable: Data is not compressed during backup.
In the Edit Lifecycle step, configure the lifecycle for full backup data in the Configure Full Data Backup Lifecycle section.
If you set the Incremental Backup parameter to Enable in Step 6, you must configure the lifecycle for incremental backup data. For more information about the lifecycle rules of backup data, see How do I manage the lifecycle rules of backup sets?
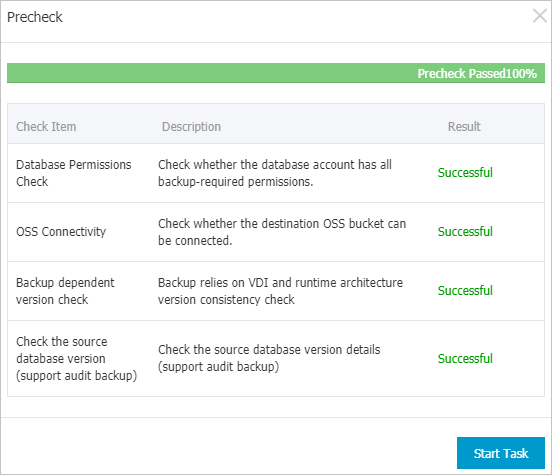
After the preceding configurations are complete, click Precheck in the lower-right corner of the page.
If the Precheck Passed message appears, click Start Task.

Restore backup data
Log on to the DMS console V5.0.
In the top navigation bar, choose .
NoteIf you use the DMS console in simple mode, move the pointer over the
 icon in the upper-left corner of the DMS console and choose .
 On the Backup Schedules page, find the backup schedule you want to manage and click Manage in the Actions column.
On the Configure Task page, click Restore Database in the upper-right corner.
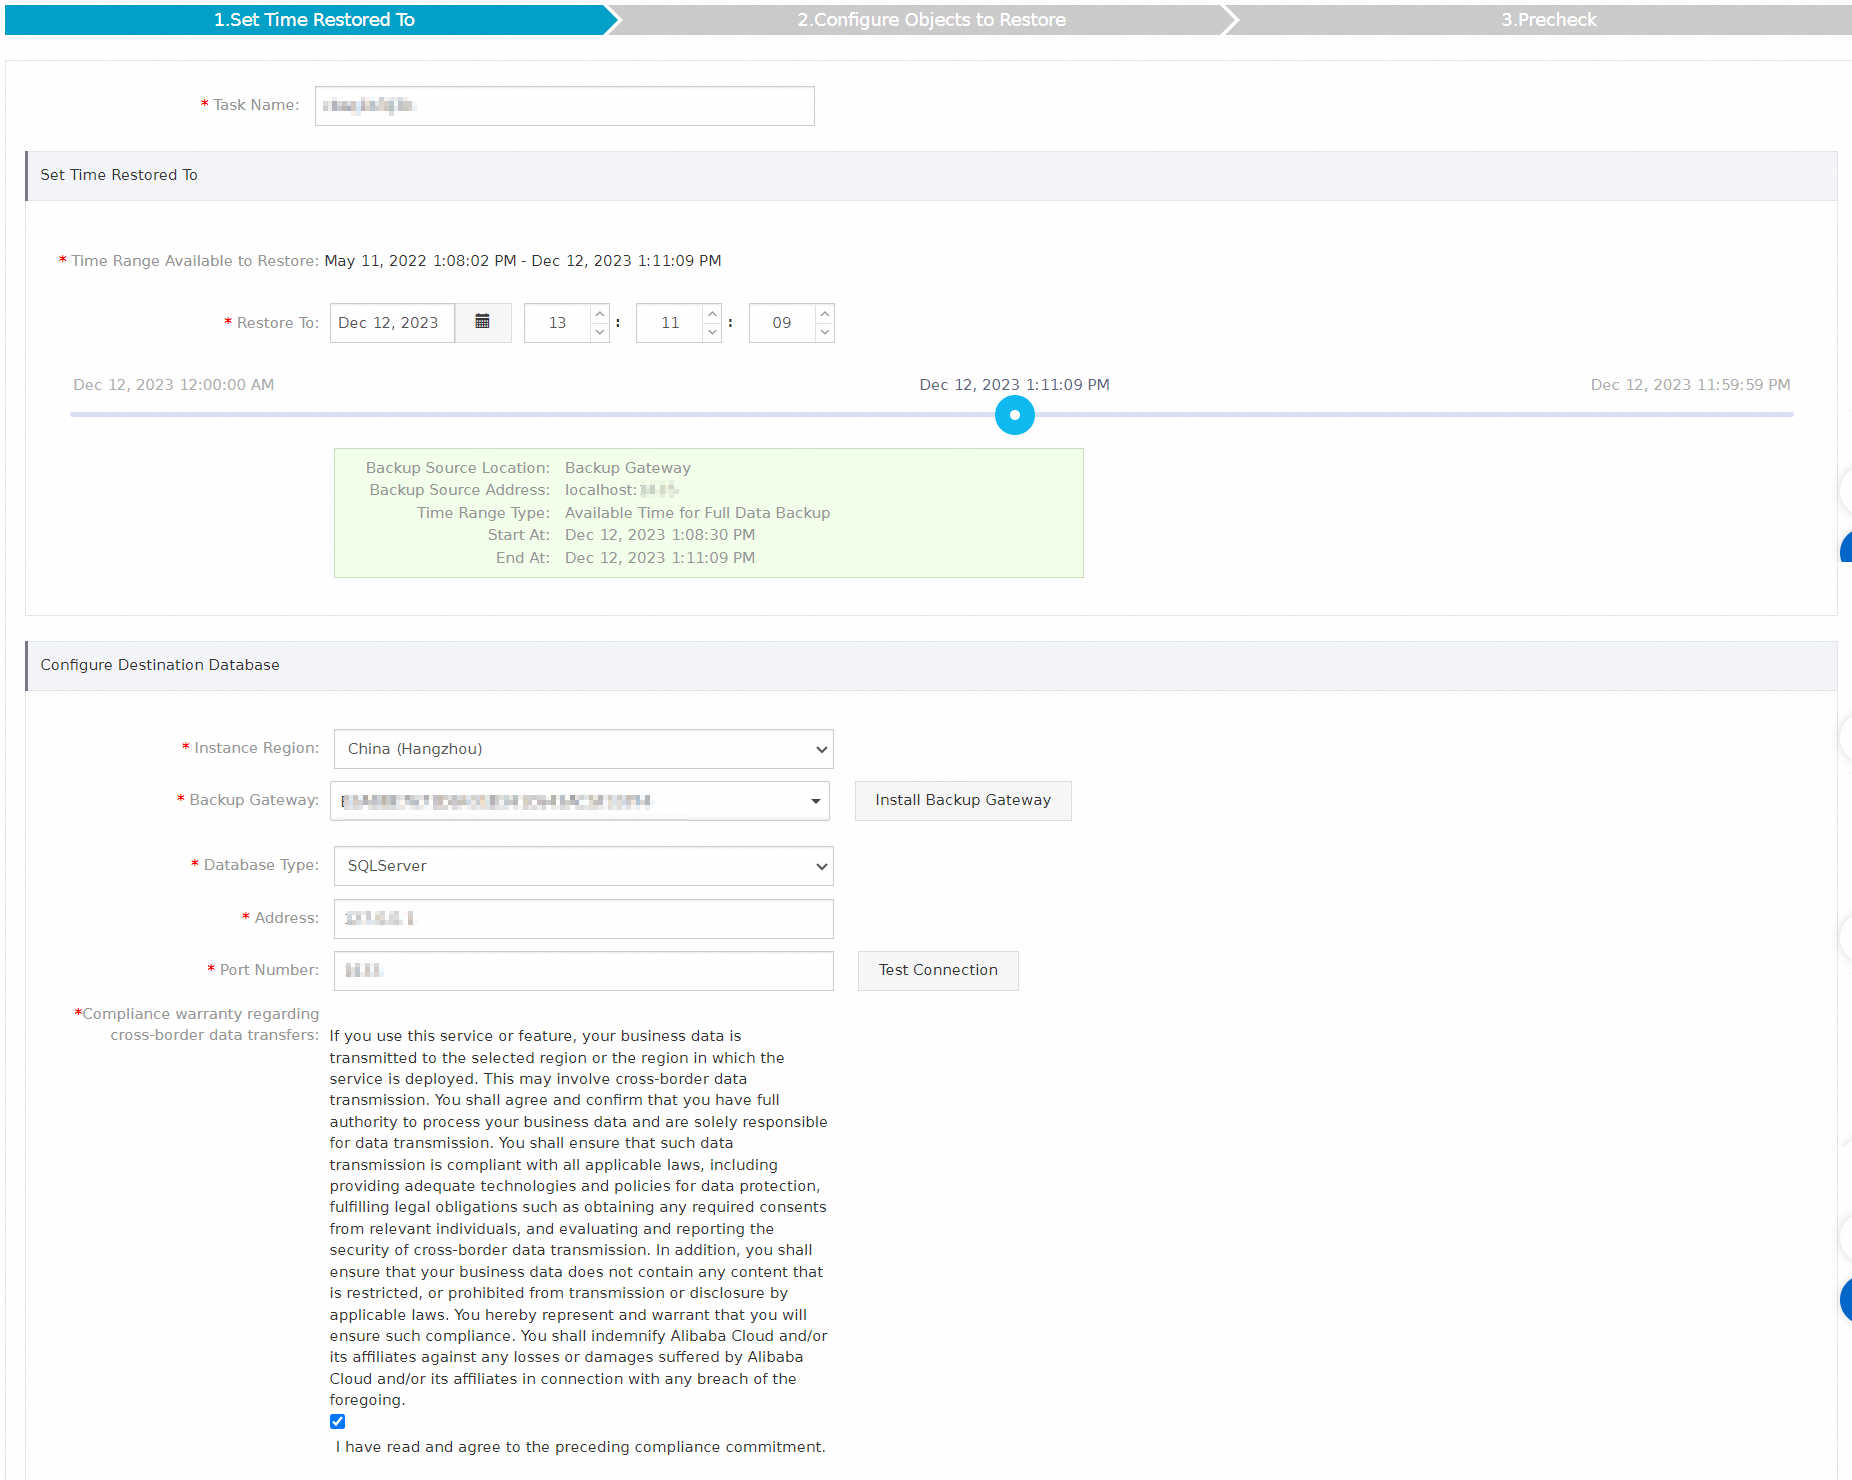
In the Set Time Restored To step, configure the parameters, and then click Next. The following table describes the parameters.

Section
Parameter
Description
N/A
Task Name
The name of the backup schedule. Data Disaster Recovery automatically generates a name. If you want to specify a custom name, we recommend that you use a name that can help easily identify the backup schedule. Backup schedule names do not need to be unique.
Set Time Restored To
Time Range Available to Restore
The time range available for source database restoration. Data Disaster Recovery displays the available time range.
Restore To
The point in time to which you want to restore the source database. The value must be within the time range specified by the Time Range Available to Restore parameter.
Configure Destination Database
Instance Region
The region in which the destination database resides, which is also the region in which the backup gateway is installed.
Backup Gateway
The backup gateway. For more information, see Install a backup gateway.
Database Type
The type of the destination database. Default value: SQL Server.
Address
The endpoint used to connect to the destination database. Default value: localhost.
Port Number
The port used to connect to the destination database. Default value: 1433.
Compliance warranty regarding cross-border data transfers
Read and agree to the compliance commitment by selecting the check box.
In the Available section, select the destination database and click the right arrow to add the destination database to the Selected section on the right. Then, click Precheck.
To view the database restoration progress, click Restore Tasks in the left-side navigation pane.
NoteThe restoration duration varies based on the backup schedule specifications and database size. The higher the backup schedule specifications, the faster the restoration. For more information, see Performance tests on logical backup and physical backup.