On the Personal Settings tab of the Settings page, you can customize the layout and theme of the DataStudio page in your workspace. For example, you can change the modules that you want to display in the left-side navigation pane of the DataStudio page, specify the background color of the DataStudio page, and configure editor settings to check for code errors and implement auto wrap and auto save.
Go to the Personal Settings tab
Log on to the DataWorks console. In the top navigation bar, select the desired region. In the left-side navigation pane, choose . On the page that appears, select the desired workspace from the drop-down list and click Go to Data Development.
In the lower part of the left-side navigation pane of the DataStudio page, click the
 icon. The Personal Settings tab of the Settings page appears.
 On the Personal Settings tab, you can configure the following settings:
Specify the modules that you want to display in the left-side navigation pane of the DataStudio page. For more information, see Configure settings in the DataStudio Modules section in this topic.
Specify whether to enable the solution feature. Users can create solutions only after this feature is enabled. For more information, see Configure settings in the File Management section in this topic.
Configure the settings of the code editor, such as the minimap feature, the error check feature, and the front size. For more information, see Configure settings in the Editor Settings section in this topic.
Specify the background color of the DataStudio page. For more information, see Configure settings in the General Settings section in this topic.
If you want to apply the settings of the DataStudio page in the current workspace to all workspaces within the current logon account, click Apply to All Workspaces in the lower-right corner of the Personal Settings tab.
Configure settings in the DataStudio Modules section
In the DataStudio Modules section, you can specify the modules that you want to display in the left-side navigation pane of the DataStudio page. 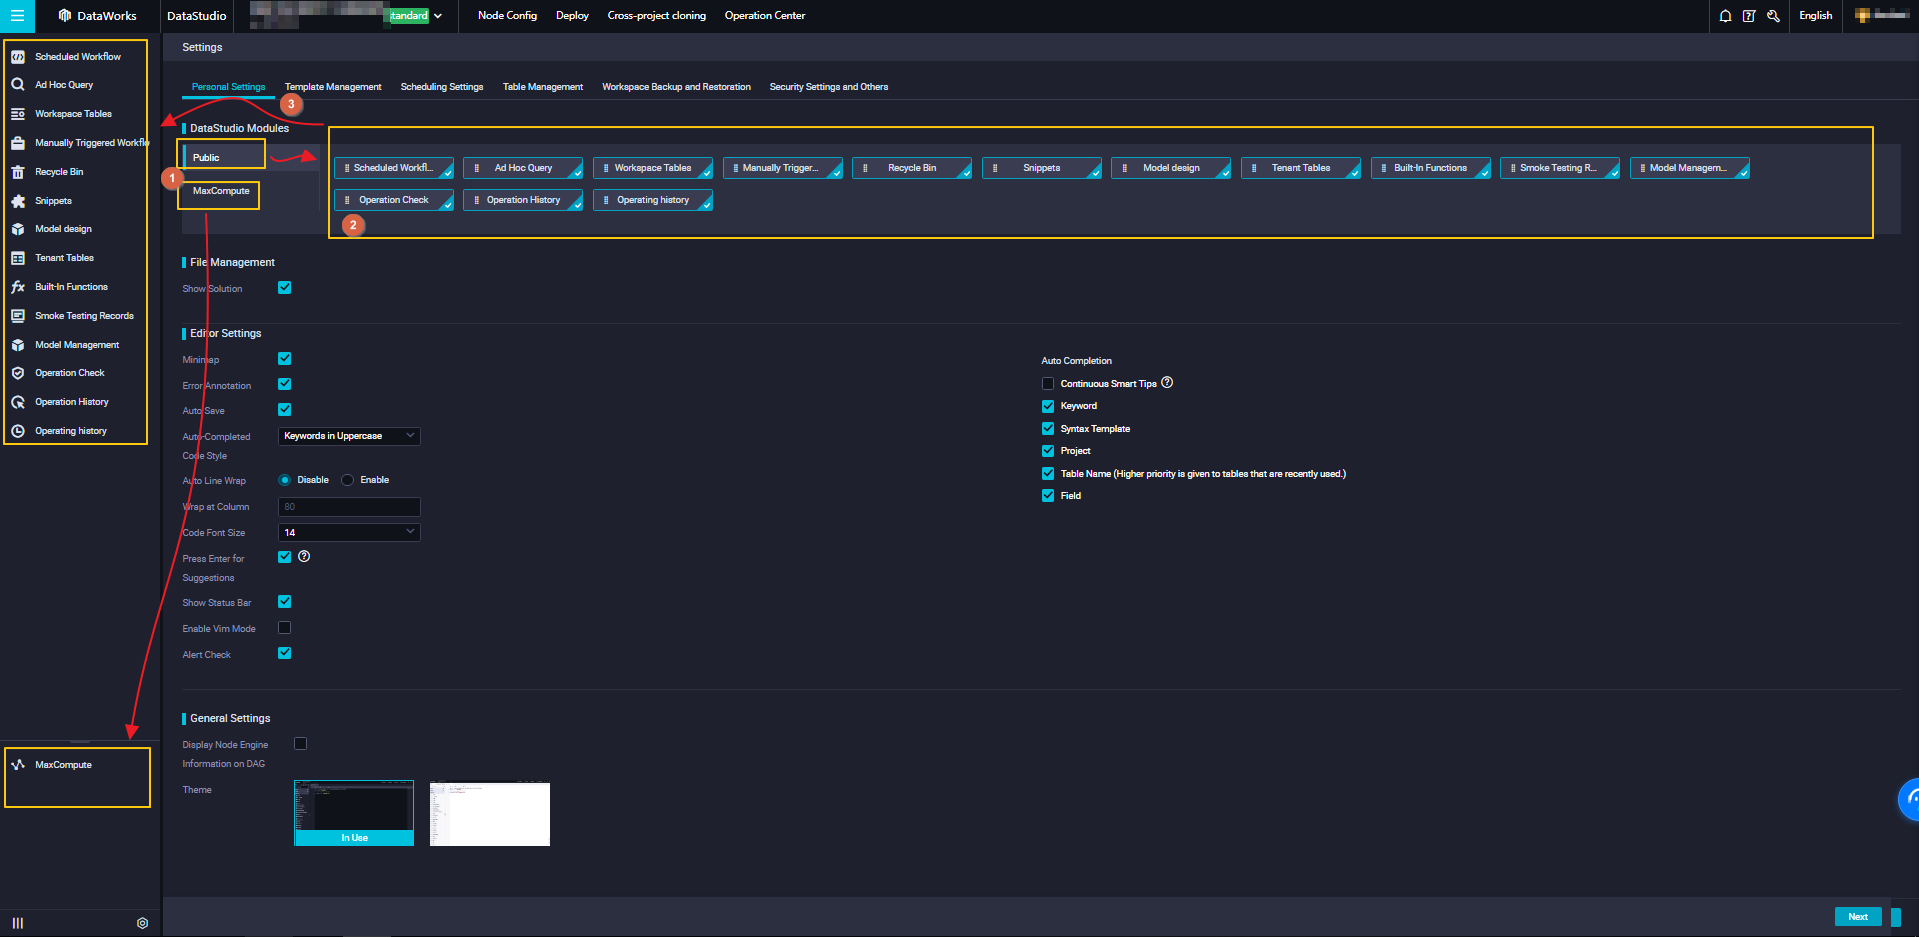 On the Public or MaxCompute tab, you can select the modules that you want to display in the left-side navigation pane of the DataStudio page. After the modules are displayed in the left-side navigation pane, you can click the icons that represent these modules to perform data development operations.
If you cannot find a module in the left-side navigation pane of the DataStudio page, the module is not selected in the DataStudio Modules section. In this case, you can select the module in the DataStudio Modules section to enable the module to be displayed in the left-side navigation pane of the DataStudio page.
If you do not want a module to be displayed in the left-side navigation pane of the DataStudio page, you can clear the module in the DataStudio Modules section. The module is removed only from the left-side navigation pane of the DataStudio page, but not from DataWorks.
Configure settings in the File Management section
In the File Management section, you can select Show Solution to enable the solution feature. For more information about solutions, see Create a solution.
Configure settings in the Editor Settings section
In the Editor Settings section, you can configure code- and keyword-related features for the editor. The settings immediately take effect. The following table describes the parameters in the Editor Settings section.
Parameter | Description | Effect |
Minimap | Specifies whether to display a minimap that provides an overview of the code in the code editor. If the code is long, you can move the pointer in the minimap to specify the code block that you want to display. |
|
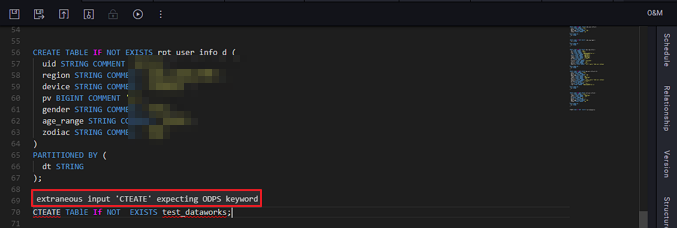
Error Annotation | Specifies whether to check the code syntax for errors. If you select this check box, the errors are marked in the red shading. If you move the pointer over the red shading, you can view the error details. |
|
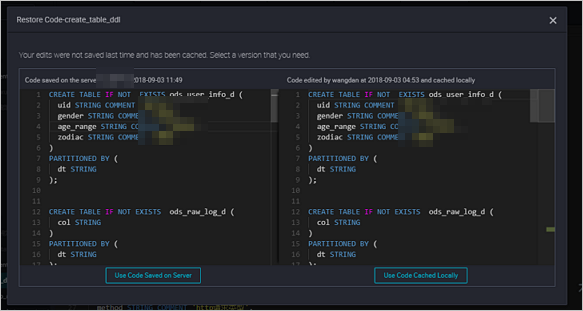
Auto Save | If you select this check box, DataWorks automatically saves the code that is being edited. This way, if the code editor of a node is unexpectedly closed, you can click Use Version Saved on Server or Use Version Saved in Local Cache when you re-open the node. |
|
Auto-Completed Code Style | Specifies whether the keywords in the code are uppercase or lowercase. |
|
Auto Line Wrap | Specifies whether to enable auto wrap for long clauses. Valid values:
| None |
Wrap at Column |
| None |
Code Font Size | Valid values: an integer from 12 to 18. You can configure this parameter based on your personal preference and code size. | None |
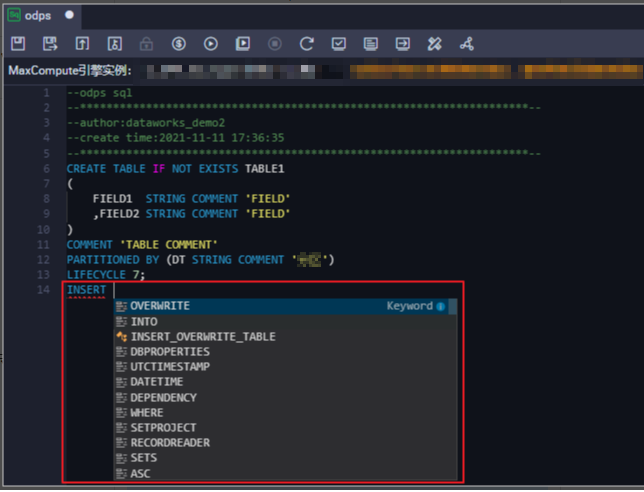
Press Enter for Suggestions | Specifies whether to display suggestions on code after you press Enter in the code editor. Note
|
|
Show Status Bar | Specifies whether to display data related to task development at the bottom of the task configuration tab. The data includes the number of characters and the specific row and column to which the current code belongs. | None |
Enable Vim Mode | Specifies whether to develop code in vim mode. | None |
Alert Check | Specifies whether to verify code based on the standard code development specifications and display an alert message if your code is not standard. | None |
Auto Completion | Auto code completion. You can enable the following types of hints for code completion:
| None |
Configure settings in the General Settings section
In the General Settings section, you can configure the display settings of a directed cycle graph (DAG) and the background color of the DataStudio page. The following table describes the parameters in the General Settings section.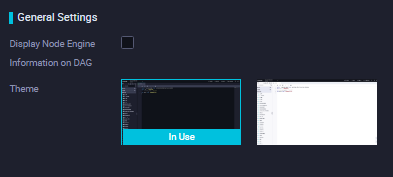
Parameter | Description | Effect |
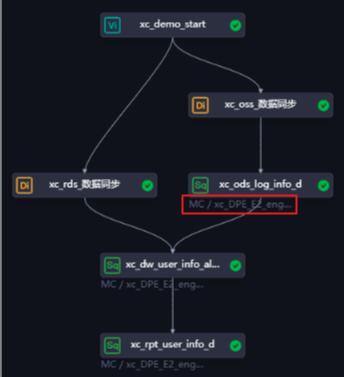
Display Node Engine Information on DAG | Specifies whether to display the information about compute engines of nodes in a DAG. |
|
Theme | Specifies the background color of the DataStudio page. The background color can be black or white. | None |

