Data Insight in DataWorks provides in-depth data analysis to help you gain insights. This feature supports data exploration and visualization, which lets you understand data distribution, create data cards, and combine them into data reports. You can also share the results as a long-image report. This feature uses Artificial Intelligence (AI) to parse complex data and support your business decisions.
Applicability
Permissions: You must have permissions for DataAnalysis. For more information about supported workspace roles, see Preset role permissions for DataAnalysis.
For more information about how to grant permissions to a role, see Add a workspace member and manage the permissions of the member's role.
Region limitations: This feature is available only in China (Hangzhou), China (Shanghai), China (Shenzhen), China (Chengdu), China (Zhangjiakou), China (Beijing), and China (Ulanqab).
Go to the Data Insight page
Log on to DataWorks DataAnalysis, switch to the destination region, and click Go To DataAnalysis. In the navigation pane on the left, click the ![]() icon to go to the Data Insight page.
icon to go to the Data Insight page.
Create a data insight task
You can create a data insight task in multiple ways: from the Data Insight list, from a table in the SQL Query data catalog, or from the results of an SQL query.
Create a task from the Data Insight list
On the Data Insight page, click Create Data Insight Task. In the Create Data Insight Task dialog box, configure the table object for analysis and click Start Data Insight.
The data source type and data range default to the values from your last operation. The most recent partition is selected by default.

(Optional) If you have not enabled enhanced analysis, click Try Now as prompted on the page.
Table insights based on SQL queries
This feature is available only in the legacy version of DataAnalysis and is not supported in the new version.
In the navigation pane on the left, click the
 icon to go to the SQL Query page. Add the table to the catalog on the left, as shown in the following figure.
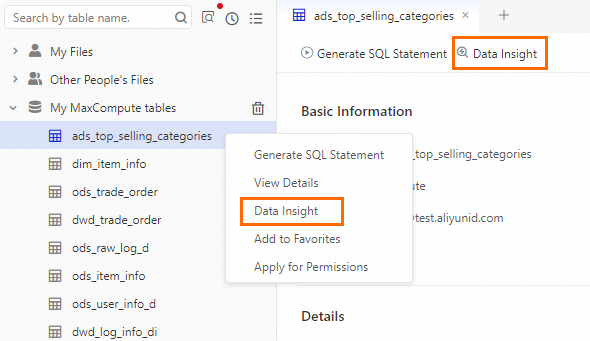
In the data catalog on the left, find the table that you want to analyze.
On the basic information page of the table, click Data Insight.
Right-click the table name and select Data Insight from the shortcut menu.

In the Create Data Insight Task dialog box, the parameters are automatically populated. Click Start Data Insight.
(Optional) If you have not enabled enhanced analysis, click Try Now as prompted on the page.
Insights based on SQL query results
New DataAnalysis
Hover over and click on the right.
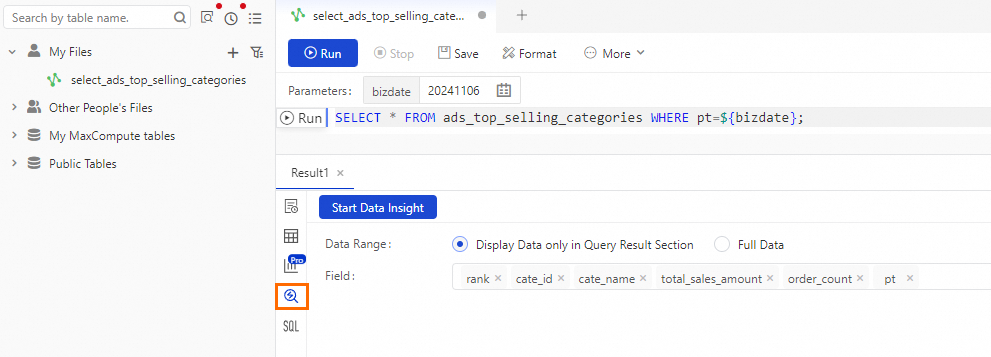
Edit the SQL code. In the toolbar at the top of the SQL editor page, click Run and wait for the query to complete.
In the results, click the
 icon, select a Data Range, and then click Start Data Insight.
(Optional) If you have not enabled enhanced analysis, click Try Now as prompted on the page.
Legacy DataAnalysis
In the navigation pane on the left, click the
 icon to go to the SQL Query page. In My Files, click Create File, run the SQL query statement, and then wait for the results.
In the results, click the
 icon, select a Data Range, and then click Start Data Insight.
(Optional) If you have not enabled enhanced analysis, click Try Now as prompted on the page.
View Data Insight results
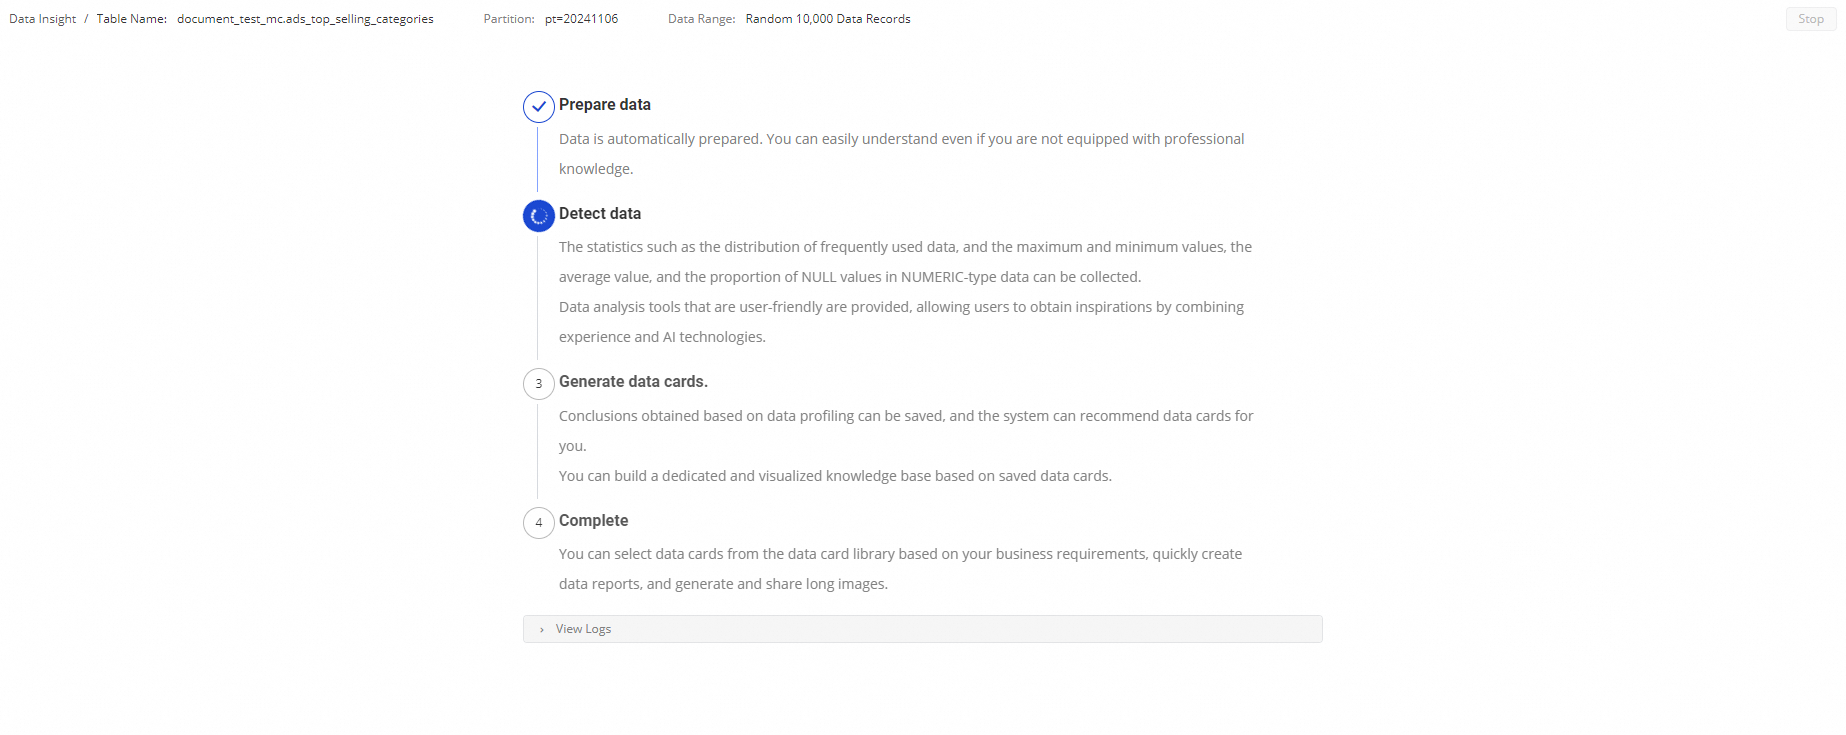
Wait for the Data Insight job to complete.
NoteWhile the data insight is running, you can click Stop Analysis to stop the job.
A job that explores all data may take a long time to complete. You can check the results later on the Data Insight list page. Closing the current page does not interrupt the job.

View Data Insight results: The system automatically generates visualization chart cards based on data types and other data features.
After the cards are generated, click Load More to display more cards.


If the Data Range is not set to include all data, hover over the upper-right corner of a chart and save the chart to Cards.
FAQ
Q: Why does Data Insight show "No more cards"?
A: This may occur if the data set is too small to generate insights. For best results, run Data Insight on data sets that contain at least 500 entries.
Q: How do I troubleshoot a failed Data Insight analysis on a table?
A: Ensure that the data source can be connected and that queries can be executed successfully. You can test this by running a query in the SQL query tool.