This topic describes how to deploy a deployment application by using Nginx images. You can create an application by pulling Nginx images, creating services, and setting up network routing through the Alibaba Cloud Container Compute Service (ACS) console.
Prerequisites
An ACS cluster has been created, in which no Ingress with the domain name foo.bar.com exists. For more information, see Create an ACS cluster.
Step 1: Create an NGINX application
Log on to the ACS console. In the left-side navigation pane, click Clusters.
On the Clusters page, find the cluster that you want to manage and click its ID. In the left-side navigation pane of the cluster details page, choose .
On the Deployments page, click Create from Image in the upper left corner. The following table shows the key parameters (you can use default values for the others):
Configuration Item
Description
Example Value
Screenshot
Basic Information
Enter the application Name and click Next.
nginxtest

Container
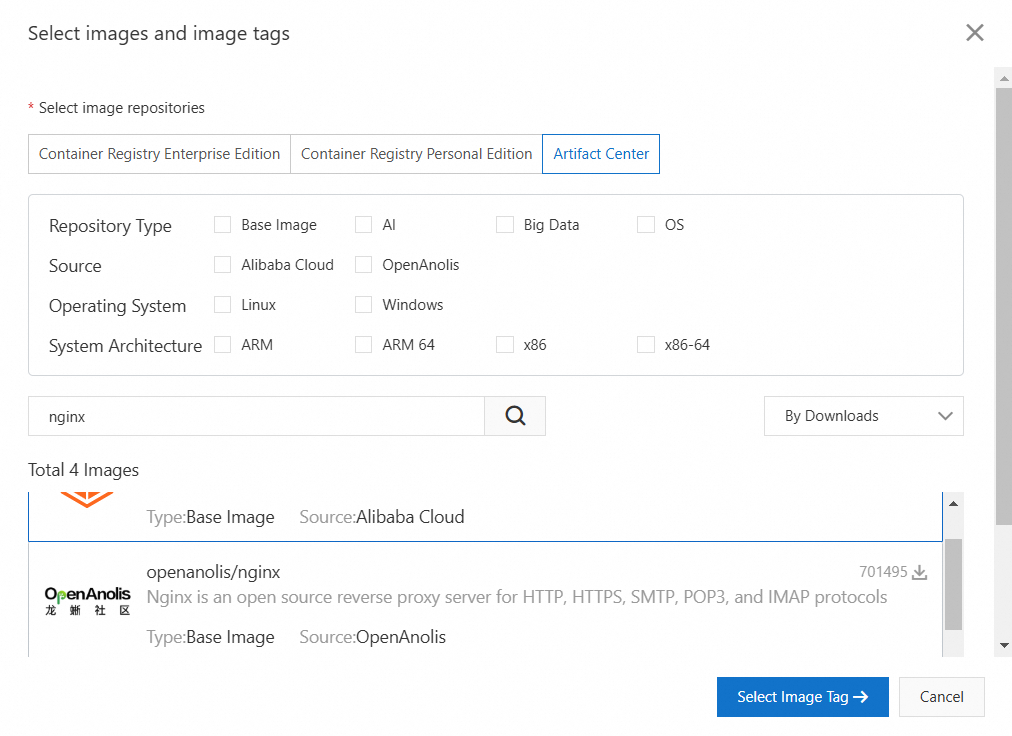
Select the Nginx image:
In the Image Name section, click Select images.
Click Artifact Center.
Search for nginx.
Select the nginx image, click Select Image Tag, choose the required tag, and click OK.
Complete the relevant fields and click Next.
nginx
Advanced
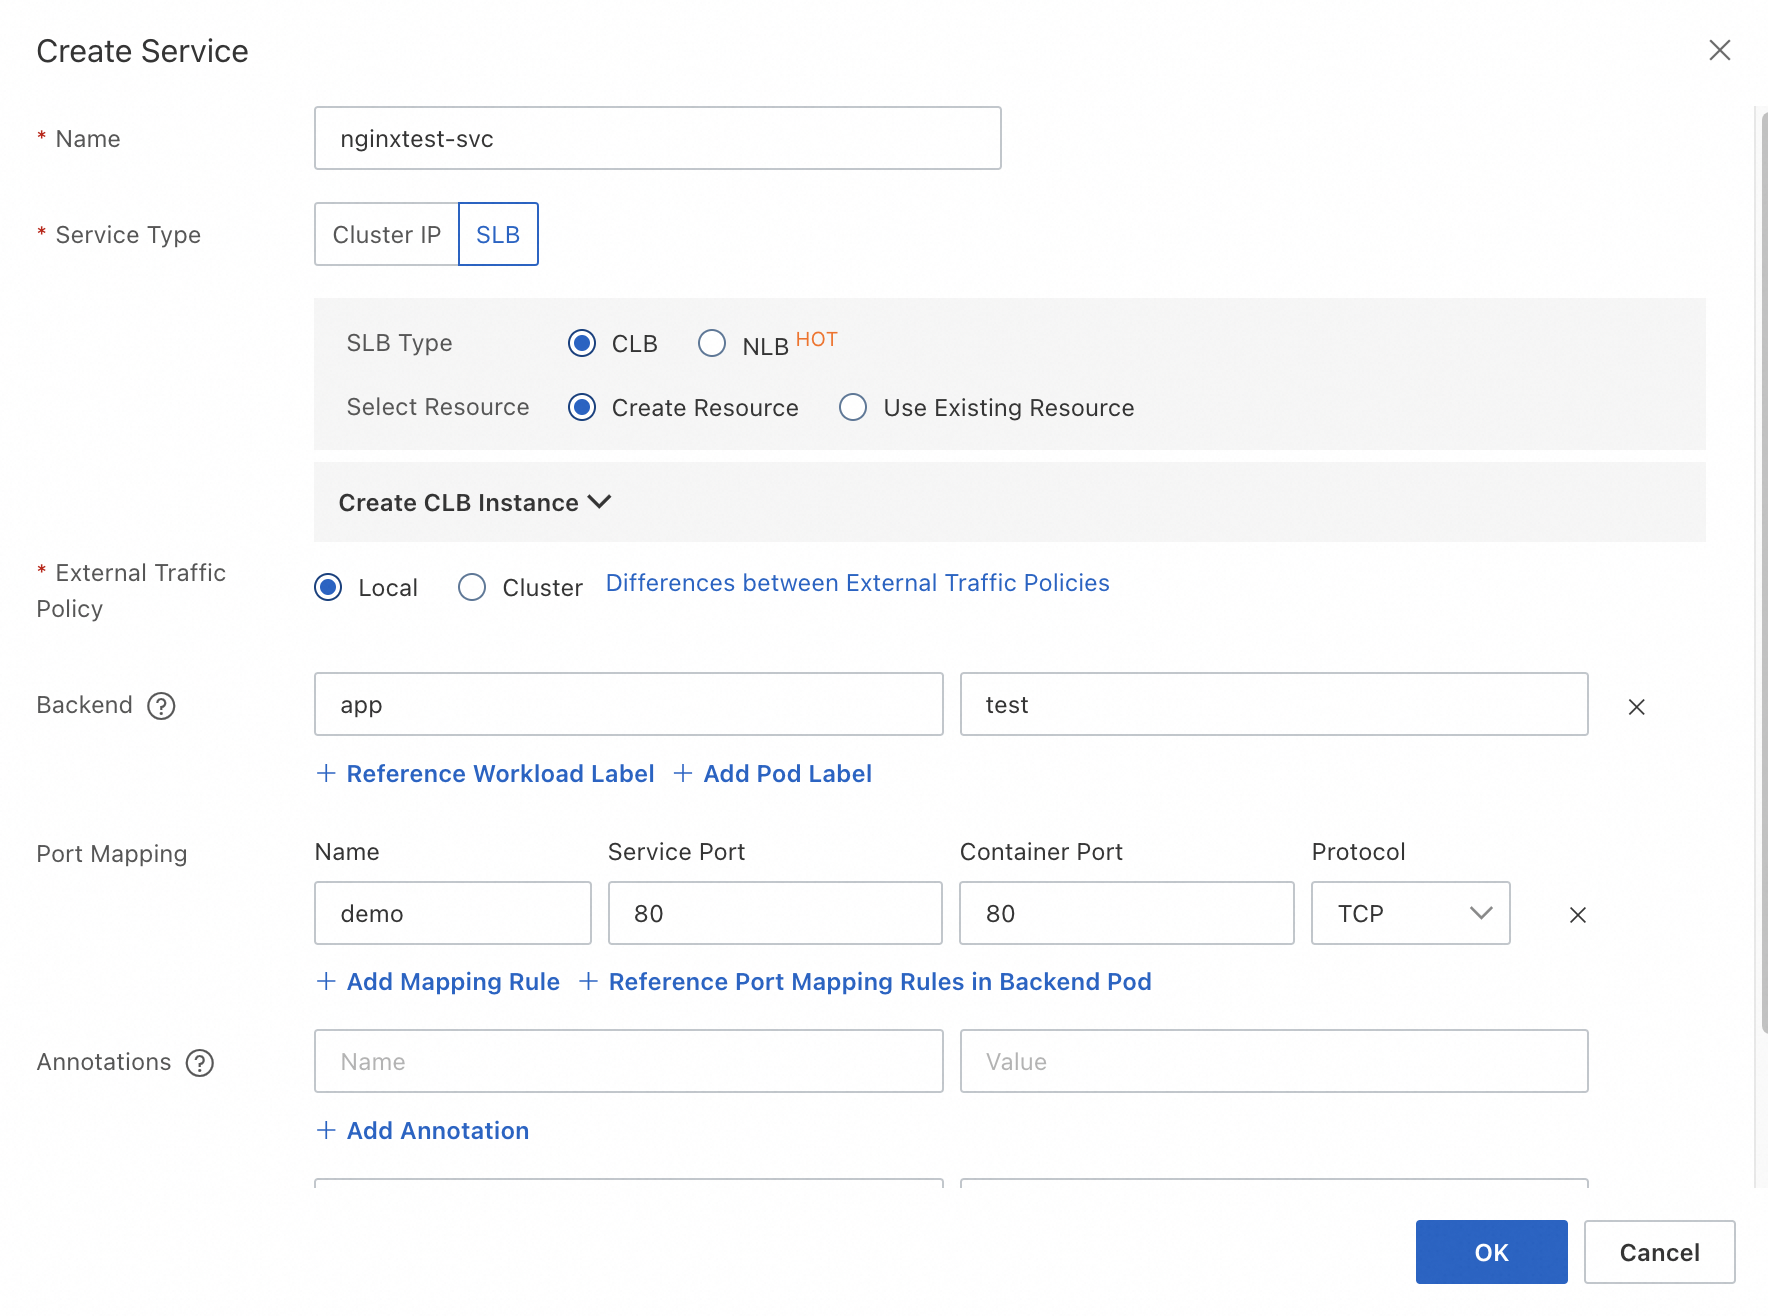
Create a Service:
Click Create.
Add a Port Mapping with the following details:
Name: http
Service Port: 80
Container Port: 80
Click OK.
Service Name: nginxtest-svc
Port Name: http
Service Port: 80
Container Port: 80
Create an Ingress (Optional):
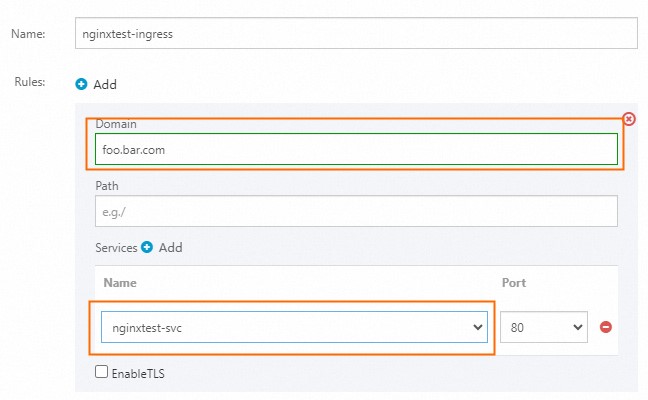
Click Create.
In the Rules section, set the Domain to
foo.bar.comand select the created service for Name in the Services section.Set the Ingress Class to the name of the created ALB Server Load Balancer. For more information, see Get started with ALB Ingresses.
Click Create.
Domain Name: foo.bar.com
Name: nginxtest-svc
Configure Horizontal Pod Autoscaler (HPA):
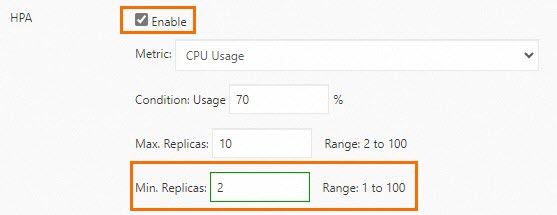
Enable HPA.
Set Min. Replicas to 2.
Click Create at the bottom of the page.
HPA: Enabled
Min. Replicas: 2
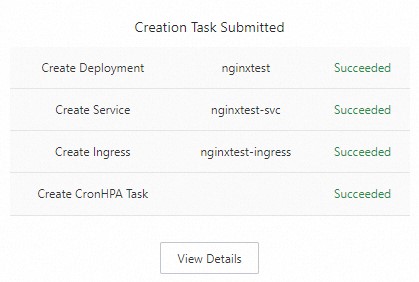
The following interface indicates the successful creation of the application:
Step 2: Access the test website
Configure the Hosts file on your computer
Log on to the ACS console. In the left-side navigation pane, click Clusters.
On the Clusters page, find the cluster that you want to manage and click its ID. In the left-side navigation pane of the cluster details page, choose .
On the Deployments page, click the application name created in Step 1.
Click the Access Method tab and note the External Endpoint of the service.
To bind a domain to a specific IP address, edit the Hosts file on your computer by adding the entry in the following format: IP address + space + domain name, such as
39.104.XX.XX foo.bar.com. Then, you can access the service using the domain name.The method for editing the Hosts file varies by operating system:
Windows (requires administrator permissions)
Open My Computer, navigate to
C:\WINDOWS\system32\drivers\etcin the address bar, and locate the Hosts file.Edit the Hosts file with Notepad, append
39.104.XX.XX foo.bar.comto the end, and save the changes.
Mac
From the menu bar, select Go > Go to Folder, enter
/private/etc, and press Enter.Find the Hosts file and copy it to the desktop for editing.
Right-click the Hosts file on the desktop, select Open With, and choose TextEdit.
Add
39.104.XX.XX foo.bar.comto the end of the Hosts file. Save the file and replace the original Hosts file in the/private/etcfolder with the edited version.
Access the website using a browser.
Launch the browser, clear the cache or use incognito mode, and navigate to
http://foo.bar.com. The following image is an example (actual results may vary based on the browser display):
Use ALB Server Load Balancer domain name resolution
On the Deployments page, click the application name created in Step 1.
Click the Access Method tab and note the Ingress Endpoint.
Follow the following steps to create a CNAME record:
ImportantMake sure your host domain name has passed TXT record verification.
Log on to the Domain Name Resolution Console.
On the Domain Name Resolution page, click Add Domain Name.
In the Add Domain Name dialog, enter your host domain name and click OK.
In the Actions column of the target domain name, click DNS Settings.
On the DNS Settings page, click Add DNS Record.
In the Add DNS Record page, configure the following items to complete the CNAME resolution setup, and click OK.
Configuration Item
Description
Record Type
Choose CNAME from the drop-down menu.
Host Record
The prefix of your domain name, such as
www.Resolution Request Source
Select the default option.
Record Value
Enter the CNAME address corresponding to your domain name, which is the DNS name you recorded earlier.
TTL
The time-to-live (TTL) for the DNS record to be cached on the DNS server. Use the default value unless otherwise required.
Access the website using a browser.
Launch the browser, clear the cache or use incognito mode, and navigate to http://foo.bar.com . The following image is an example (actual results may vary based on the browser display):
If you encounter a critical message such as "The website cannot be accessed because it has not been registered according to the relevant laws of the Ministry of Industry and Information Technology (MIIT)," please check whether the load balancer (LB) type configured for the front-end of the Ingress is set to expose a public IP address. If it is a public IP, according to MIIT requirements, exposing a public domain name service on a cloud platform must be accompanied by the corresponding domain registration. The domain must be reviewed and approved before it can be properly resolved and accessed.