Vim is a common text editor in Linux and suitable for scenarios such as system O&M and shell script compiling. This topic describes the basic commands of Vim and how to switch the Vim working mode. This helps you quickly get started with the Vim editor.
Installation of Vim
By default, Vim is installed in Linux. You do not need to separately install Vim. To view the Vim version, run the vim --version command in the terminal. In the following example, Vim 8.0 is used. Commands may vary based on the Vim version.
VIM - Vi IMproved 8.0 (2016 Sep 12, compiled Aug 10 2022 11:26:47)
Included patches: 1-1763
Modified by OpenAnolis Community
Compiled by OpenAnolis Community
Huge version without GUI.  Features included (+) or not (-):
+acl               +farsi             +mouse_sgr         -tag_any_white
 ...
Switch the mode
When you run the vim <File name> command to open a file, Vim enters the Normal mode. If the file does not exist, Vim creates the file. The following figure shows how to switch the Vim working mode.

Mode | Functionality | Mode switching method |
Normal mode
| Allows you to copy, paste, and delete characters or lines. |
|
Insert mode
| Allows you to insert characters. | To switch from the Normal mode to this mode, press Note After the Vim editor enters the Insert mode, |
Replace mode
| Allows you to replace characters. | To switch from the Normal mode to this mode, press Note After the Vim editor enters the Replace mode, |
Visual mode
| Allows you to select a block of text. Before you run commands such as copy, replace, and delete commands on text, you must select a block of text. | To switch from the Normal mode to this mode, press Note After the Vim editor enters the Visual mode, |
Command mode
| Allows you to find and replace strings, query line numbers, save changes to a file, and exit the Vim editor. | To switch from the Normal mode to this mode, press |
Basic commands
Open a file
Run the
vim <File name>command to open a single file and enter the Normal mode. If the file does not exist, Vim creates the file.Run the
vim <Name of File 1> <Name of File 2>command to open multiple files and enter the Normal mode.By default, File 1 is opened. After you modify File 1, enter
:wto save File 1. Then, enter:bnto open File 2, modify File 2, and then enter:wto save File 2.Enter
:bpto re-open File 1.Enter
:lsto view the file list.
Run the
:open <Name of File 3>command to open a new file in Command mode. Before you run the :open <Name of File 3> command, enter:wto save the previous file.
Move the cursor
In Normal mode
Up arrow key or k: Move the cursor upward.
Down arrow key or j: Move the cursor downward.
Left arrow key or h: Move the cursor to the left.
Right arrow key or l: Move the cursor to the right.
In Insert mode
You can move the cursor only by pressing the up, down, left, or right arrow key.
Insert content
To switch from the Normal mode to the Insert mode, press i, I, a, A, o, or O.
i: Insert a character to the left of the current character.I: Insert a character at the beginning of the current line.a: Insert a character to the right of the current character.A: Insert a character at the end of the current line.o: Insert a line below the current line.O: Insert a line above the current line.
Copy and paste content
The keys used to copy and paste content provide the same functionality as Ctrl+C and Ctrl+V in the Windows Word editor. In Normal mode:
yy: Copy the content of the line on which the cursor is located. You can paste the content by pressingp.nyy: n specifies the number of lines to be copied. For example, press2yyto copy the line on which the cursor is located and the next line.p: Paste to the line next to the line on which the cursor is located.P: Paste to the line above the line on which the cursor is located.
Delete content
In Normal mode
To delete a single character, move the cursor to the character and press
x.To delete an entire line, move the cursor to the line and press
dd. This key is equivalent to Ctrl+X in the Windows Word editor. You can paste content by pressingp.To delete the current line and the line above the current line, press
dk.To delete the current line and the next line, press
dj.To delete content from the current line to the end of the file, press
dGto delete content from the current line to the end of the file.nx: n is a number. This key deletes the character highlighted by the cursor and the subsequent (n - 1) characters.ndd: n is a number. This key deletes content from the current line on which the cursor is located and the (n - 1) lines below the current line. This key is equivalent to Ctrl+X in the Windows Word editor. You can paste content by pressingp.
In Insert mode
Move the cursor to the right of the content that you want to delete and press the
Deletekey.
Query content
In Normal mode
/text: Query text. By default, exact match is used. After you run the /text command and press the Enter key, matching characters are highlighted.To search for content regardless of case, run the
:set ignorecasecommand first. Run the:set noignorecasecommand to obtain exact match results.
Press
nto go to the next match.Press
Nto go to the previous match.
Replace content
In Normal mode
r: Replace the character highlighted by the cursor.R: Continuously replace highlighted characters until you press theEsckey to exit the Replace mode.cc: Delete the line on which the cursor is located and enter the Insert mode.:%s/<Old text>/<New text>/g: Search for all texts that match <Old text> and replace each matching text with <New text>./gindicates that all matching texts are replaced. If you do not enter /g, only the first match on each line is replaced.
In Insert mode
Delete the content that you want to replace and insert the replacement content.
Undo and redo operations
In Normal mode
u: Undo the insertion or modification. This key is equivalent toCtrl+Zin the Windows Word editor.U: Undo all insertions and modifications and restore the previous line content.Ctrl+r: Redo the previous operation to restore the undone operation. This key is equivalent toCtrl+Yin the Windows Word editor.
Indent and typeset lines
In Normal mode
>>: Indent the entire line to the right. By default, the indentation value is 8, which is the number of spaces that a tab character (Tab) defaults to.<<: Indent the entire line to the left.
In Command mode
:ce: Align the entire line to the center.:le: Align the entire line to the left.:ri: Align the entire line to the right.
Comment out code
Back up files. Before you perform extensive replacement operations, we recommend that you back up files or use the undo feature (
u) to prevent accidental operations. For example, run thesudo cp /etc/text.txt /etc/text.txt.bakcommand to back up a file.Understand regular expressions. Make sure that you understand the meanings of Vim regular expressions and do not delete irrelevant content. In Vim regular expressions, a forward slash (
/) must be escaped as a combination of the forward and backward slashes (\/). If you are unfamiliar with regular expressions, practice or debug your regular expressions by using tools, such as Regex101.Understand comment styles in different languages. Use comment delimiters in replacement commands based on the programming language that you use.
In Visual mode
To comment out successive lines of code, perform the following steps:
Move the cursor up or down to select the lines that you want to comment out.
Press
:to enter the Command mode. Then,:'<,'>is automatically filled in, which indicates that the selected content is to be commented out.Enter a replacement command or string. For example, add a comment delimiter (
#) at the beginning of each line, enter thes/^/#/command and then press theEnterkey.
Comment out all code. Run the
:%s/^/#/gcommand to use the comment delimiter (#) to comment out all lines.
In Insert mode
Manually enter the comment delimiter (#) to comment out the lines that you want to comment out.
Save a file and exit
To save a file, enter
:win Normal mode and press the Enter key.To exit Vim, enter
:qand press the Enter key.To save a file and exit Vim, enter
:wqor:xand then press the Enter key, or directly enterZZ.To forcefully exit Vim without saving a file, enter
:q!and press the Enter key.To save a file and forcefully exit Vim, enter
:wqand press the Enter key.
Encrypt a file
To encrypt a file, run the
vim -x <File name>command. After you specify a password, you enter the Normal mode. You must save the file at least once. Otherwise, the encryption does not take effect. When you re-open the file, enter the password for authentication.Cancel file encryption.
In Vim, run the
:set key=command to cancel encryption. This command clears the encryption key from the current file.Enter
:wqto save the change and exit Vim.Run the
vim < File name>command to open the file. You are not prompted to enter a password.
Run commands
Run the
!pwdcommand to query the current working directory without the need to exit Vim.Run the
!lscommand to query the files and file folders in the current directory, without the need to exit Vim.
Modify files in multiple windows
Run the
vim -o <Name of File 1> <Name of File 2>command to open files in two windows at the same time. When you exit Vim, separately run the exit command.Enter
:nto switch to the other window for editing.Enter
:Nto return to the previous window for editing.
Obtain help information
Run the
vim --helpcommand in the terminal to view help information of Vim commands.In Normal mode
:help: View the help information. The Vim help documentation is read-only. Enter:qto exit the help documentation.:help i: Query the help information of theicommand.:help yy: Query the help information of theyycommand.:set nu: Query the line number.
Examples
Modify a configuration file
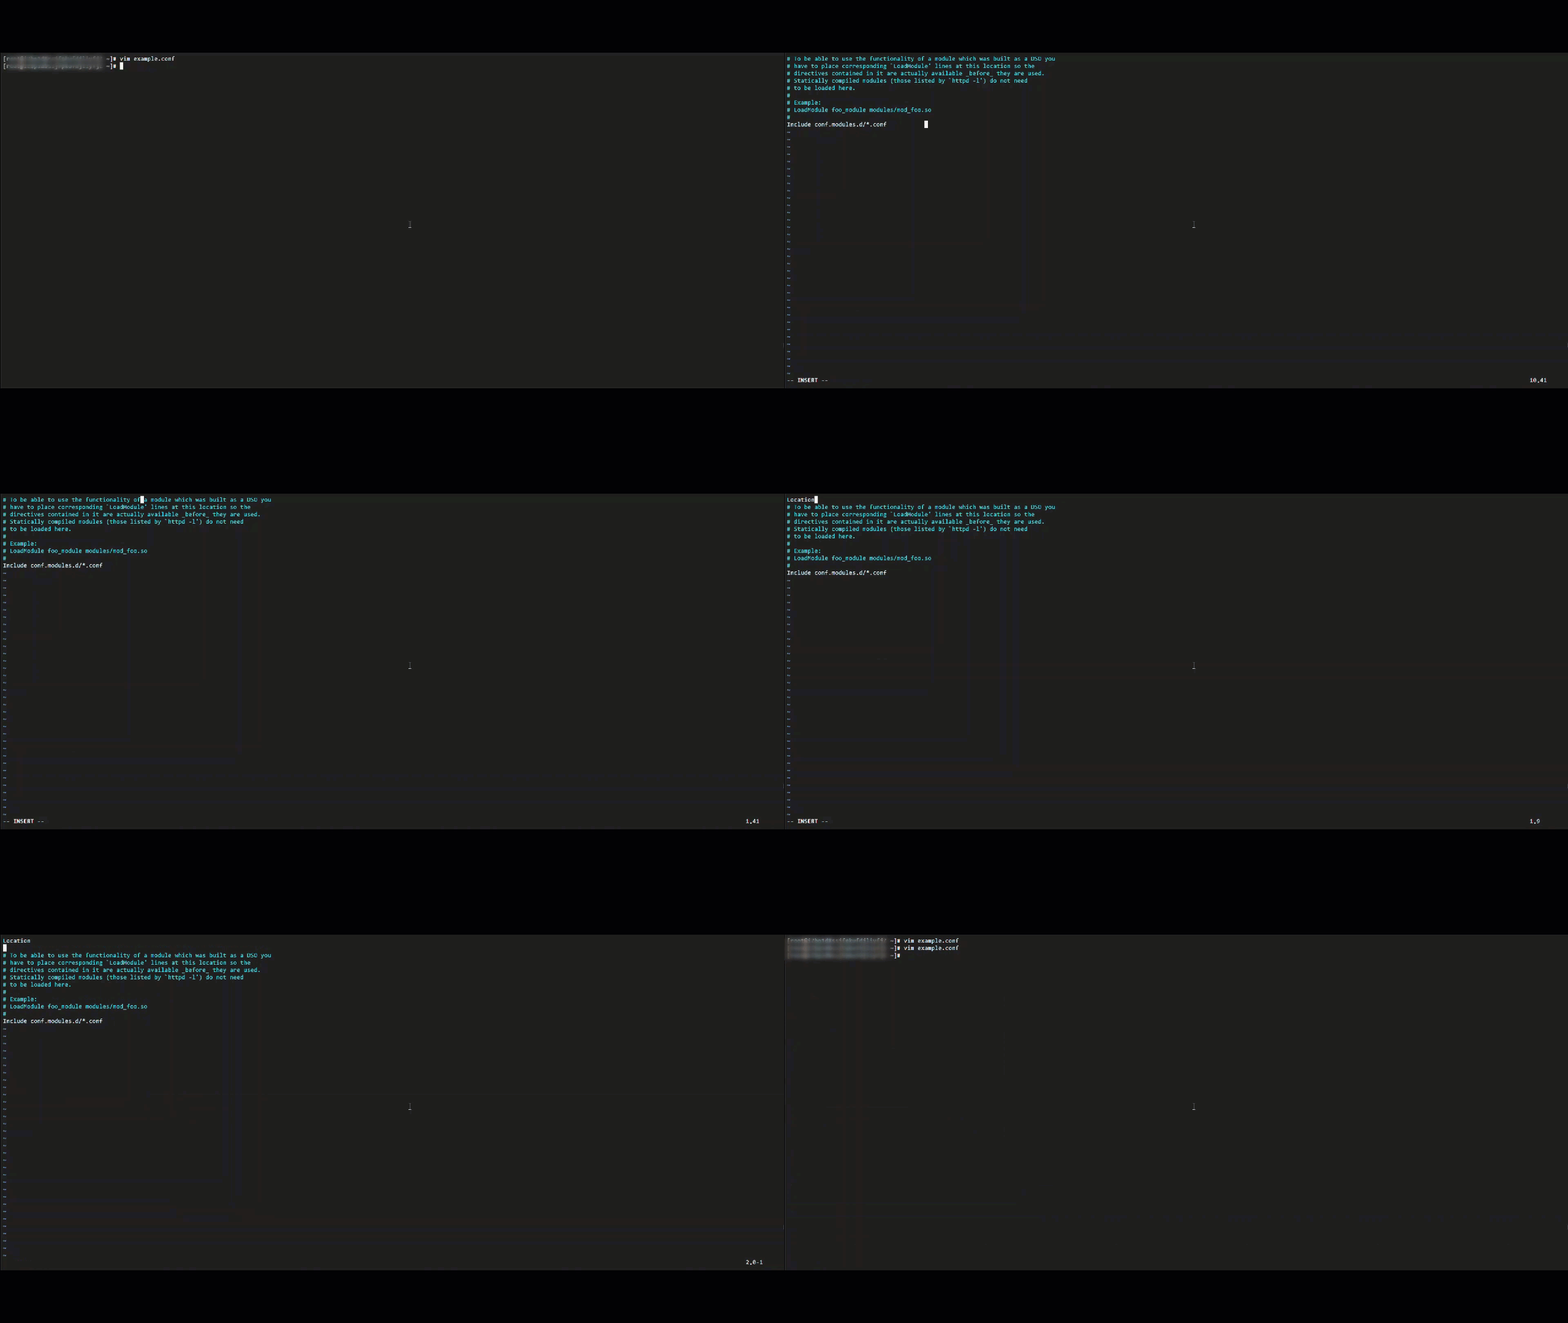
To insert Location as the first line in the example.conf file, perform the following steps:
Run the
vim example.confcommand to open the file and enter the Normal mode.When the cursor moves to the first character of the file, press
ito enter the Insert mode.Enter
Locationand then press the Enter key.Press the
Esckey to exit the Insert mode.Enter
:wqto save the file and exit Vim.
Insert content on a specific line
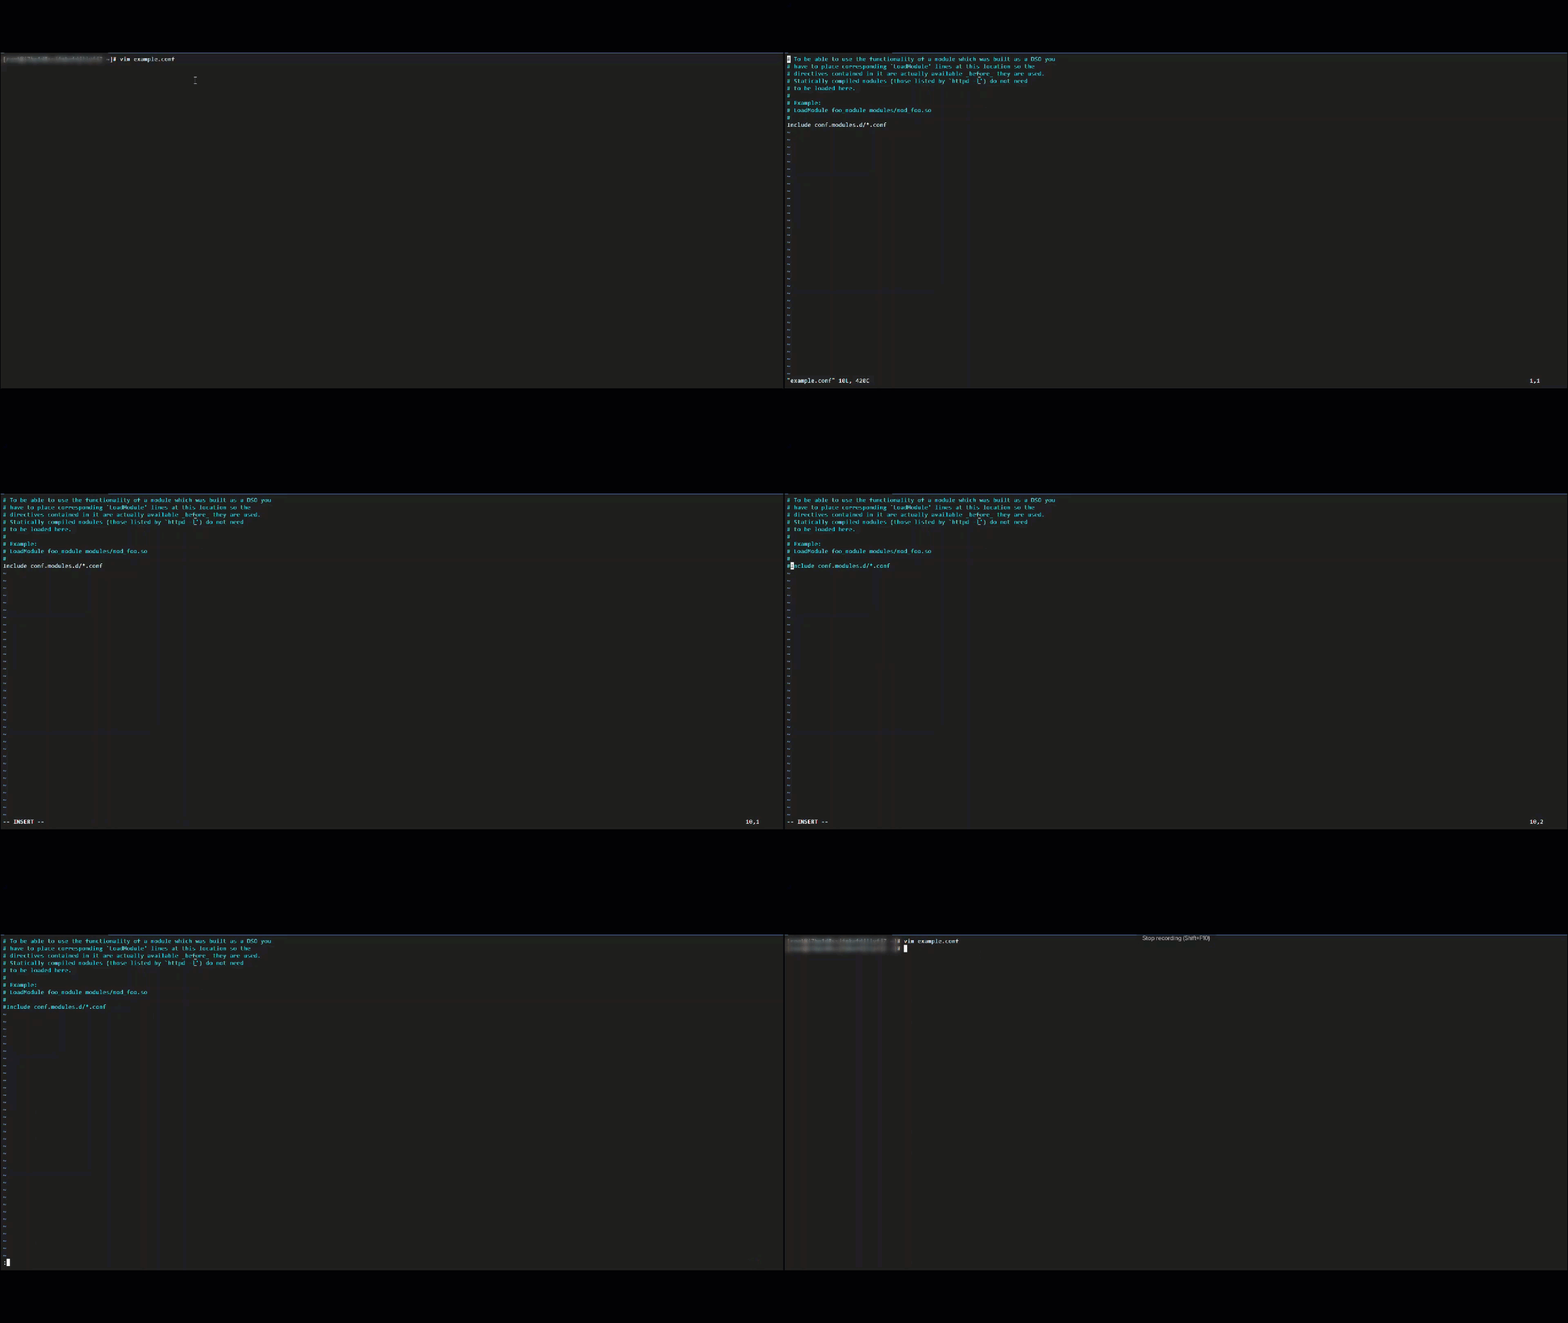
To insert # at the beginning of Line 10 in the example. conf file, perform the following steps:
Run the
vim example.confcommand to open the file and enter the Normal mode.Enter
:10to move the cursor to Line 10.Press
ito enter the Insert mode.Enter
#.Press the
Esckey to exit the Insert mode.Enter
:wqto save the file and exit Vim.
Find and insert content
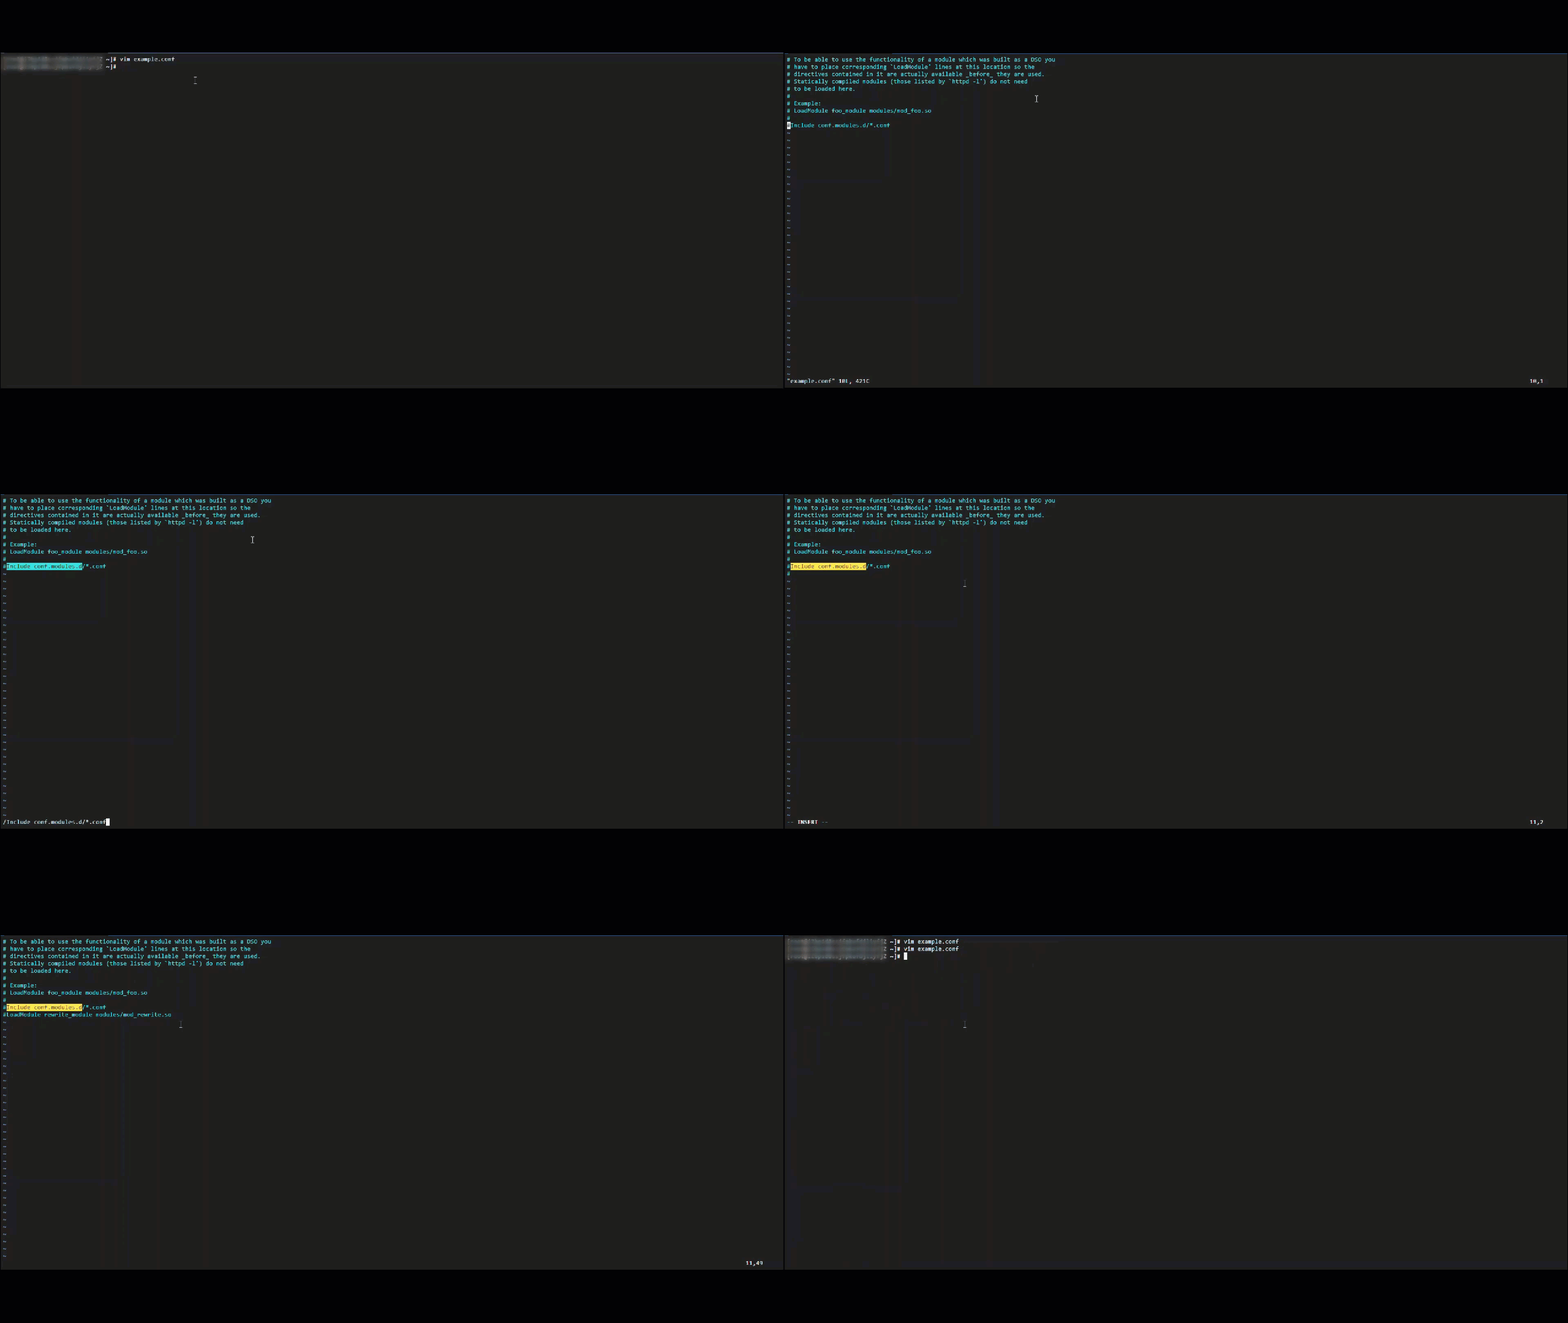
To insert LoadModule rewrite_module modules/mod_rewrite.so on the line below the Include conf.modules.d/*.conf line in the example.conf file, perform the following steps:
Run the
vim example.confcommand to open the file and enter the Normal mode.Run the
/Include conf.modules.d/*.confcommand to find the line on which you want to perform the insert operation.Press
ito enter the Insert mode.Run the
LoadModule rewrite_module modules/mod_rewrite.socommand.Press the
Esckey to exit the Insert mode.Enter
:wqto save the file and exit Vim.
Delete content
To delete # at the beginning of the #Listen 12.34.XX:XX:80 line and Listen 80 in the example.conf file, perform the following steps:
Run the
vim example.confcommand to open the file and enter the Normal mode.Run the
/#Listen 12.34.XX:XX:80command to find the line on which you want to perform the delete operation. This way, the cursor is moved over the#symbol.Press
xto delete#.Move the cursor to Listen 80 and press
ddto delete the line on which Listen 80 resides.Enter
:wqto save the modified file and exit Vim.
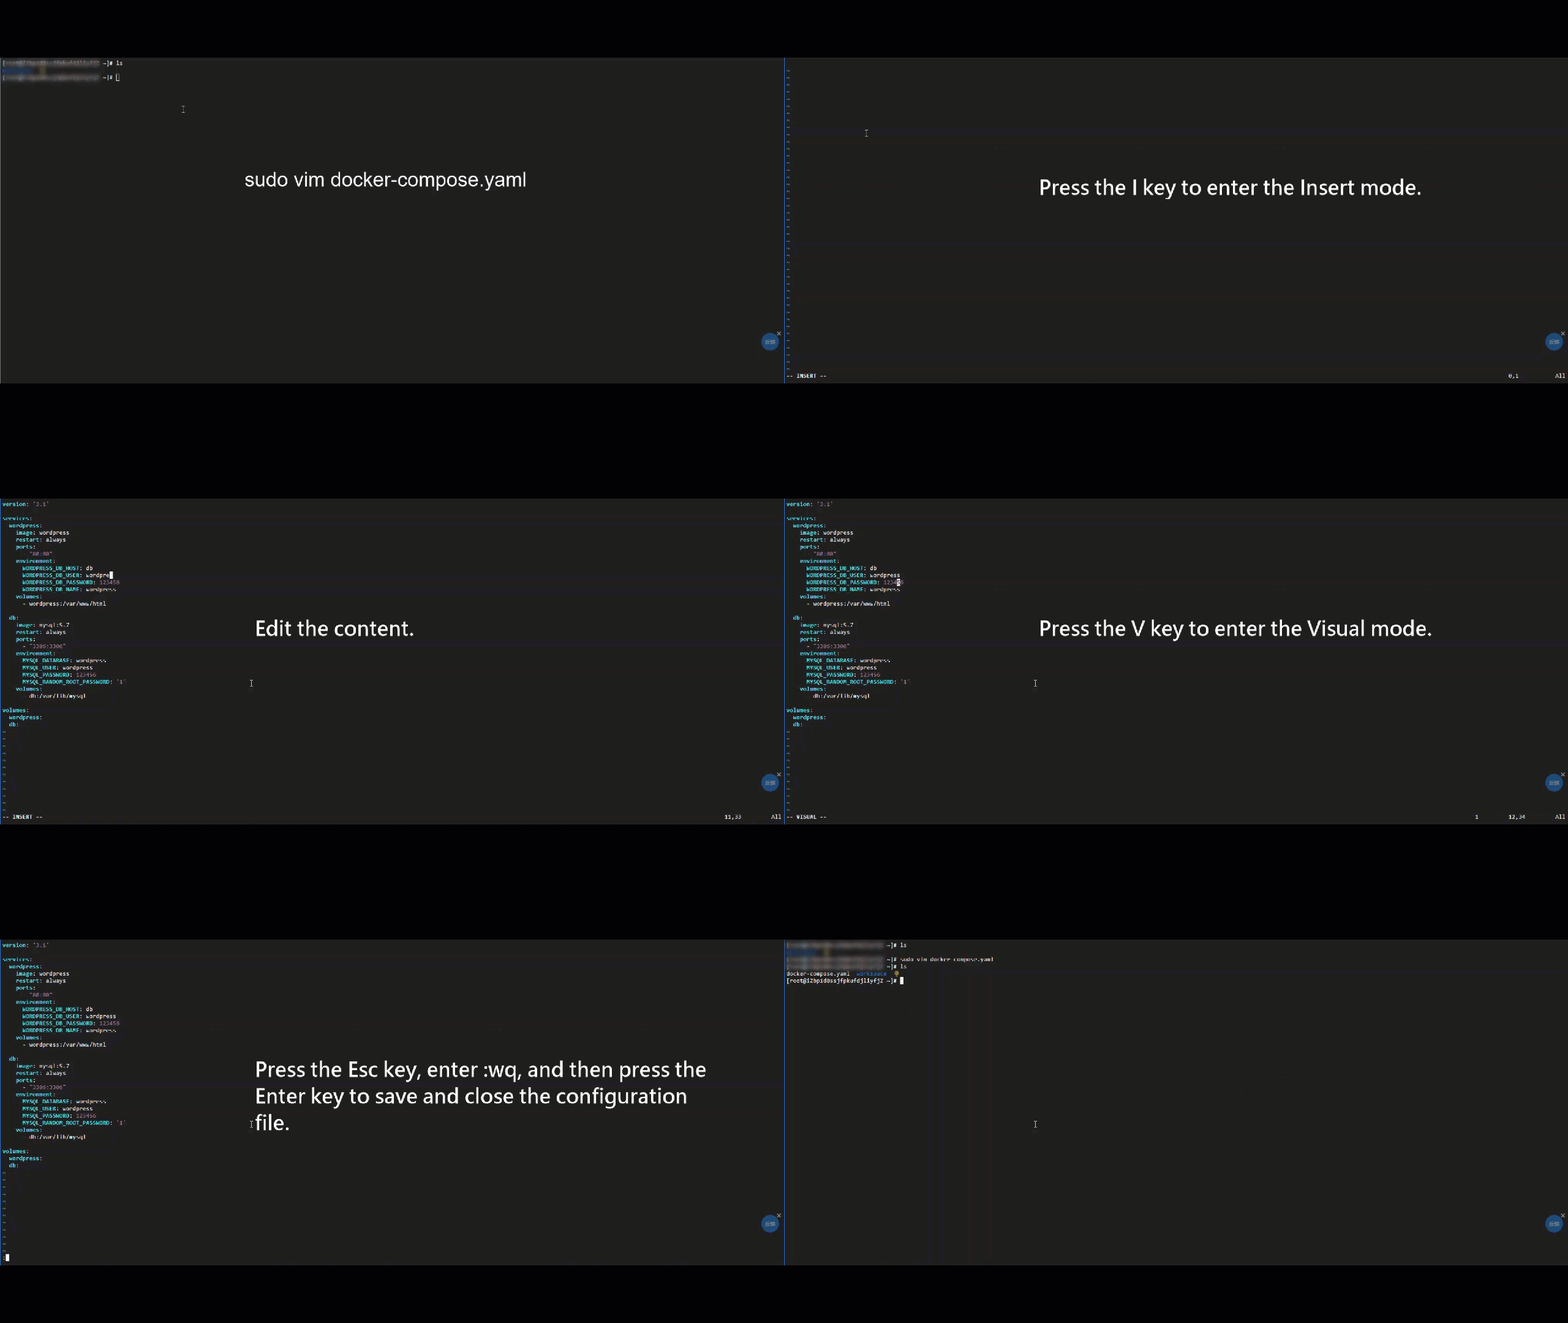
Modify a Docker.yaml file
Create and modify the docker-compose.yaml file.

Delete comment delimiters from multiple lines
If the comment delimiter (
#) is at the beginning of a line, whitespace characters may exist before and after the comment delimiter.# This is a comment # Another comment # Yet another commentTo delete the comment delimiter and whitespace characters (such as spaces and indentation) before and after the comment delimiter on each line, run the following command:
:%s/^\s*#\s\?//Take note of the following parameters:
^: matches the beginning of a line.\s*: matches any number of whitespace characters (indentation).#: the comment delimiter.\s\?: matches an optional whitespace character such as a space after the comment delimiter.//: deletes matching content by replacing it with empty content.
The command traverses the entire file. The following example provides the content of the modified file:
This is a comment
Another comment
Yet another comment
Update Vim
If Vim provided by the current operating system does not meet your business requirements, run a command to update Vim. The command may vary based on the operating system.
Alibaba Cloud Linux 2 and 3
sudo yum update vimCentOS 7 and CentOS 8
sudo yum update vimFedora
sudo yum update vimUbuntu and Debian
sudo apt upgrade vimopenSUSE
sudo zypper update vimFAQ
What do I do if the "No Write..." message appears when I exit a file?
Cause: The file was modified but not saved.
Solution: To save the modified file and exit, enter
:wq. To exit without saving the file, enter:q!.
What do I do if I cannot enter text?
Cause: The Vim editor may work in Visual mode.
Solution: Press the
Esckey to return to the Normal mode and then enter the Insert mode.
What do I do if I cannot save a file?
Cause: You may not have the required permissions. You do not have write permissions on the file or the directory in which the file is stored. For example, to modify system configuration files, such as
/etc/hostsand/etc/nginx/nginx.conf, you must have superuser privileges.Solution 1: Start Vim as the superuser by running the
sudocommand. For example, run thesudo vim example.confcommand.Solution 2: Run the
:w !sudo tee %command to save the current file as the administrator. To change the access permissions or ownership of a configuration file, run thesudo chownorsudo chmodcommand.
What do I do if a .swp file exists?
Cause: A file is opened by another Vim session.
Solution: To check whether another Vim session is editing the file, query and delete the
.swpfile by running thell -acommand, and then open the file for modification. You can also run the:recovercommand to restore the file and then modify the file.