1. Network connection
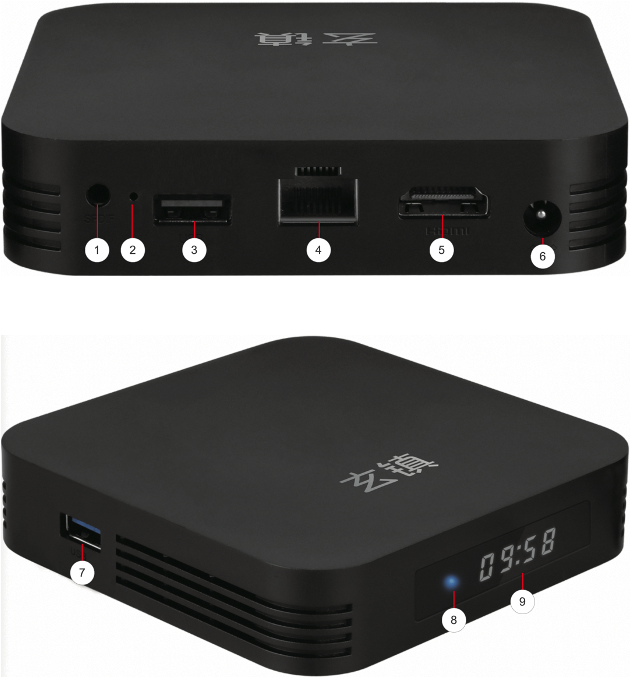
1.0 Interfaces of the M905 player
No. | Feature | Quantity | Remarks |
1 | MIC | 0 | The M905 player does not contain a microphone (MIC). |
2 | Reset | 1 | Resets the system. |
3 | USB | 1 | USB 2.0 |
4 | RJ45 | 1 | The network interface. |
5 | HDMI | 1 | The high definition multimedia interface (HDMI) port. |
6 | Power | 1 | 5 V |
7 | USB | 1 | USB 2.0 |
8 | LED power indicator | 1 | If the light is on, the device is powered on. If the light is off, the device is powered off. |
9 | LED clock | 1 | The system clock. |
/ | WIFI antenna | 1 | The WIFI antenna is built in. |
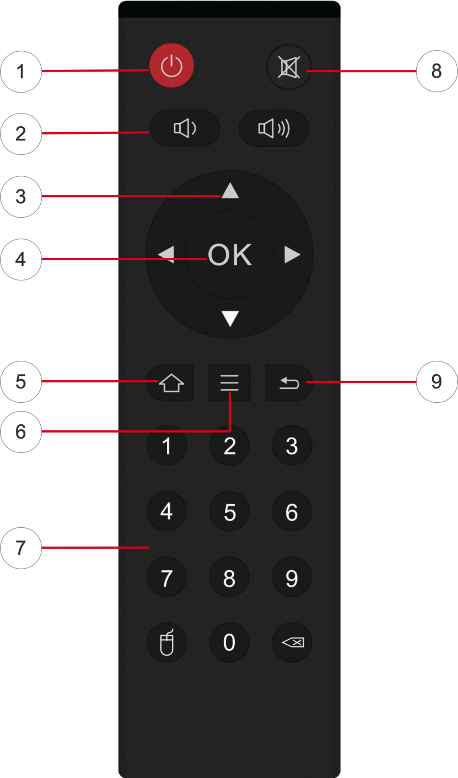
1.1 The remote control
No. | Button | Quantity | Remarks |
1 | Power | 1 | The button that is used to make your player sleep or turn on your player. |
2 | Volume | 2 | The buttons that are used to control the volume. You can press the button on the left to decrease the volume and press the button on the right to increase the volume. |
3 | Up, Down, Left, and Right | 4 | The buttons that are used to scroll through lists, pages, or menus. |
4 | Home | 1 | The button that is used to go to the homepage. |
5 | Confirm | 1 | The button that is used to confirm configurations. |
6 | Menu | 1 | The button that is used to go to the system configuration page. |
7 | Number | 12 | The buttons that are used to enter numbers. There are 12 number buttons on the remote control of the M905 player. |
8 | Mute | 1 | The button that is used to mute or unmute the player. |
9 | Back | 1 | The button that is used to return to the previous step. |
1.1 Wired network connection
Insert the network cable into the network port of the player. Insert one end of the HDMI cable into the HDMI port of the player, and insert the other end into the HDMI port of the TV or monitor.
The following figure shows the ports of the player.

M905 player support HDMI 1.4 and later. Make sure that the HDMI version of the TV or monitor is 1.4 or later.
1.2 Start the player
1.2.1 Boot animation
Load batteries into the remote control and press the Power button to start the player.
The following figure shows the boot animation.

1.2.2 Configure guide page
Go to the configuration guide page.
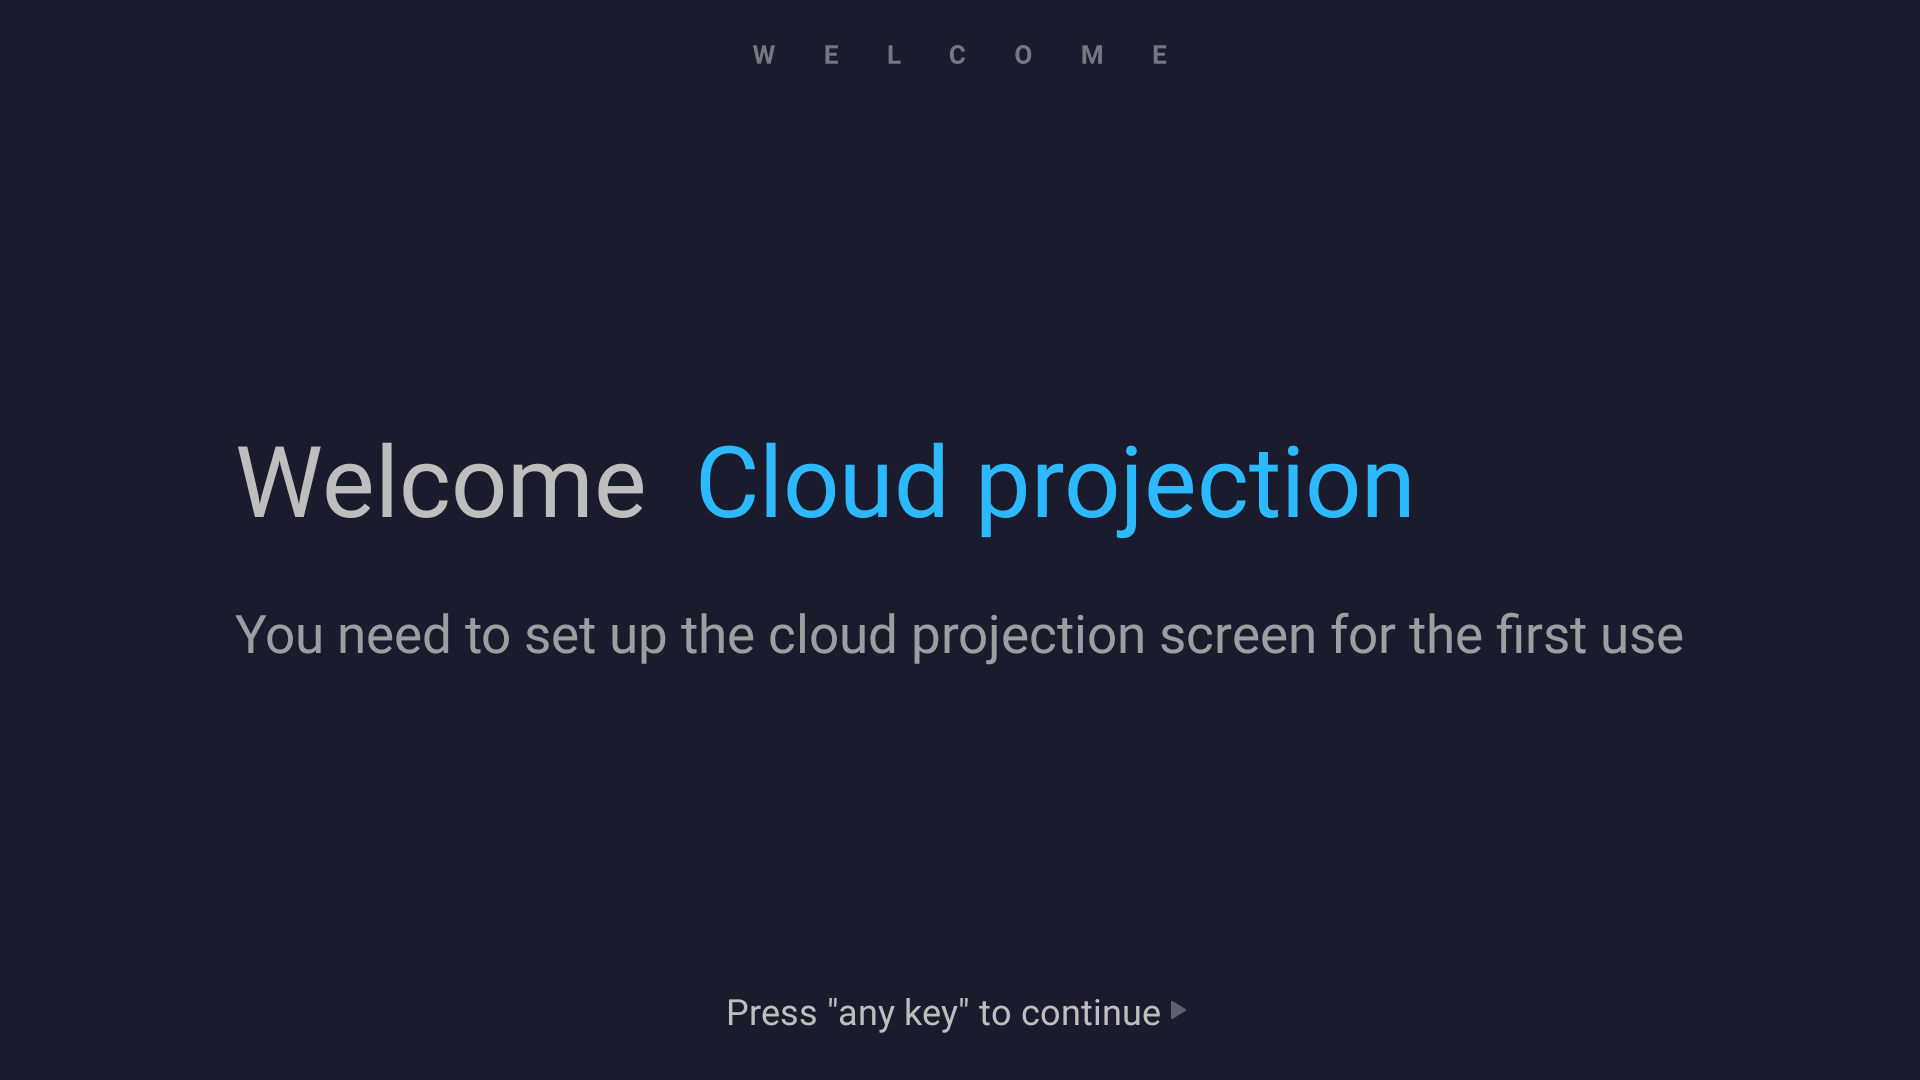
Press any button of the remote control to enter the next step.
1.2.3 Language and region settings
Go to the language settings page.

Supported languages:
Simplified Chinese
English
Japanese
Press the Right button to go to the region settings page.
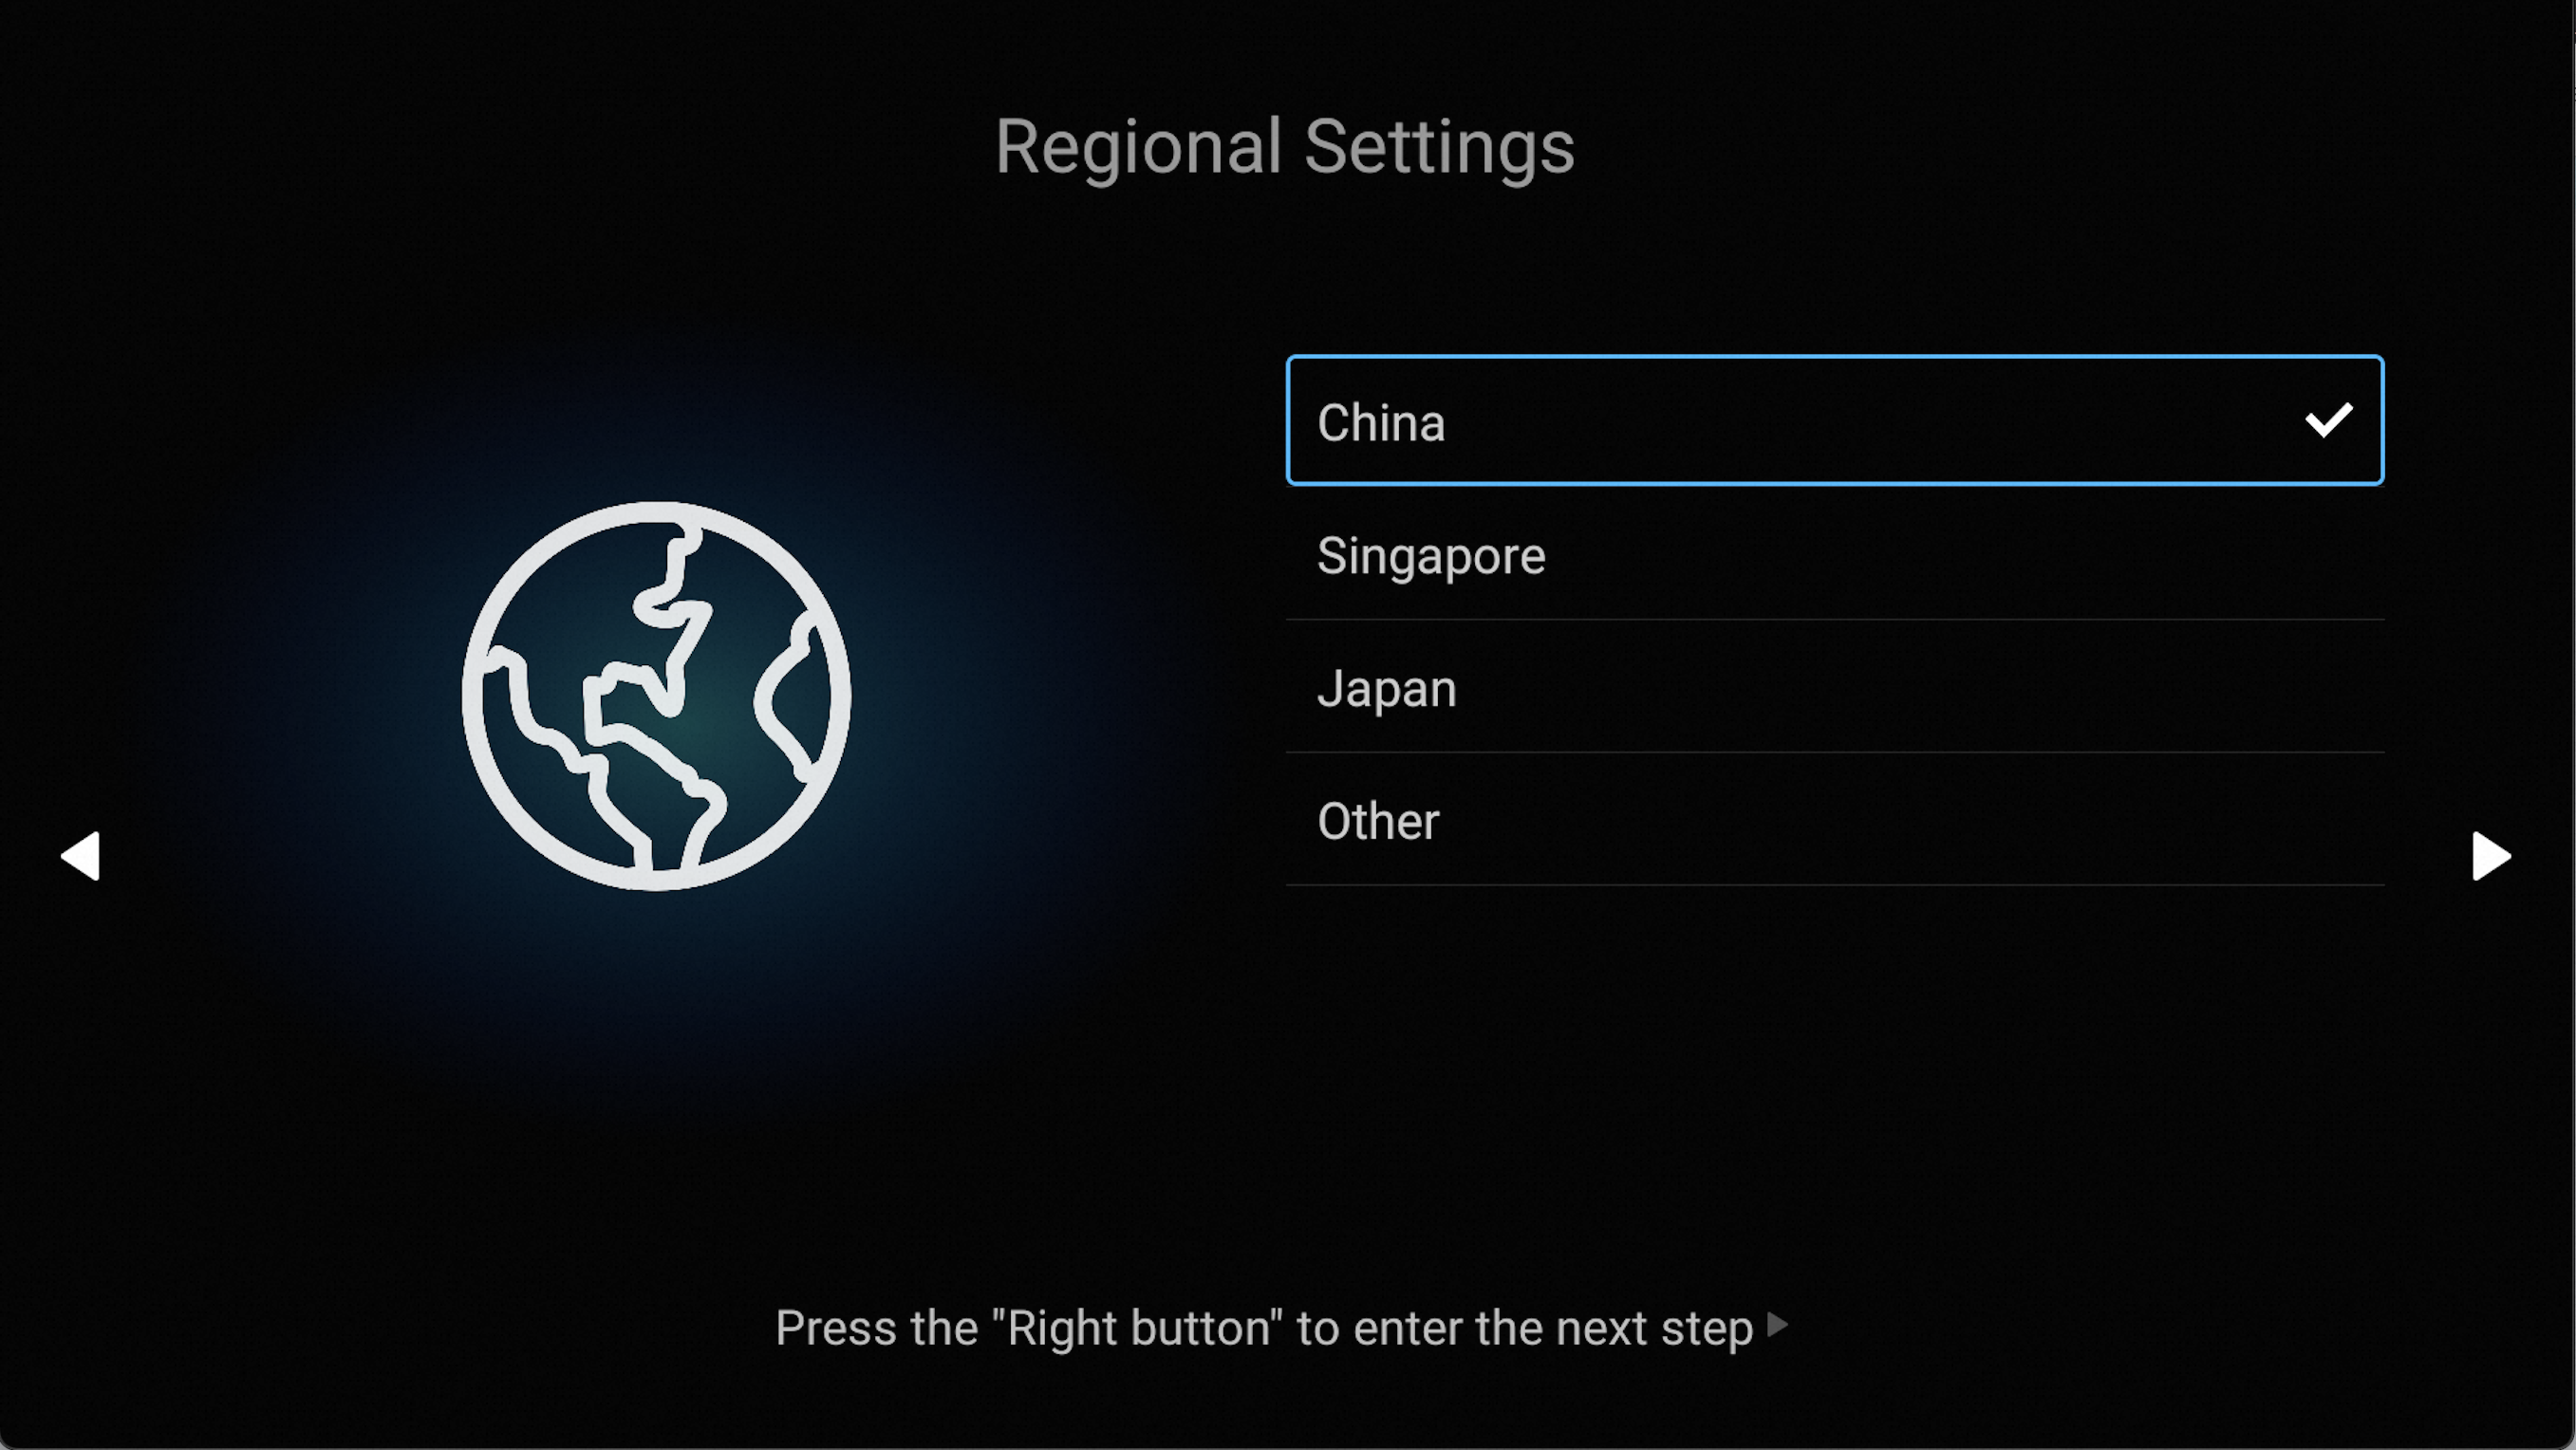
Supported regions:
Chinese mainland
Singapore
Japan
Press the Right button to go to the network settings page.
1.2.4 Network settings
If your player is not connected to a wireless network, go to the network settings page. If your player is connected to a wireless network, skip this step.
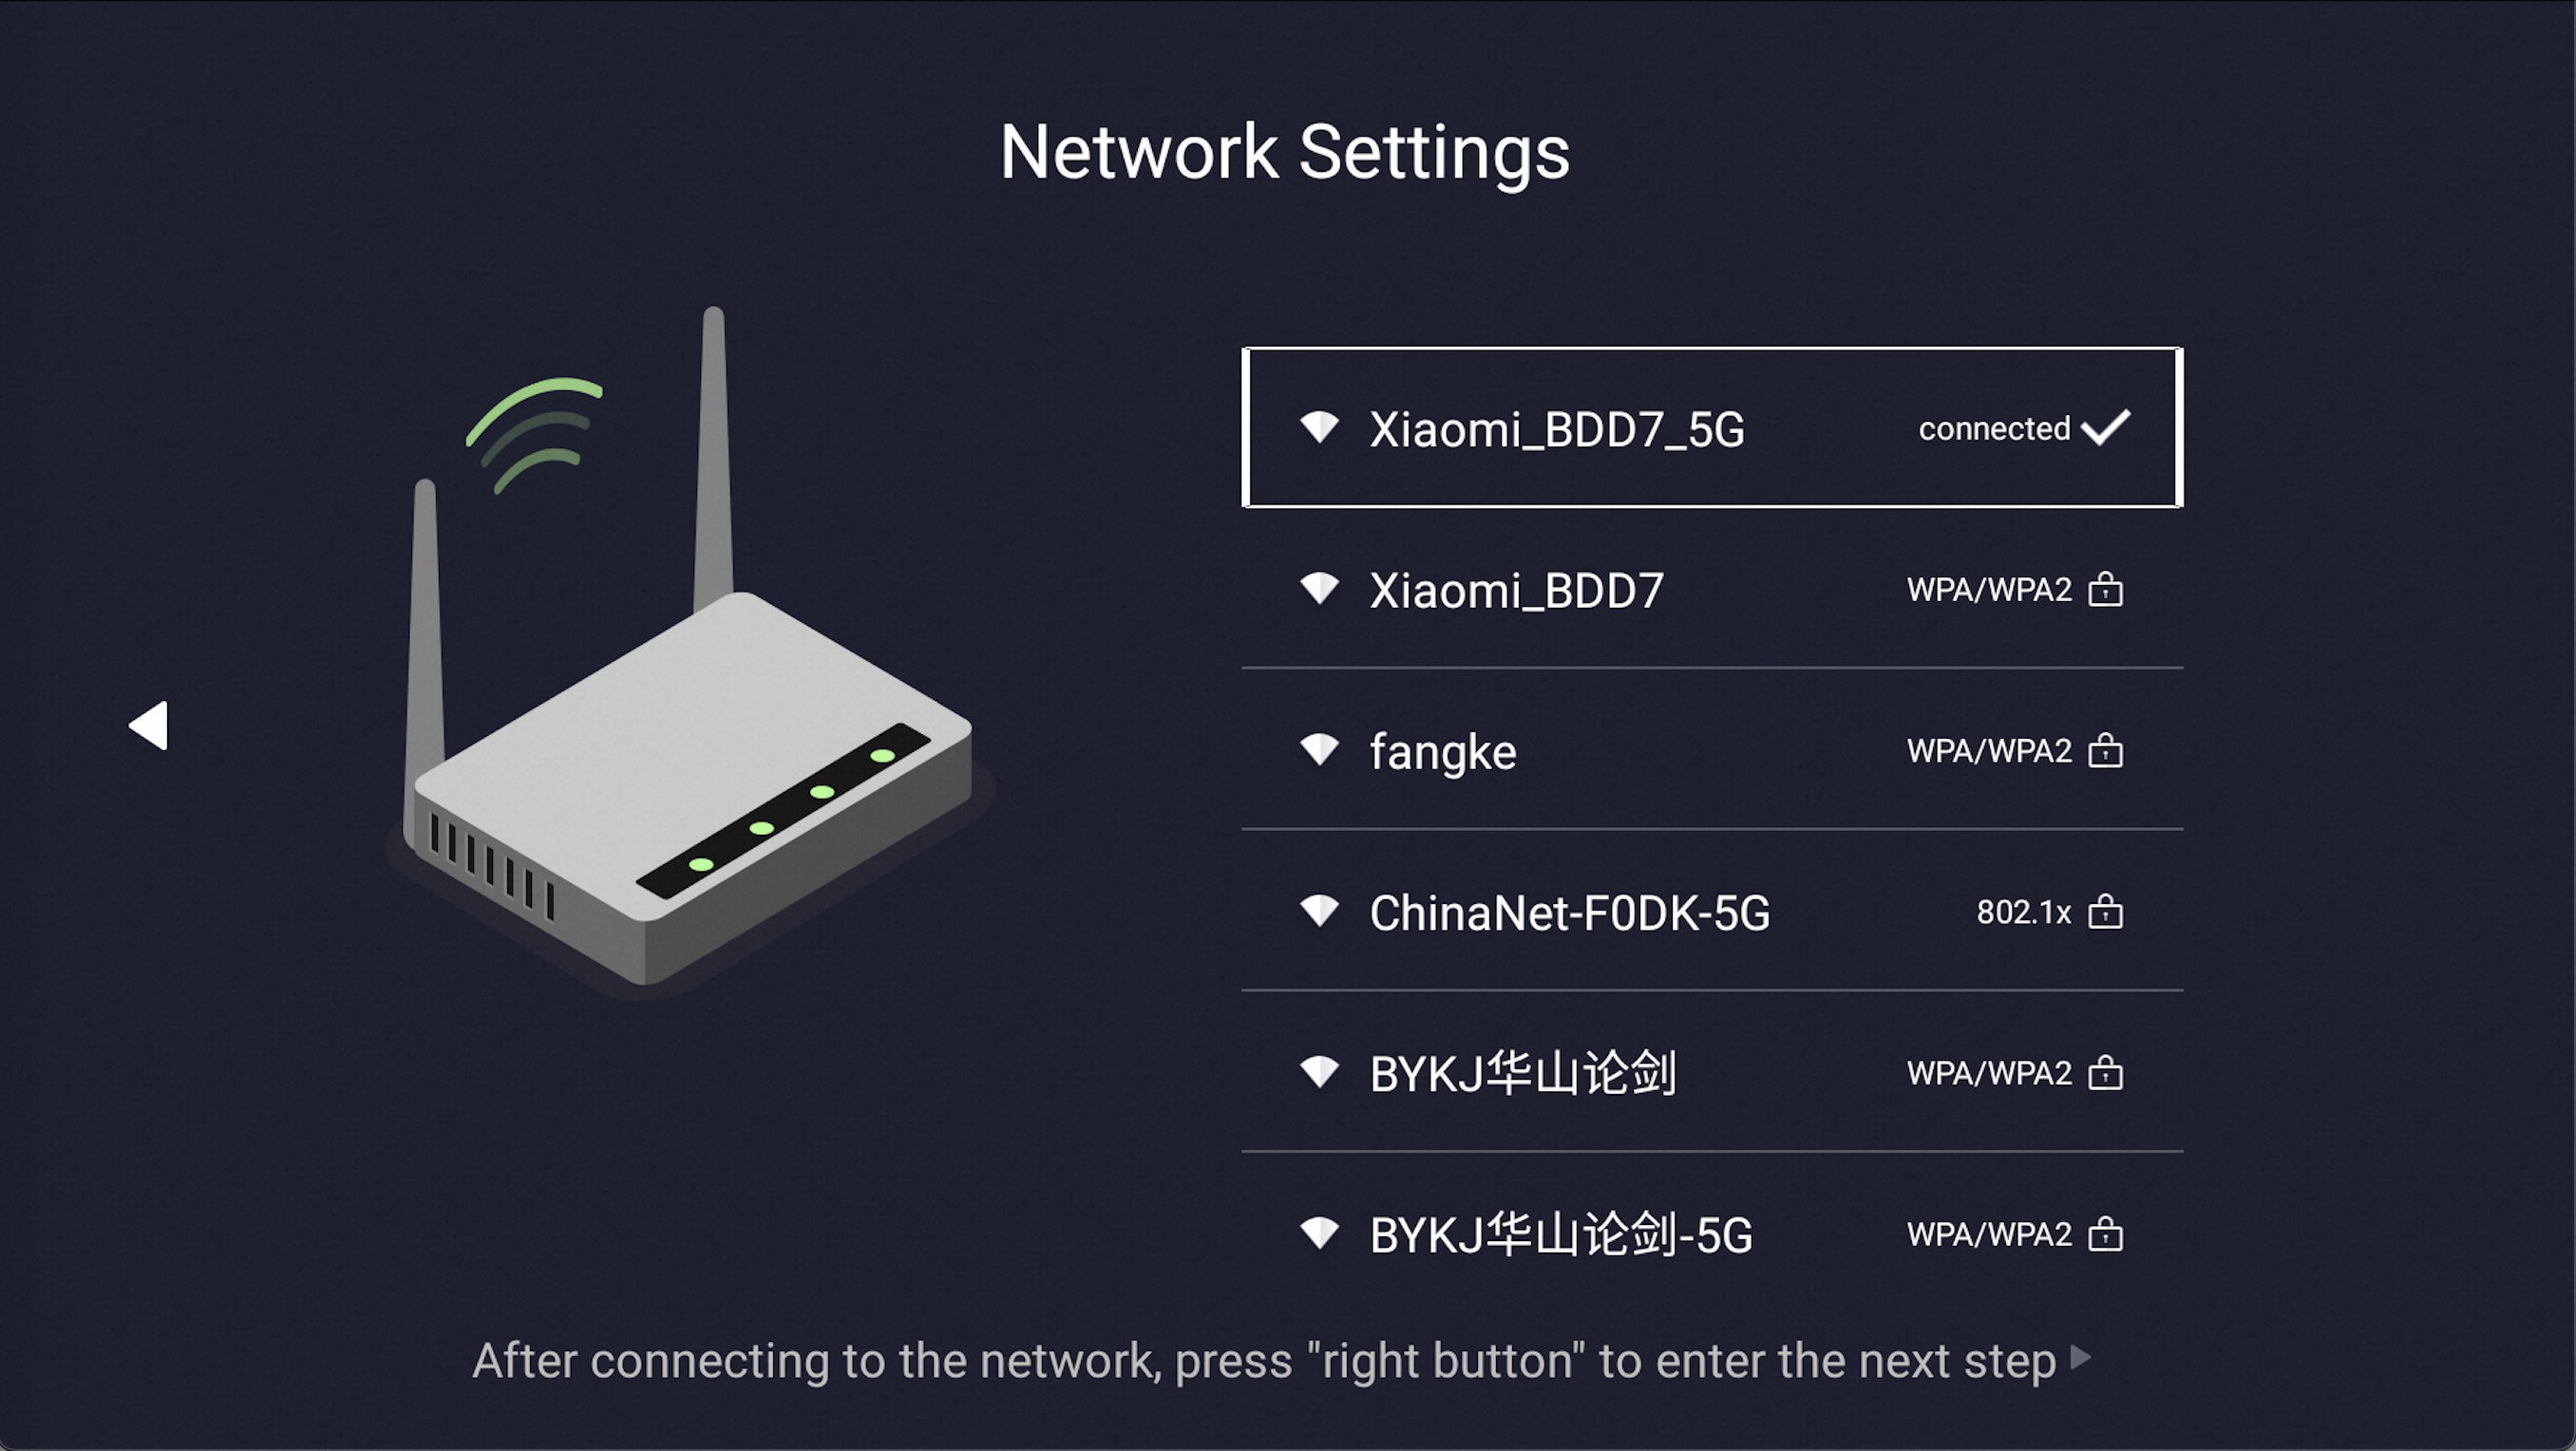
Select a wireless network.
The preceding figure shows a sample network. The actual wireless network prevails.
1.2.5 Test the Internet speed
Press the Right button to test the Internet speed.
If the Internet speed is greater than 1 Mbit/s, the network conditions are normal. If the Internet speed is less than 1 Mbit/s, press OK to test the Internet speed again.
The Internet speed must be at least 1 Mbit/s.
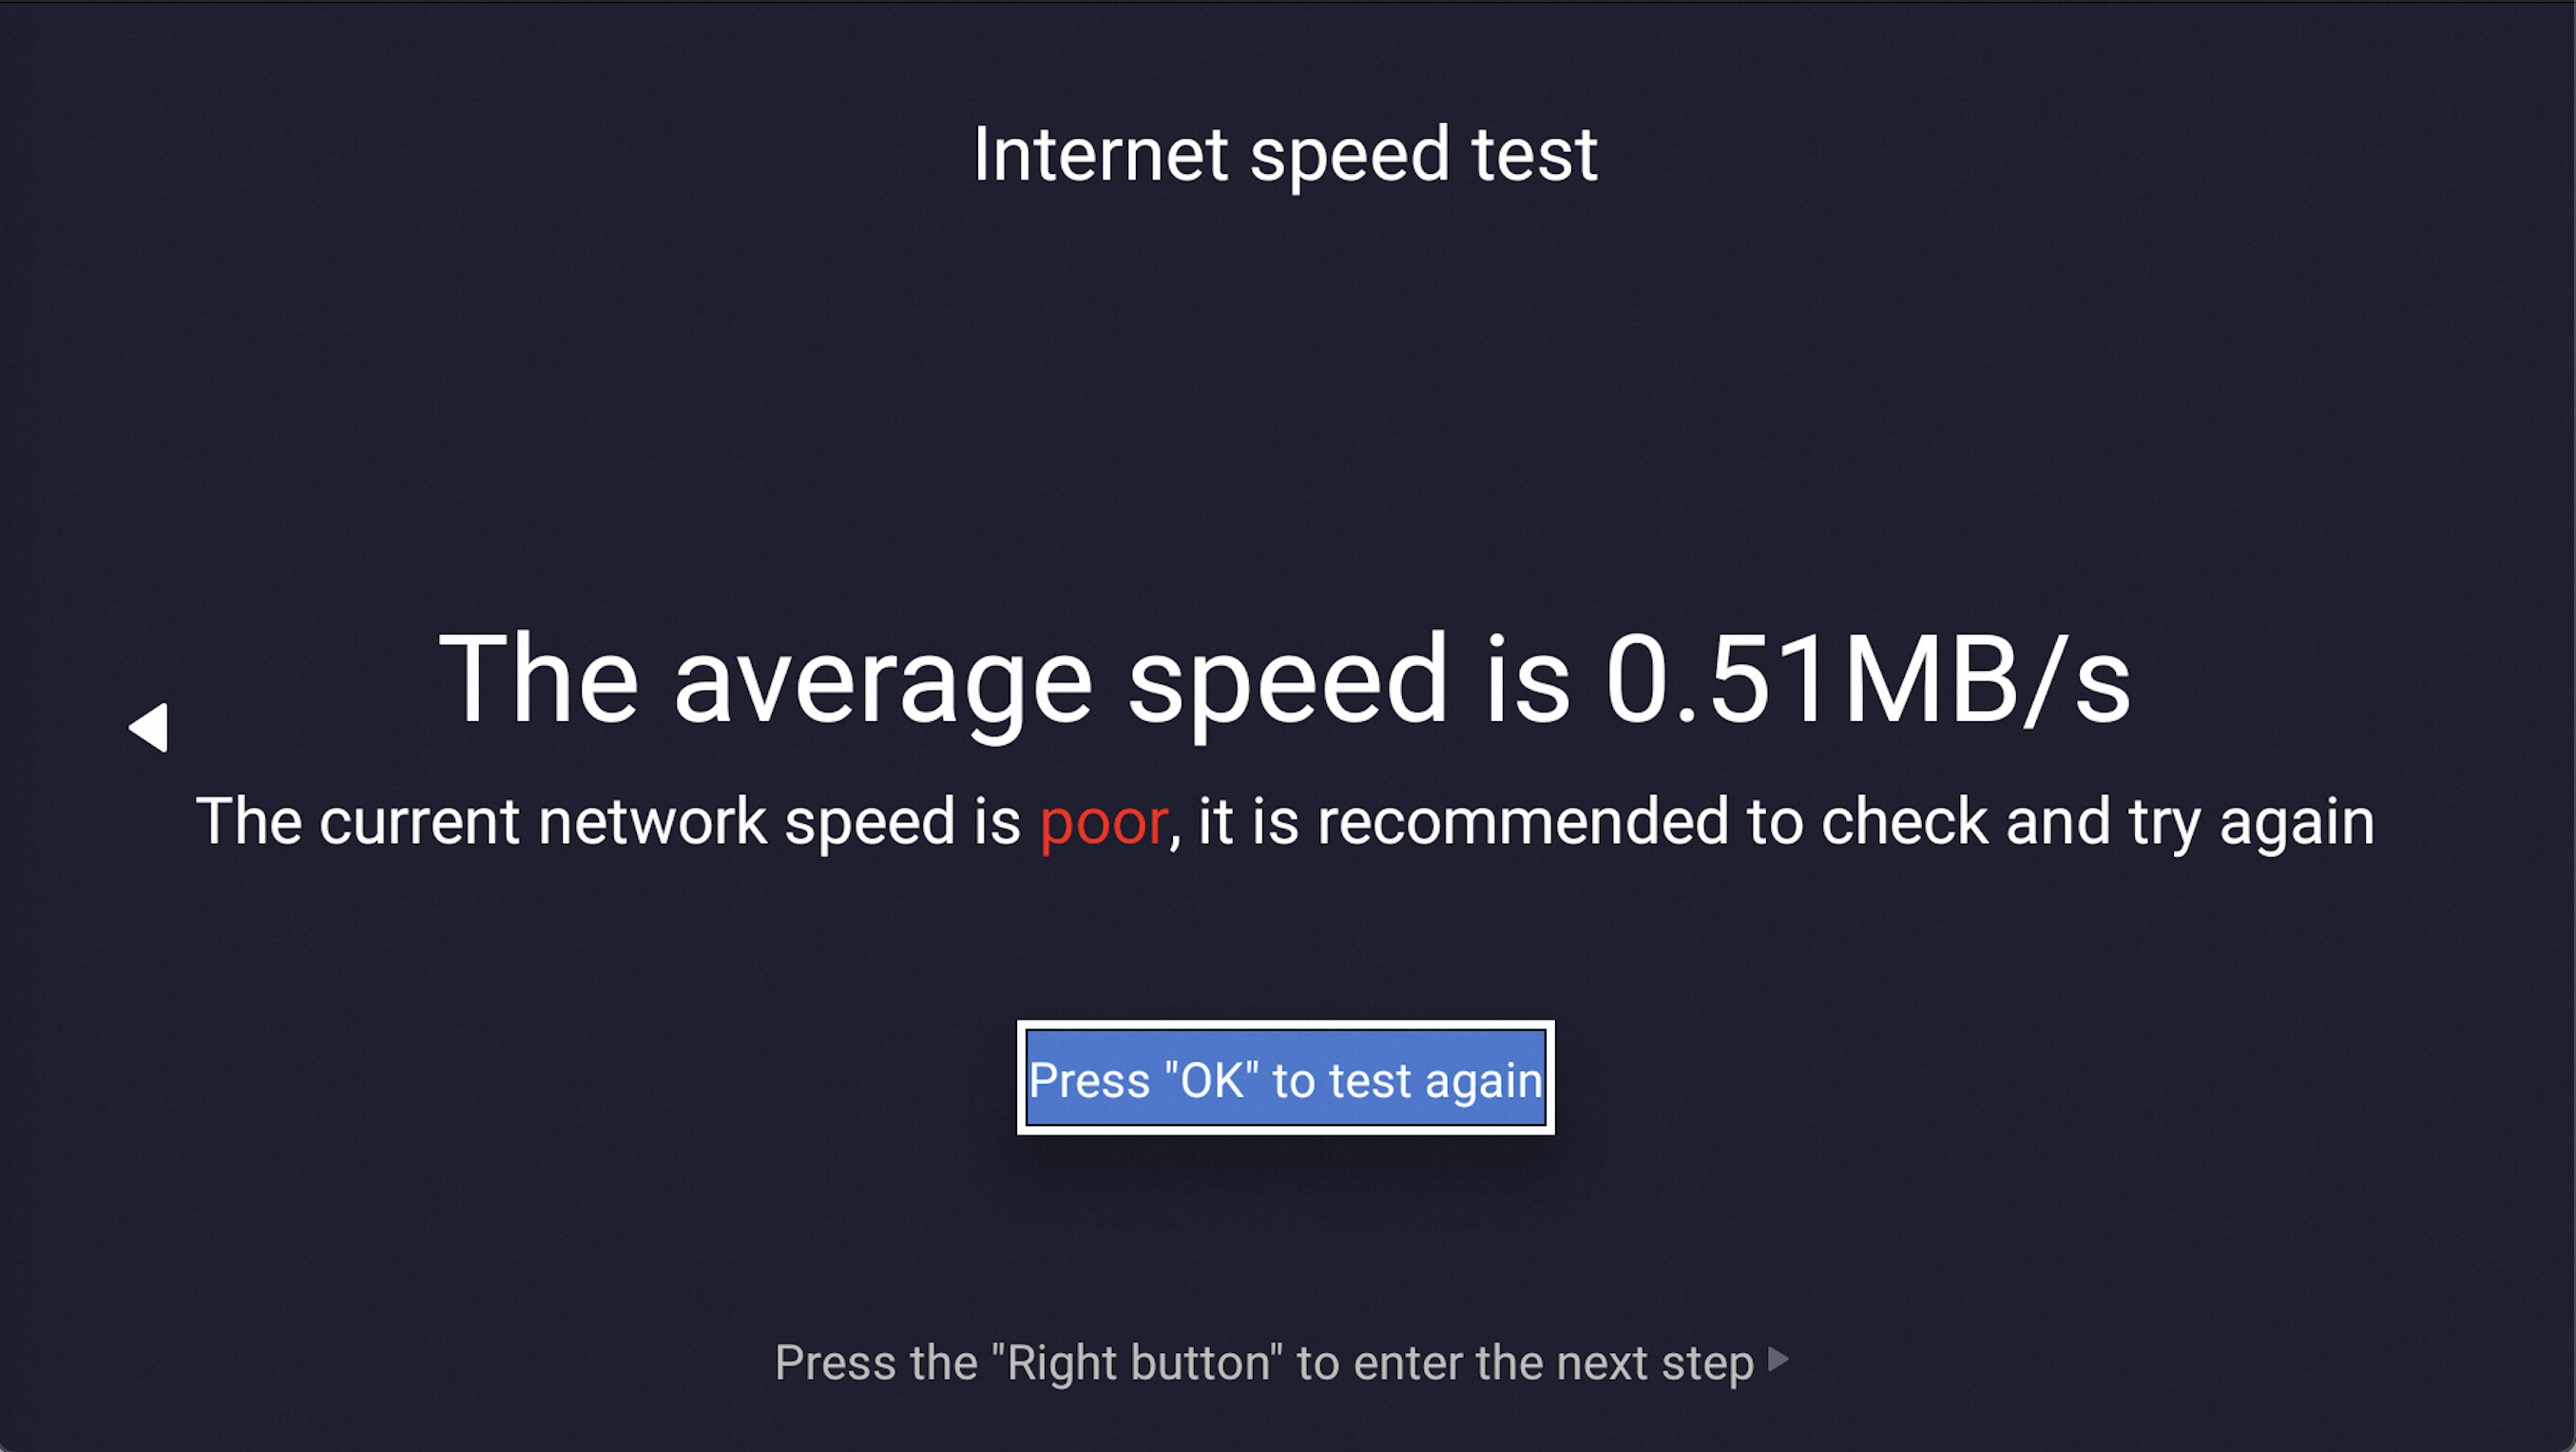
Press the Right button to complete the network settings.
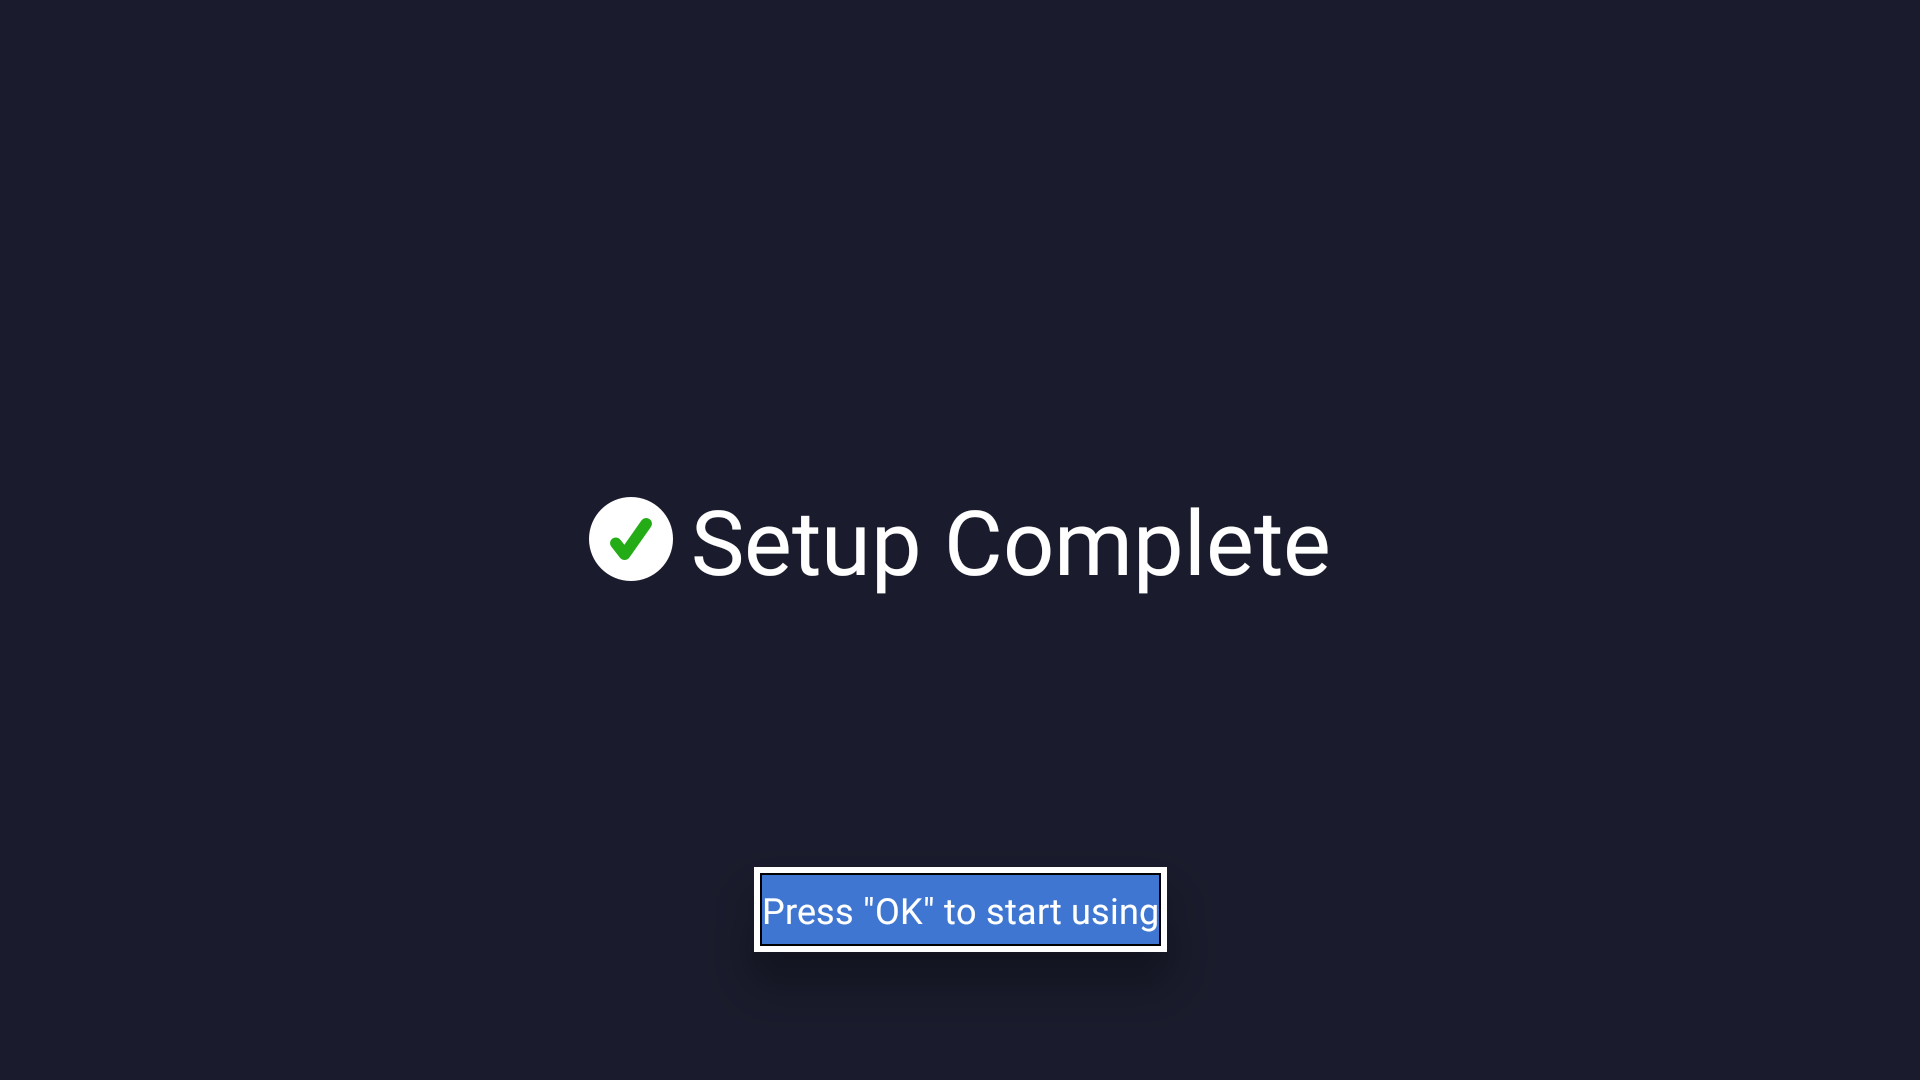
Press the OK button to go to the display page.
1.3 Scan the QR code to register an account
If you configure the settings for the first time, no content is displayed on the device.
Press the Menu button to go to the QR code page.

If the device is not connected to the Internet, the Logon failed message is displayed in the upper-right corner.
If the device is connected to the Internet and the Logon failed message is still displayed, restart the device.
The preceding figure shows a sample QR code. Scan the actual QR code of the device.
The preceding figure shows an example MAC address. Use the actual media access control (MAC) address of the device.
The QR code page is valid for 60 seconds. If you do not scan the QR code within the timeout period, press the Menu button to go to the QR code page again.
2. Information filling
2.1 Scan the QR code
Open Alipay and search for IoT device management. Then, access the IoT device management mini program.
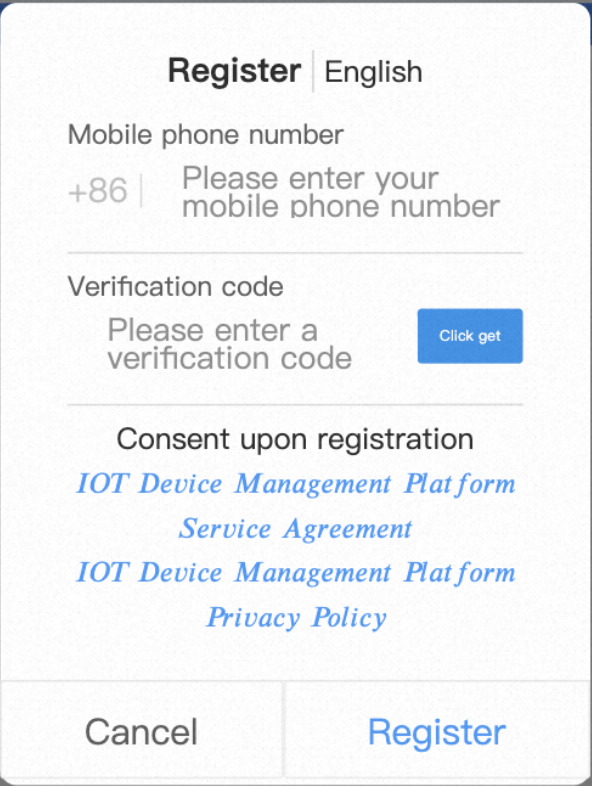
If you access the mini program for the first time, you need to register an account first.
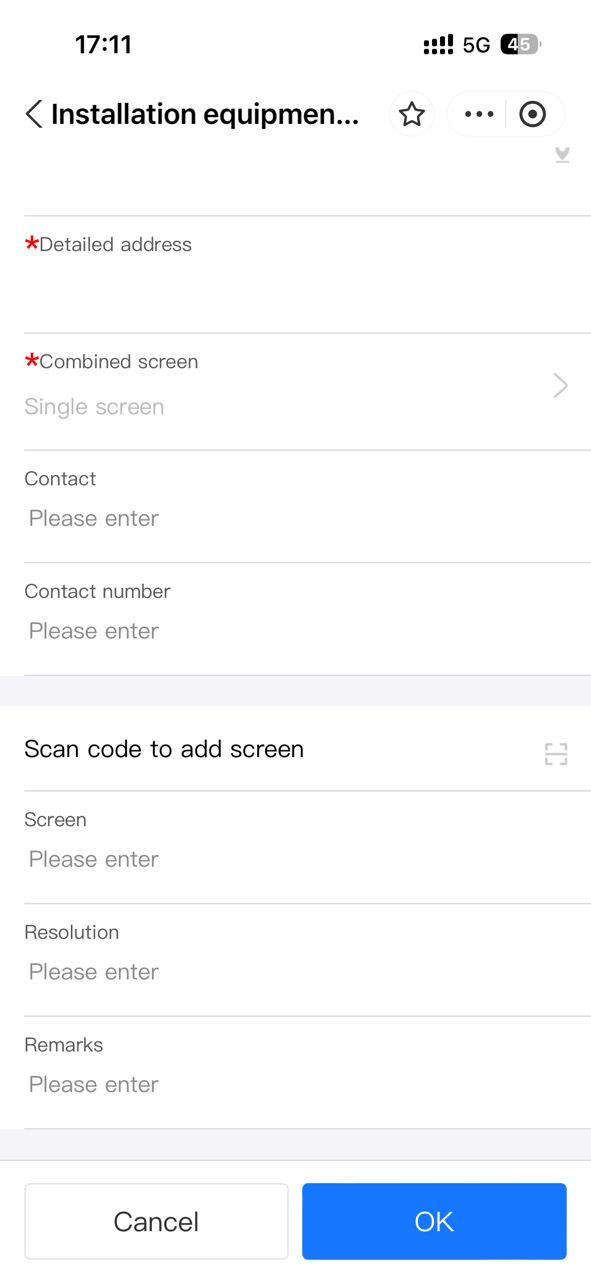
Go to the equipment installation page and enter the required information.
Scan the QR code to add screens.
If you want to add a screen, specify the Combined screen parameter based on your business requirements.
If you want to add an audio device, set the Combined screen parameter to Single Screen-Audio.
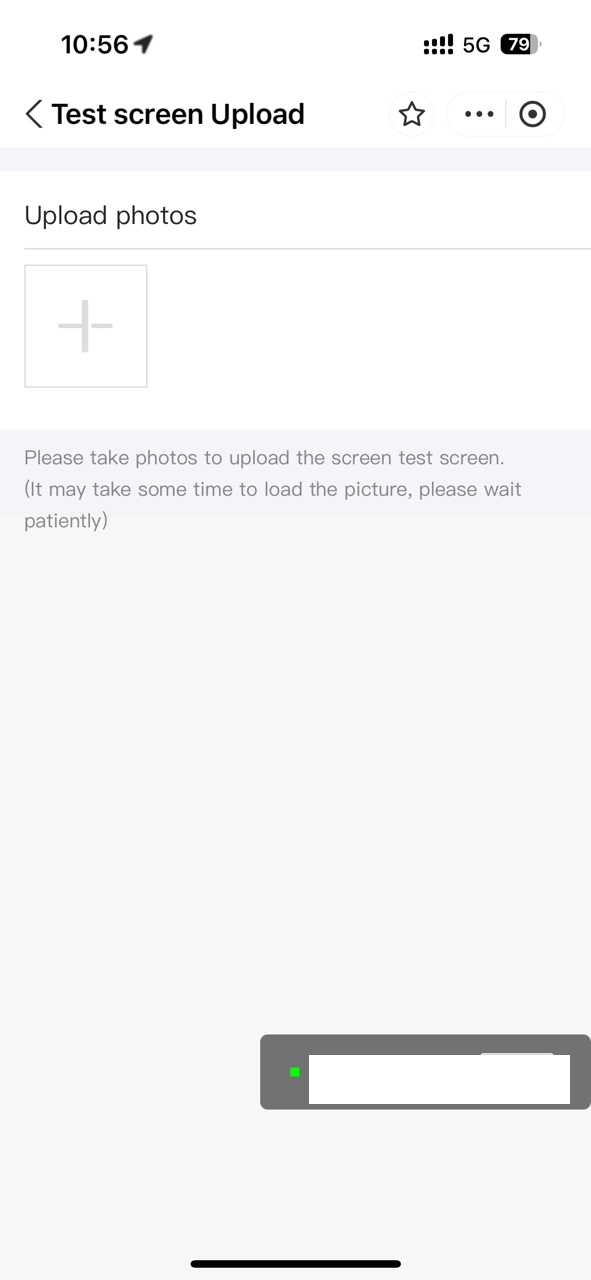
Take photos of all devices and upload the photos.
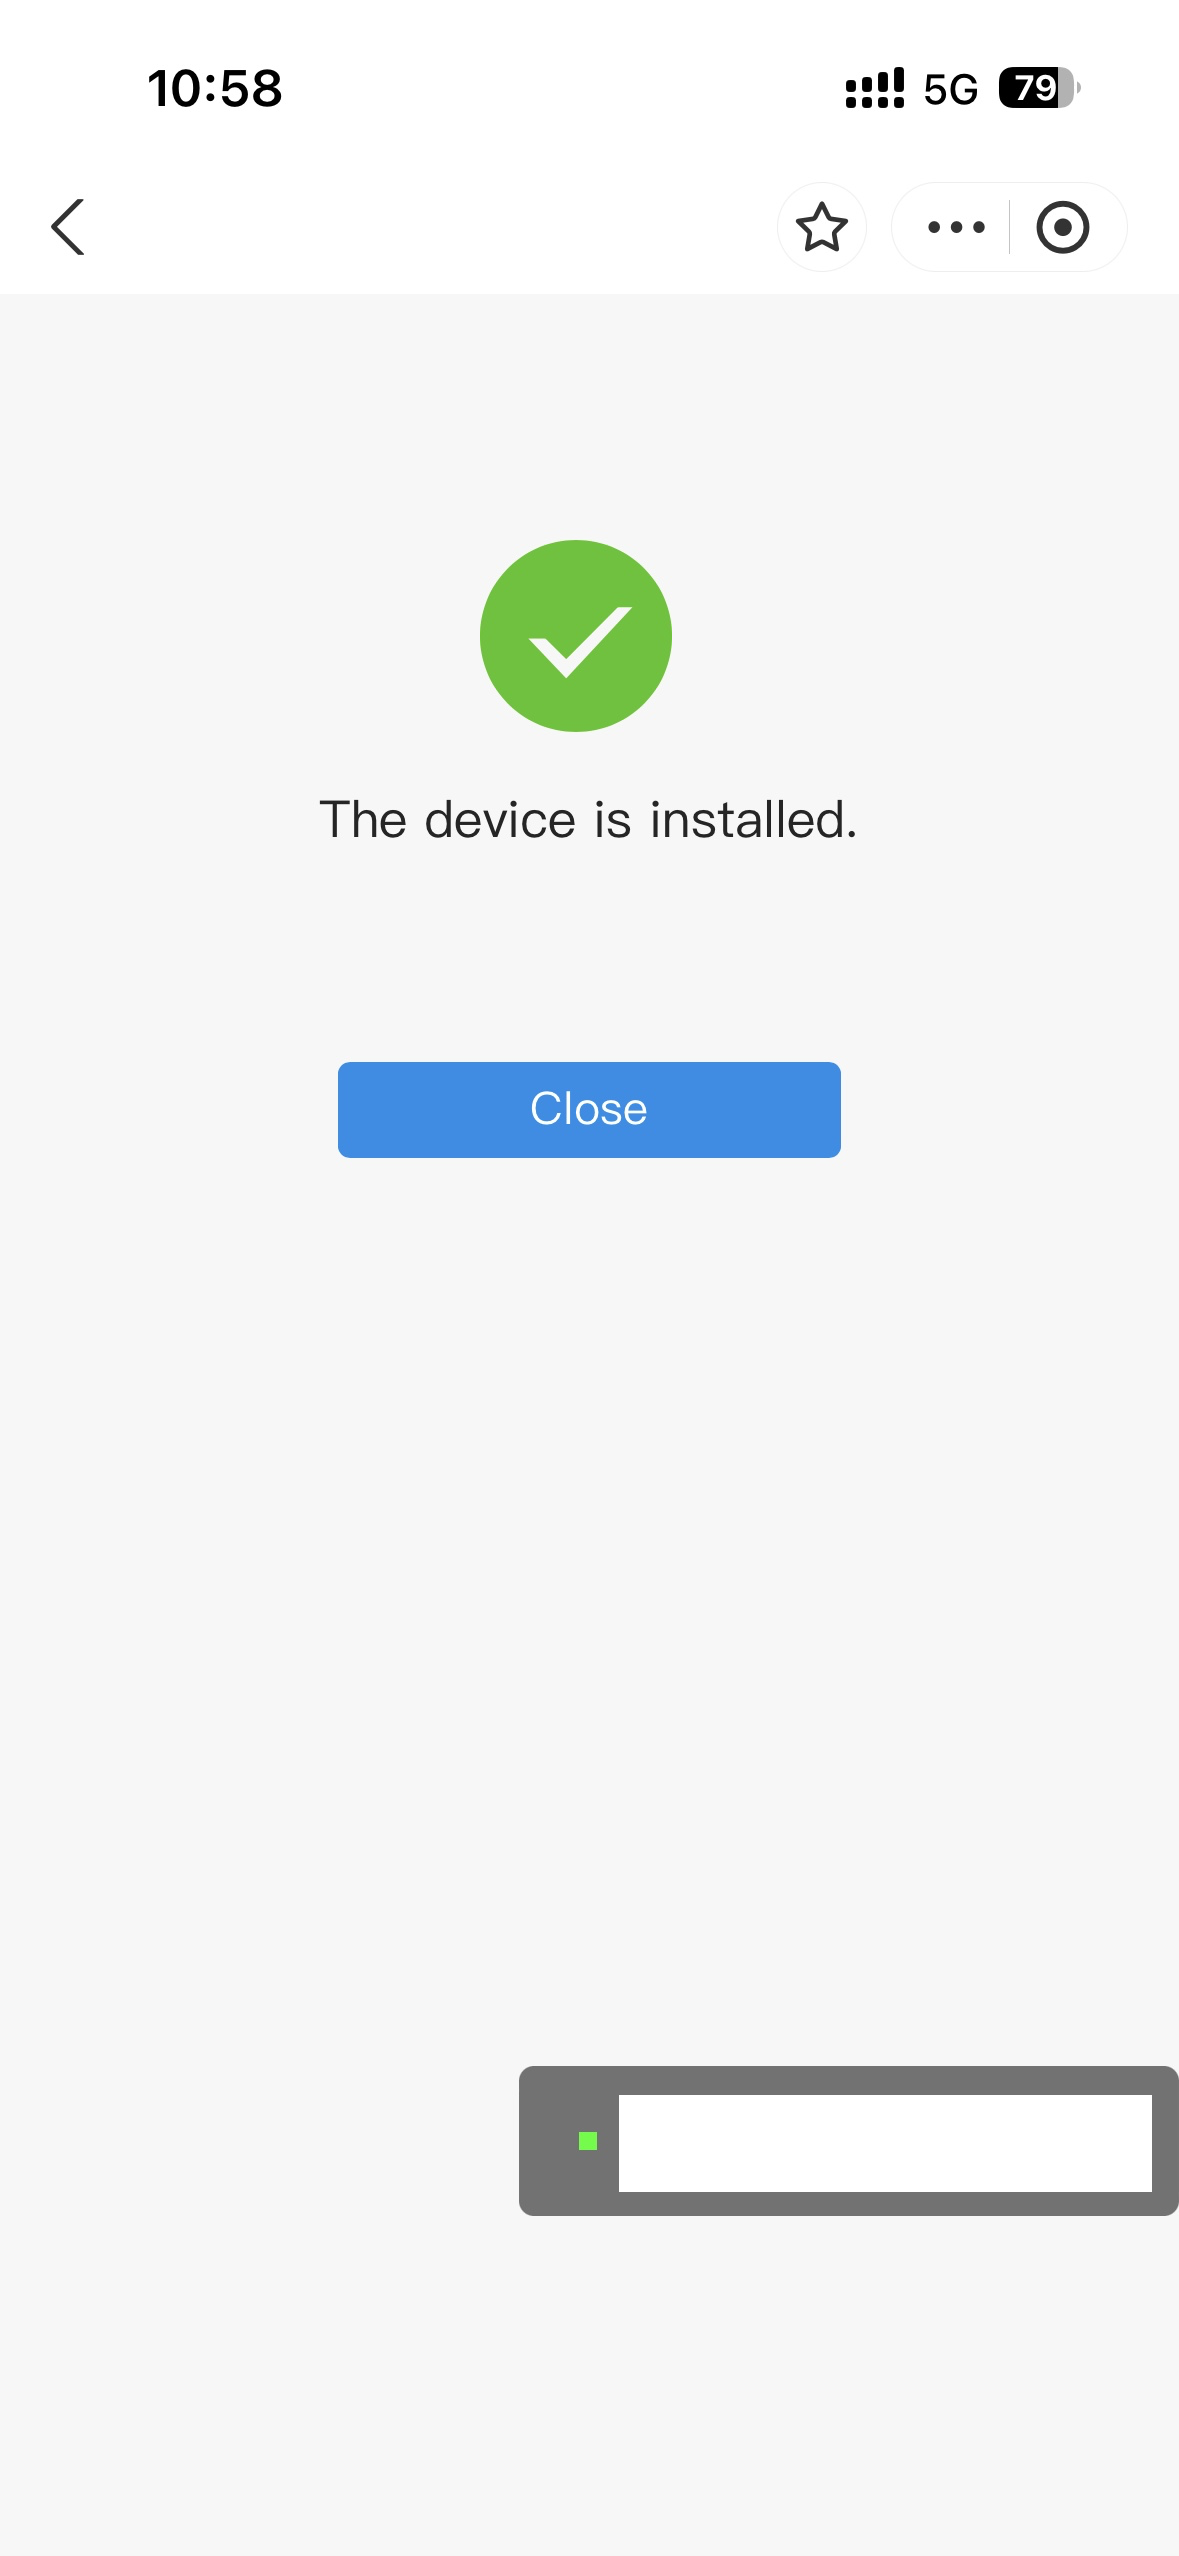
The preceding figure indicates that the devices are installed. Check whether pictures are shown on the screen.
The preceding figure shows the sample photos of devices. Take photos of the actual devices.