This topic describes how to configure the Call a Function component. This component lets you invoke custom functions from Function Compute within your flow. Use this component to implement custom business logic, such as data processing, remote service calls, message delivery, and data storage.
Component information
Icon
Name
Call a Function
Overview
To use the Call a Function component, first activate the Function Compute service, and then create and design a function in the Function Compute console. The process has three main steps:
Configure the function in Function Compute.
Design the function logic in Function Compute.
Configure the component in your flow to invoke the function.
Before you begin
Activate the Function Compute service.
1. Create and configure a function
Follow these steps to create and configure a function.
Go to the Function Compute console. In the left navigation pane, choose . At the top of the page, select the same region as your flow.
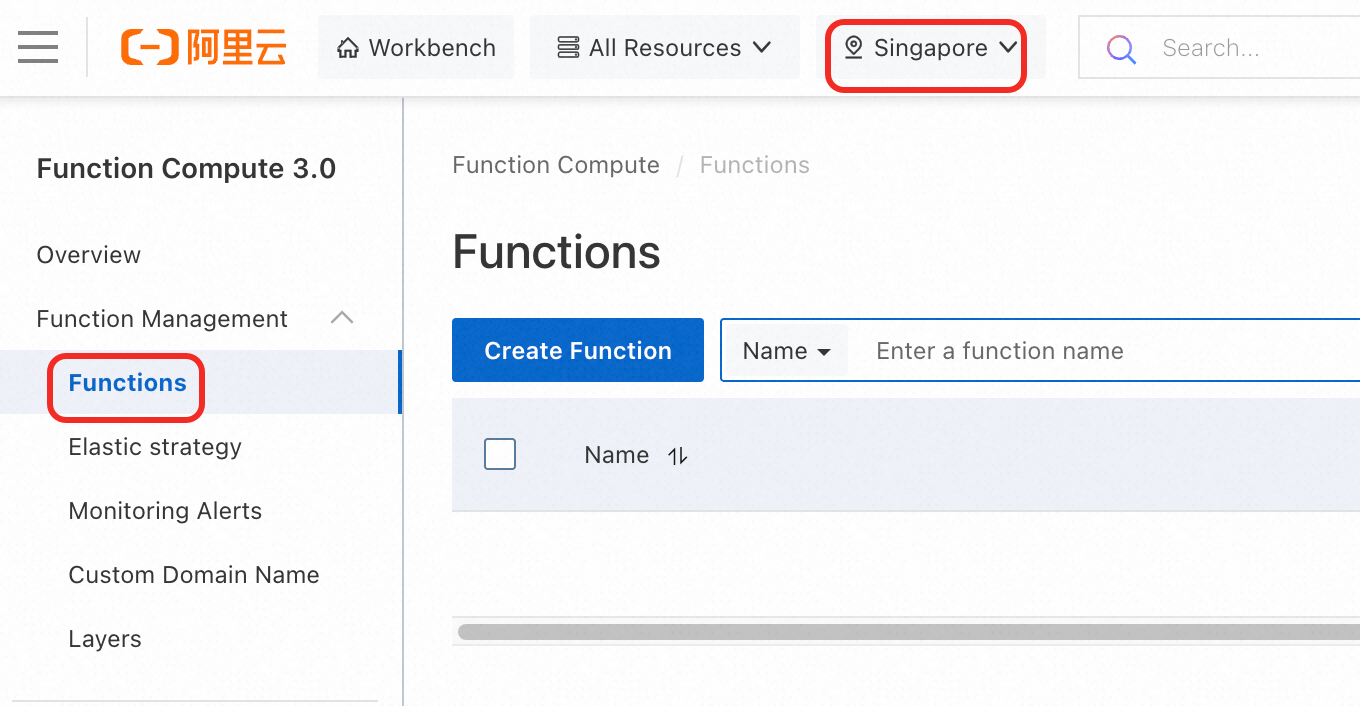
On the Functions page, click .
In the Code section, select an appropriate environment for the Runtime parameter. This example uses Built-in Runtimes / Python/ Python 3.10.
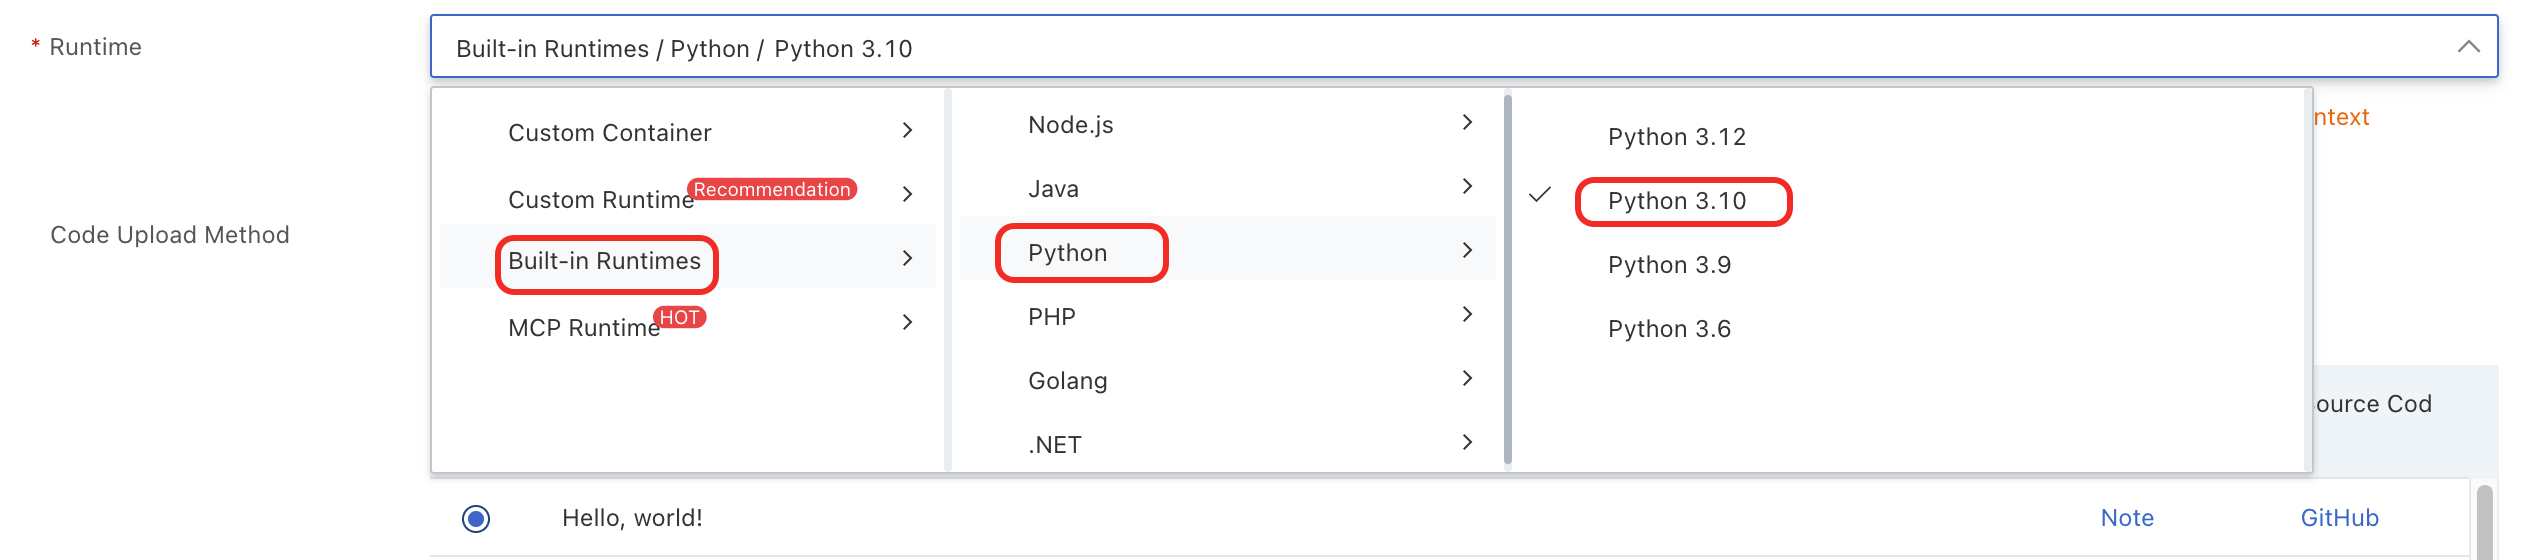
Configure other parameters as needed.
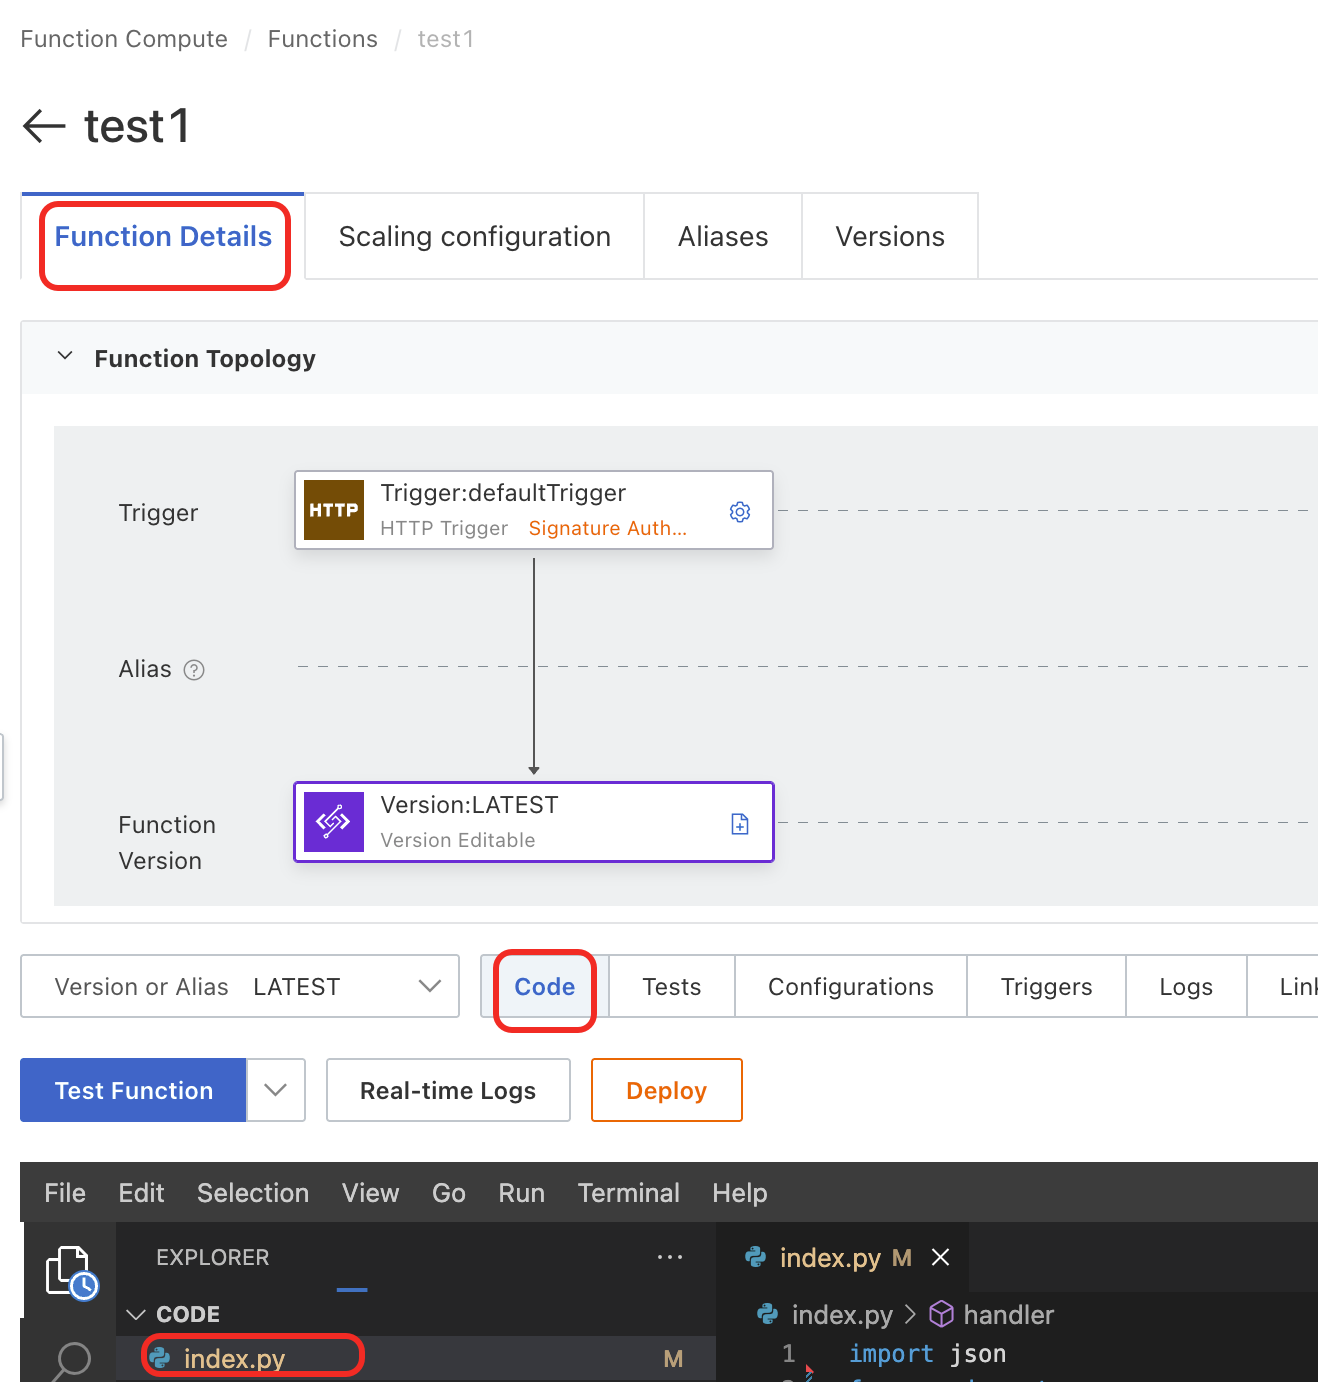
2. Design the function
The provided function template for Chat Flow lets you focus on your custom business logic and quickly deploy a simple, operational function for your flow.
On the Function Details page, click the Code tab, replace the content of the
index.pyfile with the following template.NoteThis code is a WSGI handler that is compatible with the flow invocation logic and contains no custom business logic. Do not modify this file.
import json
from my import *

# DO NOT CHANGE THIS ENTIRE FILE!

# handle wsgi request
# about wsgi: https://wsgi.readthedocs.io/en/latest/learn.html
def handler(environ, start_response):
    # get request_body
    try:
        request_body_size = int(environ.get('CONTENT_LENGTH', 0))
    except ValueError:
        request_body_size = 0

    request_body = environ['wsgi.input'].read(request_body_size)
    print(request_body)

    # get path info
    path_info = environ['PATH_INFO']
    print(path_info)

    # load http triggering request to json
    # as flow node input args
    body = json.loads(request_body.decode('utf-8'))

    # do custom node process
    if path_info == '/handle_exec':
        output = handle_exec(body['variables'])
    elif path_info == '/handle_awake':
        output = handle_awake(
            body['asyncId'],
            body['async_event_data'],
            body['variables']
        )
    else:
        raise Exception('Invalid path ' + path_info)

    status = '200 OK'
    response_headers = [('Content-type', 'text/plain')]
    start_response(status, response_headers)

    return [json.dumps(output).encode('utf-8')]
Create a
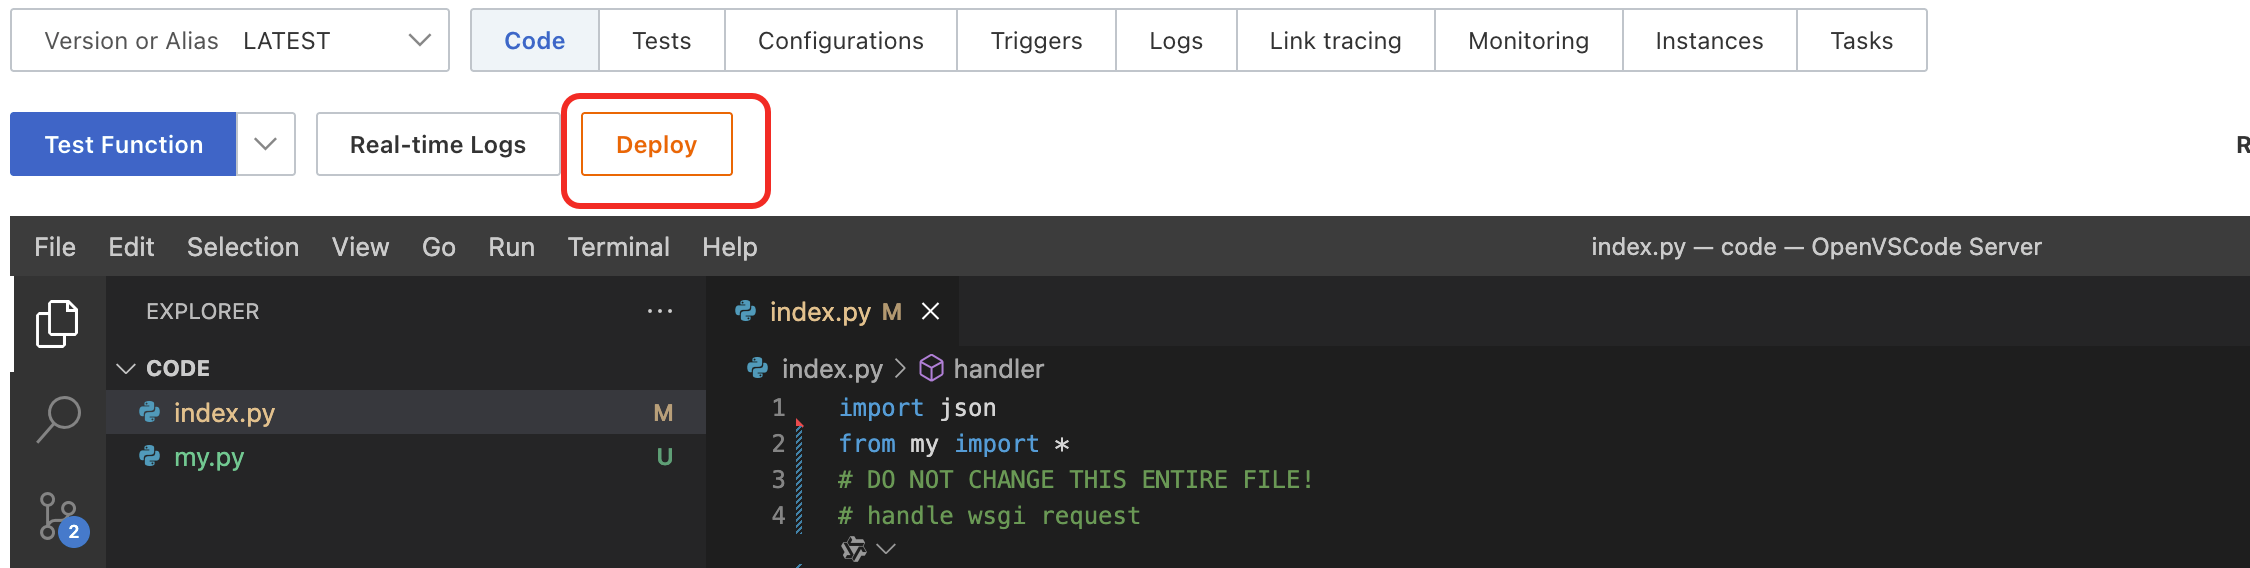
my.pyfile. Copy the following code to themy.pyfile.
The following template generates a random number of a specified length based on the random_number_length input, directs the flow down an even or odd branch based on the number's parity, and outputs two variables (random and type).
import random


# impl: py spi handle_exec
def handle_exec(variables) -> dict:
    # translate fun request
    random_number_length = variables['random_number_length']

    random_number = generate_random_by_length(random_number_length)
    print("random generated as " + str(random_number))

    if (random_number % 2) == 0:
        number_type = "even"
    else:
        number_type = "odd"

    result = {
        'success': True,
        'message': 'OK',
        'await': False,
        'outputVariables': {
            'random': random_number,
            'type': number_type
        },
        'toBranchCode': number_type
    }

    return result


# impl: py spi handle_awake
def handle_awake(async_id, async_event_data, variables) -> dict:
    return {}


def generate_random_by_length(random_number_length) -> int:
    length = int(random_number_length)

    start = 10 ** (length - 1)
    stop = 10 ** length

    print("from " + str(start) + "(inclusive) to " + str(stop) + "(exclusive)")
    return random.randrange(start, stop)
Regardless of your custom logic, the my.py file must contain the following two functions.
These two functions are used for flow invocation and event handling, respectively. If you have already configured event handling for the Function Compute component in Chat Flow, you do not need to handle events again in the function.
def handle_exec(variables) -> dictdef handle_awake(async_id, async_event_data, variables) -> dict
The return structure for both functions is fixed, regardless of your custom logic.
success: Indicates whether the function call was successful. If it fails, the flow throws an error and stops.
message: A custom message that provides additional information.
await: Indicates if the flow must wait for subsequent event handling. Typically
False. IfFalse, the flow proceeds using the returnedoutputVariablesandtoBranchCode.outputVariables: A dictionary of variables and their values to return to the flow. You can reference these variables in subsequent steps. These are used only when
awaitisFalse.toBranchCode: The branch code to be output to the flow. The flow uses this code to determine the next step based on the multi-branch configuration in Chat Flow. This is used only when
awaitisFalse.
result = {
    'success': True,
    'message': 'OK',
    'await': False,
    'outputVariables': {
        'myVarExample1': 'a',
        'myVarExample2': 'b'
    },
    'toBranchCode': 'example'
}
After modifying the files, click Deploy.
3. Configure the component
Follow these steps to configure the Call a Function component in your flow. This configuration enables the flow to invoke the custom function you created in Function Compute and execute your business logic.
Preparations
Go to the canvas page of an existing flow or a new flow.
Go to the canvas page of an existing flow.
Log on to the . Choose Chat Flow > Flow Management. Click the name of the flow that you want to edit. The canvas page of the flow appears.

Create a new flow to go to the canvas page. For more information, see Create a flow.
On the canvas, click the Call a Function component icon to view its configuration pane on the right.
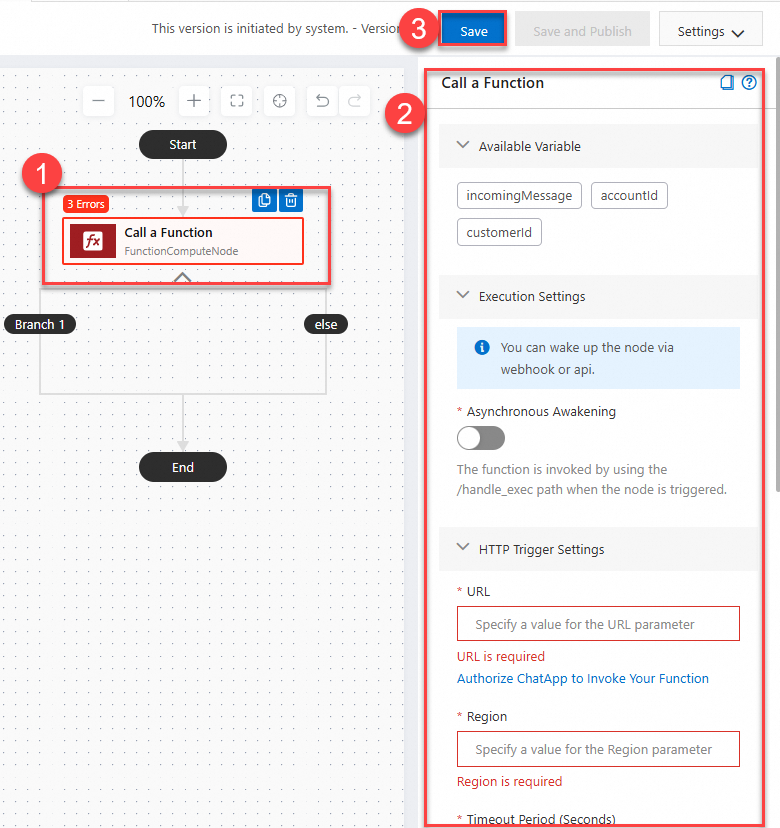
Configure the component parameters as needed. For detailed descriptions, see Parameter details.
Click Save in the upper-right corner. In the message that appears, click Save.

Parameter details
Section | Parameter | Description | Example |
Execution Settings | Asynchronous Awakening | When enabled, the component supports asynchronous invocation for triggering and waking up. |
|
Asynchronous Wait Timeout Period (Seconds) | The timeout period for the asynchronous wait, in seconds. | ||
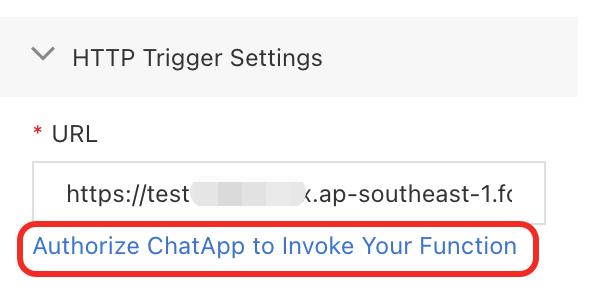
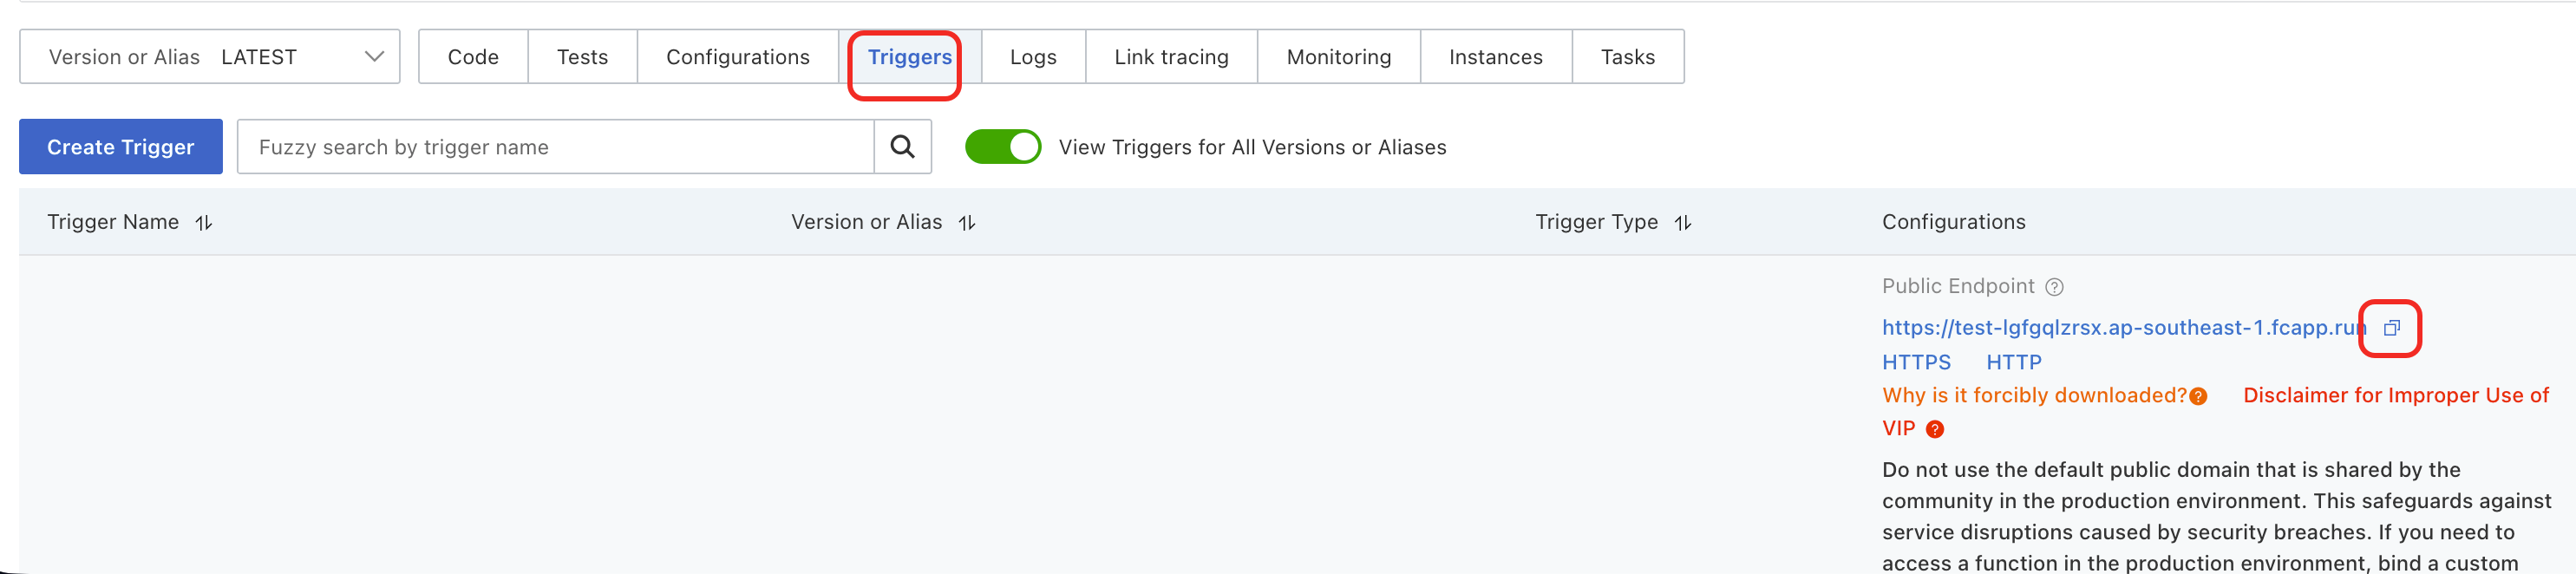
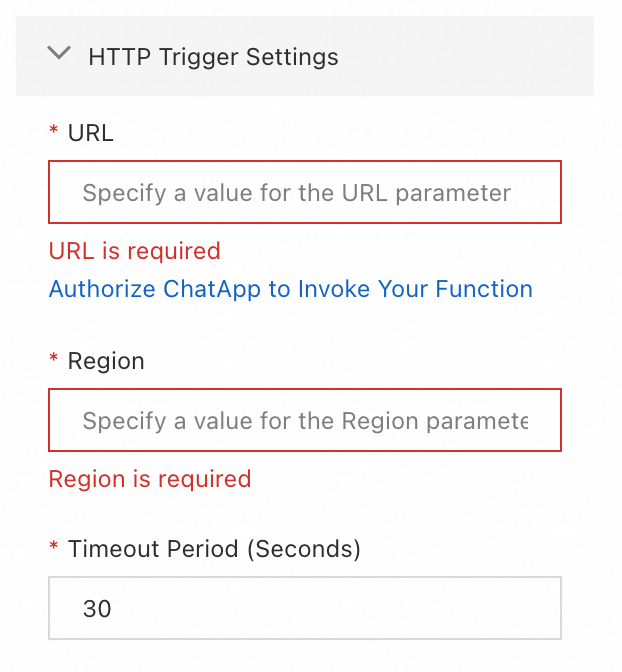
HTTP Trigger Settings | URL | The function's URL. To find it, go to the Function Compute console. Choose and click the target function. Click the Triggers tab. The Public Endpoint is provided. Note The first time you use this component, click Authorize Chat App to Invoke Your Function.
|
|
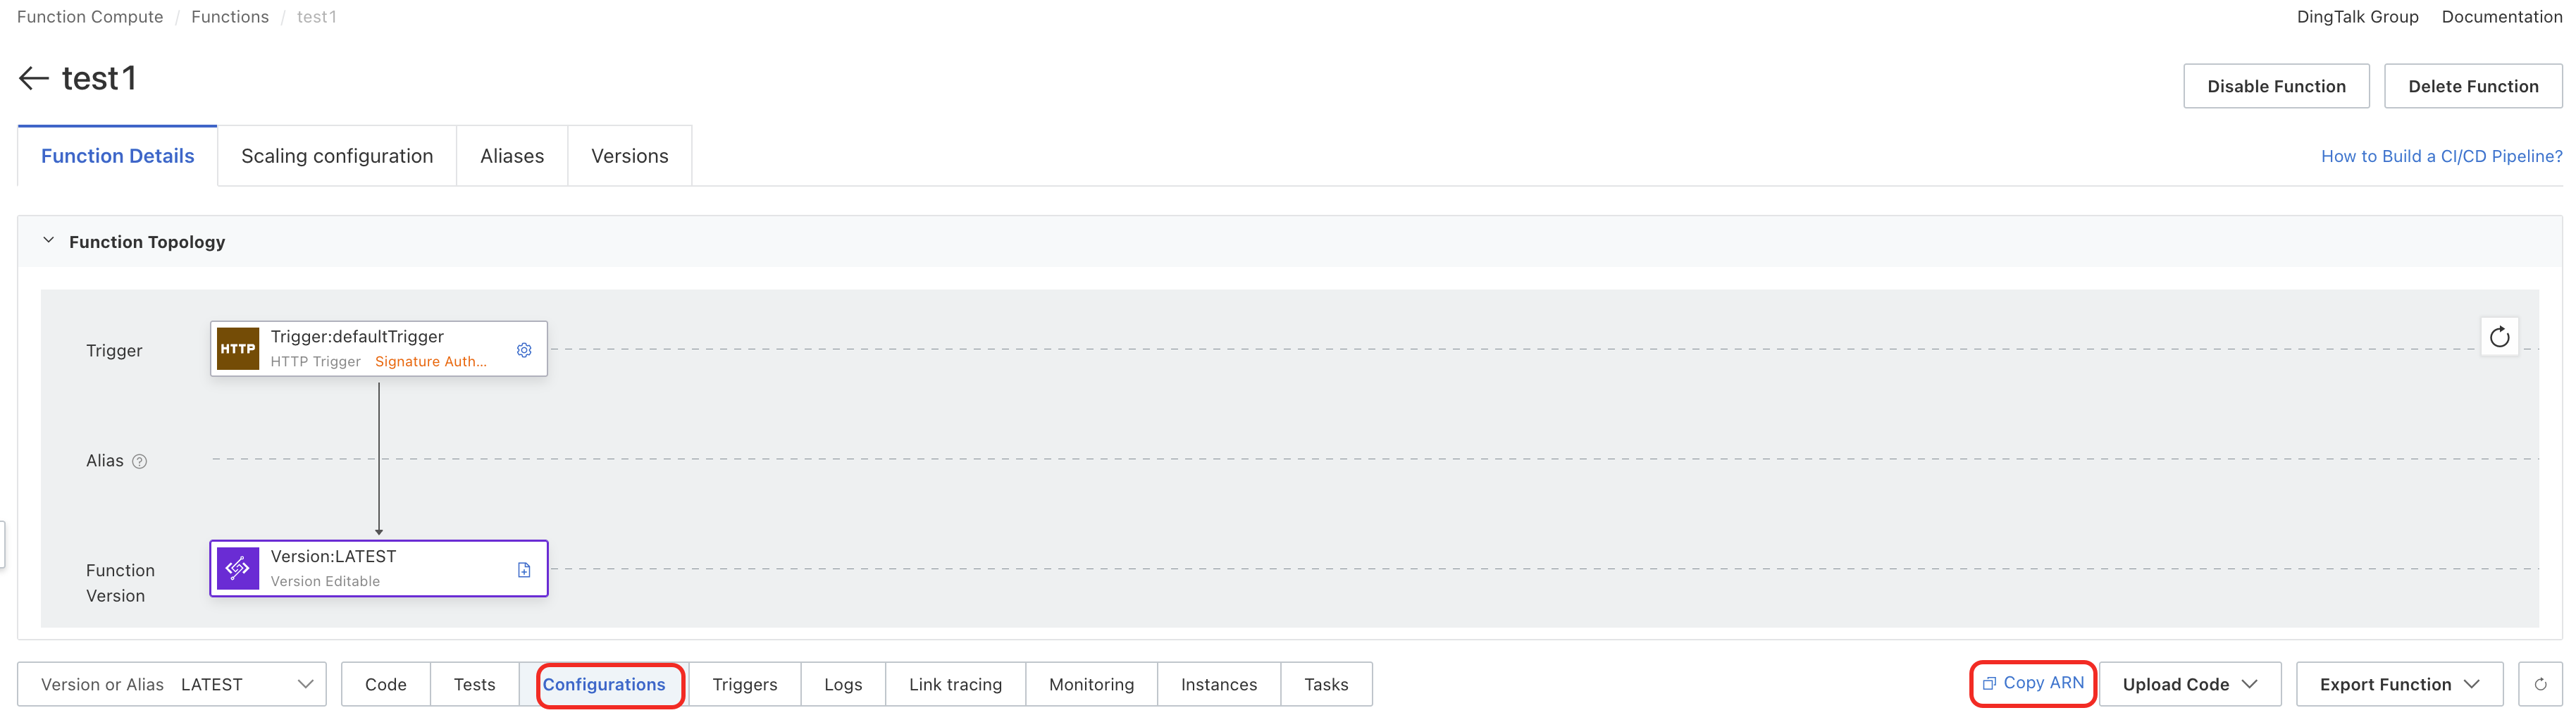
Region | The function's region, which is the third segment of its ARN. To find it, go to the Function Compute console. Choose and click the target function. Click the Configurations tab, then click Copy ARN. Note For example, if the ARN is the Region is |
| |
Timeout Period (Seconds) | The custom timeout period. |
| |
Parameter Settings | - | Define the input parameters for the function. Parameter names must match those in your function code. The values can be constants or flow variables. |
|
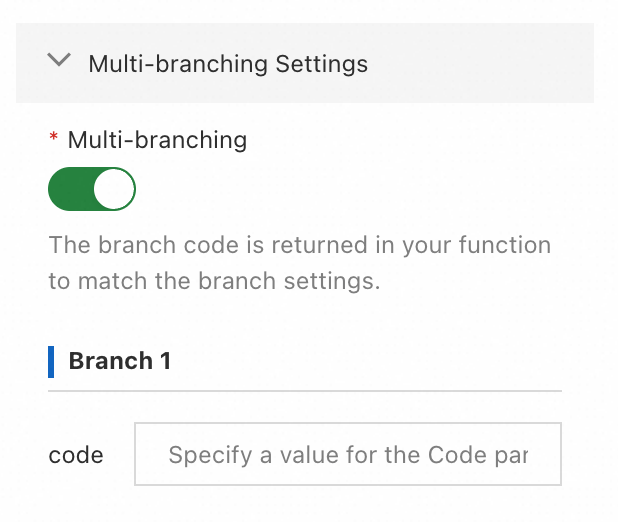
Multi-branching Settings | - | If required, configure branches for the function's output. The branch code must match a |
|
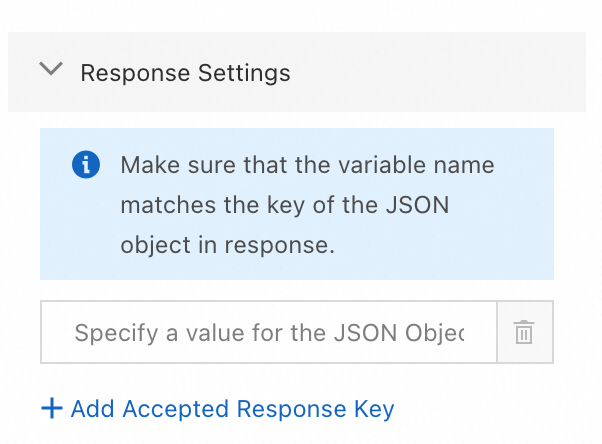
Response Settings | - | If required, map the function's output to flow variables. The variable names defined here must match the keys in the |
|